DIY Aged Chippy Paint Technique | Pretty Handy Girl

How to Install Shelves on a Tile Wall (using Corbels) | Pretty Handy Girl

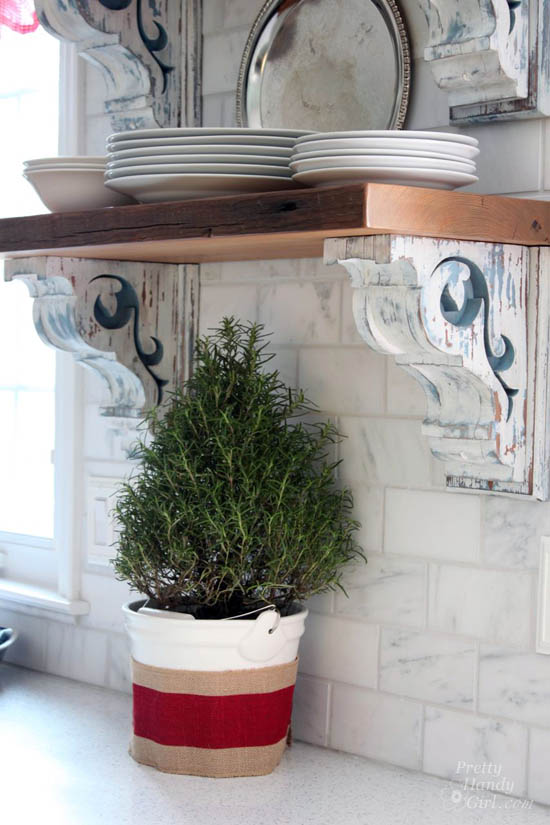
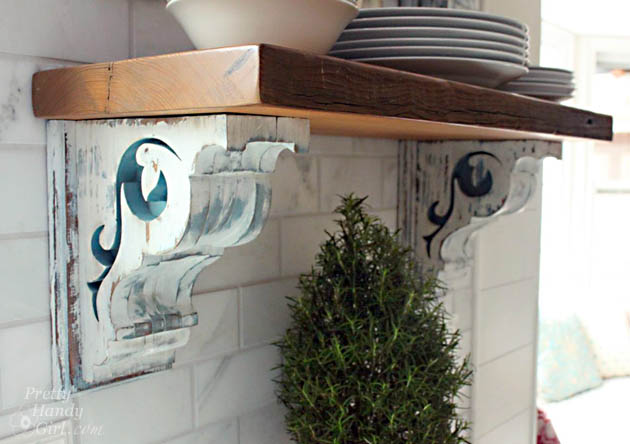
After painstakingly tiling my backsplash, I was more than a bit hesitant to drill holes into the tiles to hang the corbels and open shelving. But, I convinced myself to stop being a wussy procrastinating and just do it.

I’m so pleased with how they turned out and I didn’t chip or crack a single tile. In hindsight I really didn’t need to stress this project. It was less nerve-wracking than I had anticipated.

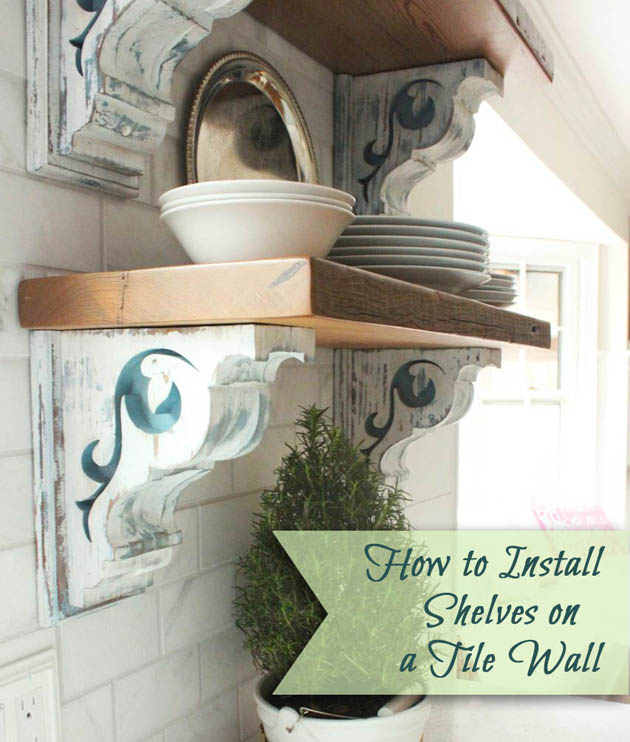
Here’s the full tutorial so you can install your own open shelving on a tile wall!

Materials:

  • Diamond drill bit (the same diameter as the screws you are using)
  • Wood screws to attach anchor board (must be long enough to go through board, tile, drywall and at least an inch into a stud)
  • Drill
  • Spray bottle filled with water
  • Level (long and a small one if you have one)
  • Pencil
  • 2 regular drill bits (1 the same diameter as the screw + 1 large enough to create a countersink for the screw head)
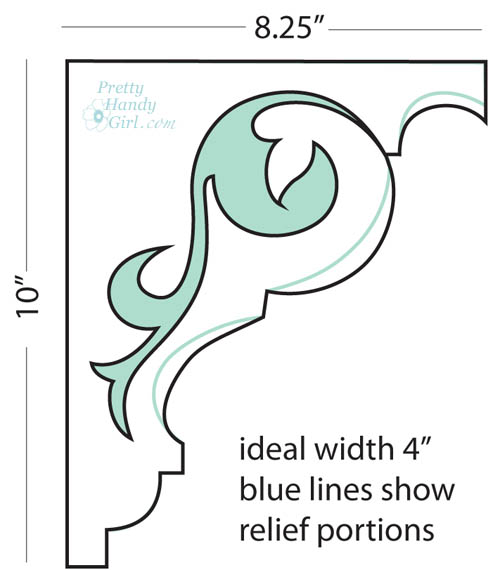
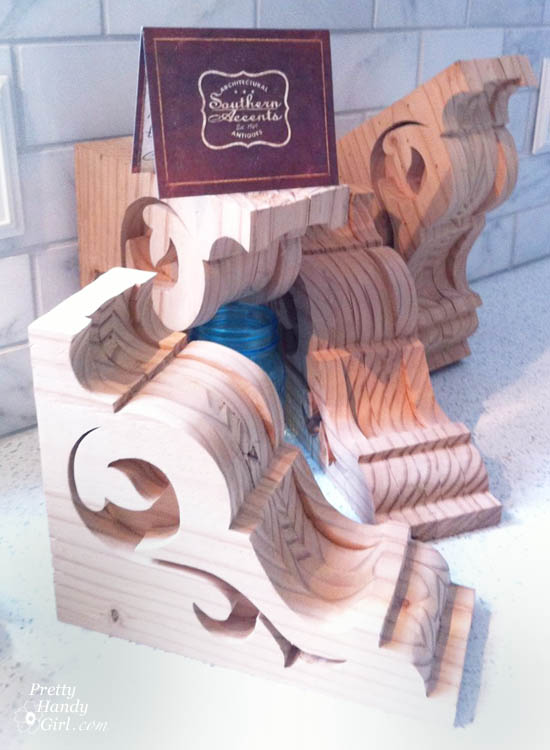
  • Shelf brackets (I used corbels and a 1″x6″ pine board as an anchor)
  • Kreg jig
  • Pocket hole screws (long enough to attach corbel to anchor board without going through the board)
  • Joint compound or wood putty

Instructions:

Start by determining the height you want your shelves to hang. Read more

DIY Aged Chippy Paint Technique | Pretty Handy Girl

DIY Aged Chippy Paint Technique | Pretty Handy Girl

This is another one of those tutorials that I’ve been dying to share with you! Like sitting on my hands and anxiously waiting to type it out. But after taking 2 weeks off from blogging, I’m back and ready to give you this fabulous tutorial for achieving the aged chippy paint look on your next project.

DIY Aged Chippy Paint Technique | Pretty Handy Girl

Before I give you the chippy gritty, I want to give you the background story on those gorgeous corbels.

If you’ve been following along, I finally completed my 13 month kitchen renovation. The last task was installing two open shelves on the full tile wall. Finding the perfect corbels to use as shelf brackets was not an easy task. I scoured eBay, Craig’s List and salvage shops. I was really getting discouraged. That was when I met Garlan from Southern Accents Architectural Antiques at Haven. We talked for a few minutes and he showed me some of the corbels he had in his store. There were some wonderful old ones, but I felt a bit like Goldilocks. One was too tall. The other not big enough, but the biggest problem was that I needed four of them. Garlan showed me some new corbels that he had. He told me he has a guy that can duplicate any corbel design and can customize them to meet any size requirements. It was as if the heavens parted and angels sang! I was elated and couldn’t wait to find an image of a design I liked. But, again, the Goldilocks in me couldn’t find the “perfect” corbels. So, I opened up Adobe Illustrator and started to design my own unique corbels.

Chippy Paint Technique

PHG Corbel Design for Sa1969.com


I designed a scroll pattern based off of one corbel I saw, but also added some relief portions inside the corbel. I sent the image to Garlan and a week later he sent me a picture of one of the corbels. It was love at first sight! I quickly approved the initial one and waited anxiously for the corbels to arrive. When I opened the box, they were beautiful and exactly as I had pictured them in my head.

Southern Accents Architectural Antiques corbels

I set forth to give them an appropriate aged chippy paint look to fool people into thinking they were actually antique salvage. Here’s how I did it. Read more

Boy's Red, White & Blue Themed Room | Pretty Handy Girl

Galvanized Tub Storage Bench for Kids | Pretty Handy Girl

Every month Lowe’s challenges me to create another unique project to share with you. This month’s challenge was creative storage ideas. Have kids? This is a unique storage solution using a galvanized tub and a furry upholstered lid. It’s the perfect place to store and corral all that kid clutter in your child’s bedroom. The storage tub doubles as a bench and a step stool. Don’t be deterred if you don’t have children, the storage bench could be used for magazine storage and much more!

Grab these materials and tools and follow along with me (and my 13 year old assistant.)

Creating the Galvanized Storage Bench and Lid

(I’ve included affiliate links for your convenience. I earn a small percentage from a purchase using these links. There is no additional cost to you. You can read more about affiliate links here.)

Materials for the Galvanized Storage Tub and Lid:

Galvanized Tub Storage Bench for Kids | Pretty Handy Girl


Instructions:

Turn the galvanized tub upside down on the plywood. Use the sharpie to mark approximately 1/2 – 1″ out from the edge of the tub. Read more

Pretty Handy Girl's Christmas Home Tour

PHG_Christmas_Home_Tour

Welcome, welcome! I see you made it here from Songbird’s beautiful home. If you are coming here first, be sure to check out Marianne’s home:

songbird-house-tour

I can not tell you how excited I am to have you in for the tour. Last Christmas we were living in a demolition zone. So, it feels wonderful to have our kitchen complete and be able to focus on decorating for the holidays.

Pretty Handy Girl's Christmas Home Tour

I’m also enjoying low fuss decorating. Like this fake wreath that looks fabulous when you tuck some live greenery inside (thanks for the idea Colleen.)

Pretty Handy Girl's Christmas Home Tour

Pretty Handy Girl's Christmas Home Tour

Another lazy decorating trick is to wrap garlands around the chandelier. Read more

Giant Lighted Christmas Ball Tutorial | Pretty Handy Girl

Giant Lighted Christmas Ball Tutorial | Pretty Handy Girl

A few years ago we discovered a street in our city that is lit with giant hanging lighted ornament balls. We drove down the street with our low beams on and were truly speechless. It was magical, ethereal and beautiful seeing giant orbs of light suspended in mid-air. Since then I’ve scoured store shelves to find these beautiful lighted spheres. Little did I know that they were truly a DIY project.

This year, our neighborhood decided to hold a workshop to teach anyone who was interested how to make giant lighted ornament balls. You know I was there with bells on ;-). Here’s how to create your own hanging lighted Christmas ornament balls complete with hanging suggestions!

Giant Lighted Ornament Balls Materials Cost breakdown:

  • Chicken Wire: 2′ x 50′ roll (yields about 12 balls) – $24
  • 3 – 100 light strings of outdoor Christmas lights (green wire is best) – $10
  • Twisty tie from the light strands
  • Poly-braided rope or clothes line rope – $10 per 100 ft.
  • Extension cord: $15
  • Small water bottle
  • Gloves
  • Aircraft sheers for cutting wire

Cost: approximately $37 per ball with extension cords and hanging supplies (not including gloves and shears)

Optional: 

  • Three way plug in adapter $5 (to add more balls to one cord),
  • Extra extension cords
  • Timer


Giant Lighted Ornament Balls Instructions:

Cut a section of chicken wire 46″ long (using a 24″ width roll). Shape the section into a cylinder.

Giant Lighted Christmas Ball Tutorial | Pretty Handy Girl

Secure the ends of the chicken wire by folding the ends over and securing to the opposing side. Stop about 8″ from each end. Read more