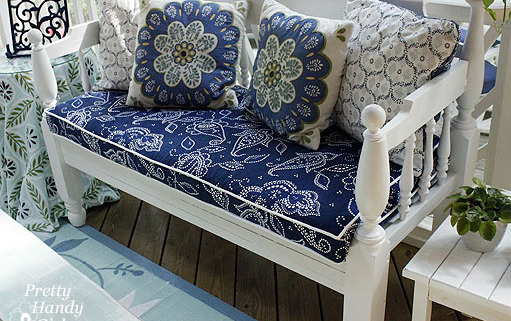
You can sew your own custom DIY bench cushion with piping. I’ll show you how to make your own bench cushion covers with this detail tutorial.
How to Sew a DIY Bench Cushion with Piping
I thought sewing a custom cushion for a was going to be a difficult project to sew.
And, I thought sewing a bench cushion with piping would be next to impossible.
However, once I figured out an easy way to create the box, it was actually very easy!
Let’s get started and I’ll show you how to make custom DIY Bench Cushions with an added detail of piping.
My Fabric Source:
Before we get started I wanted to let you in on a little secret. 🤫
The bench cushion and side table fabrics you see below are actually Target shower curtains!
That’s right, I didn’t use upholstery fabric, instead I used beautiful fabric shower curtains which are just a durable.
Remember this the next time you want to sew a bench cushion, dining bench or window seat cover.
You read that right. Fabric shower curtains are not only inexpensive, but they are durable and can stand up to moisture.
This makes them perfect for outdoor use. I bought both of these at fabric shower curtains at Target for under $20 each!
You could score cute fabric shower curtains on sale and save even more.
Materials:
(I’ve included affiliate links for your convenience. I earn a small commission from a purchase using these links. There is no additional cost to you. You can read more about affiliate links here.)
Once you have all your materials, let’s get sewing.
DIY Bench Cushion Tutorial
Follow these detailed steps to make your own bench seat cushion.
Preparing the Foam Cushion
Measure or lay your foam on top of the bench. Mark line(s) where you need to trim the cushion to fit the length of your bench.
The next step is to use an electric knife to cut through your piece of foam on the long side of the edges of the foam.
Wrap batting around your foam. Then trim the edges down to size.
I had enough to put two layers on top of the foam and one layer on the bottom of the cushion.
This will make for a cushier and less sharp-edged cushion.
Cutting out the pieces
1. Fold your bench fabric in half and lay it out. Place your cushion on top.
Trace around the cushion about 3/4″ wider on each side of the foam to determine the length of the fabric needed.
Cut through the two layers. This will give you a top and bottom panel for your cover.
2. Next let’s cut out four strips of fabric for the sides. First, plan on cutting your lengths 2″ longer than your cushion.
If your foam is 3″ and you use 1-2 layers of batting, you can use these measurements for your strips:
Front: 4.25″ wide by length + 2″
Sides (left and right): 4.25″ wide by length + 2″
*Back: 5.5″ wide by length + 2″
*Back Fold Over Flap: 3.5″ wide by length + 2″
*You may have noticed the back measurement is wider and has two strips. This is because we need to sew an overlapping flap and velcro to allow for the cover to be removable for washing.
Assembling the sides of the DIY bench cushion cover
1. Wrap the 4 strips around your cushion right sides facing in. (Reserve the back fold over piece for later.)
Pin the edges where they meet at your cushion corners. The back strip should line up with the sides on the one edge.
But, the other outside edge will extend 1.25″ taller than the rest.
2. Remove the sides and stitch where the pins are.
When you get to the back strip, fold over the excess so it matches the same height as the rest of the strips.
Then stitch along the back strip’s folded over your piece of fabric to secure it.
Set your sides aside for now. It is time to pin the piping to your cushion top.
1. Lay the top panel right side up on top of the cushion. Pin the long strip of piping on top of the fabric.
Line up the piping with the edges of the cushion. Be sure the raw edge of your piping is facing the raw edge of the fabric.
When you reach a corner, snip into the raw edge of the piping all the way (but not through) the rope piping.
Then turn your piping creating a 90 degree angle and continue pinning.
When you reach the start of your pinned piping, simply overlap the two alittle bit about 2″ and cut off the excess.
Your bench cushion top should look like this:
2. Set the top panel on your sewing machine and sew the piping into place.
Your needle will be very close to the piping, but it shouldn’t stitch into the rope.
This is where a zipper foot really helps get close to the piping and give you professional looking results, especially around the corners of your cushion.
Carefully sew and backstitch over the place where your piping overlaps.
Connecting the top and sides for the DIY bench cushion
1. Lay your top panel onto the cushion. Pick up your sides and begin pinning them to the top of the cushion.
(Note, the raw edge of your back panel should be lined up next to the piping and the hem on the back side should be facing up and away from the piping.)
Position your pins close to the piping but not on top of it. Try to line up the corners of your sides with the 90 degree corners of your piping.
2. Stitch the sides onto the top piece. Again, your needle will be very close to the piping but not over it.
This is a little trickier because you can’t see the piping, but you can feel it.
Just use your fingers to guide you. (Piping shown by the red arrowed line below.)
3. Remove the cushion cover from your sewing machine. Turn your top cover right sides out and test the fit on your cushion.
Hopefully at this point you don’t need a tighter fit and everything is looking good. You see it’s a fairly easy sewing project.
4. Repeat the steps above for “adding the piping” to sew piping onto your bottom cover.
Sewing the cushion back flap
1. Now you can pick up that back fold over strip that has been sitting all by its lonesome.
Fold the edges over twice on three sides (2 short and 1 long) to hem your flap. Press the hem with a hot iron.
Stitch along the folded hem to secure it.
2. Center and pin the flap along the back edge of the bottom panel (right sides together) as shown.
The raw edges should be facing out.
3. Stitch the back flap onto the bottom panel next to the piping. An inch or more of the panel will extend on both ends.
That’s perfectly fine, you want to leave it loose so it can tuck inside the cushion.
3. Turn your top panel and sides wrong sides out and put your cushion inside it. Then lay your bottom panel on top as shown.
Pin the bottom panel to the sides just like you did for the top panel. This time leave the back side unpinned (where your two flaps overlap.)
4. Now is a good time to trim any excess from your previously stitched seams of the entire bench.
(There will be a lot of fabric on the sewing machine, and this is just one less piece that could get caught while stitching.)
Trim off the corners at an angle.
Carefully peel the pinned cover off the cushion.
5. Stitch along the two sides and front of your cover. Leave the back length of the cover open.
Remember, use your fingers to feel for the piping.
6. Turn the cover right side out and slide the cushion into the cover.
Check the fit and make sure you don’t have any stray fabric that might have gotten caught while sewing.
You should have an opening in the back like this.
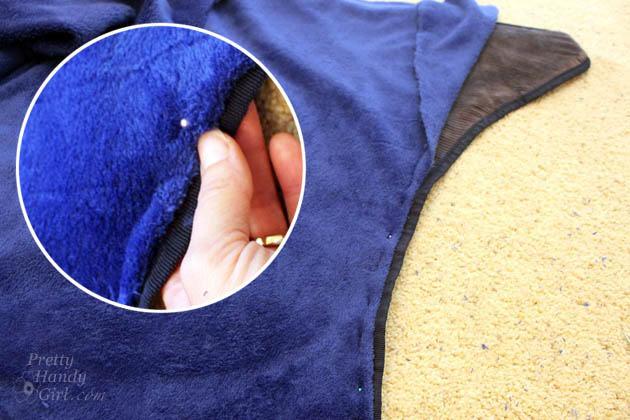
Adding the velcro closure to the back of the cover
1. Take out your coordinating velcro tape.
Pin the hook and loop velcro tape onto the backside and the back fold over flap.
To save money, I used 4 strips of 3″ velcro evenly spaced along the length of the opening.
But, you can certainly use one long piece of velcro if you wish.
2. Stitch the velcro onto the cushion. You can use a zig-zag stitch for extra strength (if you have destructive little boys like I do!)
Check the fit of the velcro.
3. If everything looks good, you can turn the cover inside out and trim off any excess raw edges.
Then turn the cover right side out and insert your cushion.
And that’s it! You are done and you have a professional-looking bench cushion with piping!
The best part is now you know how easy Sewing a DIY Bench Cushion with Piping can be!
This is such a versatile piece of furniture. It would make a great addition to a living room for extra seating or to use as entryway bench.
Add some pretty throw pillows and the only thing you need to do now is enjoy your beautiful easy sew bench cushion.
Want to see the rest of my screen porch makeover? I spent less than $125, that’s what I call an extreme budget!
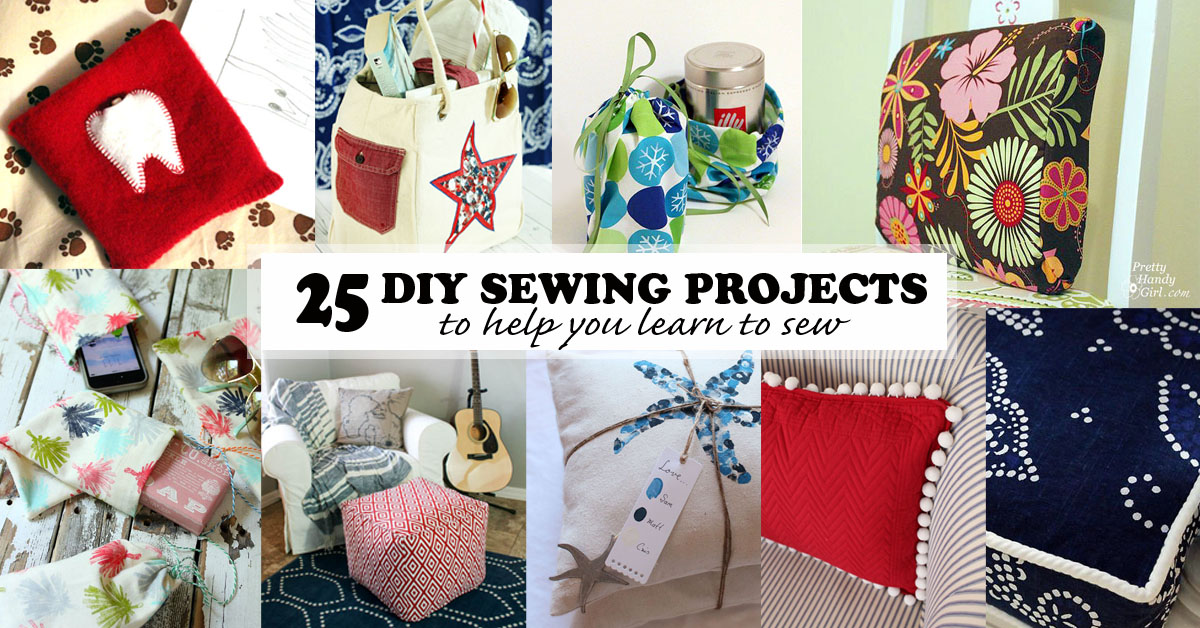
Now that you knocked out a custom diy cushion, why not sew one of these 25 easy sewing projects next!
https://prettyhandygirl.com/wp-content/uploads/2011/07/angled_bench_view.jpg375511Brittany Baileyhttps://prettyhandygirl.com/wp-content/uploads/2021/07/PHG-logo-tagline-2020-1030x211-R.jpgBrittany Bailey2025-03-10 07:00:142025-05-06 15:15:13How to Sew a DIY Bench Cushion with Piping
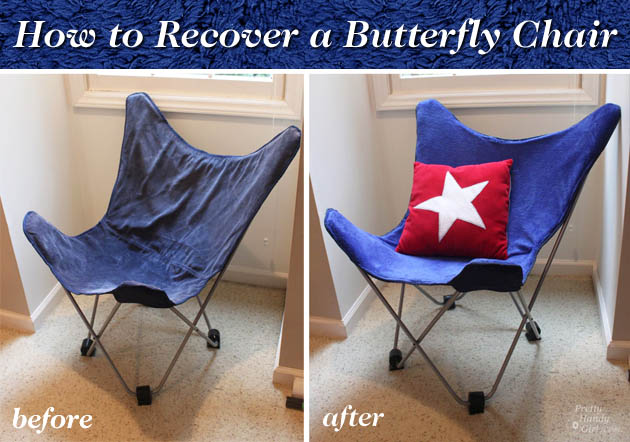
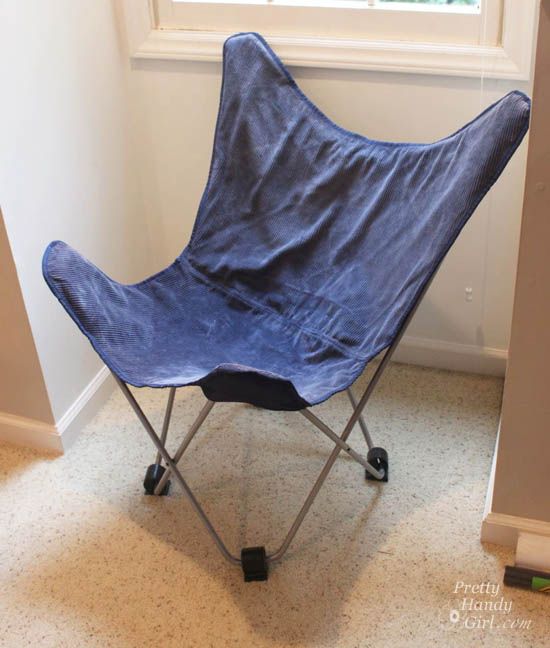
Happy St. Patrick’s Day! Do you have a butterfly chair that is sun-faded or has hideous fabric on it? I bet you thought it was a lost cause, right? Nope! With a sewing machine, some new fabric and a little spare time you can recover that ugly butterfly chair and have a new one. Okay, so I didn’t recover it with green fabric in honor of St. Patrick, but what could be greener than a good old upcycling project! Believe it or not, this was a much easier project than I had anticipated, so don’t get scared by the curves. You can “sew” do this! 😉
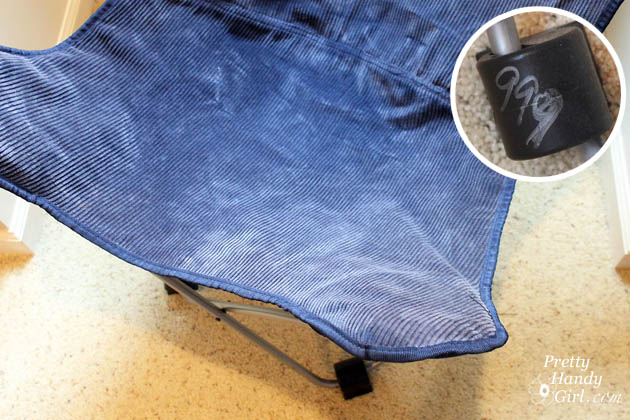
I stumbled upon this chair at Goodwill for $9.99. Normally I wouldn’t spend this much for a sun-faded chair, but because I was working on the school library makeover project — and we needed more comfortable seating — I bought it. After all, we would have had to pay at least double for another comfy chair.
Luckily, I had some soft leftover fleece fabric that I could use to recover the chair. I wish I had measured how much I used, I think it was a little less than 2 yards.
Materials:
2 yards of fabric
Coordinating thread
Pins
Scissors
Old butterfly chair + old cover
Instructions:
1. Remove the old cover from the butterfly chair frame. Lay it on top of your fabric (both right sides up.) Read more
https://prettyhandygirl.com/wp-content/uploads/2014/03/fold-under-and-pin-edges.jpg420630Brittany Baileyhttps://prettyhandygirl.com/wp-content/uploads/2021/07/PHG-logo-tagline-2020-1030x211-R.jpgBrittany Bailey2014-03-17 07:00:002021-07-26 19:35:44How to Recover a Butterfly Chair
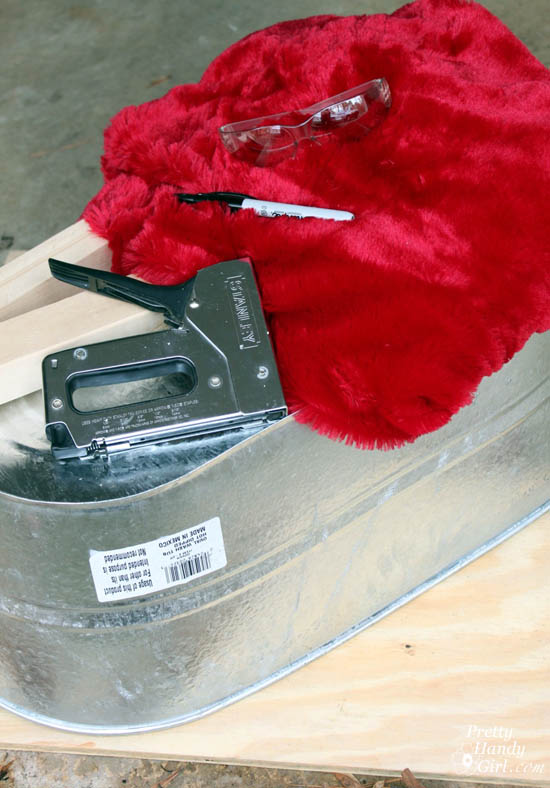
Every month Lowe’s challenges me to create another unique project to share with you. This month’s challenge was creative storage ideas. Have kids? This is a unique storage solution using a galvanized tub and a furry upholstered lid. It’s the perfect place to store and corral all that kid clutter in your child’s bedroom. The storage tub doubles as a bench and a step stool. Don’t be deterred if you don’t have children, the storage bench could be used for magazine storage and much more!
Grab these materials and tools and follow along with me (and my 13 year old assistant.)
Creating the Galvanized Storage Bench and Lid
(I’ve included affiliate links for your convenience. I earn a small percentage from a purchase using these links. There is no additional cost to you. You can read more about affiliate links here.)
https://prettyhandygirl.com/wp-content/uploads/2014/05/toy-blanket-in-tub.jpg377558Brittany Baileyhttps://prettyhandygirl.com/wp-content/uploads/2021/07/PHG-logo-tagline-2020-1030x211-R.jpgBrittany Bailey2014-01-06 07:00:002017-08-29 21:57:48Galvanized Tub Storage Bench with Furry Upholstered Lid {Lowe’s Creator Idea}
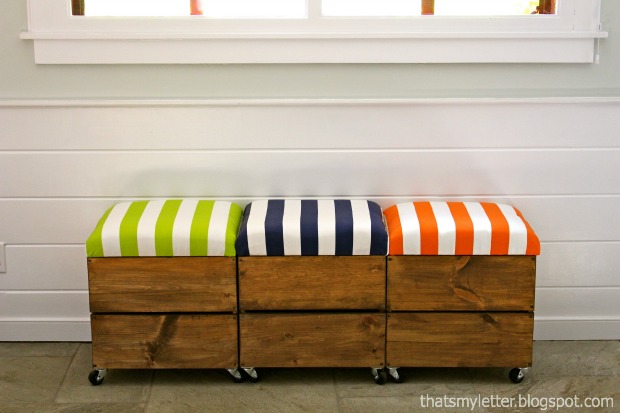
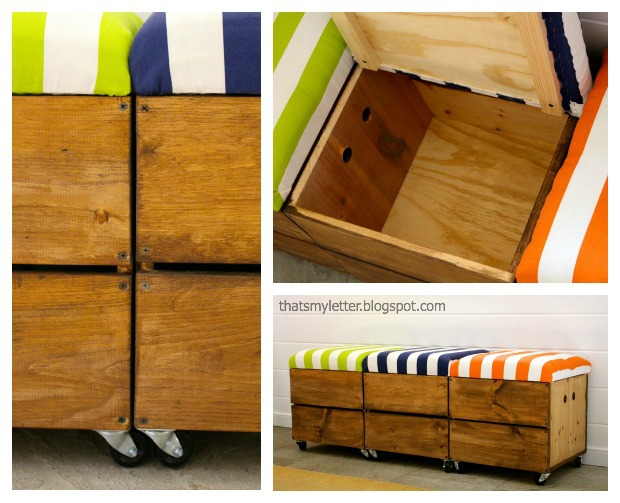
Everyone can always use more hidden storage! What’s better than getting organized with more storage? How about combining it with additional seating! Jaime here from That’s My Letter sharing with you this easy tutorial for how to build a rolling storage seat.
Of course I couldn’t stop myself at just one seat, I had to make three – they’re just that fast and easy! The finished size is a generous stool at 19″w x 18″ d x 20″h.
Lift up that cushioned top and you’ve got tons of storage space:
To make the rolling storage stool you’ll need the following supplies: Read more
https://prettyhandygirl.com/wp-content/uploads/2021/07/PHG-logo-tagline-2020-1030x211-R.jpg00Jaime Costigliohttps://prettyhandygirl.com/wp-content/uploads/2021/07/PHG-logo-tagline-2020-1030x211-R.jpgJaime Costiglio2013-09-18 07:00:312013-09-19 12:34:07How to Build a Rolling Storage Seat
Okay, no over 40 jokes! Yes, I use a back pillow, and without it my neck hurts. Sadly I lost my way too expensive memory foam back pillow on the airplane trip to Ca. I couldn’t bring myself to buy another one, so I decided to see if I could make one.
This is definitely an easy project. Plus, it is sure to improve your posture!
Materials:
2″ thick foam cushion
Batting
Fabric
Sharpie or fabric marker
Coordinating thread
Velcro
Pins
Sewing machine
Electric carving knife
Instructions:
I used another back pillow as a guide to create the shape for my DIY back pillow:
Here are the dimensions I used for my pillow.
1. Mark the outer dimensions onto your foam.
2. Cut the shape out using an electric carving knife (you can try scissors or x-acto knife, but nothing cuts through foam “like butter” than an old fashioned electric carving knife.)
3. Mark 3″ in from the side on top of the cushion and 1″ up from the bottom on the side. Connect the dots with a diagonal line. Repeat on the opposite side. Then draw a line connecting the points on the front of the cushion.
4. Use the carving knife to cut off the diagonal shapes.
5. Lay the foam cushion on top of the batting.
Use the foam as a guide to cut enough batting to wrap around your pillow form as shown:
6. Cut a piece of fabric that will also wrap around the cushion and and leave an extra 5″ on the length. Also, allow an extra 3/4″ for seam allowance on the sides.
7. Fold over one end two times for a hem. Make sure the hem is large enough to accommodate the width of the velcro. Iron the hem to hold it in place.
8. Sew the hem.
9. Pin the velcro onto the hem you just sewed.
10. Stitch the one velcro strip ont0 the right side of the fabric.
11. Figure out where the other strip of velcro needs to sit and pin it in place. Fold over the raw edge and sew the hem. Then stitch your 2nd piece of velcro in place.
Test the fit to make sure the fabric is pulled snug over your cushion when the velcro is secured.
12. Time to add the sides. Stand your cushion up on its end and draw around the shape, allowing at least 3/4″ seam allowance. Cut two identical pieces (one for each side).
13. Put the cover on the cushion inside out. And pin your end shapes inside the cover.
Cut small slits to fringe the ends of the tight radius turns. Do not cut past where your stitching will go.
14. Carefully remove the cushion from the cover.
Stitch the ends onto the body of the cover.
Trim the excess fabric off the seams.
15. Turn the cover right sides out and insert your cushion into the cover. Hooray! You are done!
I actually use this cushion in the car for driving. It fits perfectly between the sides of the seat.
https://prettyhandygirl.com/wp-content/uploads/2015/11/DIY_back_pillow_finish.jpg426545Brittany Baileyhttps://prettyhandygirl.com/wp-content/uploads/2021/07/PHG-logo-tagline-2020-1030x211-R.jpgBrittany Bailey2011-07-29 21:37:292021-07-30 16:07:32Make Your Own Back Pillow