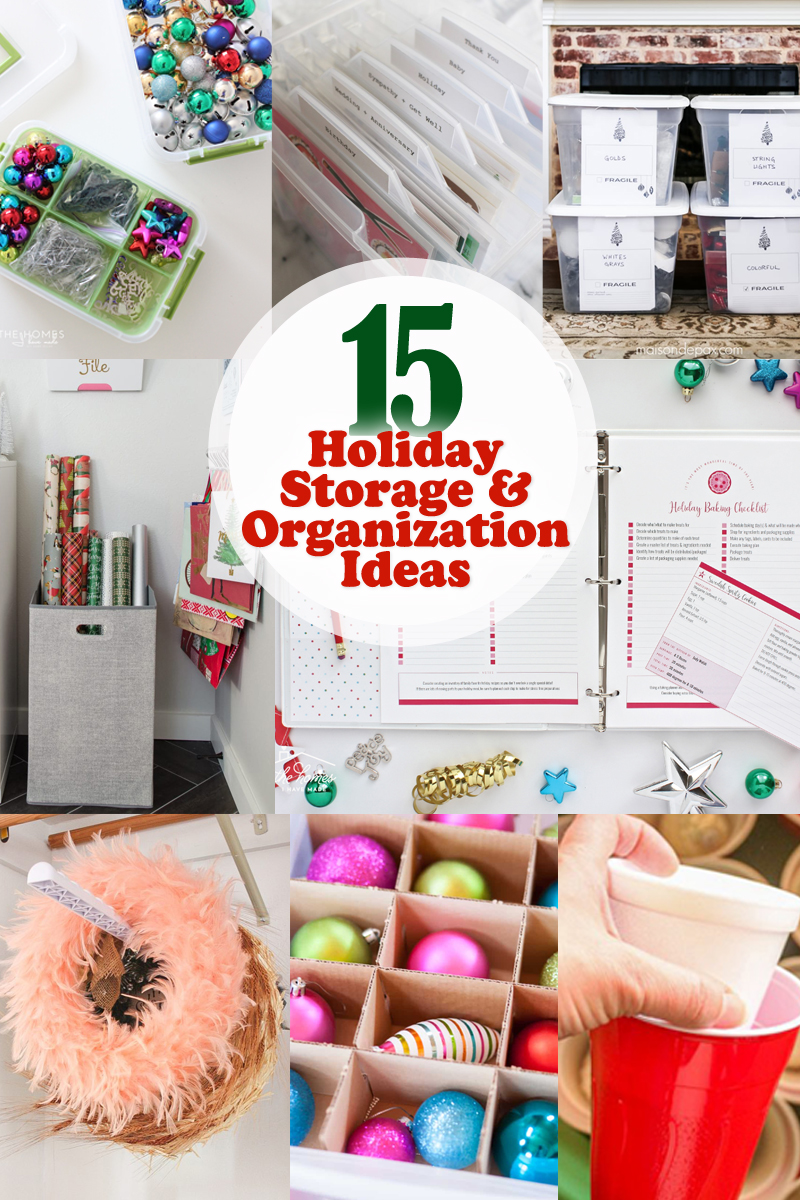
Most of us love to decorate for the holidays, but the mess and chaos after you take all the decorations down can be overwhelming. Instead of letting that stress into your life, use these 15 Holiday Decoration Storage and Organization Ideas to keep everything in order and easy to handle.

15 holiday storage and organization ideas

Holiday Decoration Storage and Organization Ideas:

When the holidays hit, things can be chaotic and you might feel a bit disorganized. Use these ideas to stay organized before, during, and after the holidays!

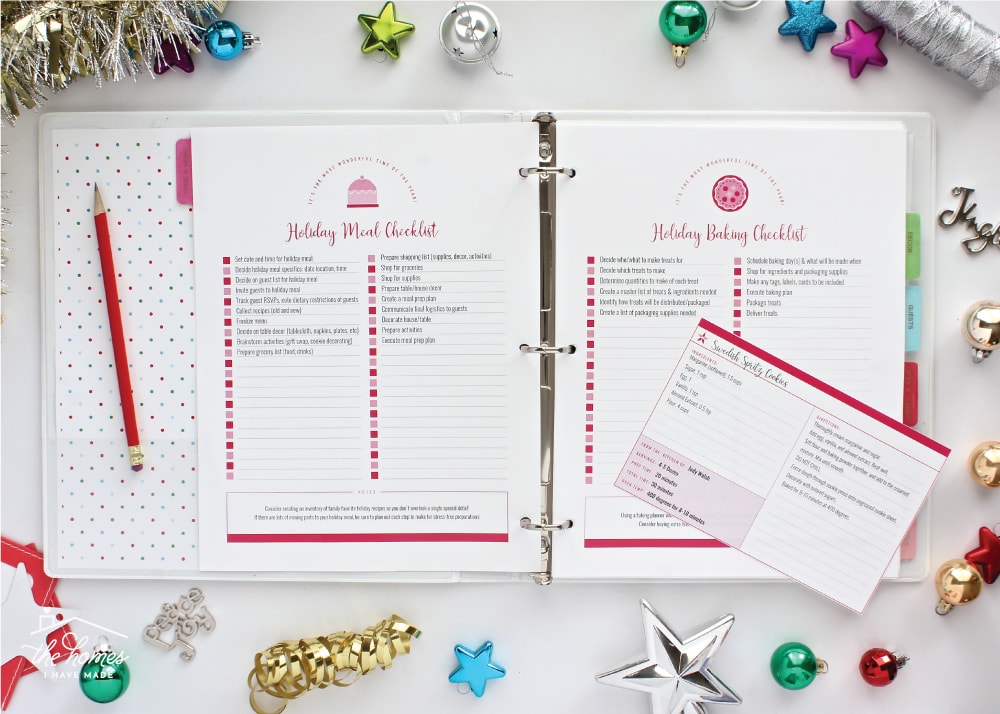
make a holiday planner like this printable one by the homes i have madePrint off an amazing printable Holiday Planner like this one to keep yourself organized before, during, and after the holidays.


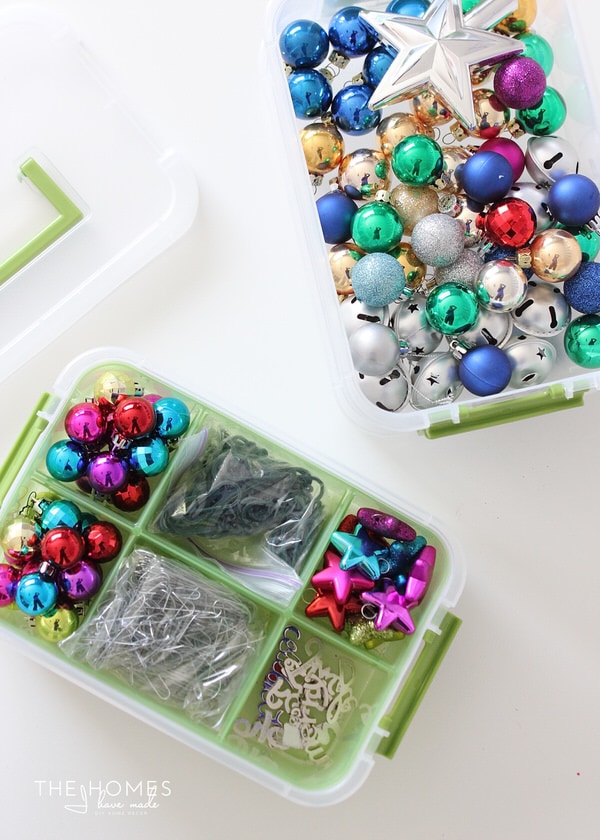
Use small compartment containers to organize the little ornaments, hooks, and other small pieces you’ll want to save for next year.


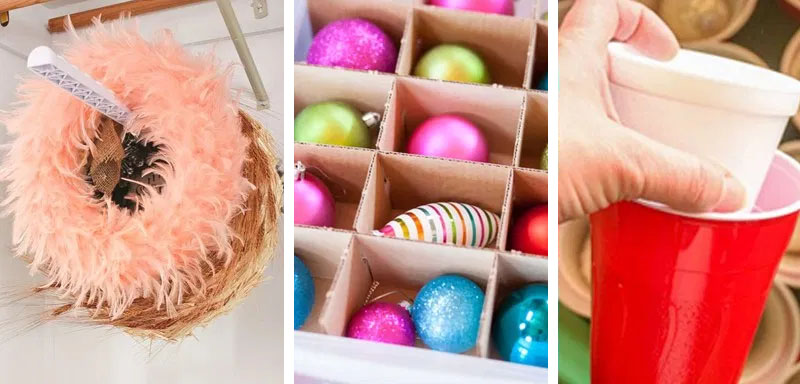
organize ornamentsCreate a grid of compartments using cardboard to keep your ornaments safe from breaking and perfectly organized.


greeting card cash storageUse a plastic filing bin to keep all holiday cards organized year-round for quick access when you need to mail one off!


wrapping paper storage idea by southern hospitalityBuild a wrapping paper holder on your wall where you can store the paper for gifts all year long!


acasarella labeled drawersUse plastic drawer sets to store different holiday gift supplies and be sure to label what each drawer holds.


put ornaments in foam and plastic cupsPrevent broken ornaments next year by using styrofoam cups inside of plastic cups to insulate glass ornaments.


saran wrap your christmas tree for storingWrap your entire tree in plastic wrap to keep it secure and prevent any critters from getting into it during storage. It also makes the tree much easier to move!


use plastic apple holders for ornament storage by make life lovelySave plastic apple containers after eating the fruit and use them to store all your nice ornaments until next year.


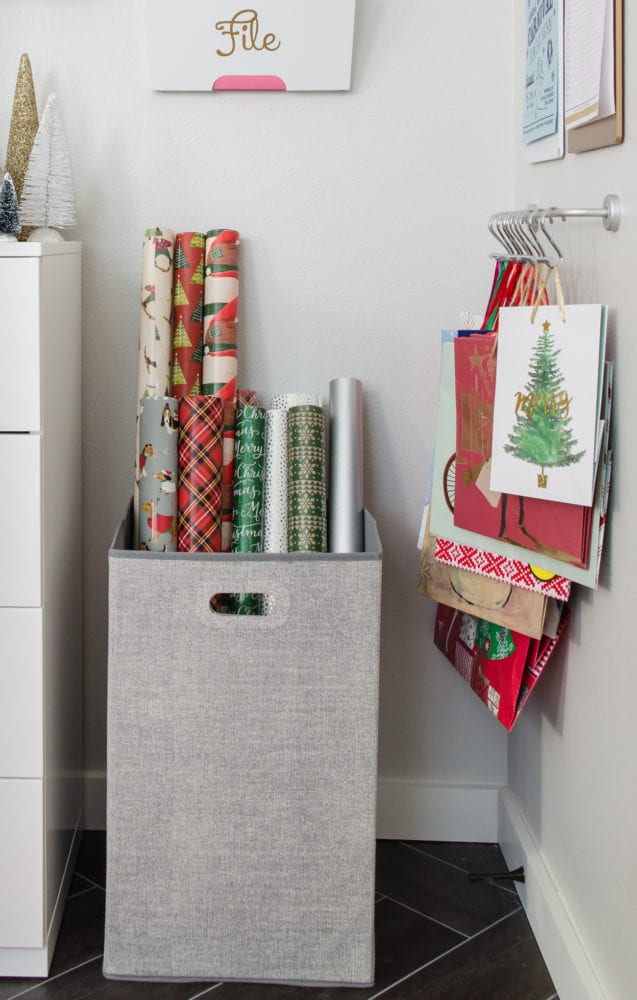
use square hamper to hold long gift wraps by polished habitatPlace your long wrapping paper rolls into a square hamper to keep them organized and safe from damage.


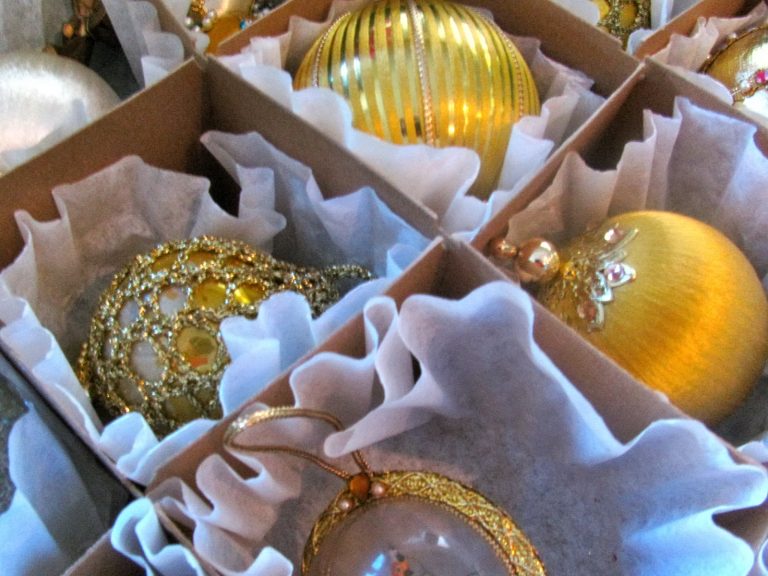
use coffee filters to cushion ornaments by one crazy houseCoffee filters make a great liner for glass ornaments to keep them from shifting and breaking.


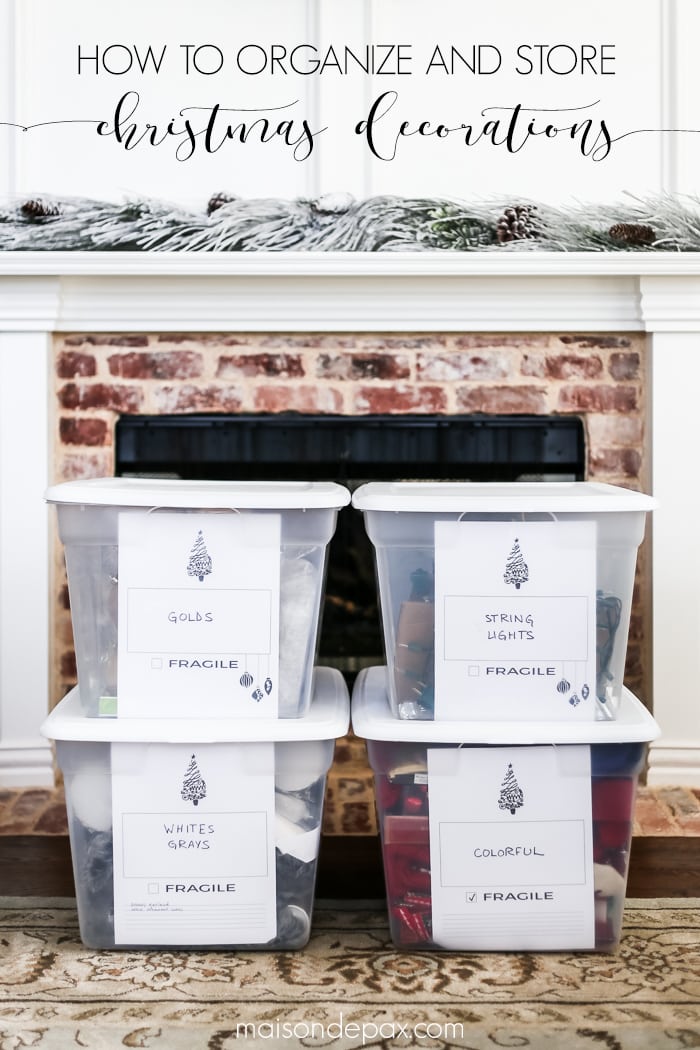
organize christmas decorations by color by maison de paxUse large labels in clear bins to keep your holiday decorations sorted by color theme.


cover wreaths in plastic by sew many waysWrap wreaths in plastic bags to keep them organized and clean from bugs or critters during storage.


create christmas card books by oh louiseMake booklets out of holiday cards from previous years to continue to enjoy the memories and see how friends and family grow over the years.


Storage Hacks for Holiday Decorations | Pretty Handy Girl

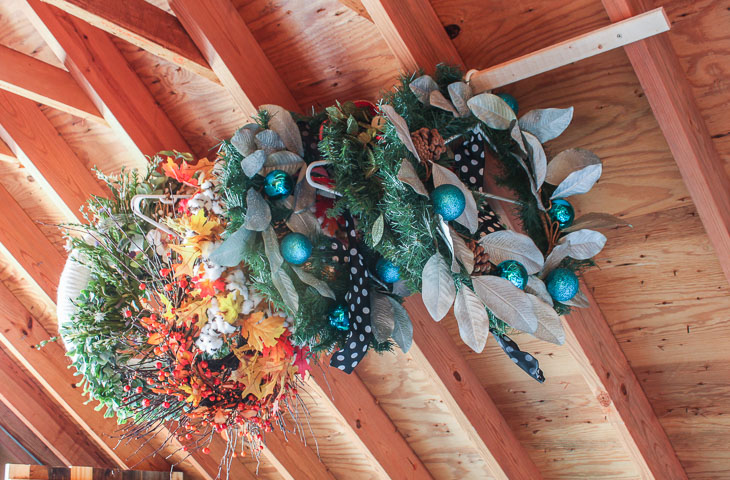
Hang wreaths on a rod, so they don’t get smashed or flattened during storage.

I hope you found these ideas helpful with the upcoming holiday season! Do you have any other great ideas? Feel free to share them in the comments. As always, thanks for reading! Please remember to share on Pinterest to inspire others as well!

Hi, I’m Sheri from Hazel + Gold Designs. Here are a few fun stats about me: I like love chocolate and peanut butter (together of course.) If you like stats, I have been crocheting for about 16 years, crafting for 20, and woodworking for about 4 years. I found a passion in making and being creative and began documenting my projects online at Hazel + Gold Designs.

When not working on projects, I enjoy spending time with my husband, four children, perfect dog, and ornery cat. You can find me on Facebook, Pinterest, Instagram and Twitter.

Read all of Sheri’s tutorials.

~Find more of Sheri’s projects here ~

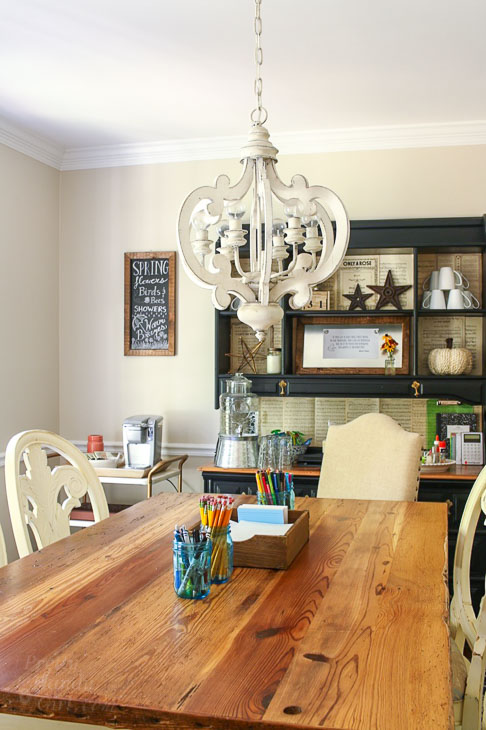
dining room makeover into homework station

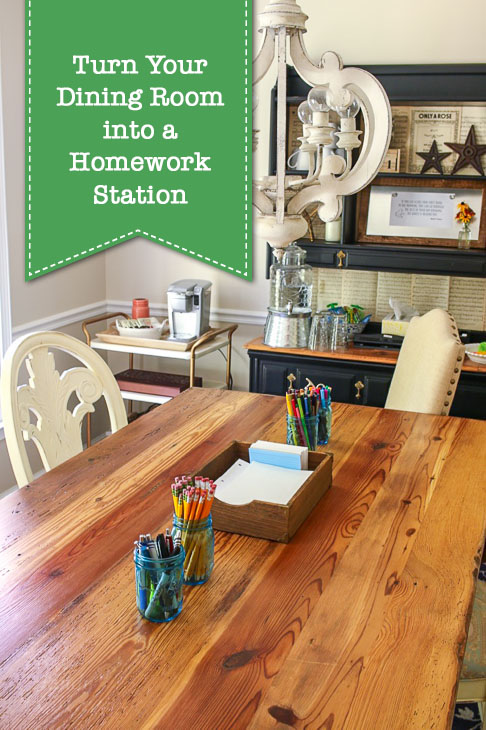
Whether your children are going back to school, being home schooled, or participating in online learning, they’ll need a spot to feel inspired to do schoolwork and homework. Are you trying to keep their school work off the kitchen table? Why not turn your dining room into a homework station with these important supplies.

Turn Your Dining Room into a Homework Station

Dining Room Makeover – Homework/School Work Station

We’ve decided to sign our boys up for the online learning option in our school district. (I have great empathy for anyone who has to make the tough decision on where to school kids this year. This was a decision made based on lots of discussions with other parents, our children, and friends that are teachers.)

If we didn’t carve out a dedicated spot to work, our boys would either sit in bed all day, or spread out all over the kitchen table. In the past, all the books and notebooks ended up on the kitchen table until I asked my sons to put away their homework in time to serve dinner. I’ll admit, some nights I didn’t ask, but barked orders. Can you relate?

Besides cluttering the table we eat at, the kitchen table was not a space without distractions. Like most kitchens, ours is the hub of activity after 5pm. Brother may be watching TV in the adjacent living room, hubby might be on a phone, and I am usually cooking. Obviously, it wasn’t the best location for focused studying and work. Two years ago, after moving pencils and books off the kitchen table (for the umpteenth time), I came up with this plan:

Operation Dining Room Converted to Homework Station

dining room makeover into homework station

The idea was to create a space so organized and inviting that my boys would create better work habits and be able to plow through their school work efficiently. Here’s how I achieved the perfect school or homework station and freed up our kitchen table for other things…like eating!

Creating the Perfect Homework Station

If you create a space that is clean, organized, and comfortable; you can set your child up for good work habits from the start. Having a space that is neat prevents distractions and keeps your child more focused. Personally, I have a hard time working in a messy space. Normally I have to clear my desk completely before I can start writing or taking on a focused task.

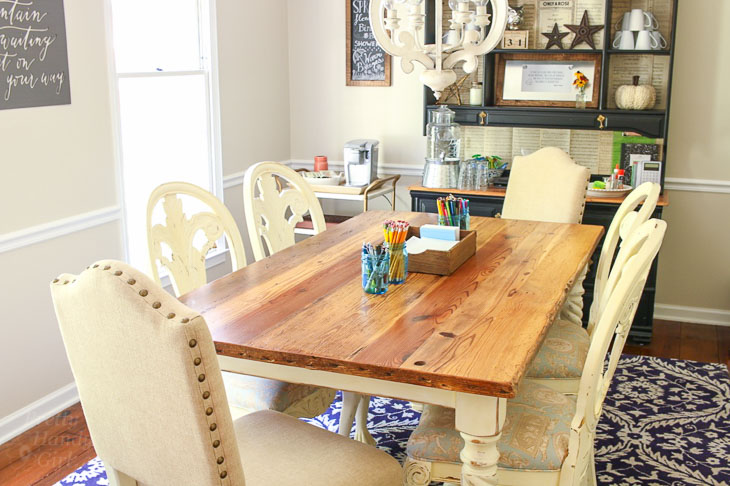
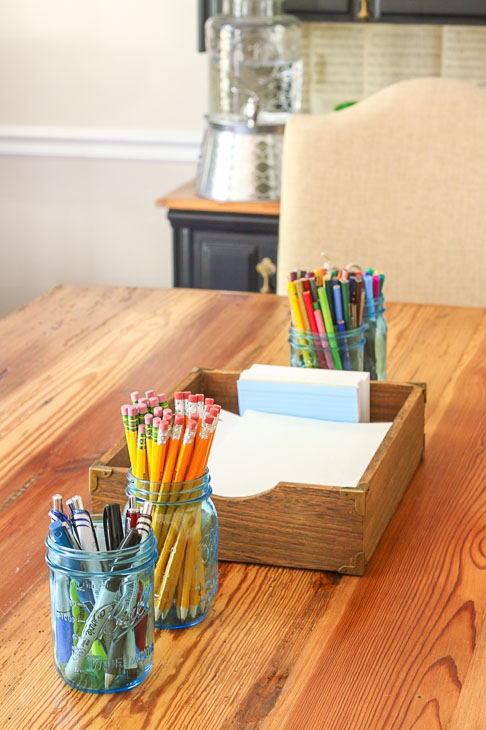
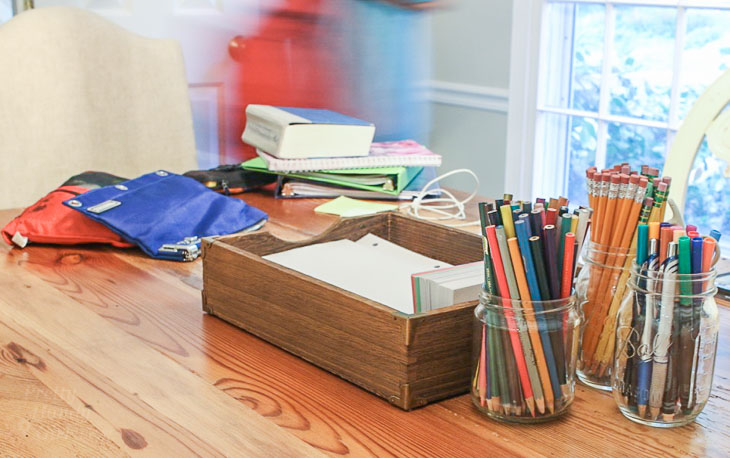
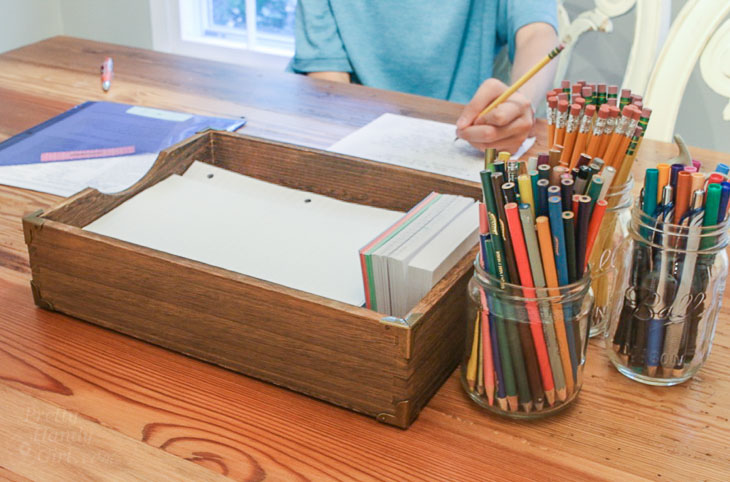
To clear the clutter, put writing utensils and other necessary supplies in the center of the table in jars or trays. This puts things at your student’s fingertips and prevents the need to get up and get off track. (Obviously, sharpen those pencils ahead of time, and add eraser tops to any worn pencils.)

Supplies for a School/Homework Station

(I’ve included affiliate links for your convenience. I earn a small percentage from a purchase using these links. There is no additional cost to you. You can read more about affiliate links here.)

dining room table set with homework supplies pencils, paper, pens

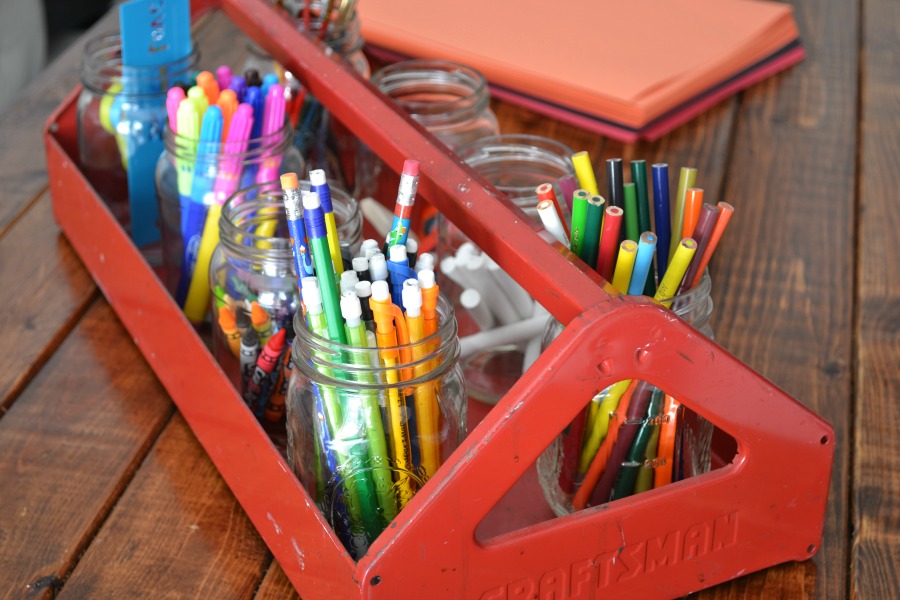
You can use any tray or even an old tool box as a utensil organizer:

Get organized before the school year creeps up on you. This toolbox homework caddy will help your kids find everything they need. | Toolbox Homework Caddy

Papers Galore

In the center of the table is a paper tray filled with lots of looseleaf paper and 3×5 cards. I also salvaged paper from half-used spiral binders. My sons helped me tear the pages out and trim the ragged edges with a paper cutter. Now we have an endless supply of scratch paper and I don’t feel guilty having to throw away half-used notebooks.

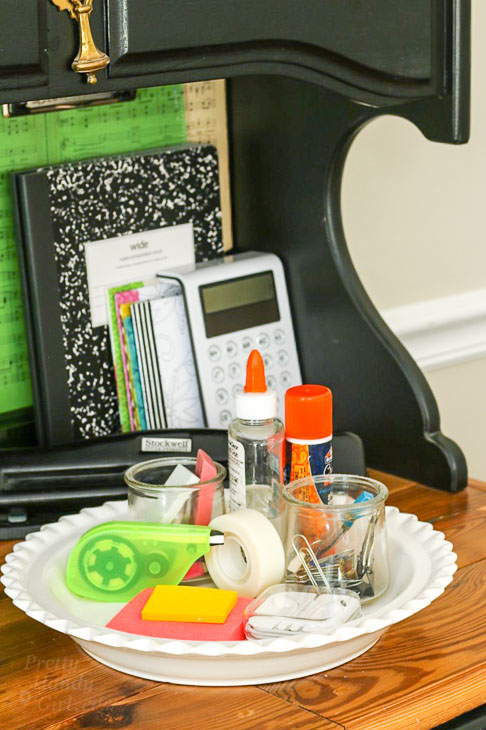
The non-essential supplies are nearby on our dining room hutch.

calculator notebooks and other office supplies for homework station

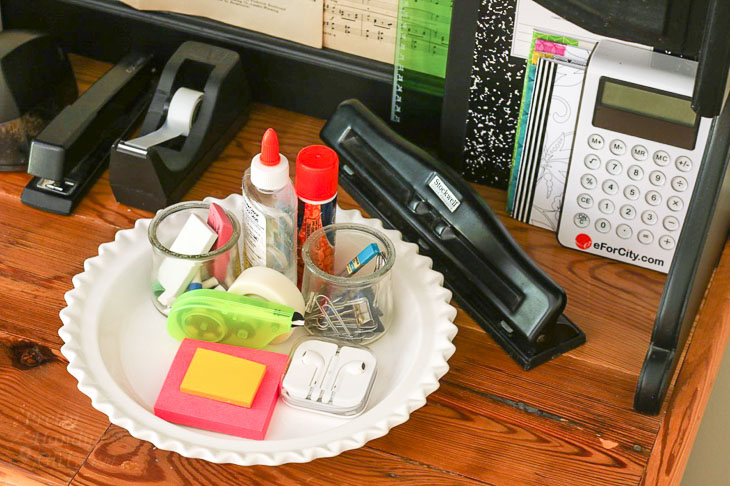
A dish corrals the little things in one space keeping them neat and organized. Earbuds are also stored here for my teenagers who love to listen to music while they work (or maybe to help tune out brother or Dad on his Zoom calls.)

office supplies in pie dish

Proper Chairs

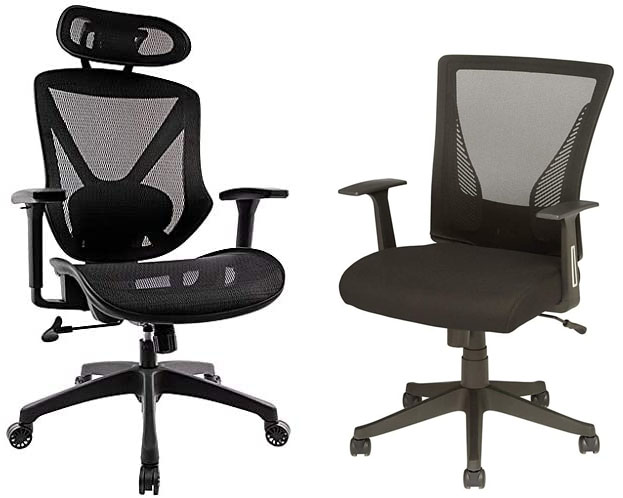
Making a space cozy and comfortable can be as easy as pulling up some upholstered dining chairs (if the seats are hard, just add cushions or pillows.) But, for a full day of learning, it is best to use comfortable and supportive office chairs. We just assembled two new office chairs for the boys (after they tested chairs at Office Depot and Staples. These are the two chairs we bought them for this year of virtual learning: (Dexley Mesh Task Chair and Brenton Radley Mesh Task Chair)

Brenton & Dexley Task Chairs

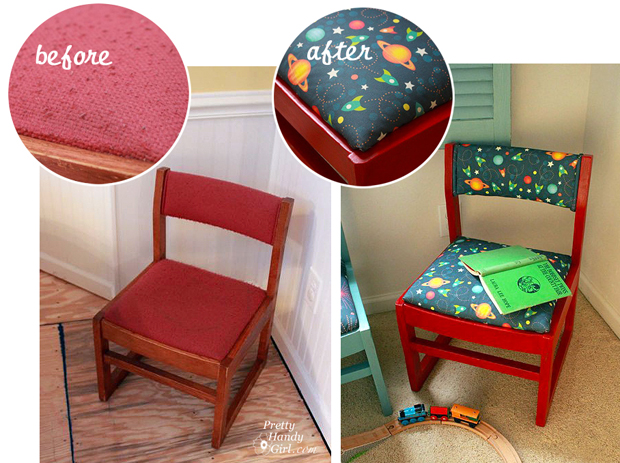
I completely understand if purchasing new chairs is out of your budget. If so, you can try scouring Craig’s List or Facebook Marketplace for a sturdy used chair. Don’t let the condition deter you, because you can always recover it following this tutorial:

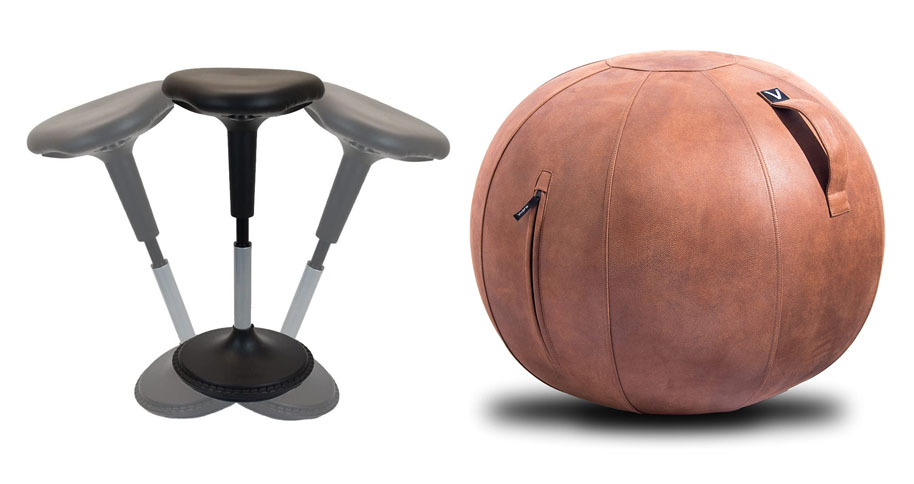
For kids that have a hard time sitting still, you may want to let them try either a wobble stool or an exercise ball (with weighted bottom).

Decorating the School Work Space

Working in a space that has some decorations or art makes a space more appealing. Decorate the homework station with art, flowers, or anything that makes the space feel beautiful and relaxing.

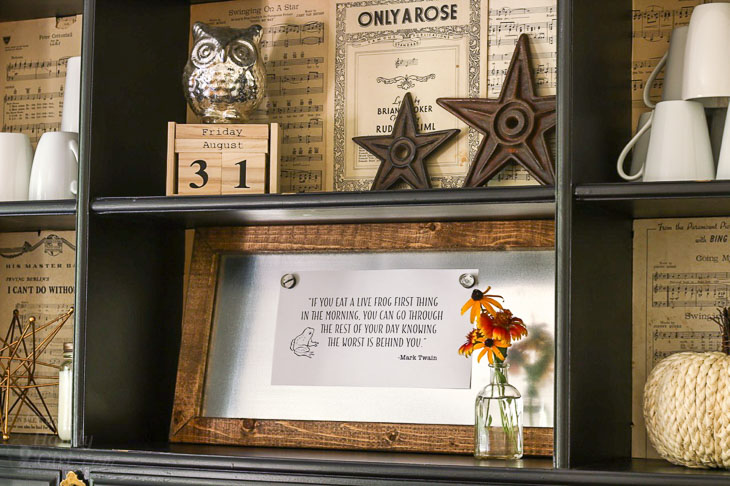
dining room hutch with mark twain eat the frog quote

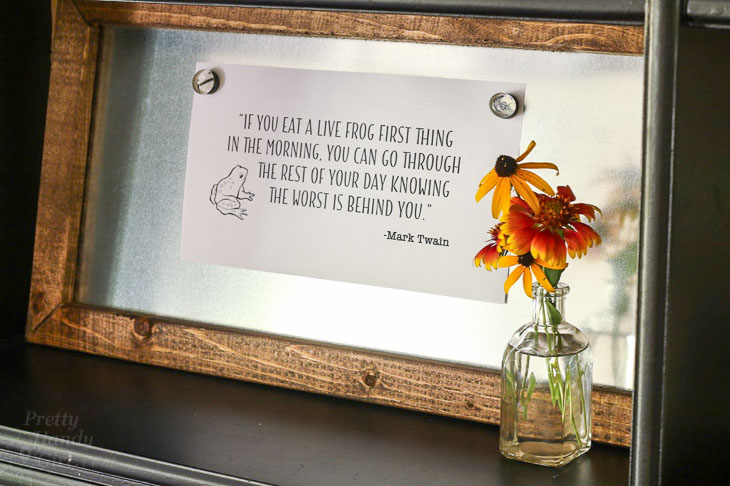
While decorating the room, I added a wood block calendar and a quote from Mark Twain. Have you heard this quote before?

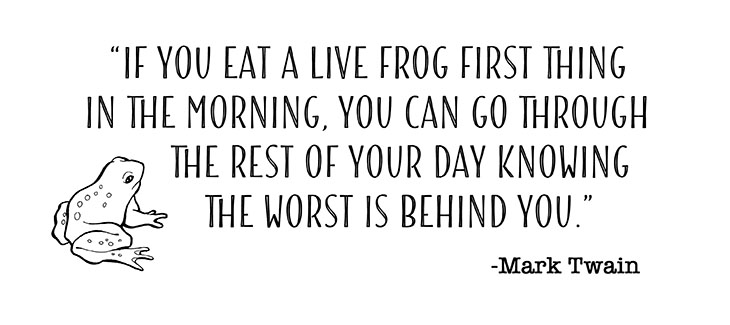
Eat your frog first thing in the morning Mark twain quote

The gist of the message is to stop procrastinating. Do your least favorite task first thing in the morning and put the worst behind you. This leaves the rest of your day with tasks you don’t mind as much or with the tasks you actually enjoy doing. So, go ahead and eat your frog every morning.

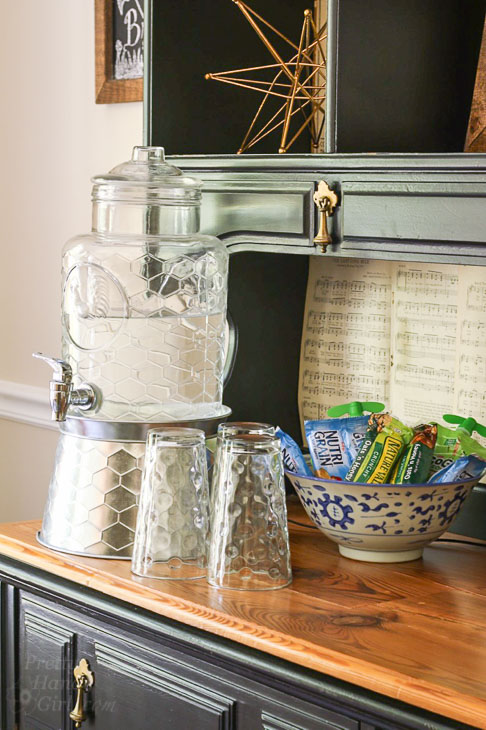
If you like this quote, you can download the printable I made here:Eat your frog first thing in the morning Mark twain quoteSpeaking of eating, you can add snacks and water to the space if you feel it will help your kids avoid leaving to raid the pantry. Plus, if kids grab snacks in the kitchen, they are more likely to set up their workspace there. Snacks already accessible lure them into the homework station and keep them there. Don’t forget to keep fresh water close by. All those salty snacks can make you thirsty.

homework station complete with drink dispenser and snacks

This space has been perfect for my sons to use for focused homework time. I don’t know why I didn’t change the dining room (which rarely gets used) into a more usable space sooner. But, now that we have signed them both up for the online virtual academy, I’ll be creating a second space for my other son. Having a high schooler and a middle schooler means they each need to be able to focus on their work.

dining room reused as homework station also good for home schooling

I’ll be sharing an update on how we are turning the guest room into another school/study zone.

Now, speaking of my sons, here comes my oldest now.

motion blur of boy coming home from school

He loves having a spot to spread out and get his homework done. He has asked me to cut a piece of plexiglass or masonite to top this rustic farmhouse table, because it’s a little too rustic to be a smooth writing surface.

boy doing homework at table with school supplies in foreground

What about dinner guests, you ask? If at some point we have family or close friends over, I can move the supplies onto the hutch and set the table for dinner. Or we could serve Chinese and let our guests use pencils instead of chopsticks. LOL.

Do you have a homework/school work space set up in your home? Where is it? Did I forget to include anything in this functional space?

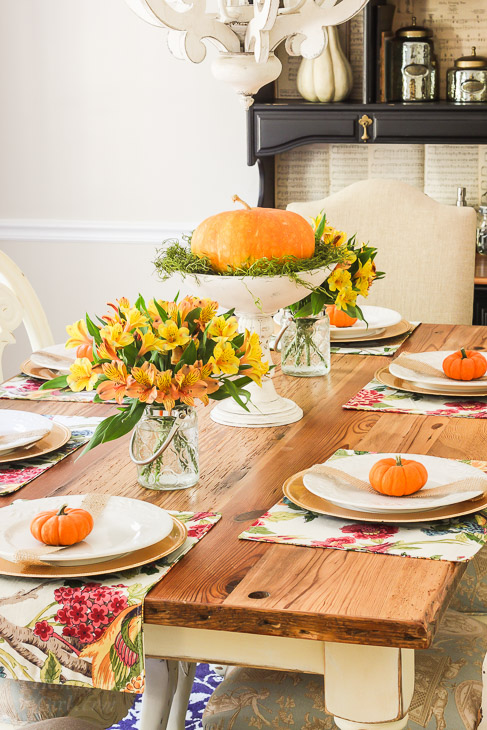
If you liked the dining room makeover, you might like to see it decorated for the holidays:

Colorful Fall Dining Room:

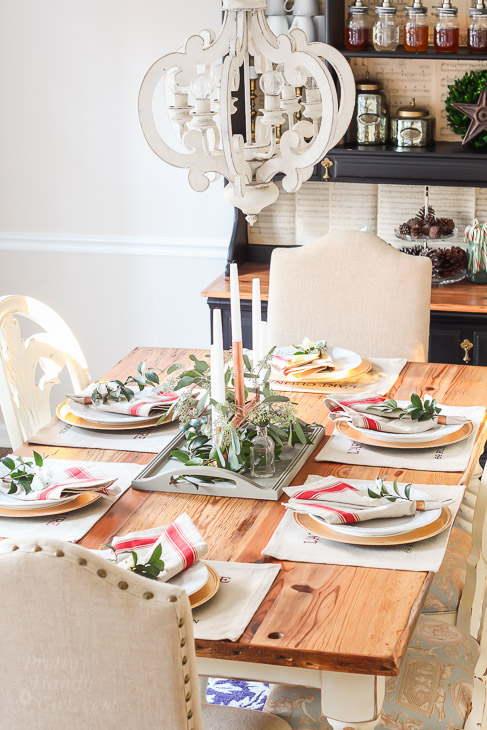
Pretty Handy Girl Fall Tablescape 2016


Christmas Tablescape:

Holiday Home Tour 2016 | Pretty Handy Girl

Many of you have suddenly found yourselves transitioning to a home office during this period of social distancing and feeling overwhelmed. No matter how much or how little space you have to work with, I’m here to help you create a cheerful and practical work space with these DIY Ideas for Setting Up a Home Office.

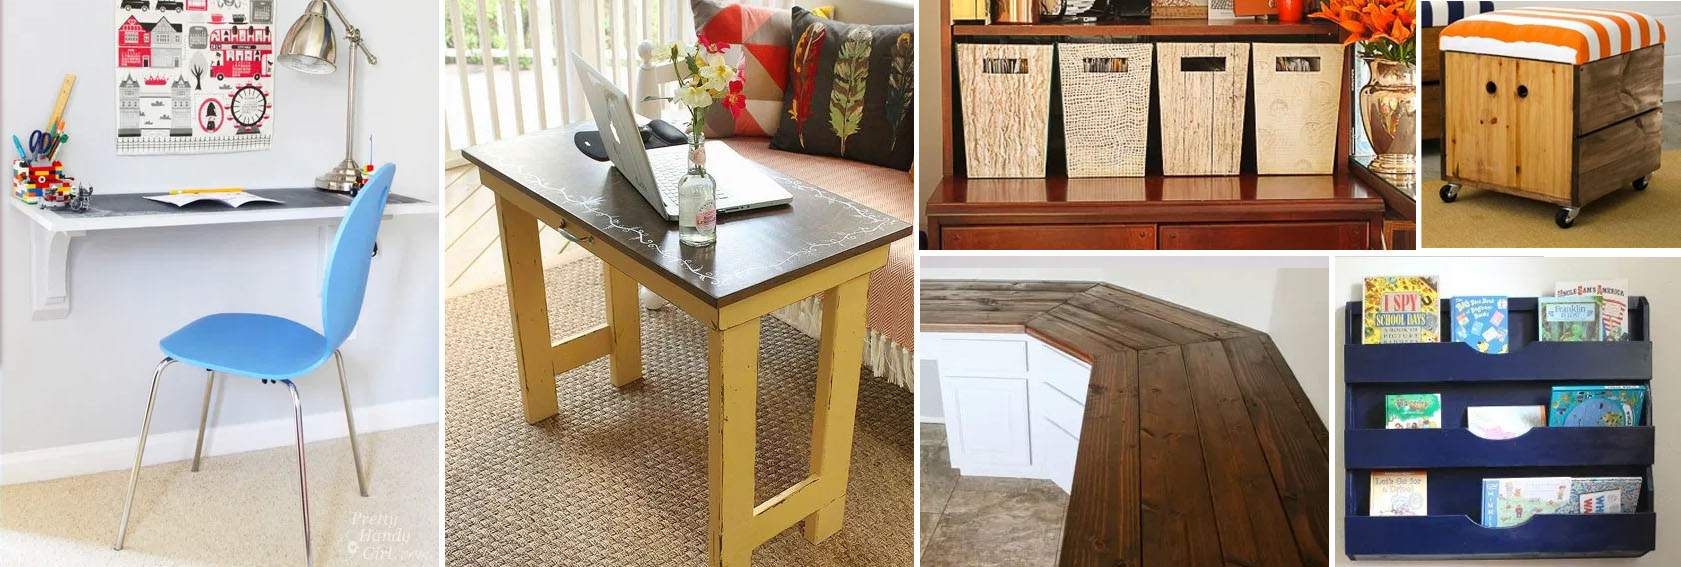
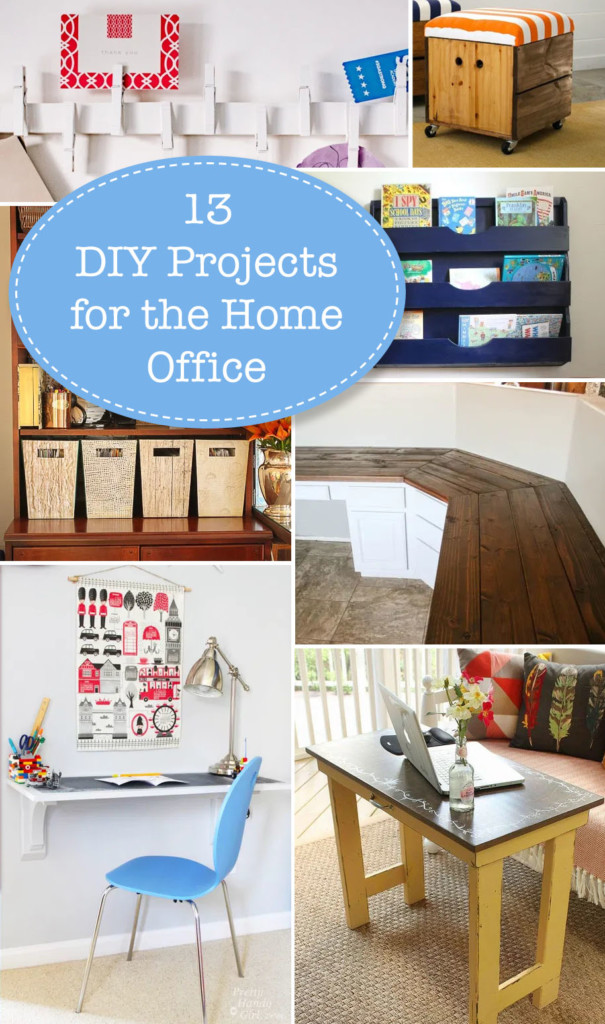
13 DIY Projects for Setting Up A Home Office
DIY Ideas for Setting Up A Home Office

I have been working out of a home office for quite a while now, so I thought I would share some of my most valuable ideas for getting organized to work at home. For inspiration, here are 13 easy, inexpensive, and practical projects to get you started.  Who knows, after you get set up, you may not want to return to your corporate office.

Wall-Mounted Desk Tutorial | Pretty Handy Girl

The great thing about this Wall-Mounted Desk is it can be small or large and it won’t take up any floor space!


Folding Laptop Writing Desk | Pretty Handy Girl

This Folding Laptop Writing Desk is the perfect height, and can fold up and store away when you’re not using it.


Build a Wood Plank Desktop for about $40

Here’s how you can create a simple (and most importantly, inexpensive) Wood Plank Desktop for about $40!


Magazine File Box Facelift | Pretty Handy Girl

Tired of your boring home office decor? Within minutes you could give a Magazine File Box a Facelift (or a storage box)!
I saved a lot of money reusing the old. Put ‘er there fellow savers!


DIY Wood Wall Organizer

If you’ve seen these cute Wall Organizers and thought: “I could totally make that,” I’m here to tell you, you can!


29 hacks to help you get more organized social media image

Here are 29 hacks to help you get more organized and help you transition to a better organized home office!


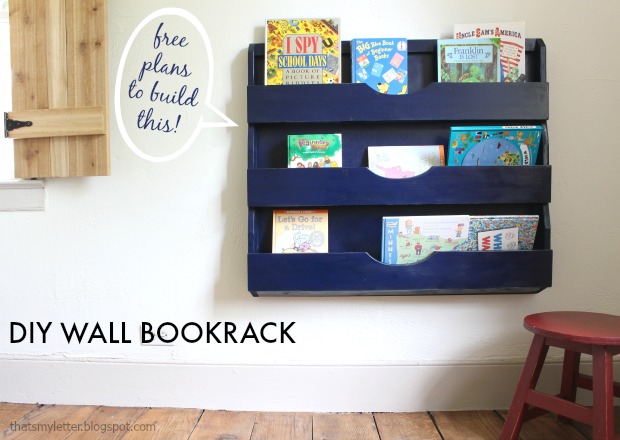
DIY Wall Bookrack

This Bookrack Building Project will have you organized and will free up space in no time.  The shelves are tapered and have plenty of depth for multiple books, files, or magazines.


File Cabinet Makeover Using Chalk Paint

Give a boring beige File Cabinet a SUPER cheap and quick makeover using chalk paint! I bet you can score a free file cabinet on your local buy, sell, or trade group. Or look on FreeCycle.org or Craig’s List.


12 DIY Home Storage Tutorials | Pretty Handy Girl

I’m taking advantage of these days at home to do a big “clean out”!  You’re sure to find one of these 12 DIY Storage Projects to help you organize your home useful.


Wall-Mounted Hutch Tutorial

This charming Cottage Style Desk and hutch is where I keep our lives organized! It takes up otherwise wasted space in the corner of our kitchen.


Scrap Wood iPad Tray

If you are accustomed to DIY projects, you probably amassed quite the stockpile of leftover wood. You’ll love this quick, easy, and cheap DIY iPad Holder!


rolling storage stool final

What’s better than getting organized with more storage? How about combining it with additional seating! Check out this easy tutorial for how to build a Rolling Storage Seat.


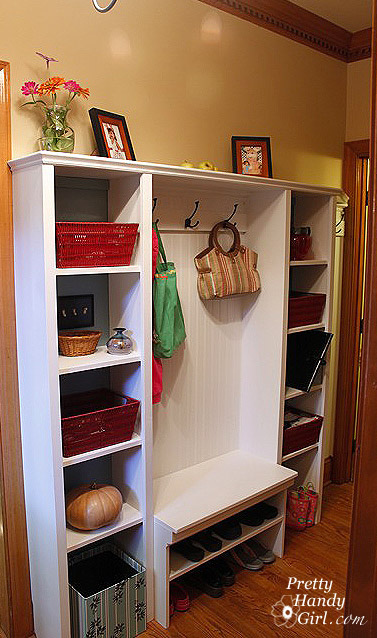
Although this wall Storage System was built custom for a mudroom, you can easily adapt it for a home office!

I hope you found some of these DIY Ideas for Setting Up a Home Office helpful. Gotta run and get set up for working tomorrow from home. Good luck to all of you, especially if you have family members who like to interrupt your workflow.

Have you ever wanted to maximize the space in one of your drawers? Do you have a drawer that acts like a black hole? Learn how to build a DIY Drawer in a Drawer and watch your organizational dreams come true.
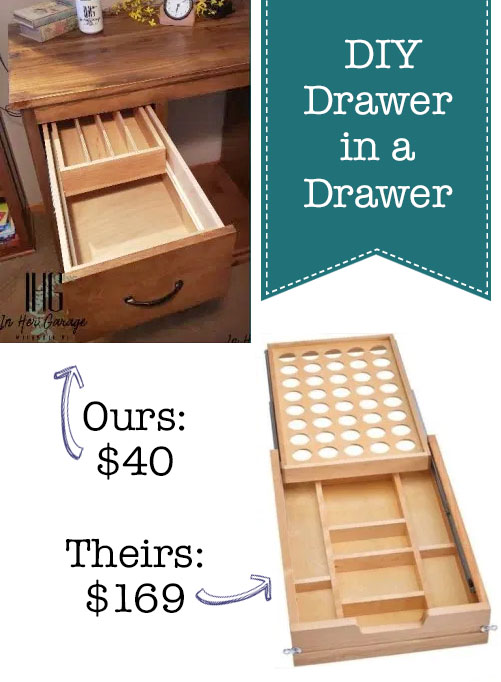
DIY Drawer in a Drawer

Hi! This is Kristen from In Her Garage, and I’m here with a tutorial just for you. We all love organization, but in almost every room of the house we have a drawer that houses those tiny little necessities. And inevitably they end up scattered and lost within the drawer depths. Today I’ll teach you how to build a DIY drawer in a drawer to keep those little things easily at hand while still allowing use of the drawer beneath. You could just build a small separate top drawer, which would be fine if that is the outward aesthetic you want, but if you desire your uniform size drawer front, then this is a perfect solution. And, great news…this can also work as a modification to an existing drawer.

There are similar drawers available online but chances are they won’t fit the size drawer you’re building or already have. Not to mention the cost! Why not just do it yourself?!

I have built this drawer several times and each time I made it for a coffee bar/beverage center I was building. This drawer makes the perfect K-cup organization drawer. My clients had complained, “I’m sick of these K-cups laying all over the drawer!” or “I do not like the look of the K-cups on the tabletop. It looks like clutter!” I was thrilled to be able to help with this issue by building a DIY drawer within a drawer. Once you know how to make this insert drawer, you can use it to hold more little things such as:

  • Office, craft room, kid’s craft room- holding paper clips, push tacks, post-its, those sticky page marker tab things, pens/pencils, markers, scissors, legal pads
  • Bathroom- makeup, hair ties, bobby pins, Qtips, all the little creams, first aid supplies
  • Junk drawer!!- batteries, keys, phone chargers, pens/pencils, tape, rubber bands

I’m sure the list could go on but let’s get down to it and start making this drawer happen!

(I’ve included affiliate links for your convenience. I earn a small percentage from a purchase using these links. There is no additional cost to you. You can read more about affiliate links here.)

Tools:

Materials:

Please read through the instructions first to gain a basic understanding of what you will be building.

Instructions:

Figure out the size of your drawer you want to build. Then select a height for the inner drawer based on what will be stored in it.

  • If you plan to use it as a K-cup organization drawer allow at least 2” inches in height. (Standard K-cup dimensions are 1 ¾” tall x 2″ top diameter and 1 ¼” bottom diameter.)

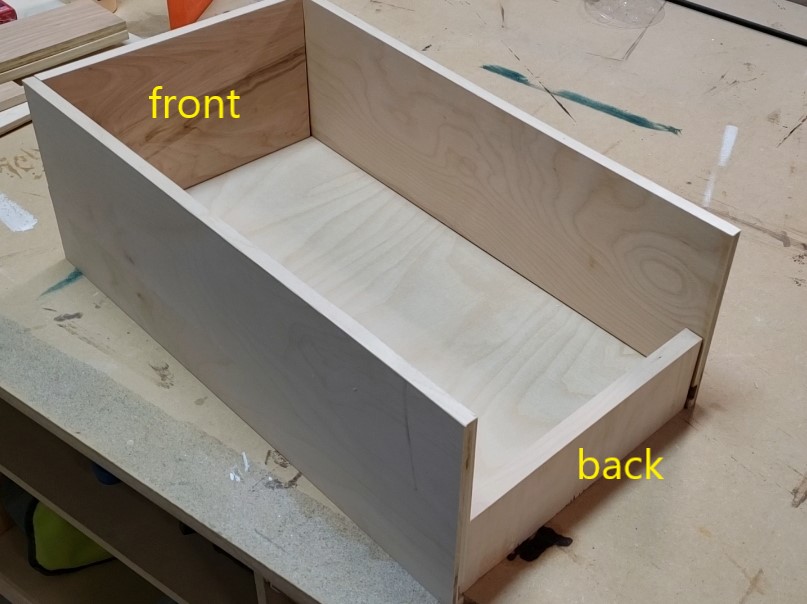
Next, you will need to figure out the dimensions of the inner drawer.  Follow the instructions for the drawer slides you chose for the base drawer for sizing. (My slides dictated 1/2″ for each.) The front and sides of the base drawer should be cut to the same height BUT the back of the drawer should be shorter to allow the inner drawer to roll away. See the photos below.
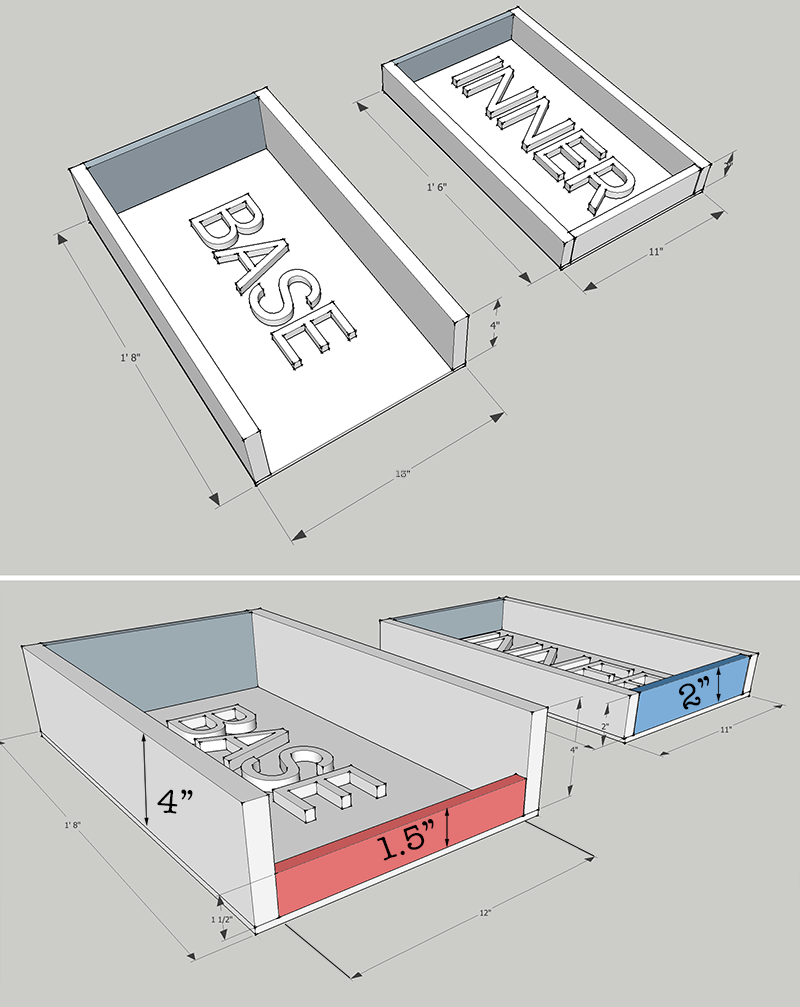
The equation to figure out the back of the base drawer: 

The inner height of the base drawer  – (the height of the inner drawer + 1/2”) = Back of the base drawer

Using the example as shown above:

4” inner base drawer height – (2 ” inner drawer + 1/2”) = 1.5” back of the base drawer

If you are modifying an existing drawer, cut the back panel to this same height using a jigsaw.

Feeling good about that? Great!

Building Your Inner Drawer:

Now it’s time to assemble the inner drawer components. (Double-check your measurements below):

  • Height- you’ve already chosen this dimension
  • The width will be 1 inch narrower than the inner width of the base drawer to allow room for the drawer slides
  • The length will be slightly longer than the length of the drawer slide so the drawer meets the back of the base drawer.
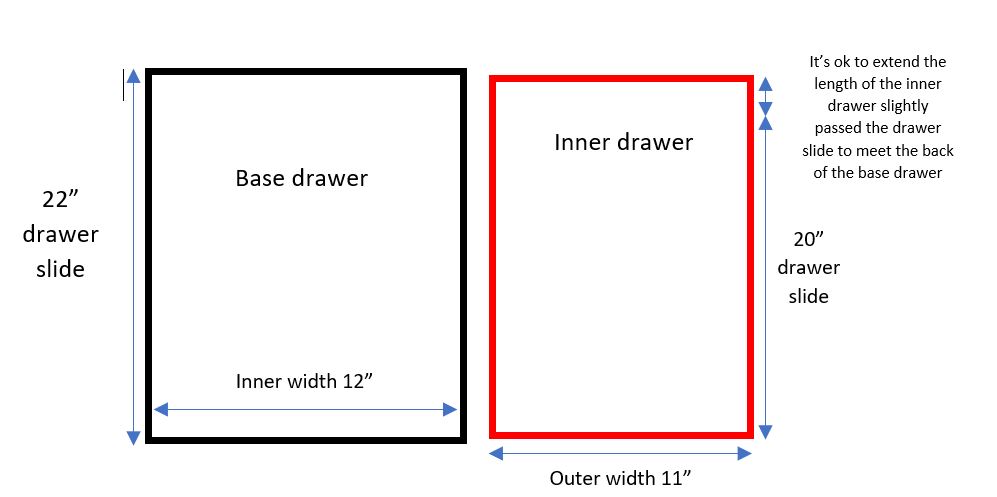
Assemble the inner drawer using wood glue and brad nails.

Installing the Drawer Slides for the Inner Drawer:

You can watch this video and then read the directions, which should help clarify installing the drawer slides.

Set out the base drawer components you pre-cut.

Note: Installing the drawer slide is the opposite of what you would normally think. You always pull a drawer open toward you but this drawer will operate by being pushed away from you to reveal the base drawer beneath it. Meaning the front of the inner drawer slide is now the back. You’ll see what I mean in a minute.

First, take the two sides from the base drawer and mark the front and top of both sides. Now, using your combination square, mark the height of the inner drawer on the sides of the base drawer measuring from the top down. Add about a 1/8” to let the drawer sit slightly lower than the top of the base drawer.

Now figure out where the “front” (actually the back) of the inner drawer slide will be attached.  (Allow 1/8” from the front of the base drawer.) Remember to take into account whether or not the base drawer front attaches inside the sides (as shown in the picture below) or in front of the sides.  If the front does attach between the sides, be sure to allow for the thickness of the drawer front when attaching the slides to the sides.
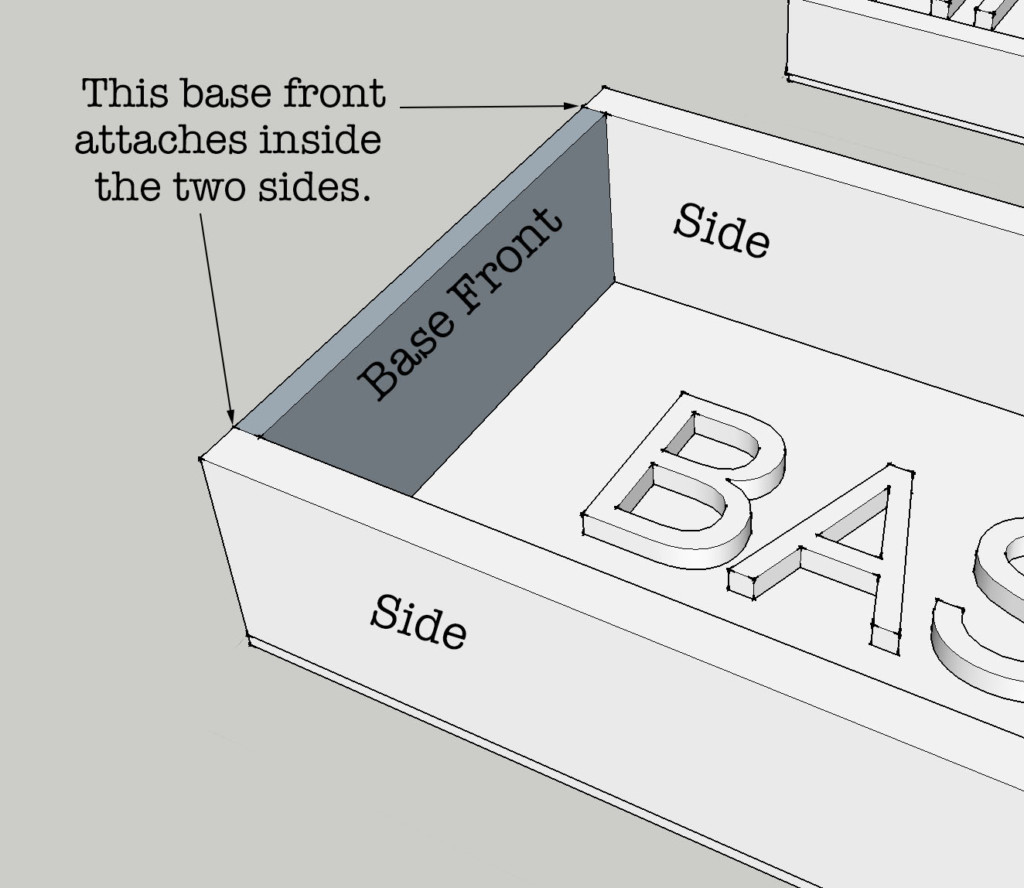
Mark a pencil line where you will be attaching the drawer slides. Attach the inner drawer slides to the inside sides of the base drawer. Lining up the “front” and bottom of the slides with the two lines you’ve drawn.

Attach the other piece of the drawer slide to the inner drawer bottom (double-check you are lining the back of the slide up to the “front” of the drawer. Normally you would align the front of the drawer slide to the front of the drawer but what was the front of the drawer is now considered the back.)

Now that the drawer slides are installed, Assemble the base drawer (pretend there are drawer slides in the photo below.)
Finishing Your Drawers with Edge Banding:

For a finished look, cover the exposed edges of the plywood with edge banding. I prefer iron-on edge banding because it is easy, inexpensive, and finishes nicely. Brittany has a great tutorial for how to finish plywood edges which includes iron-on edge banding, click here to check it out.

Nesting the Inner Drawer:

Slide the inner drawer into place inside the base drawer. Now you are ready to set your base drawer back into the cabinet it goes in.  That’s it. Good work!
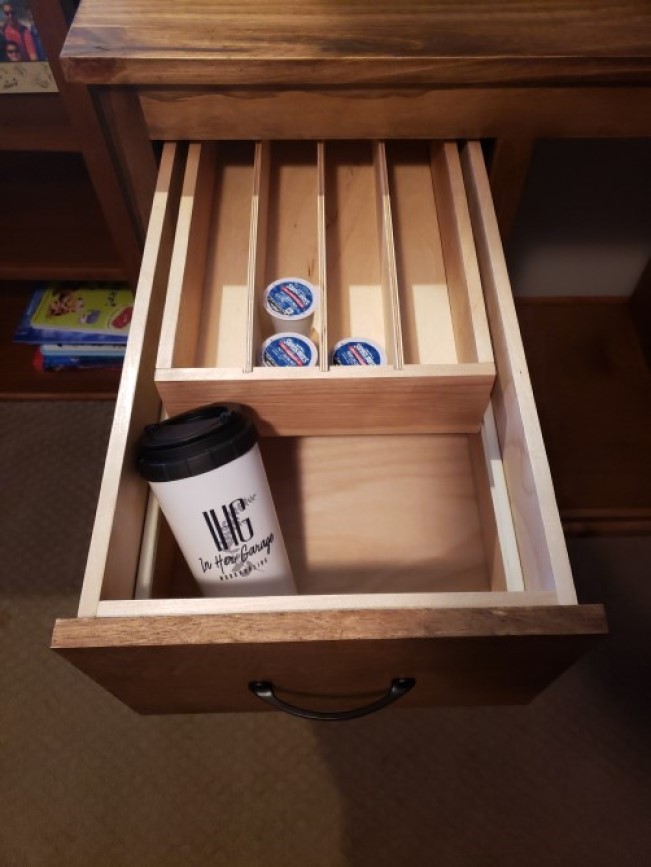
Optional last step: you can add little felt pads to the front and back of the inner drawer. This will make closing the drawer whisper quiet.  Most people will pull the inner drawer closed before closing the base drawer after use but it isn’t necessary if there is a back to the entire cabinet piece. The inner drawer will simply hit the back of the cabinet and be pushed back into place when closing the base drawer so having little felt pads on the back of the drawer will make this quieter and having pads on the front of the drawer will help with this too.


Good luck keeping all the little things organized and I hope this DIY drawer in a drawer will come in handy for any room in your home! Happy Building!

Find more projects and inspiration In Her Garage and follow my DIY journey on Instagram and Facebook.

Hi! I’m Kristen, from In Her Garage, and I am a self-taught woodworker and DIY fanatic from Minnesota where I live with my husband and our two daughters. Between being a wife, mom and, registered nurse, I try to make as much time for DIY as possible. My love for building came after our family built our current home in 2015. After we moved in, we needed furniture and instead of spending massive amounts of money to order the pieces we wanted I decided that I would build them myself. I started with a buffet table plan from the fabulous Ana-white and quickly set out to remodel my entire home office.

Since then I have started a side business building furniture for the people in my community. I love hearing my clients talk about the pieces they wish they had whether it be a rustic buffet table, a one drawer side table, or a toy box and then making it a reality for them. While starting my small business it made perfect sense that I would document my building journey so I simultaneously launched the In Her Garage blog and I love sharing my plans, tips and tricks.

Making something beautiful with your own two hands through a little preparation and determination is an amazing feeling and I hope to bring inspiration and know-how to those looking to tackle a big or small project.
I am so glad that you found me here and please feel free to connect with me on PinterestInstagram, and Facebook to see what I am working on right now.


Clean out and organize your junk drawer

I hope everyone had a lovely Holiday and a thought-provoking New Years. Thought-provoking? Well, I always find myself thinking more than usual around New Years. How about you? I think about the past year and the year to come. And, like most people around this time, I think about any goals I want to achieve in the New Year. I’m sure you can relate to wanting to declutter. Welcome to the Declutter Challenge for 2020.

Take the challenge and finally declutter your home!

Declutter Challenge for 2020

I know a lot of us strive to be tidier. To clean our house, clear the clutter, and get more organized overall. I think the New Year is a great time to do this. In fact, it’s one of the first things I do every new year. I start purging with the Christmas decorations, as I’m taking them down to be put away. Any decorations that didn’t get used, and are not precious to me, get donated. I do this every year and my Christmas decor stash has stayed very manageable this way.

But that’s just one example. Today, I want to share with you a little declutter challenge that we can do together.

In this free printable pdf, you will find a list of areas to clean out each day. Feeling more motivated? Feel free to tackle two or three areas a day! Don’t forget to check the box when you have completed cleaning and organizing an area. And make sure to pat yourself on the back!

I also wanted to share a few tips to help you along the way in this decluttering challenge.

How to Declutter Your Home

Before you start on any area, collect three things:

  • a trash bag,
  • a box for donations
  • an empty laundry basket

Any items to throw away will go into the trash bag. Any items that should be donated, can go into the box. Lastly, any items not where they belong get put in that empty laundry basket to be put away later.

If you need an extra push, check out my list of 59 things you can get rid of right now.

Paperwork

The best way I found to tackle all that paperwork is to digitize it. You don’t have to create any elaborate systems. Simply switching to online bill pay and paperless billing will help a lot. Reduce mail by getting yourself off those junk mail and catalog lists! You can easily remove yourself using this free service on the Catalog Choice website.

Keep one small area designated for paper mail, and make it a point to go through this pile weekly. Keep a paper shredder handy so you can securely dispose of papers as they come in. It’s usually not necessary to keep product manuals and menus, most of these can be found online these days. Just recycle them and use the space for something else.

Organizing Kids Artwork

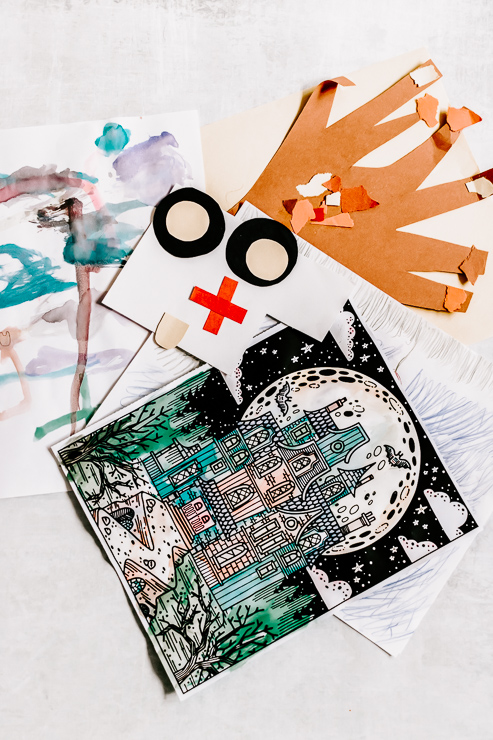
What about kids artwork? My philosophy has always been to keep the favorites and display them proudly (but recycle the rest.) You can display them as a lovely gallery wall of framed prints that your children created. There are also services like ArtKive that create a memory book or collage print of all their artwork for you.
Junk Drawer

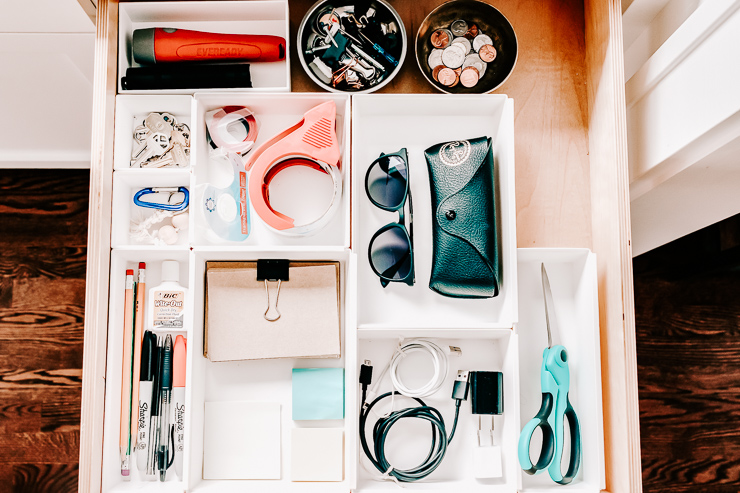
Clean out and organize your junk drawer

Things are much easier to keep organized when we don’t have a lot of things. When you go through your junk drawer, keep only the bare minimum of items needed. Few of us really need twenty five pens and three staplers in one drawer. Use drawer organizers to keep items corralled in their own spaces.

Magnetic Trays for Holding small parts

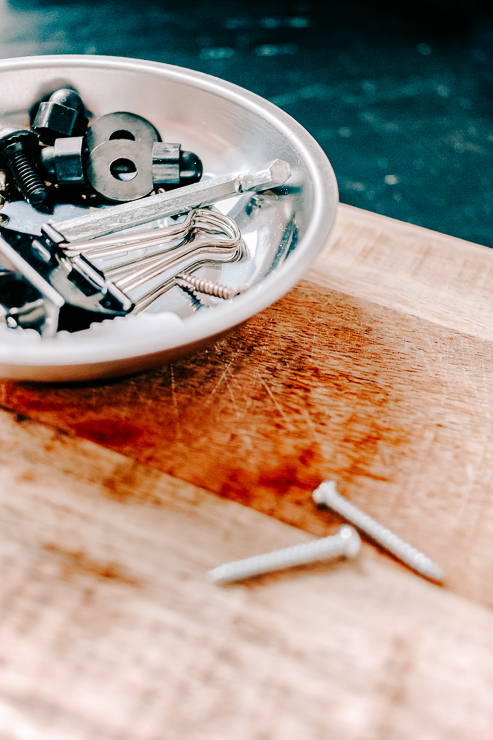
I also love using those magnetic parts tray. They’re perfect for keeping those loose screws, paperclips, binder clips, and the like together and not rolling around in your drawer.

Closets

Organize your Closets

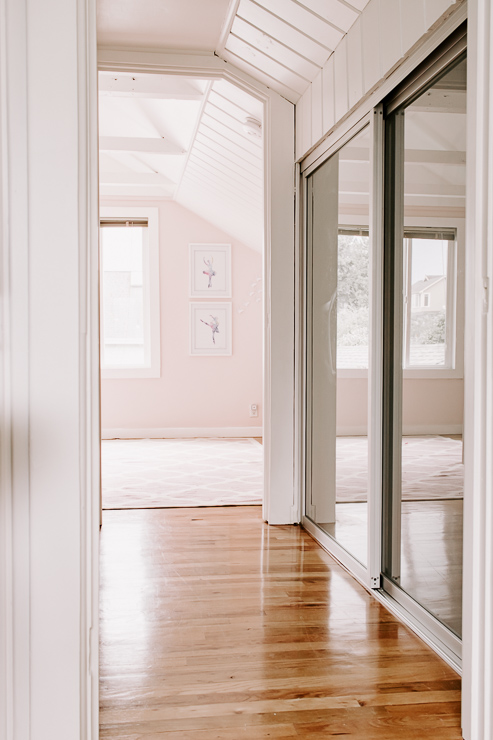
Closets tend to take up the bulk of our decluttering time. For most closets, I find it best to take everything out of the closet to see what you have. This is where you really need to be honest with yourself. Only keep those items that you really love. I don’t recommend saving clothing for the “ifs or maybes in the future.” Only keep what you wear now, the exception being formal wear and business attire. Shoes are another biggie here! It’s amazing how many pairs of shoes we can accumulate over time.

Where to Donate

We are probably all familiar with Salvation Army and Goodwill. Here are some additional ideas for donating your things to those in need:

  • Your local library will sometimes accept book donations.
  • Veterinarian offices are usually in need of old towels and sheets for pet beds.
  • Habitat for Humanity ReStore accepts used appliances, household goods, building materials, and furniture.
  • Local Shelters, Food Banks, and Churches
  • Hospitals, Police, Fire Departments, and Daycare Centers will accept used toys.
  • Local Schools will sometimes have seasonal clothing drives aka Coat Collections.

Don’t forget your donation receipt when you drop off your goods. These receipts help you save money on your taxes the next year.

So it’s official!  Consider this challenge your excuse to declutter!  Even if you end up crossing off just a few of the areas on your declutter challenge printable, that’s still a great start.

Don’t forget to download and print your Declutter Challenge Printable Right Here! 

For more organization tips and tricks, check out Love your Home, Not the Stuff – Taming the Clutter.

Here’s to a more organized 2020!

karen signature

~ See More of Karen’s Tutorials ~


karen from decor hintHello!  I’m Karen, the creator of the Home Decor and DIY Blog: Decor Hint. I’m a Native of the East Coast, but I currently live in beautiful Seattle with my hubby, our two wonderful children, and our spunky wheaten terrier.

You can usually find me with some sort of craft in one hand and a coffee in the other. And I’m always rearranging furniture or moving lamps from room to room. I have a passion (read: obsession) for decorating, DIY, and gardening. In short, I love making my house into a home.

Like many, I’m inspired by what I see in home decor magazines, but I’m not so inspired by the price tags.  Consequently, I love finding and creating beautiful budget-friendly home decor items. In a head to head competition, I bet you’d never know the difference between the designer items and my DIY creations!  Many of my DIY projects focus on sewing, crafting, upcycling and organizing. Some of my favorite projects have been making pretty wreaths, sewing my own tassel hand towels, and crafting these trendy wood bead garlands. I can’t wait to inspire you and spark your creativity through my DIY projects.

You can always connect with me on Pinterest, Twitter or Instagram.