You can sew your own custom DIY bench cushion with piping. I’ll show you how to make your own bench cushion covers with this detail tutorial.
How to Sew a DIY Bench Cushion with Piping
I thought sewing a custom cushion for a was going to be a difficult project to sew.
And, I thought sewing a bench cushion with piping would be next to impossible.
However, once I figured out an easy way to create the box, it was actually very easy!
Let’s get started and I’ll show you how to make custom DIY Bench Cushions with an added detail of piping.
My Fabric Source:
Before we get started I wanted to let you in on a little secret. 🤫
The bench cushion and side table fabrics you see below are actually Target shower curtains!
That’s right, I didn’t use upholstery fabric, instead I used beautiful fabric shower curtains which are just a durable.
Remember this the next time you want to sew a bench cushion, dining bench or window seat cover.
You read that right. Fabric shower curtains are not only inexpensive, but they are durable and can stand up to moisture.
This makes them perfect for outdoor use. I bought both of these at fabric shower curtains at Target for under $20 each!
You could score cute fabric shower curtains on sale and save even more.
Materials:
(I’ve included affiliate links for your convenience. I earn a small commission from a purchase using these links. There is no additional cost to you. You can read more about affiliate links here.)
Once you have all your materials, let’s get sewing.
DIY Bench Cushion Tutorial
Follow these detailed steps to make your own bench seat cushion.
Preparing the Foam Cushion
Measure or lay your foam on top of the bench. Mark line(s) where you need to trim the cushion to fit the length of your bench.
The next step is to use an electric knife to cut through your piece of foam on the long side of the edges of the foam.
Wrap batting around your foam. Then trim the edges down to size.
I had enough to put two layers on top of the foam and one layer on the bottom of the cushion.
This will make for a cushier and less sharp-edged cushion.
Cutting out the pieces
1. Fold your bench fabric in half and lay it out. Place your cushion on top.
Trace around the cushion about 3/4″ wider on each side of the foam to determine the length of the fabric needed.
Cut through the two layers. This will give you a top and bottom panel for your cover.
2. Next let’s cut out four strips of fabric for the sides. First, plan on cutting your lengths 2″ longer than your cushion.
If your foam is 3″ and you use 1-2 layers of batting, you can use these measurements for your strips:
Front: 4.25″ wide by length + 2″
Sides (left and right): 4.25″ wide by length + 2″
*Back: 5.5″ wide by length + 2″
*Back Fold Over Flap: 3.5″ wide by length + 2″
*You may have noticed the back measurement is wider and has two strips. This is because we need to sew an overlapping flap and velcro to allow for the cover to be removable for washing.
Assembling the sides of the DIY bench cushion cover
1. Wrap the 4 strips around your cushion right sides facing in. (Reserve the back fold over piece for later.)
Pin the edges where they meet at your cushion corners. The back strip should line up with the sides on the one edge.
But, the other outside edge will extend 1.25″ taller than the rest.
2. Remove the sides and stitch where the pins are.
When you get to the back strip, fold over the excess so it matches the same height as the rest of the strips.
Then stitch along the back strip’s folded over your piece of fabric to secure it.
Set your sides aside for now. It is time to pin the piping to your cushion top.
1. Lay the top panel right side up on top of the cushion. Pin the long strip of piping on top of the fabric.
Line up the piping with the edges of the cushion. Be sure the raw edge of your piping is facing the raw edge of the fabric.
When you reach a corner, snip into the raw edge of the piping all the way (but not through) the rope piping.
Then turn your piping creating a 90 degree angle and continue pinning.
When you reach the start of your pinned piping, simply overlap the two alittle bit about 2″ and cut off the excess.
Your bench cushion top should look like this:
2. Set the top panel on your sewing machine and sew the piping into place.
Your needle will be very close to the piping, but it shouldn’t stitch into the rope.
This is where a zipper foot really helps get close to the piping and give you professional looking results, especially around the corners of your cushion.
Carefully sew and backstitch over the place where your piping overlaps.
Connecting the top and sides for the DIY bench cushion
1. Lay your top panel onto the cushion. Pick up your sides and begin pinning them to the top of the cushion.
(Note, the raw edge of your back panel should be lined up next to the piping and the hem on the back side should be facing up and away from the piping.)
Position your pins close to the piping but not on top of it. Try to line up the corners of your sides with the 90 degree corners of your piping.
2. Stitch the sides onto the top piece. Again, your needle will be very close to the piping but not over it.
This is a little trickier because you can’t see the piping, but you can feel it.
Just use your fingers to guide you. (Piping shown by the red arrowed line below.)
3. Remove the cushion cover from your sewing machine. Turn your top cover right sides out and test the fit on your cushion.
Hopefully at this point you don’t need a tighter fit and everything is looking good. You see it’s a fairly easy sewing project.
4. Repeat the steps above for “adding the piping” to sew piping onto your bottom cover.
Sewing the cushion back flap
1. Now you can pick up that back fold over strip that has been sitting all by its lonesome.
Fold the edges over twice on three sides (2 short and 1 long) to hem your flap. Press the hem with a hot iron.
Stitch along the folded hem to secure it.
2. Center and pin the flap along the back edge of the bottom panel (right sides together) as shown.
The raw edges should be facing out.
3. Stitch the back flap onto the bottom panel next to the piping. An inch or more of the panel will extend on both ends.
That’s perfectly fine, you want to leave it loose so it can tuck inside the cushion.
3. Turn your top panel and sides wrong sides out and put your cushion inside it. Then lay your bottom panel on top as shown.
Pin the bottom panel to the sides just like you did for the top panel. This time leave the back side unpinned (where your two flaps overlap.)
4. Now is a good time to trim any excess from your previously stitched seams of the entire bench.
(There will be a lot of fabric on the sewing machine, and this is just one less piece that could get caught while stitching.)
Trim off the corners at an angle.
Carefully peel the pinned cover off the cushion.
5. Stitch along the two sides and front of your cover. Leave the back length of the cover open.
Remember, use your fingers to feel for the piping.
6. Turn the cover right side out and slide the cushion into the cover.
Check the fit and make sure you don’t have any stray fabric that might have gotten caught while sewing.
You should have an opening in the back like this.
Adding the velcro closure to the back of the cover
1. Take out your coordinating velcro tape.
Pin the hook and loop velcro tape onto the backside and the back fold over flap.
To save money, I used 4 strips of 3″ velcro evenly spaced along the length of the opening.
But, you can certainly use one long piece of velcro if you wish.
2. Stitch the velcro onto the cushion. You can use a zig-zag stitch for extra strength (if you have destructive little boys like I do!)
Check the fit of the velcro.
3. If everything looks good, you can turn the cover inside out and trim off any excess raw edges.
Then turn the cover right side out and insert your cushion.
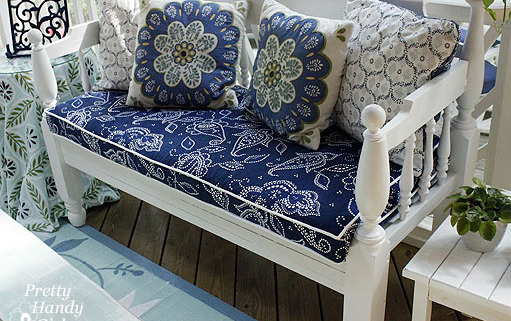
And that’s it! You are done and you have a professional-looking bench cushion with piping!
The best part is now you know how easy Sewing a DIY Bench Cushion with Piping can be!
This is such a versatile piece of furniture. It would make a great addition to a living room for extra seating or to use as entryway bench.
Add some pretty throw pillows and the only thing you need to do now is enjoy your beautiful easy sew bench cushion.
Want to see the rest of my screen porch makeover? I spent less than $125, that’s what I call an extreme budget!
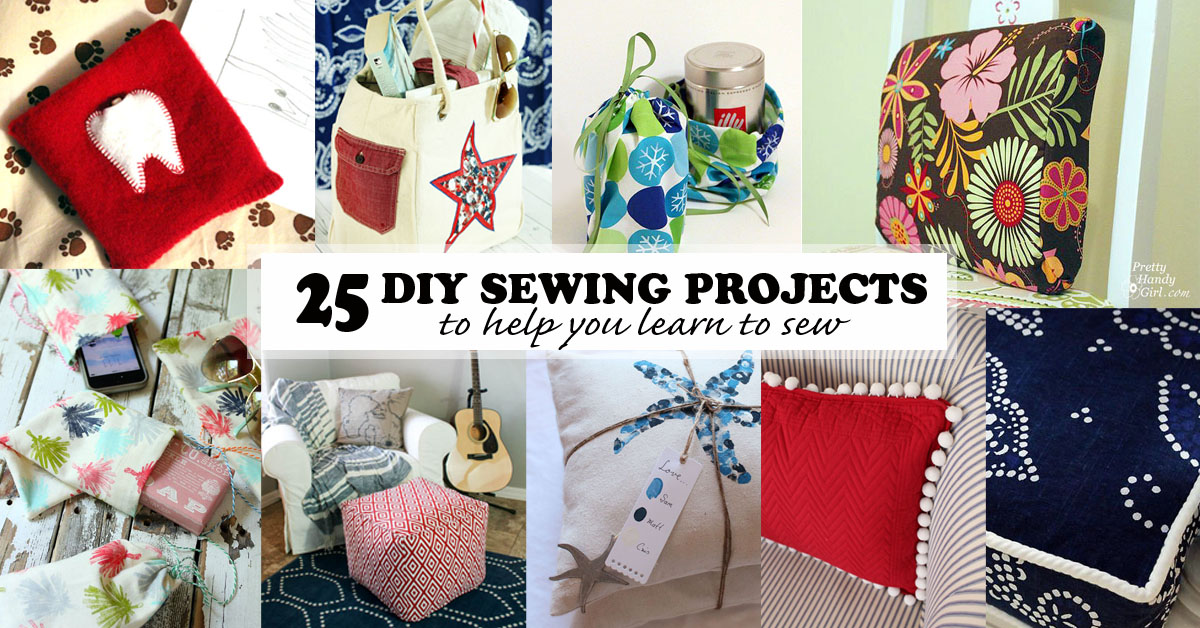
Now that you knocked out a custom diy cushion, why not sew one of these 25 easy sewing projects next!
https://prettyhandygirl.com/wp-content/uploads/2011/07/angled_bench_view.jpg375511Brittany Baileyhttps://prettyhandygirl.com/wp-content/uploads/2021/07/PHG-logo-tagline-2020-1030x211-R.jpgBrittany Bailey2025-03-10 07:00:142025-05-06 15:15:13How to Sew a DIY Bench Cushion with Piping
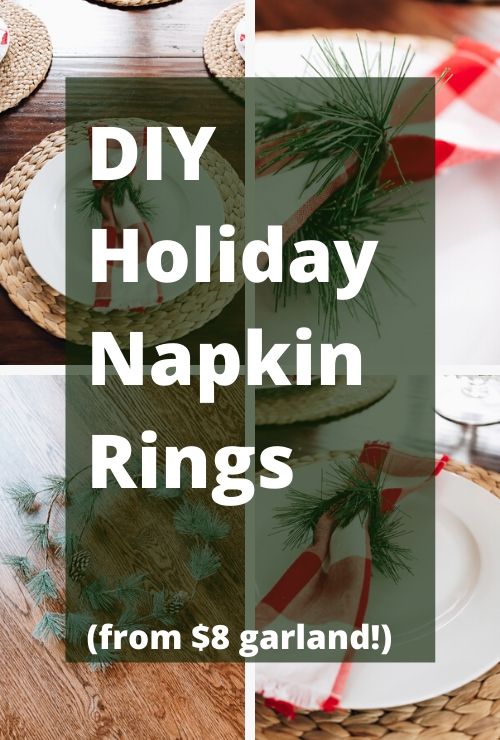
Happy Holidays! I thought it would be very apropos to share this easy last-minute holiday napkin ring tutorial with you all. It’s that time of year when time is short and things are busy. The last thing we need is to stress about table settings. If you happen to need something quick to dress your tables, these festive DIY napkin rings will have you covered!
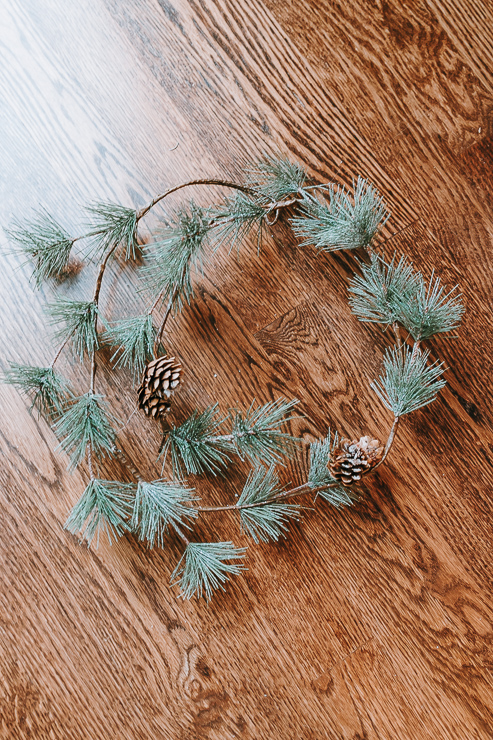
I got the idea for this while I was in Target. Of course, I love to peruse their home decor aisles, which are filled with holiday decor at the moment. I saw this lovely little green garland for $8! Bargain! I am picky about my faux greenery, but this one looked pretty good (especially for the price). I knew I could make this into a cool centerpiece or napkin rings.
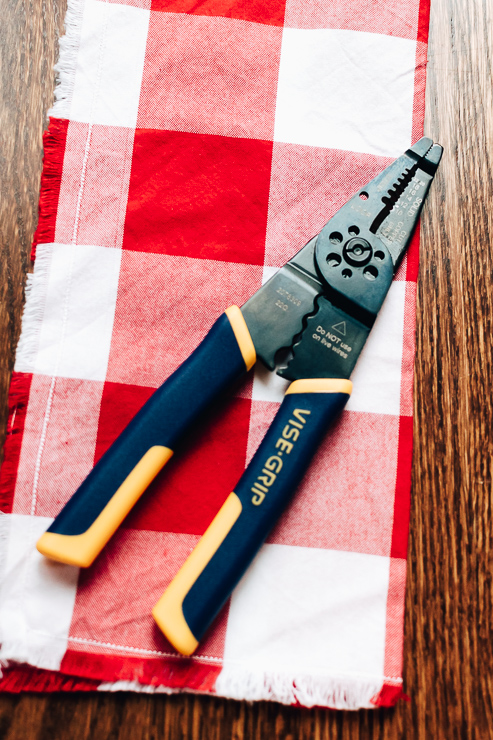
You can follow these same steps to make napkin rings out of any holiday garland. Dollar Stores might be a good source for inexpensive garlands. It’s helpful if your garland has a bendable wire with it, this makes shaping the rings easier. I would also like to suggest that you use wire cutters for cutting the wire. Strong scissors may do the job, but it can be tough. And why ruin your good scissors?
Let’s get started, shall we?
Materials:
(I’ve included affiliate links for your convenience. I earn a small percentage from a purchase using these links. There is no additional cost to you. You can read more about affiliate links here.)
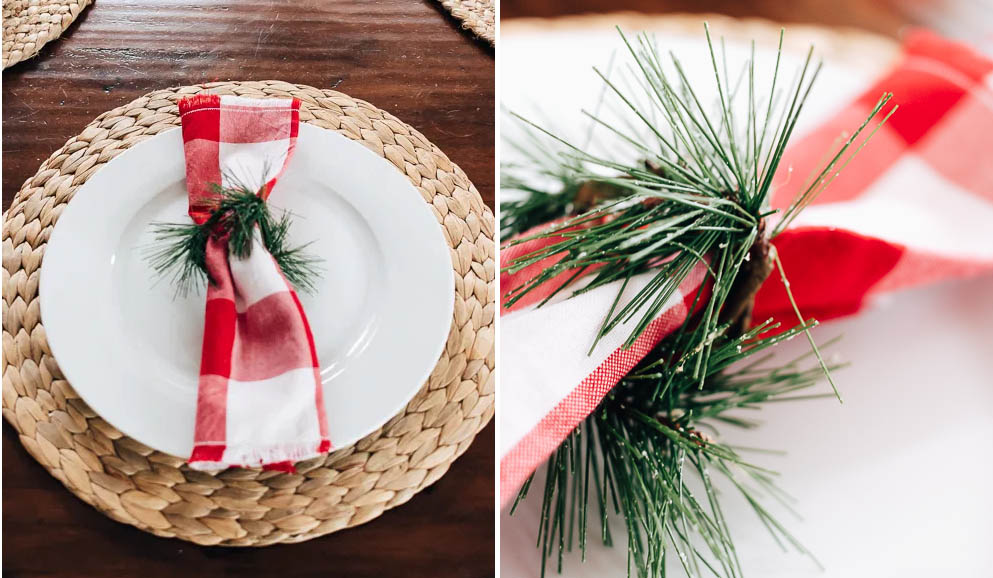
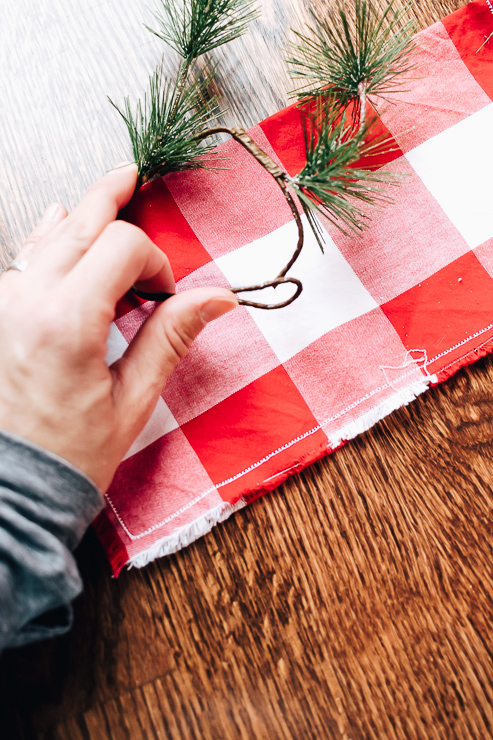
Take your wire cutters and cut a piece of garland. The length will depend on how thick your napkins are. I have these frayed red buffalo check napkins that I made for the 4th of July, and I’m reusing them for the holidays! (You can check out the tutorial for those red napkins right here.) The material is somewhat thin, so I cut about a 4-inch piece of garland.
Step 2: Bend Garland Piece into a ring
Bend your garland piece into a ring. This is why it helps to be using garland with wire! All you have to do is mold it in a circle and twist it together. Then you can fluff up the greenery on the ring any way you like.
Definitely ensure that your ring doesn’t have any sharp, exposed wires. If so, just clamp it down with pliers.
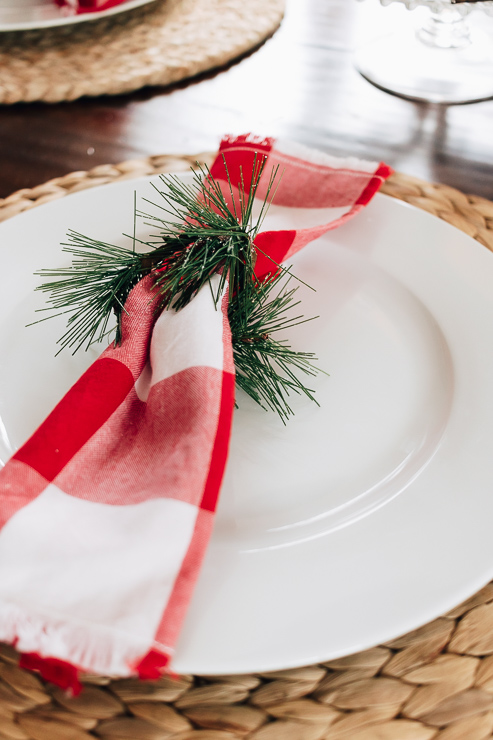
Step 3: Insert your napkin
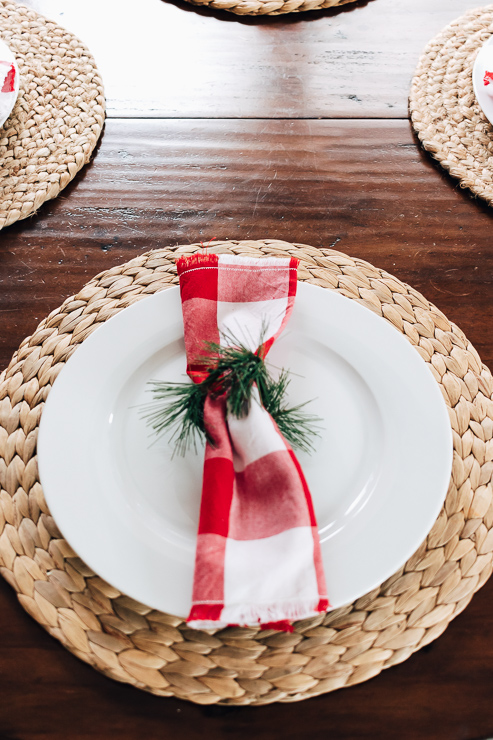
Now for the fun. Take the whole napkin and pull it through the ring. But here’s another way to do this.
Take your napkin and lay it out flat. Grab the napkin in the center and place your napkin ring over the center fold. Voila!
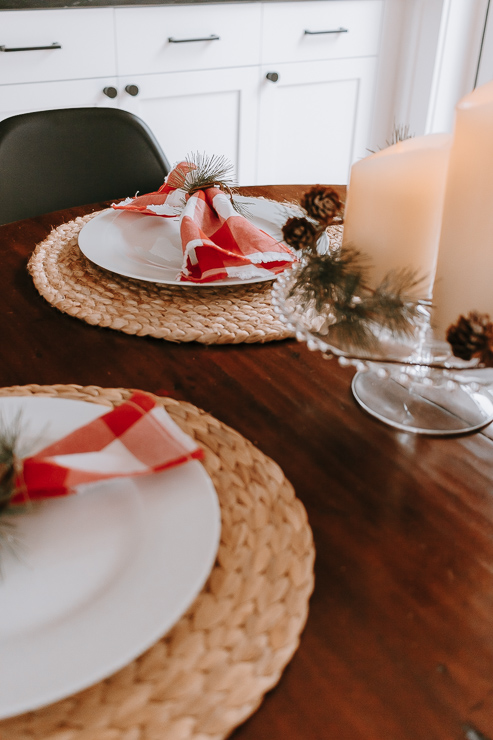
I think napkin rings really add to place settings, especially if you’re like me and only have a small round table. It’s stylish without overcrowding the table. I think these extra touches really make the holidays feel special. And instead of spending $5 on each napkin ring, you spent $8 on the whole project. As a bonus, you’ll probably have garland leftover to decorate with!
I want to take a moment to wish you all a Happy and safe Holiday and a Joyous New Year. I’ve now been writing for Pretty Handy Girl for a year, and I couldn’t be more thankful for this opportunity to connect with you all. Thank you so much for being a reader! It means so much to me to have you here.
Hello! I’m Karen, the creator of the Home Decor and DIY Blog: Decor Hint. I’m a Native of the East Coast, but I currently live in beautiful Seattle with my hubby, our two wonderful children, and our spunky wheaten terrier.
You can usually find me with some sort of craft in one hand and a coffee in the other. And I’m always rearranging furniture or moving lamps from room to room. I have a passion (read: obsession) for decorating, DIY, and gardening. In short, I love making my house into a home.
Like many, I’m inspired by what I see in home decor magazines, but I’m not so inspired by the price tags. Consequently, I love finding and creating beautiful budget-friendly home decor items. In a head to head competition, I bet you’d never know the difference between the designer items and my DIY creations! Many of my DIY projects focus on sewing, crafting, upcycling and organizing. Some of my favorite projects have been making pretty wreaths, sewing my own tassel hand towels, and crafting these trendy wood bead garlands. I can’t wait to inspire you and spark your creativity through my DIY projects.
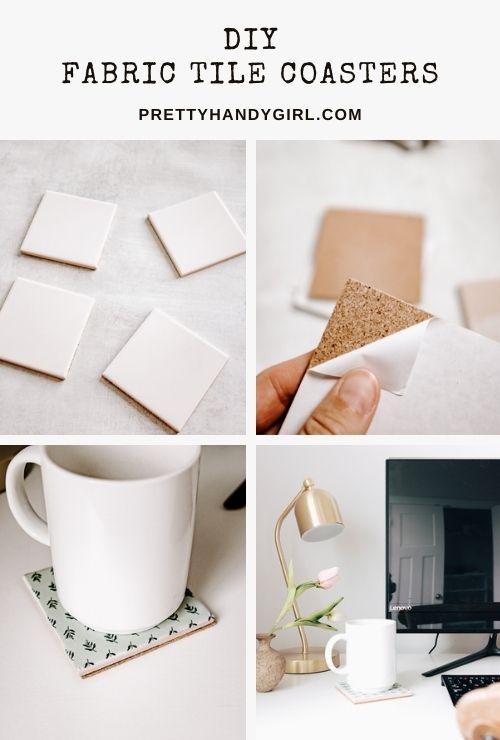
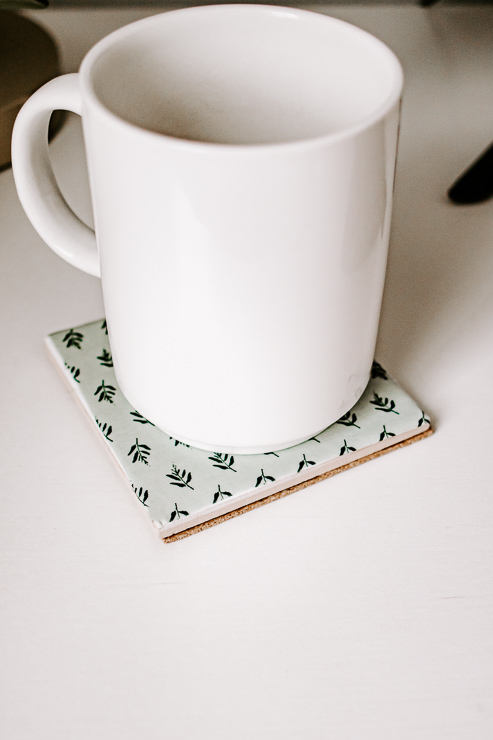
The holidays may look a lot different this year, but the same sentiments and traditions are still here. If you have a tradition of making handmade holiday gifts, I have the perfect craft for you today! These DIY fabric tile coasters are a cinch to put together and you can customize them with any fabric you like.
This project is not only easy, it’s inexpensive too. Pick up square tiles from a home improvement store for as little as 15 cents. Then grab some fabric scraps to make these coasters come together.
I’m sharing the full tutorial plus some tips on making your coasters waterproof! So, let’s get started.
How to Make DIY Fabric Tile Coasters
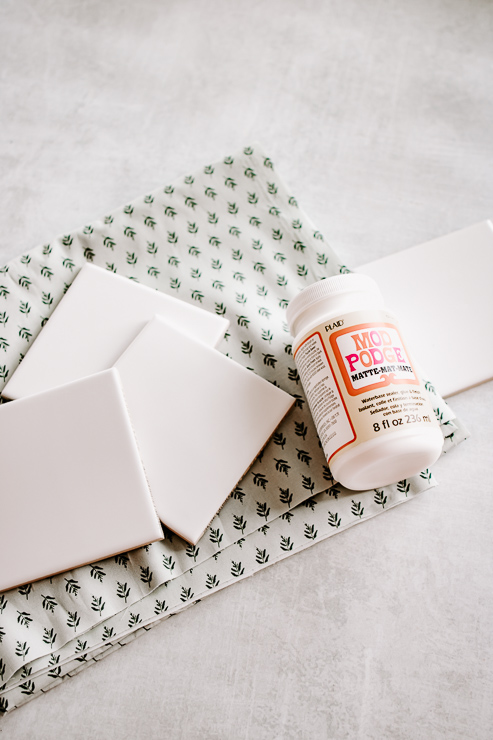
Materials:
(I’ve included affiliate links for your convenience. I earn a small percentage from a purchase using these links. There is no additional cost to you. You can read more about affiliate links here.)
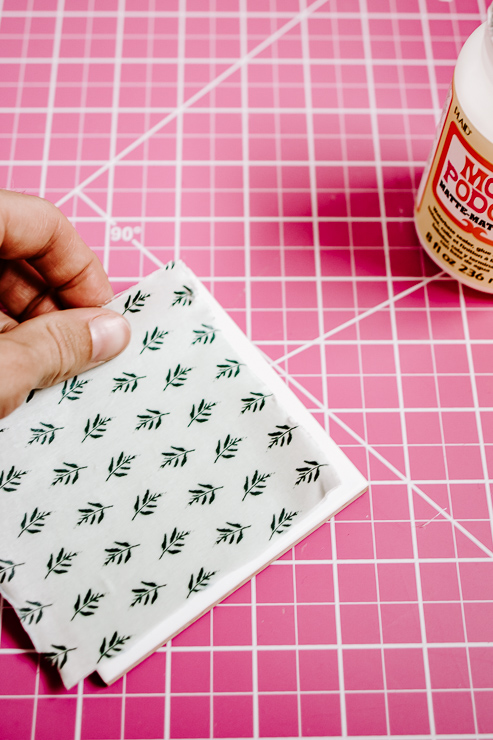
The first thing you need to do is cut your fabric to size. I tried this many different ways and by far the best looking option is to cut them slightly smaller than the tile. This will leave a small white border around the top of the coaster but it will look neater. Plus, it is much easier to apply this way.
Use a rotary cutter to get the neatest cuts, but if you don’t have one, use a pair of very sharp scissors or fabric scissors.
Step 2: Apply Fabric to Tile
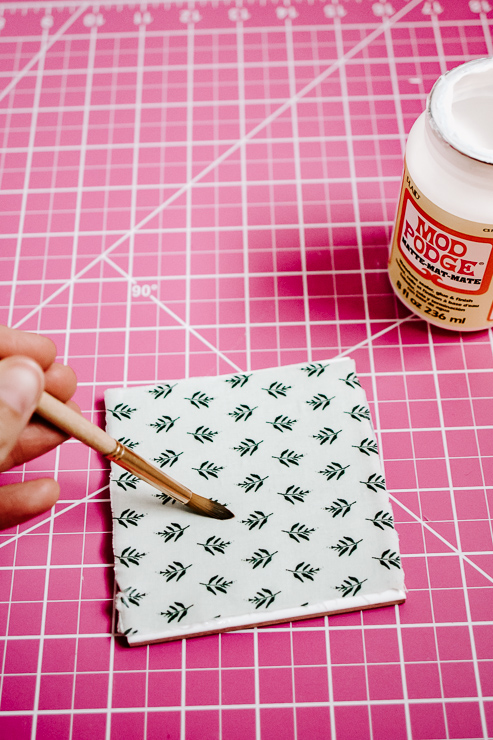
Take your foam brush and paint a layer of Mod Podge onto the top of your tile. Then, apply your fabric square to the tile, Smooth out bubbles as you apply.
Once your fabric is aligned properly and smooth, apply another layer of Mod Podge on top of the fabric.
Set aside your tile coasters to dry.
Step 3: Waterproof and Seal your Coaster
Once your Fabric and Mod Podge fully dries, you will notice it feels a little stiff and tacky. Eventually, this will go away but if you don’t have time on your hands and you really want to waterproof them, you’ll need to seal them.
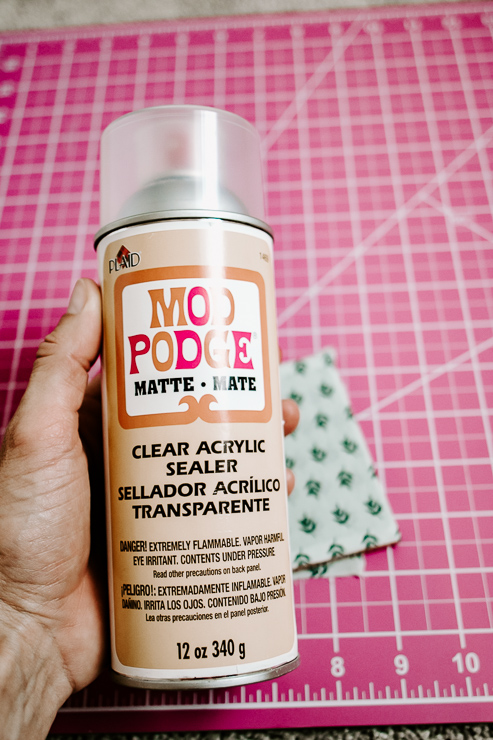
With any of these sealers, you want to spray outdoors or in an area with really good ventilation – as the fumes are pretty strong.
One way to seal them is to use an acrylic sealer spray from Mod Podge. You can buy this in gloss or matte. I only had matte on hand but I do think gloss is the way to go here.
Another sealer (which I haven’t personally tried yet) is called Engine Enamel. This is made by Rustoleum and is actually for cars! But I’ve heard it works here too. It will give a glossy finish to your coasters and protect them from water and heat.
Finally, a third option is to use resin. Resins can be more expensive than the first two options, so keep this in mind. EnviroTex Lite is a resin sold at Michael’s and other craft stores and gives your finished coaster a very high gloss, polished look. It’s really beautiful so if you are serious about your coaster making, this is definitely the winner here.
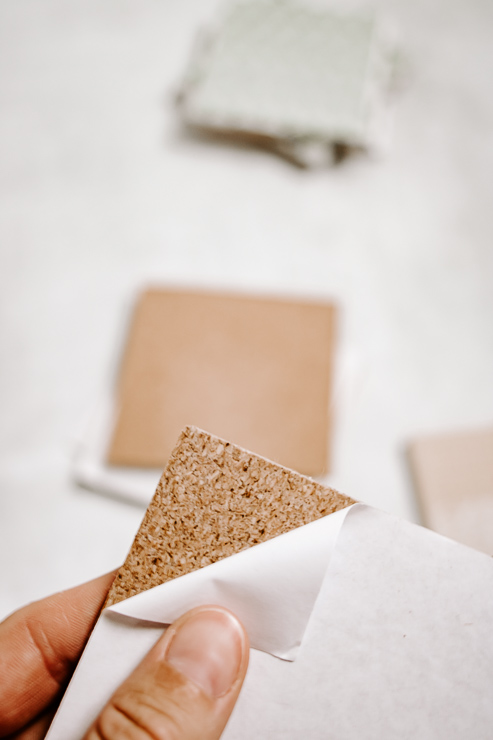
Step 4: Apply Cork to Bottom of Tile
After your coasters are dried and sealed, let’s finish the bottom. Tile squares can be a bit rough on the bottom, so we need to cover them.
Hello! I’m Karen, the creator of the Home Decor and DIY Blog: Decor Hint. I’m a Native of the East Coast, but I currently live in beautiful Seattle with my hubby, our two wonderful children, and our spunky wheaten terrier.
You can usually find me with some sort of craft in one hand and a coffee in the other. And I’m always rearranging furniture or moving lamps from room to room. I have a passion (read: obsession) for decorating, DIY, and gardening. In short, I love making my house into a home.
Like many, I’m inspired by what I see in home decor magazines, but I’m not so inspired by the price tags. Consequently, I love finding and creating beautiful budget-friendly home decor items. In a head to head competition, I bet you’d never know the difference between the designer items and my DIY creations! Many of my DIY projects focus on sewing, crafting, upcycling, and organizing. Some of my favorite projects have been making pretty wreaths, sewing my own tassel hand towels, and crafting these trendy wood bead garlands. I can’t wait to inspire you and spark your creativity through my DIY projects.
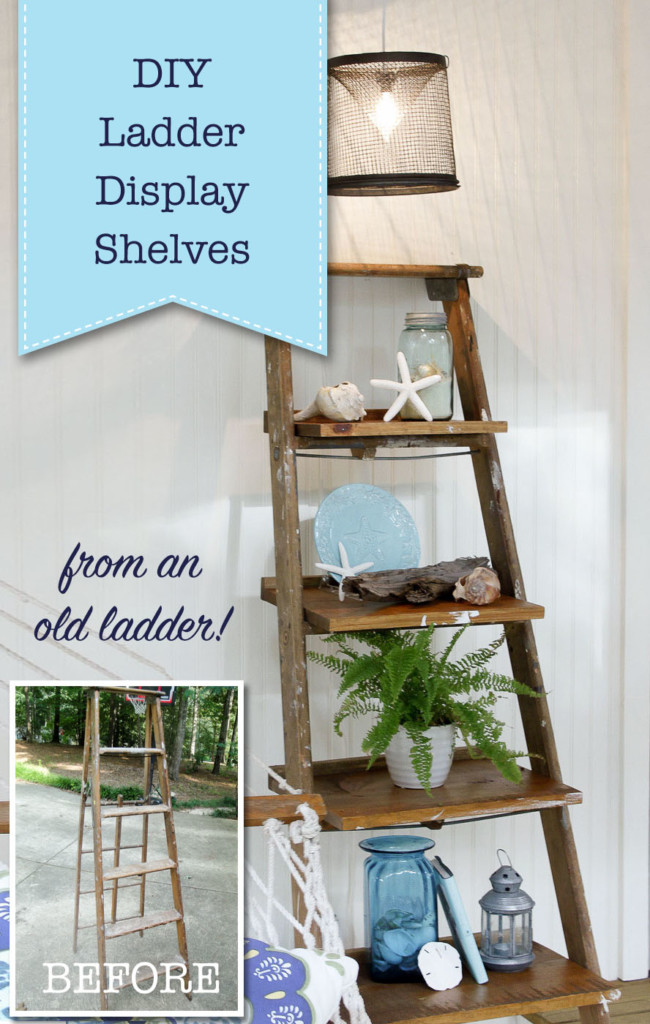
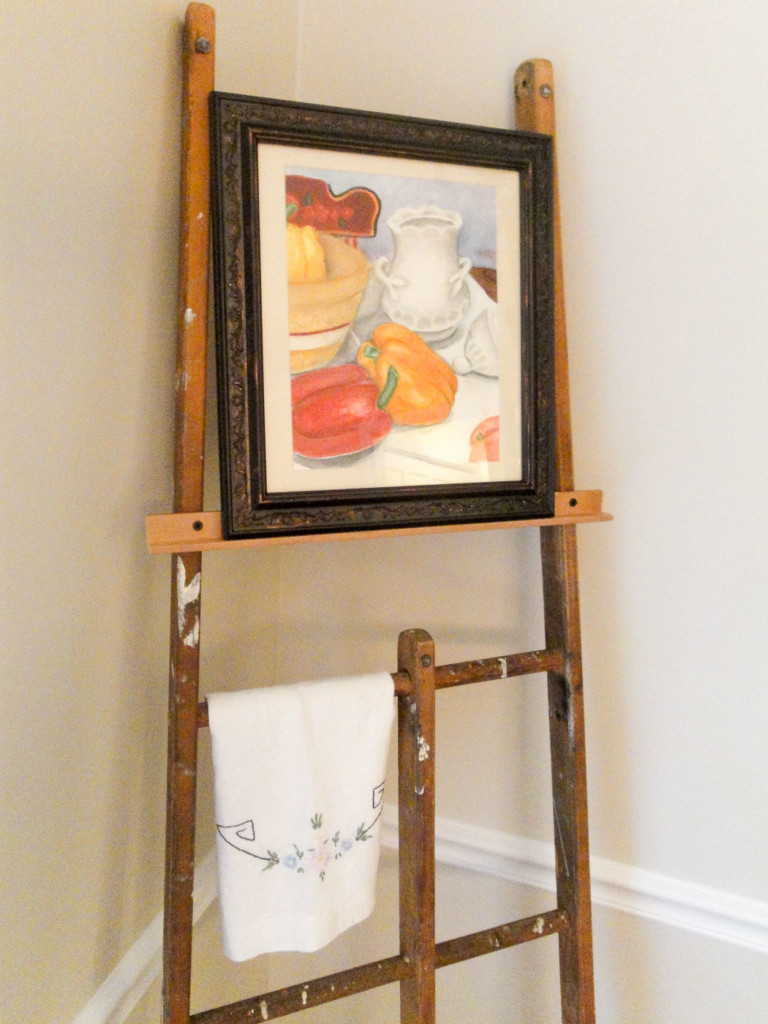
One of the easiest storage solutions is to create your own DIY ladder display shelves using an old ladder for the frame. Not only will you save time, but the money saved makes this project a winner in my book!
DIY Ladder Display Shelves
If you’ve been around for a while, you know these ladder display shelves start at $99 and go up depending on size. But, today’s tutorial shouldn’t cost you much and the result will be more personalized to your style (depending on how you finish it.)
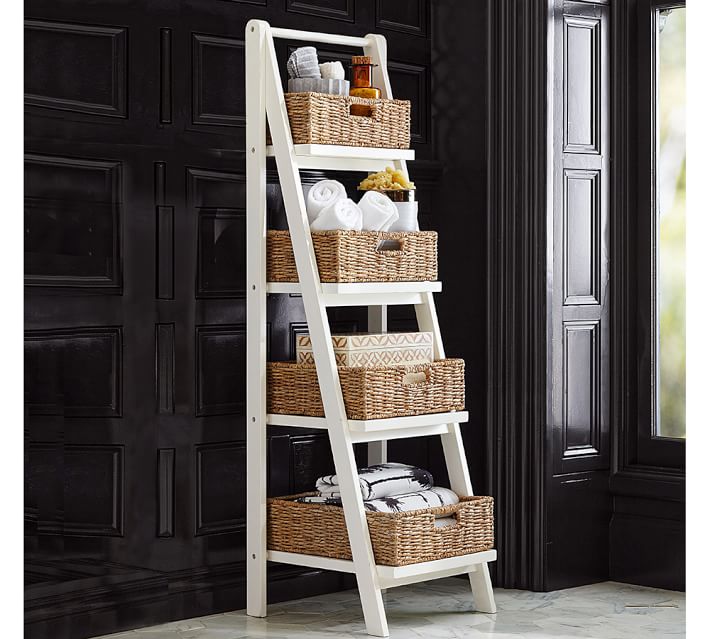
I know you’ve seen them, those adorable ladder display shelves, I really wanted one. But, the price tags were enough to send me running from the store with my purse gripped tightly in my hands. I mean, really? The one above from Pottery Barn costs $229! I don’t know about you, but I really don’t like spending more than $50 on something I can build myself.
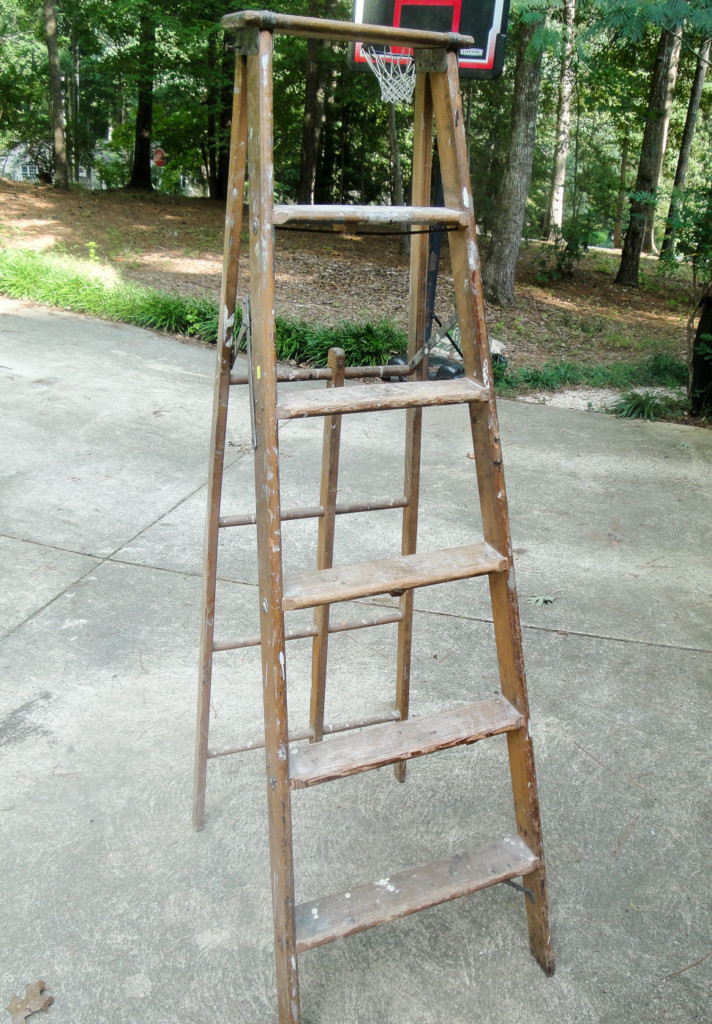
Fast forward a few weeks, and when I saw this ladder at the Habitat ReStore for $15, I knew it had the potential to fulfill my ladder display shelf dreams.
The skeptical cashier tried to persuade me not to buy the ladder, warning me not to climb on it because it was too rickety. But, who cares about rickety, I was in love with the paint splashes all over it!
So, I hauled the old ladder home (and received funny looks along the way because it was hanging several feet out the back of my car.) Little did they know that I was about to transform that old ladder.
Materials:
(I’ve included affiliate links for your convenience. I earn a small percentage from a purchase using these links. There is no additional cost to you. You can read more about affiliate links here.)
Instructions for Building DIY Ladder Display Shelves:
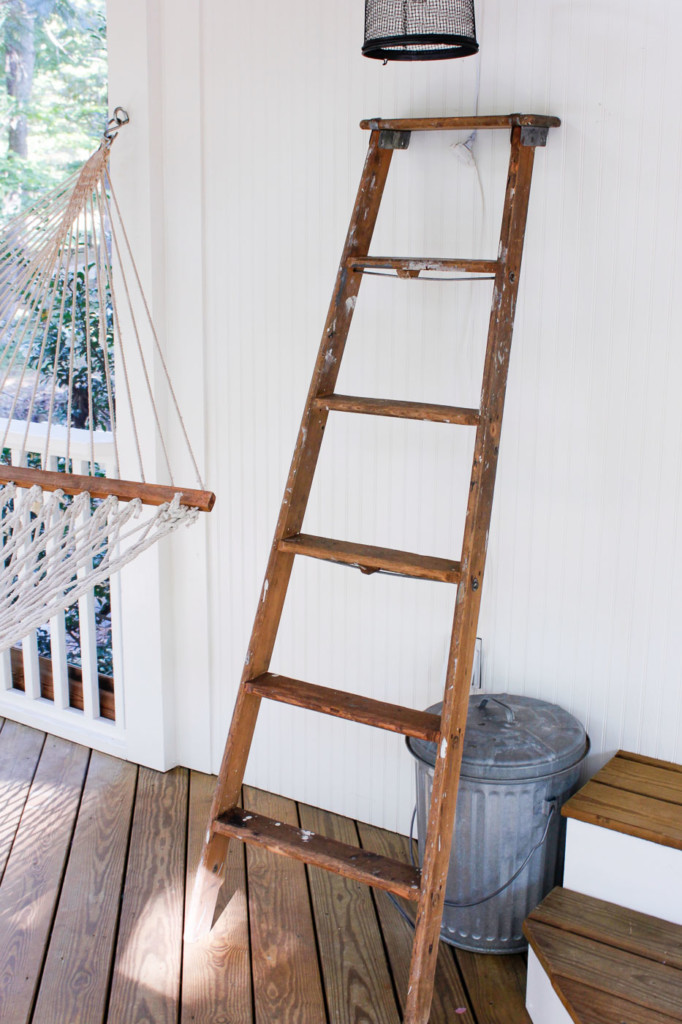
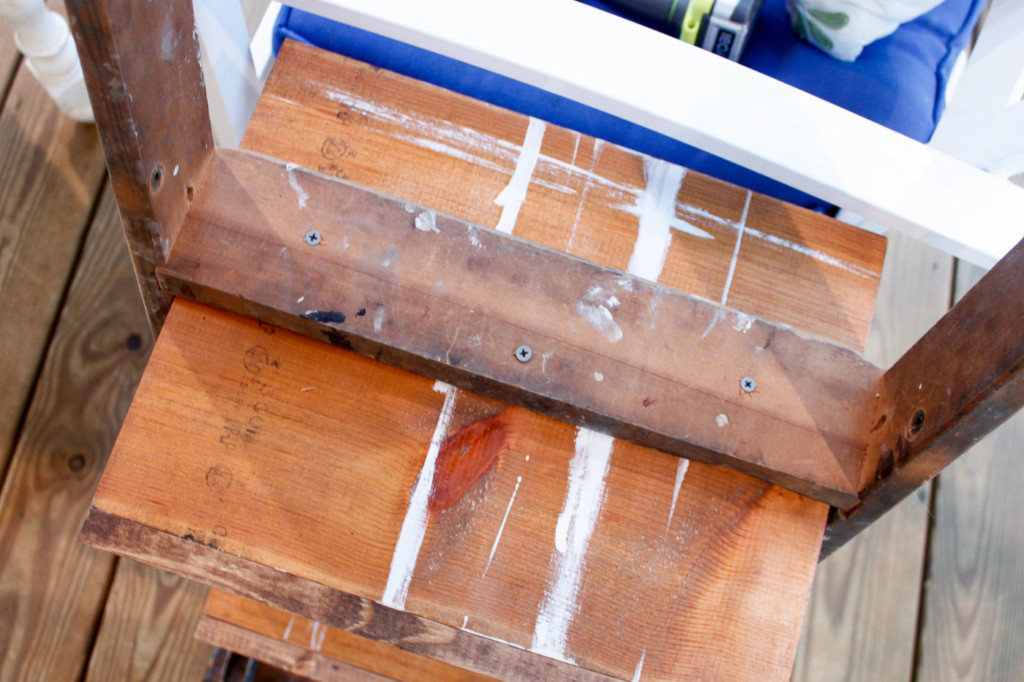
For this project, you can leave the back of the ladder intact, or pry off the top rivets to separate the front from the back. This gave me the ability to make two things from one ladder. (Be sure to read to the end to find out what I made with the backside!)
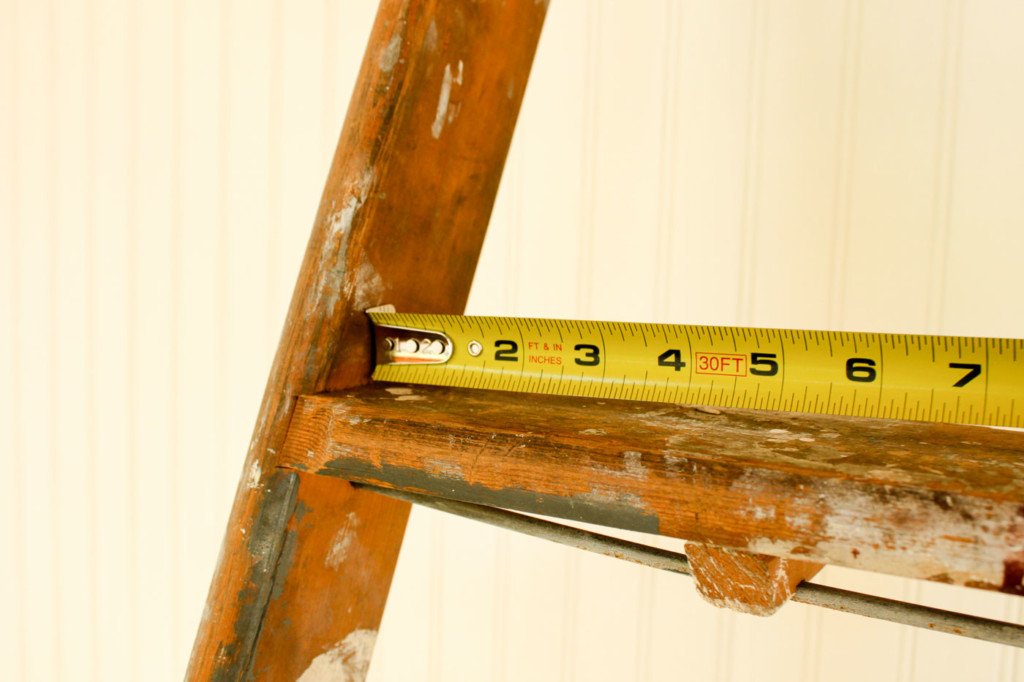
Start by measuring the width of each step (and subtract 1/8″ to account for the slant of the ladder.)
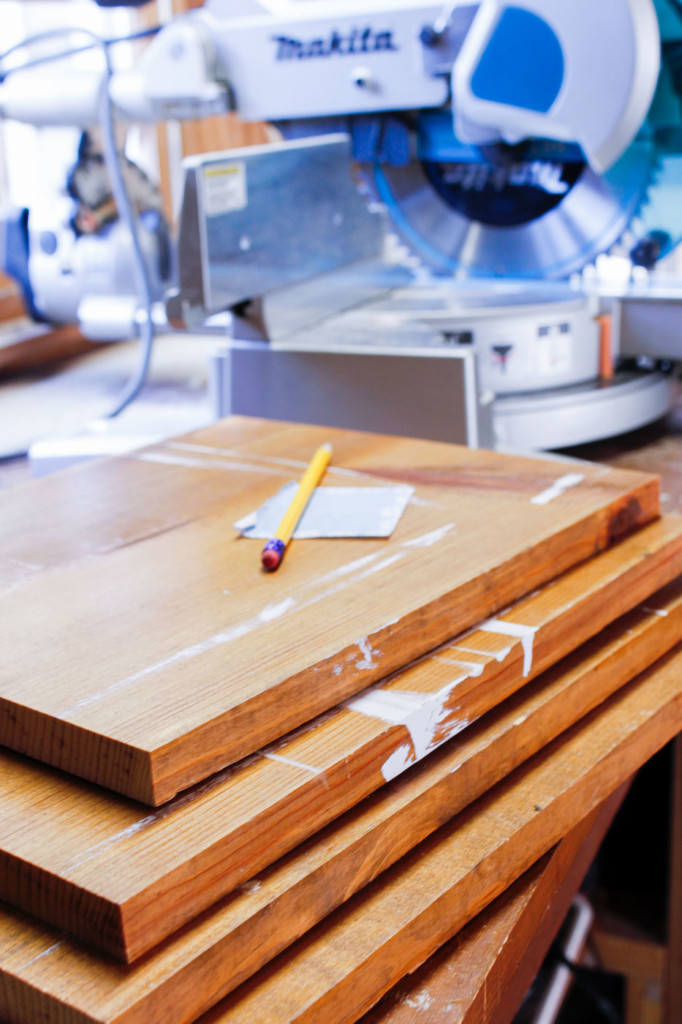
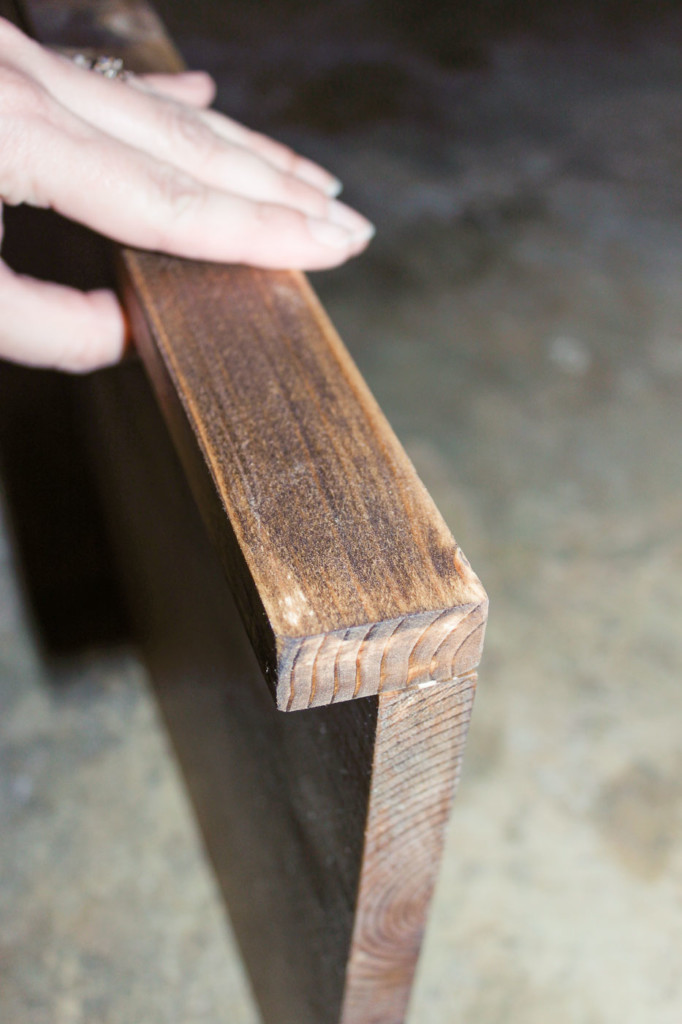
Use 1″ x 12″ pine boards or any size you choose. (I had some leftover shelving material I bought from a yard sale, so it was already pre-finished.)
Cut the boards to the appropriate width on a miter saw or ask the lumber store to cut them for you. Yes, it was a total coincidence that my boards were covered in paint splotches too!
Dry fit the boards to make sure they fit your ladder. My heart was thumping now because I could really see the project taking shape!
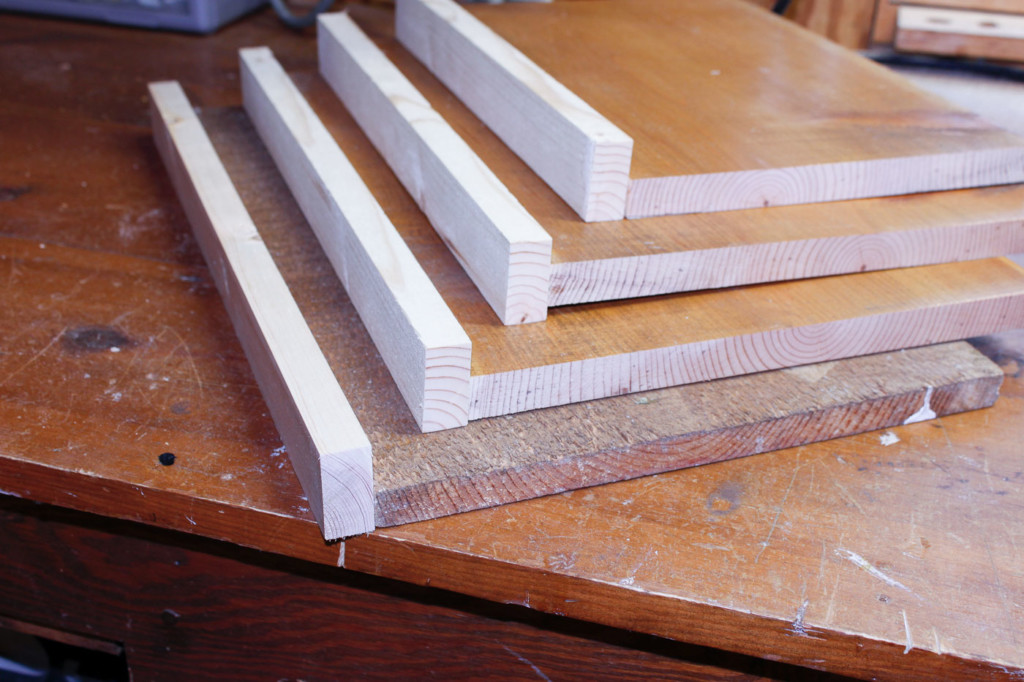
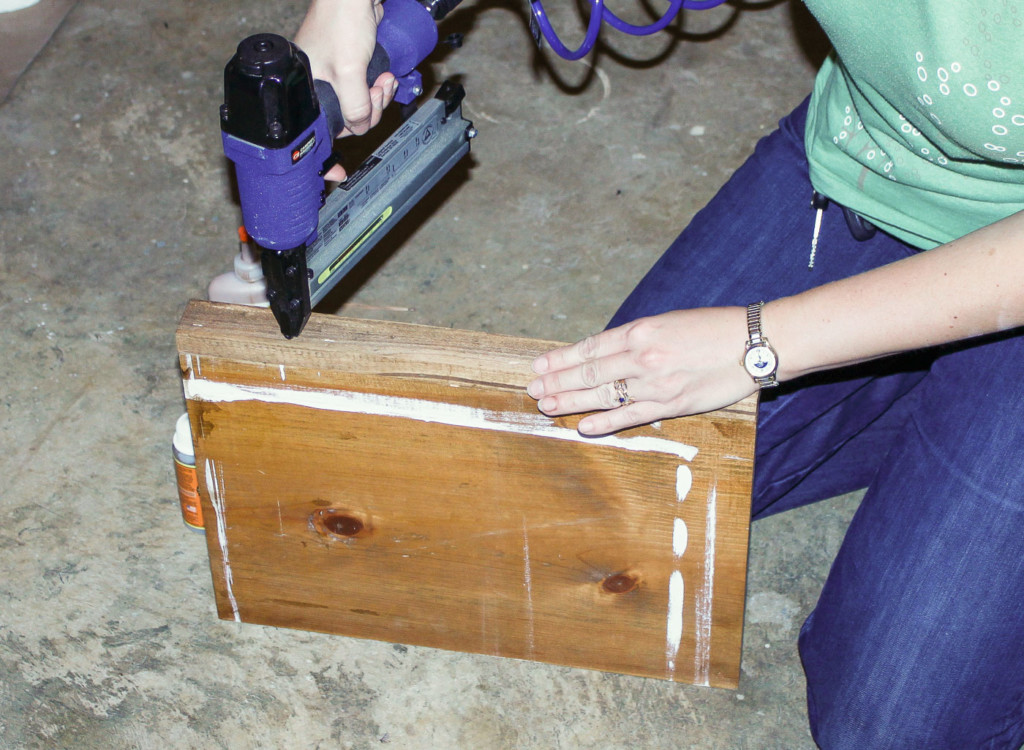
Next cut some 1″ x 2″ strips the same width as each shelf. These are for the backs of your shelves. If necessary stain your shelves or paint them to match your ladder. Or paint the entire ladder and shelves with chalk paint or a paint plus primer.
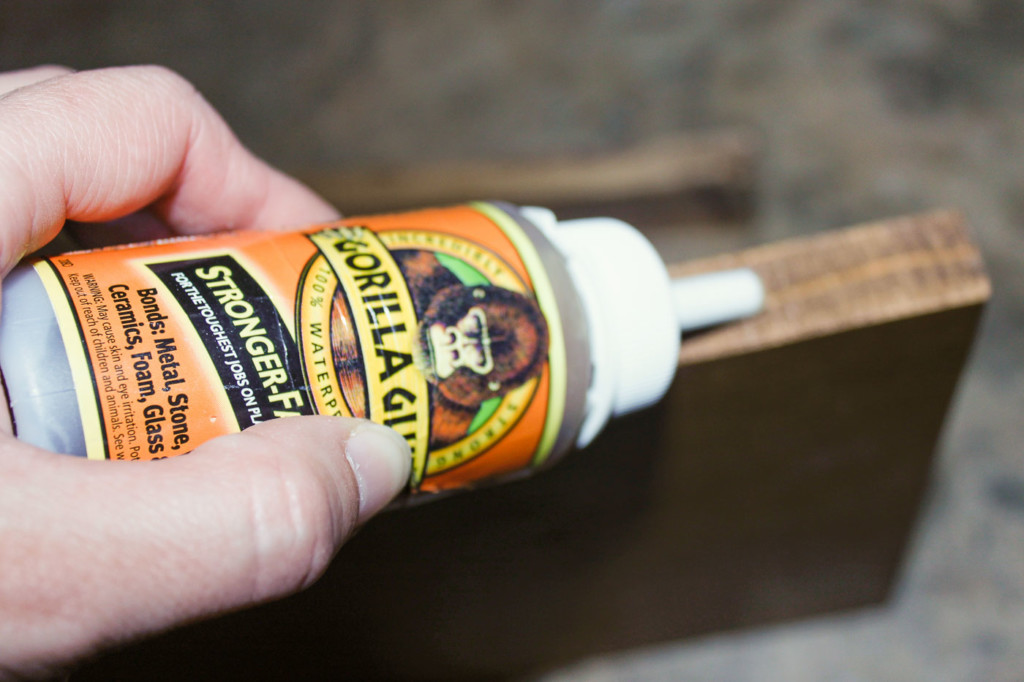
Attach the 1×2 strips to the back of the shelves, using wood glue.
Hold until the glue has gripped the trim piece.
Or nail the 1″x2″ pieces to the shelves.
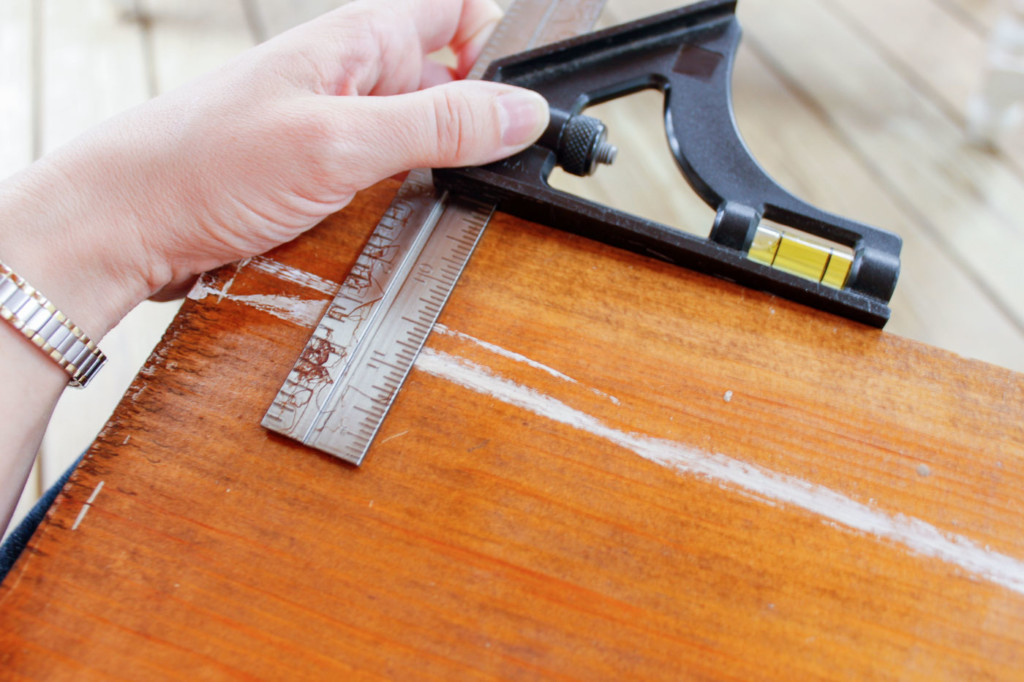
Choose how far back you want your shelves to rest on the ladder steps. Using a combination square or ruler, mark a line on all the shelves. (I chose a 3″ setback.)
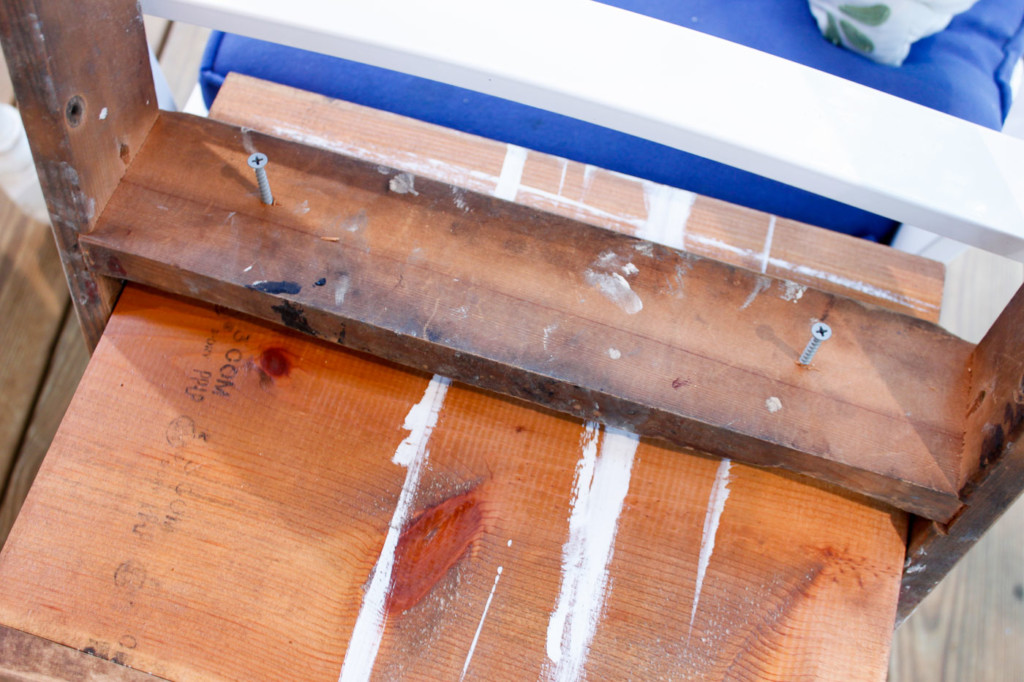
Pre-drill the location for the screws on each ladder step. Turn your ladder upside down and set the screws inside the holes. Line up your pencil lines on the shelf to your ladder step.
Clamp the shelf, or get a buddy to hold the shelf as you drive the screws into the bottom of each. Repeat the process for all the shelves.
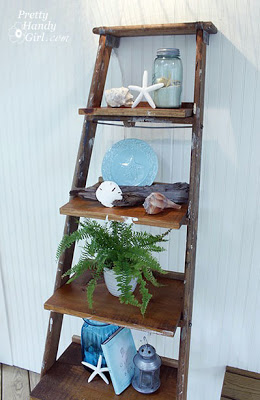
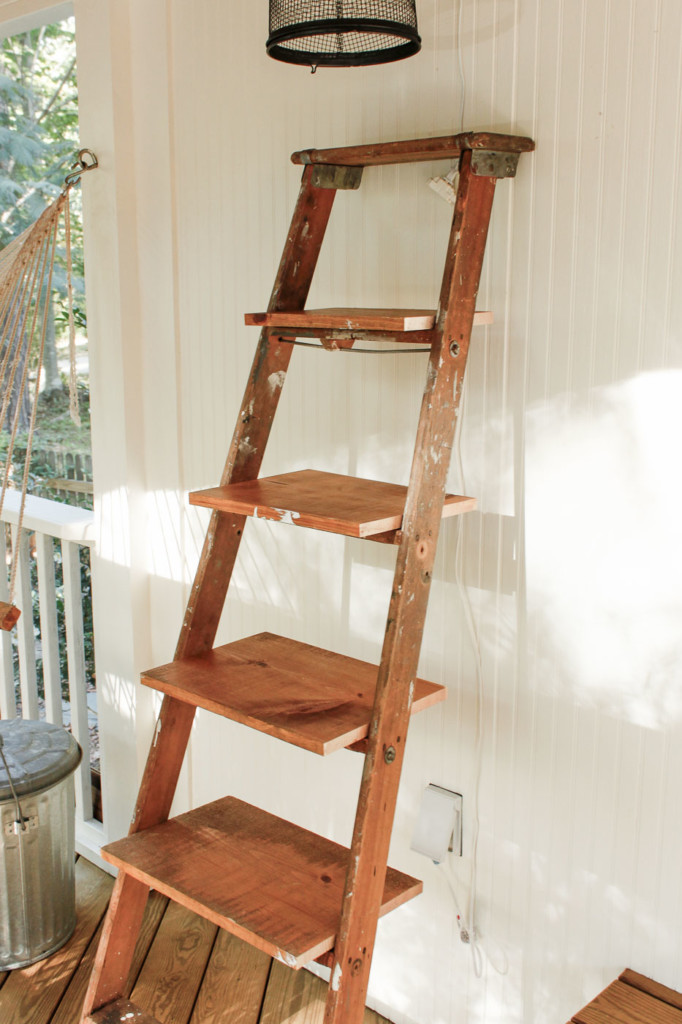
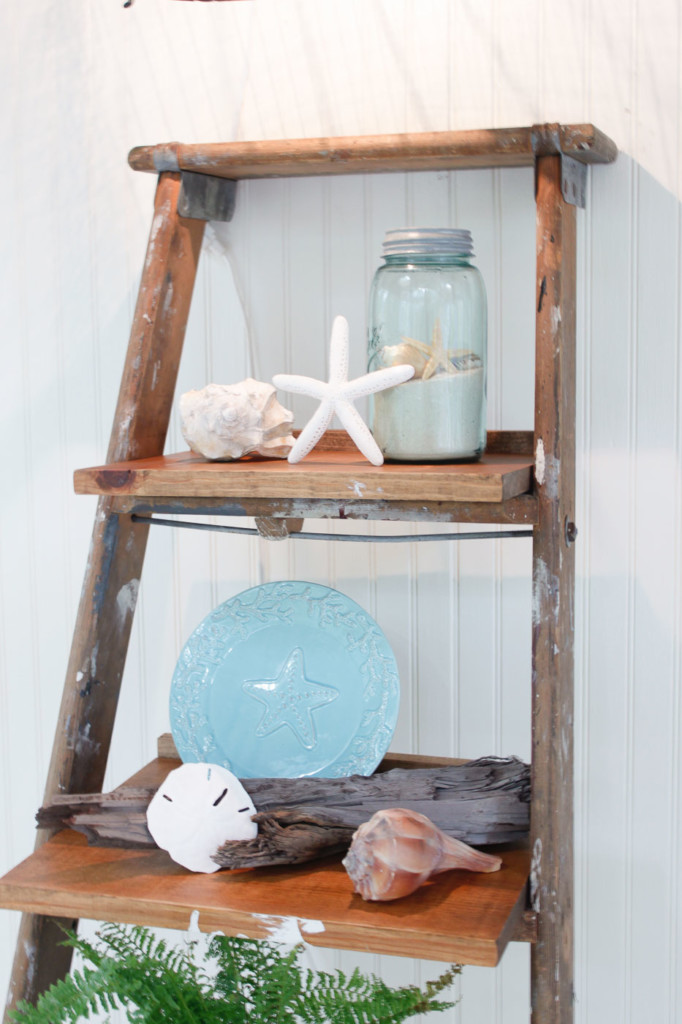
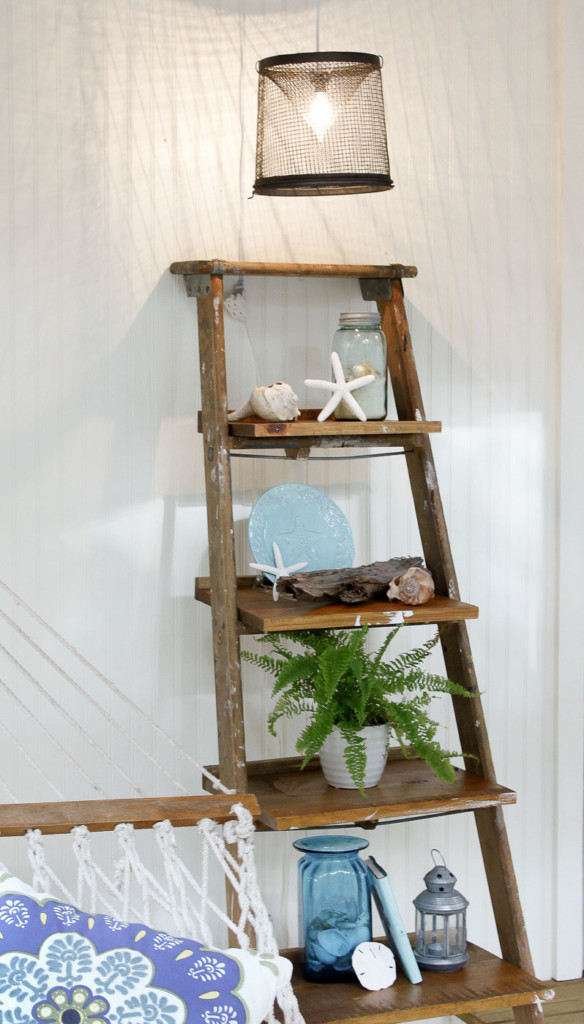
Then flip the ladder back over and admire! My total cost was $15 because I had the other materials on hand. But, even if you have to buy the screws and lumber, it should cost a lot less than a Pottery Barn shelving unit at $299!
My favorite part about this shelf is the paint splashes.
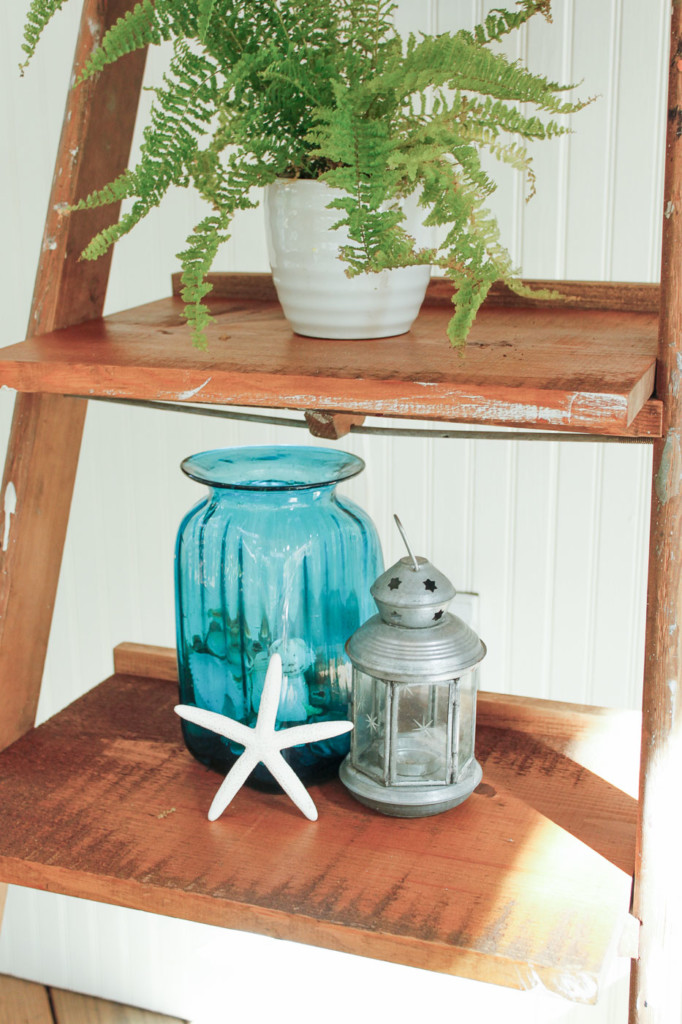
This DIY Ladder Display Shelf sits on our screen porch. But, this beauty would look good anywhere in your home.
I’m contemplating making one for my new master bathroom.
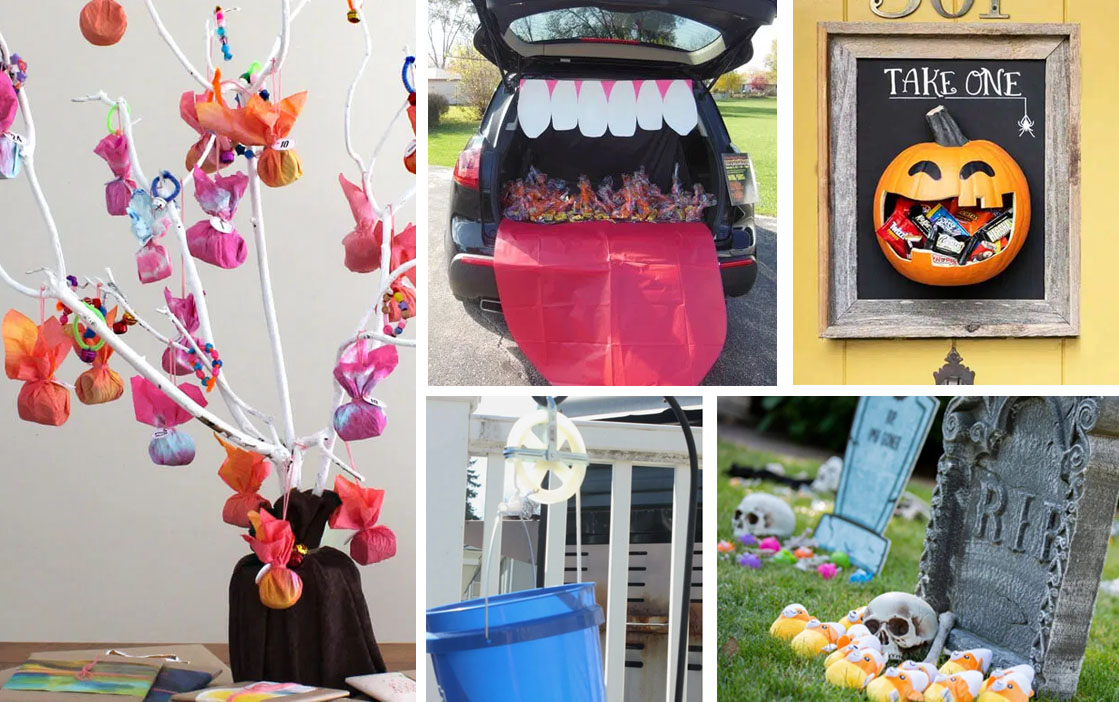
In the interest of saving Halloween, here are several ideas for contactless trick or treating!
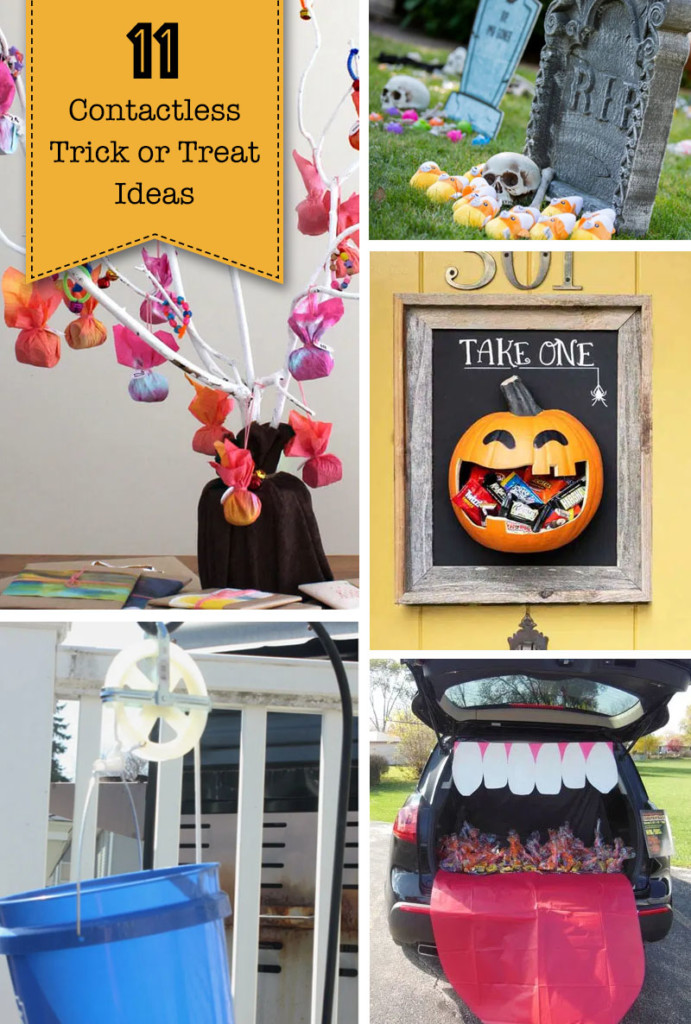
11 Contactless Halloween Trick or Treat Ideas
Halloween is a mere two weeks away. Let’s get real, 2020 has been hard enough on the kids. Cancelling Halloween would be the biggest disappointment for our little ones. With that in mind, I’ve been scouring the web and my brain for some excellent contactless Halloween Trick or Treat Ideas. Here they are in no particular order.
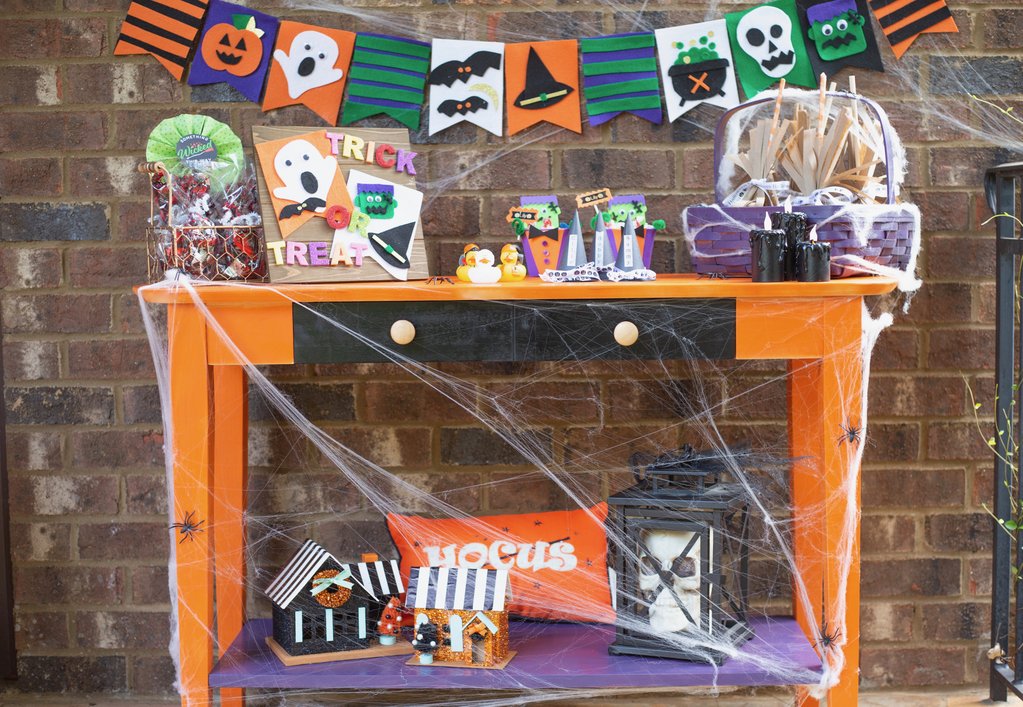
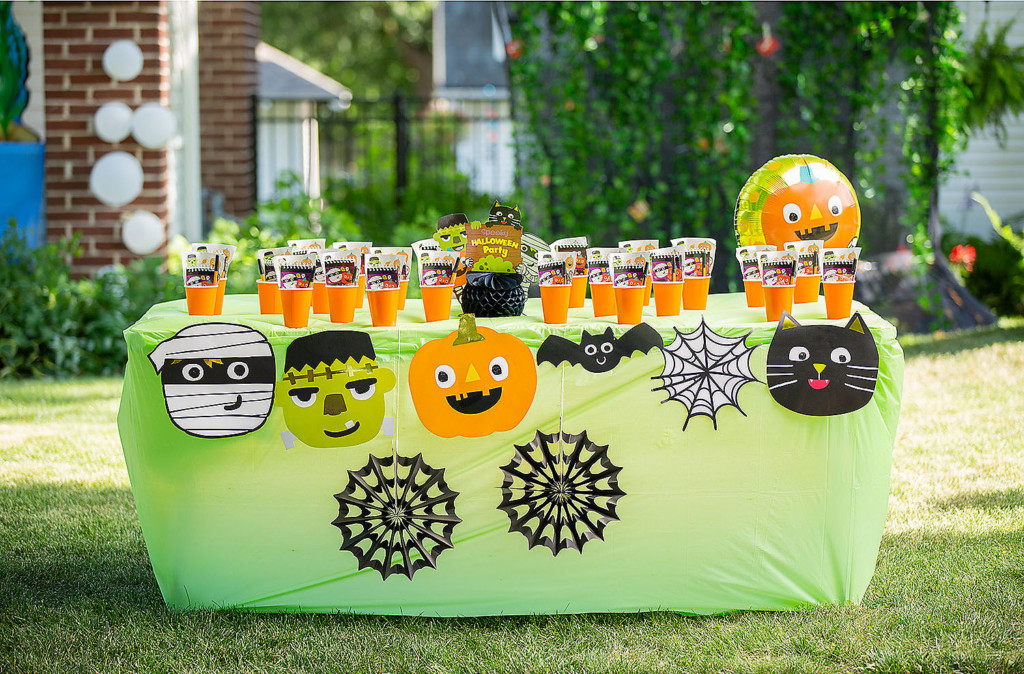
Many of our neighbors are planning on leaving pre-packed treat bags on a table by their door. Craft Box Girls, upcycled this sofa table with a little spray paint to create a Halloween Decorated Treat Table.
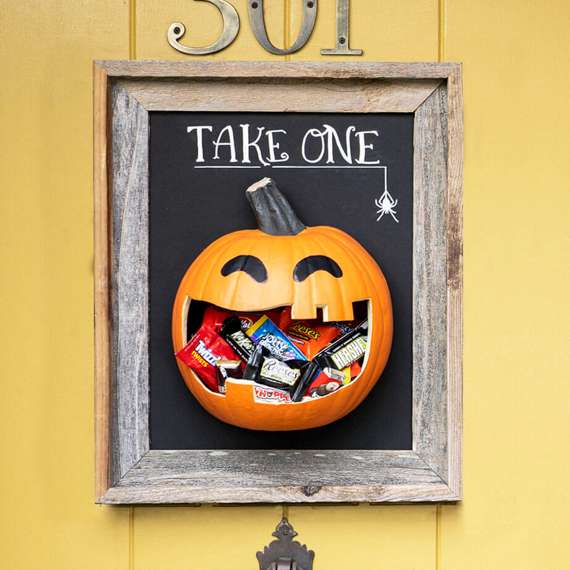
If you have a tree in your yard with low branches, you can attach treat bags to the branches. Or cut a branch and add a few treat bags like The Craft Train did.
Hang Up Halloween
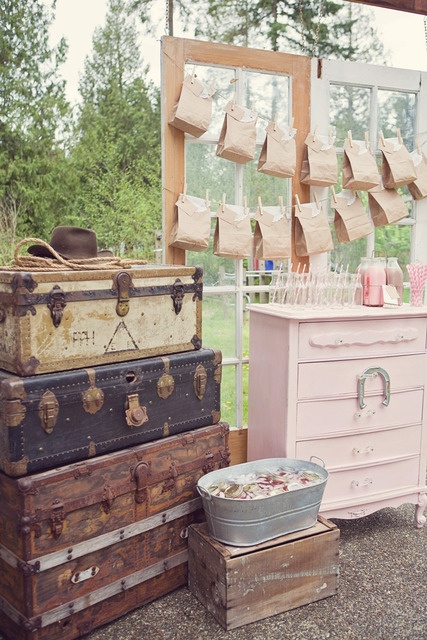
Let’s not hang up the idea of trick or treating altogether. Take a note from Little Sooti’s birthday favor idea and hang those treat bags out for the children to grab and go. You can attach them to the door, or on a clothesline between your porch posts. Get creative!
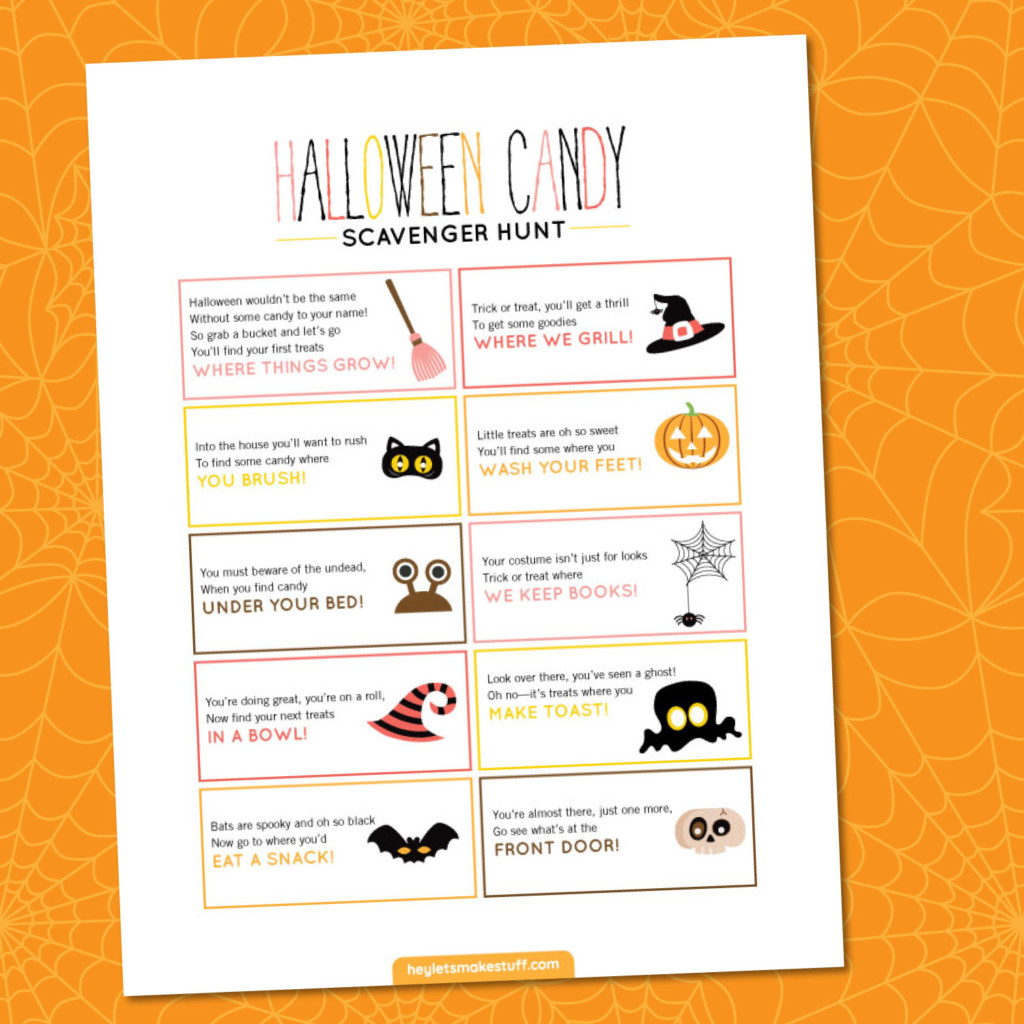
If you don’t feel comfortable letting your kids trick or treat this year, I’ve got an idea for you! A Trick or Treat Scavenger Hunt from Hey, Let’s Make Stuff. Or you can adapt this idea to your front yard for trick or treaters. Simply give one clue to each kid to find their treats.
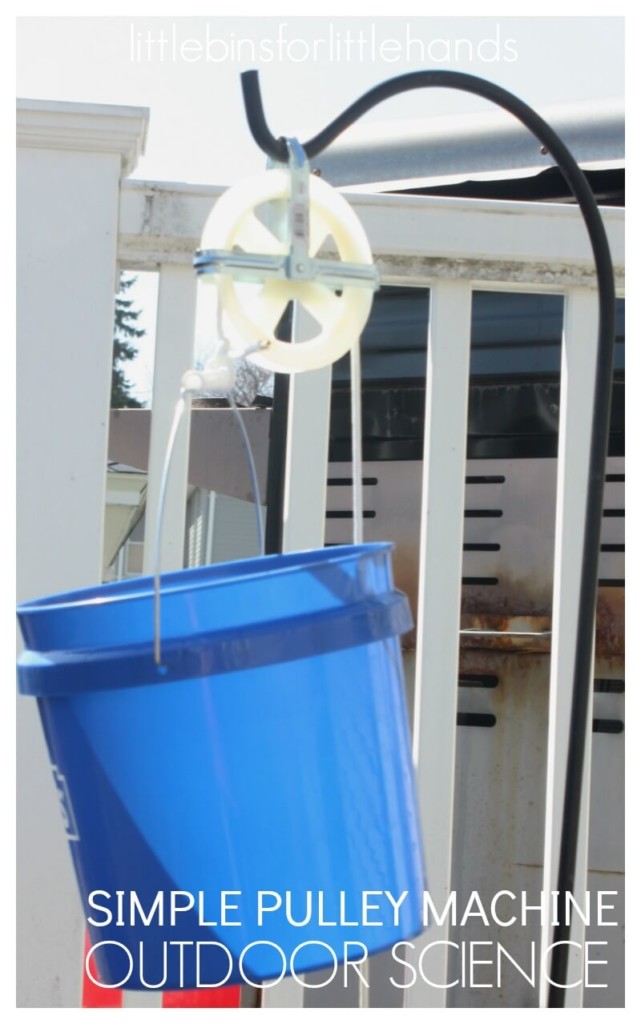
If you have a two-story window over the front door, you could create a simple bucket and pulley system to deliver treats to the children. Keep the rope in your hands to keep it contactless for the kids. You might also consider wiping the bucket between trick-or-treaters. Don’t have a pulley? No problem, you can simply run a clothesline from the window to a stationary post (light post or fence post) and then loop the bucket handle over the line. Send it down to the trick or treaters (just be sure to attach a second line to the bucket handle so you can pull it back up).
How about you? Do you have any idea for a safer contactless Halloween? I’d love to hear them. In the meantime, pin this image and share this post with your friends so the kids can enjoy Halloween even during a pandemic.