Are You Sure You're Ready to Take on a Home Renovation? | Pretty Handy Girl

There comes a time in any homeowner’s life when they contemplate taking on a home renovation. Today I want to help you answer if you are sure you’re ready to take on a home renovation?

Are you Really Ready for a Home Renovation? Prep and questions to ask before you start home renovation process.

Are You Ready to Take on a Home Renovation?

Today I wanted to approach a subject that is often on the minds of homeowners who have lived in a house long enough to wish for more space or a space that is renovated to their needs and desires. Reading the rest of this article will help you decide if now is a smart time to start that home renovation project you’ve been thinking about.

  • When is it time to take on a renovation?
  • Will it be a good investment?
  • Do I have the desire to deal with the stress?
  • Can I handle upheaval?

I can tell you from experience that there are times when a home renovation is a smart decision and there are times when it makes more sense to deal with your home as is for a while.

I hope this article helps you make your own decision as to whether you are ready to take on a home renovation.

As a general contractor and a serial renovator, I can tell you the rewards of renovating your home are wonderful. But, the actual process can be a nightmare.

Do You Really Want to Renovate?

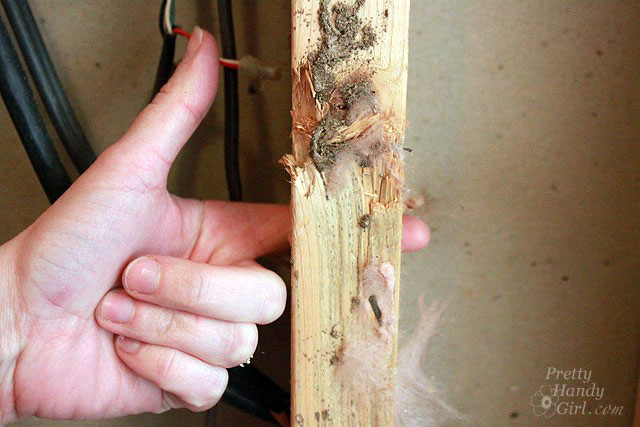
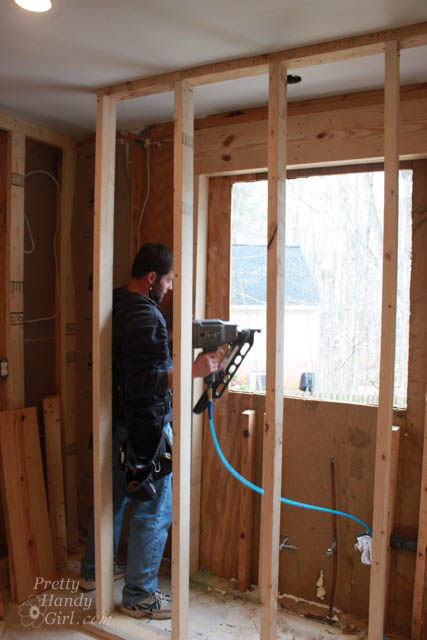
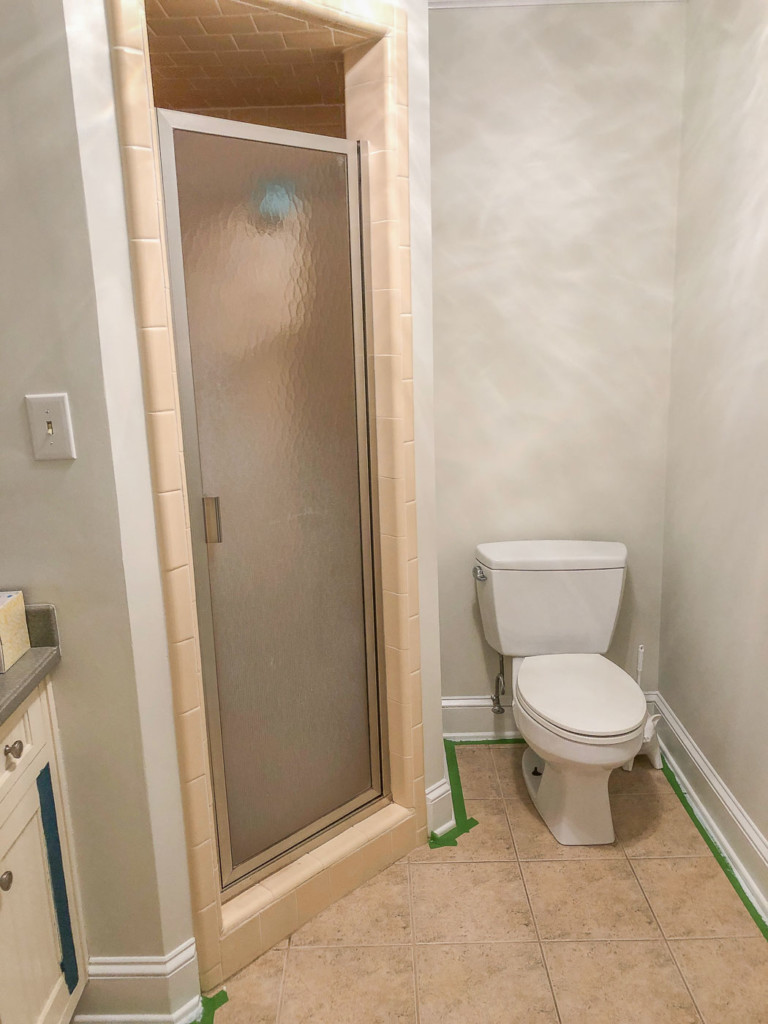
I’m going to be totally blunt about this, having your home renovated is NOT FUN. It’s a huge upheaval for you and your family. Having walls torn out or even just painted creates dust, chaos, and mess. You can forget about privacy because while the renovation is going on, workers (almost complete strangers) will be traipsing through your house. Even if you do the work yourself, you’ll have to cover furniture or move it out of the room being renovated. And if you need to pull permits, you have to be ready to have inspectors show up unannounced to inspect the work.

Depending on the room you are renovating, you need to make arrangements to avoid using that room. Where will the furniture go? If it’s in your kitchen, how can you cook and do dishes during the kitchen renovation? If it’s a bathroom renovation, do you have another bathrooms you can use while the one is out of commission.

How long will it take for the renovation to be completed? In today’s era of TV renovation shows, homeowners think a home renovation is a quick and easy process. I can tell you from lots of experience, much of the process on those makeover shows happens behind the scenes and off camera.

If I haven’t scared you off yet, let’s tackle some of the other factors that will help you decide whether or not you’re ready to take on a home renovation.

Are there Cheaper Alternatives to a Renovation?

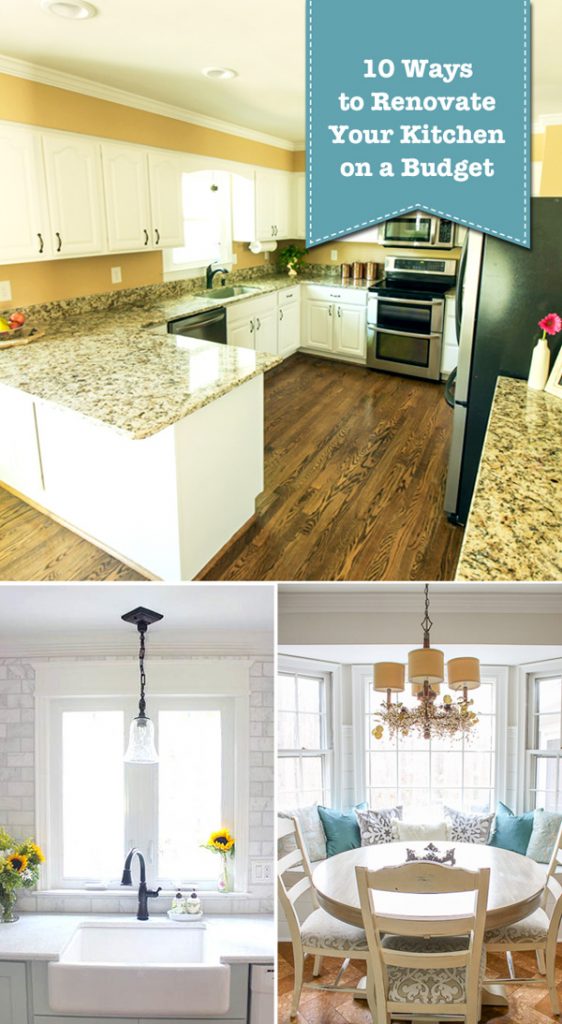
Truly ask yourself if renovating a perfectly good kitchen or bathroom is a smart decision. Oftentimes, you can make your kitchen look like a new space by painting cabinets, replacing the backsplash, cabinet knobs, or other cosmetic changes. (Here are 10 Ways to Renovate Your Kitchen on a Budget) . Simply adding an island may be enough to make you fall in love with your kitchen again. Always explore alternatives before pulling the trigger on a full blown renovation.

10 Ways to Renovate Your Kitchen on a Budget | Pretty Handy Girl

Are You Planning on Moving?

The number one thing you need to ask yourself is if you are planning on living in your home at least 5 more years. If you are planning on moving in less than 5 years, chances are you won’t recoup the cost that you put into your renovation.

However, if the renovation is one that is sorely needed due to a room being outdated or in disrepair, it could potentially help you sell your home faster and for more money. Definitely consult with a reputable realtor before taking on a renovation before listing your house for sale. They will be able to tell you what comparable houses in your neighborhood sell for and the level of finishes that are common in the area. They may also be able to give you a recommended budget for your renovation. This is also a great resource for comparing cost vs. value on home renovations.

What Rooms Bring Your Biggest Return on Investment?

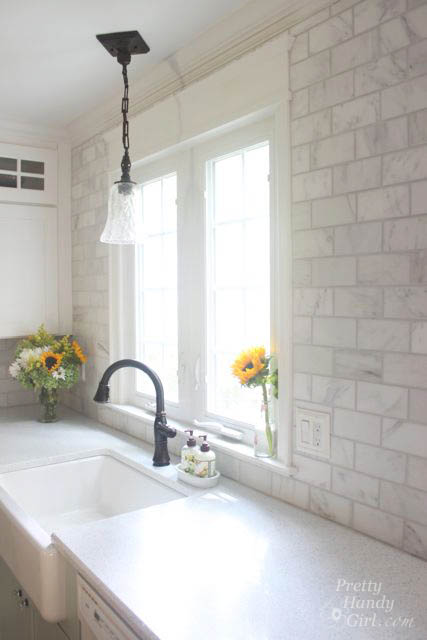
Kitchen and master bathroom renovations are the two areas in a home that give the best bang for your buck and allow you to increase your home value in a short period of time.

Are You Sure You're Ready to Take on a Home Renovation? | Modern kitchen with granite counters and modern tile backsplash


Putting in a swimming pool or an exterior building (like a shed) result in the least return on your investment. In fact, oftentimes a pool is a deterrent to buyers (especially young couples who already have or are thinking of having children.) You also have to factor in higher homeowner’s insurance premiums and the cost of operating the pool.

Locale is a good determining factor for exterior structures. Take into consideration your climate. Adding a garage isn’t necessarily a negative in certain parts of the country where weather is more extreme (snowy and icy climates.) In that example, a garage might be more important to buyers. In warmer climates that have a lot of insects, a screen porch might be a good investment for your home.

Are You Sure You're Ready to Take on a Home Renovation? | Screen porch with blue and white furniture and hammock

What’s Your Budget?

Before you embark on any renovation, it’s important to hire great contractors. I have an entire article with questions you should ask when vetting contractors. Always get several estimates before you make your final decision to renovate. Make sure you have money in your budget for the renovation. Always allow 15 – 20% over the budget for surprises or incidentals. You never know what you might find in your walls when they are opened up. If you don’t have the budget yet, save another year or so until you are ready to take on a home renovation.

Are You Sure You're Ready to Take on a Home Renovation? | Finger poking through a termite eaten stud.

Once you begin construction, keep a close eye on your budget. Make sure you aren’t splurging on too many high end finishes. If you are using a contractor or sub-contractors, be sure to keep tabs on the bill as they are working. Ask if you are still on target and within budget. It’s better for everyone involved to keep the lines of communication open.

Are You Sure You're Ready to Take on a Home Renovation? | Mid century modern mood board for a bathroom

Who Will Do The Work?

There’s no doubt that doing a renovation yourself will save you a decent amount of cash. However, if you DIY something that you aren’t knowledgable about, you may pay twice if you have to call in a professional to fix your mistakes. If you decide to do the work yourself, be forewarned that the renovations may take 3-4 times as long to complete. Professionals work with a crew and have the expertise to knock out that renovation in no time. Regardless of who is doing the work, make sure you check with your local city/county to find out if you need a permit. Don’t just take your contractor’s word for it.

Are You Sure You're Ready to Take on a Home Renovation? | Pretty Handy Girl cutting trim with a circular saw

How to Hire a Great Contractor?

If you decide to hire a contractor (or even a sub-contractor) do your research! I have an entire article on how to hire great contractors! I highly recommend you take a few minutes to read it, plus you should download these top questions you need to ask potential contractors!

Check to see if they are licensed and insured. Ask the contractor for several references of previous customers that you can call and ask questions. Check the BBB database to see if there are any complaints filed against the contractor. It’s also worth a small investment to check out their rating on Angie’s List.

If the background check turns up positive, work with your contractor to draw up a contract that spells out all the details of the job: time frame, work to be completed and any warranties on their work. My father likes to build in a clause where the contractor has to deduct money from the amount owed if he or she goes over a certain deadline for work completion.

Are You Sure You're Ready to Take on a Home Renovation? | Contractor installing a new window into a rough opening.
How Do You Pick Out Materials and Fixtures?

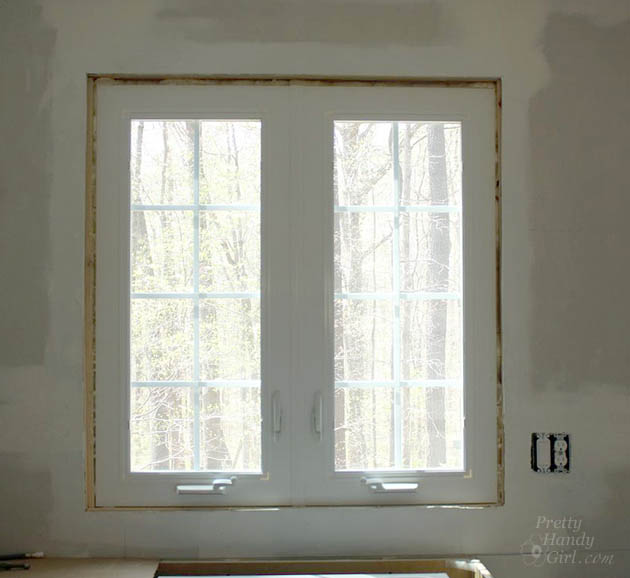
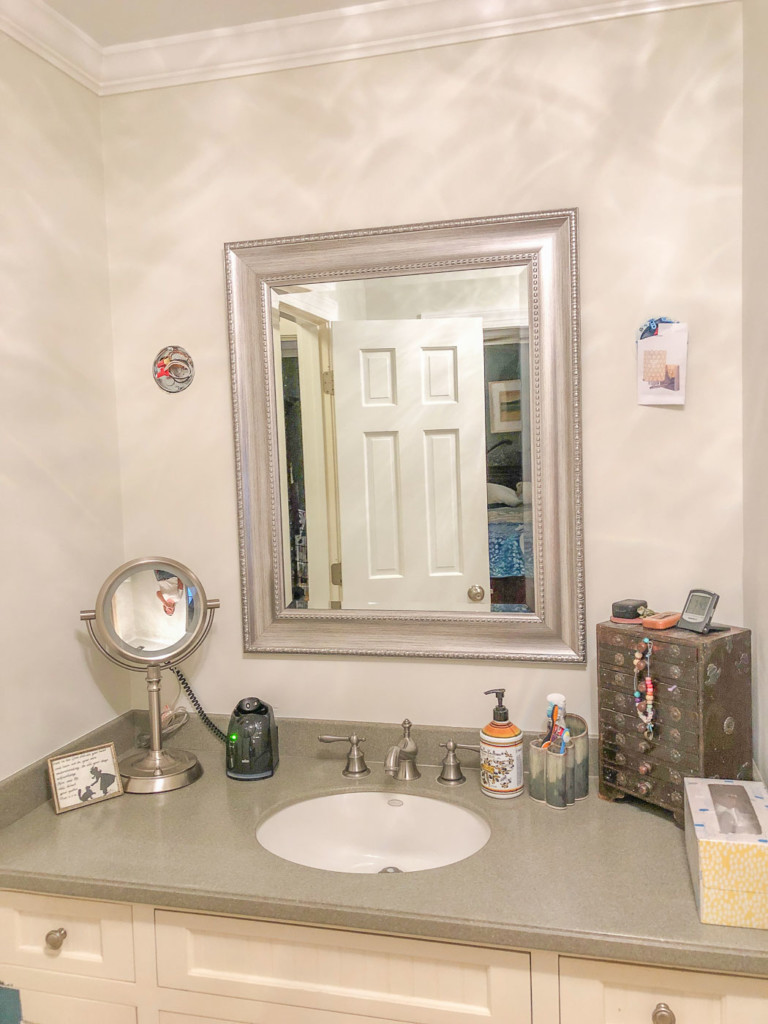
Be sure to research your fixtures and materials as diligently as you did your contractor. Read reviews on brands and products you plan to use. Ask friends or neighbors if they have an appliance brand they love or hate. You can also ask your contractor if they have clients that have fixtures you’re considering and see if they would be willing to let you talk to the client. Avoid trendy or unique choices unless you plan on living in your house for decades. You may love that pink shag wall-to-wall carpeting, but will you still love it in 10 years? Or will that be the decision that comes back to haunt you when it’s time to sell your house. Use quick change objects like art, home décor and pillows to bring in that unique punch of color instead of things that are hard to swap out.


Are You Sure You're Ready to Take on a Home Renovation? | Farmhouse kitchen mood board with oil rubbed bronze faucet, cork floors, and marble backsplash tiles.

Who To Notify Before Your Renovation?

For starters, be sure you check with your city/county to find out if you need a permit. Check with your city planning office to see if you live in a historic overlay area. If you live in a neighborhood with restrictive covenants, discuss your renovation with the HOA board especially if you are adding on to your home. You may also want to let your neighbors know that there will be an increase in street traffic and noise during renovations. Discuss start and stop times with your contractor to keep the peace with your neighbors. After the renovation is complete, it’s important to talk to your insurance agent to let them know about the changes you have made. They will be able to make sure you have sufficient limits to cover the structure and contents of your home.

Congratulations! If you made it this far, you are ready to take on a home renovation project. I wish you all the luck in the world and remember to be flexible. Things can and do come up that are not exactly according to plan. But, the good news is you will make it through and you’ll have a beautiful new room/structure at the end of it.

Don’t forget to learn how to hire stellar contractors to help you make the home of your dreams.

How to Hire Great Contractors - 20 Questions You Absolutely Need to Ask!

Be sure to pin this article to refer back to:

Are you Really Ready for a Home Renovation? Prep and questions to ask before you start home renovation process.

How to Install Window Trim & Casing
After installing a new casement window in our kitchen,I chose to install a beautiful decorative window moulding. Today I’m going to show you how easy it is to Install Trim and Casing Moulding! How to Install Window Trim & Casing

How to Install Trim and Casing Moulding

I’m excited to be sharing more tutorials from the kitchen renovation. I hope you’ll excuse me as we jump back and forth in the renovation process. I’ve been trying to get the most relevant tutorials to you as soon as I can. Speaking of relevant, I understand there are a lot of under-dressed windows out there that need trim or could use a little more “WOW Factor”!  Is that your  case—ment? (Sorry, I couldn’t resist.) Let’s go over the details for installing window trim and casing on a casement window. Have no fear if you have a double hung window or other, these techniques will work for those windows too. Replacement vs. New Construction Windows: handyman_installing_window But, let’s back up for a minute. I wanted to share with you a little snafu that happened with our casement window. When I ordered it, the guy taking the order asked me a few questions and somewhere there was a translation breakdown. He thought I needed a replacement window because I was replacing an existing window. What he didn’t realize is that I was increasing the size of the window opening and therefore needed a new construction window. In the end, I was stuck with the replacement window, but my handman and I used as many weather-stripping, caulking, and water barrier techniques we could think of to keep it water tight. This is what you need to know when ordering a new window: If you are removing the old and putting in a new window into the same frame, you can order a replacement window. If you are expanding or changing the size of your window opening (or you want to start with a full window replacement that you can flash on the exterior and add insulation around the rough opening) you will order a new construction window. But, let’s learn how to install trim and casing moulding on a window. Materials: (I’ve included affiliate links for your convenience. I earn a small percentage from a purchase using these links. There is no additional cost to you. You can read more about affiliate links here.)

Instructions for Installing Trim, Casing and Moulding on a Window:

The window has been installed. Use this opportunity to use an expanding foam to seal around the window frame while it’s exposed. This will cut down on drafts. Allow the foam to cure and trim off any excess that would interfere with the casing installation. How to Frame and Install Window Casing and Trim by Pretty Handy Girl Find the center of your actual window (not the rough opening) and make a pencil mark under the window. Use this mark as your guide for the stool and the window trim. How to Frame and Install Window Casing and Trim by Pretty Handy Girl First measure and cut the window stool. You can use a jigsaw, coping saw or hand saw to cut out the edges of the stool so it fits snug against the window and has a reveal over the sides of the window. Take into consideration the width of the window casing and trim on each side and add an inch for the stool to extend beyond the trim. (see photo below to visualize the end product.) How to Frame and Install Window Casing and Trim by Pretty Handy Girl With your stool dry fit in place, check the level of the stool and use wood shims to level if necessary. How to Frame and Install Window Casing and Trim by Pretty Handy Girl Add a bead of construction glue and set the stool on top. Secure the stool moulding to the window sill with nails. How to Frame and Install Window Casing and Trim by Pretty Handy Girl Safety note: When using a finish nailer be sure to wear eye protection and hearing protection. Don’t worry, you’ll look totally cool in your snazzy safety gear. It’s better than the missing eyeball look.

3M_Tekk_protection_with_finish_nailer

You may need to build out the window frame by cutting a 2×2″ board for the top of the window. Level the top with shims and secure it with finish nails. How to Frame and Install Window Casing and Trim by Pretty Handy Girl Cut two more pieces of 2×2 for the sides. Make sure you have the same reveal on the window for each side (refer back to your center mark.) How to Frame and Install Window Casing and Trim by Pretty Handy Girl Make sure the sides are plumb. Secure the sides with finish nails and break the shims off by scoring them with a utility knife and breaking them with your hand. (You don’t have to sing the Kung Fu Fighting song when doing this, but I do.) How to Frame and Install Window Casing and Trim by Pretty Handy Girl Time to add the side pieces of casing and backer board. The backer board is not necessary, but I like to beef up the trim on my doors and windows. It’s an easy process, and makes your home look more custom and less builder-grade. Decide what amount reveal you want showing on the window stop. Mark this depth on the 2×2″ window stops. Typically 1/8″ to 1/4″ is used.

How to Frame and Install Window Casing and Trim by Pretty Handy Girl

Measure and cut your window casing to meet the 1/8″ reveal. Be sure you have a consistent reveal from top to bottom and then secure the window casing with finish nails. How to Frame and Install Window Casing and Trim by Pretty Handy Girl Measure and cut the backer band to the same height. Set it tight against the casing and secure with finish nails. How to Frame and Install Window Casing and Trim by Pretty Handy Girl Your window should look like this at this point with the two side pieces of casing installed. How to Frame and Install Window Casing and Trim by Pretty Handy Girl Cut the 1″ x 6″ board to fit even with the outside edges of the casing and backer band. Attach it above the window with more finish nails. How to Frame and Install Window Casing and Trim by Pretty Handy Girl Cut the small cove and the small base trim pieces to fit across the top and bottom of the 1″ x 6″ board. The ends should be mitered where they meet the edges. Cut, two pieces at a 45 degree angle to act as a return for the moulding. Here’s a closer look: How to Frame and Install Window Casing and Trim by Pretty Handy Girl Before securing the returns, add a dab of glue to hold it in place. Then use painter’s tape to hold the returns while they dry.  After the glue dries, secure the returns with a finish nail in the center of each. How to Frame and Install Window Casing and Trim by Pretty Handy Girl Now the window trim and moulding is finished and it’s time to putty all of the nail holes with wood putty. How to Frame and Install Window Casing and Trim by Pretty Handy Girl Caulk all the seams where the trim pieces meet each other and the wall and window. If you need a tutorial for how to caulk like a pro, I’ve got you covered!How to Caulk Like a ProAfter the wood putty has dried, sand it smooth using a sanding sponge. Wipe off any sanding dust off with a damp rag. Prime and paint your window. And you’ll never see the seams! How to Frame and Install Window Casing and Trim by Pretty Handy Girl Congratulations, you just learned how to install trim and casing moulding. How to Frame and Install Window Casing and Trim by Pretty Handy Girl The depth of our sill, it’s just enough to set a vase onto. You may note I decided to forgo the traditional apron, and ended up using pencil edge marble tiles instead. How to Frame and Install Window Casing and Trim by Pretty Handy Girl

That seemed relatively easy, don’t you think? Trimming out a window is a personal affair, so be sure to experiment and get creative with your trim moulding. Remember, it’s your house, you can dress it up the way you want!

Here is another great trim tutorials:

How to Install Window Trim by Remodelando la Casa

More Window Resources:

How to Install a New Construction Window How to Add Privacy Film to Any Window How to Clean Your Windows Like a Pro Things to Consider When Choosing New Windows Stop! Don’t Replace Your Windows Before Reading This

PHGFancySignPin this image to save for later!

How to Frame and Install Window Casing and Trim by Pretty Handy Girl

As a general contractor, I’ve perfected how to hire great contractors. Over the years I’ve put together a list of questions I ask when interviewing contractors and calling references. Don’t let yourself be scammed, learn how to hire great contractors.

How to Hire Great Contractors - 20 Questions You Absolutely Need to Ask!

How to Hire Great Contractors and Questions You Need to Ask

Hiring a great contractor can be a tough task. The actual experience can be so paralyzing that some people ultimately give up on their dreams of a renovated space. I have a good friend who felt completely overwhelmed by the challenge of hiring a contractor to renovate her master bathroom. With media stories of people getting ripped off by bad contractors, I could understand her trepidation. Today I want to give you some tips on How to Hire Great Contractors. Plus, you can download a printable with the Questions You Need to Ask both the contractor and their references here.

Recently I’ve been vetting contractors to work on the Saving Etta project. I know first hand how difficult and scary it is to hire a stranger to work inside your home. When you factor in the amount of money you will be paying this person, it’s enough to lose sleep over the decision. Let me break down the steps for hiring a reputable contractor so you can finally have that renovation or addition you’ve always dreamed of.

How to Find Contractors:

I am of the belief that you should start with recommendations from people you know or at least people in your circle (neighbors, social groups, or friends.)  I frequently use Nextdoor.com to look for referrals for contractors. (Especially if there are multiple neighbors who used the same contractor and were all pleased with the work.) Another reason I like finding contractors through neighbors is because I know the contractor is familiar with renovations on homes that were built around the same time frame as our house. This is important, especially if you have an old home.

If you can’t get any recommendations from neighbors, ask your friends who just had a renovation completed.

If you’re still striking out, go visit a local kitchen and bath showroom and ask if they have any contractor recommendations. Oftentimes, the designer can tell you who they work with. You can also hire an interior designer who may have a contractor they work with regularly.

As a last resort, search for contractors on Google, Facebook, YelpCraig’s List, Nextdoor, or the Yellow Pages. It may be daunting to find contractors through this route, but hopefully the rest of this article will help weed out the dishonest and disqualified contractors.

How to Use the Web to Look for Reviews:

After acquiring a list of names, I like to perform some online sleuthing. Search for the company name in the Better Business Bureau database and read all the complaints. If they’ve had one or two, you don’t need to completely eliminate that business. But, if the contractor has numerous complaints, it’s probably best to remove them from the list of contractors to consider.

Next, perform a Google or Yelp search for the business name (be sure to include the city and state they are located in) and or the business owner to see what pops up. More recently, people are posting their reviews and cautionary tales on Nextdoor.com.

Contacting Contractors:

When you call the contractors you have selected, be upfront and honest about your project, the time frame, and your budget. Oftentimes good contractors may not be able to take your job right away or may charge more than you can afford.

Ask for References:

Get at least three recent references. (Ask for clients they’ve worked with in the last 3-6 mos. And ask them for client’s who had projects similar to your’s.)

Questions to Ask Contractor’s References:

This is probably the most valuable resource for you. Many people will call a reference and simple ask “were you happy with XYZ contractor?” But, you can get a lot more information about the contractor if you ask a few more questions. This is only a few of the questions I ask:

    1. Were you happy with the job the contractor did? Was the work performed to your standards?
    2. Did the contractor hire any tradespeople to help complete the job?
      • If so, what was the quality of the tradesperson’s work?
    3. Did you have to manage the tradespeople or did the contractor oversee their work?
    4. Were there any errors or mistakes that happened during the process?
      • If so, how did he or she handle them?
    5. What was the condition of your home (or job site) after the work was complete?
      • Was it cleaned up or was anything left behind?
    6. Anything you wish the contractor had done better?
    7. Was the contractor upfront with any cost changes?
    8. How accurate was the contractor’s timeframe?
    9. Did he/she show up on time or let you know of any delays?
    10. How were the inspections? Did he/she pass the inspections easily or were there any issues?
      • If there were issues, how were they handled?
    11. Did the contractor need to pull a permit and if so what for?
    12. Have you needed him/her to come back and fix or finish anything?
      • If so, how timely was that accomplished?
    13. Was the contractor open to your design preferences?
    14. Anything you want to add or any suggestions you have for me moving forward with this contractor?

For a complete list, I’ve created a questionnaire with all the questions I ask the contractor and their references. You can Download this printable questionnaire to use. (Feel free to make copies, but for your personal use only.)

Update on Backyard Landscaping | Pretty Handy Girl

What to Get from the Contractor BEFORE Work Begins:

Always get a quote before you hire a contractor (this can be a ballpark quote, but be sure to ask the contractor to alert you if they need to go over the quoted amount.)

If the contractor is a general contractor, electrician, plumber or a tradesperson that requires licensure, ask for their license number. Call or visit the licensing board website to verify that their license is up to date and the information matches their records.

Ask for a general liability insurance certificate (have your name and address included in the certificate holder’s field.)

Ask for their workman’s comp insurance if they have anyone working for them. And call the insurance company to verify that the policy is still active. 

At the end ask for a final lien waiver release after the work is done. This will protect you should the contractor fail to pay his or her subcontractors. If you don’t have a lien waiver and the subcontractors are not paid, a lien can be placed on your house until they receive payment.

Have a contract signed by yourself and the contractor that details the work you are expecting them to accomplish, the amount they quoted, and a timeline.

Red Flags to Look Out For:

  • Was the contractor forthcoming with the above information?
  • Ask the contractor if you need a permit. If they say no, be sure to ask more than one person if a permit is needed. And maybe even call your city permit office to verify that information.
  • Regarding the quotes, you will undoubtedly receive a range of quotes for your project. Be very wary if one contractor’s quote is significantly lower than the others. There is truth in the old adage, you get what you pay for.

During the project, occasionally ask your contractor if you are still on target and within budget. It’s better for everyone involved to keep the lines of communication open. Always allow 15 – 20% over the budget for surprises or incidentals. You never know what you might find in your walls when they are opened up.

Never Pay in Full:

If I have one important takeaway from this article, it’s to never pay in full until the job is completed to your satisfaction. Never fall victim to the claim, “I have to pay my guys.” If the job isn’t 100% complete, retain at least 10-15% of the total until the work is done. Once the contractor has all your money, you’ve lost all your bargaining chips.

More Information about Hiring Great Contractors (Video Chat):

A few weeks ago, I hosted a Facebook Live to talk more about how to hire great contractors and avoid getting burned. Here’s the Facebook Live video:

Good luck and remember, you can do this!

Now that you are one step closer to getting started with your project, you need to read this article: Are you Sure You’re Ready to Take on a Home Renovation?

Are You Sure You're Ready to Take on a Home Renovation? | Pretty Handy Girl

If you are thinking about renovating your kitchen, I have some great tips for Surviving without a Kitchen during Renovation:

Pin This to Save for Later:

20 Questions You Absolutely need to Ask to Hire Great Contractors

Ever want to surprise your spouse with a budget-friendly master bathroom makeover for under $500? You won’t believe this before and after transformation my friend Beth and I pulled off over a weekend.

Surprise Bathroom Makeover Under $500
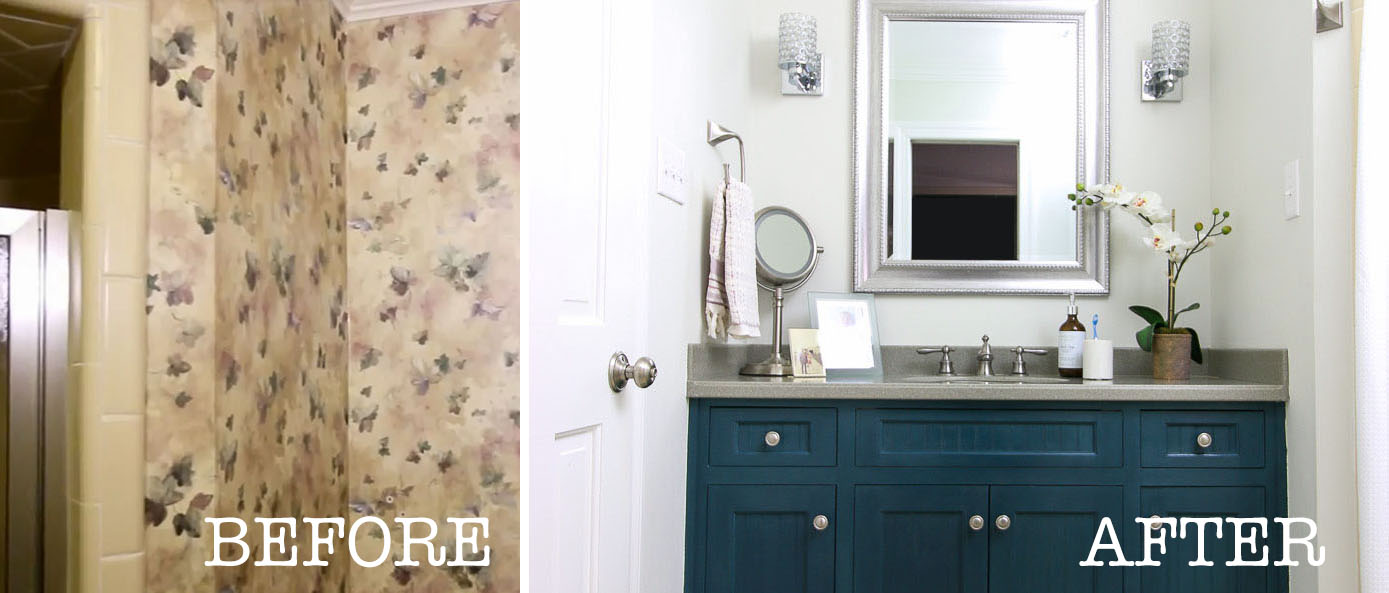
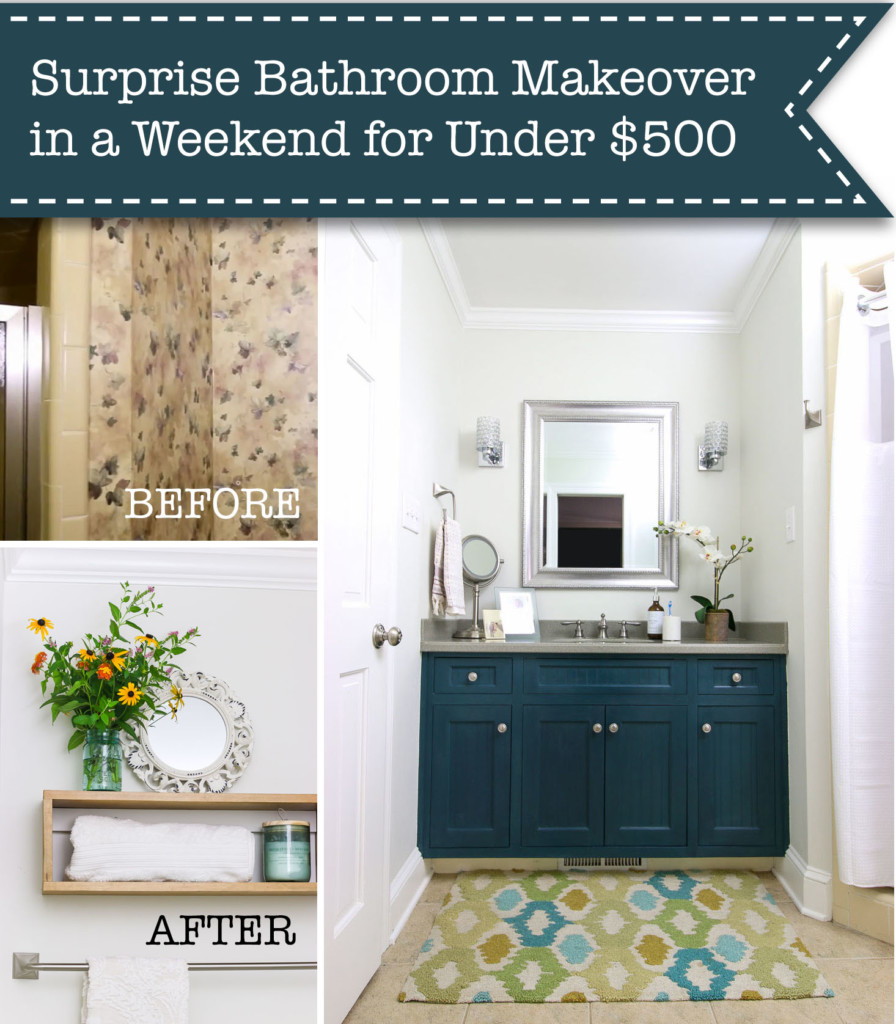
A Surprise Bathroom Makeover Under $500

My friends at GREAT STUFF™ sponsored this project, and I can’t wait to share a new product they recently released. Be sure to read to the end to find out what it is!

My good friend Beth, who I’ve known for over a decade, is my frequent walking buddy. Which means we pretty much discuss anything and everything on our walks. During one of our neighborhood strolls, we were discussing projects we wanted to work on next. Beth told me her husband, John, was so fed up with their bathroom, he’d been shaving in the kids’ bathroom. Upon further questioning, I learned the light over the mirror in their bathroom had stopped working a while ago. The light remained broken as Beth was plunged into some challenging family issues. Now that things had resolved with her family, she was ready to fix the bathroom light and maybe give the room a little makeover.

The next words out of Beth’s mouth were like a match igniting my desire to plunge headfirst into a new DIY project.

“John and the kids are going away this weekend and I’m staying here,” she said.

Instantly I volunteered to help her surprise her husband with a bathroom makeover. Little did I know, we’d have a lot of work to cram into one weekend.  But, hey, what’s more exciting than a surprise makeover? Am I right?

Challenges in the Small Bathroom:

Before the big work weekend, I stopped by Beth’s house to assess the situation. Their bathroom had some issues, the first being the lack of lighting over the sink. The second was a dimly lit ceiling fixture that could only take one lightbulb. The exhaust fan worked, but it was loud and had a discolored cover.

By far, the worst feature in the bathroom was the English ivy wallpaper. It was too busy, too dreary, and I don’t even think an English noblewoman would want it in her home! Luckily, Beth was on board with stripping it. With the wallpaper gone, we could give the bathroom an impactful makeover with paint, new lighting, and some new hardware. Beth was on a tight budget (she didn’t want to alert her husband to our surprise makeover), so she kept her purchases to just under $500.

A Surprise Bathroom Makeover for under $500

It’s time to get busy on Beth’s bathroom. Just remember it’s a surprise, so don’t tell her hubby. You can come join us by watching the video (but be prepared to help us strip wallpaper.)

The Makeover Weekend Arrives:

On Friday morning I arrived at Beth’s ready to work and we got straight to stripping! Wallpaper, that is!

Did you know there are really only two types of wallpaper when it comes to removal?

  1. The Easy to Remove Kind
  2. The Pain in the A$$ (what idiot didn’t prime the drywall—oh screw it let’s just replace the drywall) Kind

I was incredibly relieved that someone primed under Beth’s bathroom wallpaper. Lucky for us, it came off fairly easily in big strips. I wish I could say the same about my house, we had wallpaper glued to the drywall (no primer between the two.) But, this means I’ve had lots of experience and a proven way to prepare the wallpaper to paint over (so you don’t see the seams and you never have to worry about it peeling).

Learn how to get rid of both kinds of wallpaper here!

A Solution for the Electrical Problem:

Now that the wallpaper is gone, it’s time to address that light (or lack thereof) over the sink. Although Beth had dutifully called my favorite electrician to fix it, they hit a wall (or more accurately, a pipe.) Upon removing the broken light fixture he discovered an unsafe wiring situation.

Some idiot had moved the wire out of the junction box and punched it through the wall in an attempt to center the light. (This a code violation because it’s a fire hazard when wiring connections are outside a junction box.) It was obvious they weren’t able to relocate the electrical box because the plumbing vent pipe was centered on the wall. Not wanting to hang the light off-center, Beth told the electrician she had to think about what she wanted to do with the light. Luckily, I had an idea that would be twice as nice. Why try to deal with one light that can’t be centered, when you can double the lighting with wall sconces? I showed Beth this photo and she instantly loved the idea.

We were grateful when my electrician was able to swing back by and install the junction boxes on either side of the mirror area before we started painting the walls. Then I patched the holes he made and we were back in business (painting business that is.)

It’s hard to see the paint color in the photos, but we chose One Horn White by Magnolia Home. It’s white with a hint of green and it looks great in this bathroom.

The off-white molding looked dingy with the new wall color, so we gave the baseboards and the crown molding a fresh coat of white paint.

New Lighting and a New Skill:

Part of the makeover involved teaching Beth how to install the new stunning crystal ceiling light she picked out! Although she was nervous at first, I taught her how easy it is to replace a light fixture. With her new electrical skills, I encouraged her to install the sconce lights as well.

Unfortunately, the sconces didn’t arrive in time for the surprise. But, we taped up a picture of the new sconces for the big reveal.

Later, Beth used her new skills to install the wall sconces when they arrived!

Budget Vanity Update:

Instead of replacing the vanity, Beth painted it a beautiful dark teal color. The color is Weekend by Magnolia Home and I love the dark elegance and also a punch of color needed in this otherwise neutral bathroom.

signature

Before we knew it, Sunday afternoon had arrived and although we weren’t able to completely finish the makeover in one weekend, it was still a big surprise for Beth’s husband. Even the kids were surprised. You have to watch the video to see their reactions. It’s priceless!

Finishing Up the Bathroom Makeover:

After our weekend of work, life got in the way of finishing their bathroom. Then a pandemic hit and we all dutifully stayed at home for several months.

A few weeks ago, I helped Beth finish up the final touches like painting the exhaust fan, adding a finish coating to the vanity, and adding a floating shelf over the toilet.

The shelf is a simple touch but adds some extra storage and style to this small bathroom.

Protecting the Bathroom from Drafts and Bugs:

While the bathroom vanity was empty, I took the opportunity to fill in the gaps around the water lines and drain pipe under the vanity using GREAT STUFF™. It’s a simple fix that takes no time at all, but makes a huge difference in controlling bugs and pests.

Those of us that live in the south know we have some Jurassic-size bugs that like to pop out of nowhere, making us scream like a little girl being spooked. (Pretty Handsome Guy is definitely guilty of being able to hit those higher octaves when he finds a roach in the house.) Some people call them water bugs or palmetto bugs, but they are big fat wood cockroaches! For this reason alone, it’s a great idea to seal those gaps around your pipes.

Sealing around the pipes with GREAT STUFF™ is super easy and it just got easier with the new Smart Dispenser which has fewer drips and can be re-used for up to 30 days! This was definitely one of my pet peeves about the original can. Previously, the GREAT STUFF™ material would harden in the dispensing straw making it unusable for future projects. (Click here to learn more about the GREAT STUFF™ with the Smart Dispenser and where you can purchase it.)

Lucky for us, GREAT STUFF™ cared enough to come up with an innovative solution to this issue—the smart dispenser!

The Reveal:

I’m thrilled to be able to show you the final reveal.

Beth and John are loving their new lighter and brighter bathroom.

It’s amazing how choosing a cooler paint color downplays the creamy tiles. This is a great trick I use when giving dated bathrooms an inexpensive facelift.

Speaking of facelift, what do you think about the painted vanity? We loved the dark teal color and how it plays nicely with the old countertop.

Beth reused the same knobs to stay under budget.

I love the elegant lighting Beth picked out for the room. The ceiling fixture is much brighter with two bulbs and reflective crystals!

And, adding two sconces, dramatically improved the lighting in this bathroom!

But, I have to say my favorite element is the simple modern floating shelf.

It adds a little storage and some style to an otherwise empty wall over the toilet.

Of course, we can’t forget the old exhaust fan. With a little spray paint, it looks brand new.

Cost Breakdown & Sources:

Grand Total: $462

What do you think? Isn’t this an amazing makeover for under $500? Do you have a room that could use a makeover for less than $500? Do tell!

Disclosure: This is a sponsored post for GREAT STUFF™. I was honored to work with them on this project and was compensated for my efforts. All words and opinions are my own. I have not been told what to say. As always I am very particular about the sponsors I work with and you will be told if you are reading a post that has been sponsored or in which materials were provided.

Whether you have pre-primed walls or the wallpaper is glued directly to the wallboard, I have the easiest and best-looking ways to get rid of wallpaper! Save yourself time and a headache with my tips to get rid of wallpaper.

2 Ways to Get Rid of WallpaperHow to Get Rid of Wallpaper (Remove It or Paint It)

Having owned two houses built in the 70’s, I’ve dealt with my fair share of wallpaper!

Did you know there are really only two types of wallpaper when it comes to getting rid of it?

  1. The Easy to Remove Kind
  2. The Pain in the A$$ (what idiot didn’t prime the drywall—oh screw it let’s just replace the drywall) Kind

I’ve dealt with both kinds and am happy to share with you the easiest way to get rid of both! Yes, even if the wallpaper is glued to the drywall (no primer between the two). Grrrr!

In a perfect world, we’d all be dealing with removable wallpaper. Unfortunately, removable paper is a relatively new invention. Back in the day, it was either pre-pasted wallpaper or unpasted wallpaper where you had to apply the glue first.

Today I’ll go over two easy proven techniques for getting rid of wallpaper permanently!

How to Strip Wallpaper:

You don’t need a steamer to strip wallpaper. And you don’t have to buy chemical strippers. All you need are a few things, most of them you can find in your house.

Materials:

(I’ve included affiliate links for your convenience. I earn a small percentage from a purchase using these links. There is no additional cost to you. You can read more about affiliate links here.)

Let’s go over the easiest way to remove wallpaper. Always test this removal process in an inconspicuous corner first. If the wallpaper doesn’t come off easily, skip down to How to Paint Over Wallpaper tips below.

How to Remove Wallpaper:

This is the easiest way to remove wallpaper and it won’t cost you a lot of money buying a steamer or other tools. You’ll definitely need a scorer though.

  1. Use a scoring tool to perforate the wallpaper with lots of tiny holes.
  2. Fill a spray bottle halfway with cheap liquid fabric softener. Fill the other half with warm water.
  3. Spray the wallpaper with the fabric softener mixture until it’s saturated.
  4. Let it sit for 15 minutes.
  5. Saturate the wallpaper again with the fabric softener mixture.
  6. Let it sit another 10-15 minutes.
  7. Use a flat drywall knife or scraper to gently pull up a corner or seam.
  8. Pull the wallpaper off the wall.

You can watch how exactly I remove wallpaper in this video:

Preparing Previously Wallpapered Wall for Painting:

It is imperative that you remove all the wallpaper pieces and any glue residue from the wall before painting. Here are the steps to properly prep your wall for painting:

How to Install a Tile Backsplash (Tile setting) | Pretty Handy Girl

  1. Fill your spray bottle with 1 part warm water and 1 part liquid fabric softener.
  2. Spray the mixture on the walls.
  3. Use a sponge saturated in the mixture to wash the walls and scrub off any pieces of wallpaper remaining.
  4. Fill a bucket with clean water. Dip your sponge in the water.
  5. Scrub the wall to remove any remaining fabric softener or residue with a clean sponge dipped in water. Refill the bucket with clean water often.
  6. Allow the walls to dry. Fill in any holes or dings with joint compound or (my favorite) Patch Plus Primer. Allow to dry.
  7. Then lightly sand with a fine-grit sandpaper. This will smooth any imperfections and leave you with a smooth and clean wall.
  8. Prime the walls before painting.

How to Paint Over Wallpaper Effectively:

If you’re reading this section, first let me say, I’m sorry you have the pain-in-the-a$$ kind of wallpaper. Rest assured, there is a solution and it’s not as bad as you think. You can paint over your wallpaper after you prep it properly.

How to Patch a Hole in Drywall | Pretty Handy Girl

  1. Make sure to glue down any seams or areas that are peeling up (you can use any thin glue, even school glue if you like.)
  2. Use joint compound to cover all the seams (don’t use drywall tape).
  3. Let the joint compound dry, then sand smooth to eliminate any appearance of the seams.
  4. Prime the wallpaper and the joint compound before painting.
  5. Paint to your heart’s content and no one will ever know you had wallpaper underneath.

I know some people are horrified at the idea of painting over wallpaper, but I assure you we’ve painted over wallpaper in several rooms in our house because the wallpaper was glued directly to the drywall. We have had no issues and you can’t see any seams. It’s been almost 15 years and they are still holding up fine.

So, let this be the day where you finally decide to get rid of that wallpaper once and for all! Whether you are successful at stripping wallpaper, or you have to seal the seams and paint it, you can say goodbye to that old, garish wallpaper once and for all!

Let’s hear from you, what’s the ugliest wallpaper you have or had to remove? I’m all ears (thankfully not eyes).