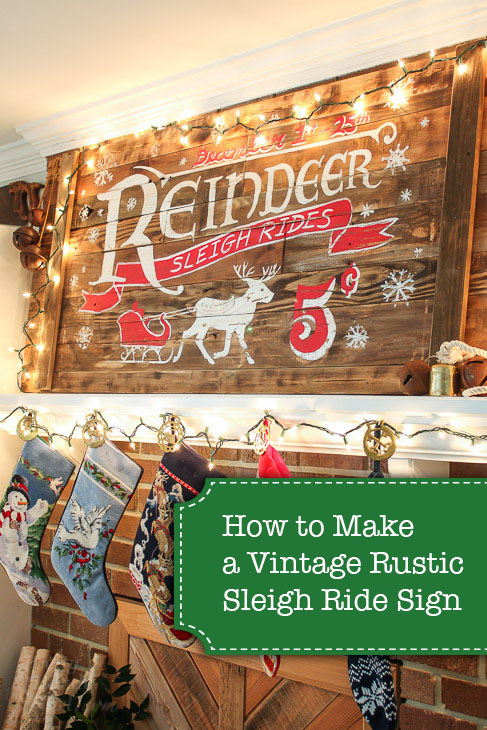
How to Make a Vintage Rustic Sleigh Ride Sign | Pretty Handy Girl How cool! You can use this technique to make or transfer any sign graphic.

How to Make a Vintage Rustic Sleigh Ride Sign | Pretty Handy Girl How cool! You can use this technique to make or transfer any sign graphic.

How to Make a Vintage Rustic Sleigh Ride Sign:

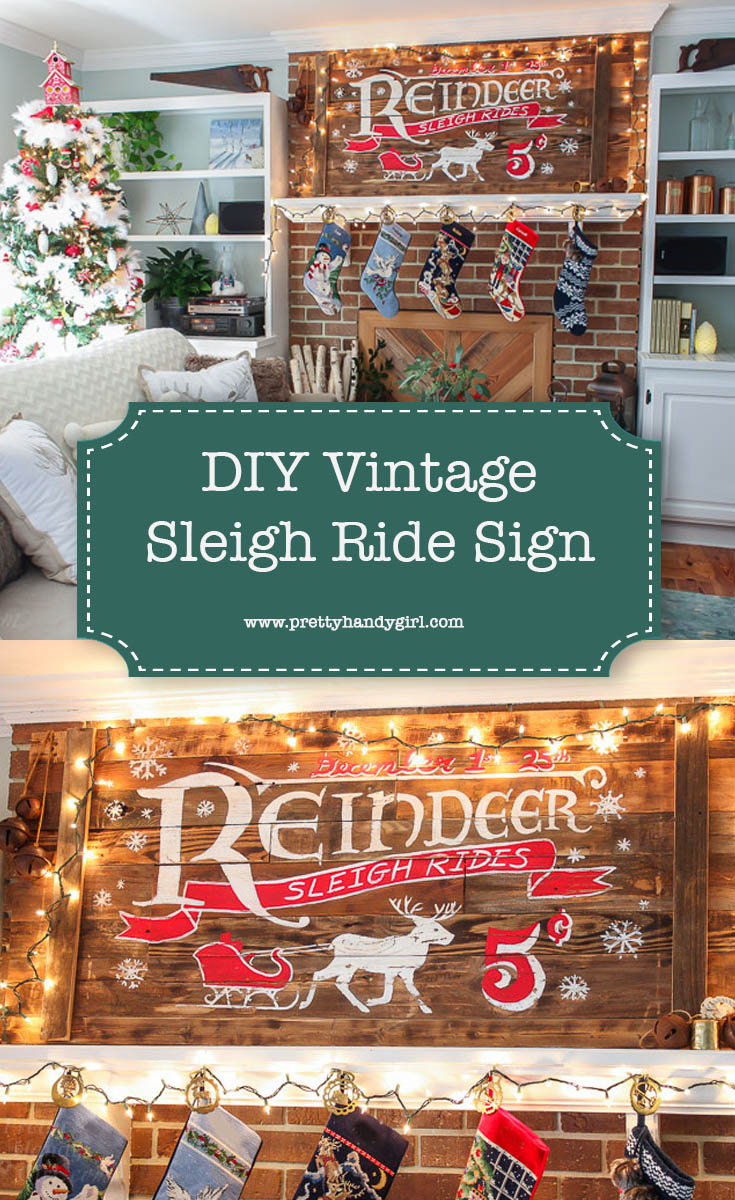
You guys, I’m super excited about this Vintage Rustic Sleigh Ride Sign I made using scraps from my workshop. This sign turned out 200 times better than I imagined in my head. I knew I had to share the tutorial with you so you can make your own vintage signs for any holiday! Let’s get this party started.

Sign:

First I suggest measuring the space where you want to hang your sign (it would suck to build it too large or too small.) Begin laying out your scrap wood. It’s best to line up the same width boards along each row. If you need to, you can rip down scraps on a table saw.
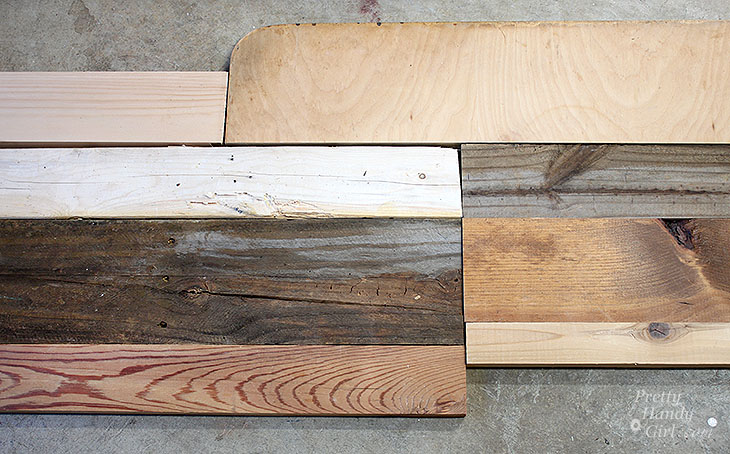
scrap-layouts

Once you have the scraps laid out, add any stain or paint if you desire. I added a combination of glaze, stain and burned some boards to give them a similar color value but still let them look unique.
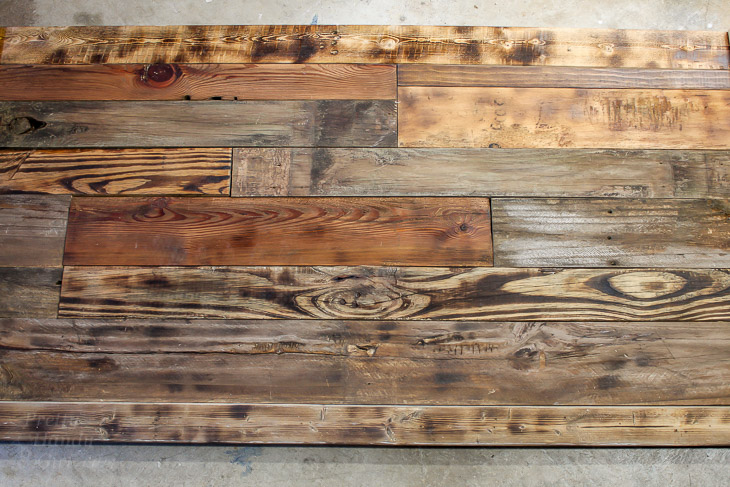
scrap-wood-assembled-2

Supports:

The key to building a sign with lots of scrap wood is to space your supports well. Each board should have two vertical support pieces on the back, unless the board is really short. You might be able to get away with just one support for those shorties.

Cut 1″ x 4″ boards to the height of your sign. Flip the scraps over and glue each support board.
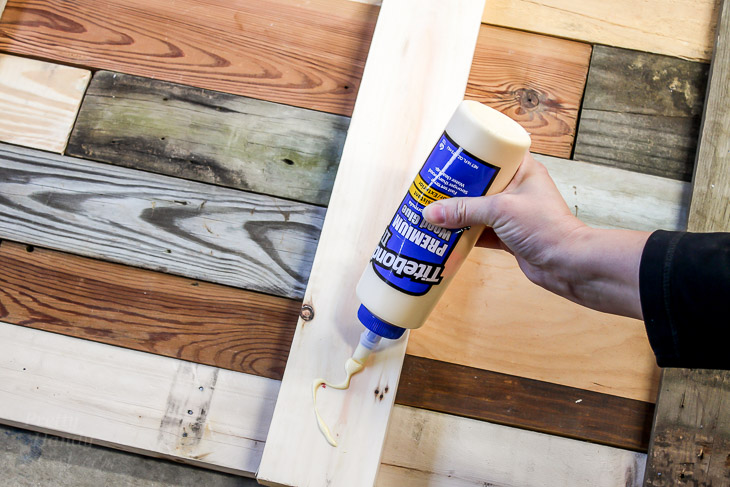
add-back-support-boards-wood-glue-4

Nail each support board 3-4 times to each scrap.
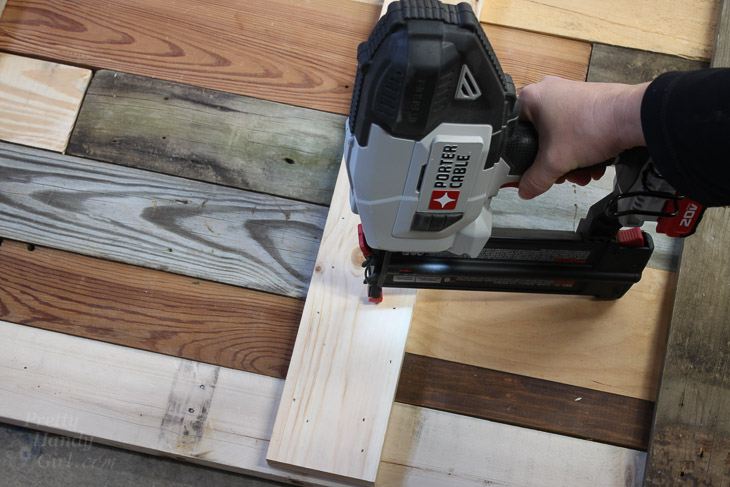
secure-supports-finish-supports-6

I ended up using 5 supports for my sign.
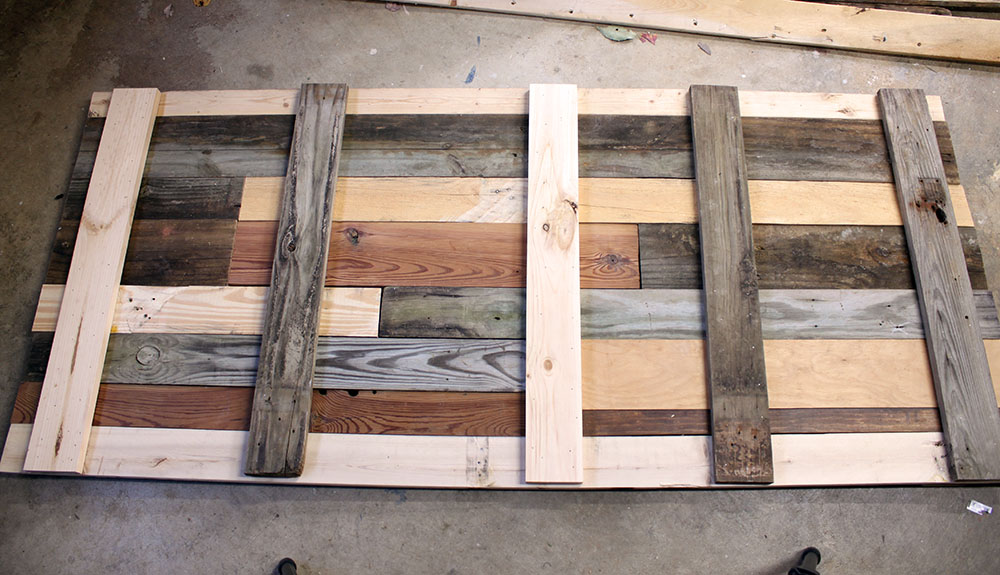
scrap-wood-sign-support

Allow the glue to dry. Flip your sign over and make sure the scrap boards are well secured.
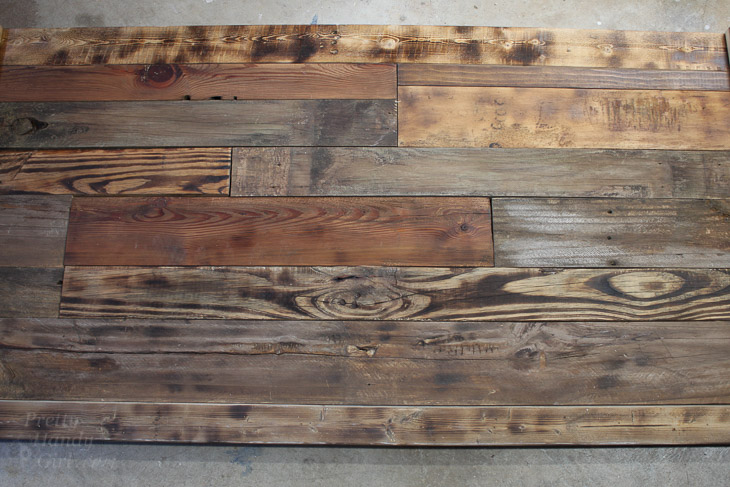
scrap-woods-layout-2

Transferring the Image:

Now it’s time to have some fun. I made a shoebox projector by following the directions in this video:

I created a basic sketch for the sign. (You are welcome to use this image, but please use for personal use only. Do not resell products with this image on it. And please be sure to credit and link back to this post if you use my image and blog about it.)

How to Make a Vintage Rustic Sleigh Ride Sign | Pretty Handy Girl How cool! You can use this technique to make or transfer any sign graphic.

For your convenience, this image has already been flipped and reversed for projecting it in the shoebox projector.How to Make a Vintage Rustic Sleigh Ride Sign | Pretty Handy Girl How cool! You can use this technique to make or transfer any sign graphic.

Send the image to your phone. Insert the phone into the shoebox. (The brightness has to be turned all the way up and you might want to change the display setting to stay lit longer.) Turn the lights out. Move the shoe box back and forth until you have the image sized as large as you want. Then move your phone forward and back to focus.
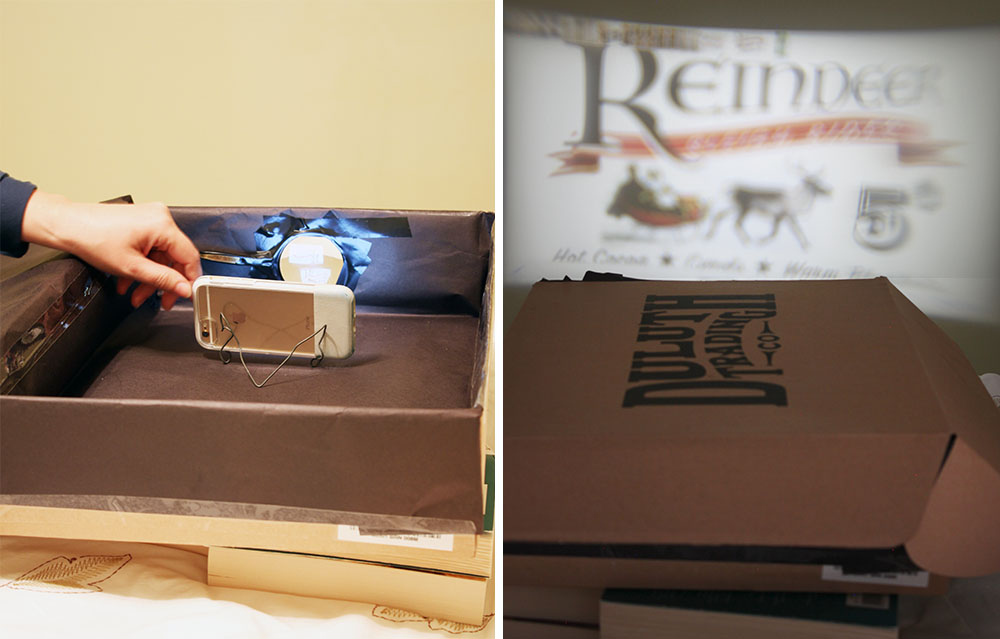
shoebox-projector

I will say that my image isn’t as clear as I expected, but my magnifying glass is old and scratched up. However, it gave me enough information to trace my image. Use chalk to trace around the design.
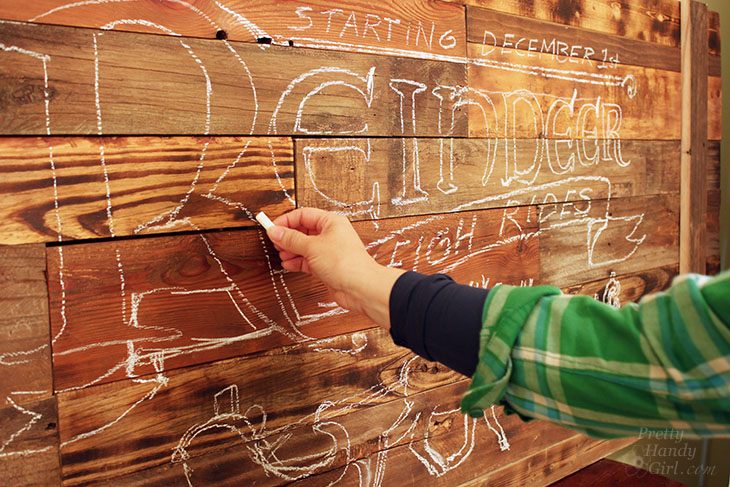
chalk-outline-sign-image

Painting Your Sign:

Now you’re ready to paint your sign. It’s not hard at all, think of it like coloring in the lines of a coloring book. Here’s my video tutorial to help you learn all my tips and tricks while painting signs:

All done? Great! Hang your “new” Vintage Rustic Sleigh Ride Sign with pride.
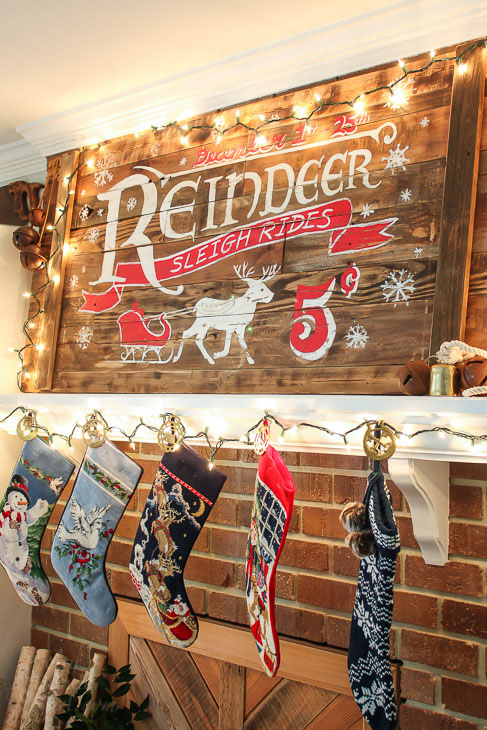
Holiday Home Tour 2016 | Pretty Handy Girl

I won’t let on that you just made it. Let’s let everyone think we scored this fun sleigh ride sign at an antique shop. 😉
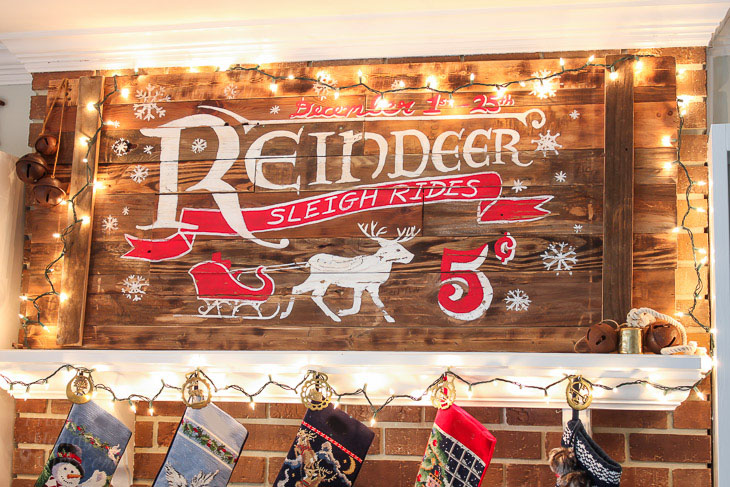
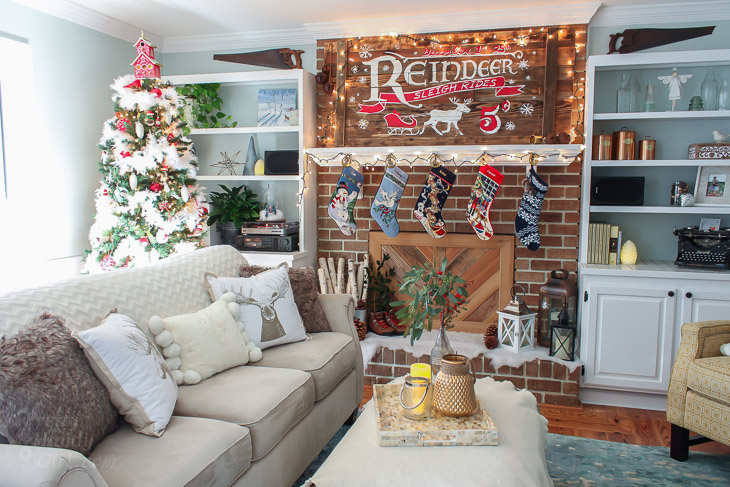
Holiday Home Tour 2016 | Pretty Handy Girl

Holiday Home Tour 2016 | Pretty Handy Girl

Where are you going to hang your vintage rustic sign? I think I’m going to make another one for our kitchen. Maybe a market sign with a pig silhouette?
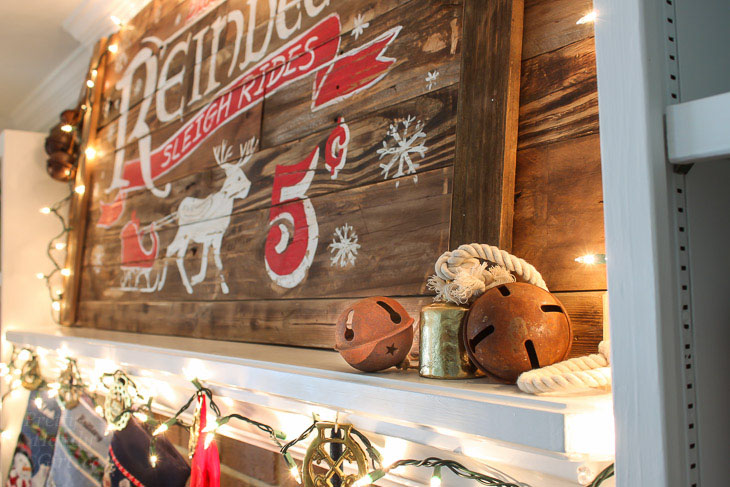
Holiday Home Tour 2016 | Pretty Handy Girl

Hope you are enjoying the holidays!

PHGFancySign


Pin for later!
Add vintage charm to your holiday home with this DIY Reindeer Sleigh Sign | Pretty Handy Girl #DIYholiday #holidayhome #holidaysign

how to build a wood ammo box

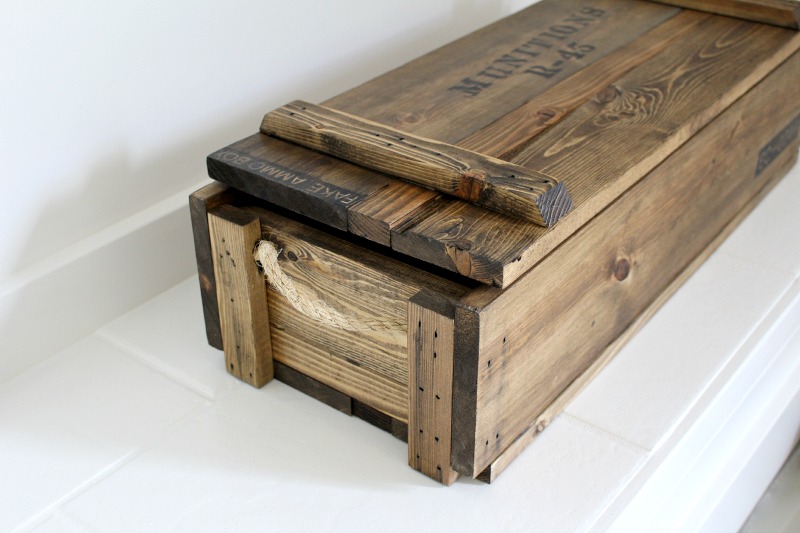
I’m super excited to have Pauline from My Altered State joining us today! It’s been a while since we’ve had a guest on Pretty Handy Girl, and this guest was certainly worth the wait! She’s joining us today to show you How to Build a DIY Decorative Ammo Box! This gorgeous crate may be for decorative purposes, but Pauline studied the construction of real ammo boxes to build it the same way the real ones are built. She’s amazing, and I know you’ll understand why in a minute.

I met Pauline at Haven last year, but I’ve been a fan of her blog way before we met. She is an avid upcycler and loves to use salvage materials in her projects.

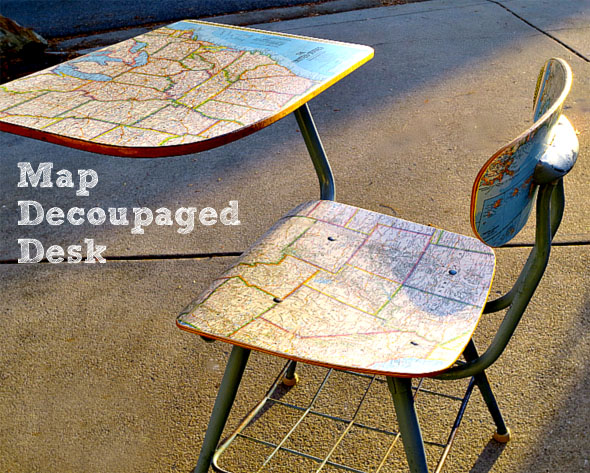
She has so many fabulous projects, I had a hard time picking a few to show you. Like this fabulous Map Decoupaged Desk/Chair!
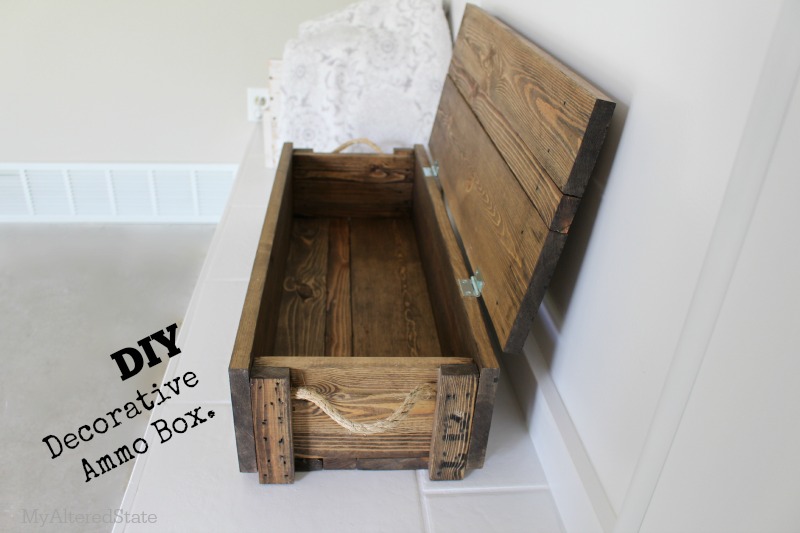
DIY Decorative Ammo Box

Map Decoupaged Desk Chair

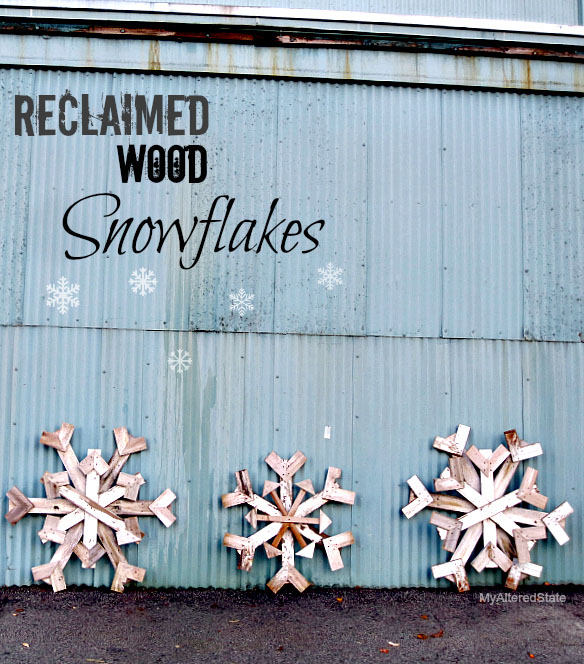
Or these beautiful Reclaimed Wood Snowflakes!
Reclaimed Wood Snowflakes

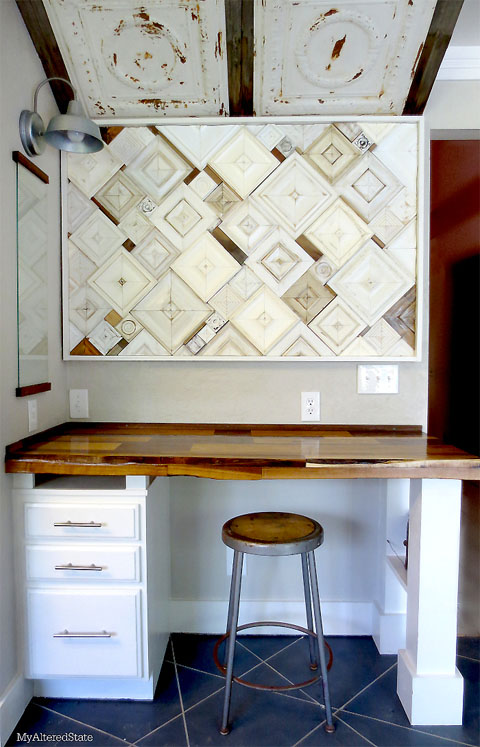
But, by far my favorite DIY project Pauline has completed so far is this desk and art installation in her kitchen!

Kitchen Nook Art Installation

And now, Pauline has an easy and unique tutorial for us today! Please clap, cheer and get on your feet for the amazing Pauline from My Altered State!

page_break_2
When I started blogging, I never dreamed that I would one day meet THE Pretty Handy Girl in person, let alone find myself writing a guest post for her.  So having said that, imagine how excited I am right now as I write my first guest post on Pretty Handy Girl!  Now it’s time to get started.  I hope you enjoy my DIY Decorative Ammo Box project.

ammo box diy

Wooden military ammunition boxes have been a staple in the vintage repurposing and upcycling world for a while. They are a versatile storage item with an industrial flavor, but sometimes they are hard to find. That’s when I get the urge to build.

In an effort to keep this tutorial from being too lengthy, you can find info on finishing and aging wood in this post. Now let’s get building.

DIY Decorative Ammo Box Materials:

To create a box with the dimensions of 27″ wide x 7″ tall x 10″ deep, purchase the following:

  • (2) 1″ x 6″ x 6′
  • (2) 1″ x 2″ x 6′
  • (1) 1″ x 4″ x 6′
  • Rope
  • Gorilla tape
  • Wood glue
  • 2 Hinges
  • Drill
  • Drill bit same thickness of rope
  • Clamp
  • Pencil
  • 2″ nails
  • Nailgun (or hammer)
  • Miter saw

DIY Decorative Ammo Box Cut List:

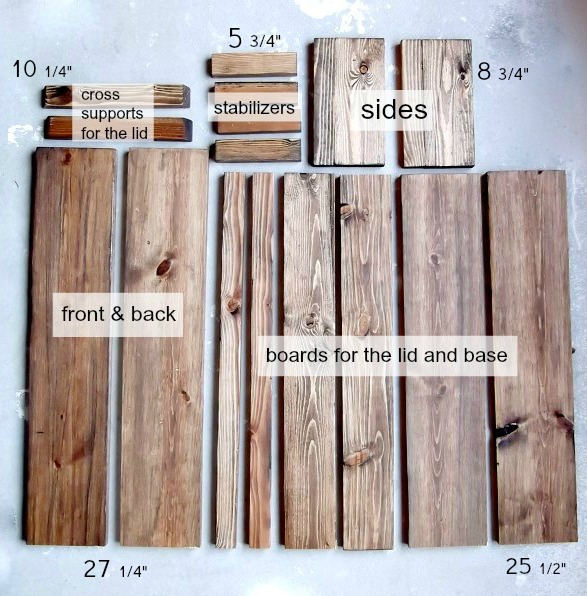
cut list wood ammo box

  • 2 – 1″ x 2″ cut to 10 1/4″ (cut ends at 30 degree bevel as shown above)
  • 4 – 1″ x 2″ cut to 5 3/4″
  • 2 – 1″ x 2″ cut to 25 1/2″
  • 2 – 1″ x 4″ cut to 25 1/2″
  • 2 – 1″ x 6″ cut to 8 3/4″
  • 2 – 1″ x 6″ cut to 25 1/2″
  • 2 – 1″ x 6″ cut to 27 1/4″

DIY Decorative Ammo Box Instructions:

By copying the design of an authentic ammo box, I will show you how to build this DIY Decorative Ammo Box clear down to the way the handles are attached.

Lay out all your pieces for a “dry run” of the design:

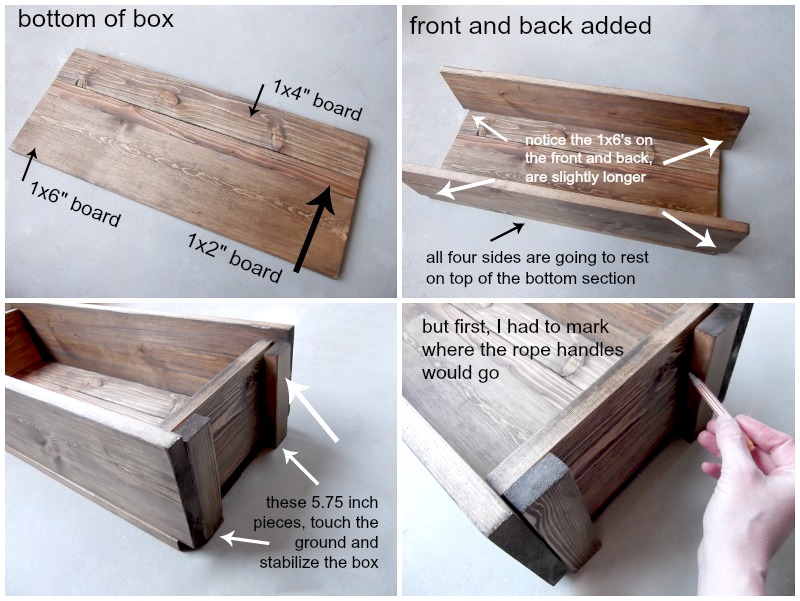
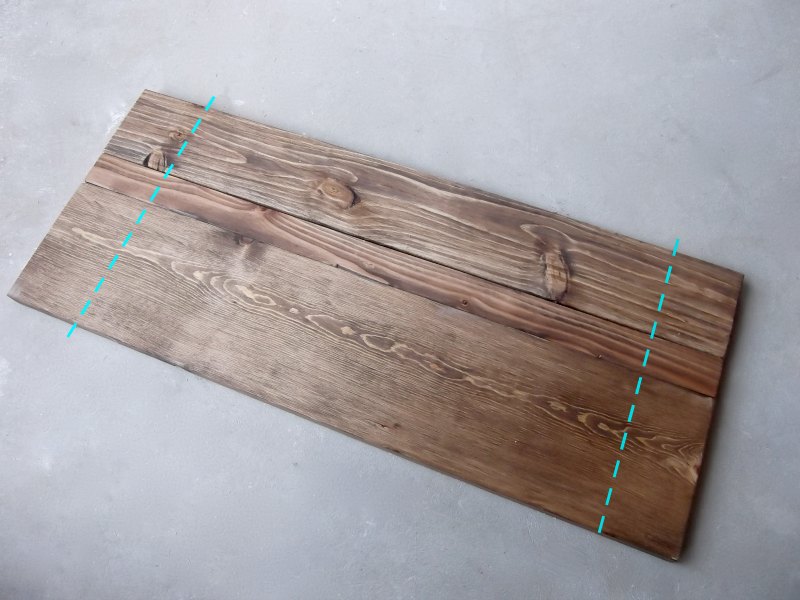
  • Bottom of box: (1″ x 6″ x 25 1/2″) + (1″ x 2″ x 25 1/2″) + (1″ x 4″ x 25 1/2″) boards.
  • Front and Back of box: 1″ x 6″ x 27 1/4″ boards
  • Sides of box (with rope handle): 1″ x 6″ x 8 3/4″ boards

Mark the location for your rope handles (approximately 2″ down from the top of the box.)

assemble wood ammo box

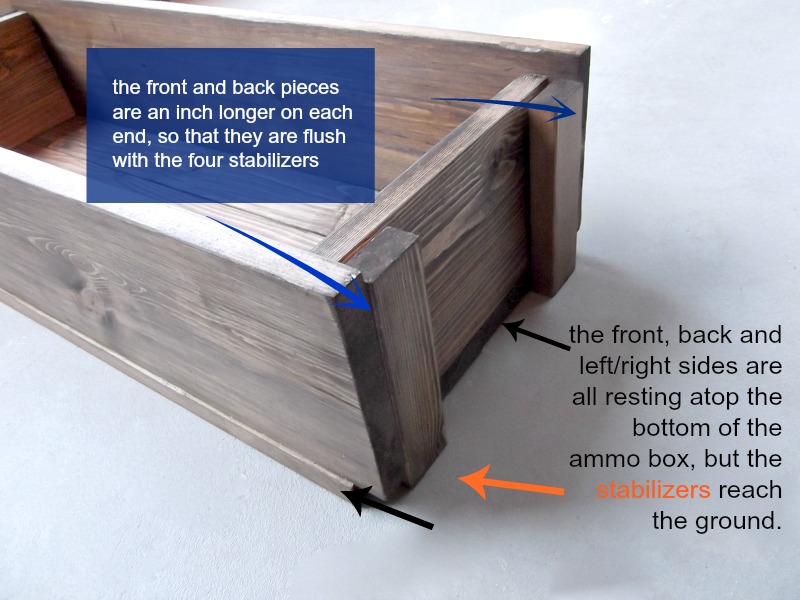
During the dry run, notice that the front and back pieces are an inch longer on each side. The stabilizing 1″ x 2″ pieces will rest on the ground, while the four sides of the box rest on the base.

diy ammo box design

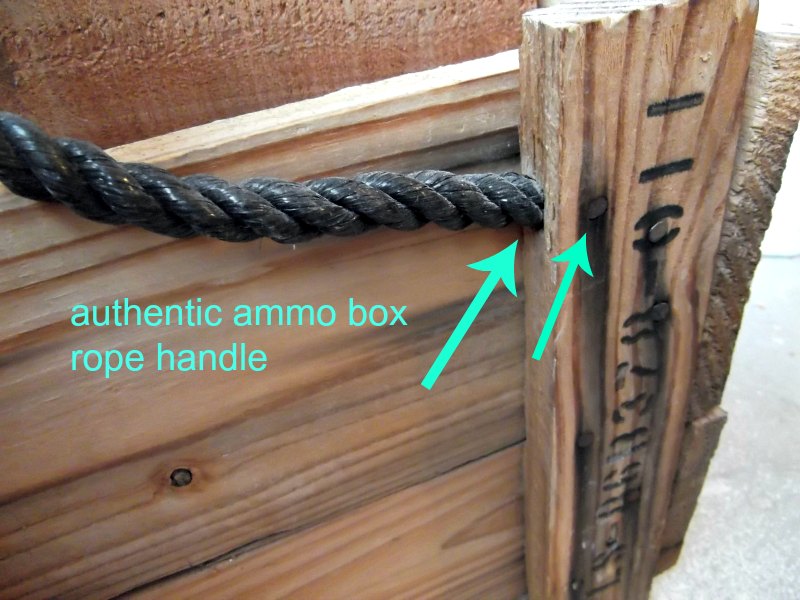
After all the ammo box collecting I’ve done over the years, you’d think I would have noticed how the handles were installed on the real thing. Nope. Never paid attention until now. Here’s a close up of the real thing:

military wood ammo box

A notch is hollowed out where the end of the rope goes, and then secured in place with nails. This design actually keeps any rope ends or knots from being visible on the inside of the box. Clever.

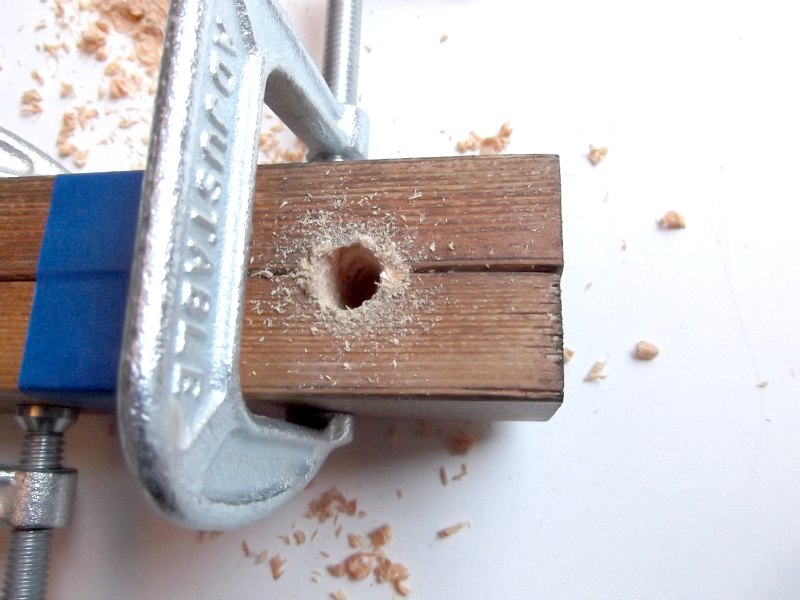
To create the notch, clamp two 1″ x 2″ x 5 3/4″ stabilizer pieces together. Use the drill bit to drill a hole directly in between the two pieces of wood. Repeat using two more 1″ x 2″ x 5 3/4″ pieces.

drill holes for rope handles

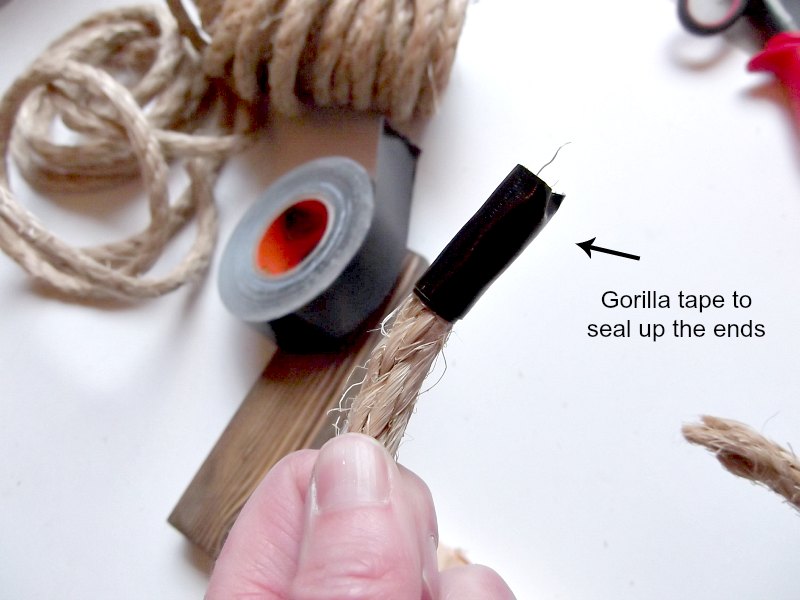
Use Gorilla Tape (or duct tape) to seal the end of the rope and keep it from unraveling.

rope handle wooden box

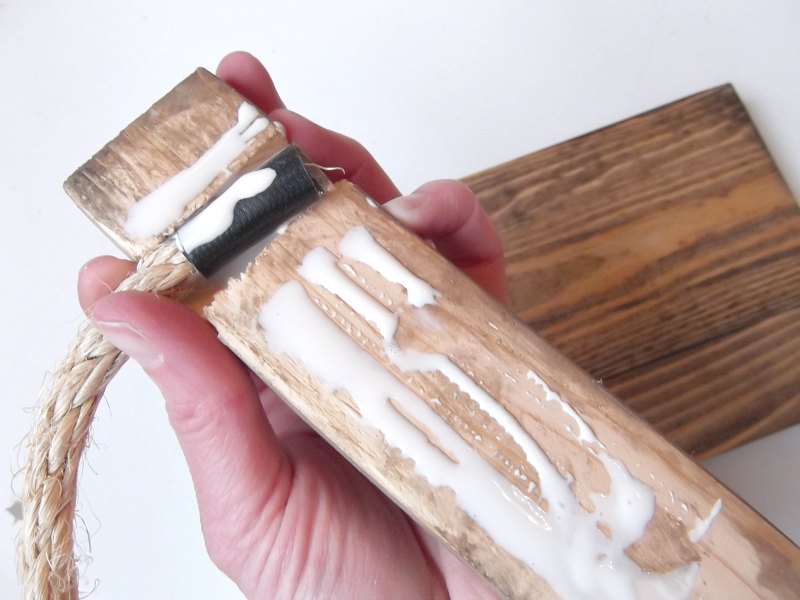
Rest the end of the rope into the notch of the stabilizer 1″ x 2″ and add wood glue to the stabilizer and the taped rope end.

wood glue diy ammo box

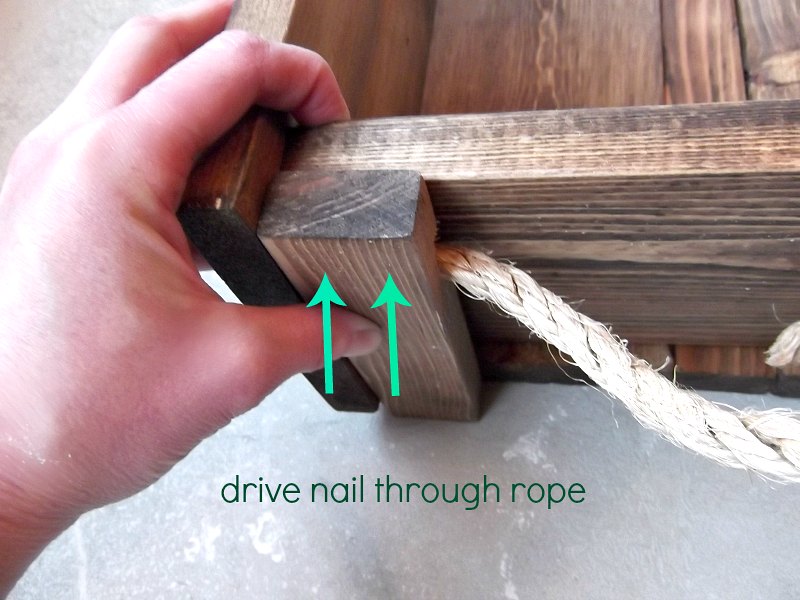
While holding the handle (stabilizer) pieces in place, drive the first nails through the wood, into the rope end and into the side of the box.

ammo box handles

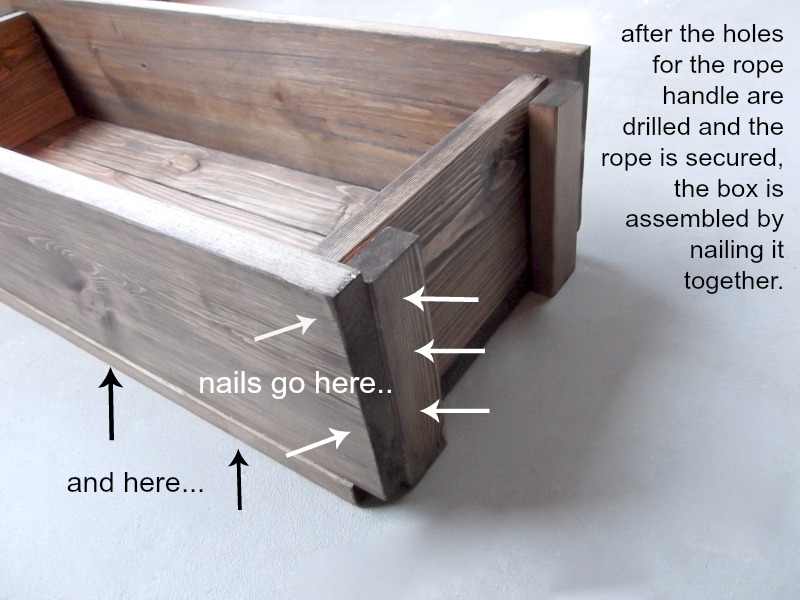
After driving two nails into the stabilizer pieces to secure the rope, drive two more nails through the front and back of the box, into the sides of the stabilizer pieces (as shown below.) Then go ahead and glue/nail all the sides together, while keeping it rested on top of the bottom boards.  (This will help you keep everything aligned and square.) Once all the sides are nailed together, flip the whole box upside down, and glue and nail the bottom boards into the frame of the ammo box.

diy ammo box secure sides

Assembling the lid:

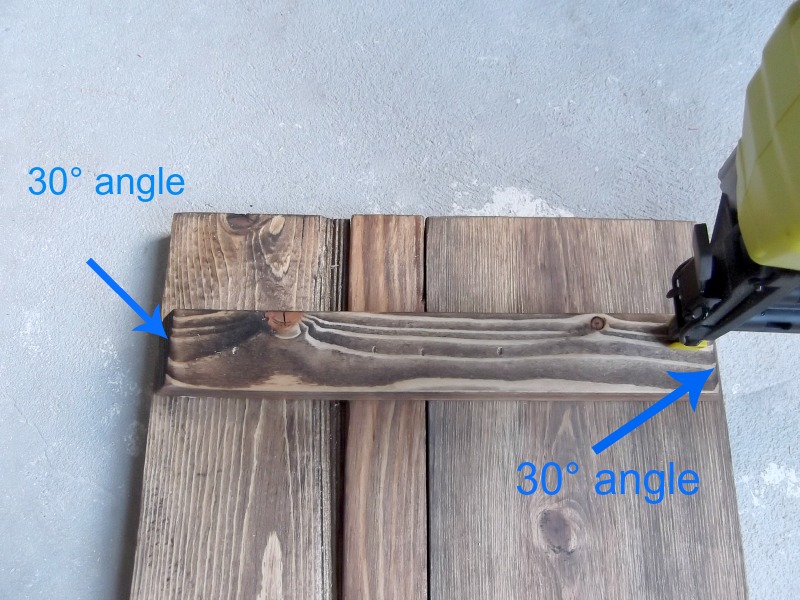
The three lid boards are identical to the boards on the bottom of the box: (1″ x 6″ x 25 1/2″) + (1″ x 2″ x 25 1/2″) + (1″ x 4″ x 25 1/2″) The lid boards are secured together by the two 1″ x 2″ x 10 1/4″ cross supports (the two pieces with both ends beveled at 30°.)

wooden ammo box lid

Nail on the cross supports about 2″  from outside ends of the lid.

ammo box lid

Attach the lid:

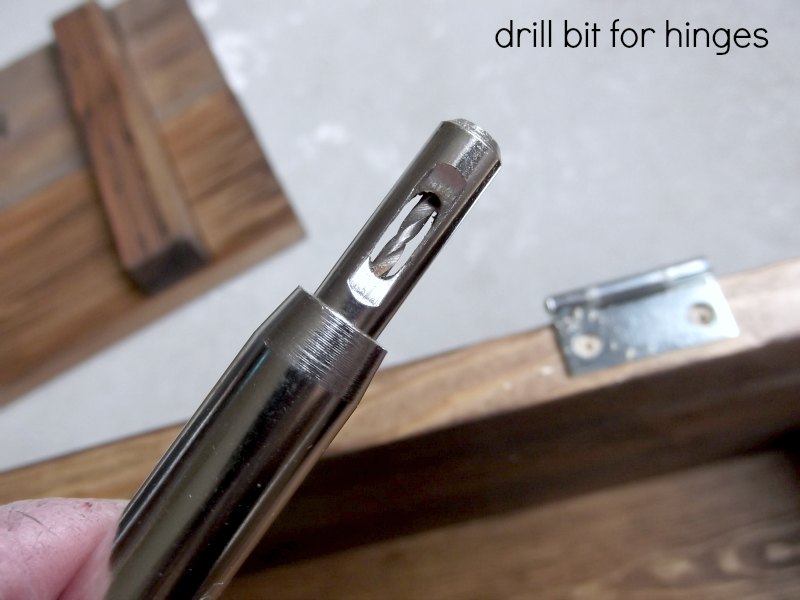
For a long time, if there were hinges involved in a project, I walked away in tears.  That is, until I discovered this little invention: a drill bit for hinges (affiliate link). I can’t say it enough as this little guy has saved my sanity a thousand times over.

Drill holes for the hinges, about 5 1/2″ from the outside edges of the box, and attach the hinges to the box and the lid.

drill bit for installing hinges

And that’s it!

how to build a wood ammo box

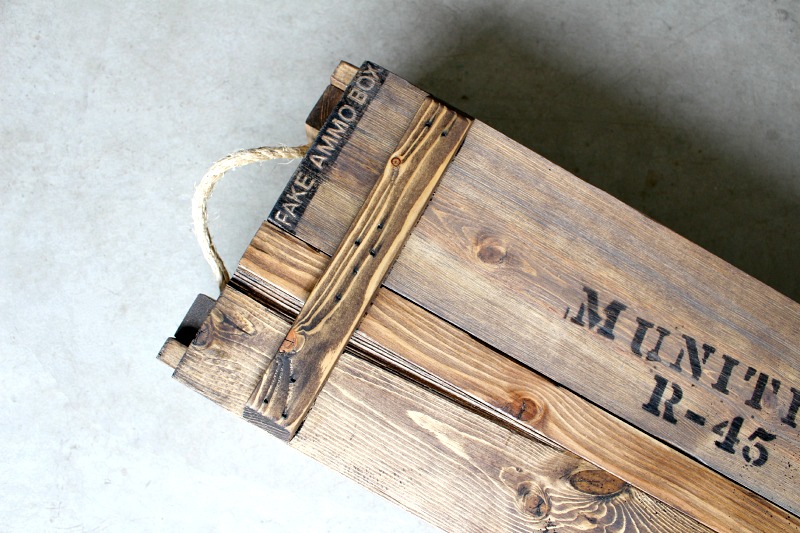
You’ve got yourself an ammo box, that has never actually held ammo.  What will you do with yours?

faux ammo box

I can think of a lot of other things that I might hide inside this box, like Wii remotes.  (After I add a lock, of course.)  😉

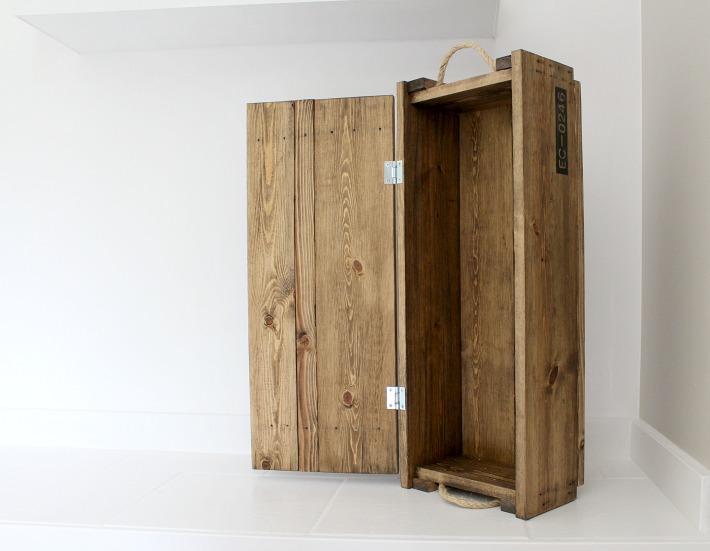
Visit this tutorial for the “how to” on the stain/distressing techniquefor this ammo box, where you’ll find great tips on aging wood with stain.

open ammo box

Hope you enjoyed!

Did I tell you Pauline is amazing or what?!

PHGFancySign

How to Paint a Deck Mandala Tattoo | Pretty Handy Girl

How to Paint a Deck Mandala Tattoo | Pretty Handy Girl

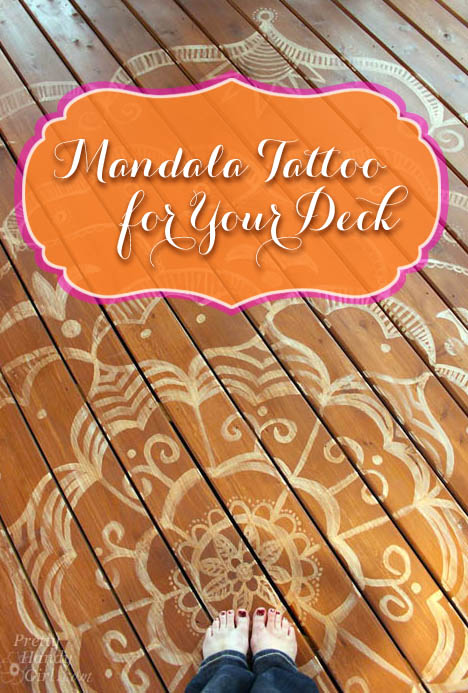
As promised, I’m back today to show you how to paint a giant mandala tattoo on your deck. Painting a design on your deck can turn an ordinary deck into a beautiful retreat. Add a few colorful accessories and you’ll have a backyard Bali getaway! Creating the mandala is a lot easier than it looks. Ready to get started?

Materials:

Instructions:

Pre-stained your deck with one coat of Thompson’s Waterseal Semi-transparent stain. (I used Acorn Brown.) Allow the stain to dry.

How to Paint a Deck Mandala Tattoo | Pretty Handy Girl

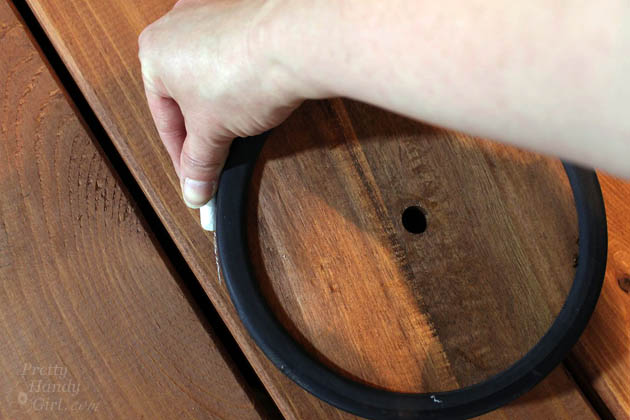
Choose the location for the center of your design. Trace around a small circular object or use the tack and string to trace a small circle.

How to Paint a Deck Mandala Tattoo | Pretty Handy Girl

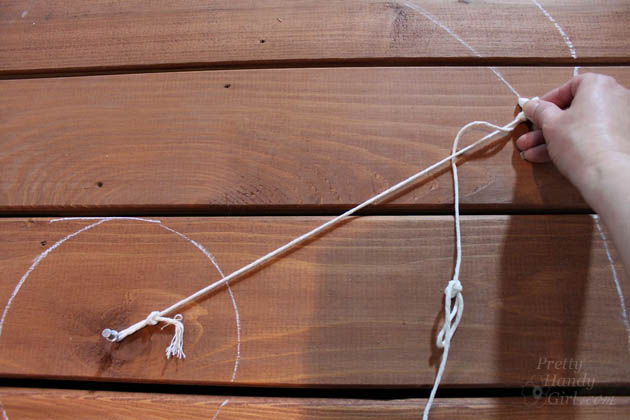
Place the thumbtack in the center of the small circle and draw circles radiating out from the center. Try to add more distance from the previous circle as you go outward. (i.e. 3″ from the center, 6″ from the inner circle, 10″ from the 2nd circle.)

How to Paint a Deck Mandala Tattoo | Pretty Handy Girl

Divide your inner circle into eight sections and make a chalk tick marks. Read more

Bali Dream Deck for Thompsons Water Seal | Pretty Handy Girl

Bali Dream Deck for Thompsons Water Seal | Pretty Handy Girl

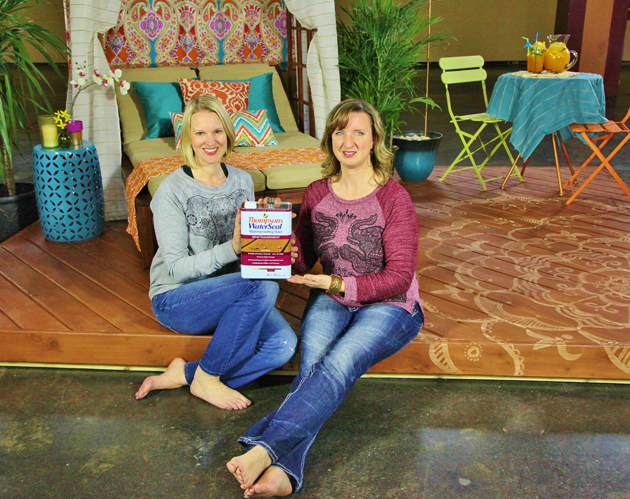
Last month while most of the US was under heavy blankets of snow and ice, I flew to Dallas. I was hoping to find warm temperatures and lots of sun. And if I couldn’t find any, I’d create my own with my sister, Caitlin’s help. Thompson’s WaterSeal asked me to design a dream deck and told me to bring an assistant. Normally I work alone, but when I need help with design and décor I know I can always count on Caitlin. Some of you may remember when Caitlin and I worked together on renovating this beach condo. Caitlin is the talented designer behind Symmetry Designs.

Bali Dream Deck for Thompsons Water Seal | Pretty Handy Girl

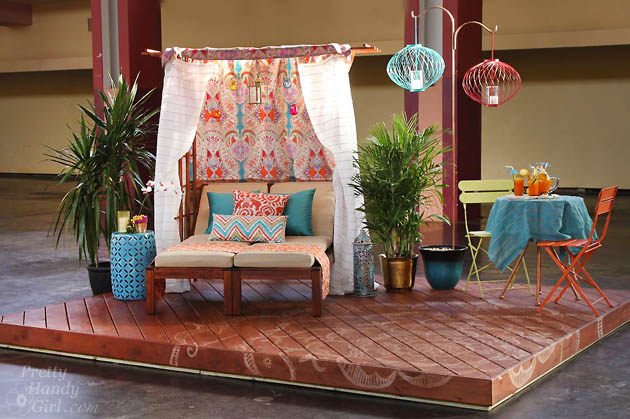
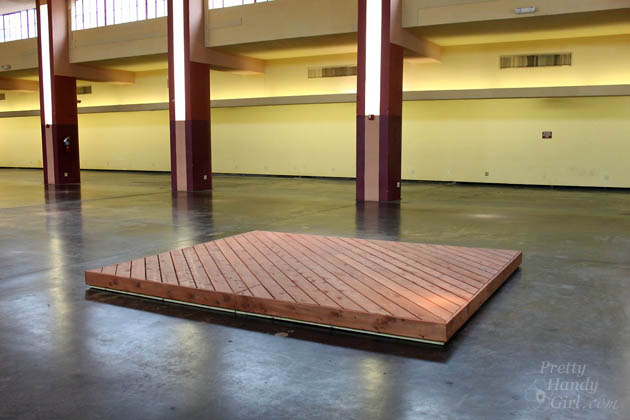
When we arrived, the weather was mild, but we were still craving some warm sunshine. We decided to create a Bali getaway destination on our Thompson’s WaterSeal Deck. We started with a clean slate deck pre-stained with Thompson’s WaterSeal Semi-Transparent Water Proofing Stain in a beautiful Acorn Brown color.

Bali Dream Deck for Thompsons Water Seal | Pretty Handy Girl

Joining us were Beckie from Infarrantly Creative with her assistant Erin and Ashley & Jamin from The Handmade Home. They also had a blank slate deck to design.

Bali Dream Deck for Thompsons Water Seal | Pretty Handy Girl

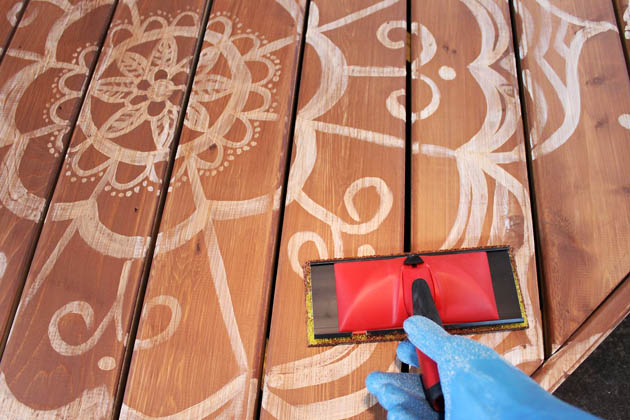
The first thing Caitlin and I did was paint a giant white mandala “tattoo” on our deckRead more

How to Refinish Wood Floors without Sanding | Pretty Handy Girl

How to Refinish Wood Floors without Sanding | Pretty Handy Girl
How to Refinish Wood Floors without Sanding

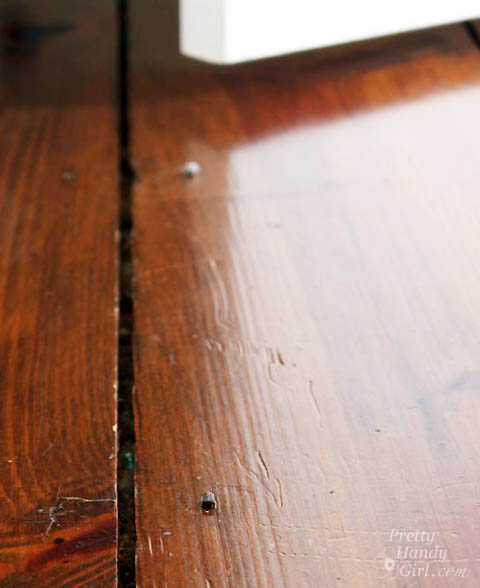
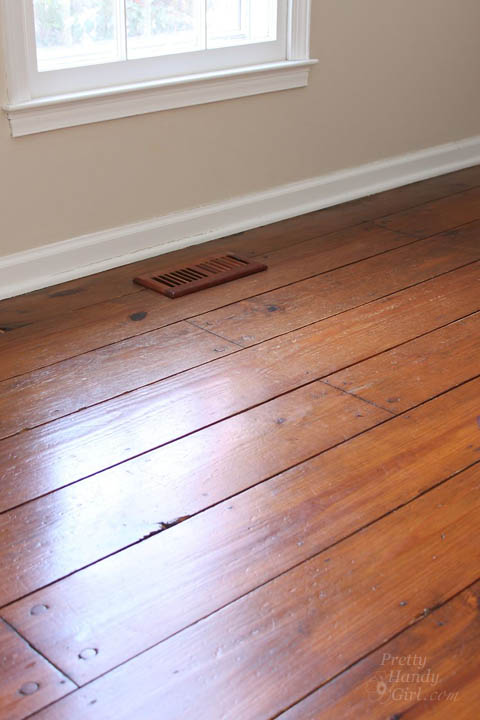
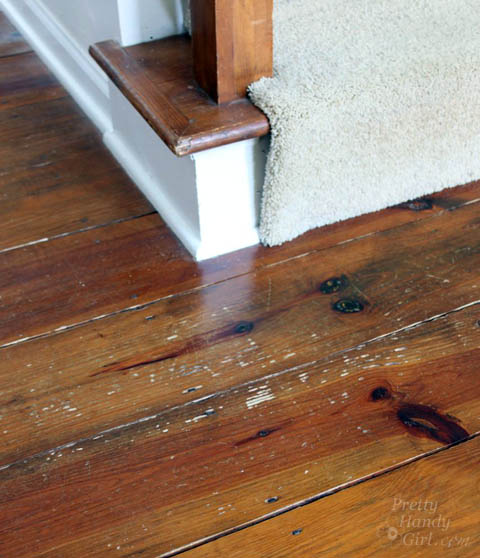
I love our antique heart pine floors! They are beautifully distressed. The round pegs and square nails securing them in place add loads of character. However, the square nails sit flush with the surface preventing us from ever being able to refinish them with a sander. The nails would tear up the sandpaper in no time. But, that’s no problem because I know a way to Refinish Wood Floors without Sanding!


How to Refinish Wood Floors without Sanding | Pretty Handy Girl

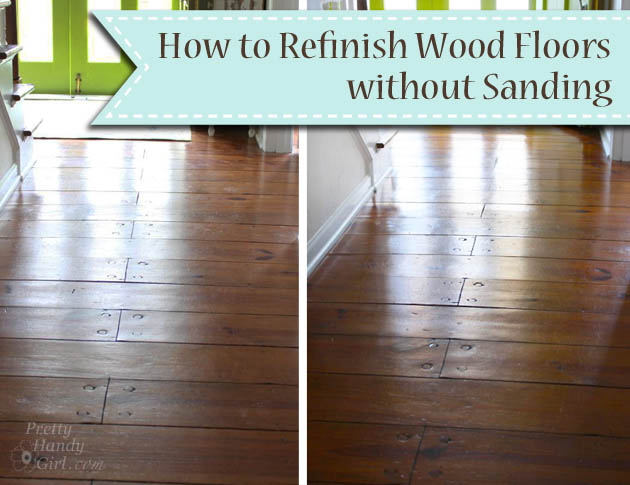
From time to time, our floors start to look dull…

How to Refinish Wood Floors without Sanding | Pretty Handy Girl

…and the scratches are more noticeable. This is when I know it’s time to refinish them.

How to Refinish Wood Floors without Sanding | Pretty Handy Girl

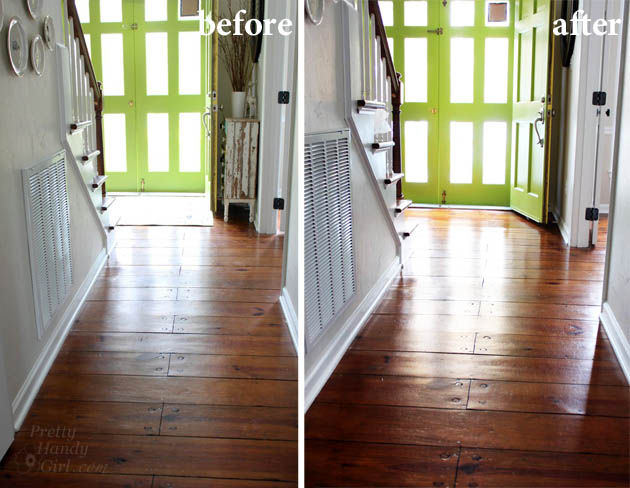
The first time I refinished our floors, it was several years ago when we were painting the office and dining room. I decided to try to refinish the floors because the rooms were already devoid of furniture. Several neighbors had recommended Bona® Hardwood Floor Cleaner and Bona® Hardwood Floor Polish. I was skeptical, but the results were beautiful floors that had luster, but still showed their beautiful age.

Before and After Finishing Wood Floors without Sanding | Pretty Handy Girl

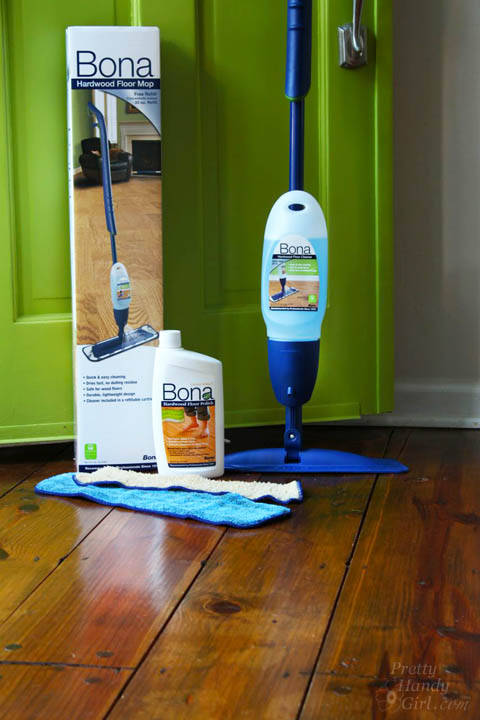
The Bona® Hardwood Floor Cleaner did a fabulous job of cleaning the floor without damaging them. And, the Bona® Hardwood Floor Polish provided a strong finish without any waxy build up. The high gloss protective layer adds some shine, but isn’t overly shiny. The polish also fills micro-scratches, evening out the appearance of the floor.

How to Refinish Wood Floors without Sanding | Pretty Handy Girl

Fast forward to this past week when Bona asked me to write a sponsored post for them, I jumped for joy because I already use and love the Bona® Hardwood Floor Products! (Here’s my full disclosure: Yes, this is a sponsored post. No, I was not told what to write. And yes, I probably would have blogged about my experiences using Bona® Hardwood Floor Products at some point anyway. Win-win.)

I highly recommend trying the combo of the Bona® Hardwood Floor Cleaner and the Bona® Hardwood Floor Polish before spending huge amounts of money to have your floors refinished. (Bona® Hardwood Floor Cleaner & Polish will not work on floors that have an oil or wax coating. Test in an inconspicuous area to be sure it will work for your floors.)

Here’s how to Refinish Your Wood Floors without Sanding:

Materials:

(I’ve included affiliate links for your convenience. I earn a small percentage from a purchase using these links. There is no additional cost to you. You can read more about affiliate links here.)

Instructions for Cleaning the Wood Floors:

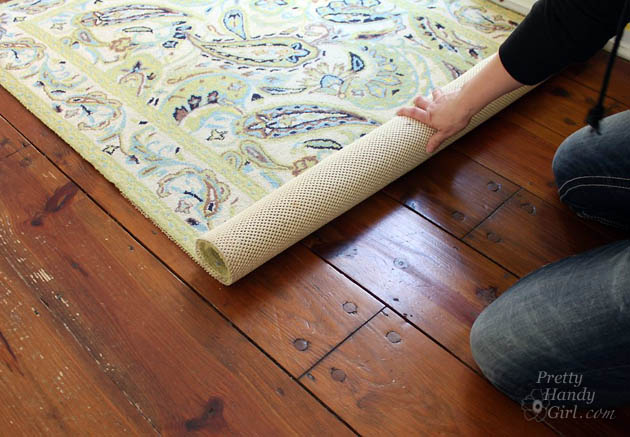
Remove all rugs and furniture from the room. If you have heavy furniture pieces that are never moved, you can leave them in place.

How to Refinish Wood Floors without Sanding | Pretty Handy Girl

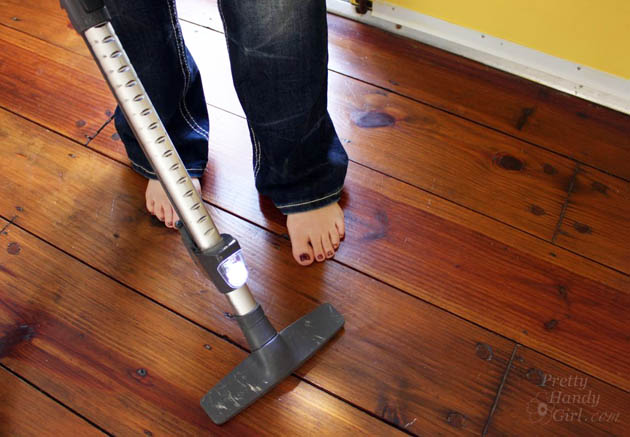
Vacuum or sweep the floors to remove all dirt and debris.

How to Refinish Wood Floors without Sanding | Pretty Handy Girl

Assemble your Bona® Hardwood Floor Spray Mop as shown here: Read more