Today I’m working on attacking the persistent weeds that takeover our patio and pathways. My natural weed killer recipe works so well it puts those commercial weed killers to shame. Would you believe that the main ingredient is regular household vinegar? Continue reading to find out how I make vinegar-based weed killers without using any toxic chemicals and stop those annoying weeds before they grow out of control.
Recently I was in Home Depot looking for an ivy and brush killer. While I was perusing the chemical weed killer section looking for a specific herbicide (for that one stubborn weed we have) a guy decided to share with me the best general weed killer in his opinion. I looked at him and thanked him but explained that’s not what I was looking for, besides I like to avoid harmful chemicals in my yard. But, he continued and insisted on mansplaining to me what I needed to buy.
Finally I turned to the mansplainer and told him I use a DIY weed killer that is all natural and homemade using everyday household items. Bonus: it costs a lot less than his favorite commercial product. His eyes widened and his assertiveness turned to curiosity. He asked me to tell him more about my non-toxic ways. That’s when I shared my weed killer with 3 Simple Ingredients Natural Weed Killer.
A little background before you rush to make the weed killer. We live on a wooded lot with lots and lots of weeds, I’ve tried many methods to control weeds. (I’ve even tried a weed torch method, but it took a lot longer than a weed spray.) Instead, I use a natural 3 ingredient weed killer that works 98% of the time. It works fabulous on almost everything. But, we have a few weeds that require a little extra: English Ivy, Poison Ivy, and Japanese Stiltgrass. (I previously shared the easiest way to kill English ivy here.) Unfortunately, the Stiltgrass and Ivy requires a stronger herbicide (thus the reason I was in Home Depot to begin with.)
Mix 1 gallon white vinegar, 1 cup of salt, and 1 teaspoon of dish soap in a garden sprayer (or mix a smaller batch and put it in a spray bottle.) Note: our sprayer holds 2.5 gallons, so I usually mix up a double batch.
Spray over weeds you want to kill. This works best on a sunny day with no threat of rain. Be careful not to spray on any plants or bushes you want to keep. And pay attention to where the spray will run off when it rains. I also don’t use a lot, only enough to saturate the weed.
Within a few hours, you’ll see the weed killer working! It’s seriously that easy and this effective.
Tips to Help Get the Best Results and Kill Weeds Faster and More Effectively:
Over the years I’ve learned how to stop weeds fast and prevent them from growing out of control in my own yard. These are the tips that help us control weeds:
Lay down ground covers like mulch, pine bark, or pine needles in garden beds
For better weed control, use a weed barrier under the mulch (we like to use flattened cardboard boxes instead of landscape fabric)
When using the homemade weed killer recipe, it helps to spray annual weeds while they are small
Choose a dry sunny day with no rain in the forecast
Avoid spraying close to nearby plants you want to keep
Avoid spraying large amounts of the weed killer on a slope where it might run off into a desired plant bed
Pull taller more-established weeds before they go to seed
If they have small seed pouches, lay the pulled weeds out in the sun to dry before disposing of them in a natural area
Alternatively, bag really invasive weeds and dispose of them (this should be a last resort option)
I hope you find this the easiest way to eliminate a wide variety of weeds from your yard.
These DIY modern house number sign ideas are stylish, easy to make, and perfect for adding an elegant boost to your home’s exterior.
Common Supplies Needed for DIY House Number Signs
Here are some of the most common supplies you may need to make your own custom sign. Most of these simple materials you can find at the craft store, or big box store, such as Home Depot or Lowe’s. Find the right material for your project.
Materials:
(I’ve included affiliate links for your convenience. I earn a small percentage from a purchase using these links. There is no additional cost to you. You can read more about affiliate links here.)
Now that we’ve talked about some of the supplies you may need for your diy address sign, let’s take a look at these DIY house number sign ideas.
Easily make your own sign to add charm, elegance, and style to your home.
DIY House Number Sign Ideas
DIY house number sign ideas are an inexpensive way to upgrade your curb appeal while adding a touch of elegance to your home’s exterior. With endless design ideas, from rustic wood and metal accents to modern minimalist looks, you can create a personalized sign that’s stylish, budget-friendly, and uniquely yours.
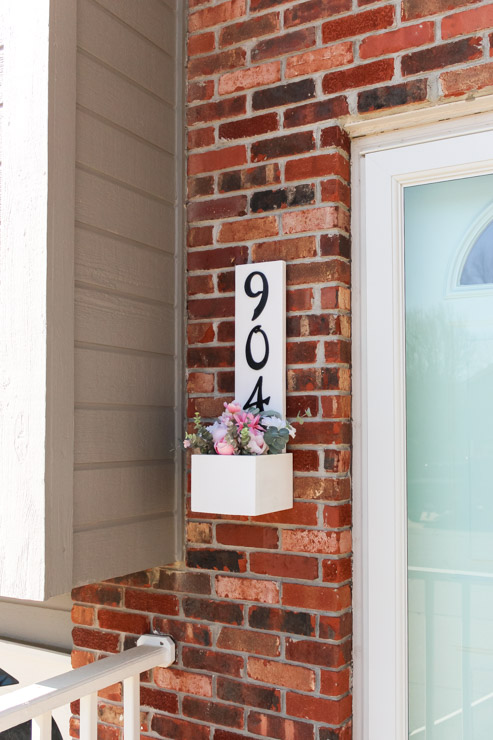
Learn how to build your own DIY house number planter box with scrap wood and your choice of address numbers. Change the flowers out for each season. It's a great way to add a pop of color.
Learn how to create a DIY modern house number sign with this step-by-step tutorial. Hang it next to your front door for an easy way to refresh your home’s curb appeal.
If you’ve been wanting a new address sign, this diy project tutorial is for you! It’s one of the easiest DIY's and it makes a big impact. Add your own style with the wood stain and number style.
Learn how to make a modern address sign with a planter box. With this tutorial and little bit of elbow grease, it's an easy DIY that adds charm and greenery to your home’s entrance.
https://prettyhandygirl.com/wp-content/uploads/2025/08/DIY-House-Number-Sign-Ideas-2.jpg12001200Michelle Jameshttps://prettyhandygirl.com/wp-content/uploads/2021/07/PHG-logo-tagline-2020-1030x211-R.jpgMichelle James2025-08-30 07:00:002025-08-29 18:26:34DIY House Number Sign Ideas to Instantly Boost Your Curb Appeal
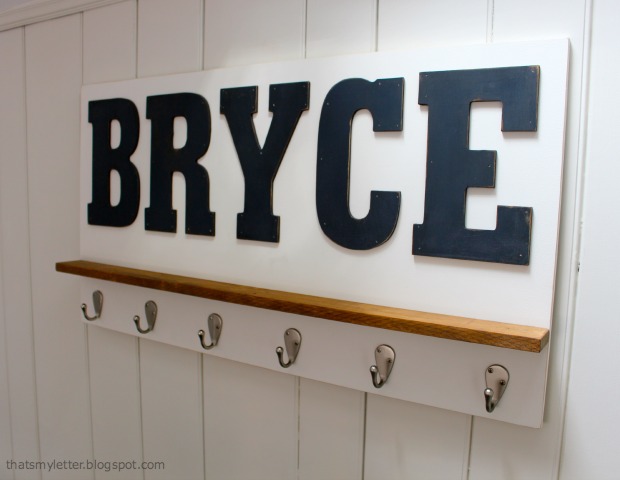
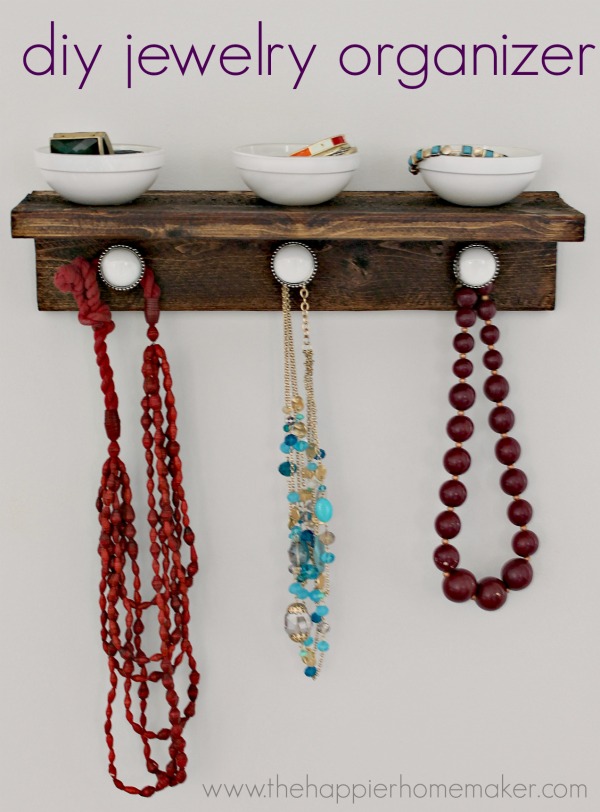
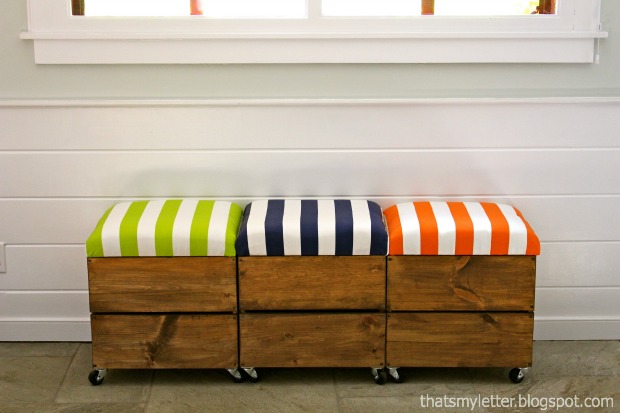
Looking to upgrade your teen’s room? Or do you need some inexpensive ideas for your college kid’s living quarters? This roundup features 20+ DIY furniture, storage, and decor ideas perfect for creating a stylish, functional, and personalized space for your teenager’s room.
Easy Builds for Your Teenager’s Room
Transforming your teen’s room into a space that reflects their personality and needs can be a fun and rewarding experience.
Creating mood boards is a perfect starting point where you can work together to visualize the space.
These 25 easy builds are a great way to dive into DIY projects that add both function and flair. And who knows, maybe your teen will want to help you with the project and spend time with you. (A parent can dream, right?!)
From bold accent walls in bright colors to clever storage solutions that double as a focal point, each idea helps bring your vision to life.
Whether you’re updating the color scheme, creating a cozy study area, or just adding personal touches, these simple upgrades are perfect for making your teen’s room truly their own.
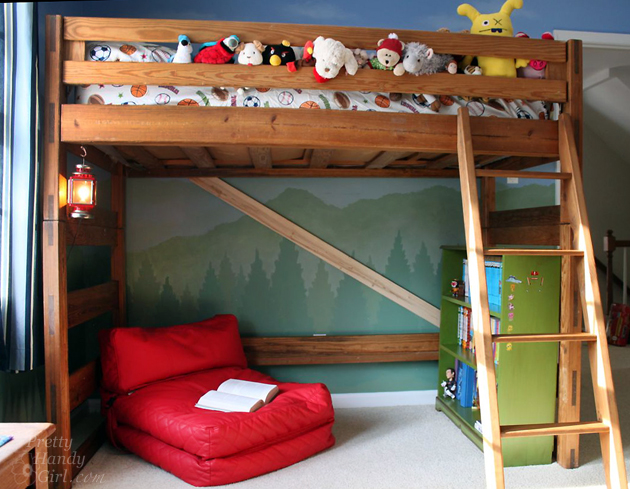
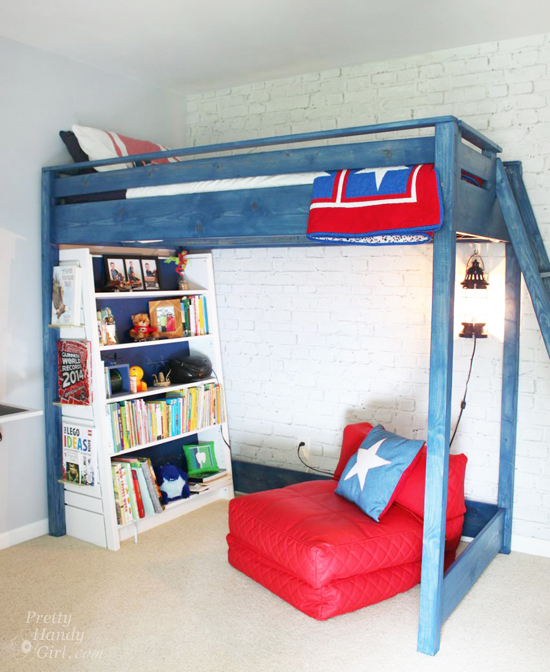
Learn how to turn a bunk bed into a loft bed to maximize space and create a sleek, modern overall look. Create a cozy, personal space with floor cushions.
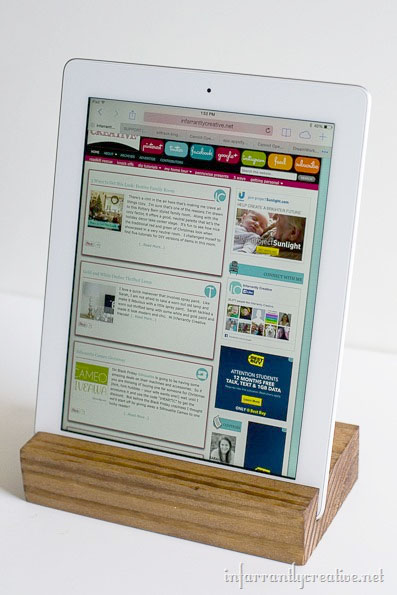
This scrap wood iPad tray is a simple and functional DIY project that's perfect for a teenager’s room—great for homework, movie nights, video calls, or filming their makeup tutorial. Hey, even an adult would love this simple iPad tray.
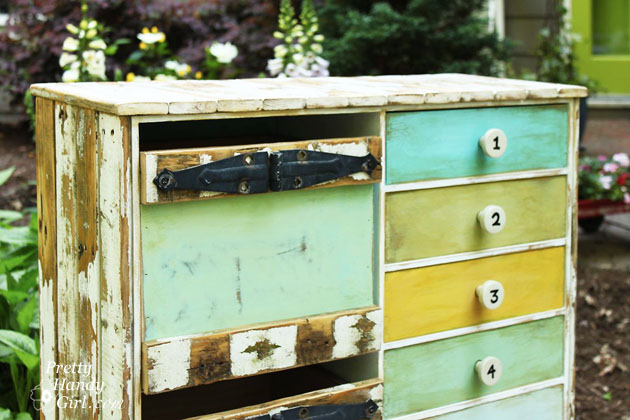
Build custom rustic wooden box crates for a good place to reduce clutter, store small items, or create a custom box drawer. They will certainly add both charm and function to any space.
Learn how to build a tall and skinny storage cabinet that's perfect for tight spaces. It’s a great place for storing small items while maximizing vertical space.
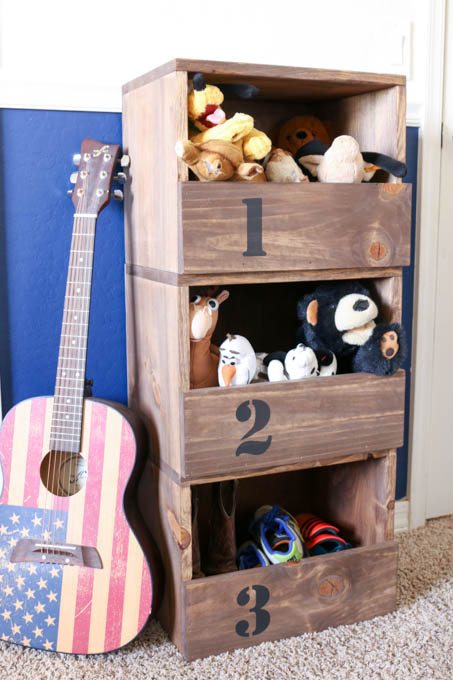
These DIY stacking storage cubbies are a smart and space-saving solution for organizing a teen’s room. Perfect for adding a unique style to a teenager’s bedroom to organize books, accessories, or small items.
This wall-mounted desk tutorial is perfect for creating a functional study area for a young adult. Pair it with adjustable lighting and a comfortable chair for the ideal workspace.
These DIY gift caddies made from scrap molding are an easy way to package small gifts, use as a dorm bathroom tote, or organize supplies—perfect for any occasion or space.
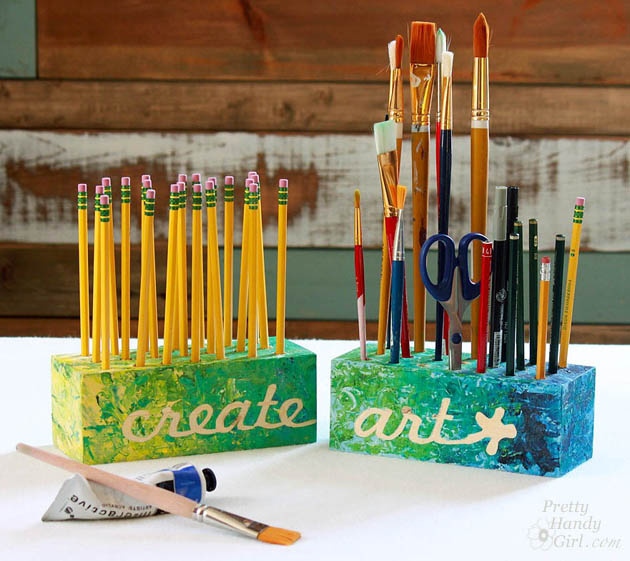
This creative block desk and art utensil holder is the perfect workspace companion, combining functionality and style. Paint simple 2x4 blocks in a bold color or personalize it with your teen's favorite colors.
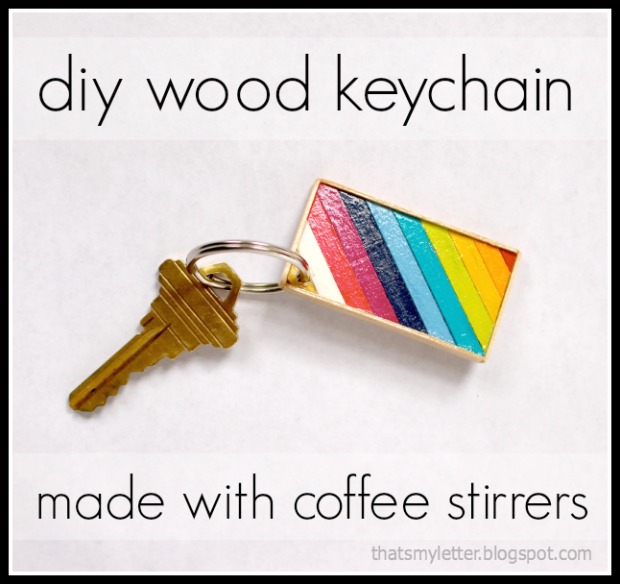
The DIY colorful coffee stirrer keychain is a fun and vibrant accessory that lets you carry a splash of your favorite colors wherever you go. Dress up your student's dorm room key or car keys with a custom keychain.
The DIY blue loft bed for my son’s room is a stylish and space-saving solution perfect for teenage boys, combining comfort and functionality. The build may take a day or two, but the loft will last a lifetime.
This DIY platform bed is perfect if you need a new frame for a larger mattress, or you need an extra bed frame for a guest room or your college kid's first apartment.
The DIY cedar underbed storage maximizes available space while adding a natural, fragrant touch to keep a room organized and clutter-free. Make it custom to fit anything that needs stowing away.
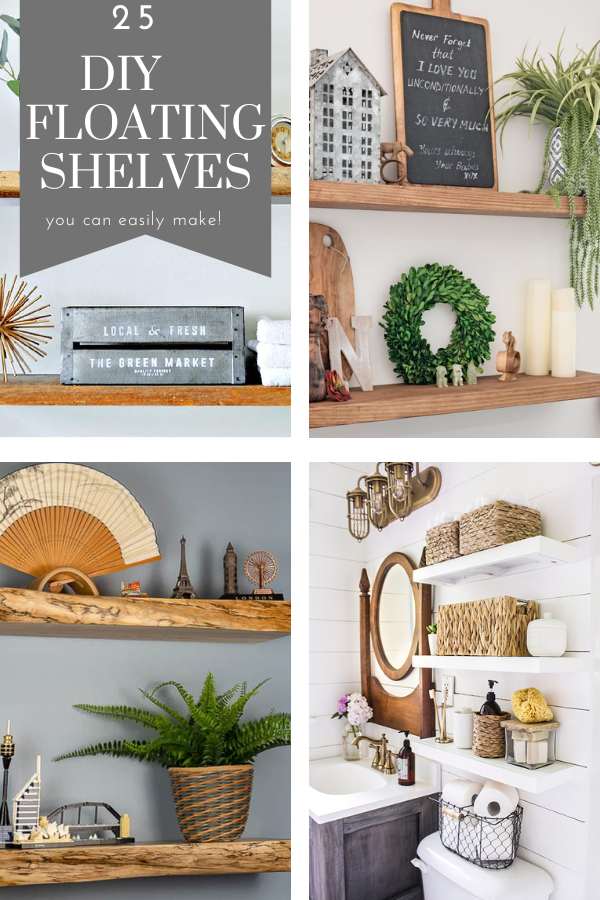
Open shelves are still trending. Discover 25 amazing DIY floating shelves that create a stunning focal point while saving valuable floor space in any room.
The DIY wall bookshelf is a practical and stylish way to display favorite books, comic books, music, or magazines while saving floor space and enhancing the room’s decor.
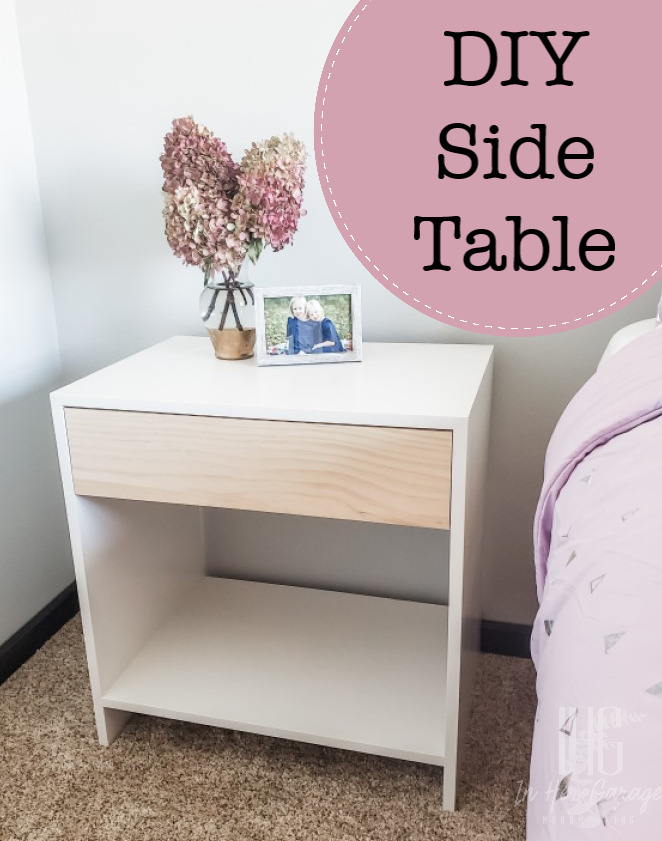
This easy wood crate nightstand and bookshelf combines rustic charm and functionality, offering versatile storage that fits perfectly in any bedroom. It's also super simple to create.
Learn how to build a rolling storage seat that fits perfectly in the closet space, providing a cozy spot with throw pillows and a handy place to store school supplies.
I hope you enjoyed this post all about easy builds for your teenager’s room. Hopefully, you found a fun DIY project to help refresh and personalize your teen’s space.
Be sure to pin this image to save it to Pinterest to refer to later.
You may also enjoy these easy crafts and DIY projects:
When you have a small bathroom with limited counter space and need to maximize storage, you may be tempted to run to the container store or your local big box store to buy some cheap plastic storage solutions. But, oftentimes you end up with more wasted space and less money. Instead I’m going to show you how to create your own custom sink organizers with a custom drawer unit and a shelf using inexpensive storage bins from the dollar store and some scraps of wood. Plus, we’ll take advantage of vertical space and offer you the best solution for storing everything in a limited space. Sound good? Read on to learn how to make these DIY-friendly under-sink storage solutions.
DIY Under Sink Cabinet Storage Idea for a Small Bathroom
Our downstairs powder room may not be a primary bathroom, but it has to function as storage for cleaning supplies, bathroom essentials, toilet paper, extra soap, hand towels, and other small toiletries. Recently, I got fed up with the mess in the sink cabinet and decided to use up some of my wood scraps in the shop and create better storage in the limited space.
Measure Under Your Sink
To begin you’ll need to take the measurements inside your sink vanity. Empty everything out from the under-sink area. Measure the width, depth, and the height. Then make note of where your sink drain pipe extends down. Now decide where enough space exists for some plastic drawers or shelving.
Plan Your Storage Needs:
Assess your storage needs and search for a few bins that will work ask storage drawers under your sink. Chances are you may already own bins or baskets that will work for this project. You will need to make sure they have a lip along the top of the bin in order for this storage solution to work. But, you could also alter the plans and create a little shelf unit instead.
If you don’t have bins already, you can definitely purchase inexpensive bins from the dollar store (or a yard sale, thrift shop, or Walmart.) I purchased all three of the clear storage bins above from the dollar store for $4.83 total! If you don’t have a Dollar Tree near you, these are similar to the ones I bought.
Materials, Tools, & Supplies
(I’ve included affiliate links for your convenience. I earn a small percentage from a purchase using these links. There is no additional cost to you. You can read more about affiliate links here.)
Instructions to Build Custom Under Sink Storage Solutions
A great way to assess your cabinet space is to draw up plans using your cabinet measurements before you begin. For simple builds, you can use pencil and paper. For a more complicated build, try using a program like SketchUp.
Drawing Plans for Your Storage Cabinet
Keep in mind, you’ll need two sides (3/4″), a top (3/4″), back (1/4″), and slats (1/4 – 3/8″) to act as runners for your storage bin drawers. (A quick note about rip cutting your scrap wood: you can use a table saw, band saw, track saw, or a circular saw with this DIY jig to rip cut your plywood down.)
Now let’s start measuring your bins. Measure the depth, width and height of your plastic bins.
The depth of the bin will the exact depth of your DIY cabinet box (before adding the back.) The width of my bins is 8 11/16″, but I’ll add 1/16″ to keep them from being too tight when pulling them in and out of the under-sink storage cabinet. Therefore the interior width of my storage cabinet needs to be 8 3/4″.
Next, I’ll measure from the base of the plastic bin to the underside of the lip. Add 1/8″ to this measurement (or throw a piece of cardboard underneath the bin like I did).
(i.e. My bin lip is 4 5/8″ with an added 1/8″ space, this equals 4 3/4″. This will be the location for the top of my bottom bin runner slat.)
For the design of my storage drawer cabinet, I chose to leave a 3/4″ gap between the bins to keep space between the items inside and the bin above it.
Your measurements will vary, but based on the bins and my design idea, my mini storage cabinet is 16 1/4″ tall x 12″ deep x 10″ wide. I chose to use 3/8″ plywood ripped to 3 1/2″ and cut to 12″ in depth. You could use 1/4″ plywood for the runners, just make sure the inside of your cabinet box is no more than 1/8″ wider than the bins’ width.
Cut and Mock Up Your Storage Cabinet Pieces
After making sure your storage drawer cabinet will fit in the horizontal and vertical space in your bathroom cabinet, cut your scrap wood per your plans.
My cut pieces are shown below. You’ll notice my top piece is made from two pieces. Ideally, you would use one piece, but I was using up my scraps.
Now that you have your pieces cut, you can go an extra step and create a mock up for the storage drawers before assembling them.
Looking good? Okay, now sand all your edges smooth.
Assemble Your Storage Cabinet
Grab the two side pieces and your slats. Mark the location for the top of your bottom bin slat.
Add glue to the back of the slat and then nail it in place. Repeat the steps for the remaining slats. (Remember I chose to leave 3/4 gap between the bins. So my first slat top was positioned at 4 3/4″ height. The next slat was secured at 4 3/4″ + 3/4″ = 5 1/2”.) You’ll notice I positioned both sides next to each other to insure the slats were positioned at the exact same height.
Your two sides should look like this:
To attach the top, layout the sides and set the top in place. (I chose to add my top between the sides, but you could add it on top of the sides as shown in the computer model below.) Secure the top to the sides with wood screws. Be sure to pre-drill before driving the wood screws in to prevent splitting.
If Using Screws: Pre-drill & Screw Top Between the Sides
Test fit your plastic storage bins before adding the back.
Measure the back of your cabinet. Cut your 1/4″ plywood to size and test the fit. Add glue along the back edges of your cabinet. Then secure the back with nails or screws (pre-drill before using screws.)
Measure the Back of the CabinetCut 1/4″ Plywood to SizeAdd Glue to the Sides & TopAttach the Back with Nails
Set Your New Custom Under Sink Storage Drawers
Slide your plastic drawers into the cabinet box. Set it underneath the sink and load it up! This is a great spot to corral all those small items or things that you don’t want getting wet if there was a leak.
I hope you found this idea for tiny bathroom storage ideas super helpful. This can work in almost any bathroom cabinet or other storage cabinets that need more cabinet space or as an ideal solution for your family members who are sharing one bathroom.
But, wait, there’s more! I’m going to show you how to build a little custom shelf for the tight spaces on the other side of the cabinet. Hey, we might as well claim as much extra space as we can, right?!
Building a Custom Under Sink Cabinet Shelf
For this custom shelf, you’ll need a few more pieces of scrap plywood. 1/2″ – 3/4″ thick plywood should work fine. I just happen to have a lot of 3/4″ scraps. Start by measuring the width between your new storage drawers and the side of the cabinet. Be sure to deduct for a face frame if your cabinet has one.
Cut the top of your scrap plywood to this length. Then cut two vertical pieces to support the shelf (be sure to factor in the height of your plumbing and deduct for the thickness of your plywood shelf.
Add a bead of glue to the tops of the legs. Then square up the top on the legs. Secure with nails or screws.
Add Glue to Top of LegsSet the Shelf Top in Place and Check for Square. Nail in Place.Alternatively, You Can Secure the Top with Screws after Pre-drilling.
Set your new shelf in place next to the storage drawers.
If your storage cabinet and shelf are too tight to fit beyond the hinges, you may have to remove one of the doors to get them inside the cabinet.
What do you think? Can you believe this is the same sink cabinet? The custom storage solution is much better for keeping all our supplies within easy reach.
These under-bathroom sink storage ideas are also a great solution for smaller items like hair products, hair tools, or other beauty products. This DIY custom storage easily doubled the storage space, don’t you think?
Hope you’ll stick around for more DIY ideas to make your home more functional.
https://prettyhandygirl.com/wp-content/uploads/2025/07/diy-custom-under-sink-storage-solution-plans.jpg7151088Brittany Baileyhttps://prettyhandygirl.com/wp-content/uploads/2021/07/PHG-logo-tagline-2020-1030x211-R.jpgBrittany Bailey2025-08-01 07:00:002025-08-02 09:07:17DIY Under Sink Cabinet Storage Idea for a Small Bathroom
You asked, I listened! For years, readers and my clients have begged for a comprehensive home maintenance checklist—and the good news is, it’s finally here. One of my most requested downloads, this printable PDF is designed to help you stay on top of regular maintenance items and your home’s upkeep year after year. Ready to get organized with keeping your home in tip-top shape? Read on.
The Ultimate Home Maintenance Checklist: Your Home’s Best Defense Against Costly Repairs
As a licensed general contractor, I’ve seen what happens when small issues—like clogged gutters, leaky faucets, or cracked caulk—go unchecked. Spoiler Alert! They turn into expensive disasters: rotted siding, flooded basements, or mold behind walls (just to name a few). That’s why regular home maintenance isn’t optional—it’s essential. What if you had a simple resource to help you remember to clean lint buildup from the dryer vent, replace the furnace filter, trim trees, look for roof damage, and many other preventative measures?
Bathroom Destroyed by Water Damage
I created this regular home maintenance checklist for you, the busy homeowner juggling a million things. It’s easy to use, print-friendly, and packed with everything you need to protect one of your biggest investments: your home. Having a simple to-do list will help you stay on top of regular home maintenance tasks to protect your home’s value.
This checklist covers everything from the interior spaces to the exterior of your home, helping you head off potential problems and unexpected repair costs. It allows you to rest easy because after checking off all the boxes in this home maintenance list, you’ll be prepared for heavy rain, winter storms, or anything nature has to throw at you.
There’s even a section to keep track of the contractors you used and whether they stained the deck last year or three years ago. Did I mention an appliance section where you can keep track of when you bought big ticket appliances? There’s a spot to record all the additional information (date purchased, price, store, serial number, etc).
But, that’s just a small sample of what’s included in the Ultimate Home Maintenance Checklist.
✅ What’s Included in the Checklist:
Seasonal Preventive Maintenance Checklists
Annual and Biennial Task Lists
Paint Color Tracker by Room
Appliance Purchases & Warranty Records
Major Systems & Contractor Log
Home Maintenance Schedule Note Pages
PLUS! Quick Links to my Helpful DIY Tutorials
This checklist is super popular and has earned all 5-star reviews from happy homeowners just like you.
And the best part? It’s only $3.99. That’s less than a cup of fancy coffee—and it could save you hundreds or even thousands in future repairs. Get your copy of The Ultimate Maintenance Checklist HERE and keep your home in great shape.
Whether you’re a first time homebuyer or a long time homeowner, the most important home maintenance task is to download this list today is!
So… what are you waiting for? If you only do one thing to take better care of your home this year—make it this. Download the Ultimate Home Maintenance Checklist today. And turn your “joys of homeownership” into the joys of owning a home. Take care and I’ll see you again with another tutorial soon.