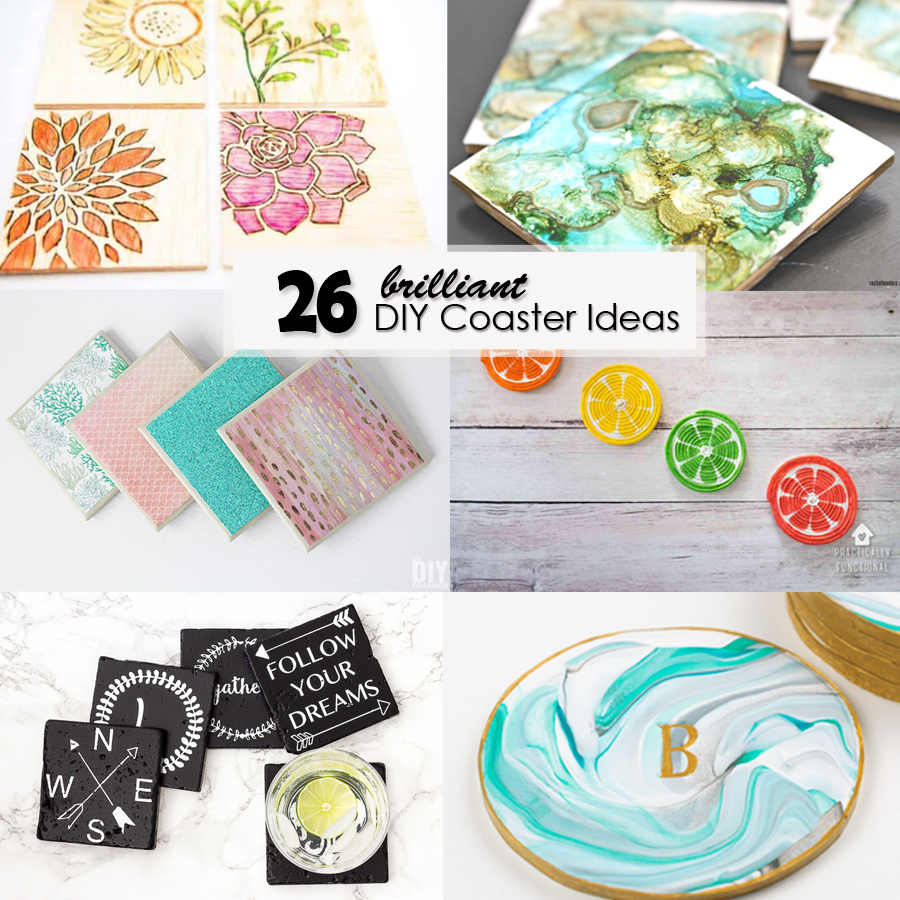
Add some personality to your home and prevent those awful rings on your tabletops by making some coasters to place under every drink! Here are 26 brilliant DIY coaster ideas to inspire you and show how you can use a variety of materials to create some really cool coasters in any decor style.
I hope you found some helpful ideas in this roundup of DIY Coaster Ideas to help add some functional beauty to your room or next party. Remember to click over to each site for the full tutorial. Please pin this image on Pinterest to share with your friends!
Hi, I’m Sheri from Hazel + Gold Designs. Here are a few fun stats about me: I like love chocolate and peanut butter (together of course.) If you like stats, I have been crocheting for about 16 years, crafting for 20, and woodworking for about 4 years. I found a passion in making and being creative and began documenting my projects online at Hazel + Gold Designs.
When not working on projects, I enjoy spending time with my husband, four children, perfect dog, and ornery cat. You can find me on Facebook, Pinterest, Instagram and Twitter.
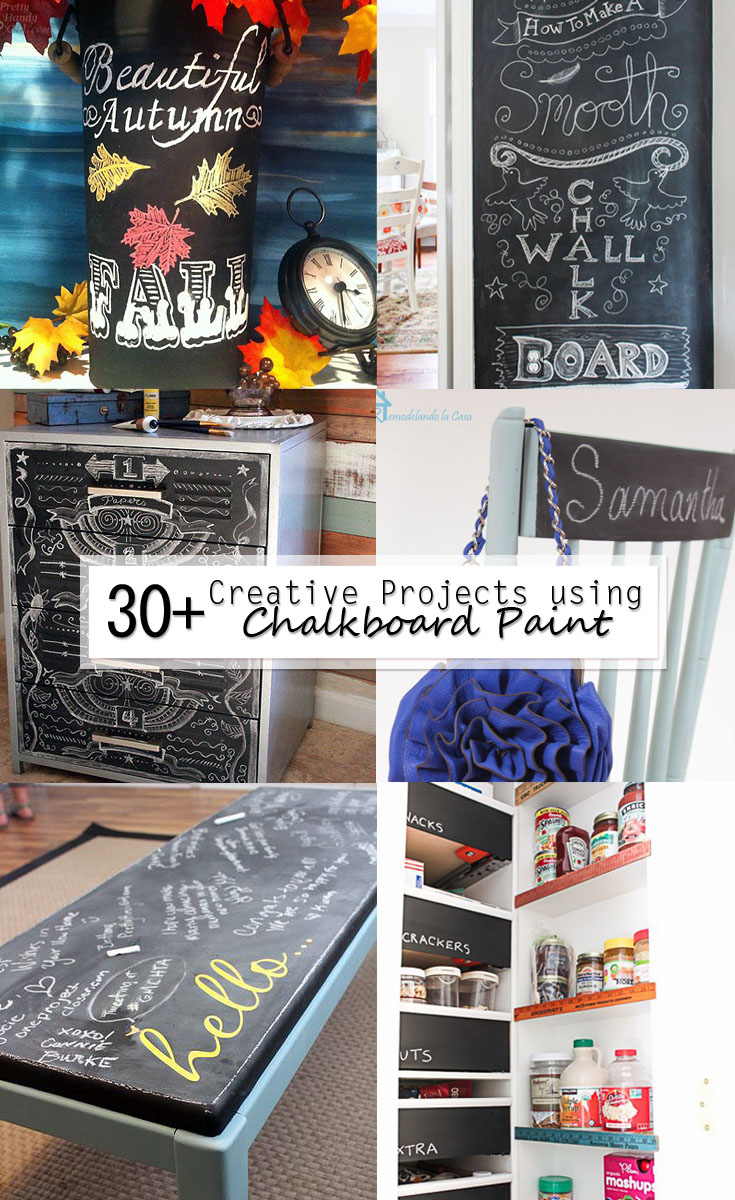
Chalkboard paint is such a fun addition to many different types of projects. You can turn anything into an ever-changeable work of art, or use it to label different items throughout your home. Here is a collection of 32 Creative Projects using Chalkboard Paint that you could create for your home or as a fun and personalized gift! Check them out and let me know what you think in the comments below.
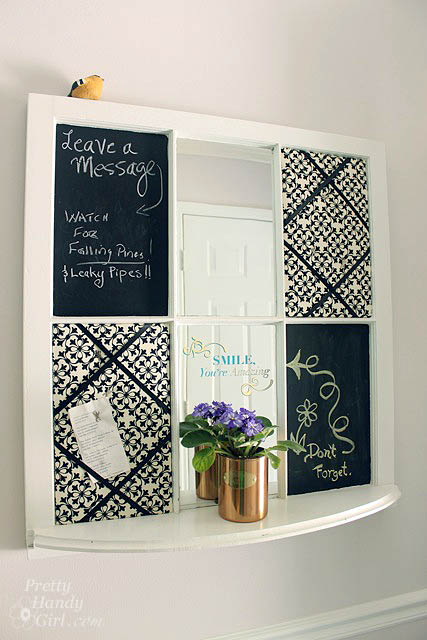
Check out this Message Board for the Mudroom! It’s a great place to drop things on your way in or leave letters to go out to the mailbox.
Thanks for reading! If you like this collection of ideas, please Pin this image on Pinterest to share with your friends and save for later!
Hi, I’m Sheri from Hazel + Gold Designs. Here are a few fun stats about me: I like love chocolate and peanut butter (together of course.) If you like stats, I have been crocheting for about 16 years, crafting for 20, and woodworking for about 4 years. I found a passion in making and being creative and began documenting my projects online at Hazel + Gold Designs.
When not working on projects, I enjoy spending time with my husband, four children, perfect dog, and ornery cat. You can find me on Facebook, Pinterest, Instagram and Twitter.
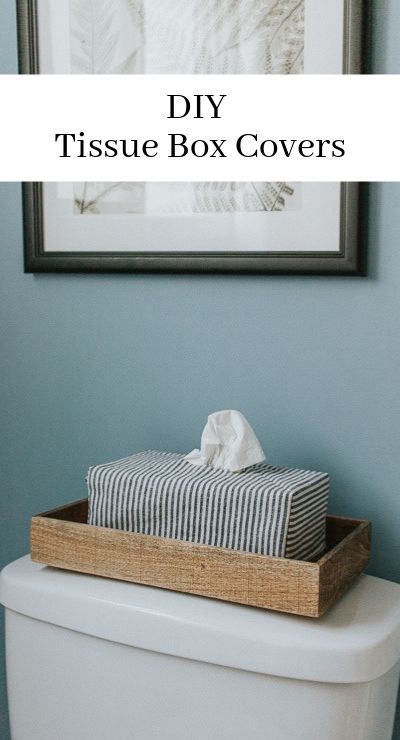
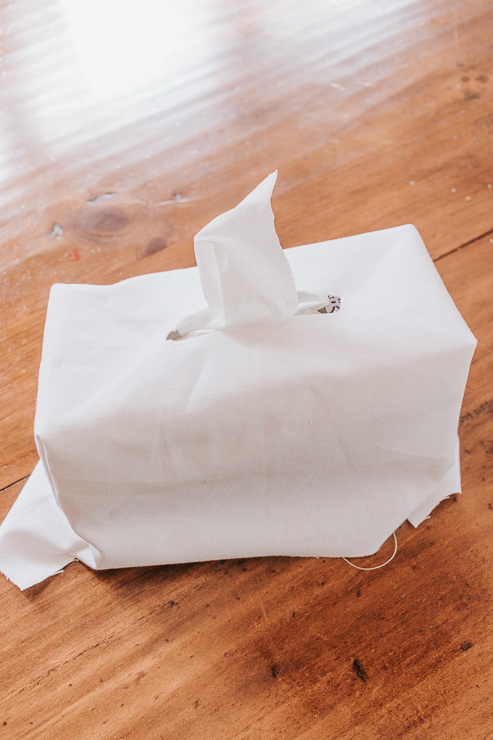
Hey Guys, happy Summer! I’m back today with another easy home project for you – a simple stylish DIY Fabric Tissue Box Cover.
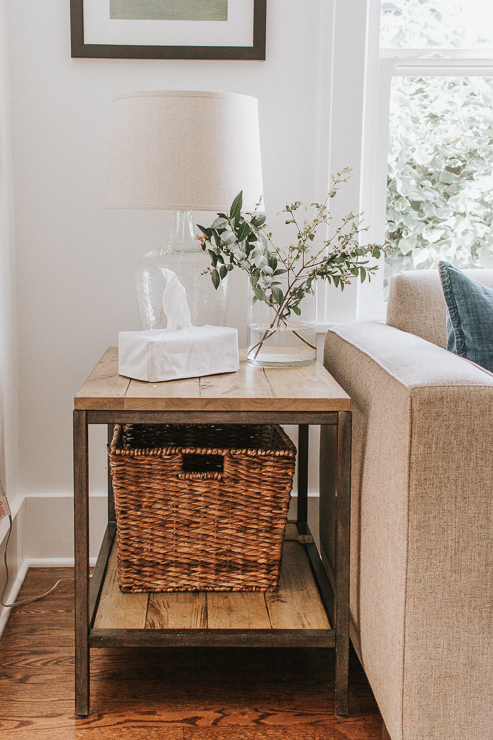
I don’t know about you, but I think most tissue boxes are tacky. They stick out like a sore thumb in our house! Unfortunately, it’s not the type of thing I can just put away in a closet (believe me, I’ve tried!) Our family has allergies and young kids—needless to say—the tissues must remain out.
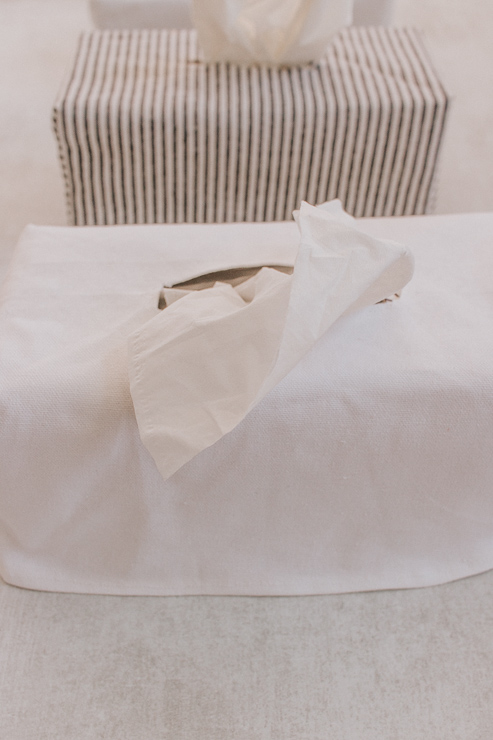
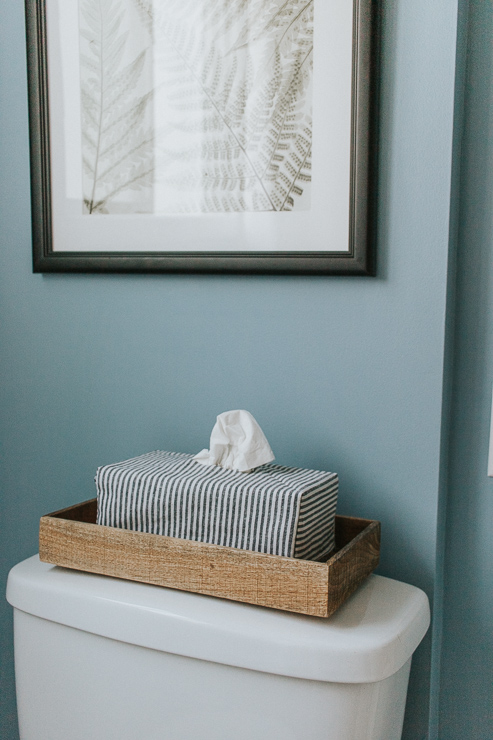
Until the tissue manufacturers come out with some better patterns, I’ll be covering mine up! These fabric tissue covers do just the trick. You don’t need too much fabric to make them. They blend in nicely with your decor, and you can wash them if needed!
Of course you could buy tissue box covers. But, these are customizable and you can make them with a $2 piece of fabric (or less.) So, go ahead and save some money by doing this yourself. I’ve seen some tissue box covers selling for almost $40! Yikes.
I wanted to make the process as simple as possible for you. You’ll be happy to know, I did this project over and over and over again until I found the perfect method for making them. Yes – I have over 5 tissue box covers now. Ha!
Ok, let’s get started.
Materials:
(I’ve included affiliate links for your convenience. I earn a small percentage from a purchase using these links. There is no additional cost to you. You can read more about affiliate links here.)
Fabric – 16 inches x 24 inches (A sturdier canvas material works best.)
Follow these steps to make your stylish tissue box covers.
Step 1: Cut out your Rectangle.
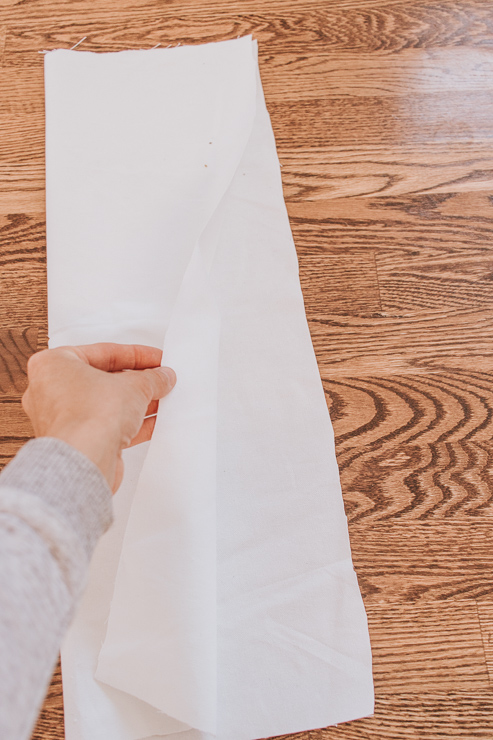
I’m assuming most tissue boxes are generally the same dimensions. But, measure your box to double check. For a standard rectangular tissue box, I started with a rectangle of fabric sized 16 inches by 24 inches.
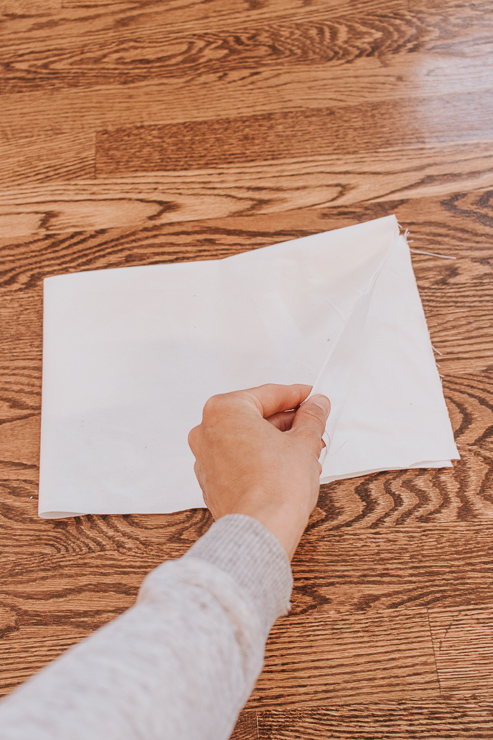
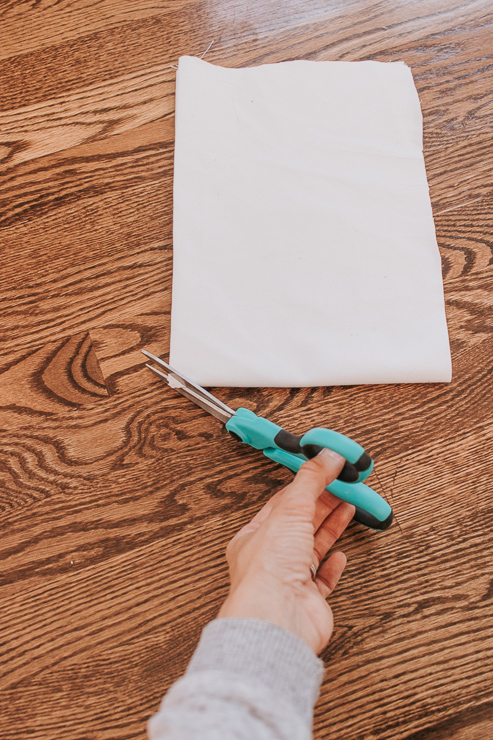
Now cut your fabric to size.
Step 2: Cut a Center Hole.
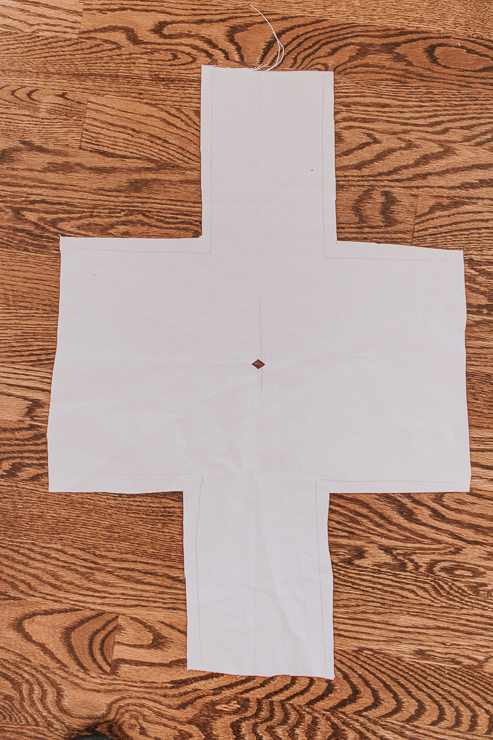
Make a hole where the tissues will be dispensed. Here’s an easy way to do this. Take your rectangle of fabric and fold it in half lengthwise, then fold it in half again. Snip a little piece of the corner section – this will create a small hole perfectly centered in your fabric.
Step 3: Measure and Mark your Corners.
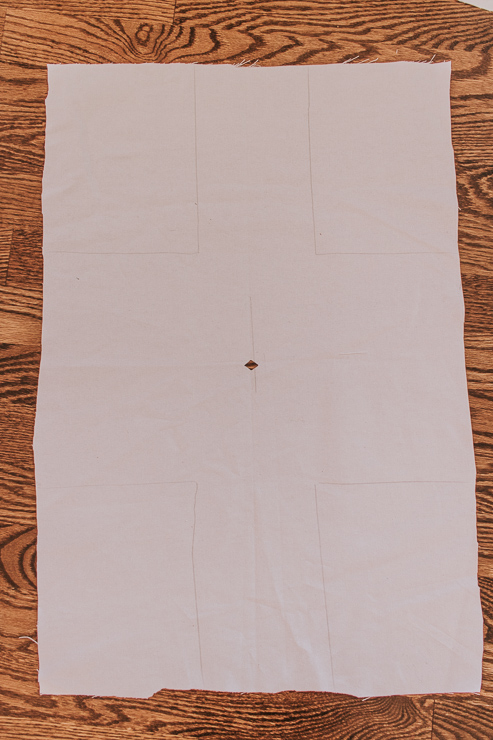
Place your tissue box in the center of your fabric. Hold the tissue box in place with one hand. With your other hand, use your pencil to mark a square at the corner of the tissue box. Repeat for all four corners.
It should look like this …
Step 4: Cut Out the Corners.
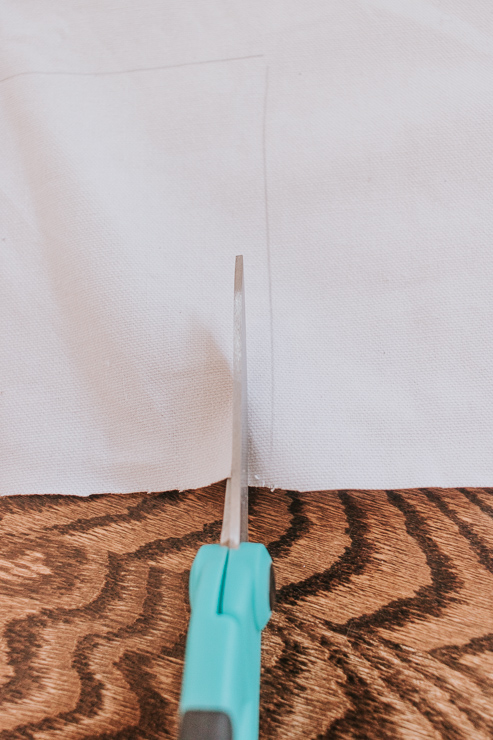
To make nice mitered corners, cut out the squares marked above. But, to allow for your seam, subtract about 1/4 – 1/2″ from the marked lines. Essentially, you’re cutting slightly outside where you made the pencil lines as shown below.
Step 5: Sew Your Tissue Box Hole.
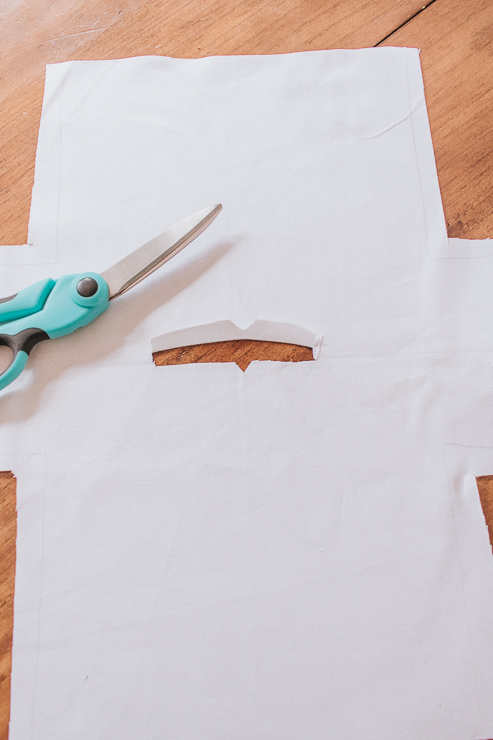
Remember the little hole we cut out of the center earlier? Now you can cut it slightly bigger to accommodate your tissues. Cut, a skinny rectangle and fold flaps toward the inside of the fabric tissue cover. Iron them to keep them from folding back. It doesn’t have to be super neat. The tissues will help cover it up!
Step 6: Sew your Corners.
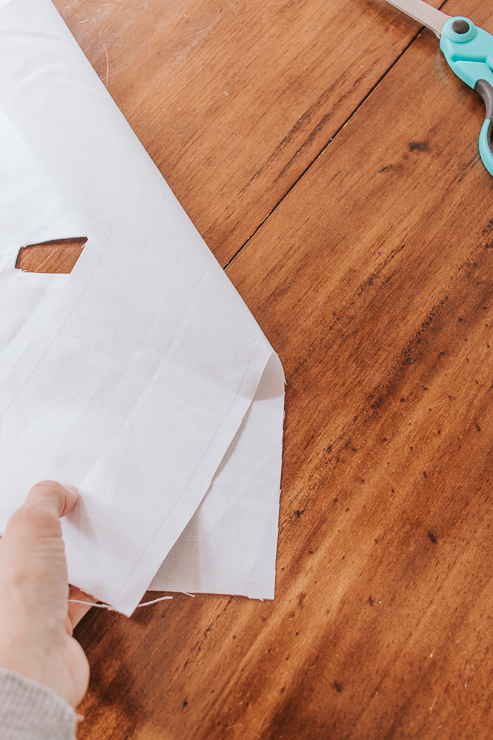
Take your piece of fabric and fold it so the corner pieces line up as shown below. You want to make sure you sew the pencil mark side on the underside so they don’t show. When you fold the fabric, the pencil marks should be facing out. Stitch along the pencil line.
Repeat and sew all four corners the same way.
Step 7: Trim the Bottom.
Woot! Your little tissue box cover is taking shape now. Turn your cover right side out and place it over your tissue box.
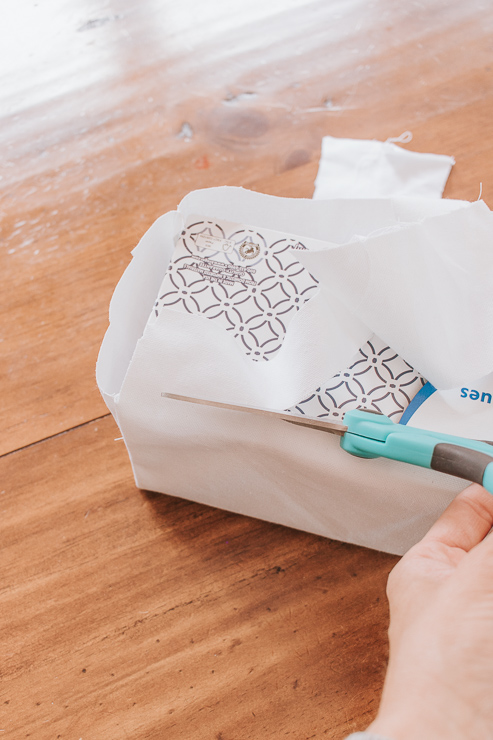
The ends are long, huh? Well, we can easily just cut those down and sew a clean seam all the way around! You may be wondering why I started with a larger piece of fabric only to have excess at the end.
Trust me – I did this five times over! Having excess fabric ensures all your ends meet nicely and cover the tissue box entirely.
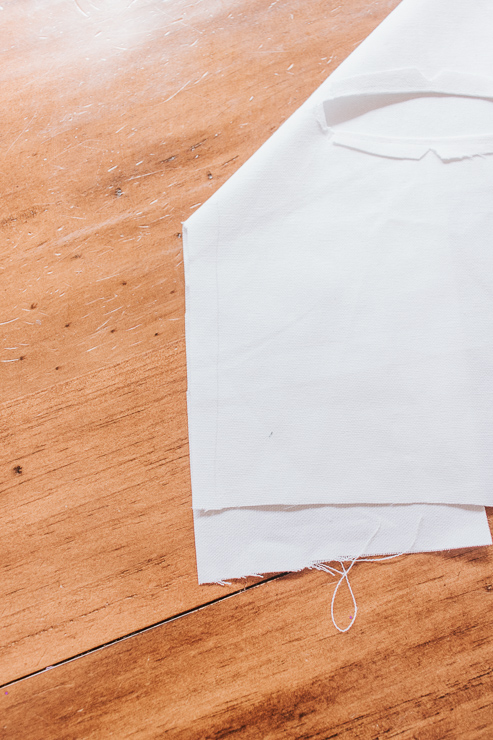
Let’s finish up by cutting away all the excess fabric minus 1/2″ to create a nice seam.
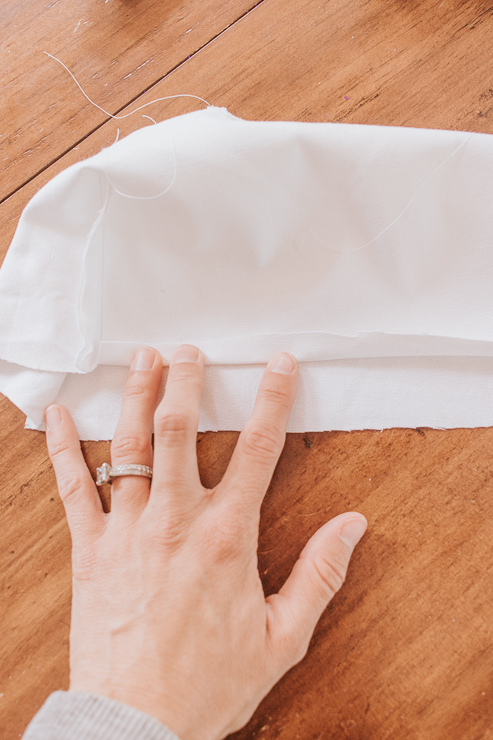
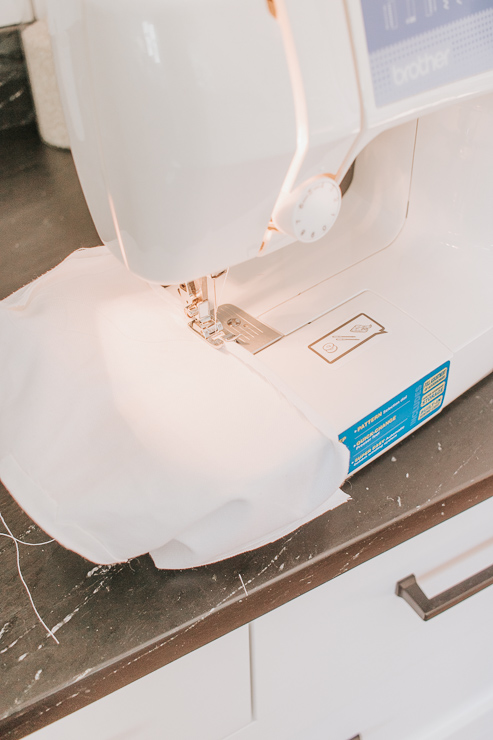
Fold over the excess. Iron the seams. Now stitch along the edge of the folded seam.
Step 8: Flip your Tissue Box cover Right Side Out.
You are all done! Flip your tissue box right sides out and place it over your tissue box.
Soooooooo much better. Right?
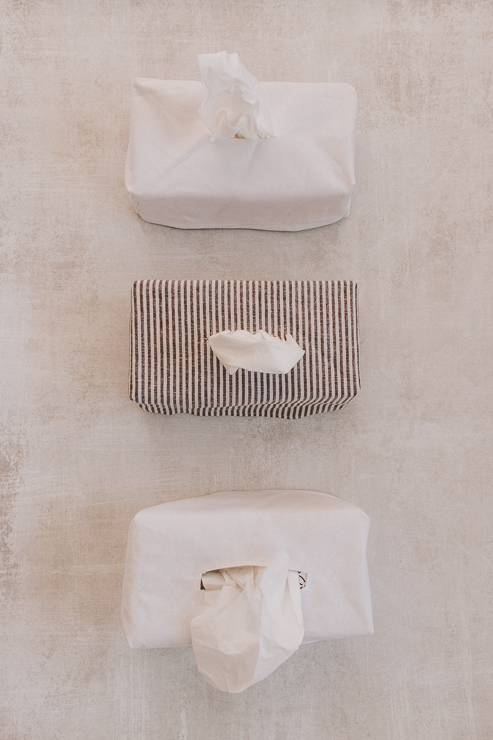
These fabric tissue box covers look great everywhere and you can customize them with fabric of your choice. Place one in your bathroom, in your bedroom, and in your living room. Anywhere you want!
No more ugly tissues boxes. And my husband doesn’t have to ask – “where are the tissues, now?” LOL.
Even though I prefer a sturdier canvas or heavy cotton fabric for this project, you can make these tissue box covers with any fabric. Add some embroidery for a personalized touch! Or get out some fabric markers and create a Scandi design on plain canvas. This is a fun project allowing you to get creative with different looks.
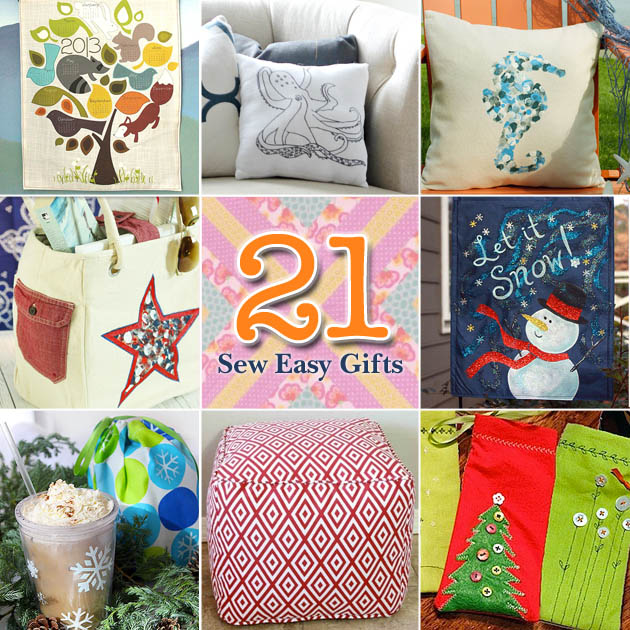
I hope you enjoyed this tutorial for a DIY fabric tissue box cover. For more fun sewing projects for your home, check out these sewing posts from Pretty Handy Girl. Or these 21 Sew Easy Gift Ideas:
Or learn how to make some of my popular projects from Decor Hint:
Hello! I’m Karen, the creator of the Home Decor and DIY Blog: Decor Hint . I’m a Native of the East Coast, but I currently live in beautiful Seattle with my hubby, our two wonderful children and our spunky wheaten terrier.
You can usually find me with some sort of craft in one hand and a coffee in the other. And I’m always rearranging furniture or moving lamps from room to room. I have a passion (read: obsession) for decorating, DIY, and gardening. In short, I love making my house into a home.
Like many, I’m inspired by what I see in home decor magazines, but I’m not so inspired by the price tags. Consequently, I love finding and creating beautiful budget-friendly home decor items. In a head to head competition, I bet you’d never know the difference between the designer items and my DIY creations! Many of my DIY projects focus on sewing, crafting, upcycling and organizing. Some of my favorite projects have been making pretty wreaths , sewing my own tassel hand towels, and crafting these trendy wood bead garlands . I can’t wait to inspire you and spark your creativity through my DIY projects.
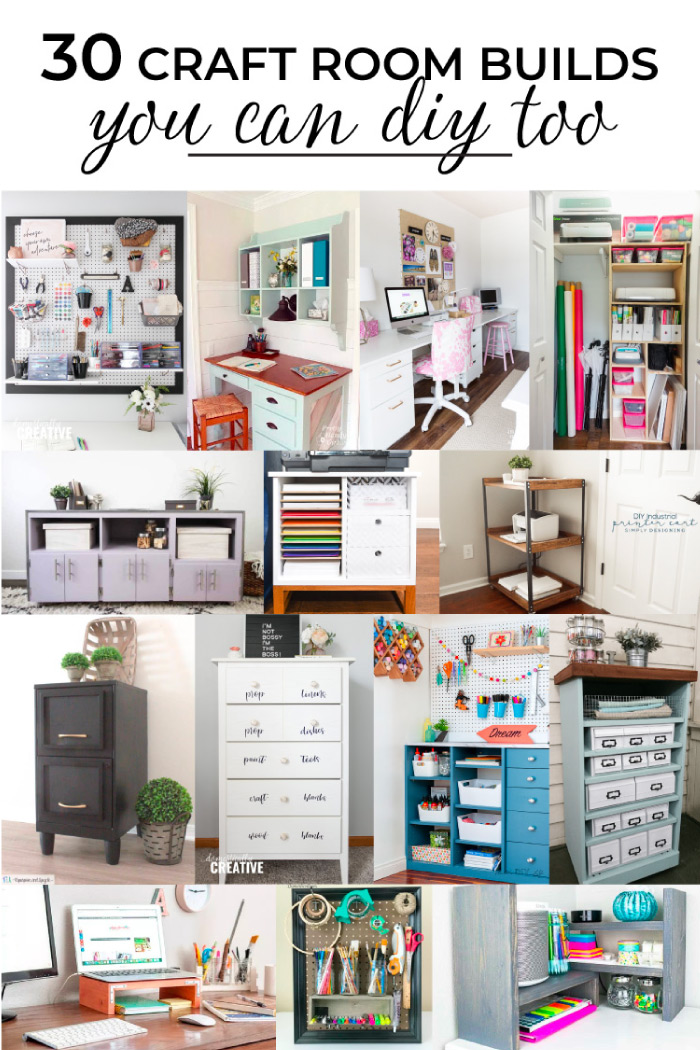
Is your home office or craft room in desperate need of some storage? Don’t spend a ton of money on brand new furniture or custom closet organizers when you can build it yourself. Check out these creative craft room builds that you can replicate.
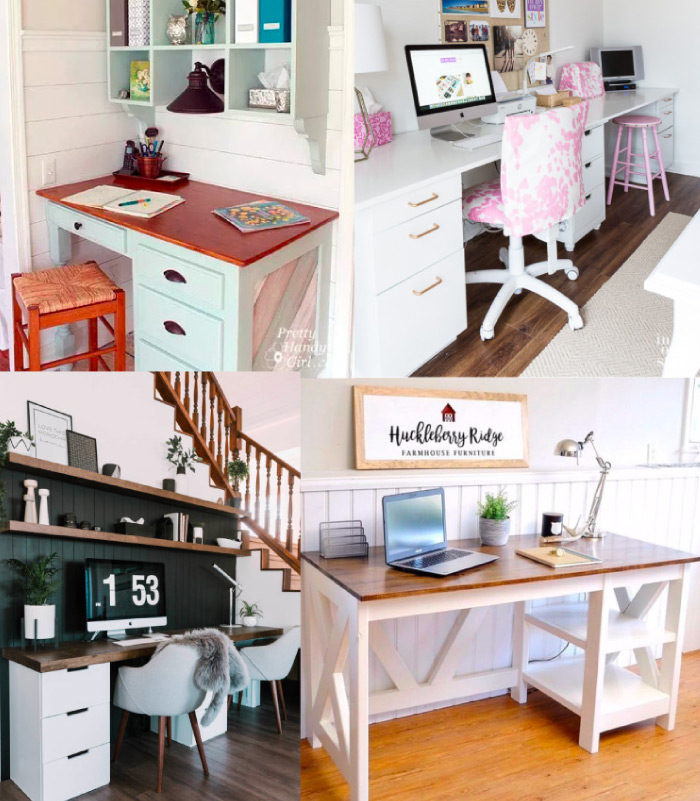
DIY Desks
Every craft room or office needs a workstation. These awesome DIY Desk ideas will help you build one to fit your space.
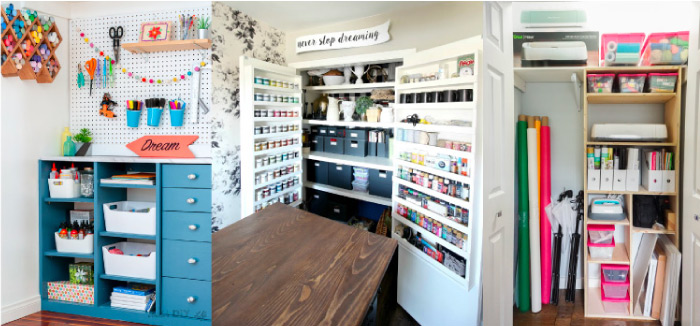
If your craft room or office has a closet, you can build custom shelving and storage inside. The ideas below for some easy to replicate builds are awesome.
Currently, my printer lives on top of a dresser in our guest bedroom, but these DIY printer carts have me in the mood to build a new home for it. They all have easy to follow plans for you to build one for yourself!
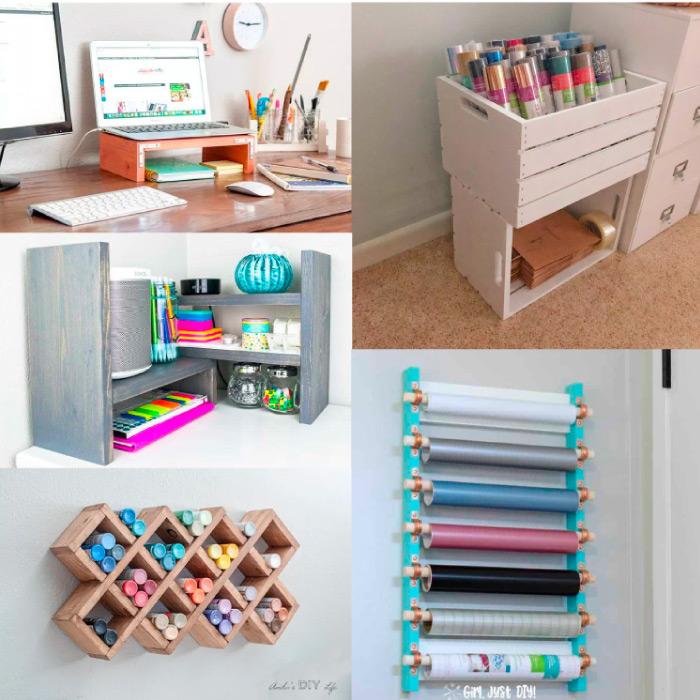
Not in the mood to build something big for your craft space? These smaller craft room builds and organization ideas are definitely worth checking out. I need vinyl craft storage in my craft room!
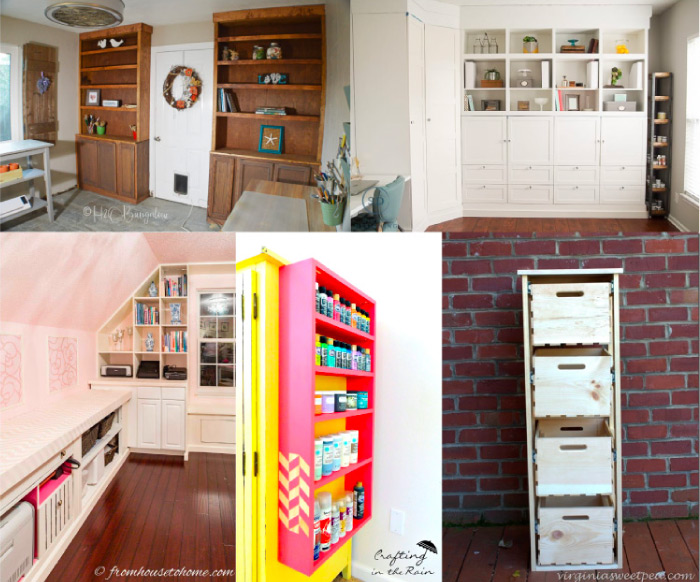
You don’t have to spend a ton of money on new furniture for your craft room. Local thrift stores, flea markets and garage sales usually have great deals on something with good bones. Then, with a little bit of creativity and elbow grease, you can turn it into something beautifully functional, like these projects.
I’m Amanda, and I am the creator and voice behind the food and DIY blog, Domestically Creative. What started as a place to share updates with friends and family after we moved from Illinois to Tennessee and then to Texas, turned into a passion for finding creative and frugal ways to feed us and decorate our homes.
I have always had the “make it myself” attitude and I’m not afraid to bust out the power tools or get creative when it comes to decorating our home on a budget. You can usually find me scouring the local thrift stores, garage sales and estate sales looking for my next makeover (like this litter box cabinet), or dreaming up ways to make our new house feel more like home. My most recent project was giving my home office a much needed facelift. Some of the plans included creating a fun inspirational accent wall and adding pegboard to store my craft hoards.
I currently call Missouri home, where I live with my husband, dog, and 2 cats in a pretty dull, late 90’s split level. My husband and I both love to travel the U.S and recently purchased a small travel trailer to tag along in our journeys. In our free time together we can usually be found working together on a home project, exploring a new place, or just lounging with our pup, Delilah.
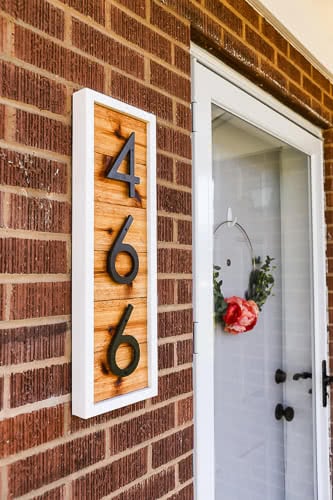
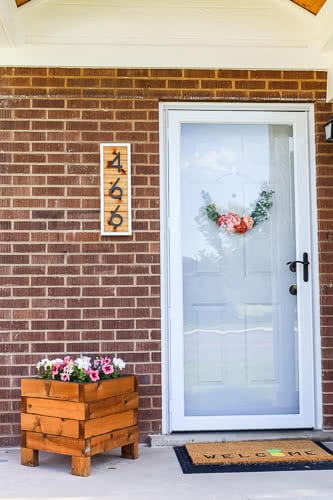
A step-by-step tutorial on how to create a DIY modern house number sign that will update your homes curb appeal.
Do you want to update your homes curb appeal? Have you thought about upgrading the look of your homes house numbers? I’m Megan from TwoFeetFirst, and I am excited to share this project with you today. This is an easy DIY project that will update any front porch!
How much does it cost to build a house number sign?
The cost of this project will depend on the number of house numbers you need, plus where you purchase them. The project should cost about $30 (includes all materials) for a three number sign. If you happen to have some of the materials on hand, it will cost less.
DIY House Number Sign
Materials:
(I’ve included affiliate links for your convenience. I earn a small percentage from a purchase using these links. There is no additional cost to you. You can read more about affiliate links here.)
Before you can start cutting the wood, determine the layout for your house numbers. The easiest way to do this is by laying out the numbers on a solid surface. Move them around until you are happy with the layout.
Then measure the spacing between the numbers and the length from the first number to the last.
TIP: For a professional look, keep the spacing between the numbers the same.
If your spacing between the numbers is the same, add this equal spacing to the top number and bottom. By doing this, you increase the height of the sign.
(For example, my numbers had a spacing of 1.25″. Therefore, I added 2.5″ + my layout measurement (18.5″) which gave me 21″.)
SIDE NOTE: I also used the 3.5″ cedar boards to determine my space. If I used five pieces of the cedar, my distance would be 17.5″ and six pieces is 21″. So I decided to use 21″ to make things easy this way I was not cutting the boards width.
Also, add this spacing to the width of the widest number. This measurement will be what you cut your cedar board too. For example, my number 4 is my widest number, 3.5″. I then added 2.5″ (1.25″ two times) to this amount giving me the width of 6″.
STEP 2: Cut the cedar boards
Now that you have determined the size of the cedar base, you can cut the wood. Cut the board to your width measurement. I will be cutting mine at 6″.
TIP: Use a scrap board clamped to the saw fence to insure the exact cut for all your cedar pieces.
After cutting the cedar board, place them on a flat surface in a column. Then measure the length of all the pieces together, mine was 21″. Cut a piece of cedar board this length. This board will be the back support for the cedar pieces you already cut. We will call this piece the bracing.
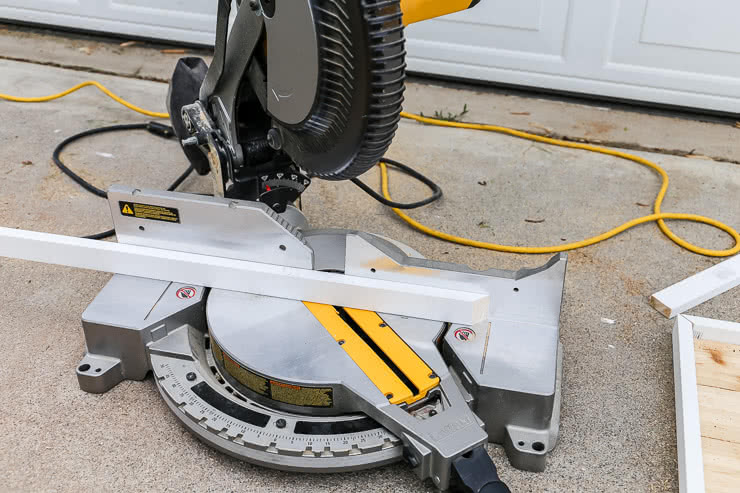
Once the cedar boards are cut, cut your 1″x2″ trim. To cut the trim, rotate your saw to a 45-degree angle. Then cut an end of the 1″x2″ board (cut the board with the 1″ side facing up.)
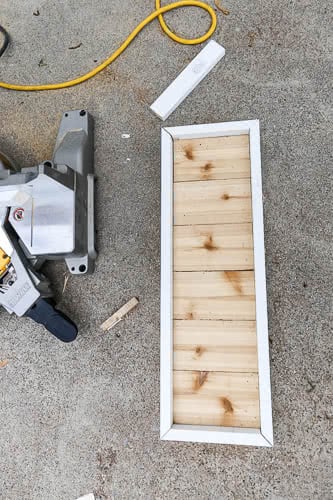
Frame your cedar pieces with the 1″x2″ board. You need to add 1.5″ to the width of your cedar base. My width was 6″ so my measurement is 7.5″. This measurement will be the top and bottom of the frame.
Cut two 1″x2″ boards to this measurement. Remember you are cutting at a 45-degree angle, this measurement is the longest point of the 45-degree, the shorter will be the same width as your cedar boards.
Next, cut the side pieces of the frame (this will be the same length of your cedar base). Again you will need to add 1.5″ to the measurement, my height was 21″ so my size is 22.5″. Cut two 1″x2″ board at this measurement, (remember you’re cutting at a 45-degree angle).
Now test your 1″x2″ frame around the cedar base, adjust the boards if needed by cutting them to give you a snug frame.
SAFETY TIP: If your pieces are too small to hold safely, cut new pieces instead of risking personal injury. Always cut your shorter pieces from longer trim stock.
STEP 3: Paint the frame and seal the cedar
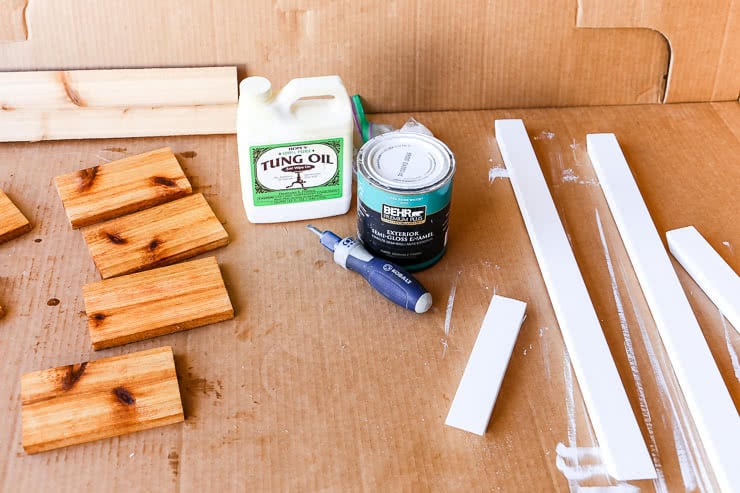
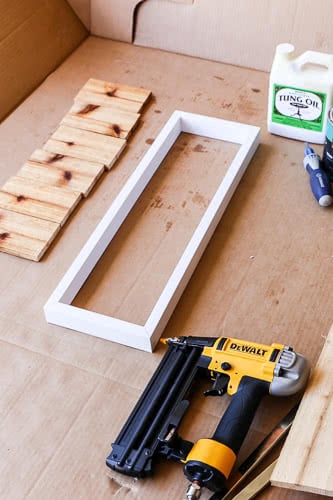
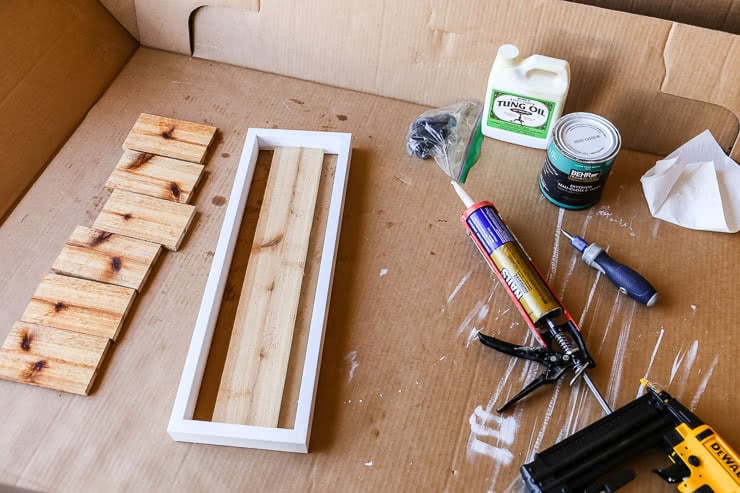
Once you’re happy with the frame, seal all the wood for outdoor use. Paint the 1″x2″ boards with outdoor paint and stain or seal the cedar boards with Tung Oil. Alternatively, you can leave the wood raw and it will grey over time.
SIDE NOTE: Tung oil helps waterproof wood plus it helps to bring out the color in the wood, see why it’s my favorite way to finish wood. I decided to paint the frame white and seal the cedar with Tung oil.
Follow the instructions on how to apply then let everything dry according to the instructions on the containers.
STEP 4: Build the frame
Once everything has dried, place the 1″x2″ pieces on a flat surface. Then arrange the pieces to make the frame.
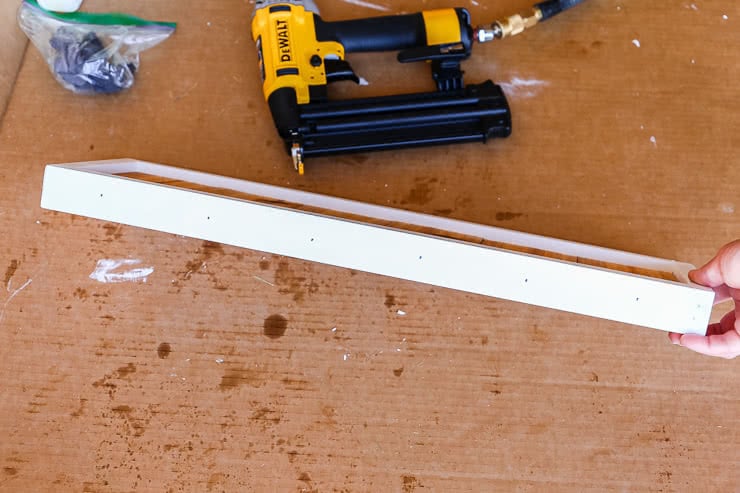
Using 1.25″ nails, nail the 45-degree angles of the frame together.
Then place the cedar bracing inside the frame, center it then nail into place on the top and bottom.
To help protect the frame from outside elements, the joints (45-degree cuts) should be sealed with silicone. Apply silicone to the joints to seal the gaps.
SIDE NOTE: You will want to do this on any nail hole too.
Let the silicone dry then touch up the areas with paint. Let the paint dry completely before moving on.
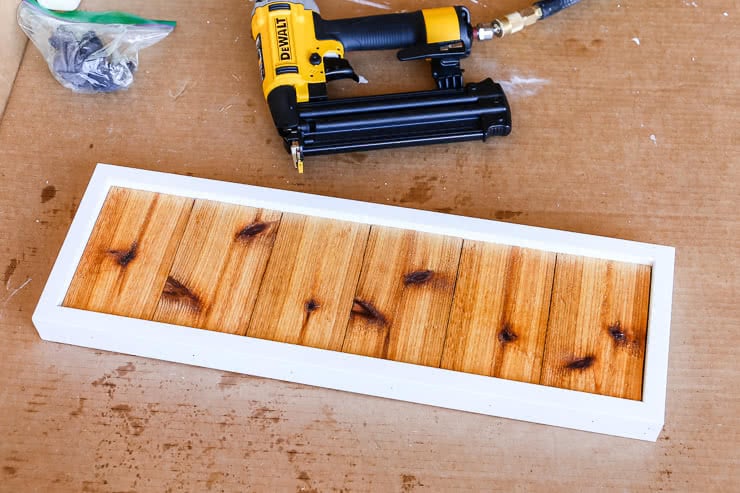
Next is adding the cedar to the frame. Apply construction adhesive or wood glue to the cedar bracing. Then lay the cedar onto the bracing, rearrange if needed.
Secure the cedar boards to the sides of 1″x2″ frame with 1.25″ nails.
Again apply silicone to the frame to cover the nail holes. Once it has dried, repaint the areas with paint and let that dry too.
STEP 5: Install the house numbers to the frame
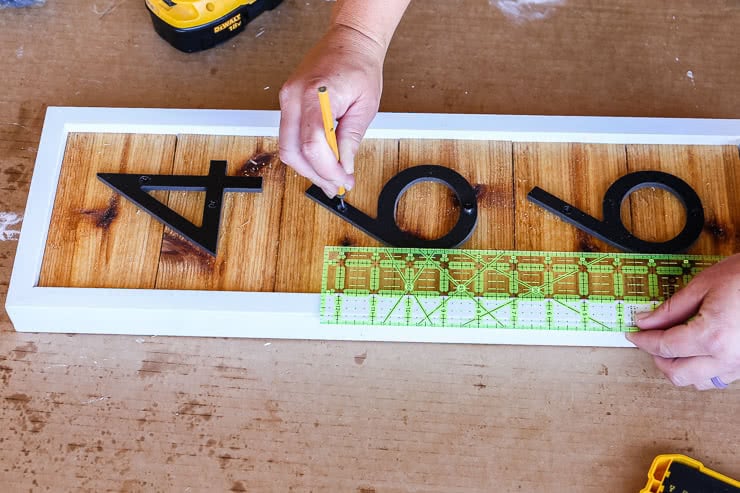
Now that the frame is built the house numbers can be installed. Place the numbers onto the frame then using a ruler align the numbers accorded to your predetermined layout.
Once you’re happy with the placement, use something (nail or pin punch) to make an indent into the cedar where a screw hole is for the house number.
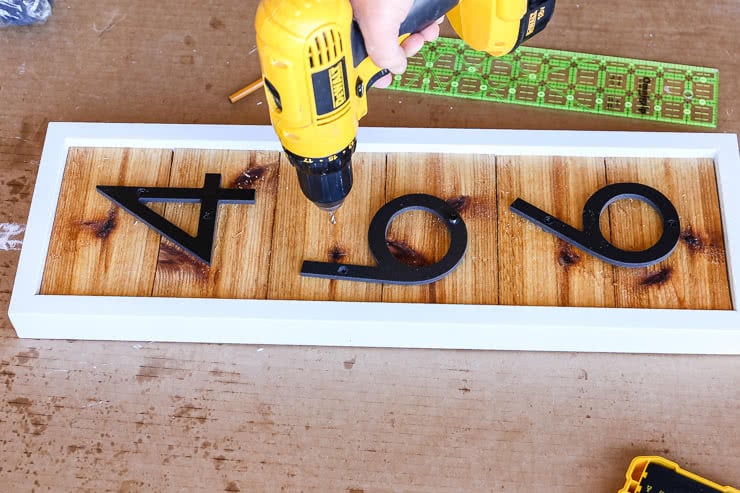
Then pre-drill a hole (smaller than the actual screw for the numbers) in the indented places.
Attach the number to the frame using the pre-drilled holes.
STEP 6: Install hanging brackets and screws
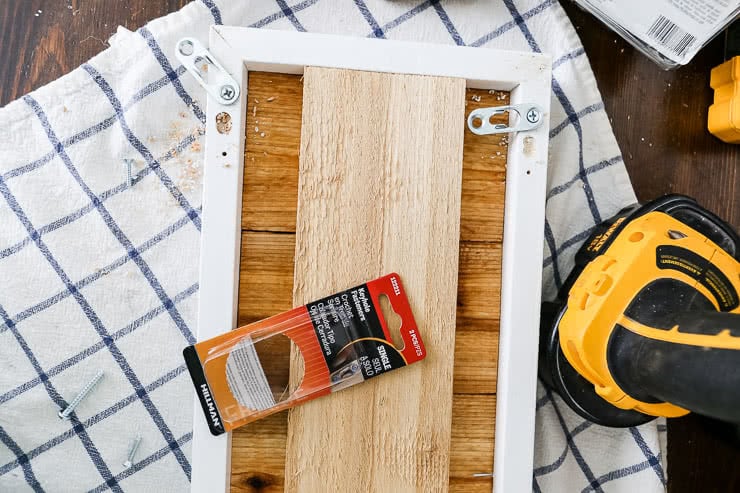
Now that the house number sign is built, you need a way to secure it into place. There are many ways to do this, but I decided to use keyhole hangers.
Before installing the hangers onto the sign, I would recommend installing the screws into the wall. To do this, measure the back of the sign were the center of the brackets will be placed (you should have an idea of where this will be). In my case, the distance was 6.5″-6.75″.
This distance is how far apart the screws on the wall will be placed, secure the screws to the wall at the height you want. Remember to use the correct screws for the material you are securing to (i.e. anchor screws for masonry if you have a brick, block, or stone wall).
TIP: Place one screw then measure the second to the distance you determined before plus use a level!
Once the screws are in place, measure the distance between them because it may have changed. Then attach the hanging brackets to the sign, make sure the distance from the center of the brackets is the distance measurement you just measured.
TIP: Use a drill bit to drill a slightly bigger hole where the screw head will be.
TIP 2: Only attach the top of the brackets then check the level by placing the sign on the wall. If everything is level, attach the bottom screws. If its not level, adjust one bracket until it is level then attach the bottom screws.
You can also place two felt pads at the bottom of the sign to keep it from rubbing against the wall.
Now you can hang your house number sign!
To help you with the process, here is a video on how to make a house number sign.
This DIY tutorial on creating a simple modern house number sign will help you update your curb appeal and will make you happy when you see it!
https://prettyhandygirl.com/wp-content/uploads/2019/06/House-Numbers-Sign-15.jpg493740Megan Taylorhttps://prettyhandygirl.com/wp-content/uploads/2021/07/PHG-logo-tagline-2020-1030x211-R.jpgMegan Taylor2019-06-19 06:00:112019-06-20 11:15:37DIY Modern House Number Sign

 Learn how to make these DIY Oilcloth Drink Coasters that you can use both indoors and outdoors.
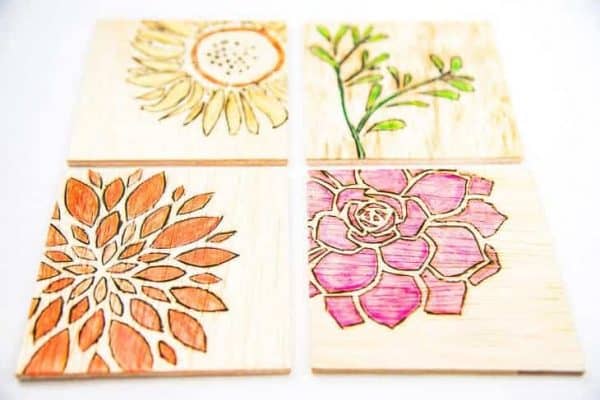
 Use cork and stencils to create these awesome Woodburned Coasters for your table.
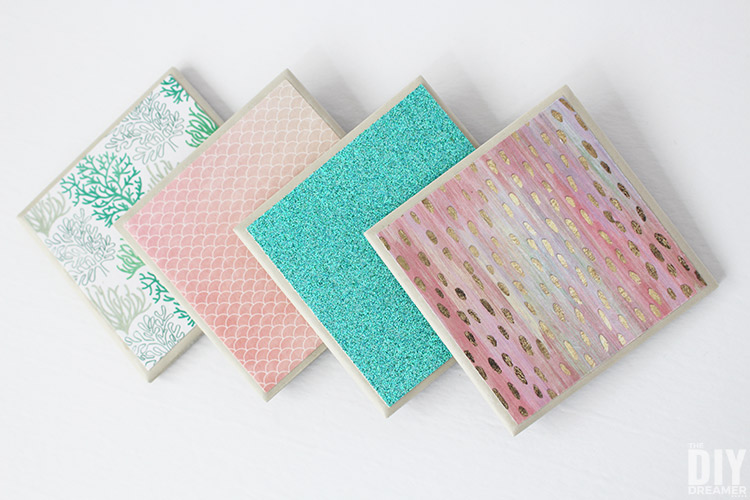 If you love beach or mermaid themed decor, make these magical DIY Mermaid Tile Coasters.
 Learn how to make these DIY Watercolor Wooden coasters to add some beautiful color to your room.
 Add some patterns to your room with these fun DIY Fabric Coasters.
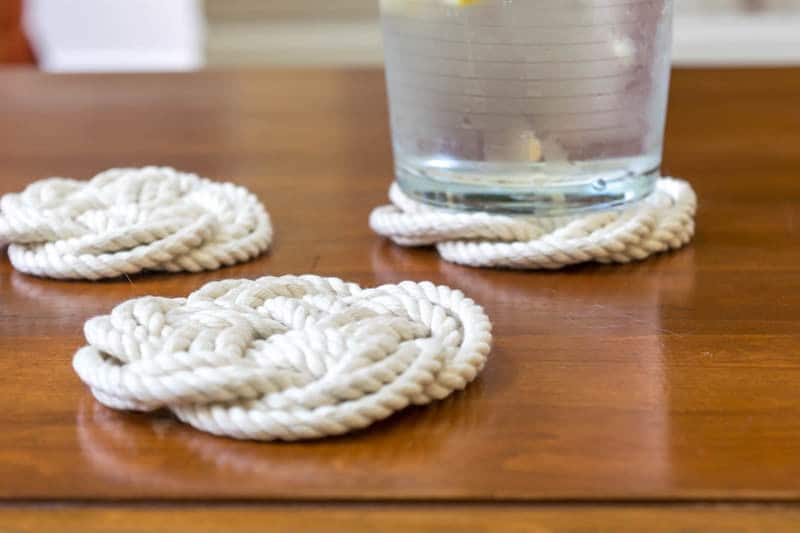 Use some cotton rope to make these amazing Turks Head Knot Coasters.
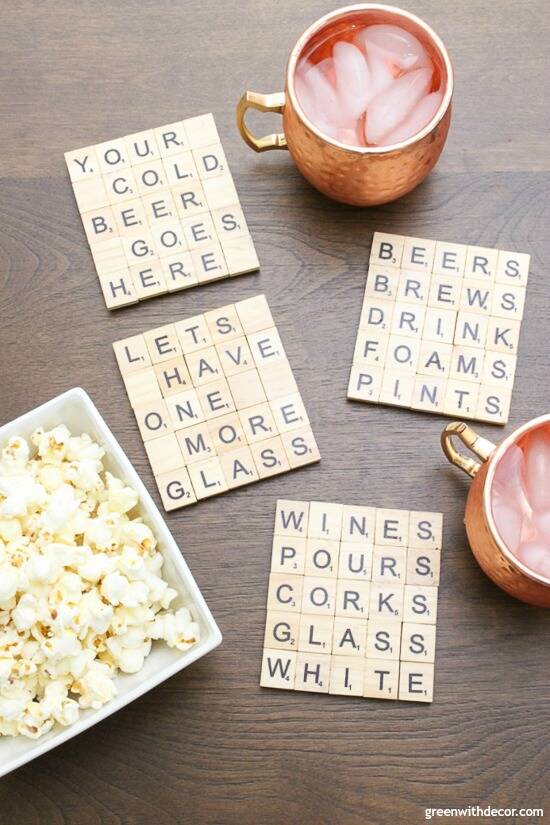 Do you love words? Create these Scrabble Tile DIY Coasters for your next gathering.
 Use small glass tile mosaics to create these modern easy-to-make Mosaic Tile Coasters.
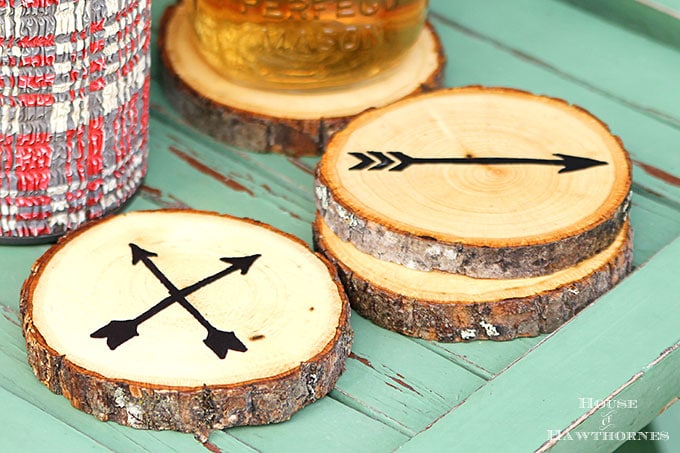 Personalized Rustic Wood Slice Coasters would be so fun for your next dinner party.
 Make note of places that you’ve lived or loved with these Geographic Map Tile and Resin Coasters.
 Gold and Marble Coasters would make a gorgeous addition to your modern space.
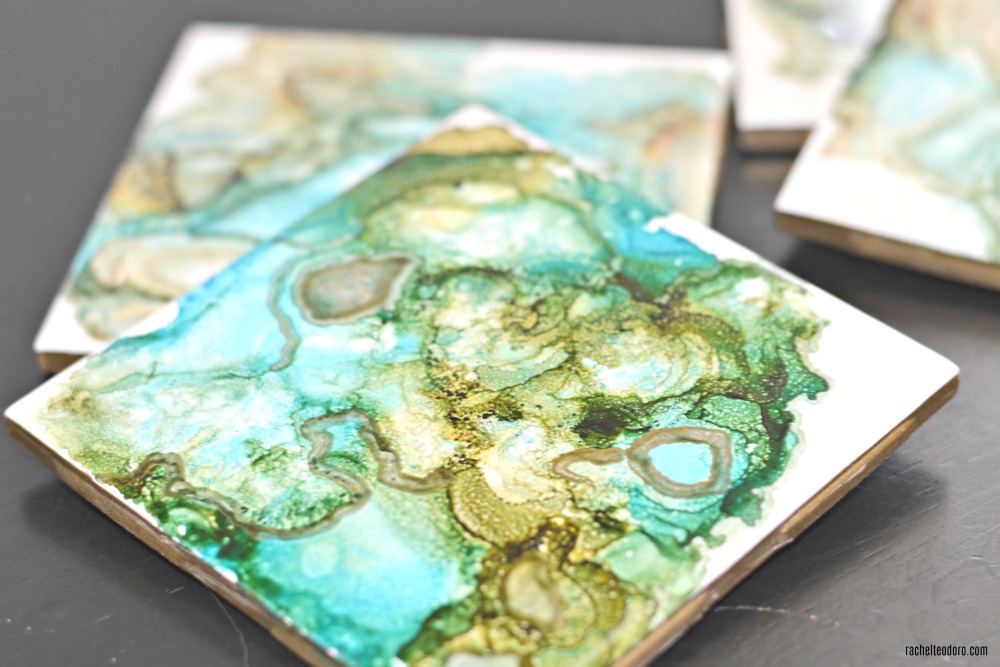 Make these natural looking Faux Agate Tile Coasters with alcohol inks.
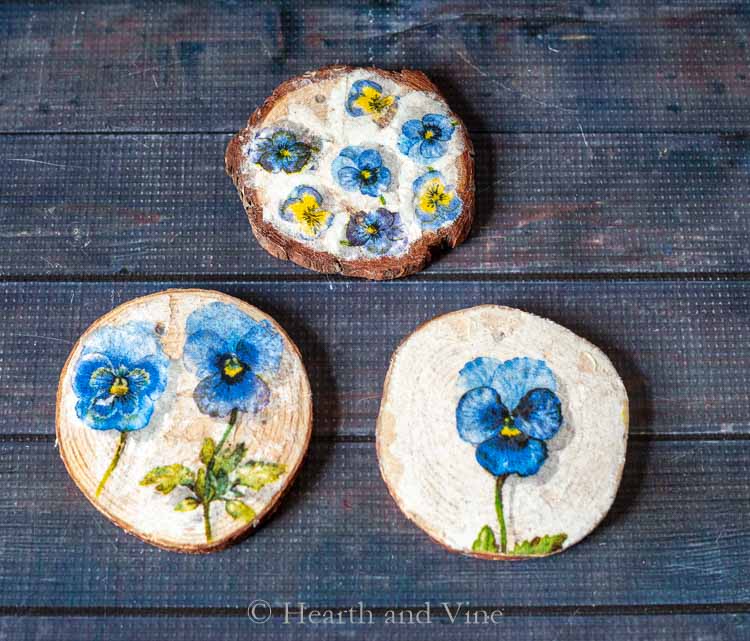 Use some old paper or napkins to make these beautiful Decoupage Coasters.
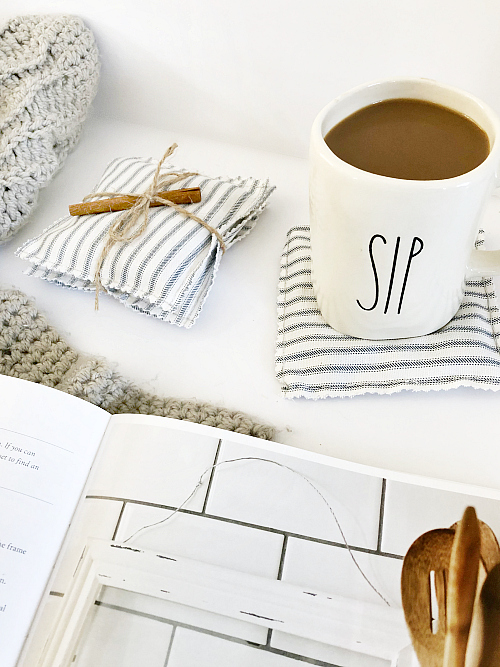 Make some clever DIY Scented Coasters using essential oils.
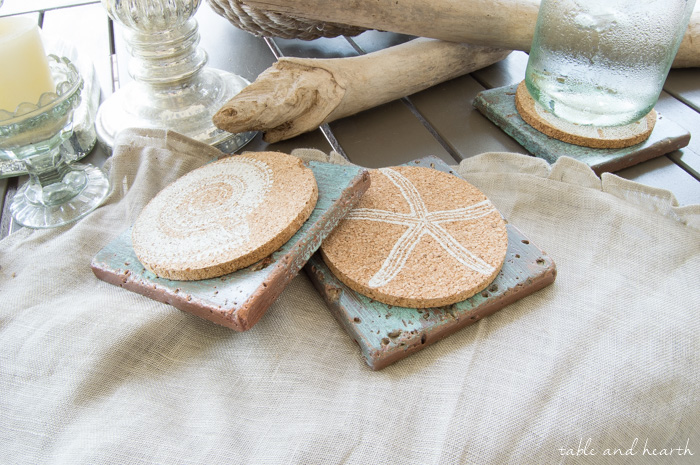 If you love coastal style, these Copper Patina Tile Coasters would be perfect for your space.
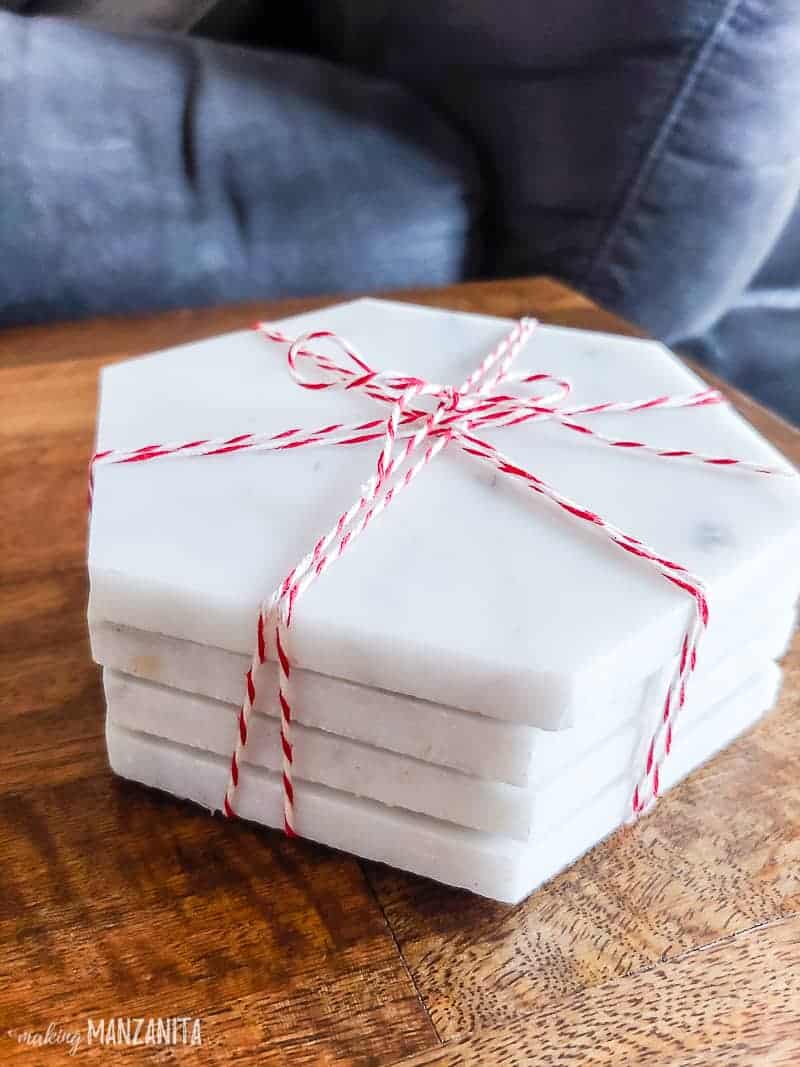 If you have extra tiles lying around, make something like these DIY Marble Coasters.
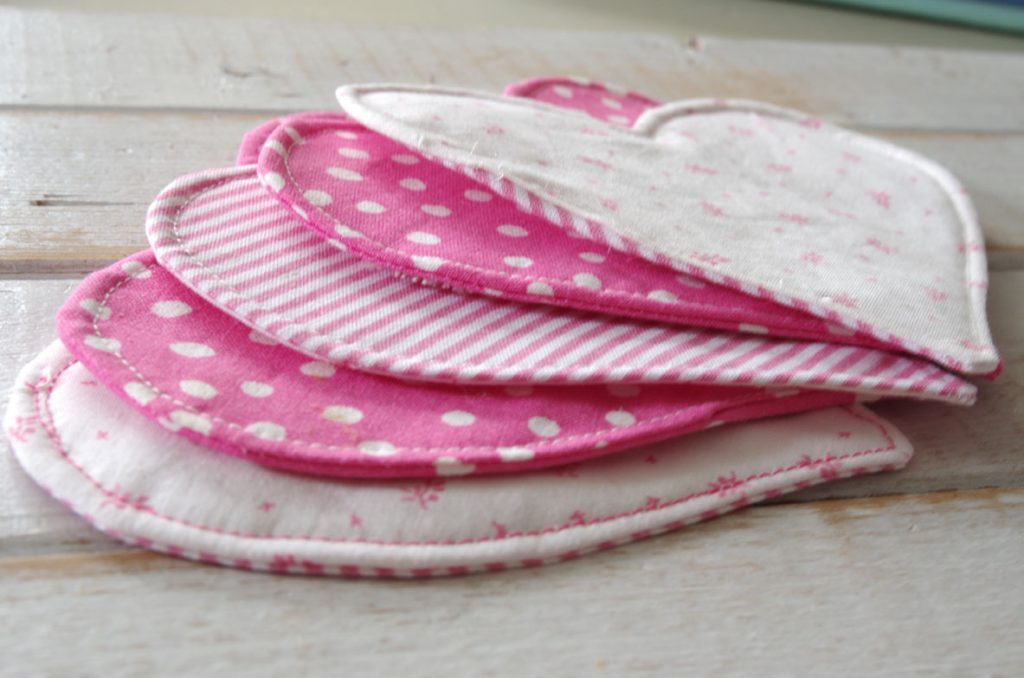 These Easy to Make Fabric Heart Coasters are a perfect way to use up some small fabric panels.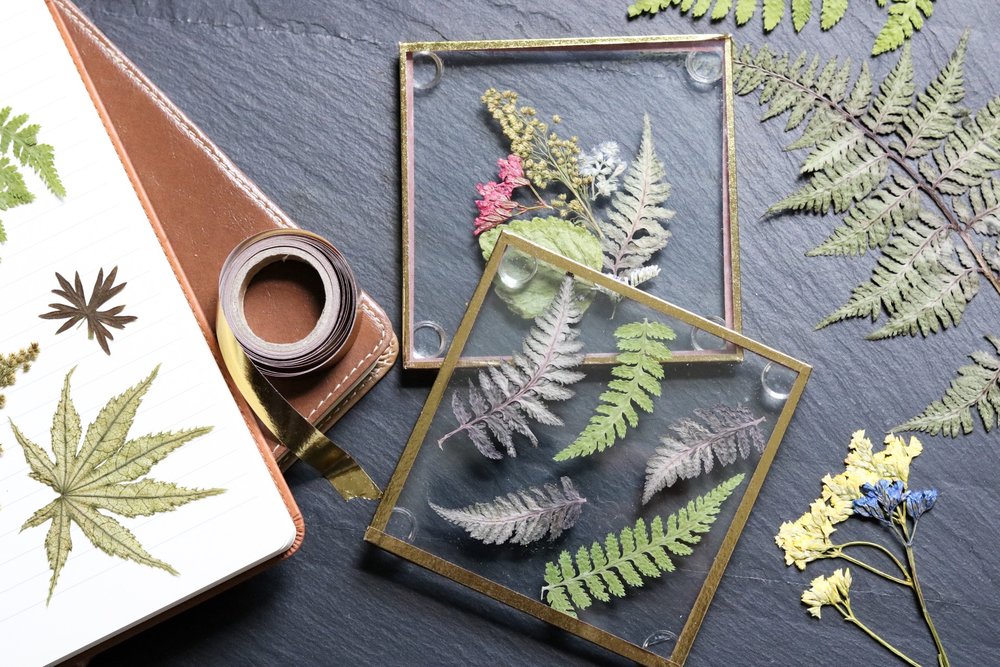
 Create something unique by making these Metal Washer Coasters.
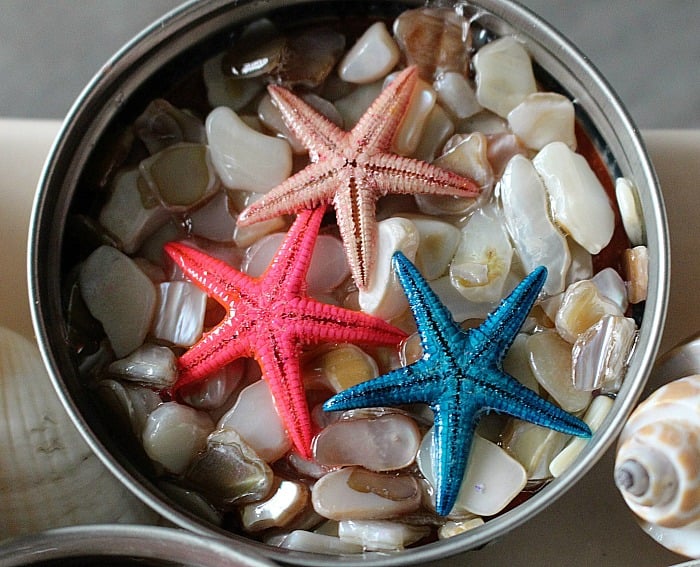 Use some gloss glaze to adhere these awesome pieces and create a Beach Themed Mason Jar Lid Coaster.
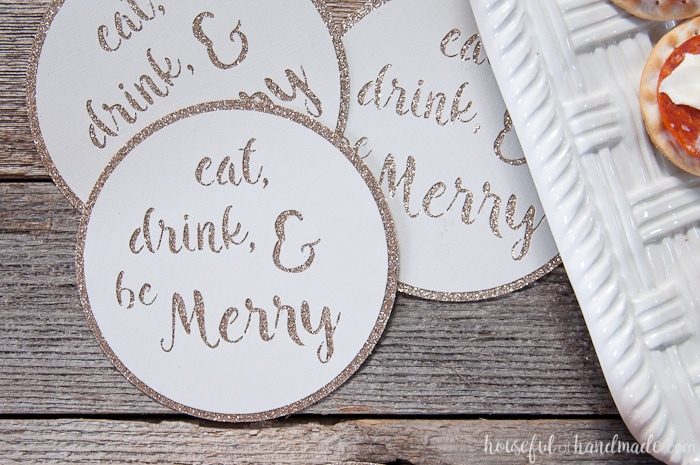 Make these quick and easy DIY Drink Coasters for your next cocktail party.
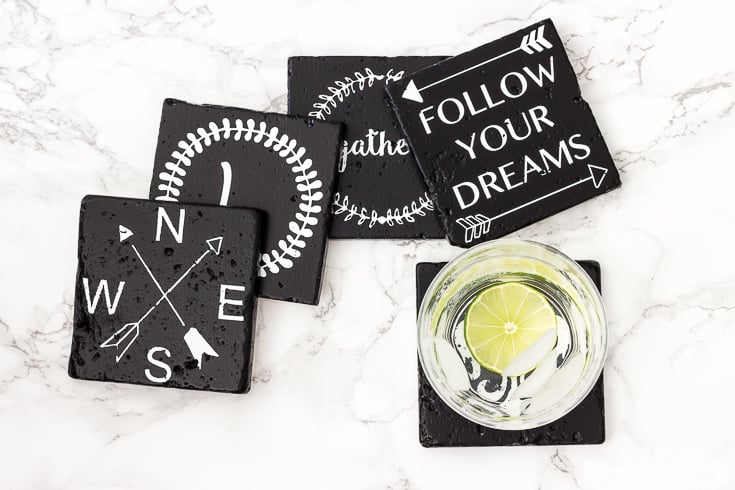 Tiles and black paint make the perfect canvas to make these DIY Farmhouse Style Coasters.
 Make these DIY Marbled Clay Coasters with any color combination you want.
 You will not believe how simple it is to make these chic Concrete Coasters.
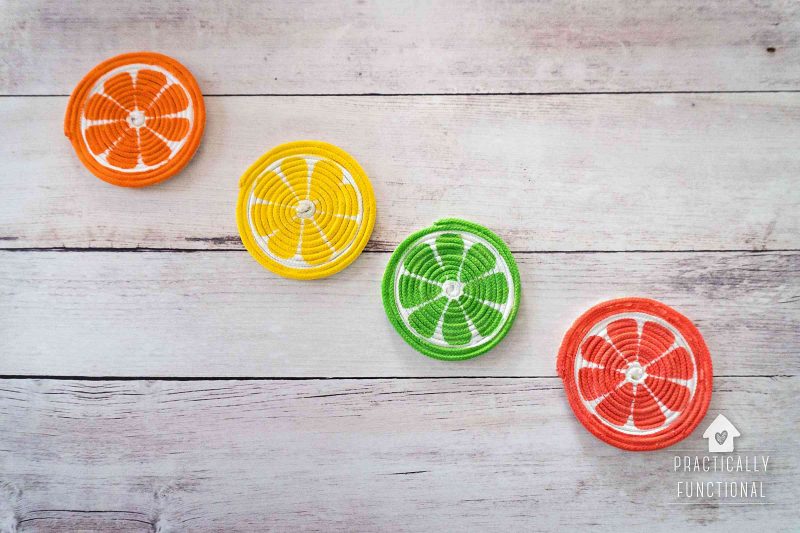 Use some rope to make these fun DIY Painted Rope Coasters for your summer parties.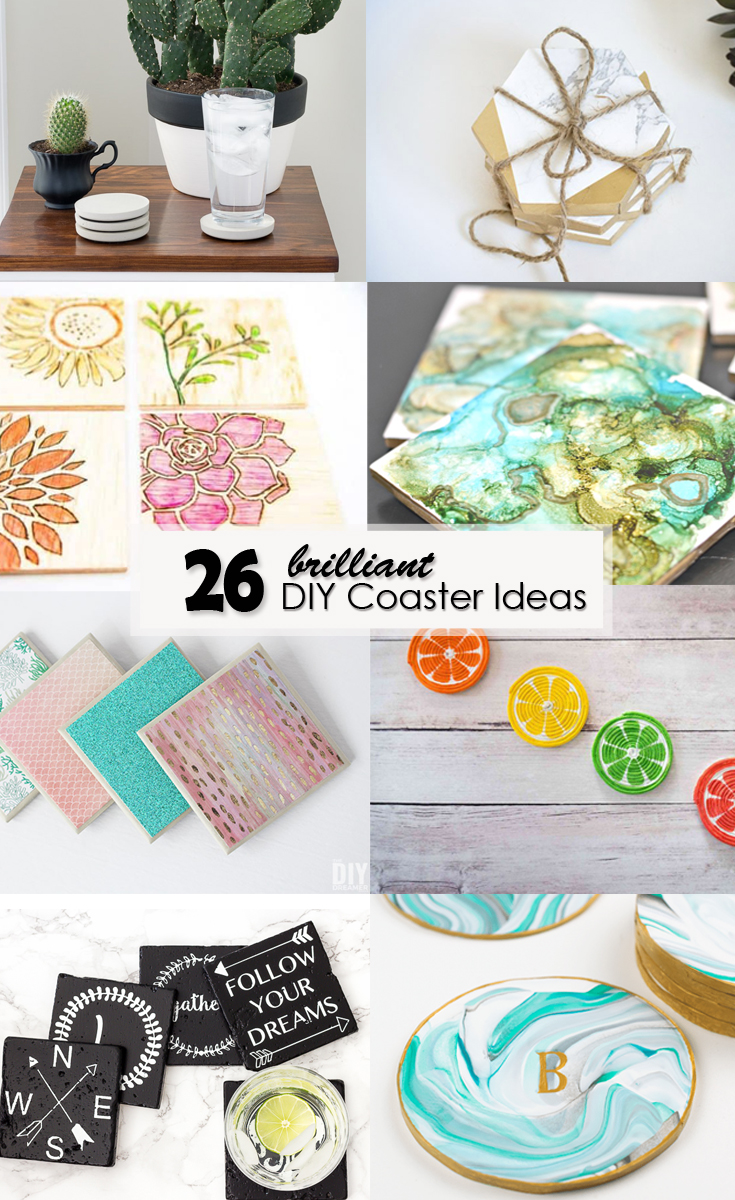




 Paint a Dated Thrift Store Spice Rack
 Label your cookie or candy jars
 Make Customizable chalkboard paint tags

 Paint a simple bucket
  Christmas ornaments coated in chalkboard paint
 Learn how to make a Smooth Chalkboard Wall
 Cover a desk with chalkboard paint
 Make a fireplace draft stopper
 Create Chalkboard Painted Mugs
 Add a huge DIY Chalkboard
 This DIY Clock Sign
 Use green chalkboard paint
 Make a magnetic chalkboard frame
 Upcycle a cabinet door
 Create Decorated Chalkboard Clipboards
 Build pull out drawers for your pantry
 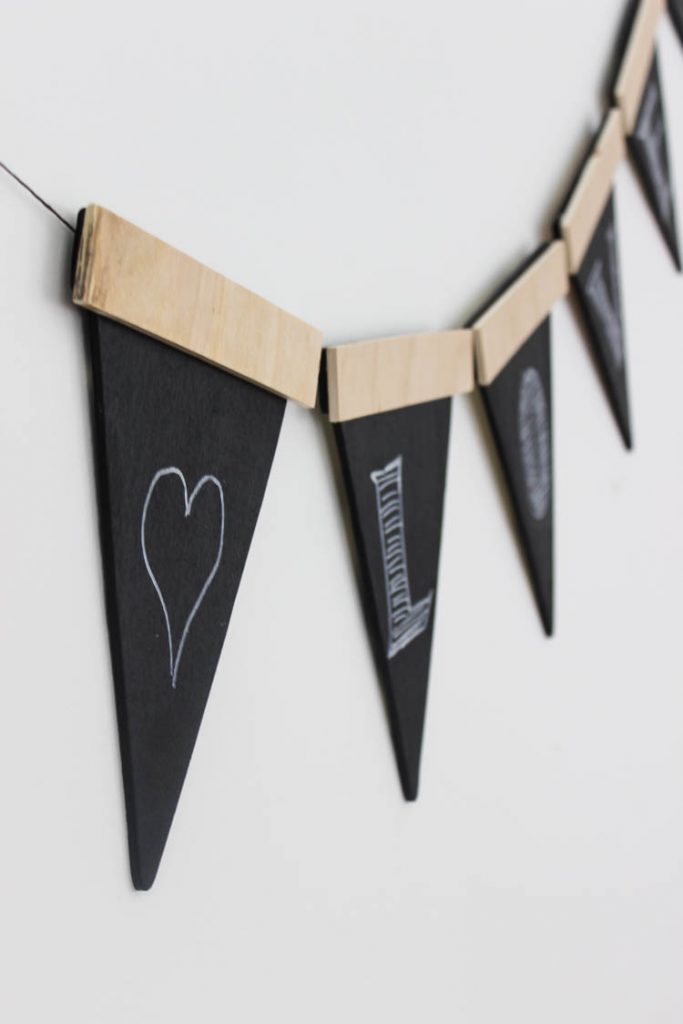 Create this amazing Wooden Party Banner
 Add some seasonal Chalkboard Art
 Create a Chalkboard Calendar


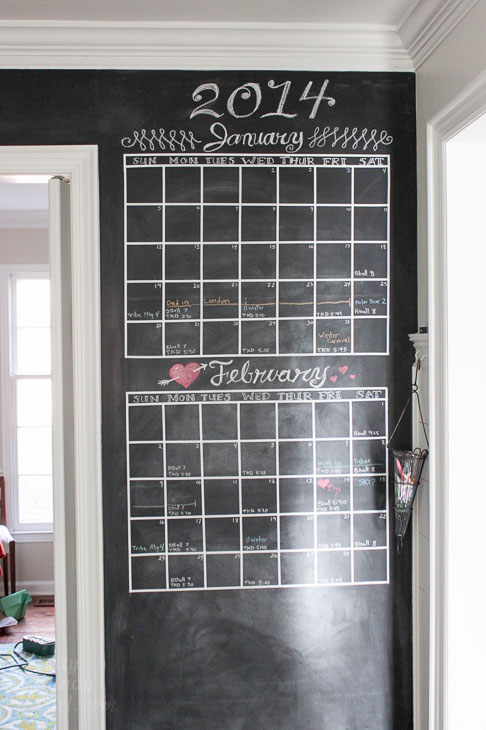 Create a DIY Wall Calendar