Tired of your sponge or soap taking up valuable sink space in your kitchen? Turn thrifted or dollar store glassware into a functional DIY pedestal kitchen sponge holder that doubles as beautiful decor.
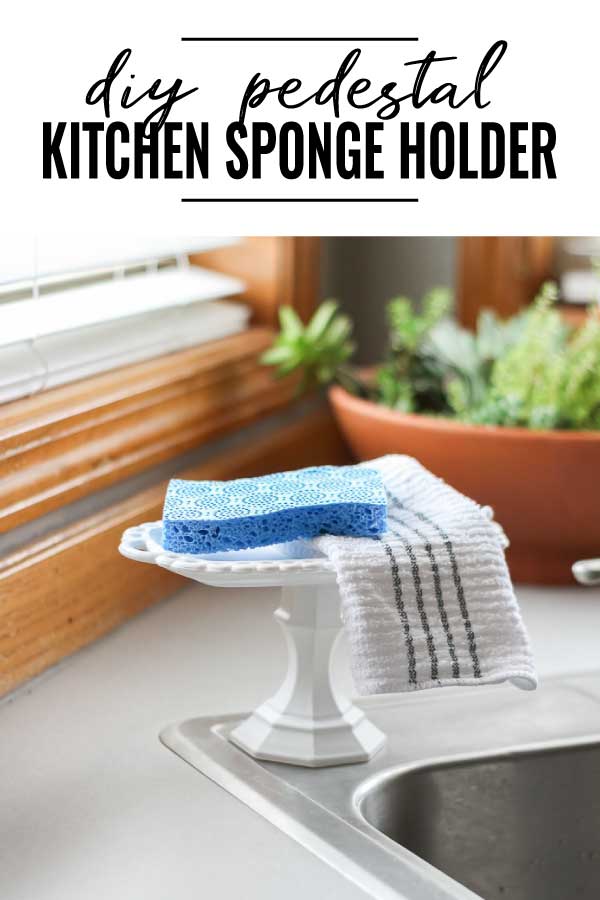
DIY Pedestal Kitchen Sponge Holder
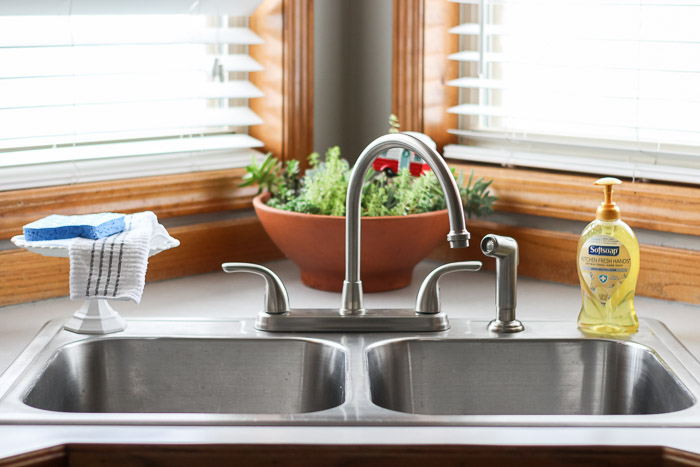
It’s Amanda from Domestically Creative and I’m back with a new way to organize or declutter your kitchen sink space! If you are anything like me, you don’t like a lot of clutter sitting around your kitchen sink. Things like dish soap, hand soap, sponges, and dishcloths sitting around my kitchen sink drive me insane!
Unfortunately, you have to have them out to be easily accessible. I decided to make a pedestal sponge holder as a functional place to keep the sponge, dishcloth, and even hand soap (if you want). This holder also serves as a beautiful decor item too. It’s easy to make your own sponge holder from dollar store or thrift store items, let me show you how.
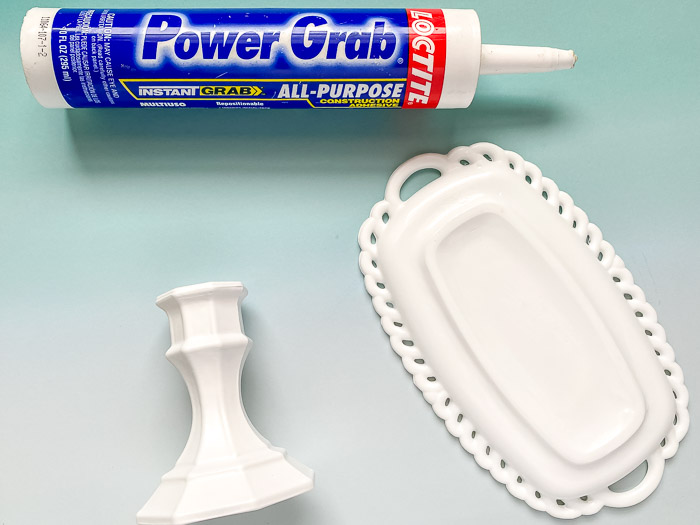
Materials:
(I’ve included affiliate links for your convenience. I earn a small percentage from a purchase using these links. There is no additional cost to you. You can read more about affiliate links here.)
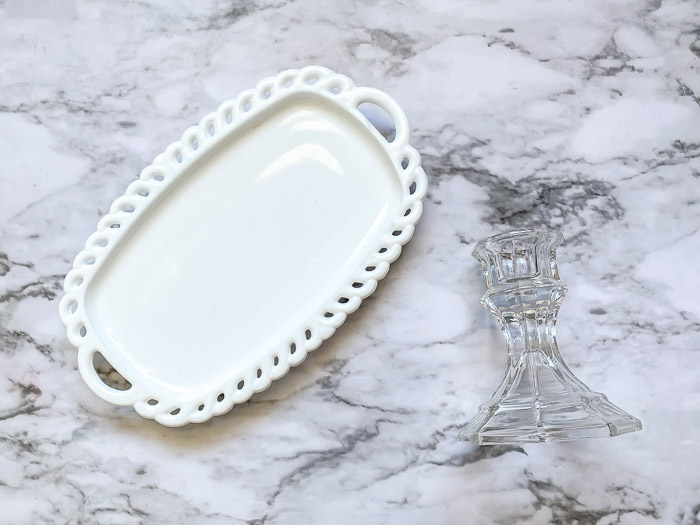
- Short candle holder (mine is from Dollar tree!)
- Plate, tray or other piece as the top (mine is a thrifted find)
- Glossy Spray Paint
- Comfort Grip nozzle
- Construction Adhesive
- Caulk Gun
Instructions:
Step 1: Prep the surfaces for paint
Clean both pieces really well with soap and water, and let them dry completely. If either piece came from a thrift store, it may be extra dirty. Consider using a mild degreaser or Murphy’s Oil Soap first. Then clean well with regular soap and water. Don’t leave any sticky or greasy spots behind because the paint will not stick in the next step.
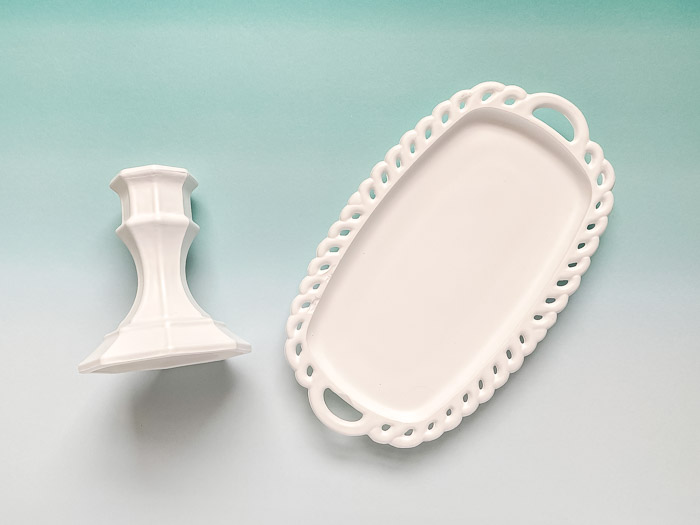
Step 2: Spray paint both pieces
Give each piece two to three coats of white spray paint. Using a high gloss paint gives the glass pieces a Milk Glass look.
Tips for Even Spray Painting:
- Paint outdoors on a calm, mild day, or use a painting tent to protect the wet pieces from debris and bugs.
- Keep the nozzle 12-15” away from the surface you are painting.
- Spray in short, even, horizontal lines across the surface, working top to bottom. The burst of spray should start and end just slightly off the sides of the object being painted.
- Avoid drips by doing multiple light coats, allowing the paint to dry between coats.
Step 3 – Attach pieces together
Before doing this step, it is very important that both pieces are completely dry and the paint is cured.
Use construction adhesive to attach the base to the top. To do this, place the plate or tray face down on a flat even surface. Using the caulk gun, add a small amount of construction adhesive to the top of the candle holder. Place the candleholder adhesive side down onto the bottom of the plate or tray.
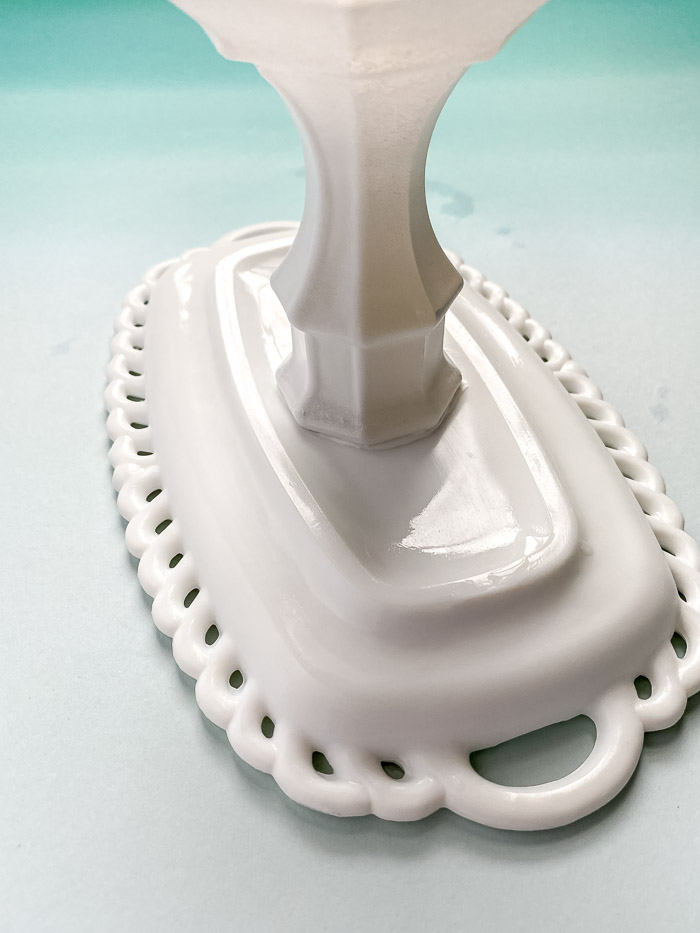
Hold a small amount of pressure on the candle holder for about a minute. Let the adhesive dry for about 24 hours before using your new DIY pedestal sponge holder.
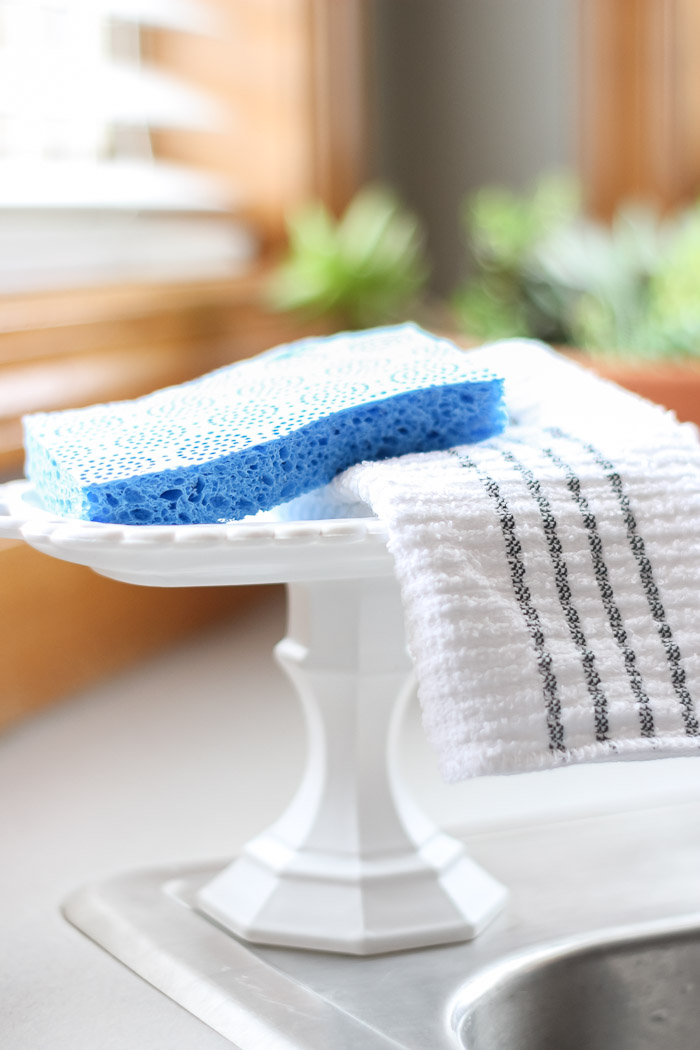
Use your new pedestal stand to keep your sponge and dishcloth in the kitchen and clear up some of that sink space!
You could make one of these pedestal stands for a bathroom or to hold jewelry on your dresser top! It doesn’t just have to hold sponges, the possibilities are endless. I plan to make one for our guest bath to hold a few mason jars we have cotton balls and Q-tips in. It could also serve as a place to keep soap.

What would you use one of these DIY Pedestal Kitchen Sponge Holder stands for in your home?
Don’t forget to pin this to save for later!
![]()

I’m Amanda, and I am the creator and voice behind the food and DIY blog, Domestically Creative. What started as a place to share updates with friends and family after we moved from Illinois to Tennessee and then to Texas, turned into a passion for finding creative and frugal ways to feed us and decorate our homes.
I have always had the “make it myself” attitude and I’m not afraid to bust out the power tools or get creative when it comes to decorating our home on a budget. You can usually find me scouring the local thrift stores, garage sales and estate sales looking for my next makeover (like this litter box cabinet), or dreaming up ways to make our new house feel more like home. My most recent project was giving my home office a much needed facelift. Some of the plans included creating a fun inspirational accent wall and adding pegboard to store my craft hoards.
I currently call Missouri home, where I live with my husband, dog, and 2 cats in a pretty dull, late 90’s split level. My husband and I both love to travel the U.S and recently purchased a small travel trailer to tag along in our journeys. In our free time together we can usually be found working together on a home project, exploring a new place, or just lounging with our pup, Delilah.
I’d love for you to connect with me on social media via Facebook, Instagram, Pinterest and Twitter!
See all of Amanda’s tutorials HERE.