41 decorative DIY pillows - Social Media Image

41 decorative DIY pillows - Social Media Image41 Decorative DIY Pillows

If you are looking for a quick and easy way to update any room in your house, change out your pillows! Pillows are easy to add, move, re-cover, or take to another room. They are used for adding texture, pattern, and warmth to your space (and let’s not forget comfort). Here are 41 Decorative DIY Pillows that will inspire you to make some beautiful pillows for your home.

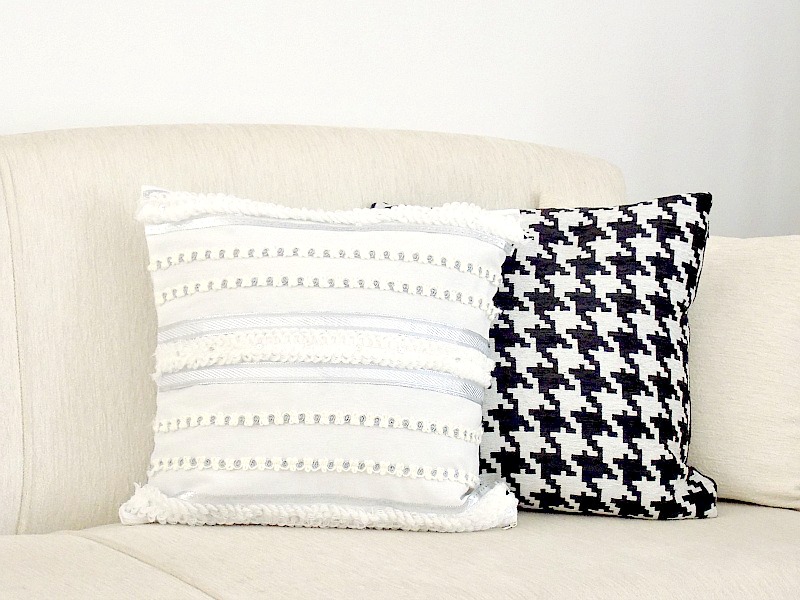
Create beautiful textured DIY Moroccan Wedding Pillows  for any room in your home.

Repurpose skirt into rectangular pillowRepurpose a skirt into a pretty rectangular pillow with bold pattern and texture.

pillow sham free pattern by organized 31Check out this Free Pillow Sham Pattern to create decorative pillows for your bedroom.

10-minute bandana pillow covers by heatherednestMake a quick 10-minute Dollar Store Bandana Pillow Cover.

Recycle a Shirt to create these plaid pillow covers by heathered nestRecycle old dress shirts to create these Plaid Pillow Covers and add some patterns to your decor.

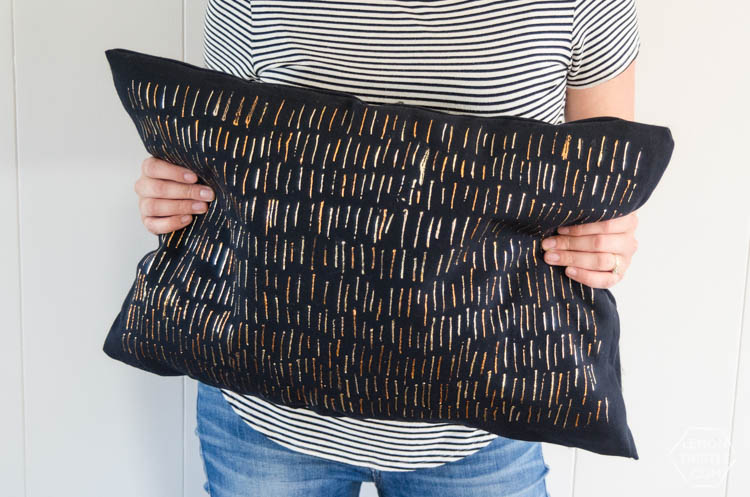
no sew metallic pillow by lemon thistleMake this gorgeous, modern no-sew metallic foil pillow.

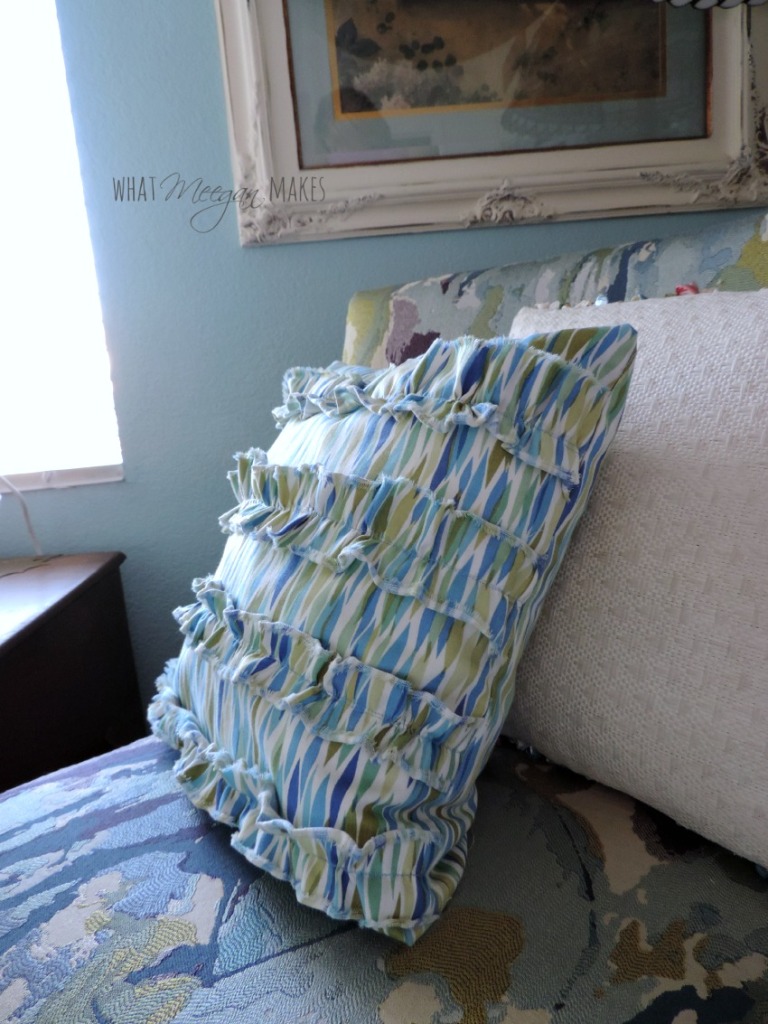
How to sew a Ruffled PillowLearn how to easily sew this Cute Ruffled Pillow.

DIY pillow with trim by postcards from the ridgeUse some fabric and add some fancy trim to make this beautiful Pillow with Jute Brush Fringe.

Shabby chic throw pillow cover by The Honey Comb HomeMake a beautiful Shabby Chic Throw Pillow Cover from light linen fabrics.

beach themed pillows by sustain my craft habitSew some fun Beach Themed Pillow Covers for your beach themed room.

kilim throw pillow covers from a rug and alpaca pillowLearn how to make both a no-sew faux Alpaca pillow cover and a Kilim throw pillow from a rug.

Map Coordinates throw pillow for first home by Michelle j designsA Map Coordinates Throw Pillow would make the perfect first home gift!

DIY Pom Pom Pillow by Jenna Kate at HomeHow fun are these DIY Pom-Pom Pillows? Adorable!

DIY Pillow Covers made with Dinner Napkins by 2 Bees in a PodRepurpose cloth dinner napkins to make a pillow cover.

diy st patricks day pillowMake a St. Patrick’s day pillow to keep your room more festive.

diy lumbar pillow by love create celebrateHelp your back by making a DIY Lumbar Pillow for your favorite seat.

Make a fun Cricut DIY Mermaid Pillow by Our Crafty MomThis adorable DIY Mermaid Pillow would be great in a little girl’s room.

diy striped euro shamsCreate Striped Euro Shams to add a decorative element to your bedding.

Sew an Outdoor Pillow by Creative RamblingsDIY Outdoor pillows are awesome too, learn how to make one for the patio.

fingerprint star pillows Use Fingerprints in stars in red, white and blue to create this awesome patriotic pillows.

birch tree pillow covers Design these Birch Tree Pillows with white felt for a bold statement.

DIY Farmhouse Stenciled Pillows by Our Crafty MomIf you like farmhouse style, these DIY Stenciled Farmhouse Pillows are perfect for you.

watercolor pineapple pillow by vanderveen houseAdd some freshness to your room with this Watercolor Pineapple Pillow Cover.

diy modern flower pillow by hazel and gold designsMake a Modern Flower pillowcase using iron-on vinyl.

DIY Paint by Numbers pillow by Shrimp Salad CircusUse Paint by Number skills to make this beautiful pillow cover.

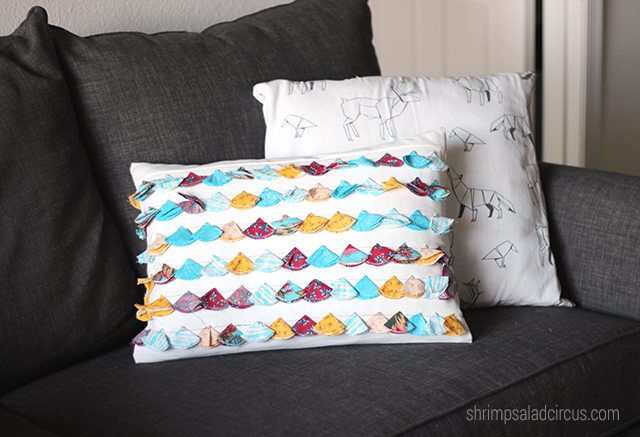
Anthropologie-inspired tasseled pillow by shrimp salad circusMake a Beautiful Tasseled Pillow inspired by Anthropologie from fabric circles.

recover outdoor pillows using curtainsUse Curtain Panels to re-cover outdoor pillows and update your patio.

Shibori Dyed pillows by shrimp salad circusTry out Shibori Dyeing to create these rad patterned pillows.

diy anthropologie knock off octopus pillowThis DIY Anthro-inspired Octopus Pillow is a cool modern statement piece.

diy back pillow Make your own Back Pillow to have the support you need while it looks good.

botanical pillows by simple nature decor blogAdd some greenery to your room with gorgeous Botanical Stenciled Pillow covers.

diy pillow cover by design inside the boxMake this bright and bold pillow using just a yard of fabric and a pillow form.

drop cloth pillow cover by girl just diyTurn a drop cloth into a pillow and add letter stenciling to make it beautiful!

diy pom pom pillow from placematCreate a fun, festive DIY Pom Pom Pillow using a placemat.


sailing themed pillow by h2obungalow
If you have a beach-themed home try creating this Nautical Come Sail Away Pillow.

diy felted wood throw pillows by h2obungalowCreate Felted Pillows to add color and pattern to your room.

Farmhouse pillowcase by making it in the mountainsMake a Simple Ruffled Farmhouse Pillowcase from a simple old pillowcase.

our happy place pillow using glitter htvTell others how much you love your home with this Our Happy Place pillow.

ruffled farmhouse burlap pillow by making it in the mountainsA 15-Minute Ruffled Burlap Pillow would be a perfect addition to farmhouse styled homes.

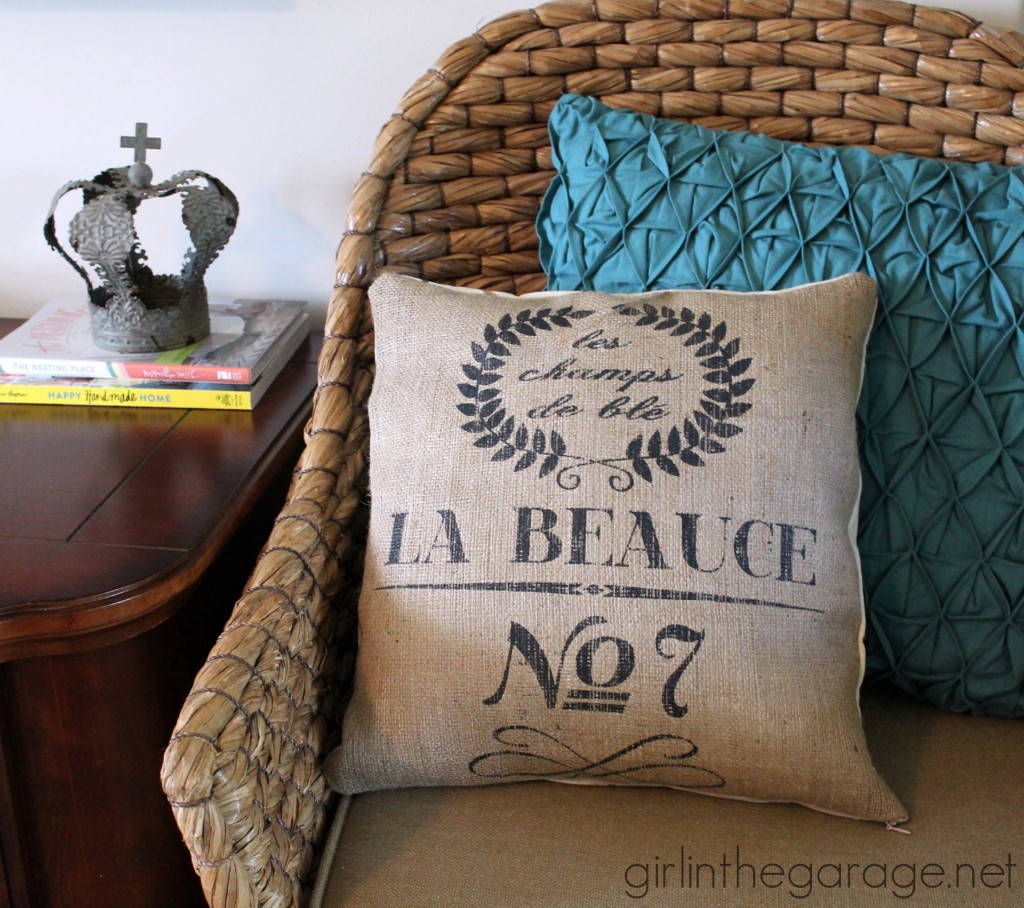
french burlap sack pillow by girl in the garageMake a Double Sided Pillow and get more bang for your buck!

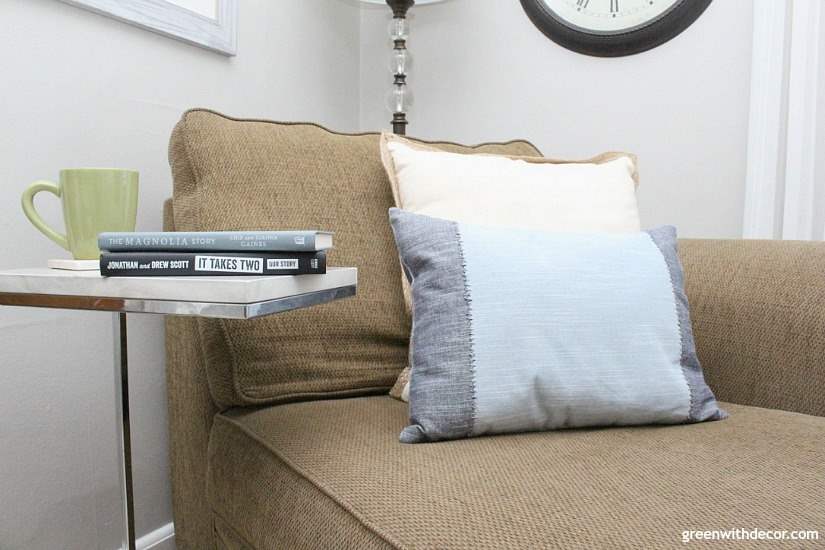
make pillow from placemats by green with decorRepurpose Placemats into Pillow covers for some durable throw pillows.


I hope you were able to find some inspiration for making custom and fun DIY pillows for your home. It’s a great change to make a big impact in a room without spending a lot of time or money. if you like this collection, please share on Pinterest by pinning this image:

41 Decorative DIY Pillows - Pinterest Image

Thanks so much for reading! I’d love to hear what you think or what kind of pillow you’d like to try to make!

Hi, I’m Sheri from Hazel + Gold Designs. Here are a few fun stats about me: I like love chocolate and peanut butter (together of course.) If you like stats, I have been crocheting for about 16 years, crafting for 20, and woodworking for about 4 years. I found a passion in making and being creative and began documenting my projects online at Hazel + Gold Designs.

When not working on projects, I enjoy spending time with my husband, four children, perfect dog, and ornery cat. You can find me on Facebook, Pinterest, Instagram and Twitter.

Read all of Sheri’s tutorials.

~Find more of Sheri’s projects here ~

9 Creative and Unique DIY Birdhouse Ideas - Pinterest ImageCreative and Unique DIY Birdhouses

Spring is just around the corner (I promise!) Now is the time to create some new birdhouses for your feathered friends. Not only will it make the birds happy, but birdhouses are a colorful way to decorate your landscaping. Here are 9 Unique and Creative DIY Birdhouses that may just inspire you to add some new bird houses to your yard. And, you don’t have to settle for the plain jane store-bought birdhouse (although several of these are made using store-bought houses). This list should help you create a birdhouse that is unique and represents your style!

Birdhouse Christmas Tree TopperMake a German-Inspired Christmas-theme birdhouse

white birdhouse with red roof and spigot for perch

Use paint, a spigot, and wood shims to create this one-of-a-kind birdhouse.

round white birdhouse with red roof and silhouette of birds and branches

Paint silhouettes of birds onto the outside of a small birdhouse to add colorful accents.

birdhouse with winter tree scene hand-painted, pine cone roof, and branch for perch

Take a simple store-bought birdhouse and add a pinecone roof and branch perch to it.

upcycle old silverware by adding knives to the top of the birdhouseUpcycle old silverware knives by making this Knife Topped Birdhouse.

painted flower garden birdhouseColleen shares some basic painting skills to create this beautiful Dip-dot Painted Flower Garden Birdhouse.

How to make a stone birdhouse by Empress of DirtEmpress of Dirt shows us How to Make a Stone Birdhouse for your yard.

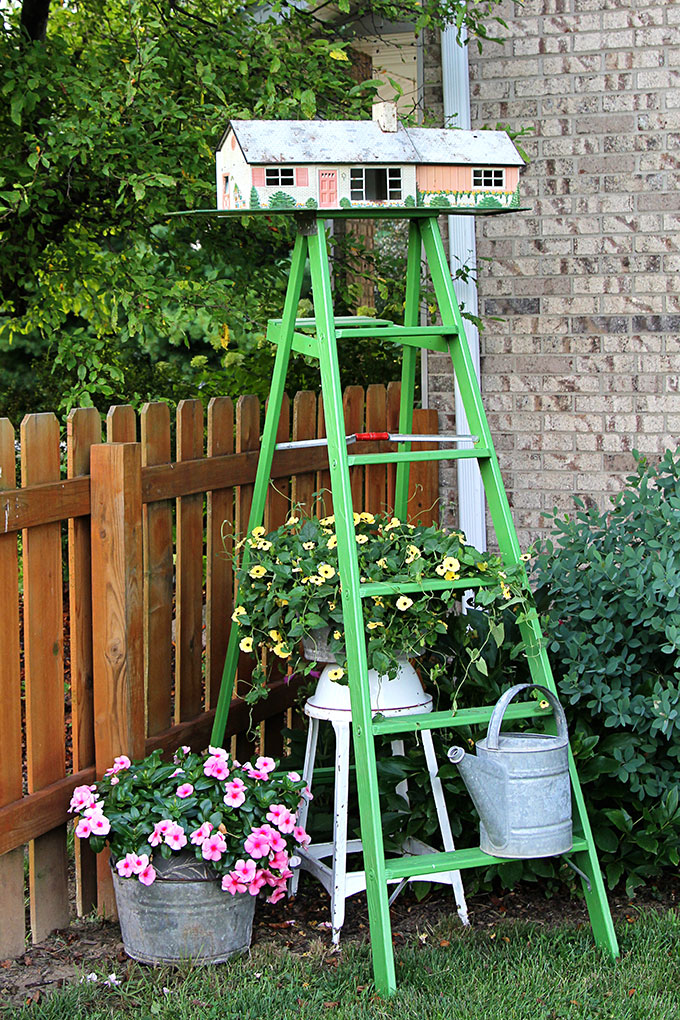
Turn a vintage tin dollhouse into a birdhouseRepurpose a Vintage Tin Dollhouse into a birdhouse.

how to install a birdhouse on a postNow that you have your beautiful birdhouse made, learn how to Install a Birdhouse on a Post for a great landscape focal point.

I hope this inspired you to think outside the box when it comes to adding a birdhouse in your yard. Let me know what you think of these! Don’t forget to share on social media or Pinterest so others can be inspired too!

9 Creative and Unique DIY Birdhouse Ideas - Social Media Image

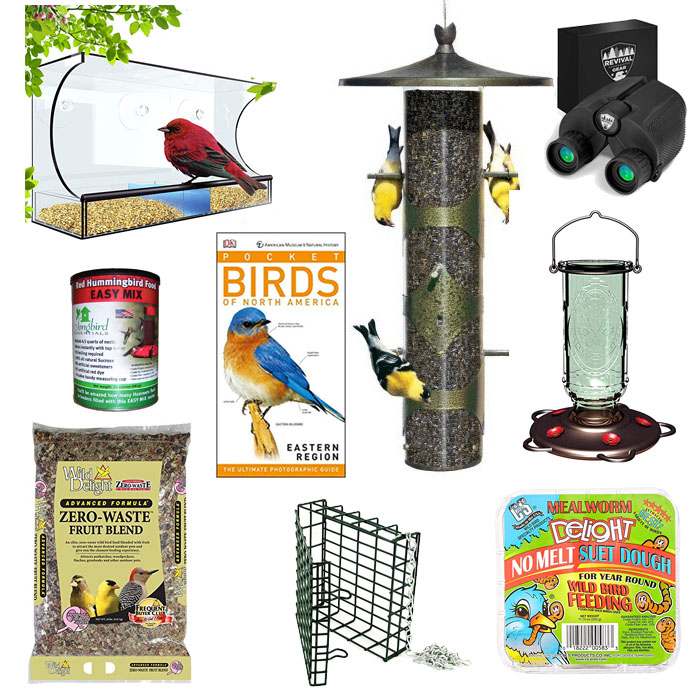
Hey bird lovers! My family loves bird-watching , too. Over the years we’ve experimented with several bird feeders, bird food, and resource books. I’ve created a list of our favorite bird-feeding and watching items on Amazon:

(I’ve included affiliate links for your convenience. I earn a small percentage from a purchase using these links. There is no additional cost to you. You can read more about affiliate links here.)
Hi, I’m Sheri from Hazel + Gold Designs. Here are a few fun stats about me: I like love chocolate and peanut butter (together of course.) If you like stats, I have been crocheting for about 16 years, crafting for 20, and woodworking for about 4 years. I found a passion in making and being creative and began documenting my projects online at Hazel + Gold Designs.

When not working on projects, I enjoy spending time with my husband, four children, perfect dog, and ornery cat. You can find me on Facebook, Pinterest, Instagram and Twitter.

Read all of Sheri’s tutorials.

~Find more of Sheri’s projects here ~

16 Ideas for Decorating a Large Wall Space - square featured Image

16 Ideas for Decorating a Large Wall Space - Pinterest Image16 Ideas for Decorating a Large Wall Space

Large blank wall spaces can often be a challenge to decorate. Whether you are at a complete loss on how to decorate yours, are trying to decide what kind of art to hang or are looking for photo collage ideas, this roundup of 16 ideas for decorating a large wall space will be helpful to you.

How to decorate a large wall:

How to update an old canvasPaint over an old piece of artwork and use the canvas to create a modern piece of art for your home.


DIY wall Bookrack tutorialBuild a large Bookrack that will take up a lot of space and keep your books organized.


Personalized wall shelfAdd a large shelf that is customized, it’s not only functional but a work of art as well.


Wall hanging desk Use blank wall space to build a wall-mounted desk for a great art or work station.

 

easy to paint giant wall artLearn how to paint your own Giant Wall Art.


diy wall chalkboard with ledgeBuild a large chalkboard with a ledge for all your supplies and hang it on your blank wall.


create rope light wall artUse rope lighting to make a bright and creative word art display.


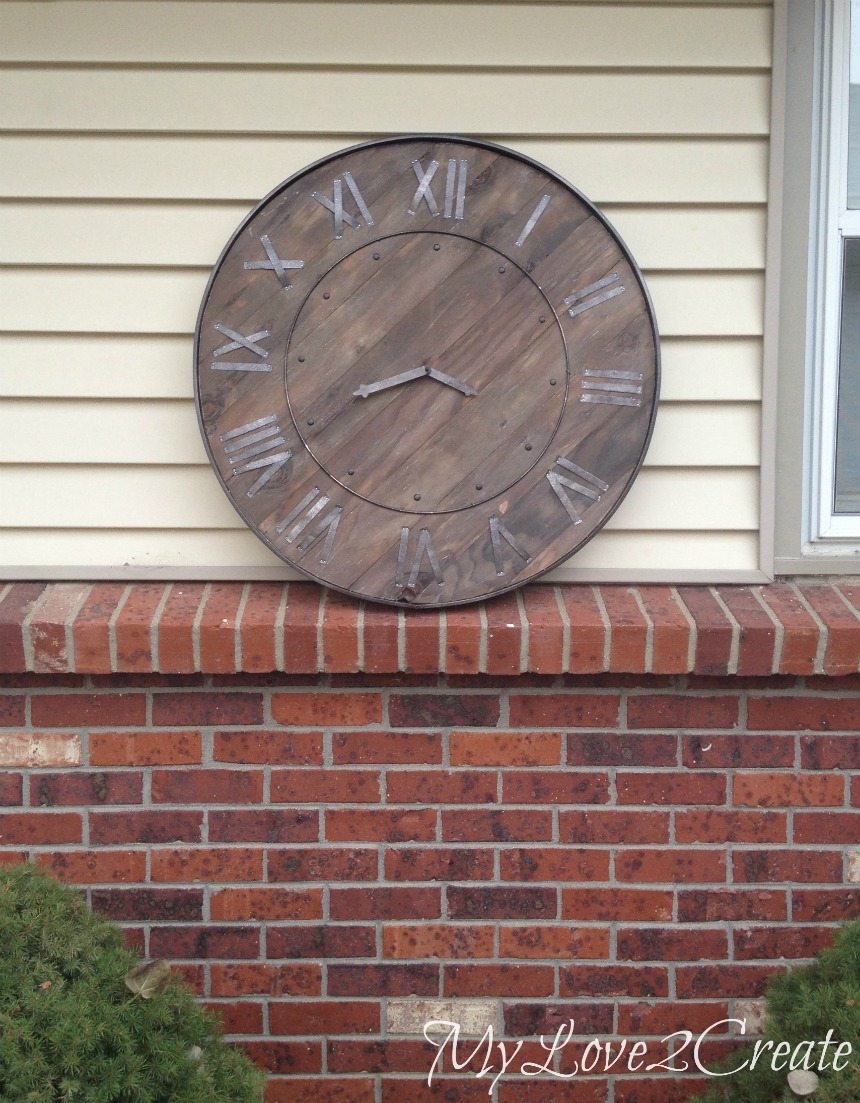
large rustic wall clockBuild a large wall clock to take up space on a large wall.


cover wall in flow wall systemUse a Flow Wall system to create the perfect storage station in any room that needs it.
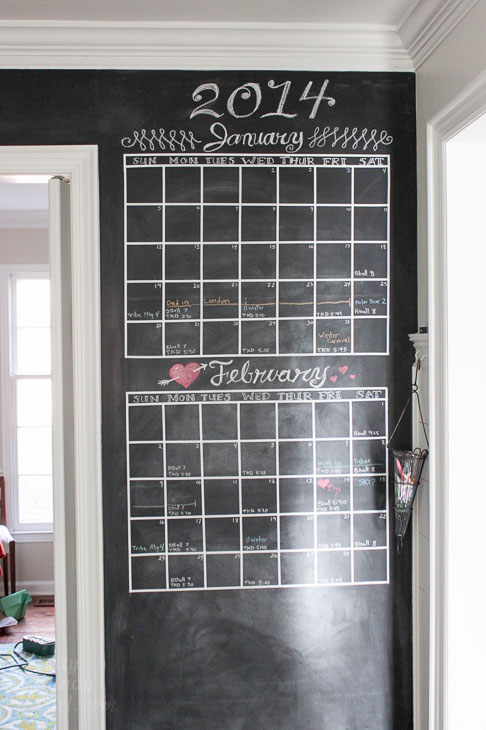
 

create chalkboard wall calendarCover the wall in chalkboard paint and use it to write down whatever your family needs.


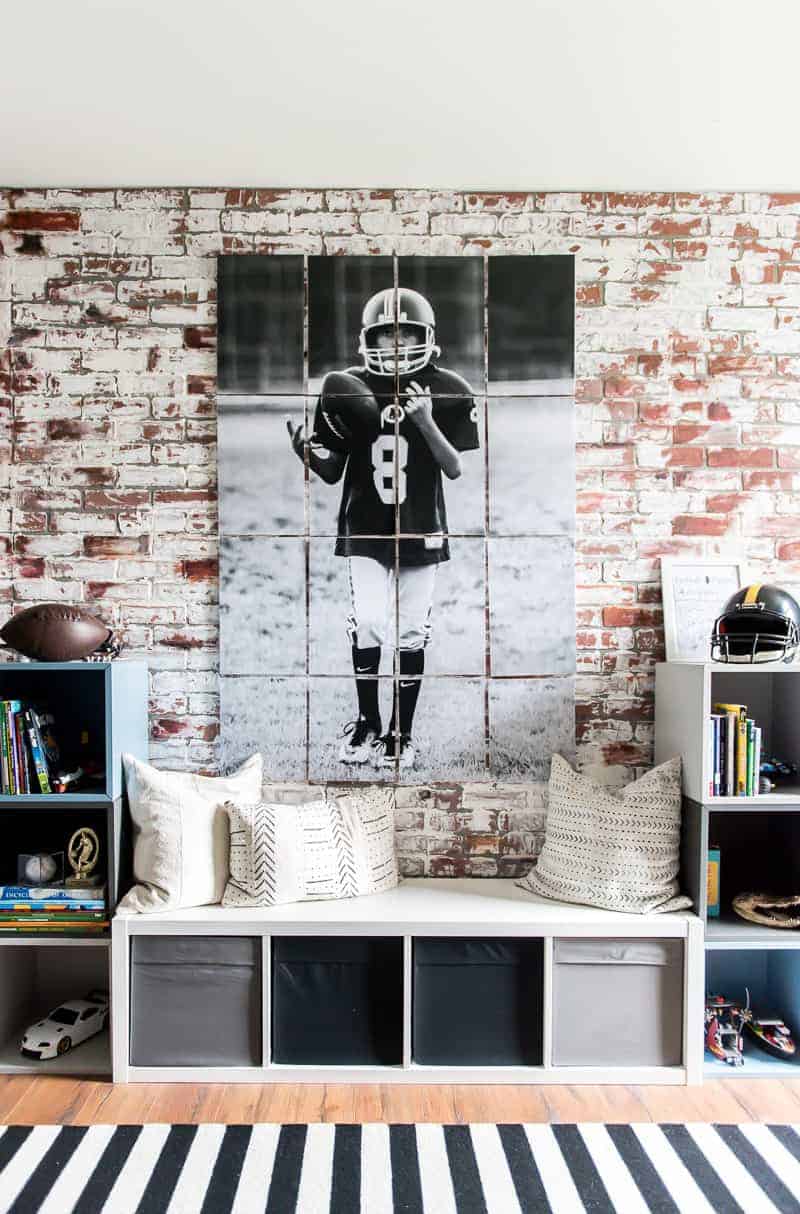
large wall art made with multiple pagesUse a photo printed on multiple pages to create this gorgeous large photo collage.


tips to create a perfect gallery wallLearn how to create the perfect gallery wall of photos, decor and memorabilia.
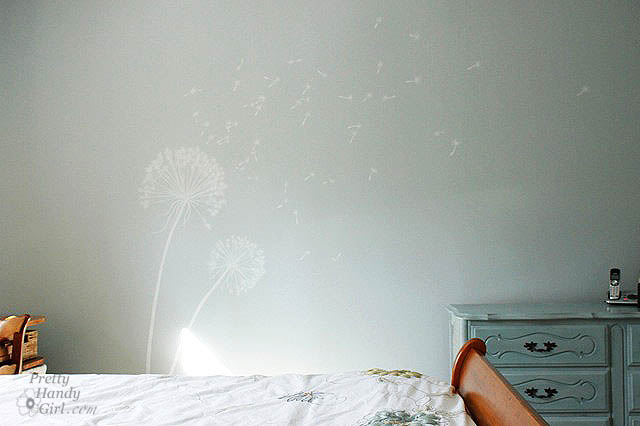
 

painting a dandelion wall muralPaint a large image onto the wall to add character.


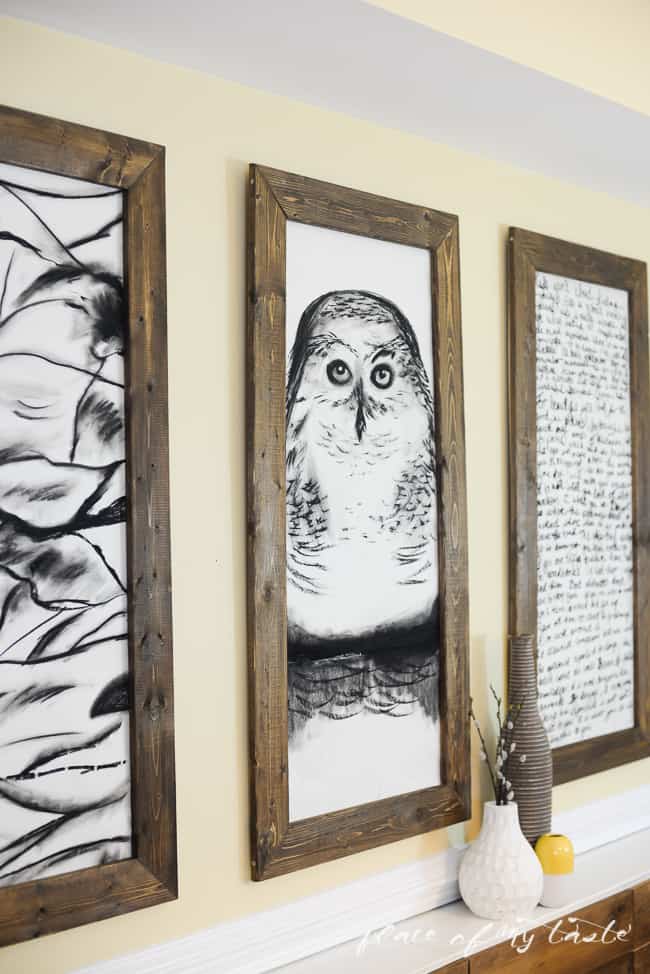
Build large frames and use multiple large canvases to build this great collage.
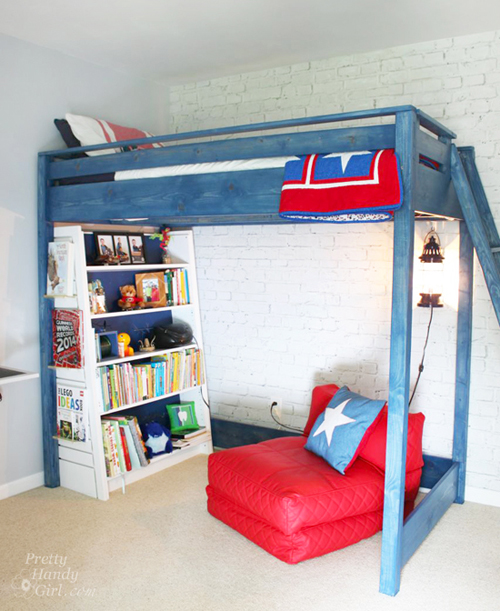
 

Install a brick wallpaper mural to add awesome character to any wall.


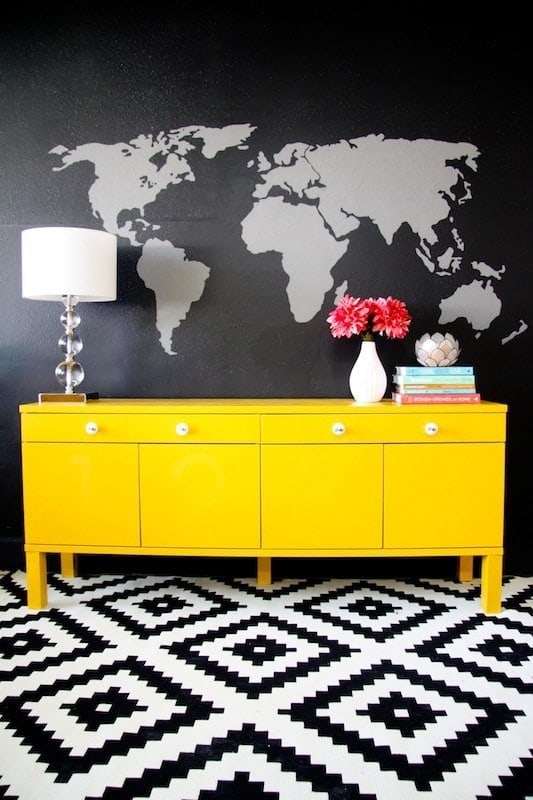
create a map wall muralPaint a map wall mural that looks awesome and modern!


What do you think of these ideas? Share thoughts in the comments. Also, be sure to save this image to Pinterest so you can find these ideas again:

16 Ideas for Decorating a Large Wall Space - Pinterest Image

Thanks for reading!

Hi, I’m Sheri from Hazel + Gold Designs. Here are a few fun stats about me: I like love chocolate and peanut butter (together of course.) If you like stats, I have been crocheting for about 16 years, crafting for 20, and woodworking for about 4 years. I found a passion in making and being creative and began documenting my projects online at Hazel + Gold Designs.

When not working on projects, I enjoy spending time with my husband, four children, perfect dog, and ornery cat. You can find me on Facebook, Pinterest, Instagram and Twitter.

Read all of Sheri’s tutorials.

~Find more of Sheri’s projects here ~


Avington Black & White Cement Tiles from TheBuilderDepot.com

Step-by-step installation guide to install cement tiles and handle intricate designs like a pro. Get expert results for any space!

close up of black and white cement tiles

How to Install Cement Tiles

If you’ve been browsing Pinterest lately or flipping through the pages of your favorite home design magazine, you’ve probably seen (and likely fallen in love with) real cement tiles.

Cement tiles are trending, so much so that porcelain tile and ceramic tiles look alikes are popping up at most tile retail shops.

The first thing you’ll notice about real cement tiles, is the price tag can be steep.

What you probably don’t realize is cement tile can be a bit trickier to work with than standard ceramic or porcelain tiles.

Don’t let this dissuade you, because today I’m going to show you how to install those beautiful authentic cement tiles and achieve professional results.

Plus, because we’re friends, I’m going to share with you my affordable source for real encaustic cement tile options.

Cement Tile Look Alike on Bathroom Floor

Cement tiles purchased from most tile retailers can run upwards of $20 per square foot. But, I’m about to let you in on my secret tile source.

Shhhh, lean close so I can whisper it in your ear. “TheBuilderDepot sells real cement tiles for less!”  In fact they sell more than just cement tiles and their prices can’t be beat!

You might remember I used beautiful marble subway tiles from TheBuilderDepot when renovating my kitchen floors .)

The Builder Depot offers popular tiles at a discount because they cut out the middle man. (Here’s a brief explanation on why their prices are lower than other retailers.)

How to Install Cement Tiles and Achieve Professional Results

Seeing those beautiful cement tiles and a great price prompted me to contact my friend at The Builder Depot and ask him about being a Saving Etta sponsor.

He agreed but on one condition; he asked me to write a tutorial on How to Install Cement Tiles and discuss the pitfalls and risks associated with improper installation techniques.

Apparently customers were unaware of the proper way to install cement tiles.

In fact, even seasoned tile installers were making costly mistakes because they were treating cement tiles like natural stone, or ceramic and porcelain tiles.

Both come in a wide selection of intricate designs, but there is a big difference between them.

Cement tiles make perfect choices for a kitchen backsplash, bringing unique character and timeless style to any space.

Their handcrafted appeal makes them a favorite among high-end retailers and design professionals.

What’s the Difference Between Cement Tiles and Porcelain or Ceramic Tiles:

  • Ceramic and porcelain tiles are slick (often shiny) and aren’t absorbent on the surface.
  • Encaustic tiles are highly porous and absorbent from the surface to the base.
  • Porcelain and ceramic tiles can be grouted immediately after the thinset mortar has cured.
  • Cement tiles must be sealed before grouting or you risk the grout staining (or permanently sticking to) the surface.
  • Porcelain and ceramic tiles do not need to be sealed.
  • Cement tiles need careful handling to avoid staining and scratching the tiles.
  • Porcelain and ceramic tiles are forgiving and can stand up to a lot of abuse.
  • Encaustic cement tile patterns are created by pouring different colored clay baked into the tile. It’s not merely a coating.
  • Porcelain and ceramic tile patterns are applied in the glazes (painted on top of the tile).

Here’s a beautiful video showing exactly how encaustic cement tiles are made:

Now that you know more details about cement tiles, you can have a beautiful cement tile floor or install them as a wall tile.

But, you need to follow this tile project tutorial closely. (Almost all these instructions will apply to installing cement tiles on a wall, so keep reading.)

Making Manzanita's tile shower niche cement tiles

Check out this beautiful bathroom makeover with a Cement Tile Niche
by Making Manzanita

How to Handle Your Cement Tiles:

The most difficult part is choosing your desired pattern! There are so many gorgeous styles. You can even include a focal point piece to add to the center of the floor or wall.

Once you receive your cement tiles you’re going to be tempted to rip open the box and rub your grubby hands all over the smooth tiles (or am I the only weirdo that likes to stroke tiles?)

Regardless, before you open the box, wash your hands. Cement tiles are EXTREMELY porous and will absorb oils and stain easily.

Until you get to the sealing step, you’re going to have to handle these tiles with care (kid gloves wouldn’t be a bad idea.) Lest you think you can seal the tiles before installation, don’t try it.

The tiles have to be porous to release moisture while the mortar is curing. If you seal it ahead of time, there’s a good chance your tiles will develop a ghosting appearance.

Cement tiles can scratch easily. For best results, keep the packing material between the tiles until you are ready to install them.

Don’t mark your tiles with a pencil or pen for cutting (unless you will be cutting off the marks.) Even faint pencil lines can’t be easily removed from the tile surface.

How to Prepare Your Floor for Cement Tile Installation:

(I’ve included affiliate links for your convenience. I earn a small percentage from a purchase using these links. There is no additional cost to you. You can read more about affiliate links here.)

Just like when you paint a room, you’ll get the best results if you take the time to prep your space before you begin.

Before laying tiles on your floor, you must put down a substrate to prevent future flexing that can lead to cracks in your grout or worse in your tiles.

Typically tile installers will use cement backer board. But, because the cement tiles are so thick, I chose to use an uncoupling mat to reduce the finished floor thickness.

cutting uncoupling mats.

Measure and cut your mat (or cement board) with a utility knife. Dry fit the mats (or boards) before proceeding.

Whichever substrate you use, be sure to follow the manufacturer’s installation instructions. 

For improved waterproofing, you’ll want to cover seams with the recommended seam tape.

For completely waterproofed floors, add seam tape around the perimeter of the room (as shown in this video.)

Installed uncoupling mats, finding center of room. Marking perpendicular lines.

Next find the center of your room and mark perfectly perpendicular guidelines to use as a guide when laying out your tiles.

Layout cement tiles starting in the center.

Dry fit the tiles with spacers in your room before you begin. Make any adjustments to the tile layout or pattern before you begin.

Dry run. Layout cement tiles before installation

How to Install Cement Tiles:

With your substrate installed, it’s time to install your tiles. Before we begin, make sure you have these tools and materials.

A quick note on cutting the tiles. You can use a score and snap manual tile cutter for straight lines, but nothing beats a wet saw for angled and more complicated cuts.

If you don’t want to buy a wet saw, you can rent one. Tile setting is a one person job, but it helps to have an assistant to speed things along by making cuts and mixing more mortar and grout.

Materials:

Instructions for Installing Cement Tiles:

Here’s a video I made to help you learn how to install cement tiles properly and keep them looking beautiful!

Mix your thinset mortar according to the package directions. (I usually try to achieve the consistency of peanut butter.)

Prepping Your Cement Tiles:

One of the most important tips for working with cement tiles is to soak them in water before installation. Allow them to soak for at least 30 seconds before laying them into the mortar.

If you don’t soak them, the tile will absorb too much moisture from the mortar.

Soak tiles in water tub

Starting from the center of your room, apply the thinset mortar to a small area and use your 1/2” notched trowel to comb the thinset.

Lay your tiles down. Lift one tile to check and see if the mortar is completely covering the back of the tile. If not, your mortar consistency may be too dry.

Avoid the temptation to lay more than a few tiles at a time.

Lay first four tiles in thinset mortar

After your first small group of tiles are set, insert spacers. Check to make sure the tiles are level and the same height.

Then immediately clean any and all thinset off your tiles using a damp sponge.

Now you can move on to installing the next small grouping. Periodically check to make sure your tiles are lined up with each other and there are no lips between tiles. (Using these self leveling spacers will eliminate any lippage on tiles.)

After all your tiles are installed, block off the room and keep off the tiles for at least 24 hours while the thinset hardens.

How to Install Cement Tiles and Achieve Professional Results

Sealing Cement Tiles:

We’ve arrived at the most important step when installing cement tiles! You must seal the tiles before grouting them. Use a penetrating sealer made for porous stone or cement tiles.

Before sealing, make sure your tiles (and the thinset for that matter) are completely dry.

You can test the tiles for any remaining moisture by laying down a piece of plastic on the tiles after installing them.

If there is moisture the next day when you lift the plastic, they aren’t dry enough. Wait for them to dry or you could risk discoloration of your tiles.

Clean the tiles by sweeping off any debris and clean with a ph balanced cleaner (a bucket of warm water with one drop of dish soap is a good cleaner.)

Let the tiles dry. Wipe or buff with a rag.

Pour the sealer into the dish pan. Dip your pad applicator into the sealer liquid. Squeeze off excess sealer against the edge of the dish pan.

Apply sealer with pad applicator

Apply the sealer in thin coats working in one direction. Remove any excess sealer from the tiles BEFORE it dries. (See the streaks below?

Those streaks and any puddling needs to be buffed off to avoid uneven drying.)

Avington Black & White Cement Tiles from TheBuilderDepot.com

Let the first coat of sealer dry completely. In fact you may want to take a break for 30 minutes or so between coats.

Buff off excess sealant from tiles.

Be prepared to apply many coats before your cement tiles are fully sealed. (My tiles needed 5 coats to seal them. Then I had to wait another 24 hours for the sealant to fully cure before grouting.)

It may seem like a long process, but this insures the tiles will withstand regular use and resist stains.

After each coat of sealant dries, you need to test to see if the cement tiles are completely sealed. Drip water onto the tiles.

If the water beads up, they are sealed. However, if the water absorbs into the tiles, add another layer of sealant and try the water test again later.

Water beading up on cement tiles means it's ready to grout.

Once your tiles are fully sealed, wait 24 hours before grouting.

How to Grout Tiles:

Because I work alone, it takes me a little longer to grout. To prevent my grout from hardening too quickly, I like to float my mixed grout container in a bucket of ice water to slow down the setting action.

Load up your float with fresh mixed grout. Holding your grout float at a 45 degree angle against the floor, spread the grout over the gaps between the tiles in a diagonal motion.

Work in small 3 – 4 square foot areas. Then scrape any excess grout off the tiles using a clean grout float.

grouting tiles with grout float

Immediately wipe off any excess grout using a clean damp sponge. Ring out and refresh your sponge with clean water frequently.

It is imperative to get all the excess grout off the tiles or you risk the grout staining or settling into the tiles.

Go ahead and move on to the next section, but go back to the previous tiles and buff off any haze with a dry rag.

Avington Black & White Cement Tiles from TheBuilderDepot.com

After the grout has cured, clean your floors with a pH neutral mild cleanser. Then apply one final coat of penetrating sealer.

A new coat of sealer should be reapplied every 6-12 months for floors, and every 2-3 years for wall tiles.

Avington Black & White Cement Tiles from TheBuilderDepot.com

Cement Tile Maintenance:

To protect your beautiful cement tile floors, clean up any spills immediately. Never leave anything sitting on the floor that could stain or scratch your tiles.

If your tiles get scratched or stained, you can use a fine grit sandpaper to sand off the stain on the surface of the tile. Just be sure to re-seal your tiles after sanding.

Still on the fence about installing cement tiles in your home? This is a good article breaking down the pros and cons of cement tiles.

A big thank you to The Builder Depot for providing the laundry room tiles for the Saving Etta project and for giving me excellent instructions for installing the cement tiles.

What do you think? Do you love the cement tile look? They really add unique character to a home and are the perfect solution for modern kitchens and other high-traffic areas.

Laundry Room with Avington Cement Tile Floor.

I hope you found this tutorial helpful. Happy tiling!

How to Install Cement Tiles and Achieve Professional Results

PIN FOR LATER:

cement tile with text

Disclosure: The Builder Depot is a proud sponsor of the Saving Etta project.  I was provided with materials for this project. I was not told what to write. All opinions and ideas are my own.

 If you haven’t done so already, be sure to *subscribe to my YouTube channel!

Subscribe to my YouTube Channel

*My followers on YouTube get sneak peeks of some of the projects I’m working on, so subscribe today!


If you liked this post, you’ll also find these tile posts helpful:

How to Install Cement Tiles and Achieve Professional Results

How to Tile a Backsplash


How to Install Cement Tiles and Achieve Professional Results

How to Grout Tiles

Top 16 Gift Ideas for the DIY Enthusiast

Cyber Monday is the perfect day to look for online deals and steals. Even if you missed Cyber Monday, I have some stocking stuffer ideas for your little (or big) DIYer? These are gift items I know any DIYer would love to have in their stocking. In the list are items I’ve found useful while working on a variety of projects this year (including building a whole house.) Here’s my list of 16 gift ideas for the DIYer in your life (in no particular order):


  1. Swanson Framing Square
  2. Iso-tune Bluetooth Noise Reducing Headphones
  3. DeWalt Battery USB charger adapter
  4. Workman’s Friend Barrier Cream and Moisturizer
  5. 10-in-1 Painter’s Tool
  6. Kreg Jig
  7. Capital Gaines by Chip Gaines
  8. Rockwell Oscillating Tool
  9. Stanley FatMax Fit in Hand Tape Measure
  10. Greenlee Non-Contact Voltage Tester
  11. Pro-Sensor Precision Stud Finder
  12. No Cry Safety Glasses
  13. DeWalt Random Orbital Sander
  14. RZ Re-usable Dust Mask
  15. DeWalt Jobsite Bluetooth Speaker
  16. Hand & Body Warmers

About my gift suggestions:

Swanson Framing Square – This year I’ve used this framing square for many framing and cutting needs especially when using my circular saw. In addition, I’ve used it to scribe a line for ripping lumber with my circular saw. Any good carpenter would be lost without a good framing square.

Iso-tune Bluetooth Noise Reducing Headphones – When you are trying to protect your hearing (but dread using ear plugs), this set of noise reducing ear buds will keep you happy and safe as you jam to your favorite tunes while working.

DeWalt Battery USB charger adapter – While preparing for Hurricane Florence, I pulled this USB charger adapter from my tool box and brought it inside. Although I didn’t have to use it, this little adapter has been invaluable for freeing up the outlets while my crew and I were running on conditional power. (It does require a DeWalt battery to attach to for charging.)

Workman’s Friend Barrier Cream and Moisturizer – I’m very particular about hand lotions. They have to provide a lot of moisture without leaving a greasy feeling. The Workman’s Friend moisturizing cream in my opinion is the perfect consistency, but it also acts as a barrier cream keeping your hands cleaner after a day of getting dirty.

10-in-1 Painter’s Tool – I didn’t think there was any way to improve on the standard 5-in-1 painter’s tool, but Purdy proved they could do it. Tucked into the handle of this tool is a small flat head and philips head screwdriver. In addition to the screwdrivers, you can also use this tool to set nails, scrape, open cans, spread compound, open/clean cracks, clean rollers, pull nails, and hammer.

Kreg Jig – The Kreg Jig has been my favorite tool for building furniture and frames. It’s an invaluable tool for anyone getting started in woodworking. You can read my tutorial for How to Use a Kreg Jig here. Forget the more expensive models of the Kreg Jig, the K4 is all you need.

Capital Gaines by Chip Gaines – This book may seem random in a list of tools, but I highly recommend everyone read this book. Chip has written a book that is full of inspiring quotes and mindsets to push you forward in any endeavor you choose!

Rockwell Oscillating Tool – This is one of those desert island tools that will get you out of a jamb and allow you to make precision cuts to molding, cut nails and score in tight spots. I never take this tool out of my truck.

Stanley FatMax Fit in Hand Tape Measure – I get it, you already have a working tape measure. But, if you try this tape measure you’ll understand my new found love for the “fit in your hand” tape measure. As a woman, I struggle with larger tape measures, but this one fits nicely in my hand, and it’s perfectly balanced if I want to drop extend it while standing on a ladder. Finally, it beats all other tape measures in a stand out competition. (Let’s be honest, it’s lots of fun to beat out the boys in a stand out competition. LOL.)

Greenlee Non-Contact Voltage Tester – Never take on any electrical job without this tool. It can test for power through wire insulation and is easy to see and hear when voltage is present.

Pro-Sensor Precision Stud Finder – This is by far the simplest and easiest stud finder I’ve used. It visually shows where the start and end of studs are in your walls.

No Cry Safety Glasses – I have a small head, but these safety glasses fit perfectly on my face without slipping down my nose. But, they also fit a larger head circumference comfortably. The No Cry Safety glasses are my new favorites.

DeWalt Random Orbital Sander – This orbital sander is another favorite tool with a dust collection bag or port to hook up to a vacuum cleaner. The hook and loop pad makes changing sandpaper a breeze.

RZ Re-usable Dust Mask – When it comes to safety equipment, you’ll be more likely to wear it if it’s comfortable. That’s why I like the RZ dust masks. The soft fabric doesn’t leave mask marks and the velcro closure provides a more comfortable fit. The inner filter can be changed as needed, and the exterior can be used over and over again. It’s better for you and the environment!

DeWalt Jobsite Bluetooth Speaker – This little bluetooth speaker has great sound, it’s small and can withstand being dropped and kicked around.

Hand & Body Warmers – Working in my unheated garage or on the job site this time of year leads to frozen fingers. I like keeping a stash of these hand warmers nearby to keep my fingers and body warmer (allowing me to work longer hours.)

I hope you liked this list of 16 Gift Ideas for the DIY Enthusiast. Anyone who works with tools or on a job site will love them too.