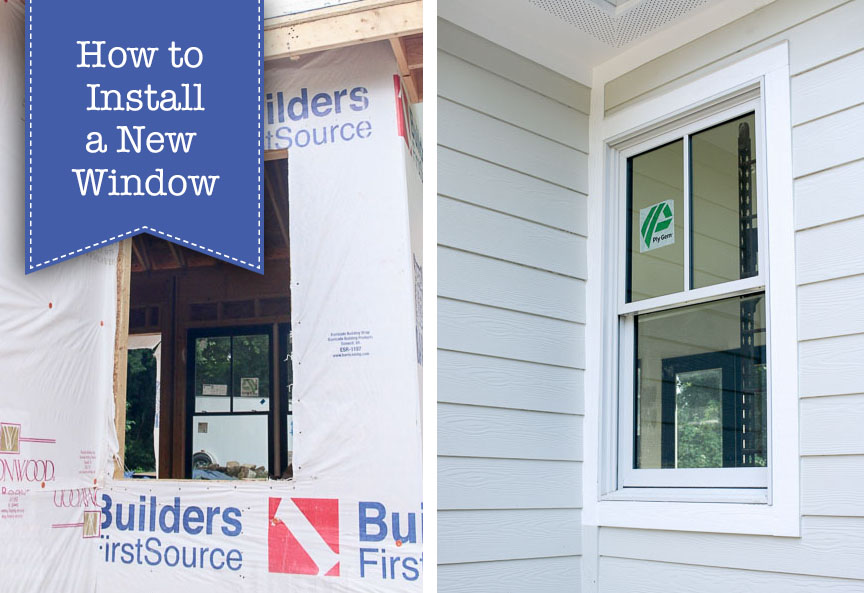
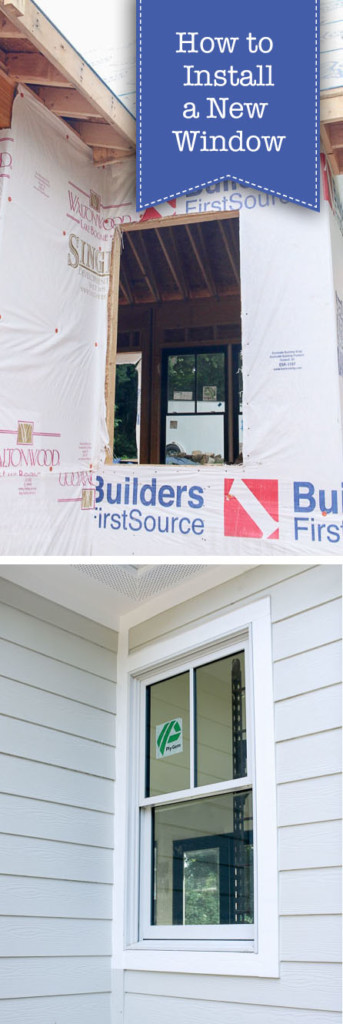
How to Install a New Window
Installing new windows on your home isn’t rocket science, but it is recommended that you have some construction experience before tackling this project. If you have the skills, the install should only take an hour or less. Today I’ll show you How to Install a New Construction Window in your home.
Installing a New Construction Ply Gem Mira Window:
If you read my article on ordering new windows, you’re probably ready to install that new window. Today I’ll take the mystique out of this process. To install new windows (as opposed to replacement windows) you need to start with the correct rough opening. Ply Gem makes it super simple to figure out the rough opening size for your new window with their downloadable window size guides. (This is a sponsored post in collaboration with Ply Gem Windows.)
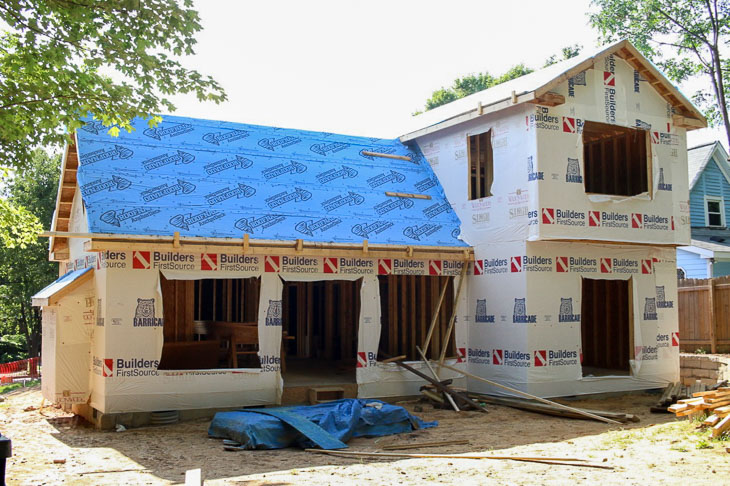
After your rough openings are cut and ready, it’s time to gather a few supplies.
Materials:
(I’ve included affiliate links for your convenience. I earn a small percentage from a purchase using these links. There is no additional cost to you. You can read more about affiliate links here.)
- Level
- 6″ Flashing tape for windows and doors
- Clear silicone sealant
- Caulk gun
- Utility knife
- Hammer
- Roofing nails (or recommended fasteners recommended by manufacturer.)
- Wood shims
- Tape measure
- Tyvek tape
Instructions:
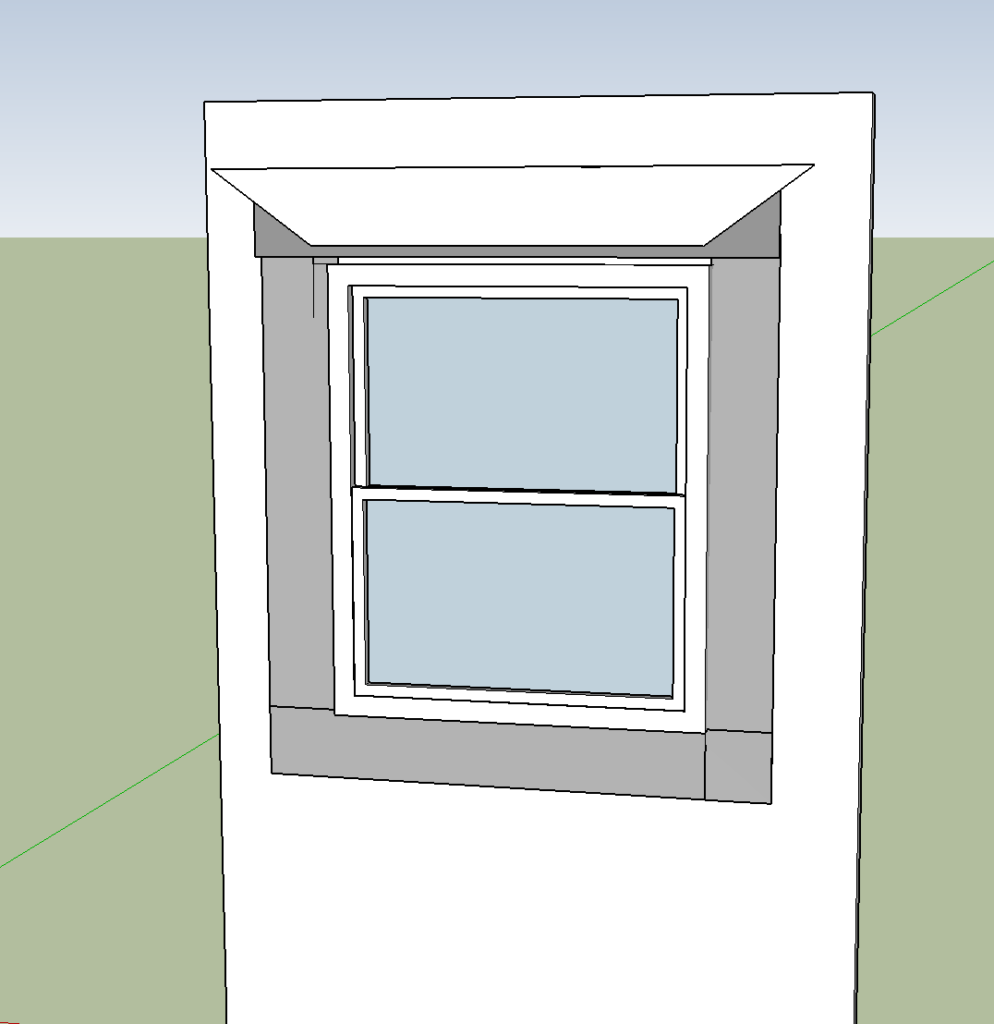
Check that the rough opening is level and plumb. If it isn’t, have some wood shims nearby to help adjust the window after it is set in the opening.

Cut the first piece of flashing tape slightly wider than the window width. Peel off the backing and attach it one inch below the window opening.
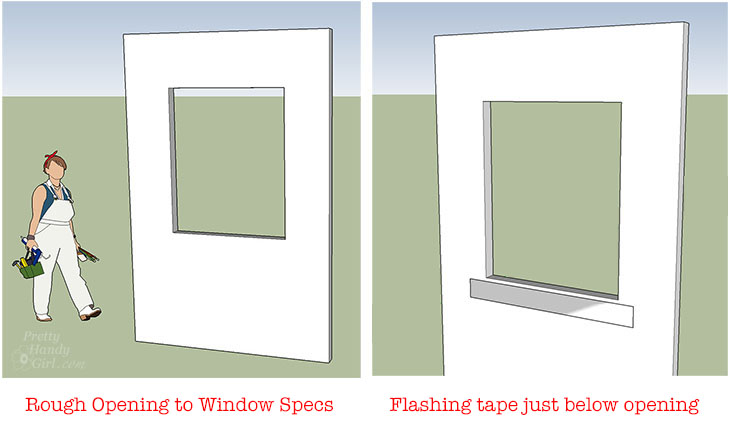
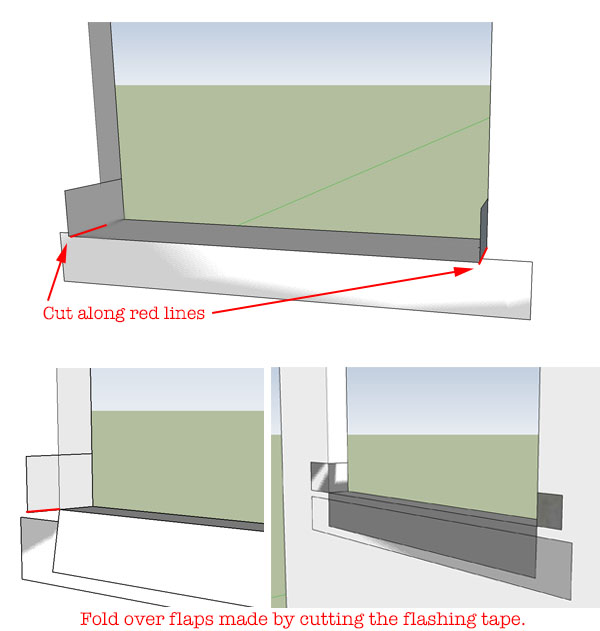
Cut a second piece of flashing tape about 8″ wider than your window opening. Center it on the sill of the window opening. Line up the inside edge of the tape along the inside of the framing (allowing the excess to hang out on the exterior side of the window (as shown below). Press the flashing tape along the sill and up the sides of the window. Cut along the corners of the excess tape. Fold the tape out and down, securing it to the outside of the house sheathing as shown below.
Cut two smaller pieces of flashing tape to cover the corners of the tape you secured above. Cut a slit in the tape where it overlaps the opening. Fold the flaps into the window opening and press your hand firmly on all the tape seams to secure.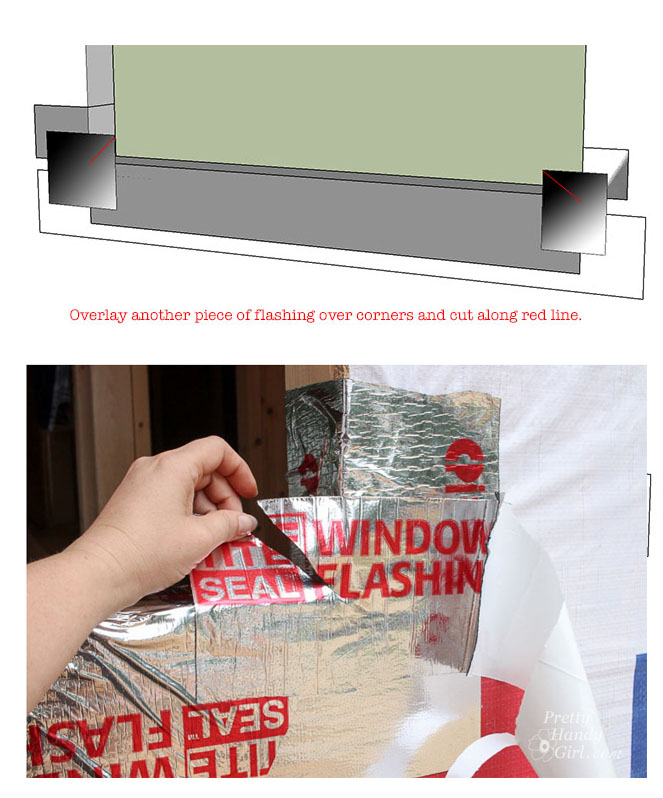 Time to install the window! Run a generous bead of silicone along the inside of the nail fin frame. Be sure to add additional silicone at the diagonal corner seams of the nail fin.

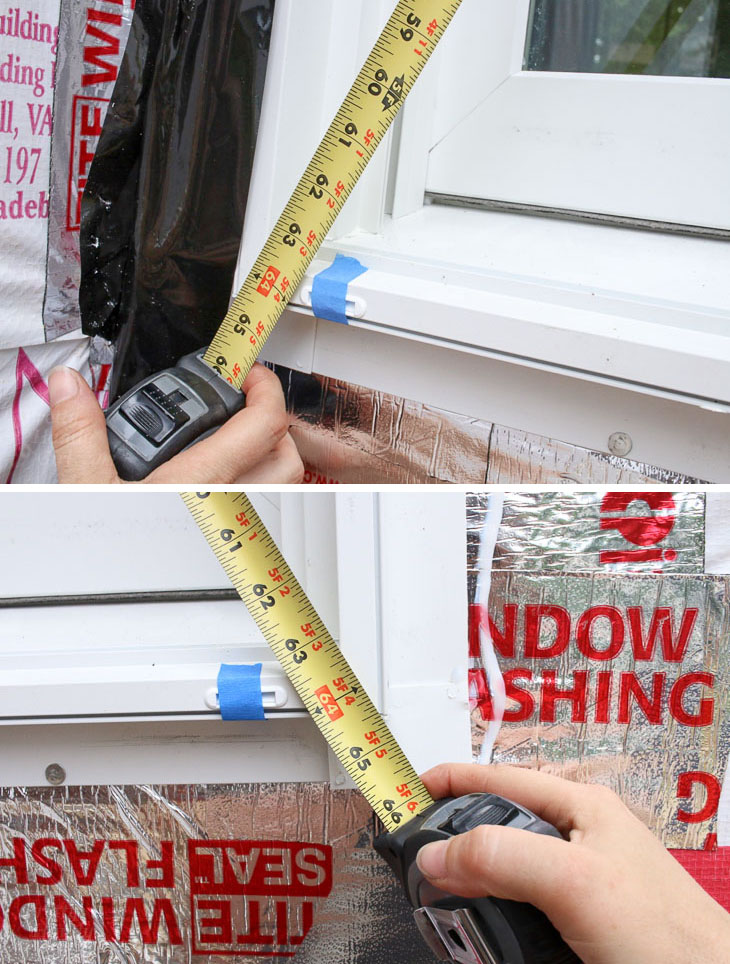
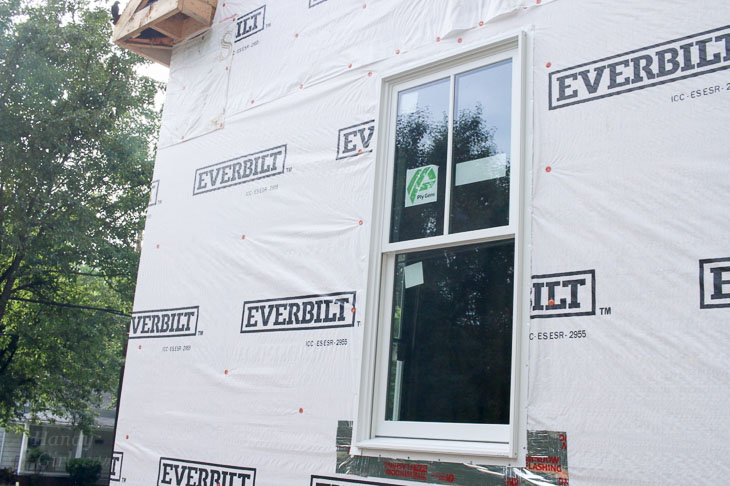
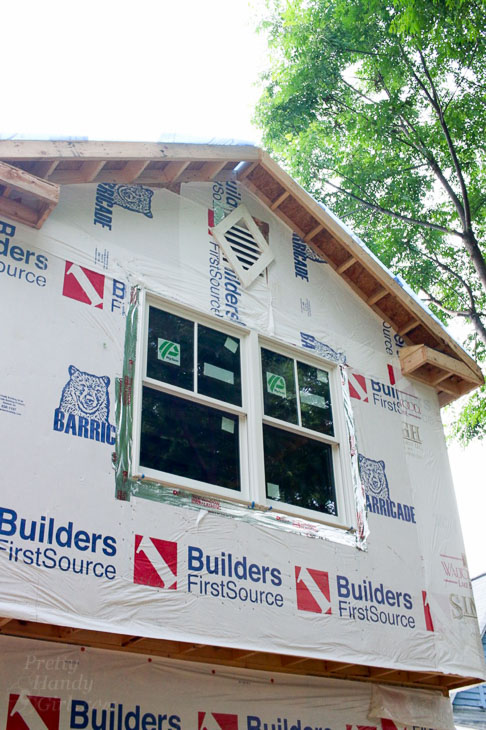
Have an assistant help you lift the window into the rough opening from the exterior of the house. (For upper story windows, you can feed the window out from the inside of the house. Make sure one person is outside to prevent the window from falling.) Check the diagonal measurements of your window to make sure they are the same. This will indicate if your window is square or not.
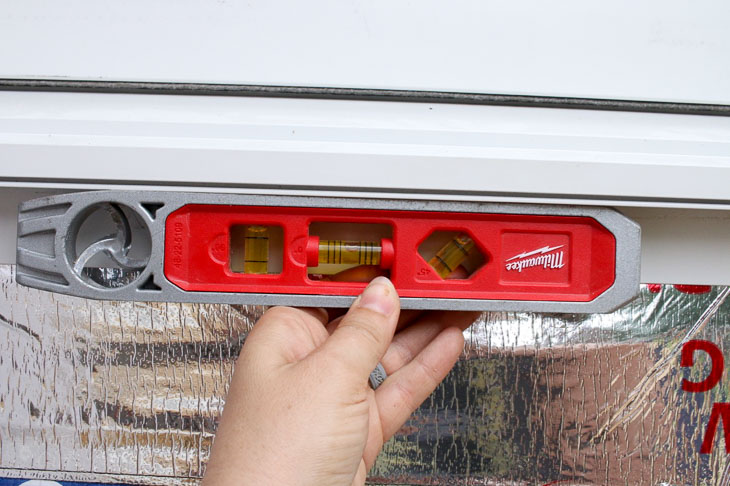
Use your level to check if the window is level and plumb in the opening. If not, make adjustments by inserting shims from the inside of the house.
Once the window is square, level, and plumb, secure it to the house sheathing with roofing nails. (For added weather protection, the nail fin should go over the Tyvek house wrap for the sides and bottom. Along the top, lift the house wrap and nail the fin directly to the house sheathing.) The top flap of Tyvek will be secured later.
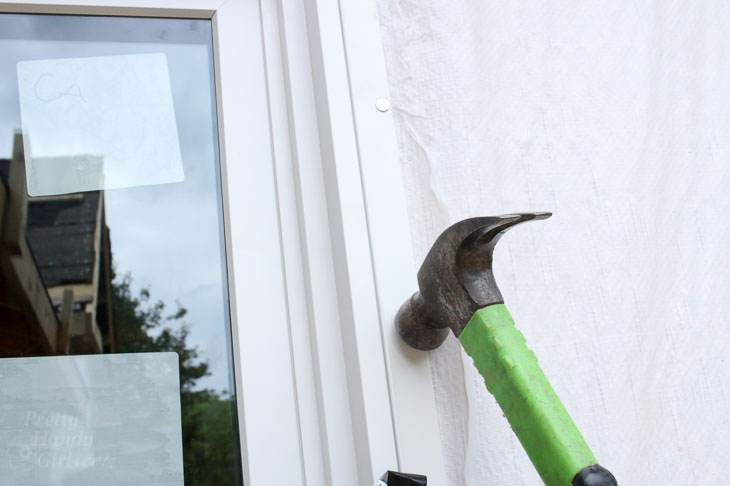
Continue adding nails to every hole in the nail fin. Your window is now securely installed. Time to add the exterior flashing.
(2.) Cut another piece of flashing slightly wider than the width of the window. Remove the backing and press firmly over the bottom nail fin.
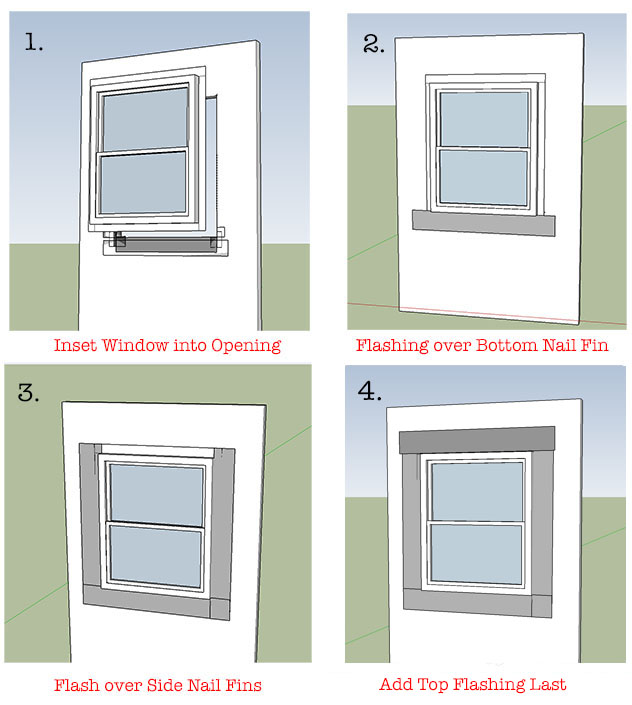
(3.) Cut two pieces of flashing slightly taller than the height of the window. Press the flashing tape over both sides of the nail fin (taking care to overlap it over the bottom piece of flashing.) (4.) Lift the top house wrap flap out of the way. Then add one piece of flashing on the top nail fin (again, take care to overlap the top piece over the side pieces.)
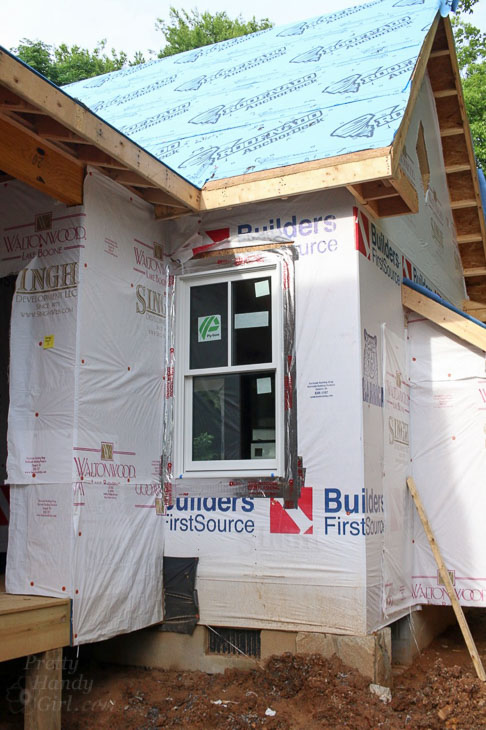
Let the house wrap flap overlap the top piece of flashing. Secure it in place with a piece of Tyvek tape.
Congratulations! Your window is installed and ready for trim and siding.
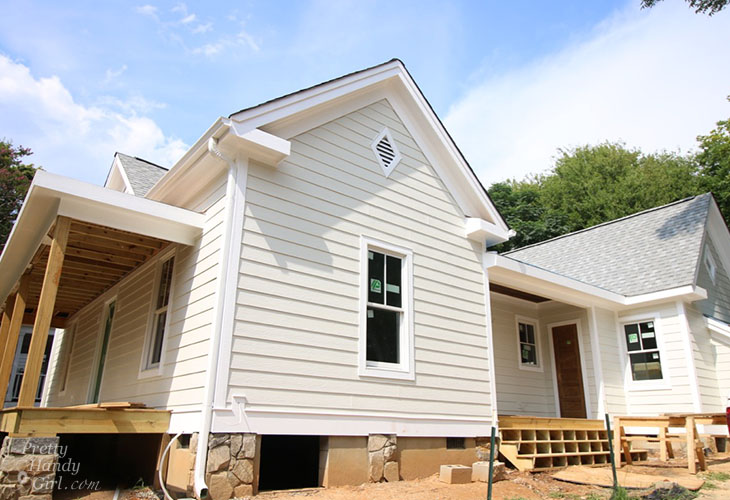
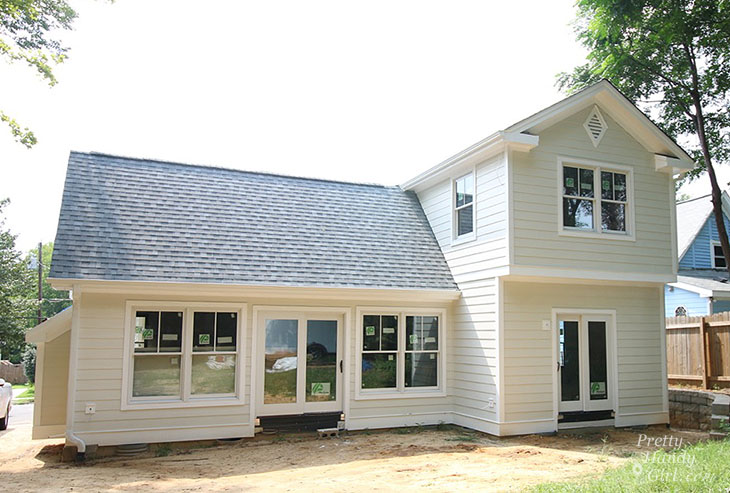
Tell me the truth, isn’t this one of the most beautiful windows you’ve ever seen? The grilles look great on this 1900 house.
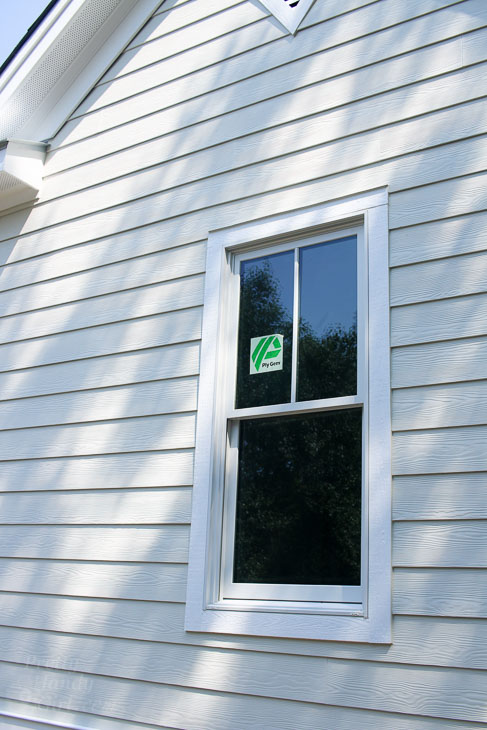
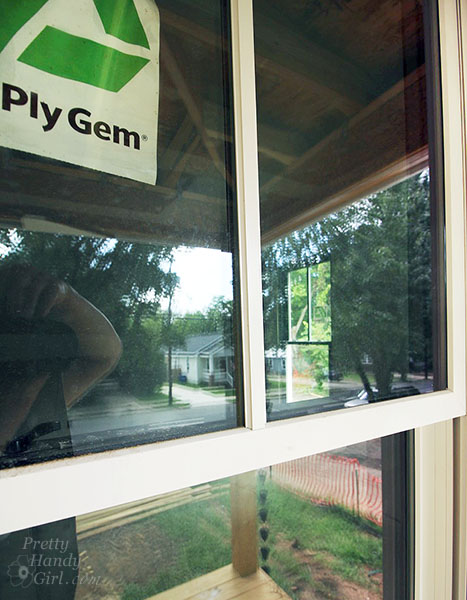
Even up close, they look like true divided light windows. The grilles I chose are the 7/8″ SDL style grilles available on Ply Gem’s Mira Windows.
On the back of the house, I installed a bank of windows and sliding glass doors to maximize the view of the big yard. The homeowners will love all the natural light pouring in from their beautiful Plygem Mira Windows.
If you like this tutorial, share the knowledge with a friend by pinning this image:
![]()
Disclosure: This post is a sponsored post for Ply Gem. It was written as part of their sponsorship of the Saving Etta project. I was not told what to write. All words and opinions are my own. I am very particular about the brands I work with, and only partner with companies that provide quality materials and/or services.
More Window Resources:
How to Add Privacy Film to Any Window
How to Install Traditional Window Trim or How to Install Decorative Window Casing
How to Clean Your Windows Like a Pro

Just a note, Most nail fin installs I’ve seen do not put flashing over the bottom nail fin…
Ok, used this post and installed a window today! We are building a new shed from scratch (have very particular husband who needed something custom) and once I told him that I saw a blog post about window installation, that task went on my to-do list. It was easy. Woman power!
I am jumping up and down with excitement! So happy you found this tutorial helpful.
Brittney, this is a post that’s so welcoming. We need new windows, but can’t afford them at this time. Good to have this post, because just make be when we are getting one window at a time. This way my husband can follow your guidelines when installing our window.
I like the narrow width of windows on the front of the house…It gives the historic “look”. The windows on the back look wider to me which will bring in more light and help the interior “live bigger”….All in all you made some great choices! Good job flashing your windows and instructions too.
This is an awesome how-to guide! Definitely pinning this in case we ever need it!