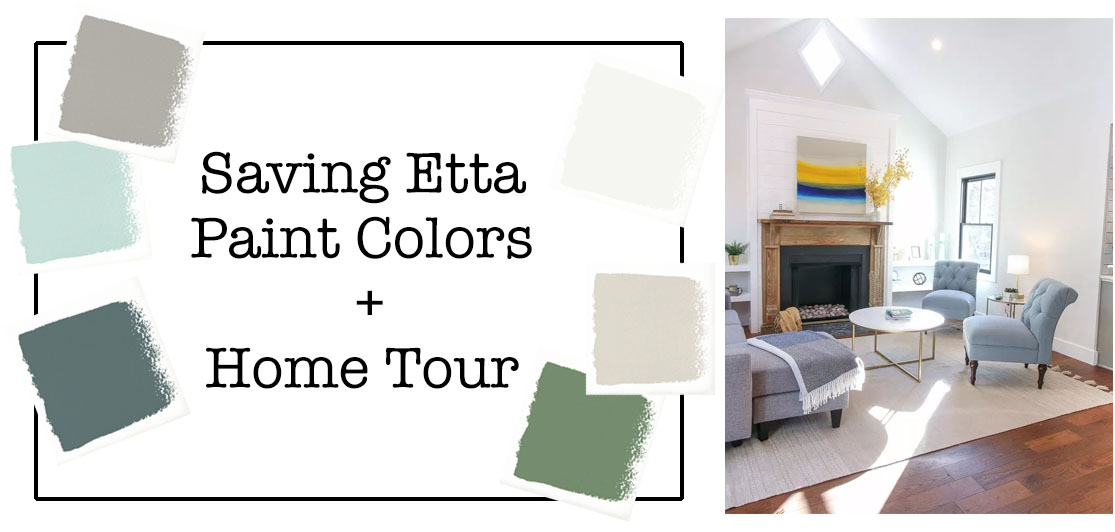
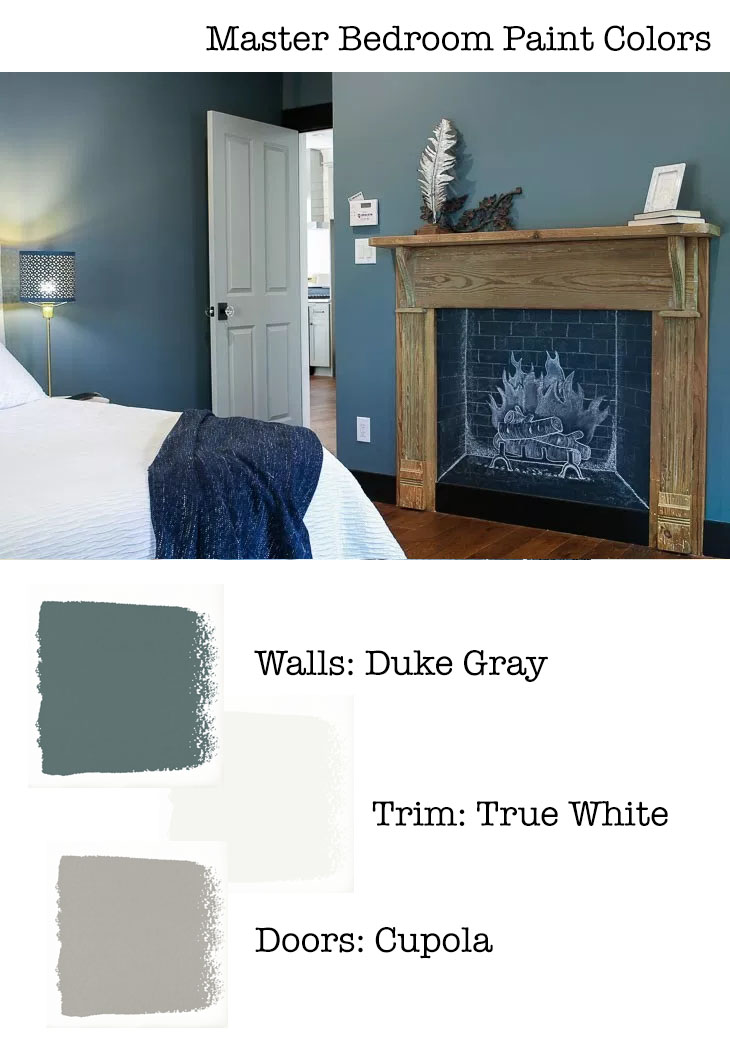
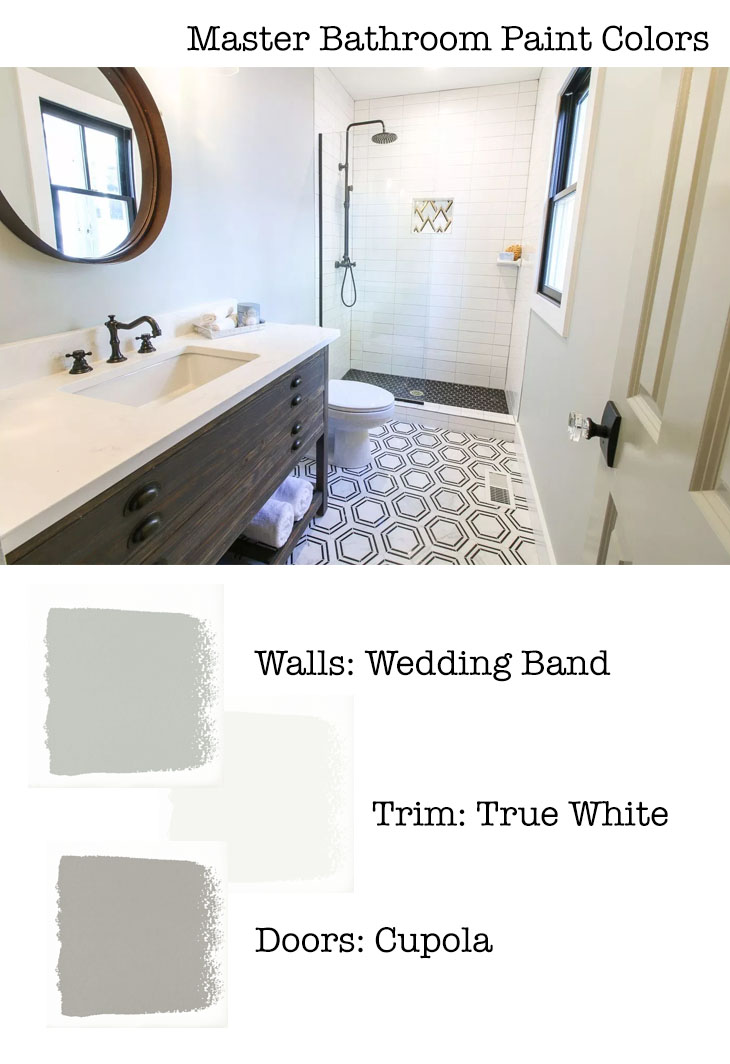
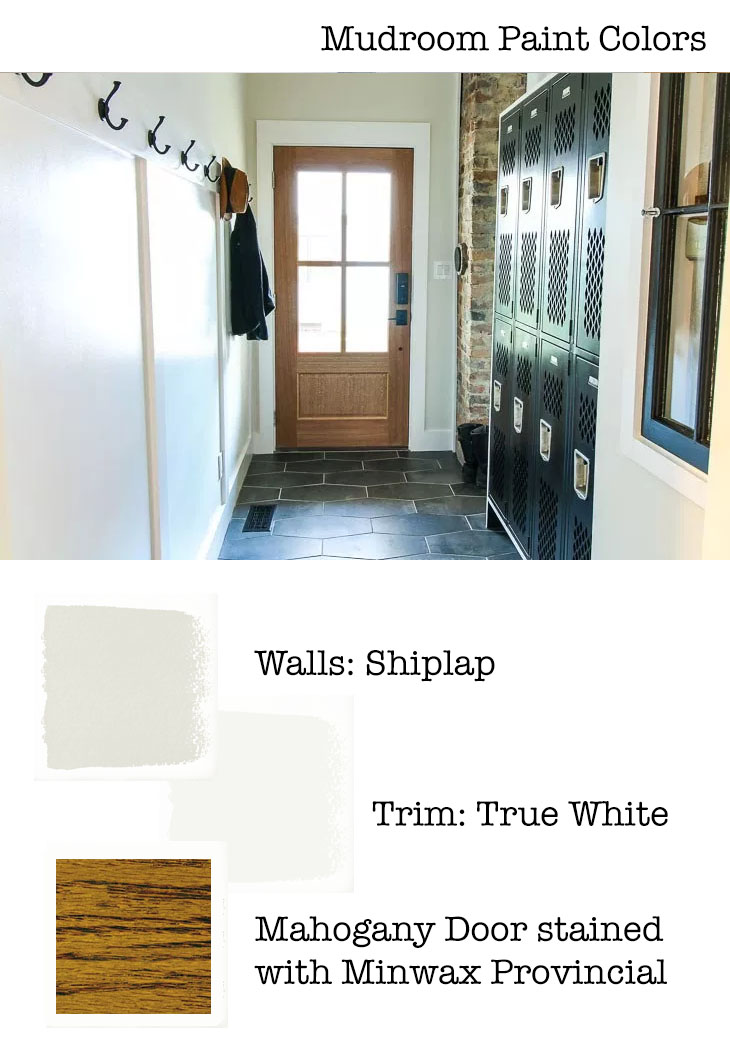
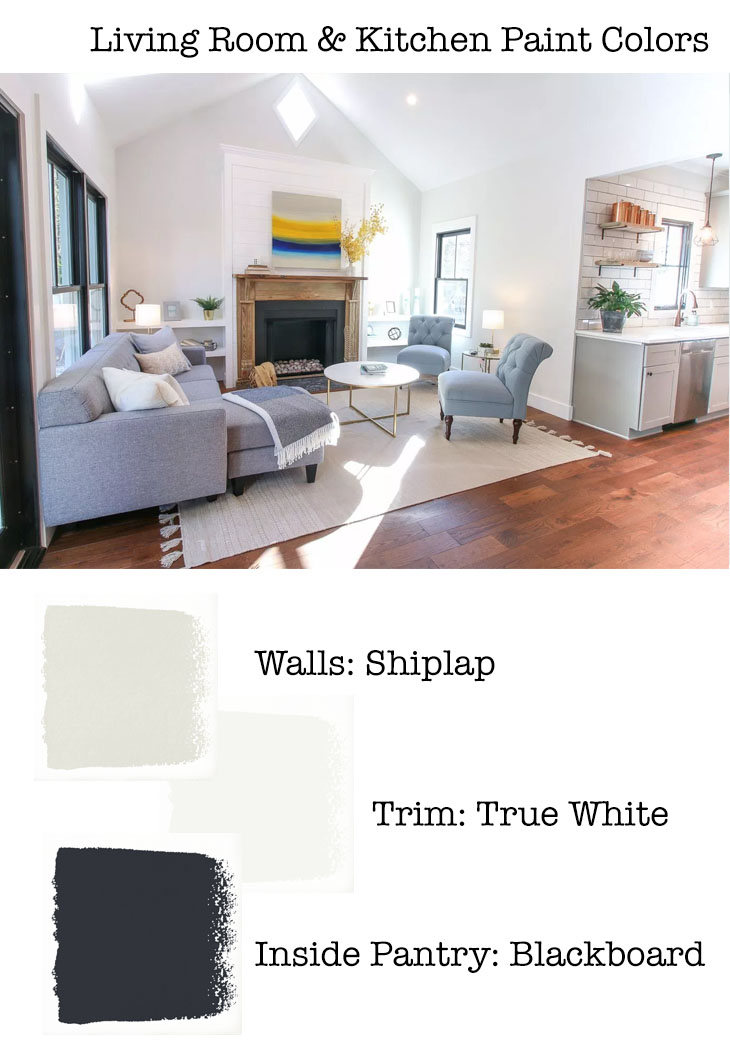
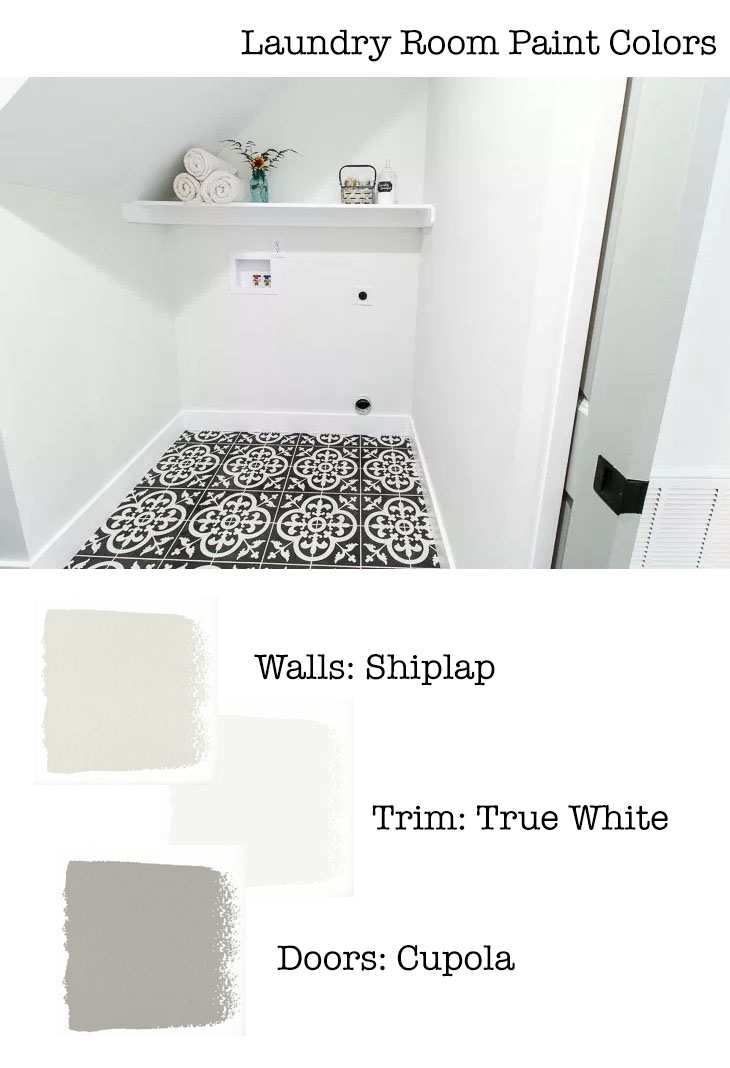
Now that all the rooms have been revealed in the Saving Etta house, I thought you’d like one post to refer to all the paint colors used inside and outside the home. This will also be a great starting place to navigate all the Saving Etta room reveals.
Before we begin, a little note to let you know that Magnolia Home Paint was a sponsor of the Saving Etta project. I was thrilled to be able to showcase some of their many beautiful paint colors. Unless specifically noted, all colors are from the Magnolia Home Paint collection.
We actually had the honor of trying out the Magnolia Home Exterior Paint line before it hit the market. I can honestly say my painters loved the paint quality and the painter at the property next door came over to ask about it (he explained he was admiring the great coverage and how beautiful the finish was.) The interior paint had already won me over with its low VOCs and creamy thick texture. The paint goes on great and levels out as it dries. I’m looking forward to using their paint on many future projects!
I hope you enjoy the Saving Etta room tours. If you have any questions, please leave them below in the comments.
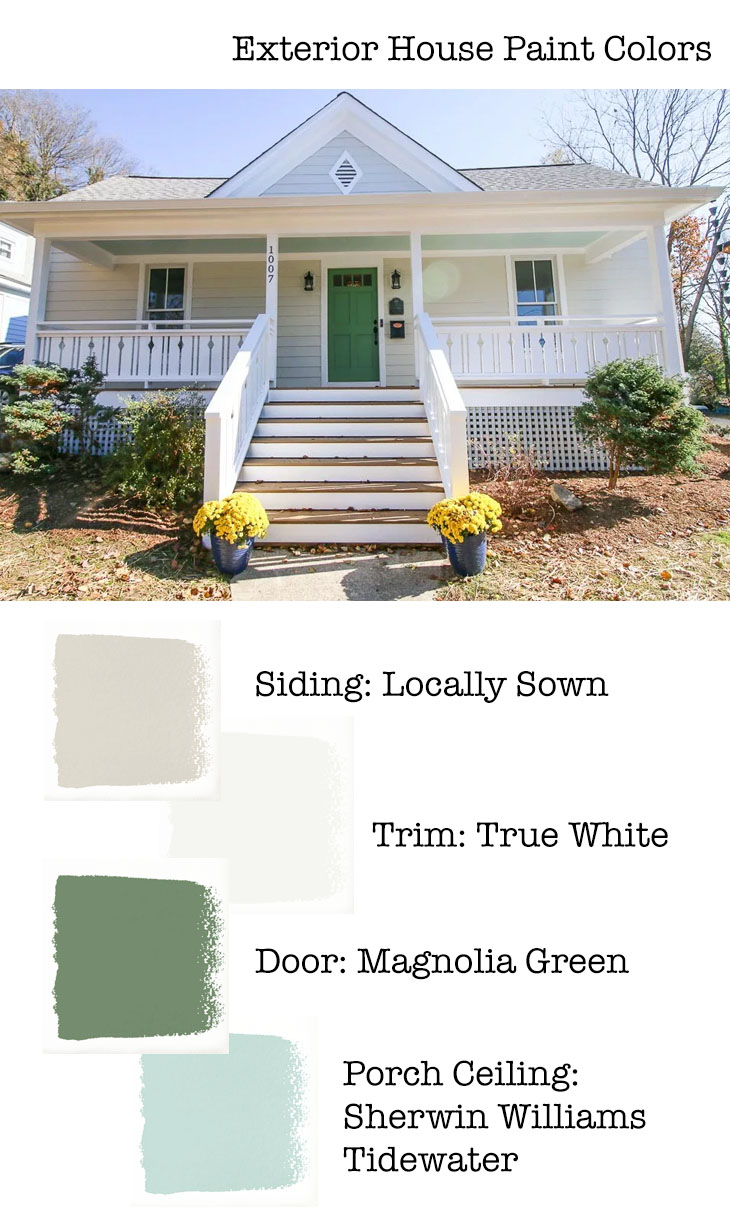
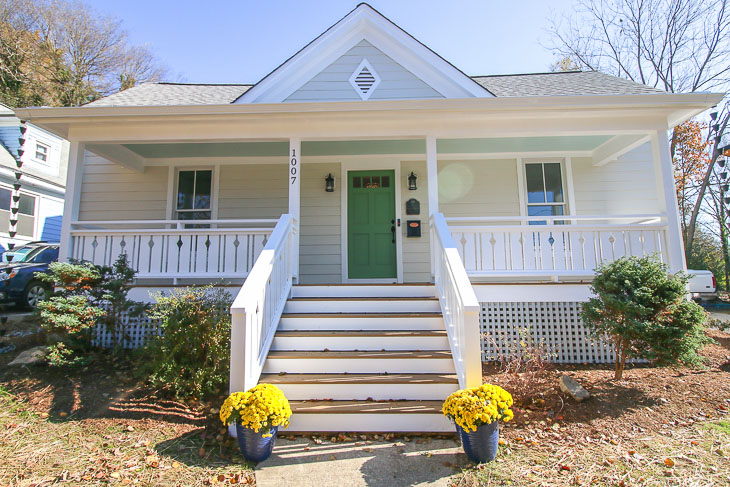
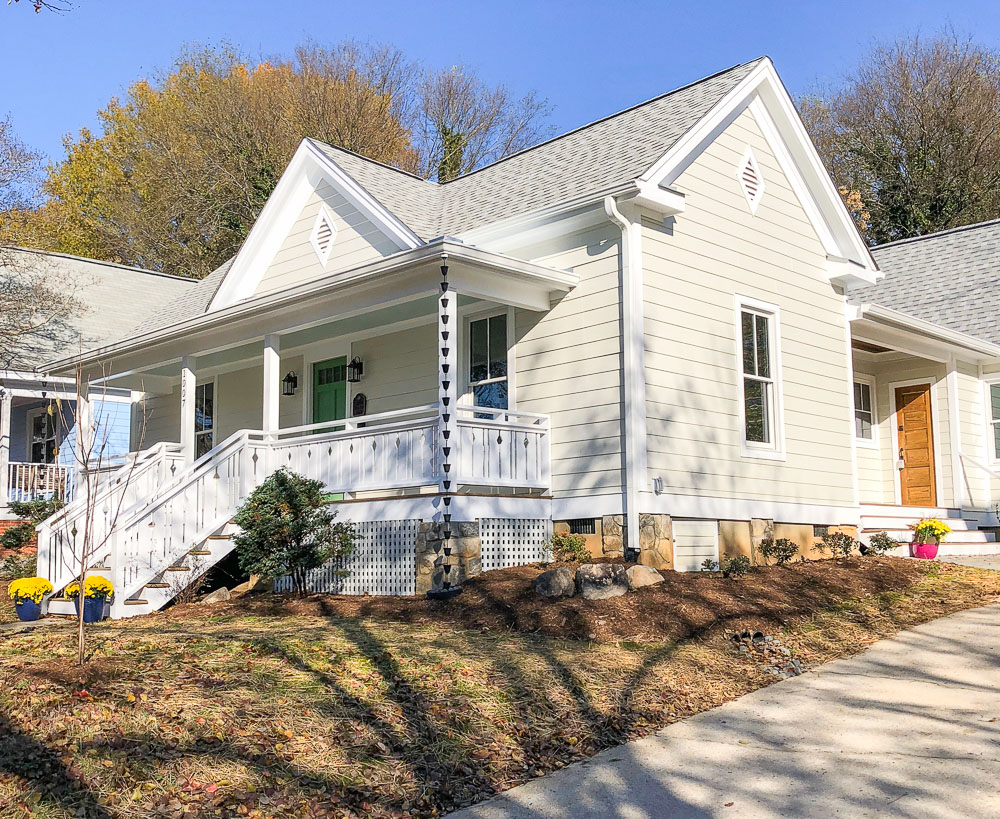
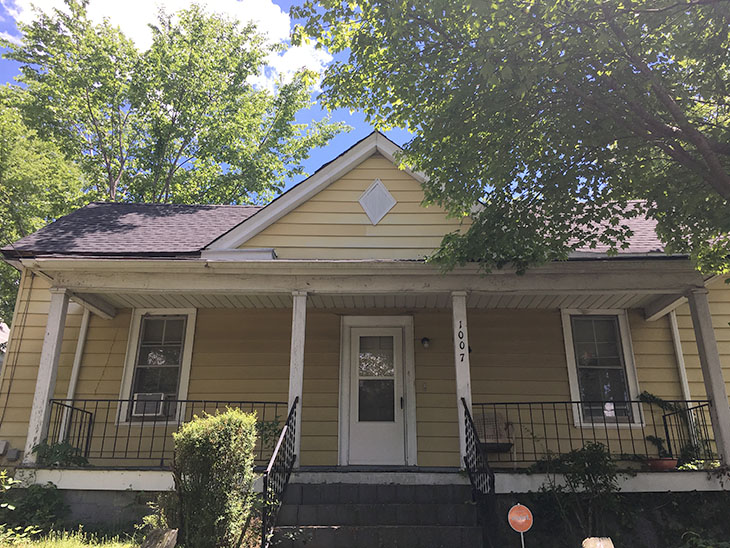
When you pull up to the front of the Saving Etta house, you’re greeted by a cheery front porch and a beautiful green door. I had agonized over the door color in this blog post. But, ultimately decided on this color palette for the home’s exterior.
I hope you found this paint colors reference helpful when picking out paint colors for your home. Did you enjoy the Saving Etta Home Tour? Please tell me which is your favorite room.
Disclosure: Magnolia Home Paint by KILZ is a Saving Etta material sponsor. I’m honored to work with them on this project. All words and opinions are my own. I have not been told what to say. As always I am very particular about the sponsors I work with and you will be told if you are reading a post that has been sponsored or in which materials were provided.
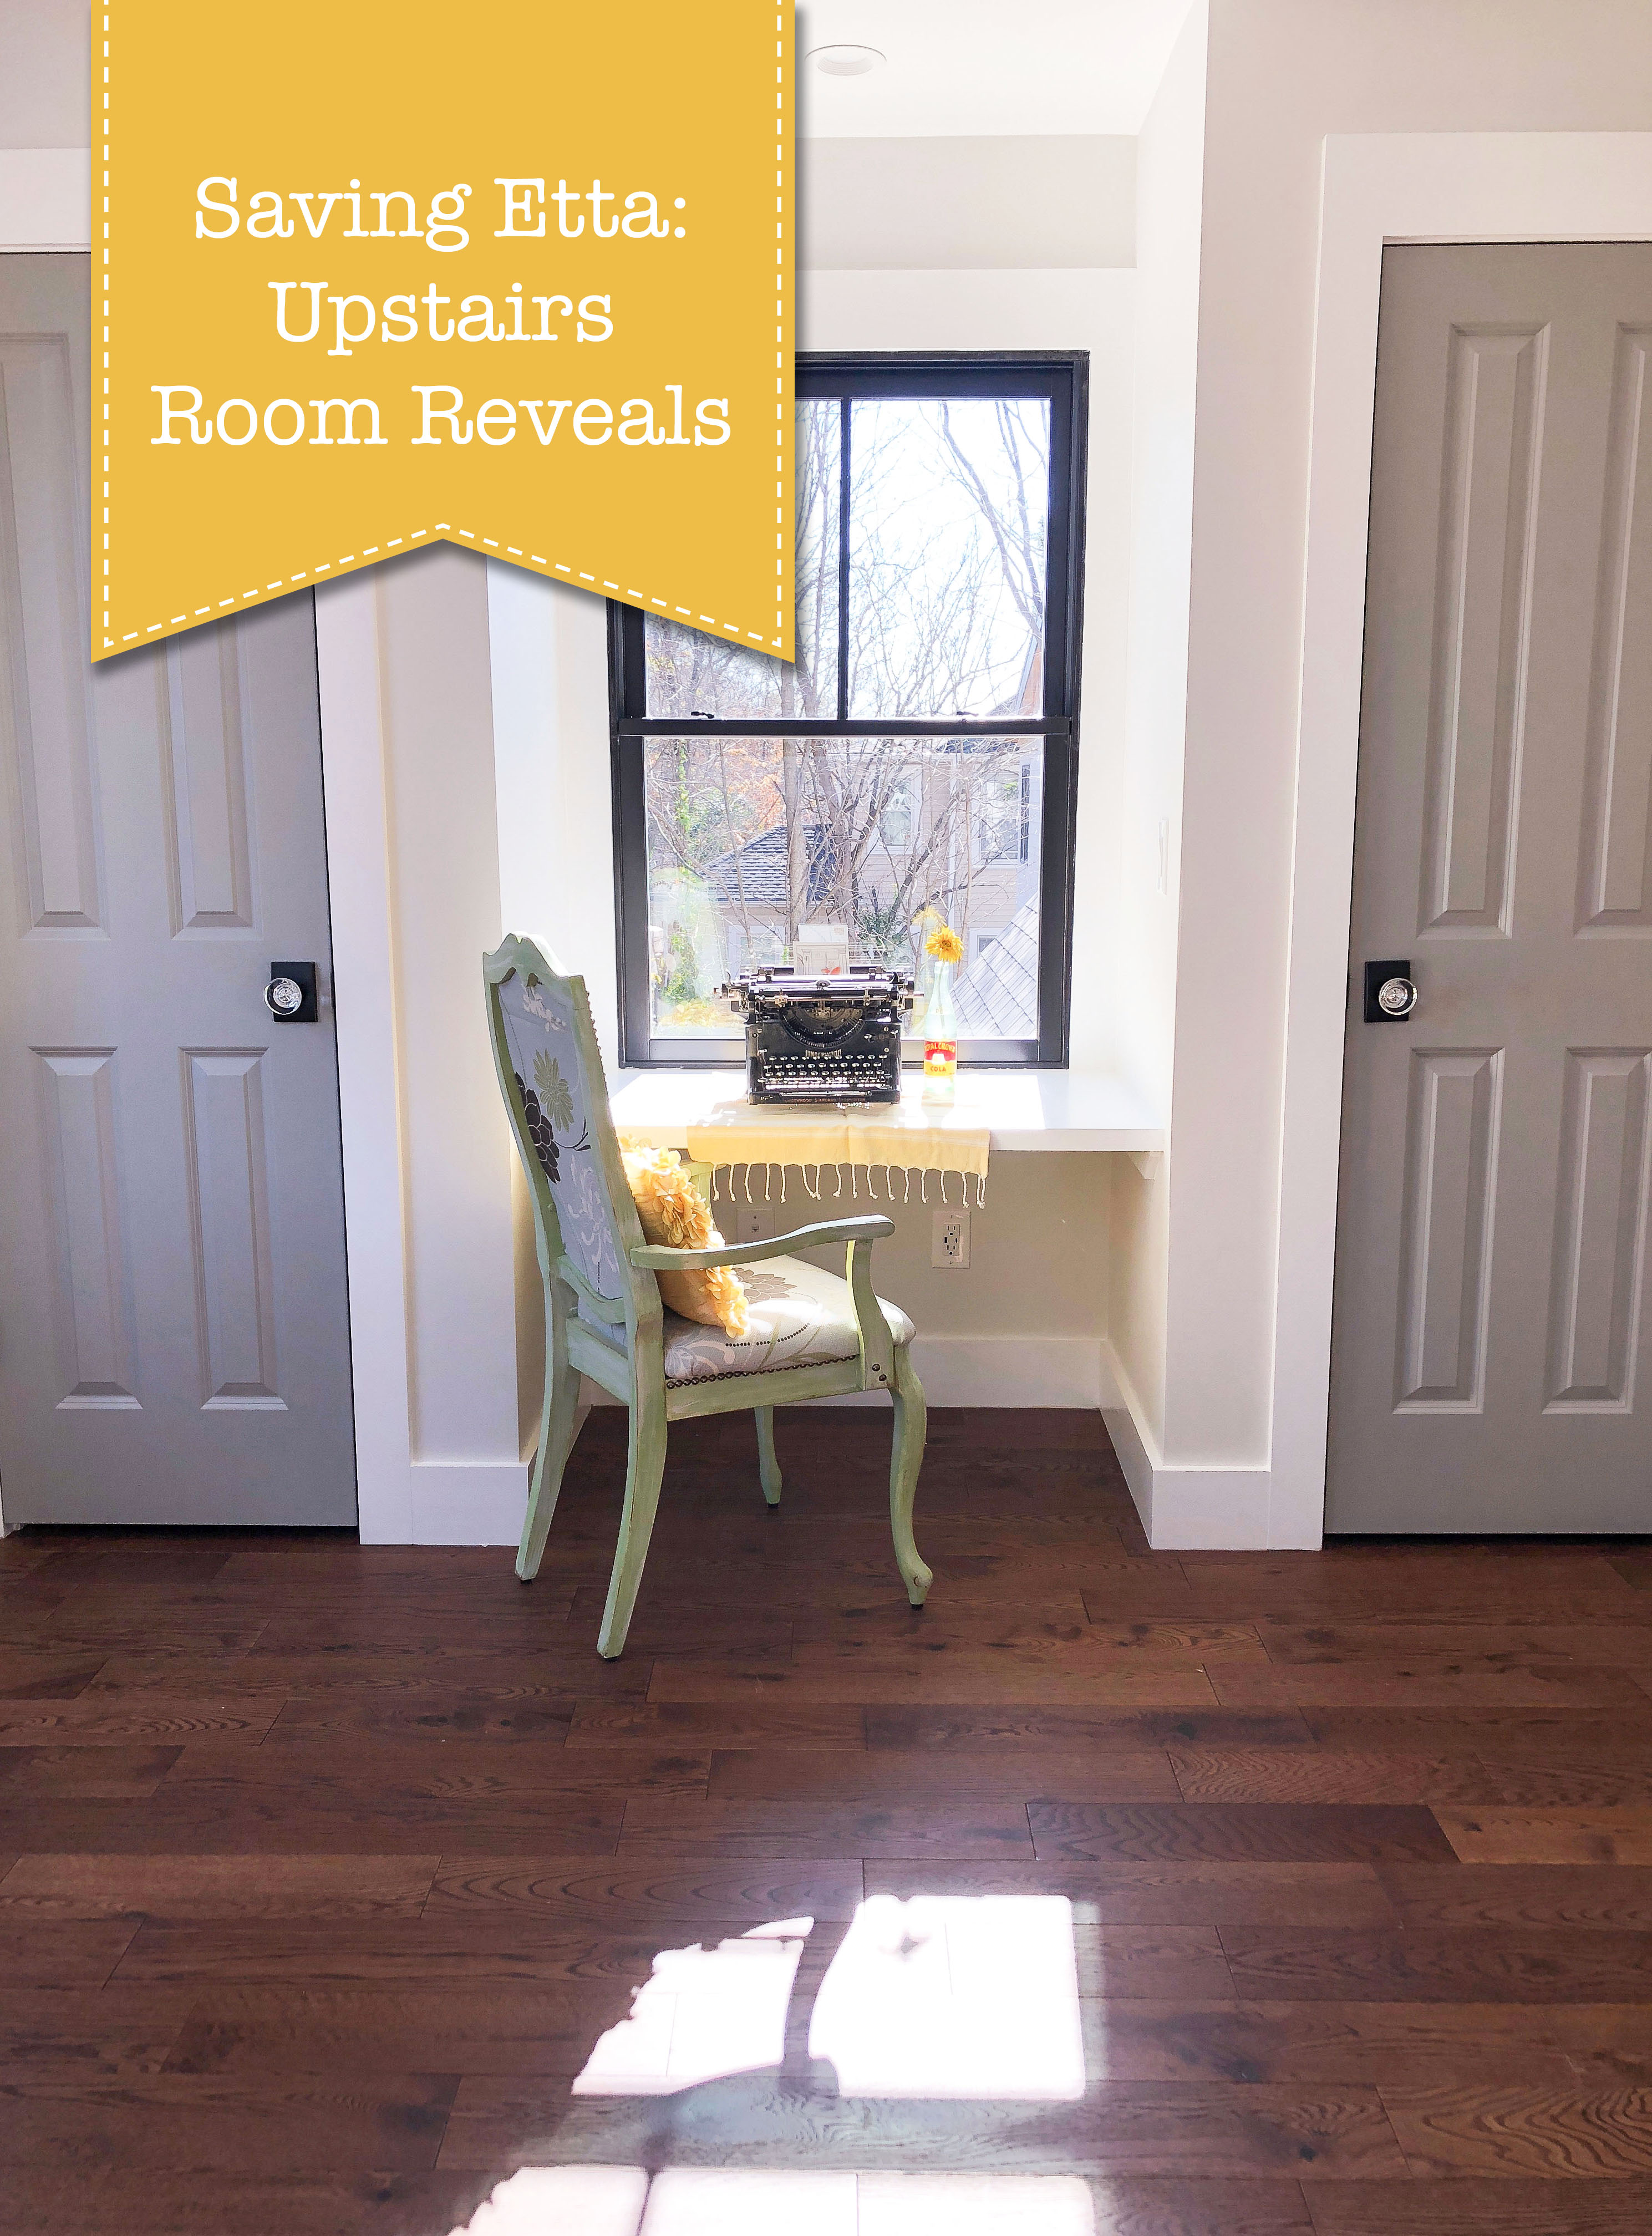
We’ve come to the end of the Saving Etta room reveals. It’s been fun, but it’s time to move on to a new project. If you were here for the last Saving Etta reveal, you saw my announcement that I’ve purchased another house to renovate. The Millie’s Remodel project is starting soon and I can’t wait to share the transformations with you. But for now, let’s head up those stairs to see the Saving Etta: Upstairs Room Reveals.
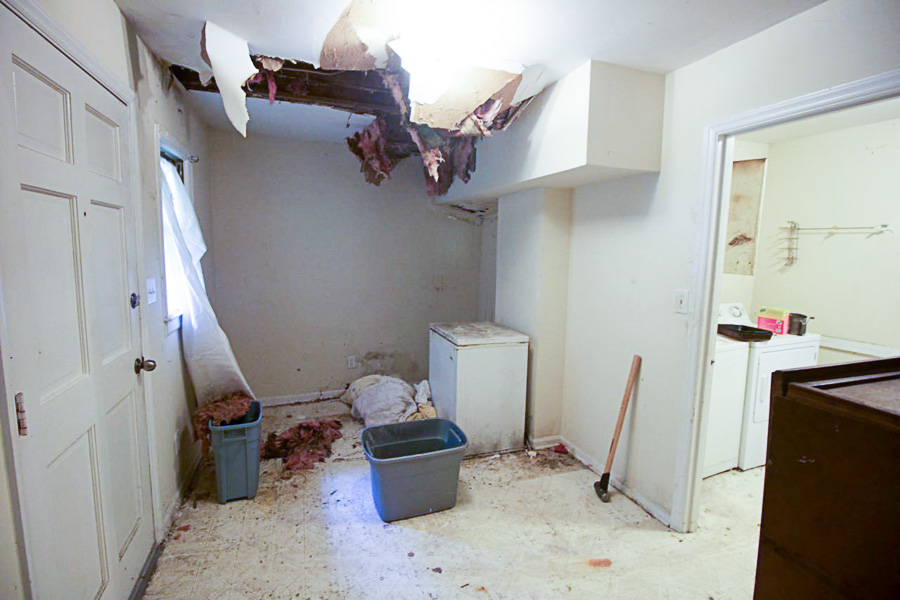
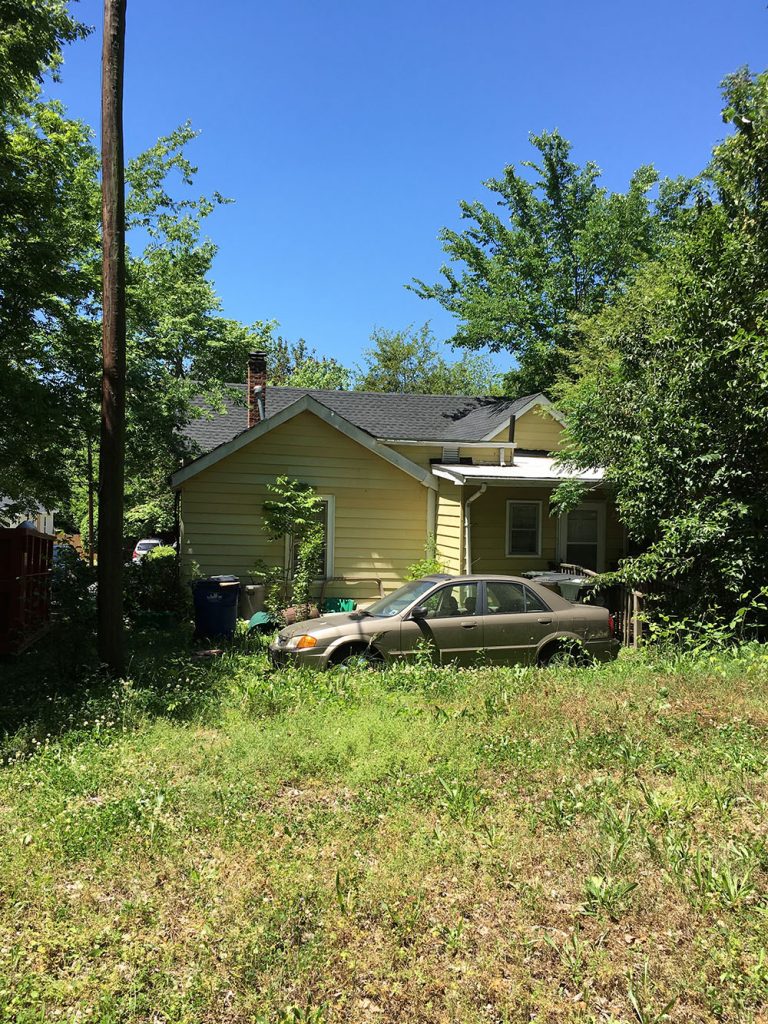
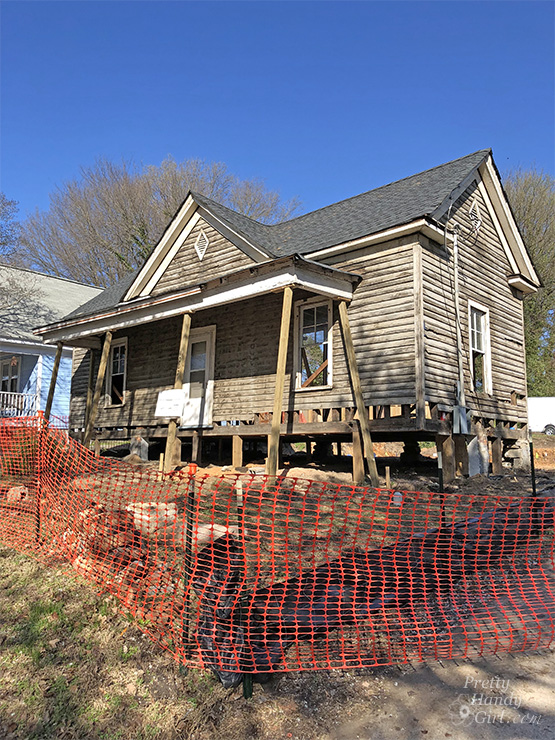
The original Saving Etta house didn’t have an upstairs, but after climbing onto the roof one day, I couldn’t resist the view and was determined to add a small second-floor room. I had climbed onto the roof to investigate for roof leaks. What I found was a host of issues: from a flat roof with no pitch to nail heads exposed. It was no wonder the ceilings inside were pocked with black mold and some spots had so much damage, the sheetrock had collapsed in places.
If I had to completely rebuild the roof, I wanted to find a way to add a small loft or second-floor room to look out onto the beautiful backyard.
Which is basically how the idea of adding a second floor came to happen (but in a more round about fashion). After mentioning to my architect that I wanted to build one roof over the back and add a small loft, she got silent. Then she measured her words and said, “I know you’ll need time to process this, but you need to tear off all this mess in the back and rebuild. It only took me 30 seconds to agree with her because I lost so much sleep trying to figure out how to fix the roof leaks, and dig a crawlspace where the floor joists rested on the earth.
Back of the House Plans
Luckily my architect came up with the brilliant two-story plans for the back of the house, and I couldn’t be happier with the results.
Look at all those glass windows and doors taking in the view of the yard. And, lest you think it looks like a giant addition, from the front sidewalk you’d never know there was a second floor addition. We both agreed it was important not to take away from the original look of the 1900 portion of the house.
Before I get ahead of myself, I’d like to thank all the Saving Etta sponsors. They are all near and dear to my heart for their support and patience. When it comes to selecting products, tools, and clothing, these are the brands I select time and time again.
Progression of the Upstairs Rooms:
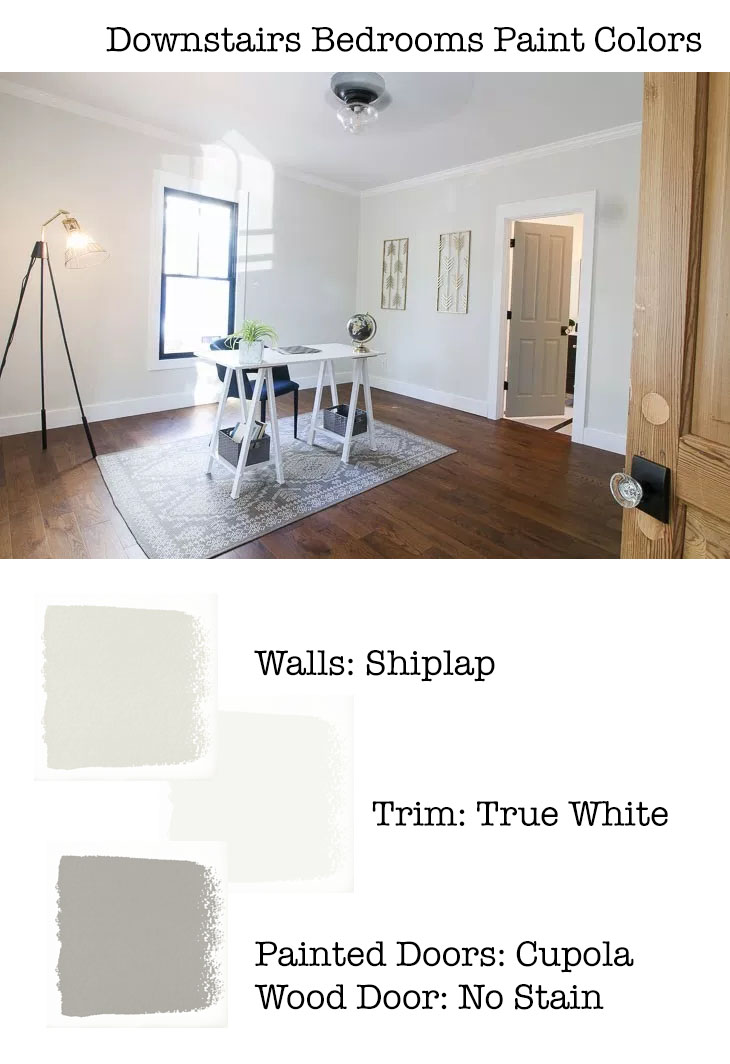
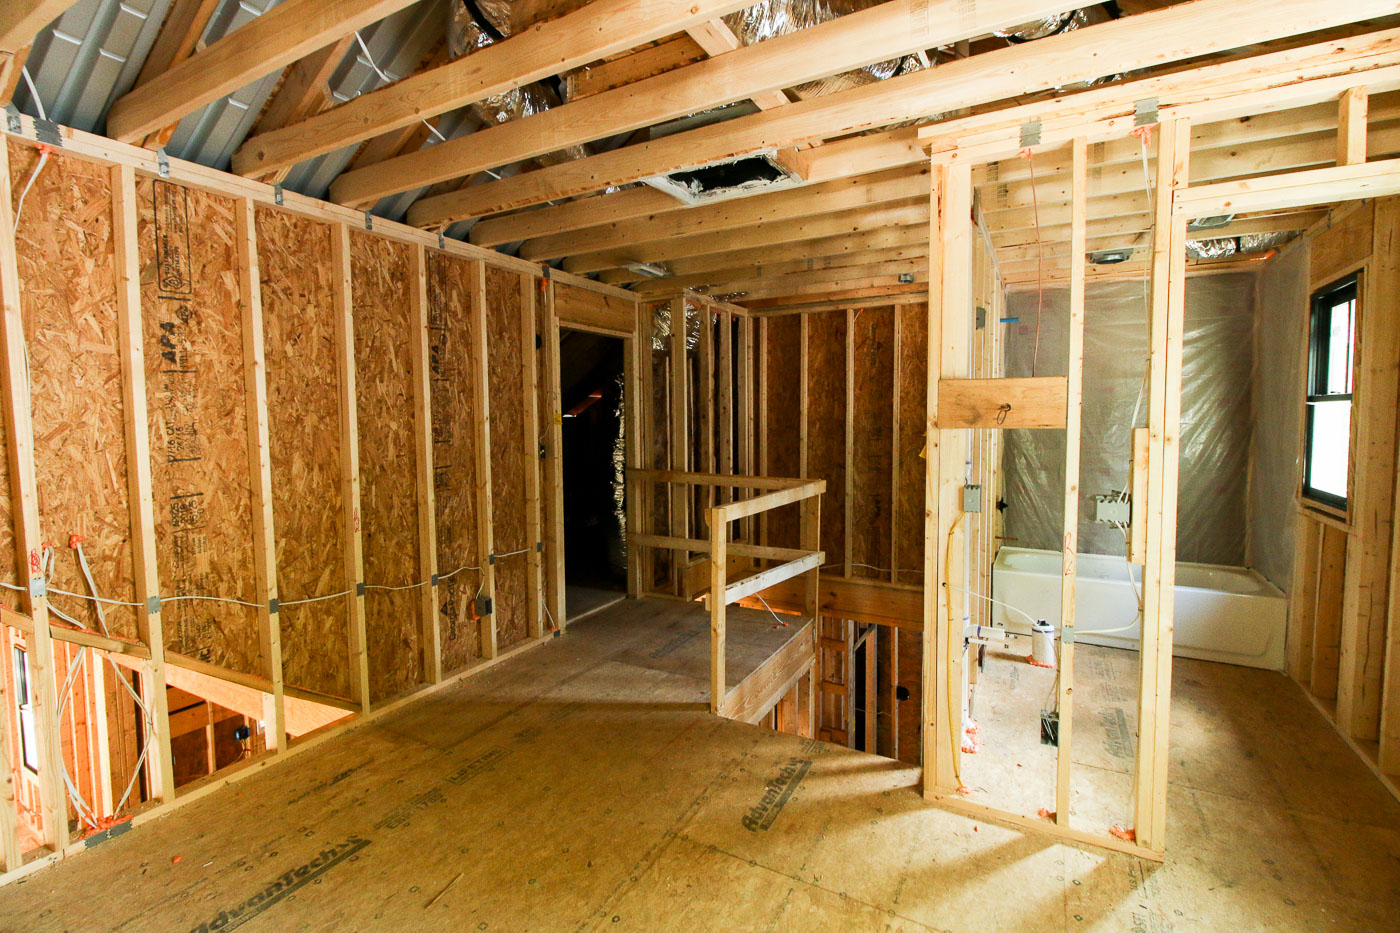
Once the framing was done, I knew the upstairs was going to be a nice little retreat for the new owners. With a private bathroom, bedroom, and an open room, this space could potentially be rented out, become an office, or a kids’ wing.
The Upstairs Reveal:
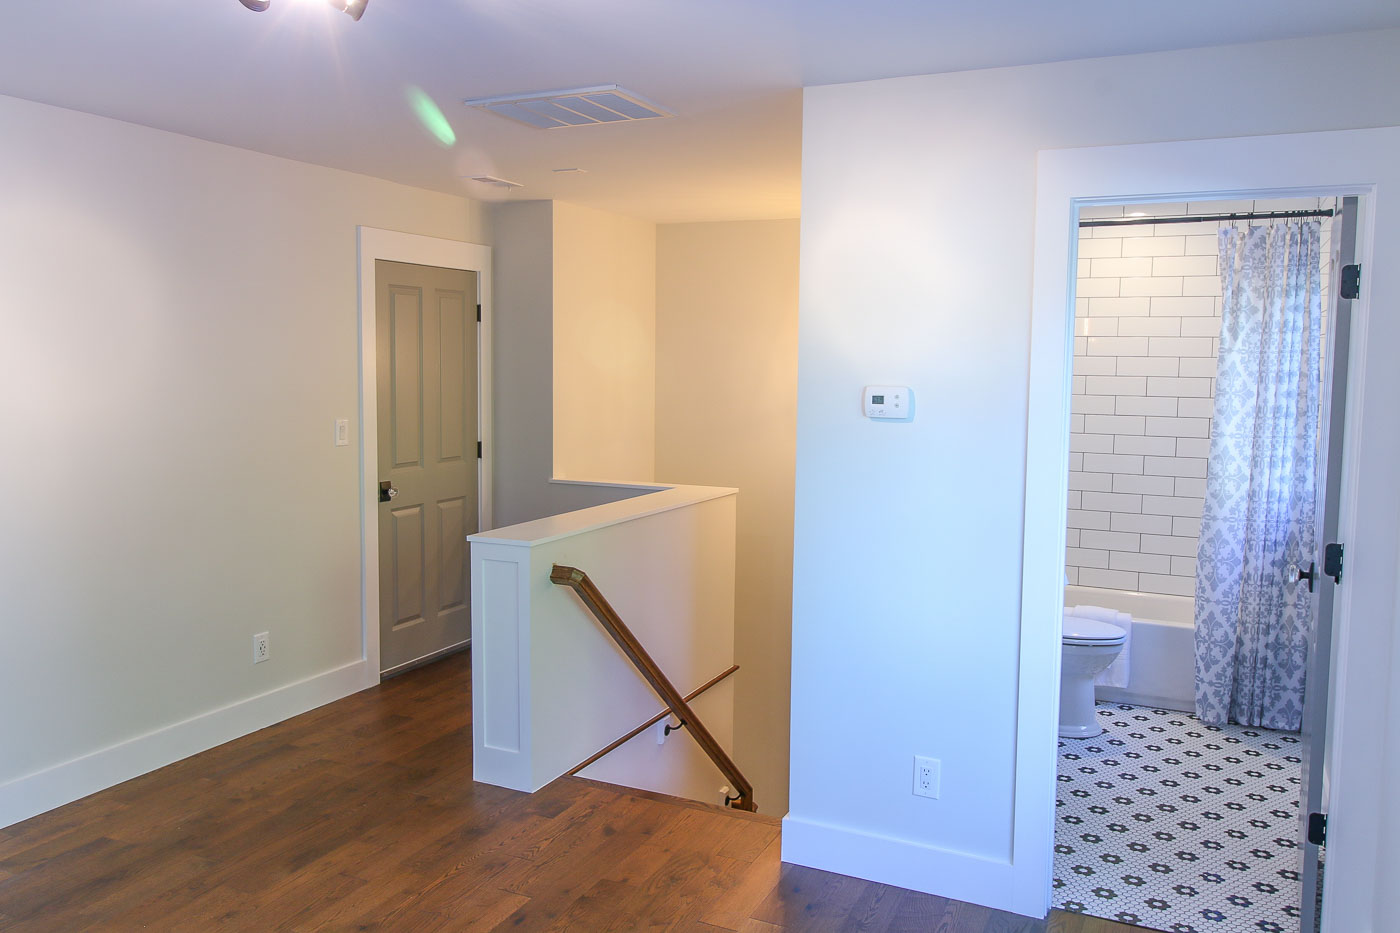
Upstairs consists of a bathroom, an open room at the top of the stairs, the attic access door (shown in the picture below), and a bedroom.
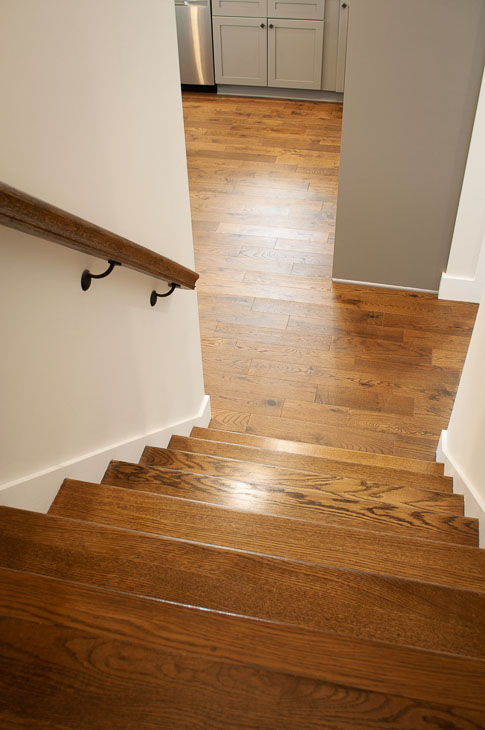
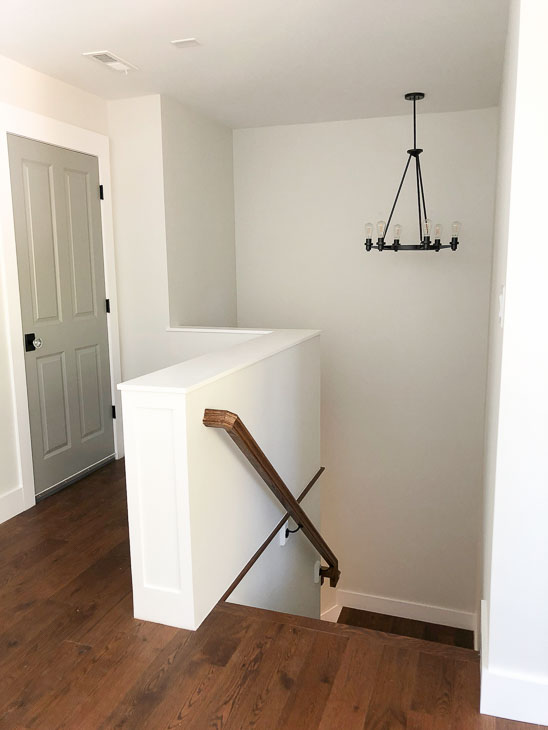
At the top of the stairs, I debated for a while about what style railing to put outside the attic access door. I couldn’t find anything I really liked.
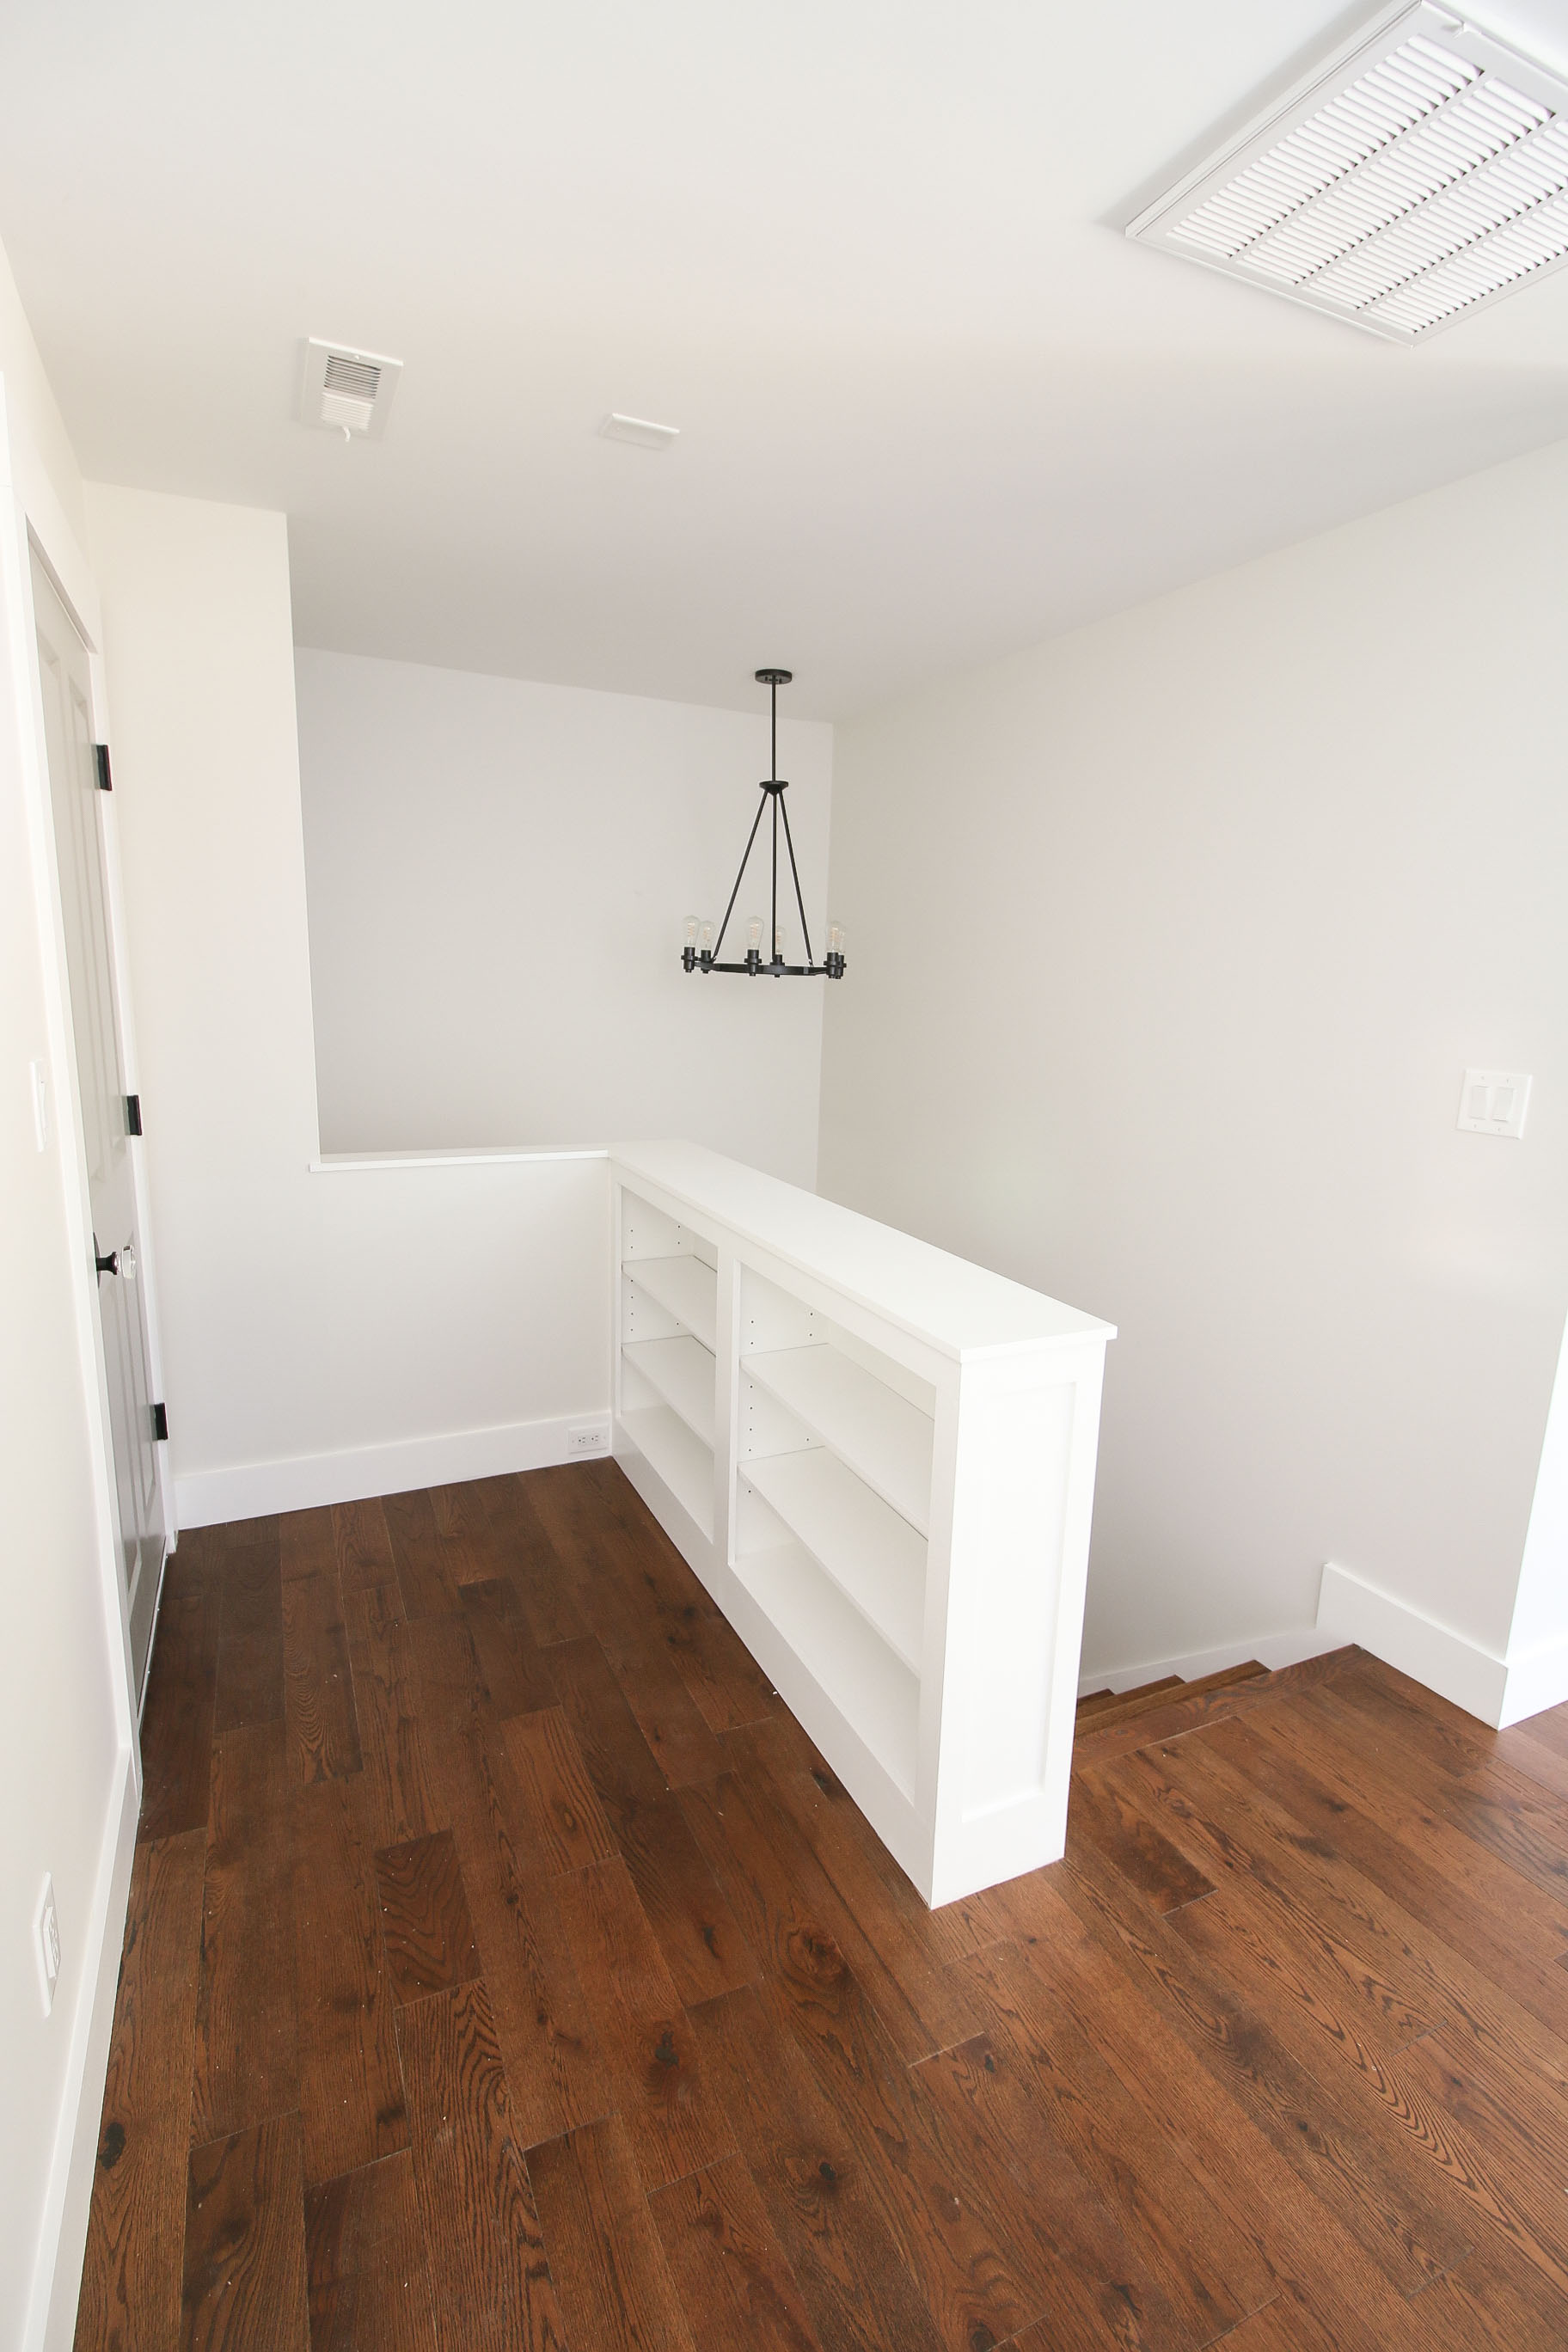
One night I had a stroke of genius. Why do we have to put a railing there? Let’s put some more storage. That’s how I decided to have my trim carpenter build a little bookcase there. I’m very happy with the decision.
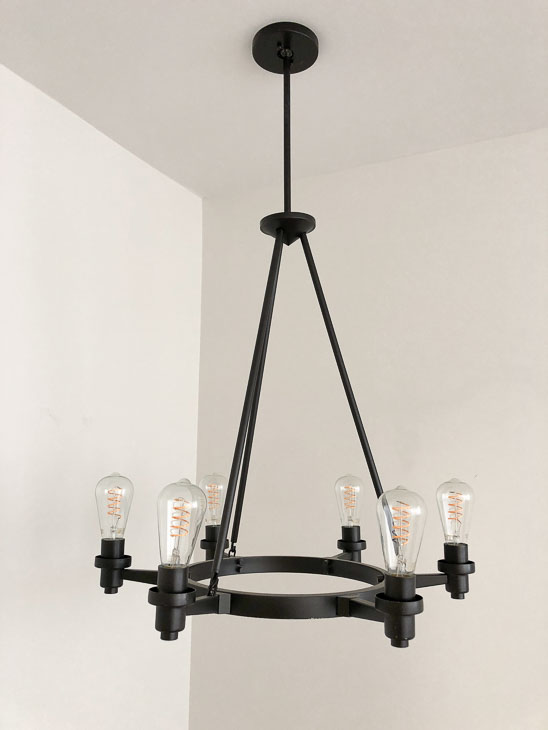
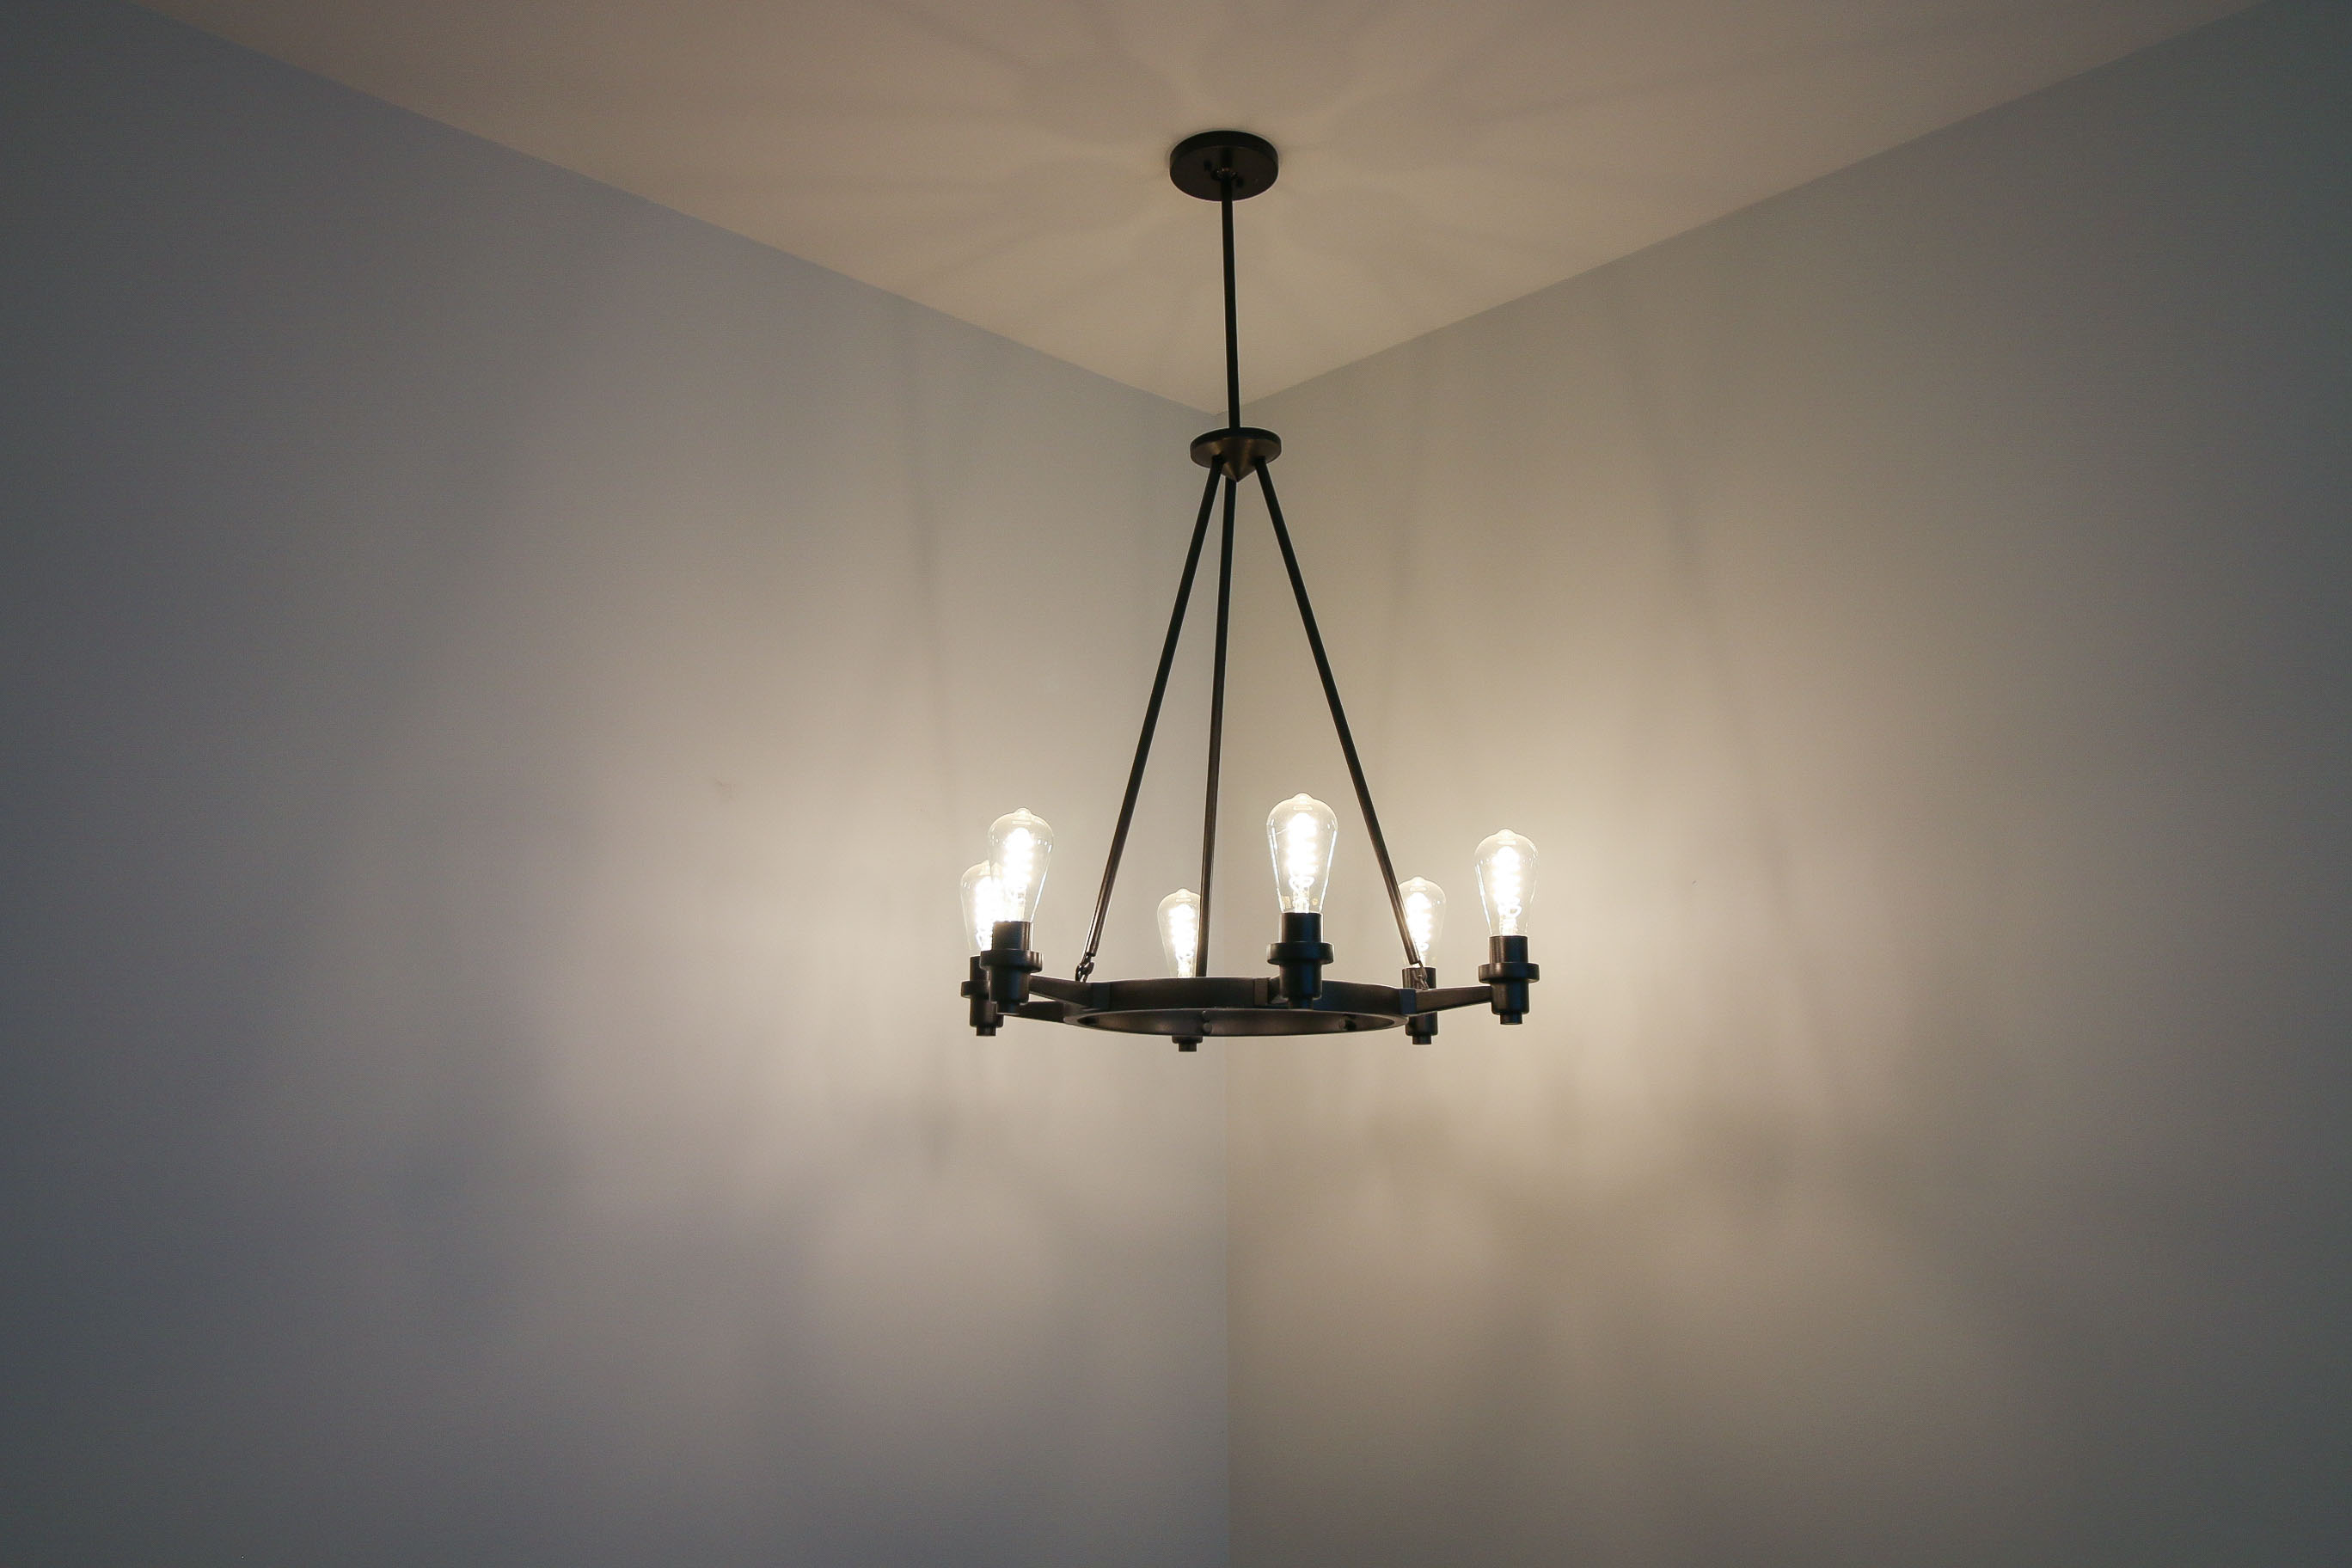
Above the stairs was one of the cheapest light fixtures I could find. No for real, I found it on the side of the road! My neighbor was throwing away the chandelier. It used to be satin nickel, but I gave it a face lift with some oil rubbed bronze spray paint and removed the cylinder light shades to give it an industrial vibe.
The LED Edison bulbs give a vintage vibe but also provide long lasting light bulbs without the need to change them.
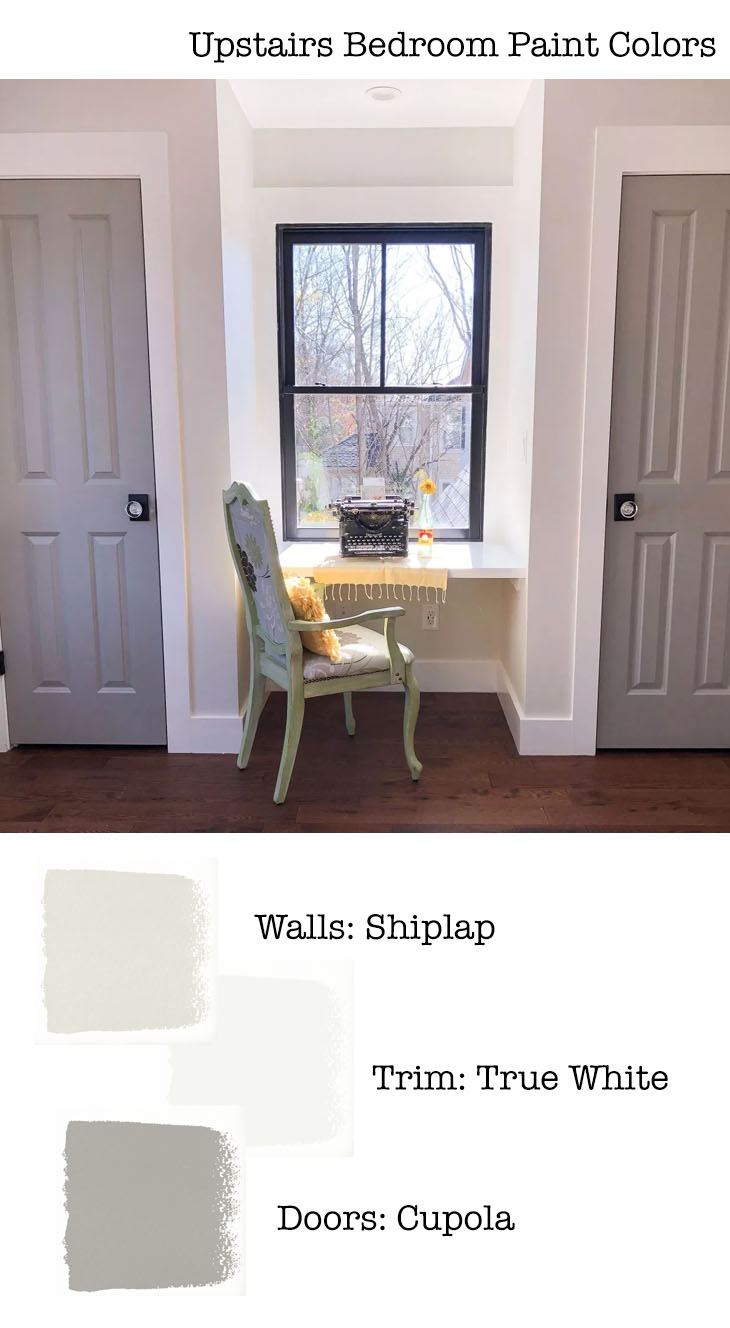
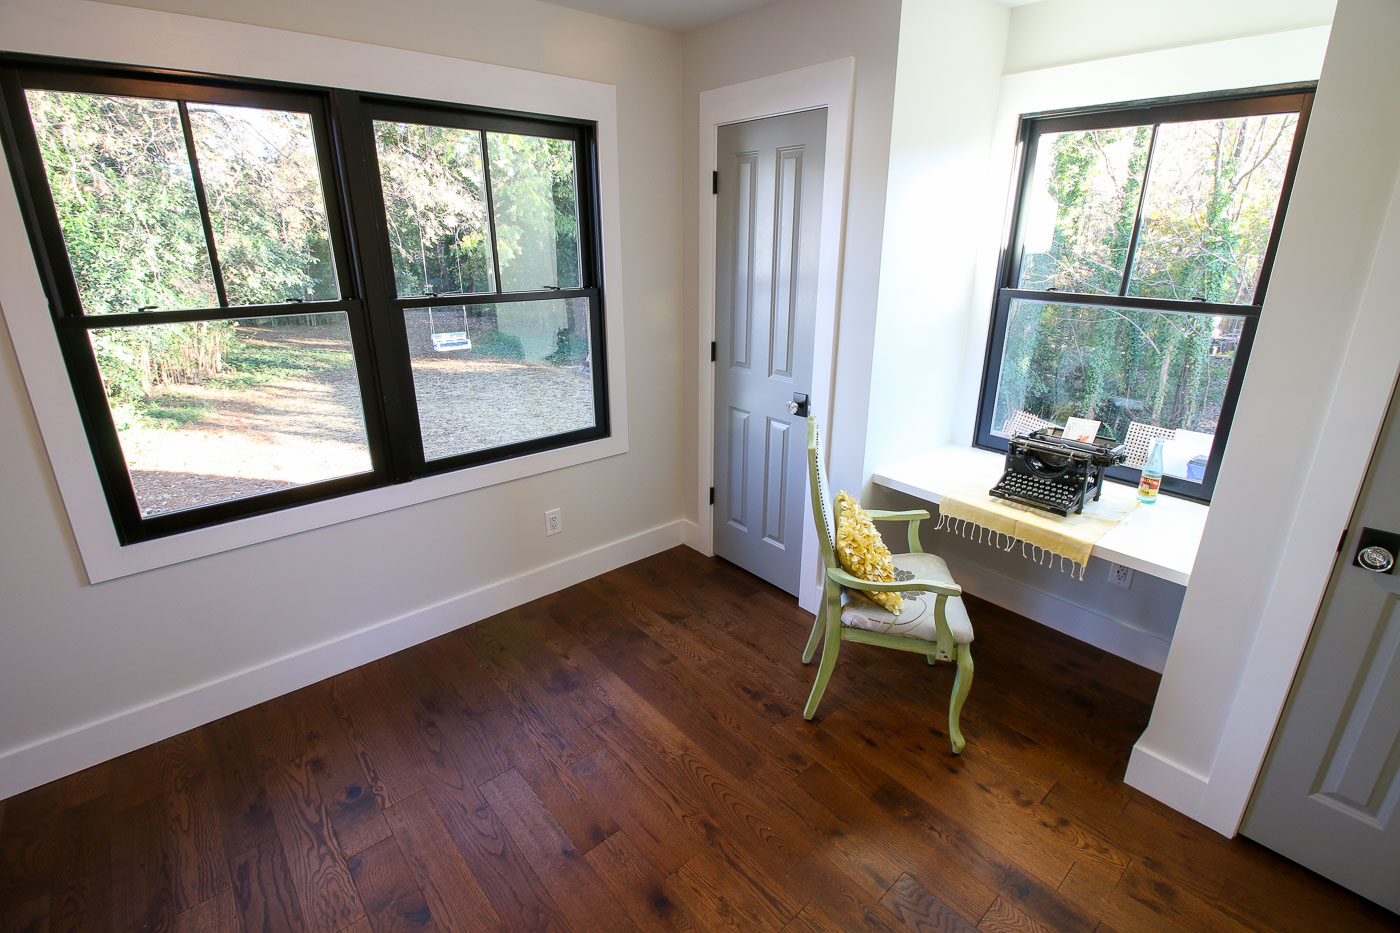
The Upstairs Bedroom
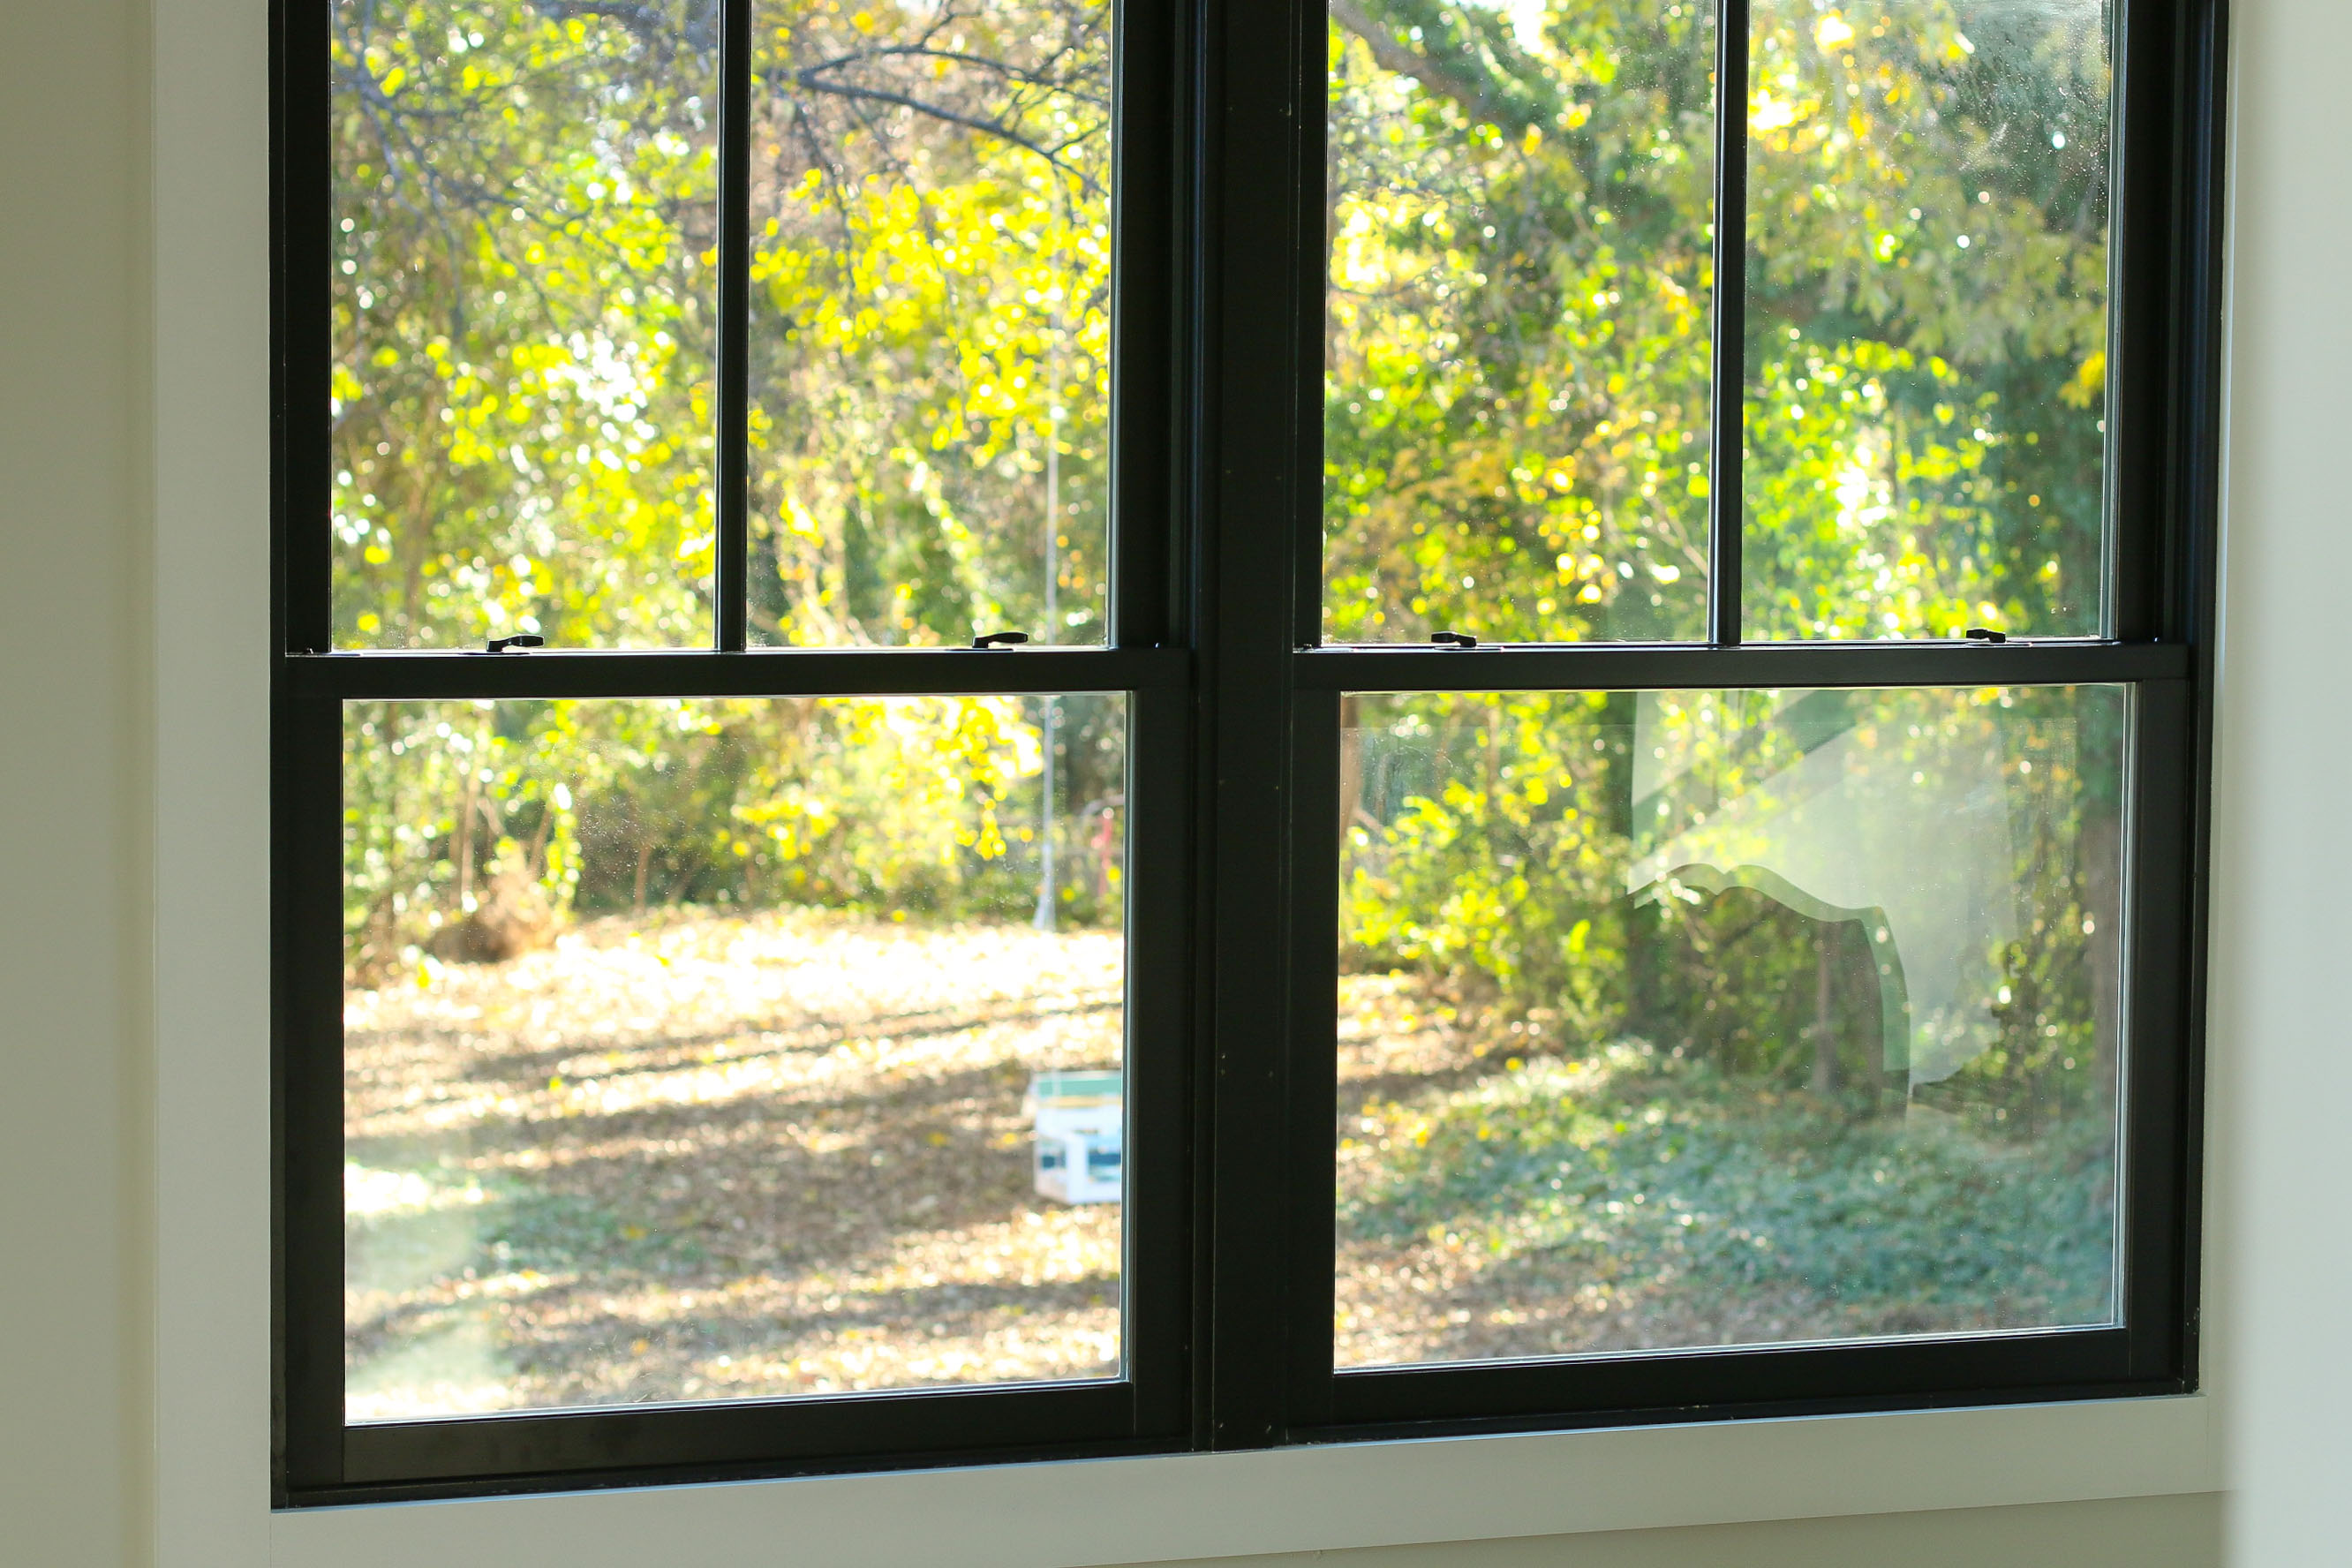
The upstairs bedroom is through the open room. It’s a quiet private retreat with an amazing view!
I spent lots of time looking out these Plygem Mira windows admiring the view. This was the perspective I saw from atop the leaking roof. It’s amazing to see your vision come to life.
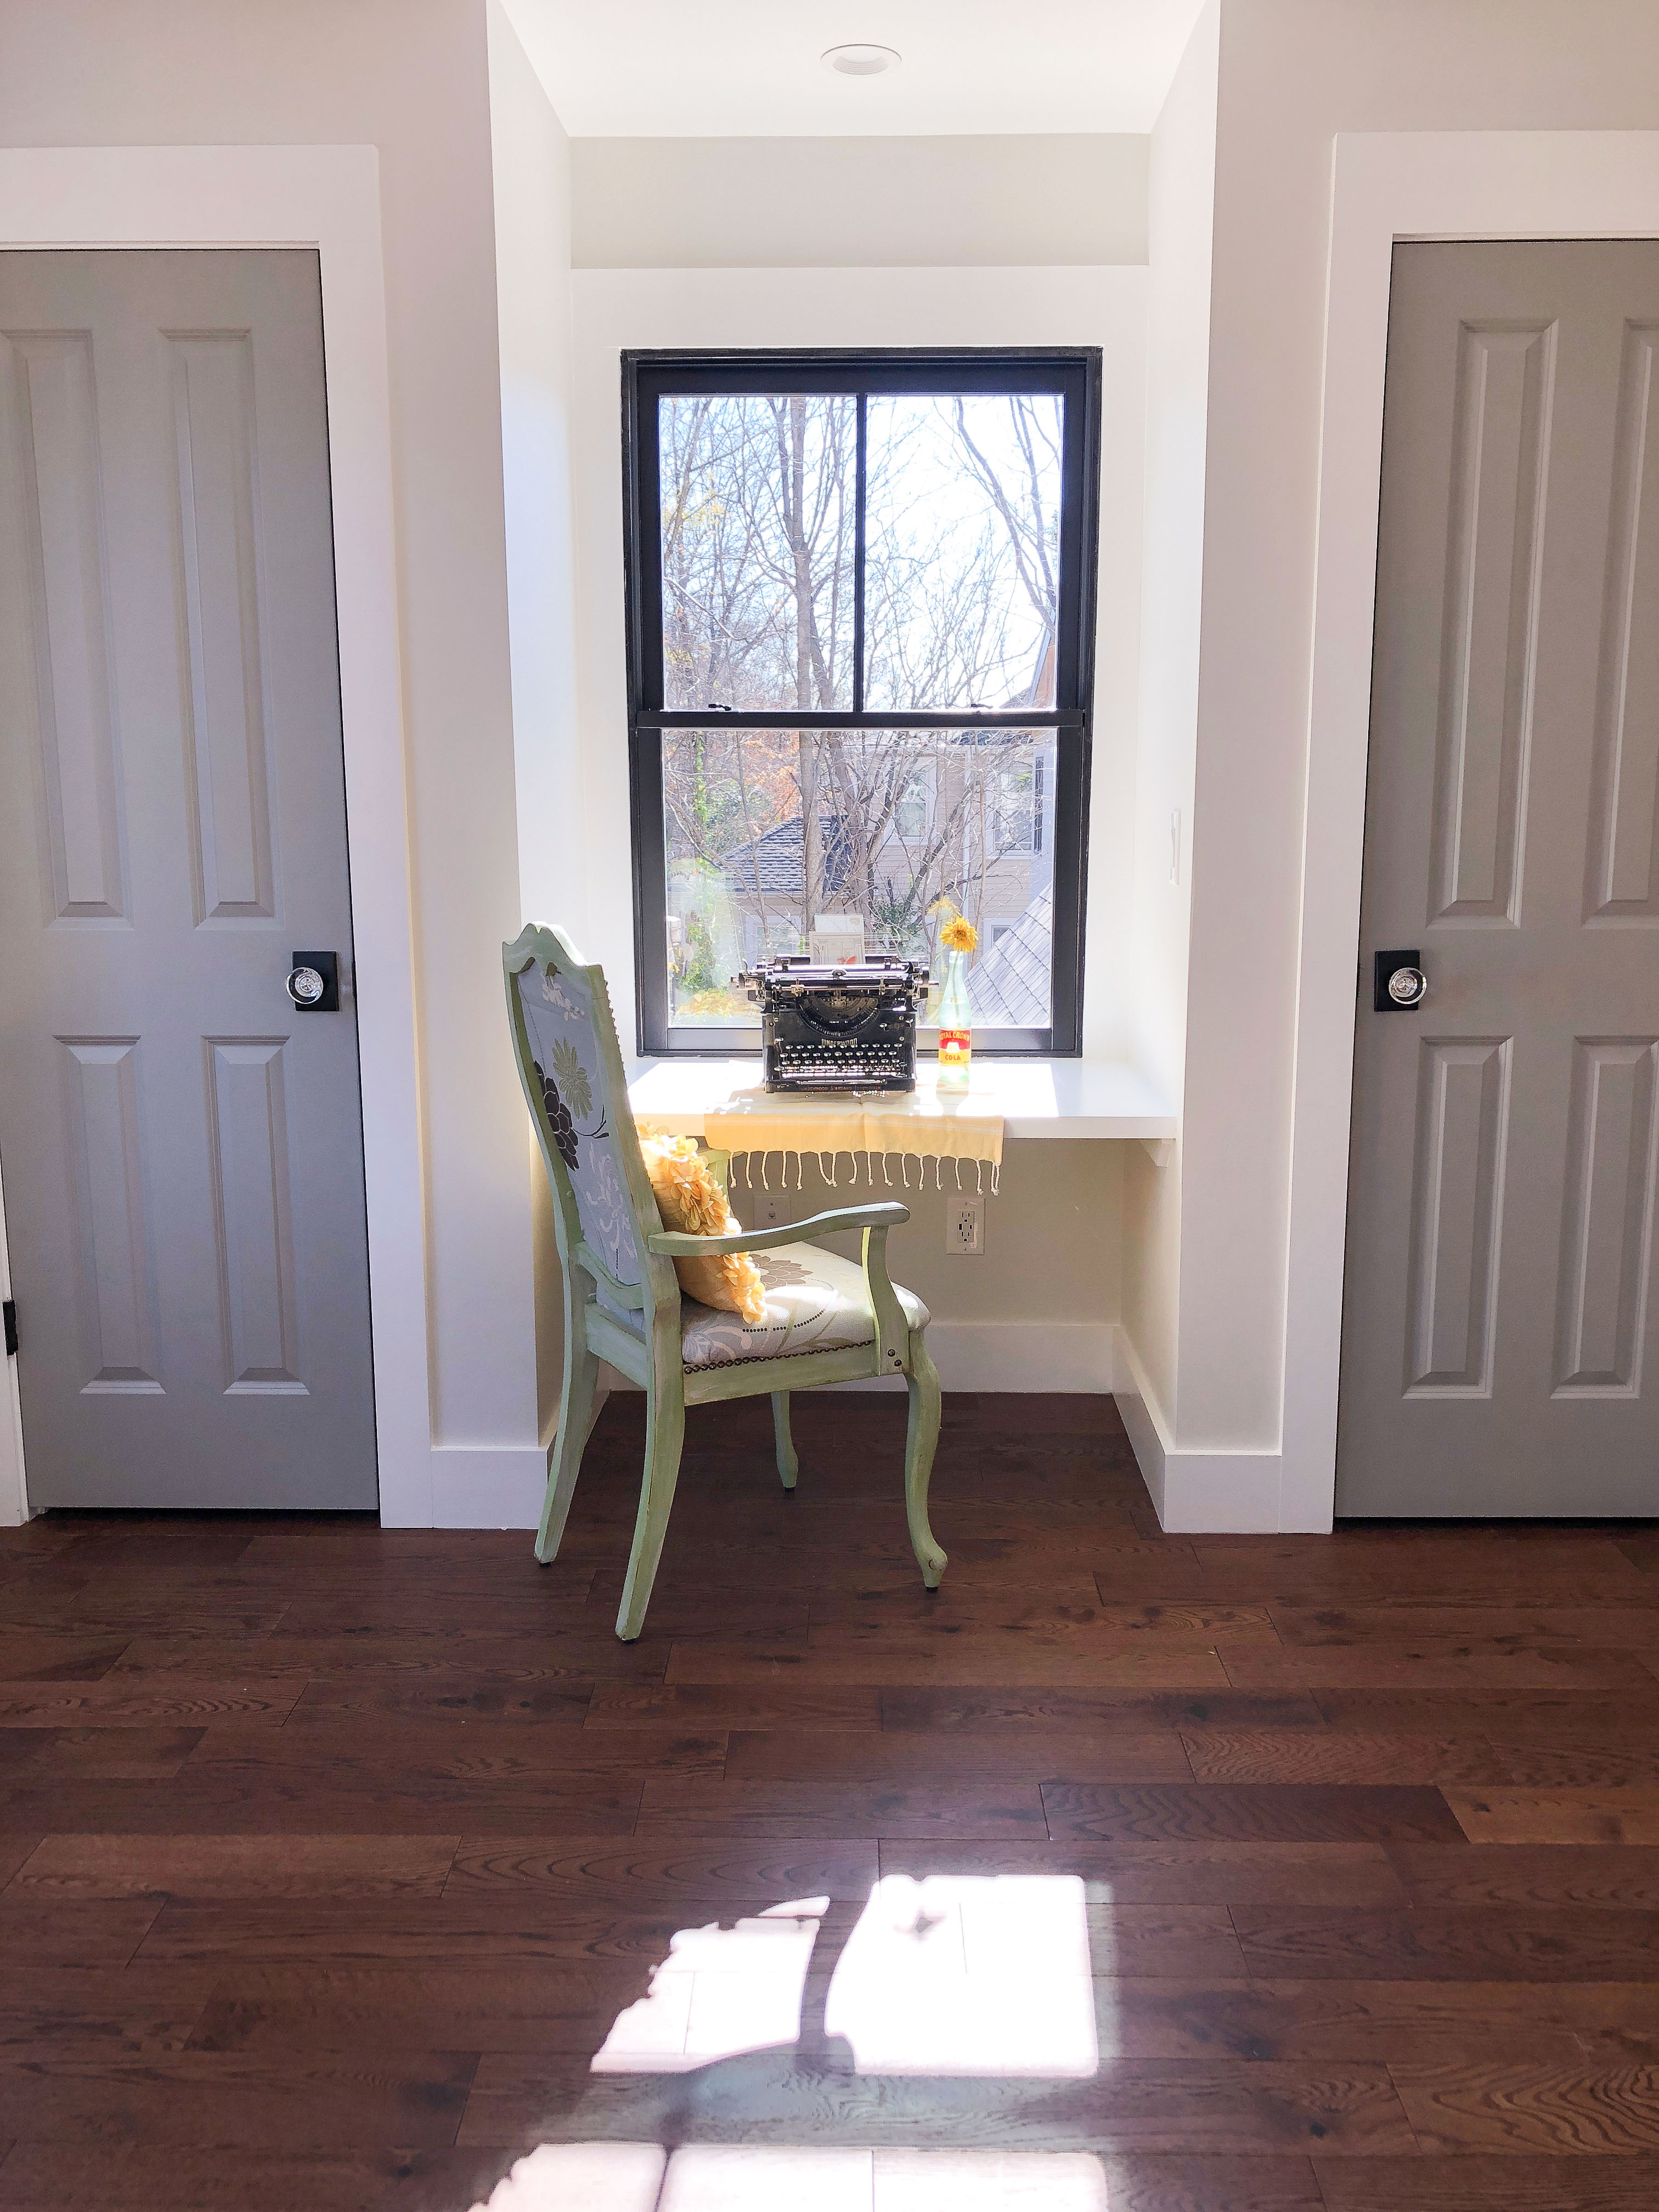
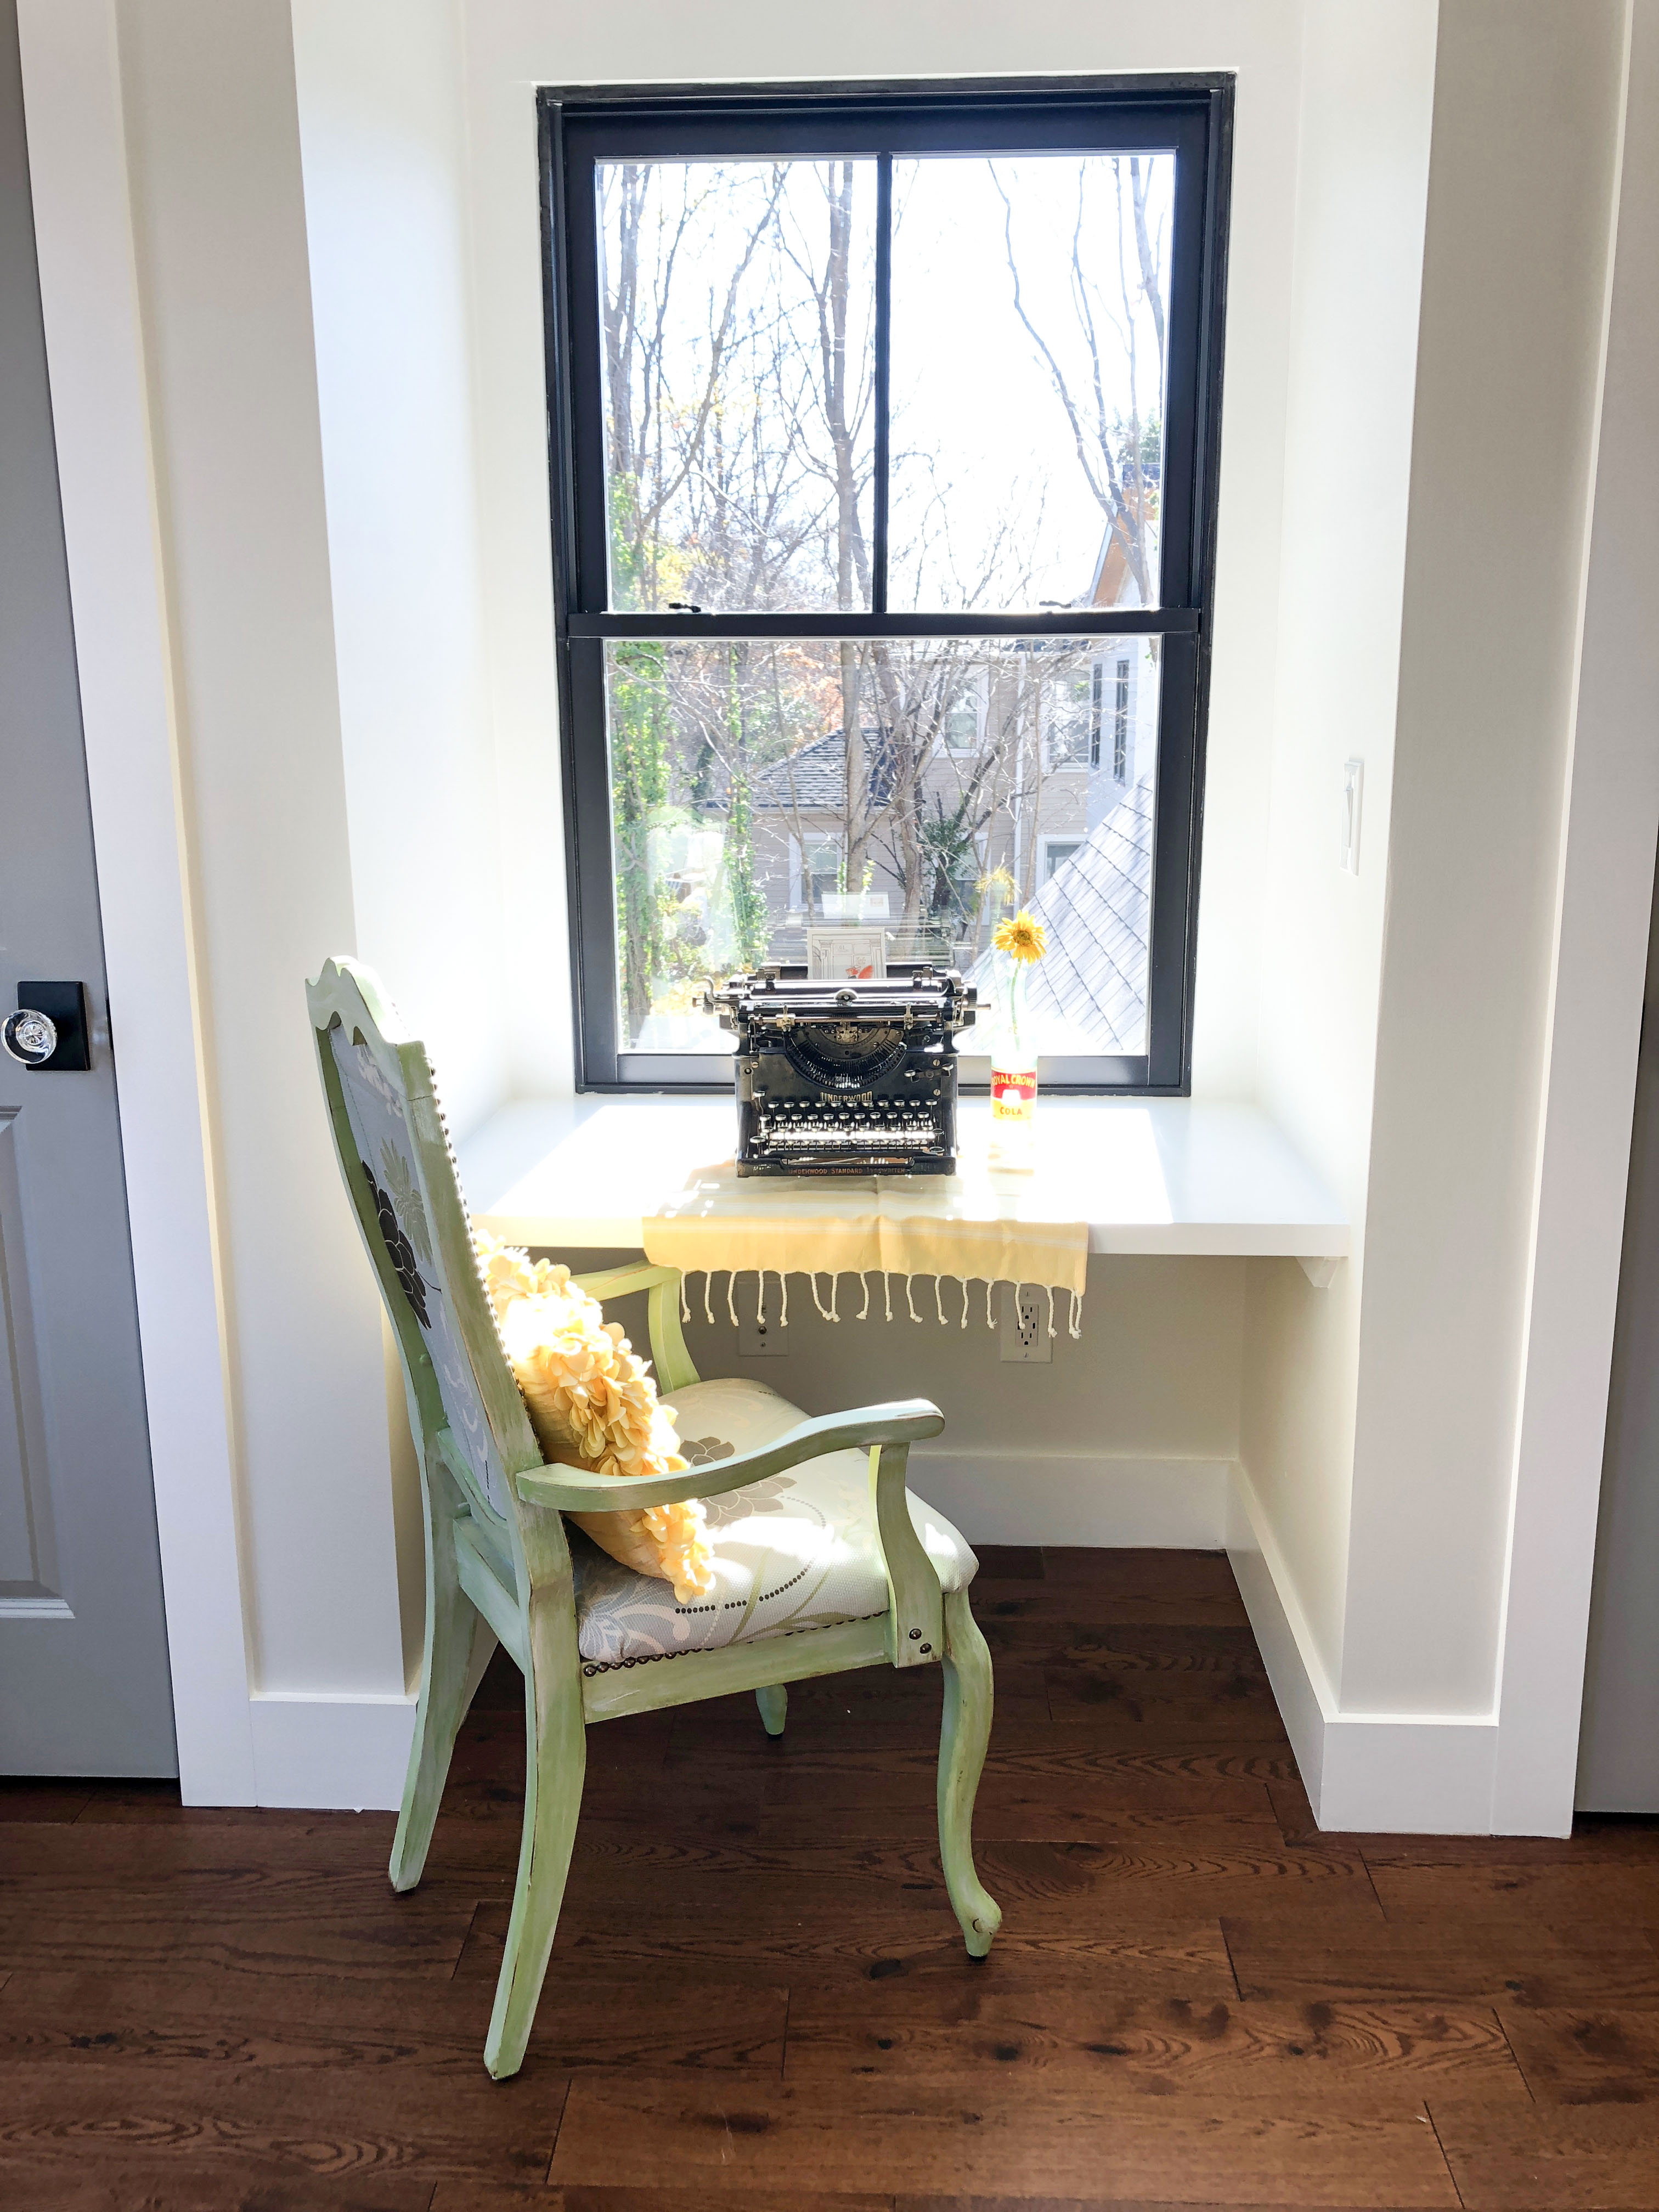
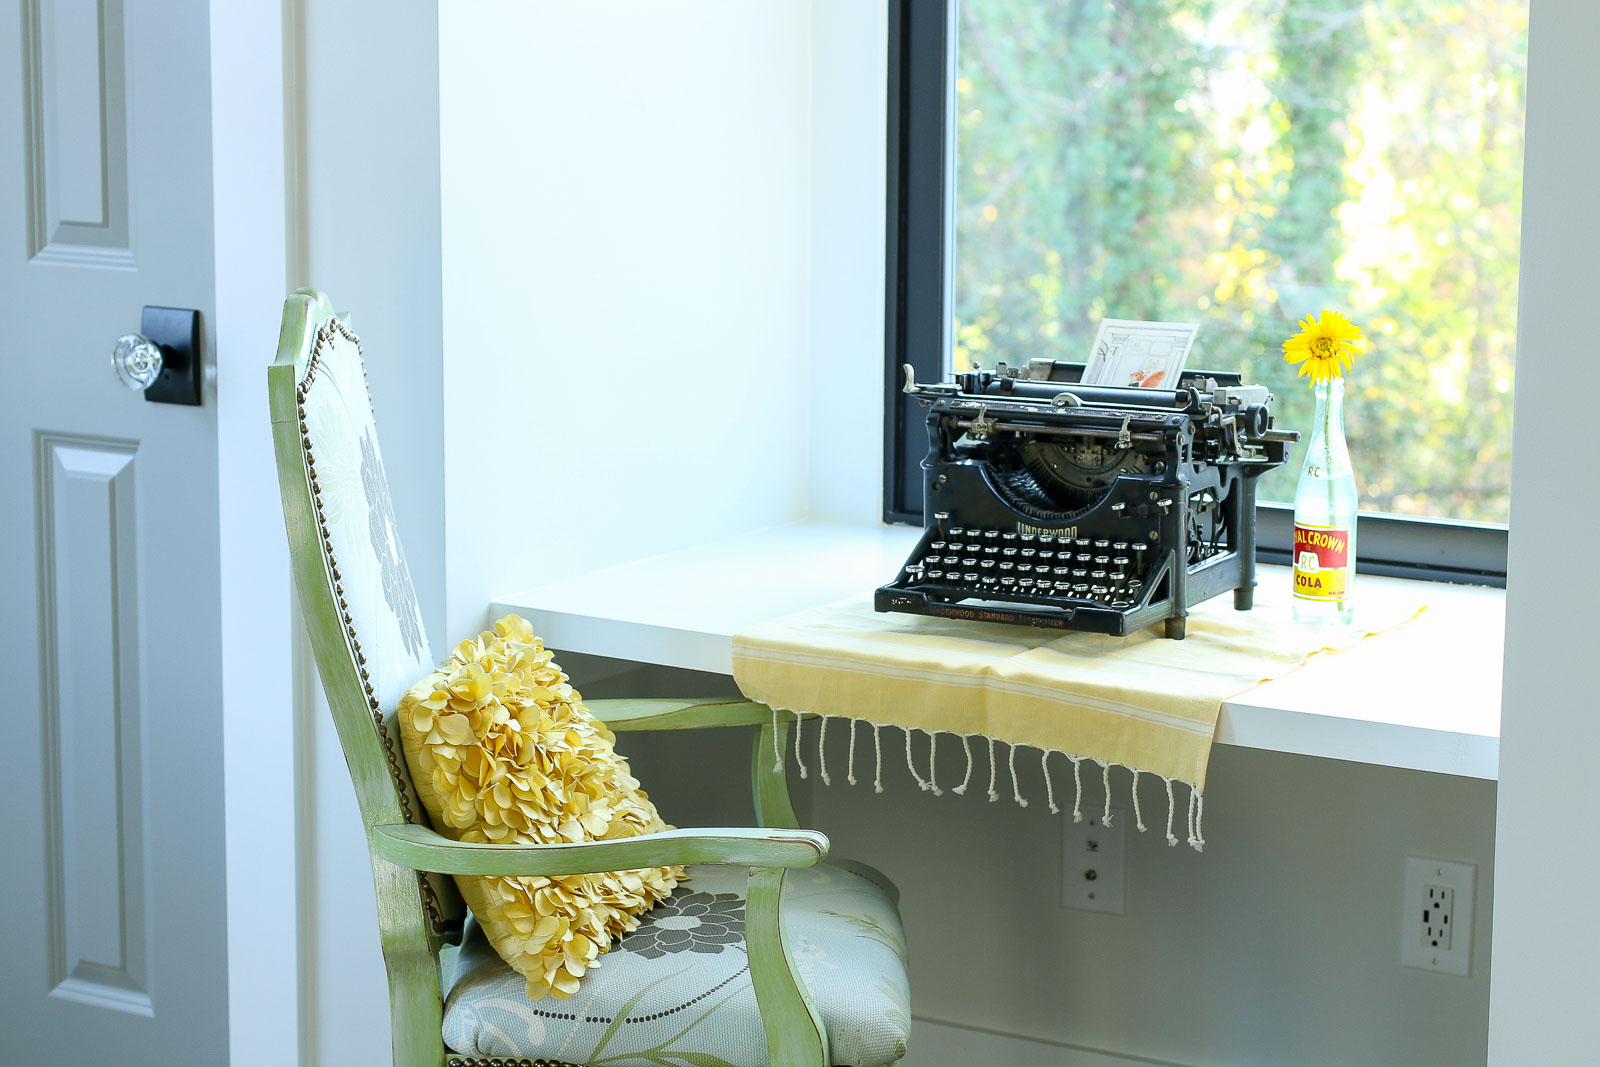
The architect suggested a bench seat between the closets. From past experience, benches just become a dumping ground, so I opted for a built-in desk.
I could definitely sit here and work for hours. Especially because I can simultaneously charge two USB devices and use both outlets because of the Leviton USB Charging outlet under the desk. To the left of the outlet is a cable and ethernet jack. After seeing how sloppy post-construction cable, internet, and phone wire installation is, I had the house pre-wired during the rough in phase. This virtually eliminates holes and voids where bugs, rodents, and cold air can get it.
This concludes the Saving Etta reveal tour with the Saving Etta: Upstairs Room Reveals. If you’re finding yourself a little sad the journey is over, have no fear a new remodel journey is starting shortly. Be on the lookout for the grand announcement and be sure to follow me on Instagram and Facebook to see up-to-date glimpses into Millie’s Remodel!
I’d love to hear what you thought of the Saving Etta project. Did you enjoy the updates? Were there too many, too few? Would you like to see more video or more photos? Would you like more DIY tutorials? More informational articles?
I’m all ears, let me know in the comments so I can try to accommodate your desires during the next project.
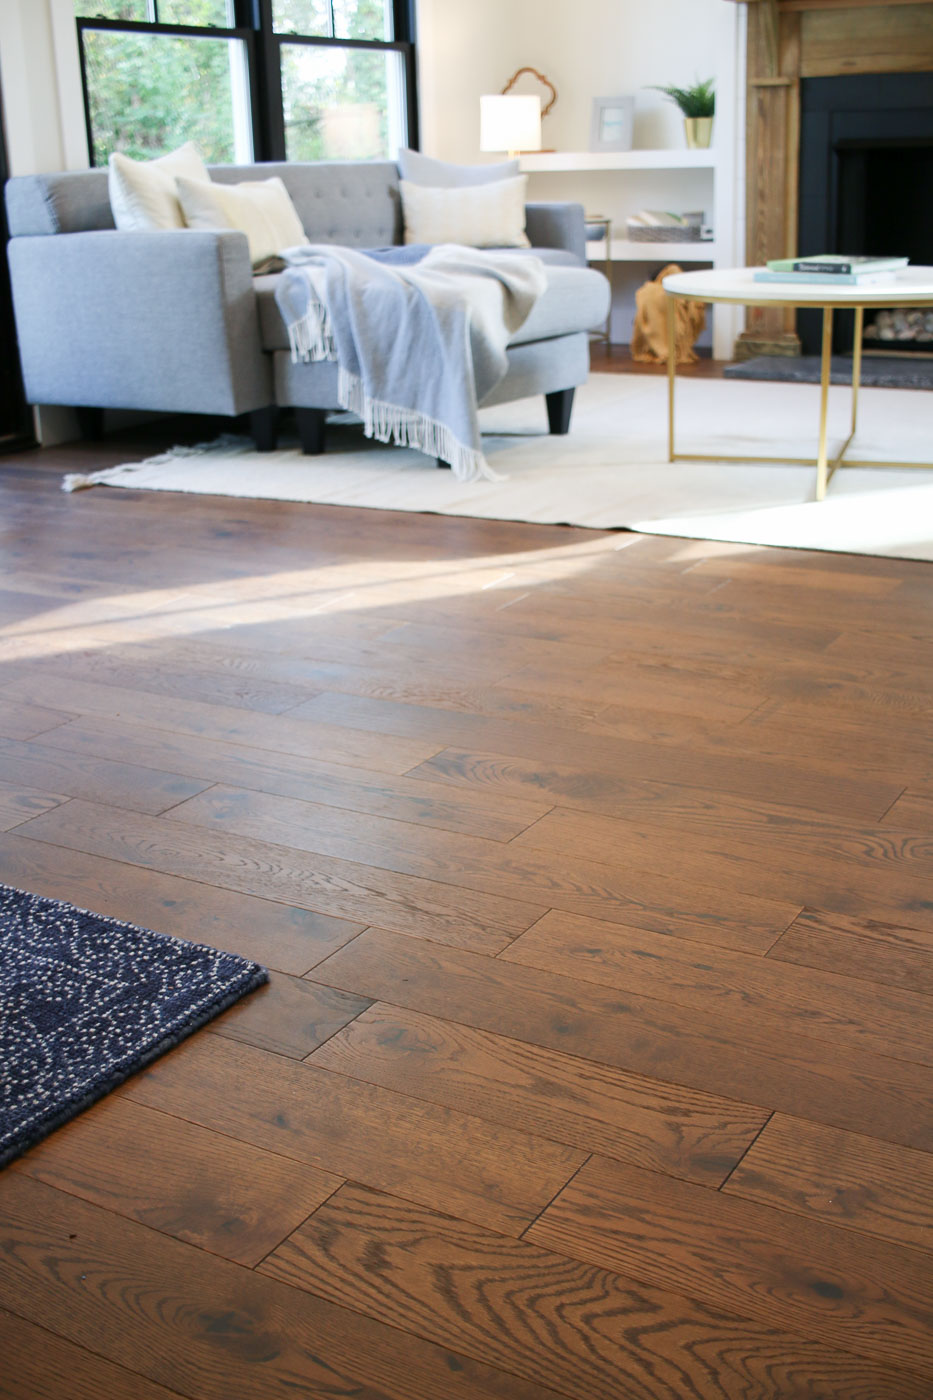
I know it’s been a while since you received a Saving Etta update. And, there’s a good reason for the delay. Not only did I renovate two bathrooms for our local Habitat for Humanity this past week, but I also bought a house! After six months of touring houses and putting in offers, I finally had one accepted on a house. I’ll be giving you more details soon, but in the meantime, I want to invite you inside for the living room reveal in the Saving Etta house.
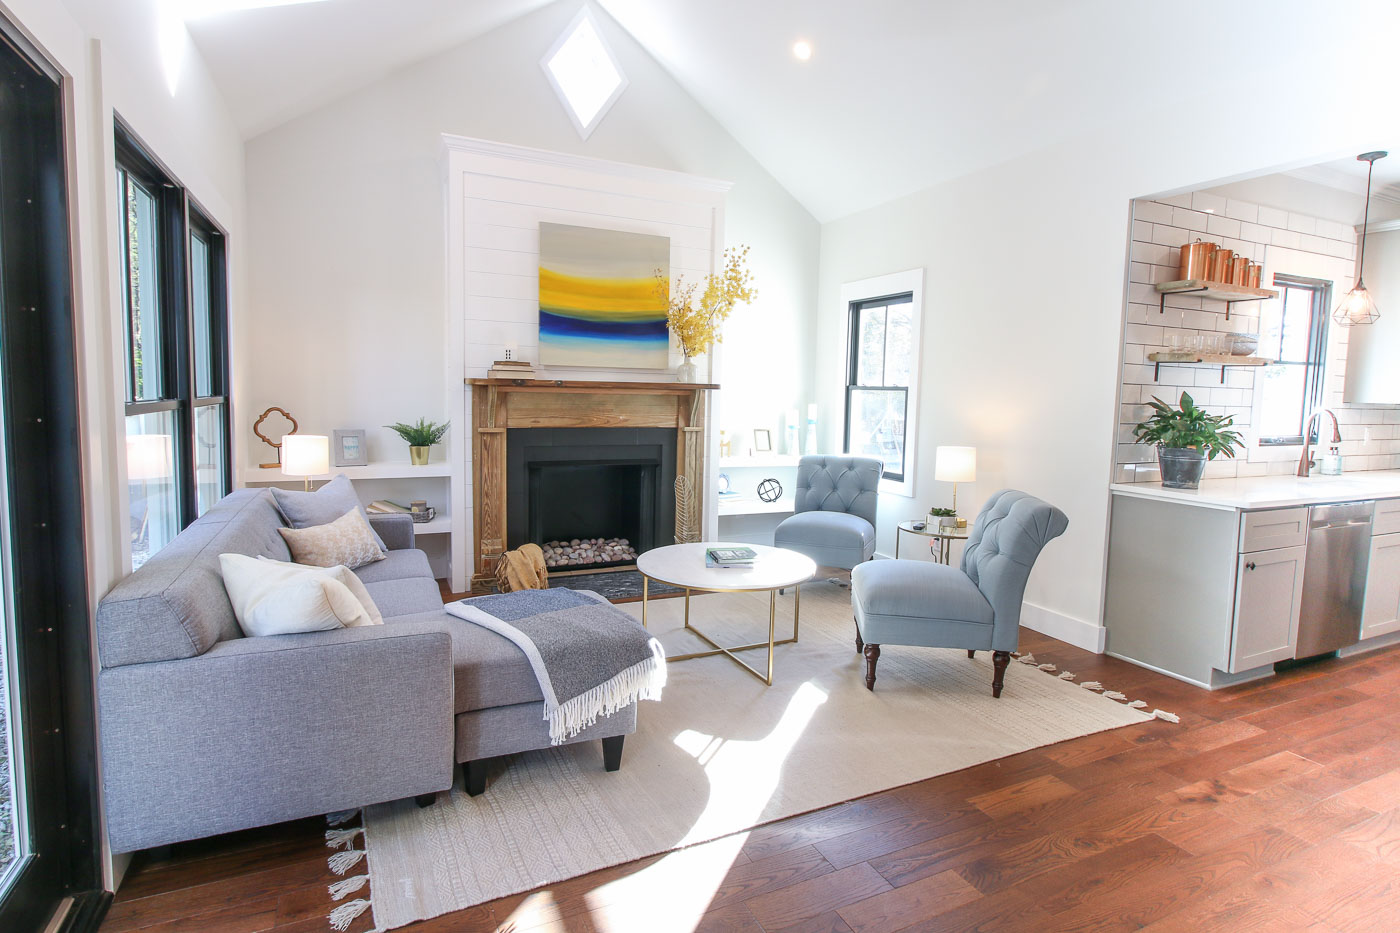
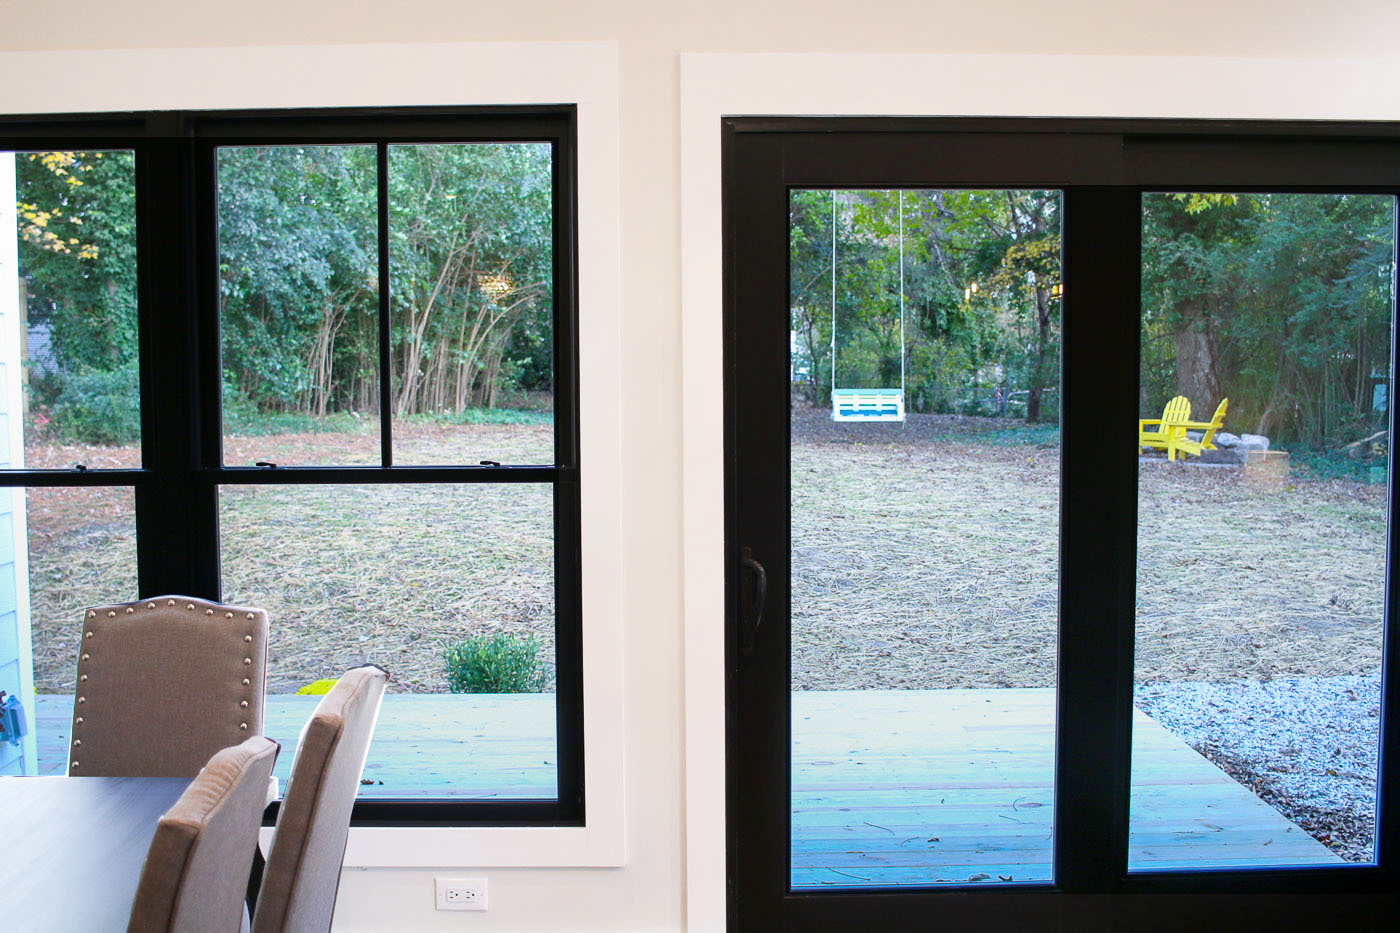
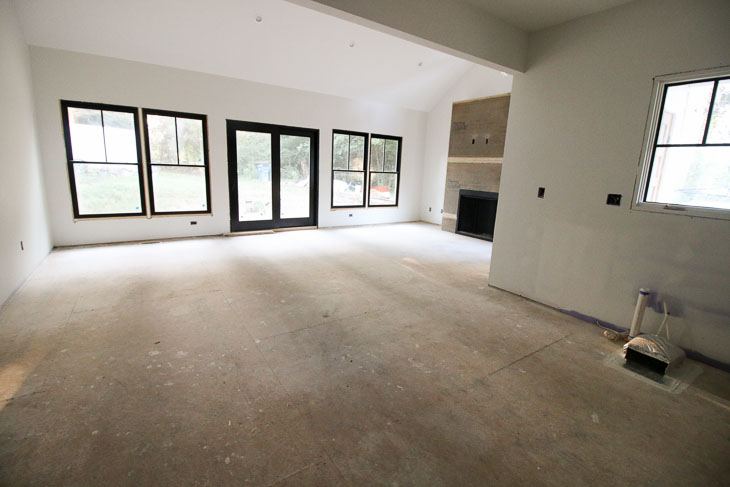
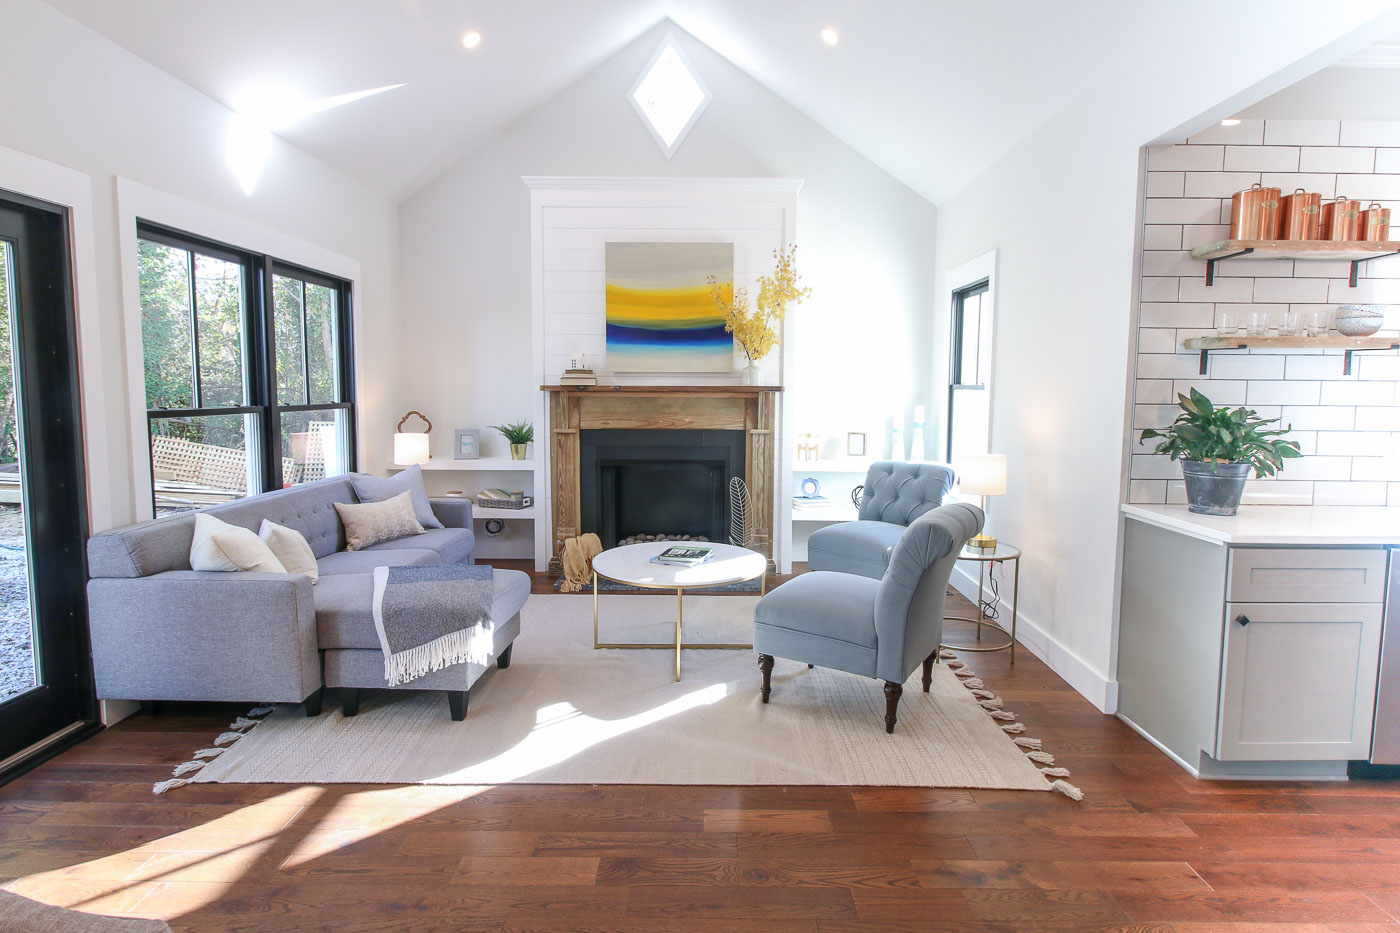
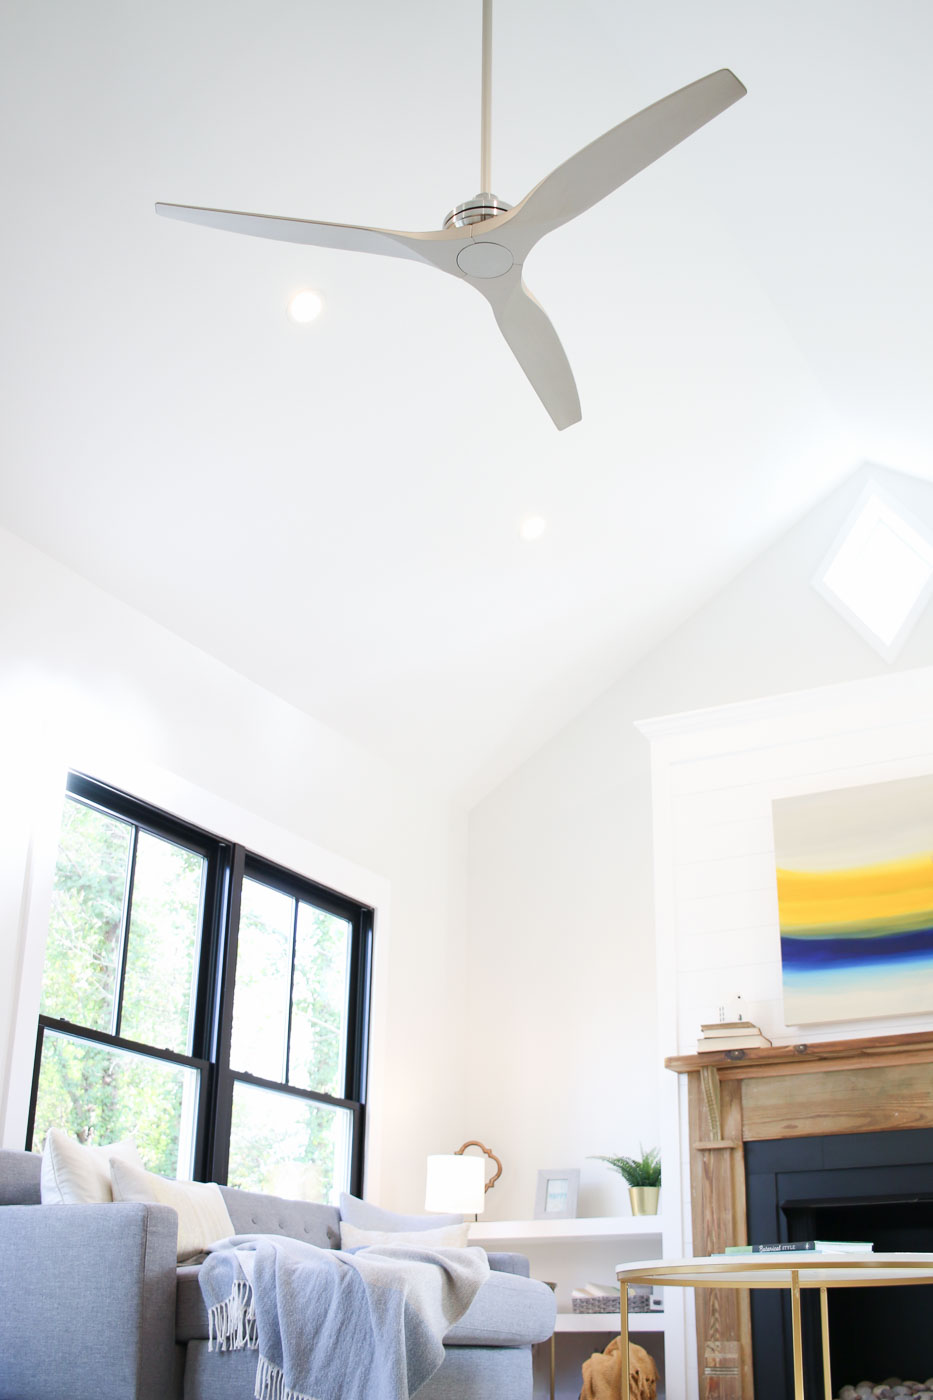
This room was one of my favorite rooms in the house because of how bright, open, and lofty the space is with huge 14 foot ceilings. The focal point of the room may not be something inside the living room itself. Instead the real star is the view to the backyard through the big Plygem Mira windows and sliding door.
Before I get ahead of myself, I’d like to thank all the Saving Etta sponsors. They are all near and dear to my heart for their support and patience. When it comes to selecting products, tools, and clothing, these are the brands I select time and time again.
(I’ve included affiliate links for your convenience. I earn a small percentage from a purchase using these links. There is no additional cost to you. You can read more about affiliate links here.)
Progression of the Living Room:
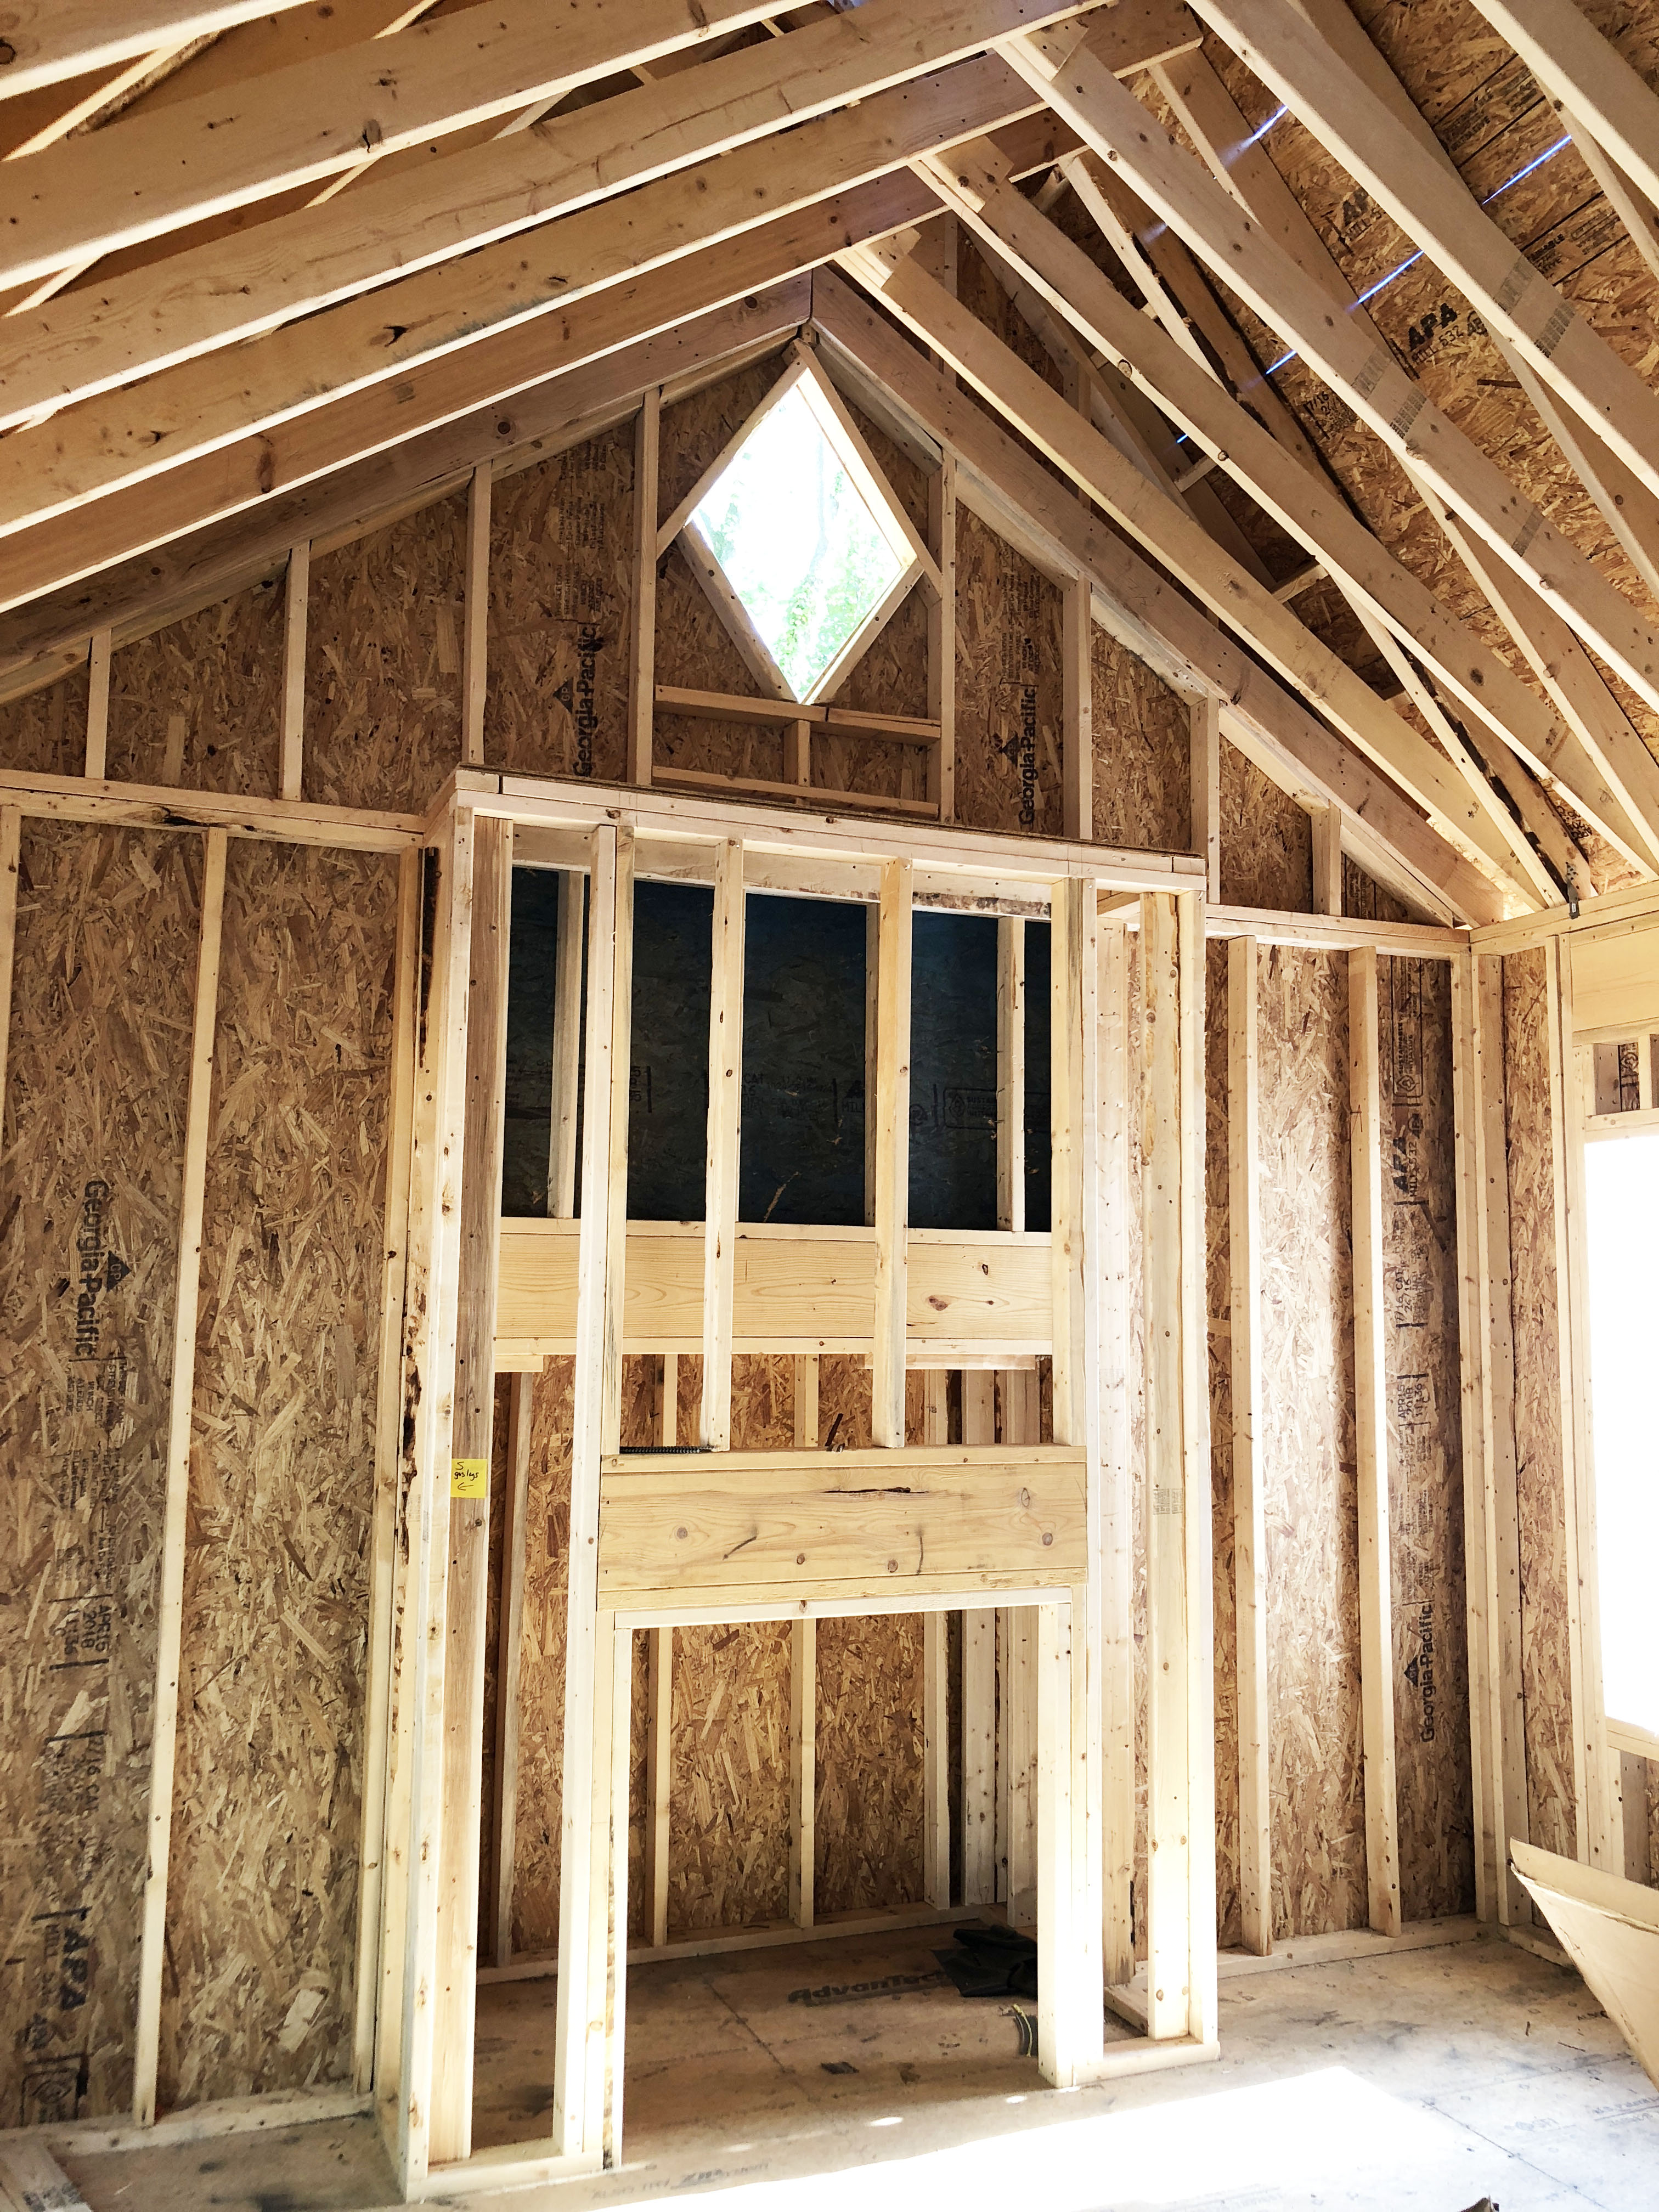
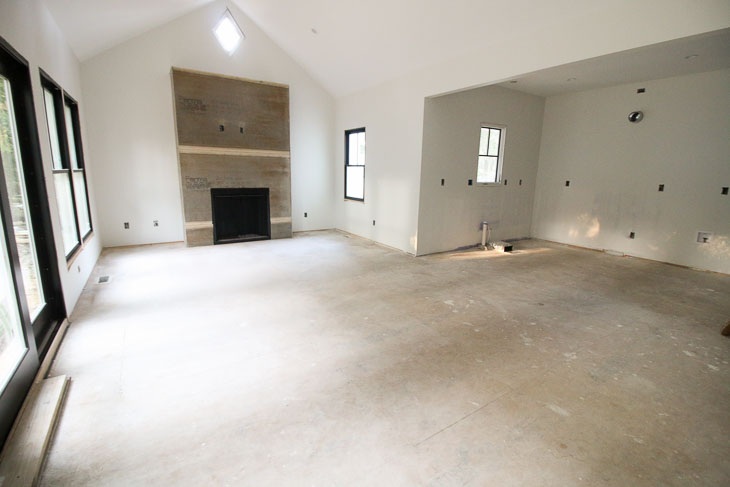
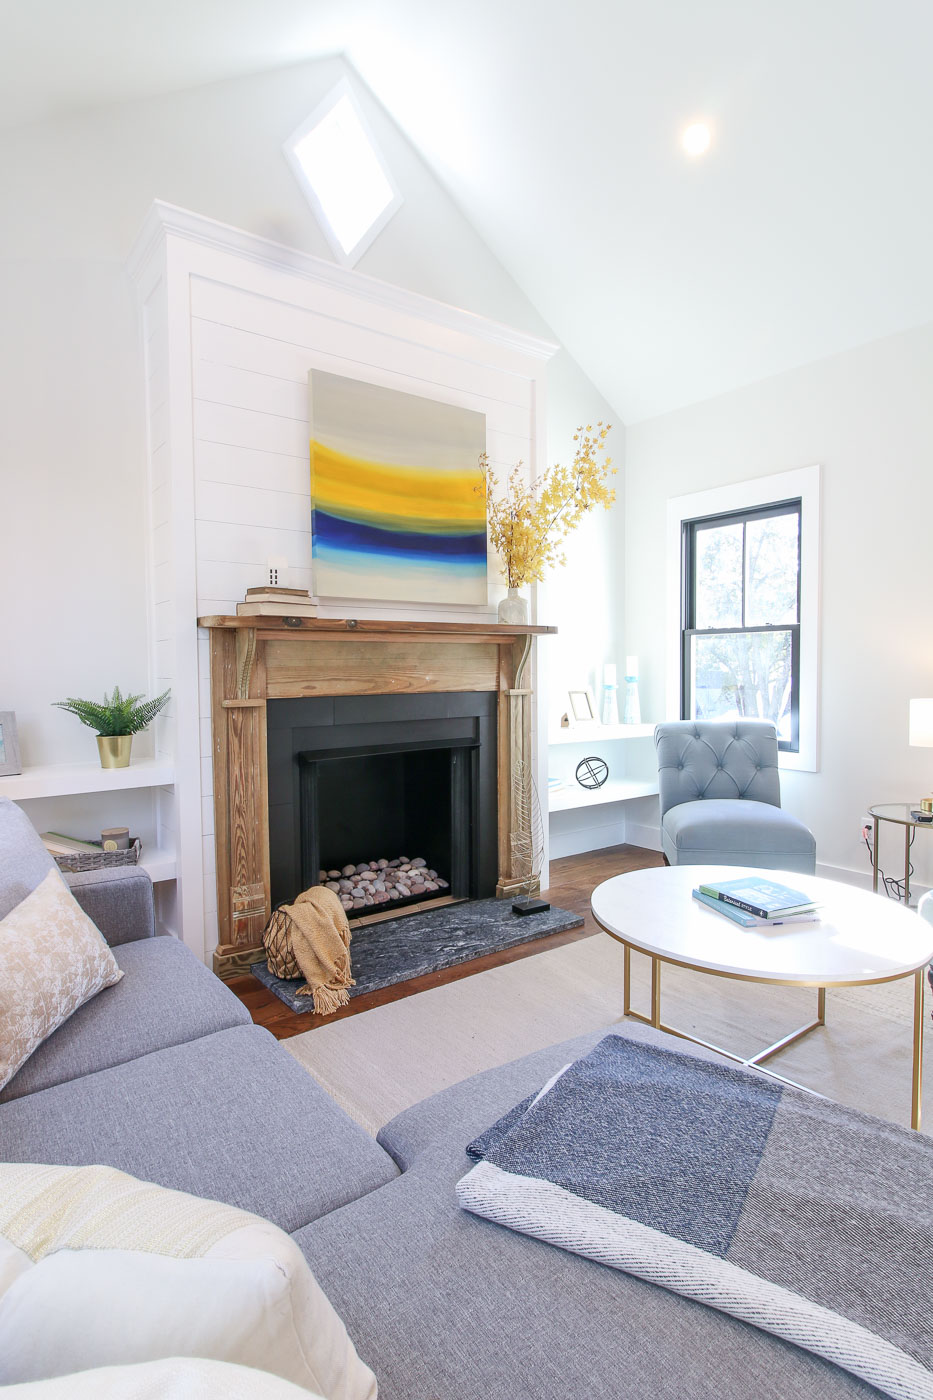
The moment the living room was framed, I could tell it was going to be glorious. The huge ceilings and the diamond cut out for the window were enough to make me awestruck. It was also the moment I knew my architect had created something grand.
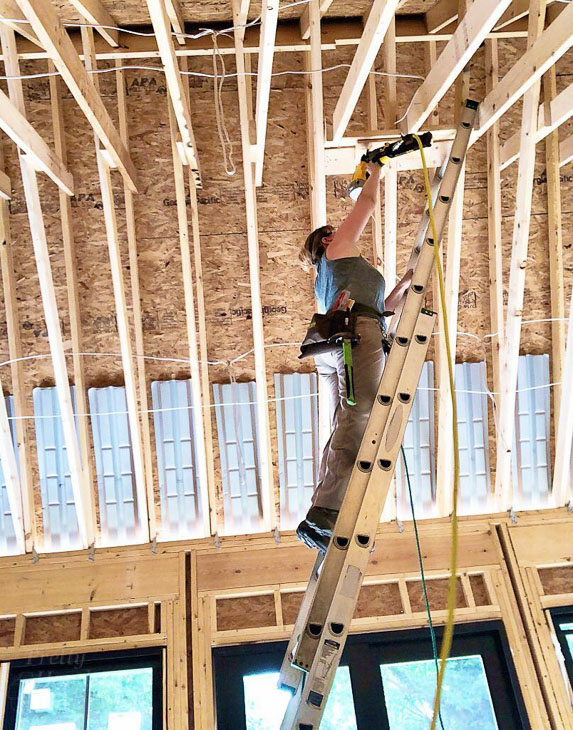
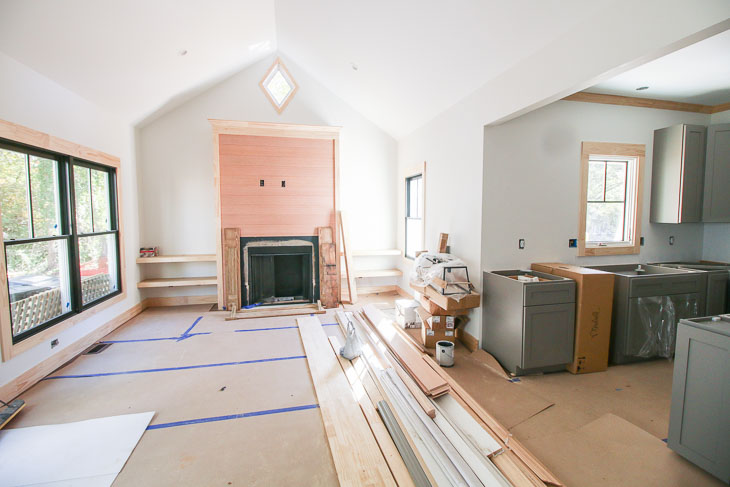
Before the electrical and lighting could be installed, my electrician pointed out one problem spot. He said there wasn’t a level spot for the ceiling fan. My framers had long left the job site, so I had to install a piece of blocking myself. It took a few trial efforts to figure out the proper angle to cut the blocking so it could fit level in the peak of the rafters.
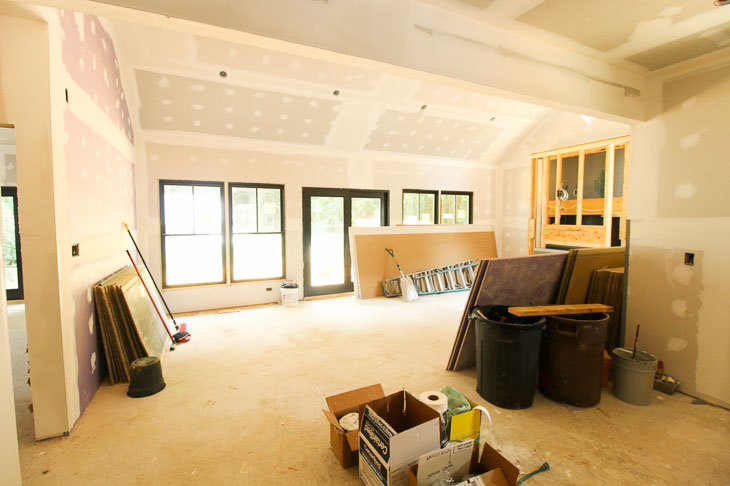
Once the blocking issue was resolved, the drywall was installed. If anyone questions the insulation value of sheet rock, I can tell you it made a huge difference in maintaining the temperature in the house after install. (It also cut down on much of the outside noise.)
Speaking of noise, if you had a sharp eye, you may have noticed the purple drywall on the left hand wall. It’s SoundBreak drywall used to reduce sound transmission between to rooms. You can read more about how I “sound-proofed” the rooms here (actually it’s more sound reduction than sound-proof.)
The fireplace surround was wrapped with PermaBase cement board in preparation for tile or stucco around the fireplace. (At this point I still had no idea how I was going to finish the surround.)
The fireplace is a ventless gas fireplace. I selected a sexy gas fire with decorative rocks for the living room. It has one linear flame and cranks out an amazing amount of heat! The few times we turned it on, the heat warmed the room very quickly. If the homeowners ever lose power they will be very comfortable using the gas fireplace for heat.
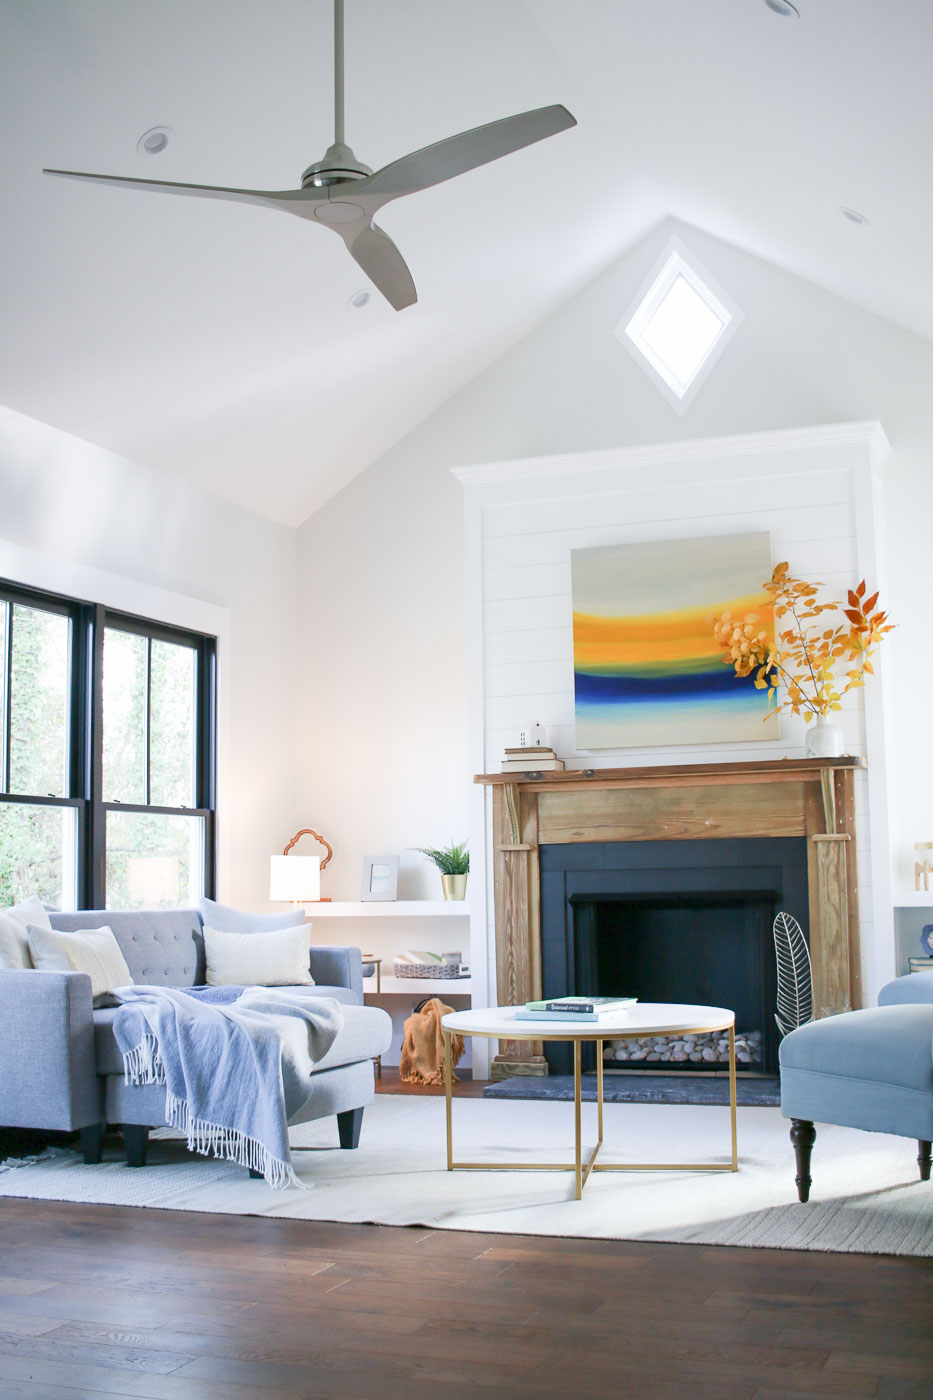
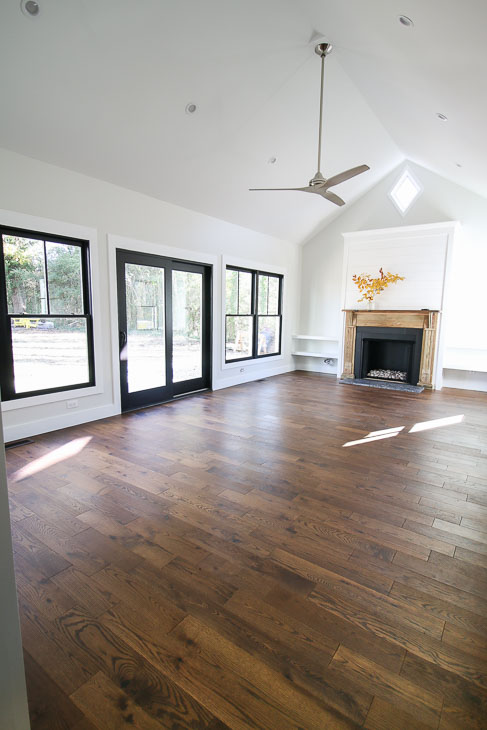
The Living Room Reveal:
At long last, I’m super proud of this room and hope you love it as much as I do.
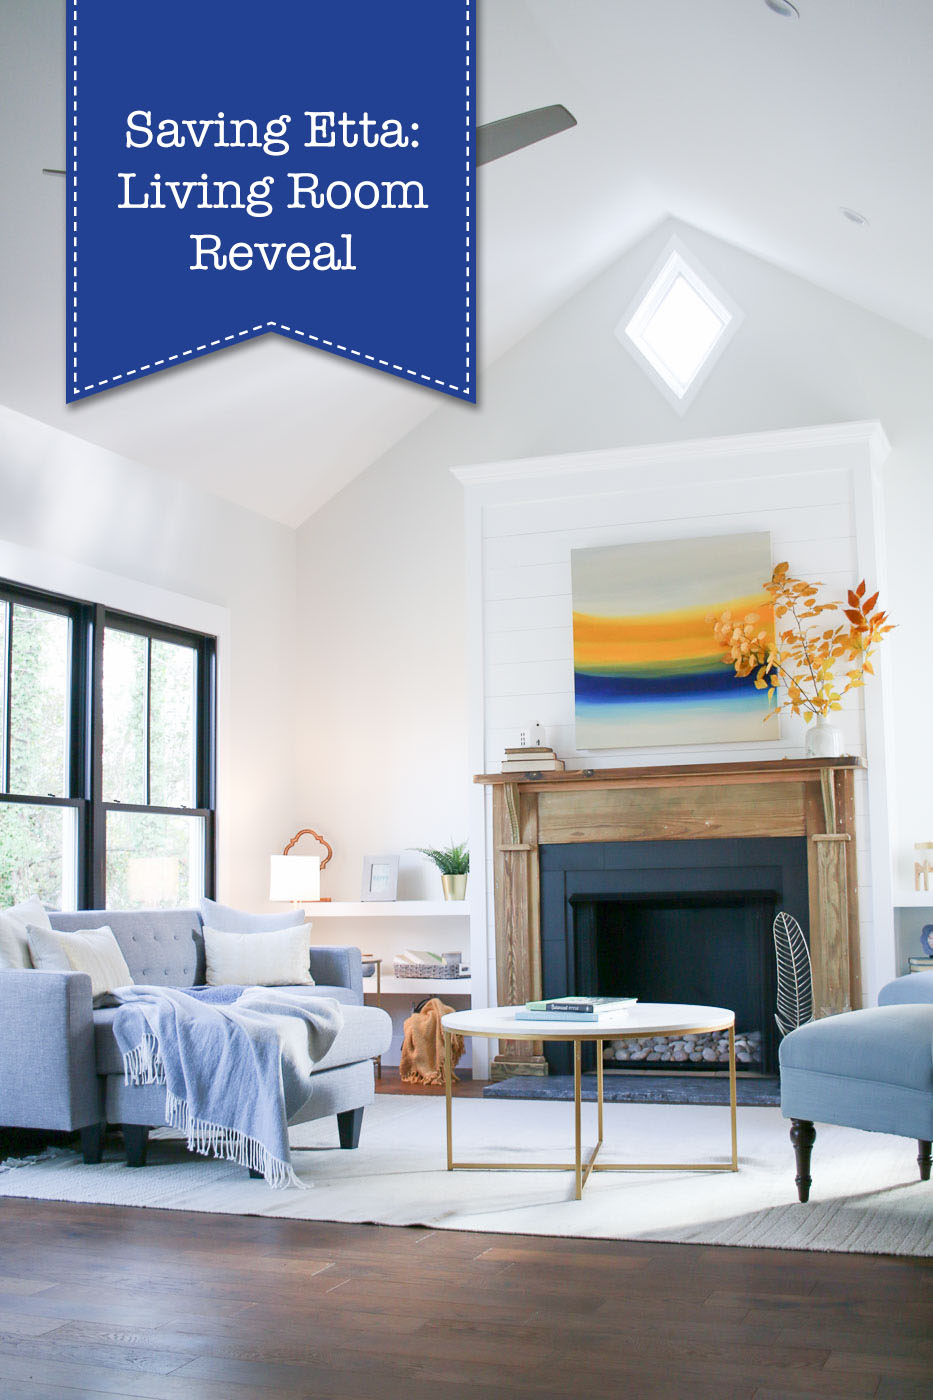
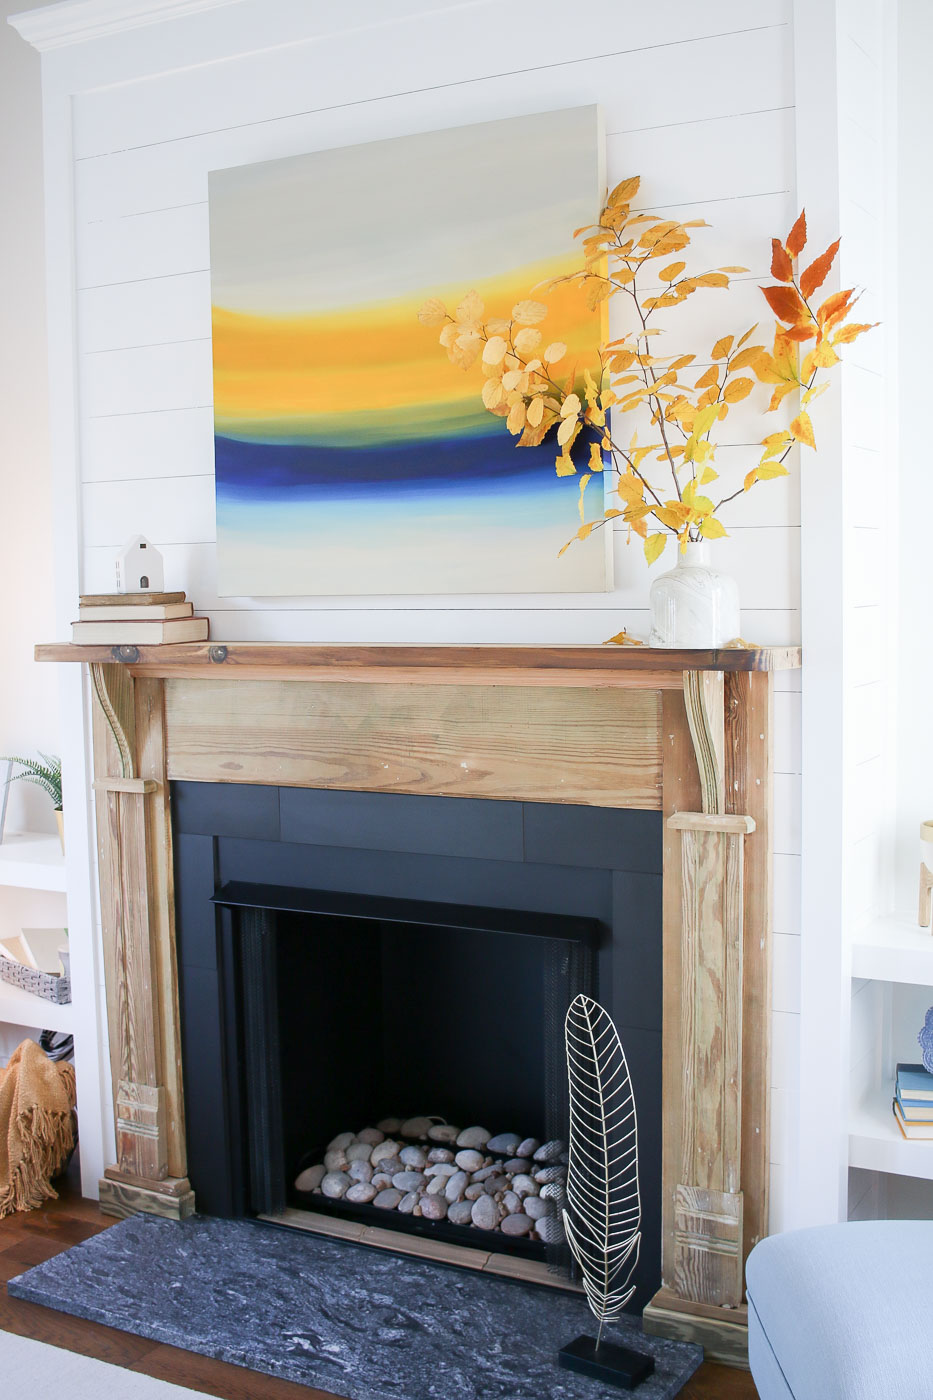
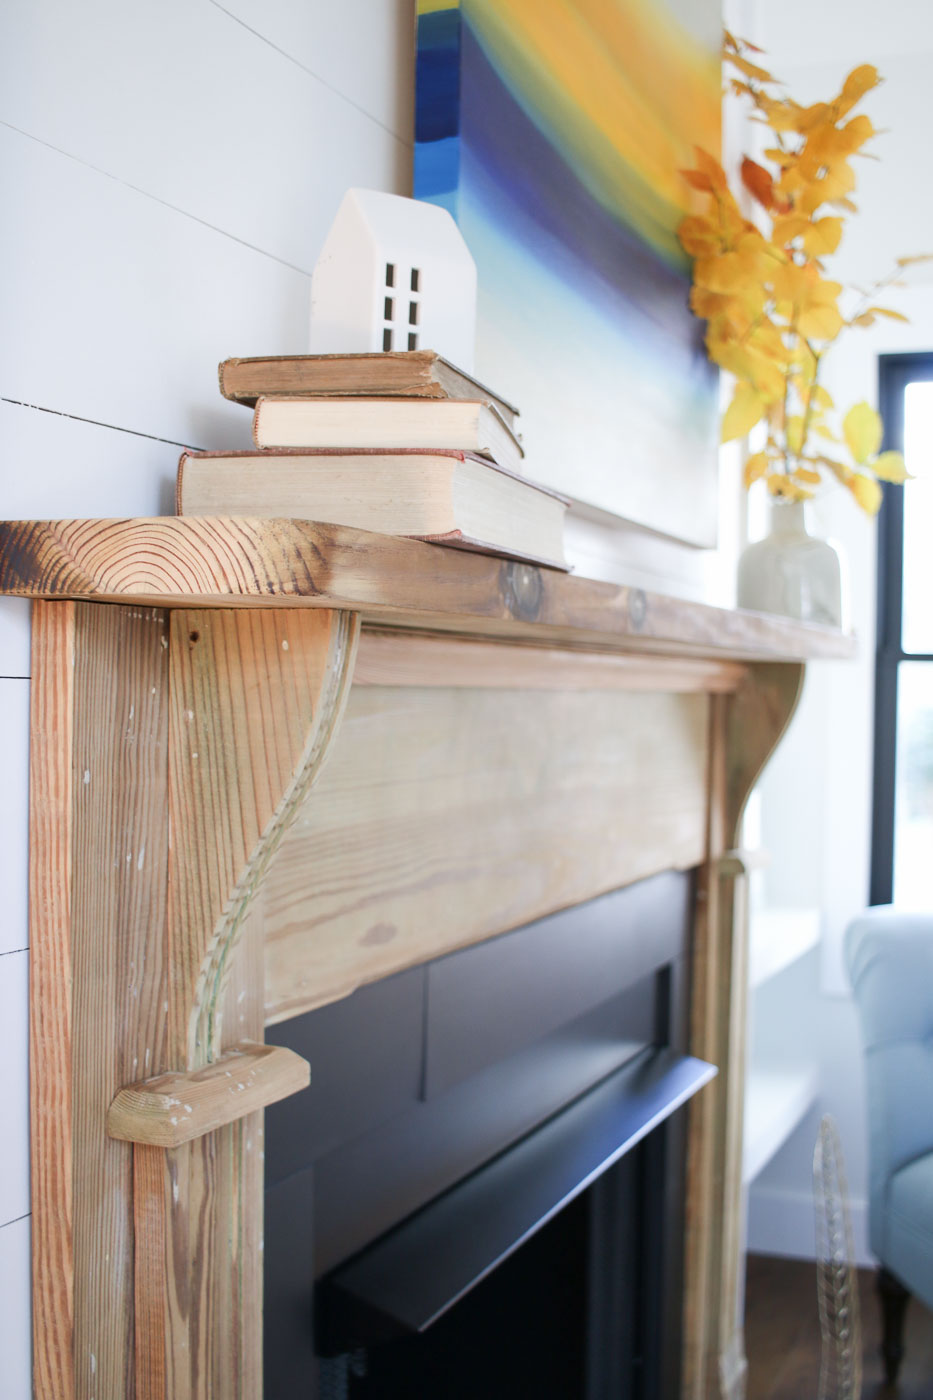
The fireplace mantel is one of two original mantels from the house. Because they both had lead paint, I had them stripped down to raw wood. The old wood and age made them too attractive to paint again.
To protect the wood, I simply added wood filler to the nail holes and finished the mantels with a flat top coat from General Finishes. The top coat protects the wood but doesn’t have a shine to distract you from the mantel’s aged appearance.
The diamond shaped window over the fireplace is one of those details I’m glad we decided to include. I wasn’t about to order a custom window for that spot, so I learned how to make my own window. It’s a single pane glass, but the size and location means there’s not a huge energy loss.
The diamond window has the same shape as the attic vents on the exterior of the house. I’m so glad my architect added it to the plans. Little touches like this really show the attention to detail for the overall design.
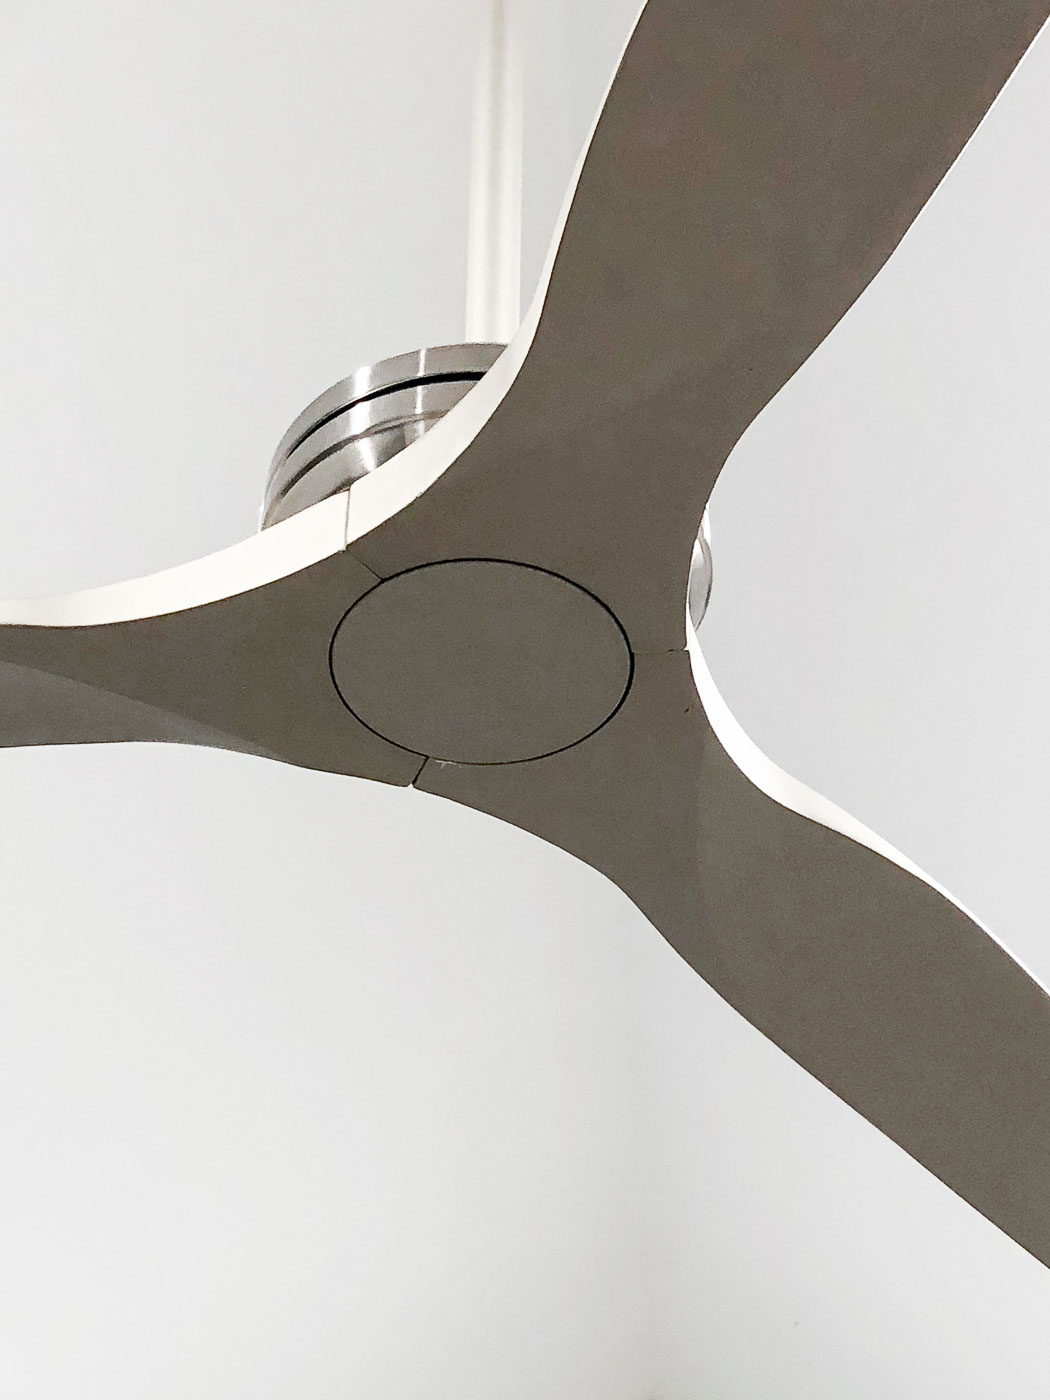
Remember the blocking I had to nail into the top of the living room ceiling? This is what it’s for:
The Fanimation Spitfire ceiling fan. Instead of black, I ordered a brushed nickel fan to keep it light and airy feeling. This fan is definitely one of my favorite modern fans.
The furniture truly set the stage for the open house event and I’m happy to say we had multiple offers that same weekend. Hooray.
After the furniture was removed, the house felt empty. I knew it was time for Etta to be turned over to the new owners so they could fill the space with their furniture and create their own memories.
Many people have asked me if it was emotionally hard to sell Etta. It wasn’t because I love our own home and stayed focused on choosing things for the young couple I always pictured as the buyers.
The last day I owned the house, I ran around finishing the few punch list fixes. After everything was complete, I sat on the floor and tried to reflect on the last 18 months building and saving this historic house. It was crazy to think where this journey started and how much the experience deviated from my idea of what rehabbing a historic house would be like.
Although it was a huge undertaking and an experience along the way, I am proud to say, “I did it! I saved Etta!” The little bungalow I bought with a major roof leak and black mold had been turned into an amazingly beautiful home.
Looking back I never would have bought the house if I had known how much was involved in rehabbing her. But, I’m glad I didn’t realize it, because this house pushed me and taught me many lessons. Plus, it would have been bulldozed like many of the other houses in disrepair in this neighborhood.
Thank you all for your words of encouragement and for cheering me on when I felt like I couldn’t press on. You are the best set of friends (some I’ve met and some I haven’t met yet) a handy girl could ask for.
I’ll be back with the last reveal (the upstairs bedroom and den), and then it’s on to the next house remodel. Stay tuned to learn more.
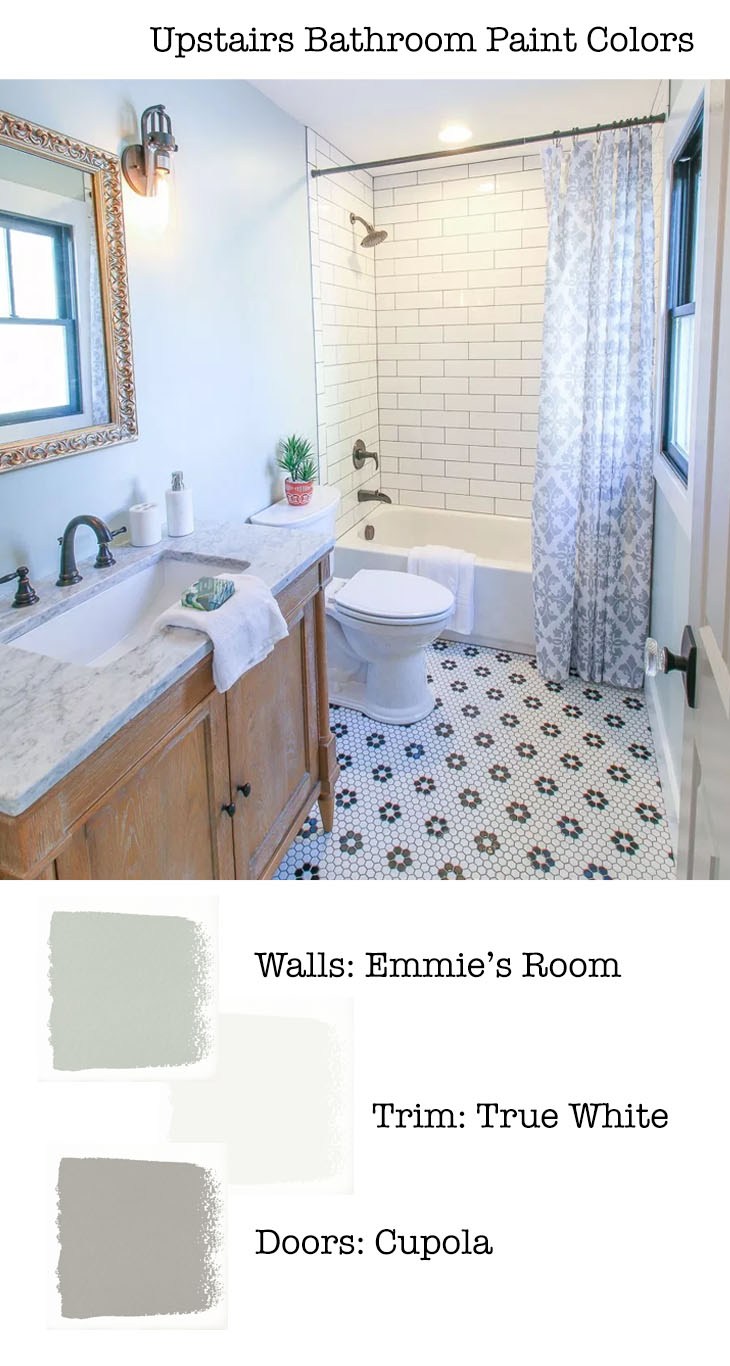
Today I’m revealing the last bathroom in the Saving Etta house. This bathroom is a departure from the more modern master bathroom and the shared downstairs bathroom. In the upstairs bathroom, I pushed the vintage look and added some feminine touches to create a bathroom I wish I could use every day!
Before I take you into the bathroom, I want to thank all the Saving Etta sponsors. As you all know, I’m very particular about the brands I work with and I can honestly say my sponsors are the cream of the crop when it comes to selling products for your home and lifestyle.
(I’ve included affiliate links for your convenience. I earn a small percentage from a purchase using these links. There is no additional cost to you. You can read more about affiliate links here.)
Progression of the Upstairs Bathroom:
The upstairs bathroom is off the second floor loft area right above the master bathroom. All the bathrooms in the house are approximately the same size.
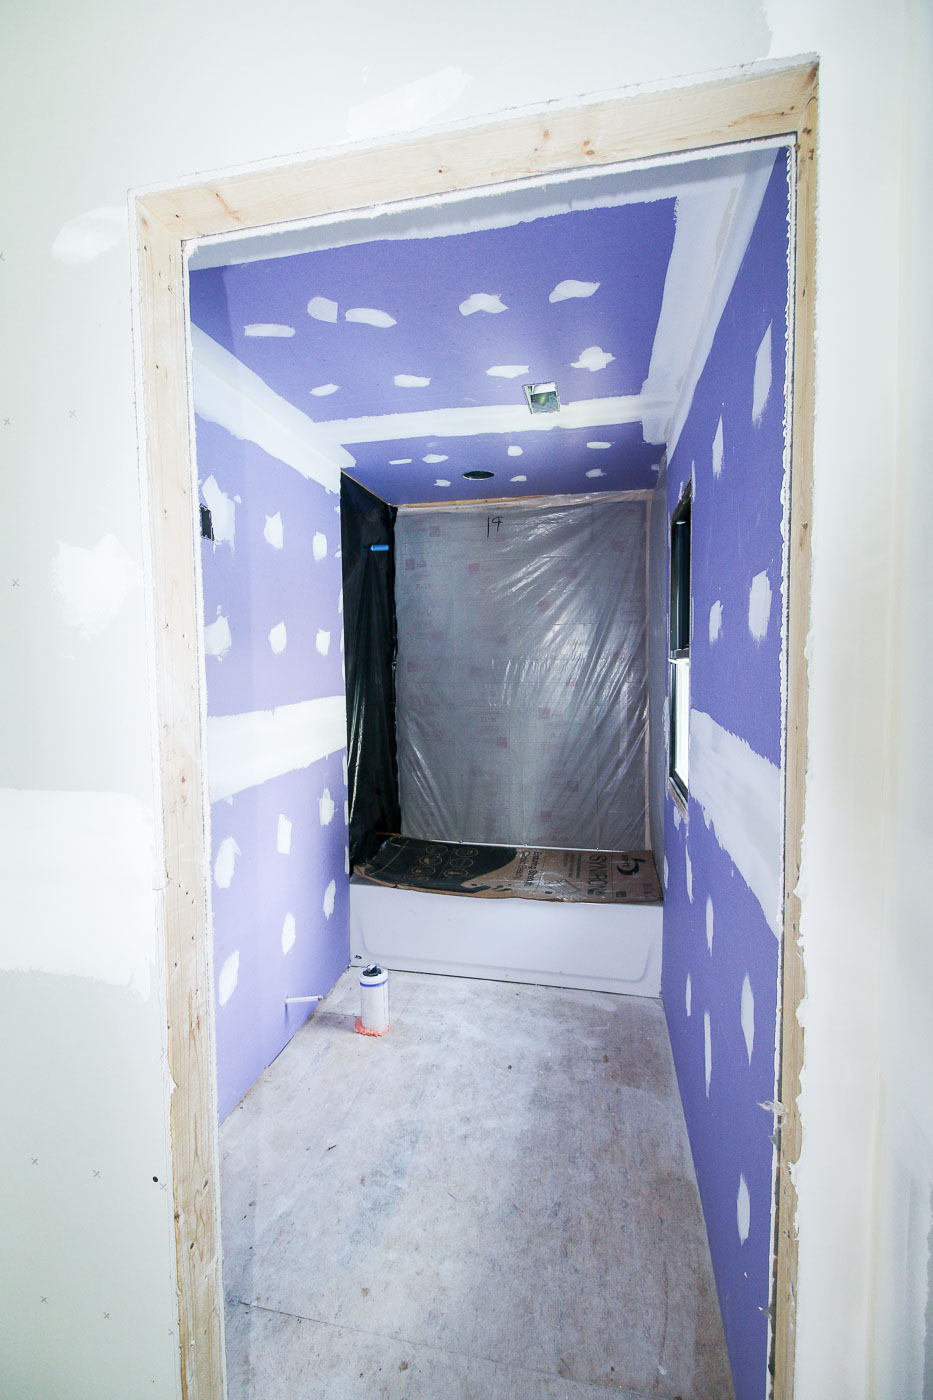
Shortly after the roof was finished, we started installing the water lines, tubs, and waste lines in the bathrooms.
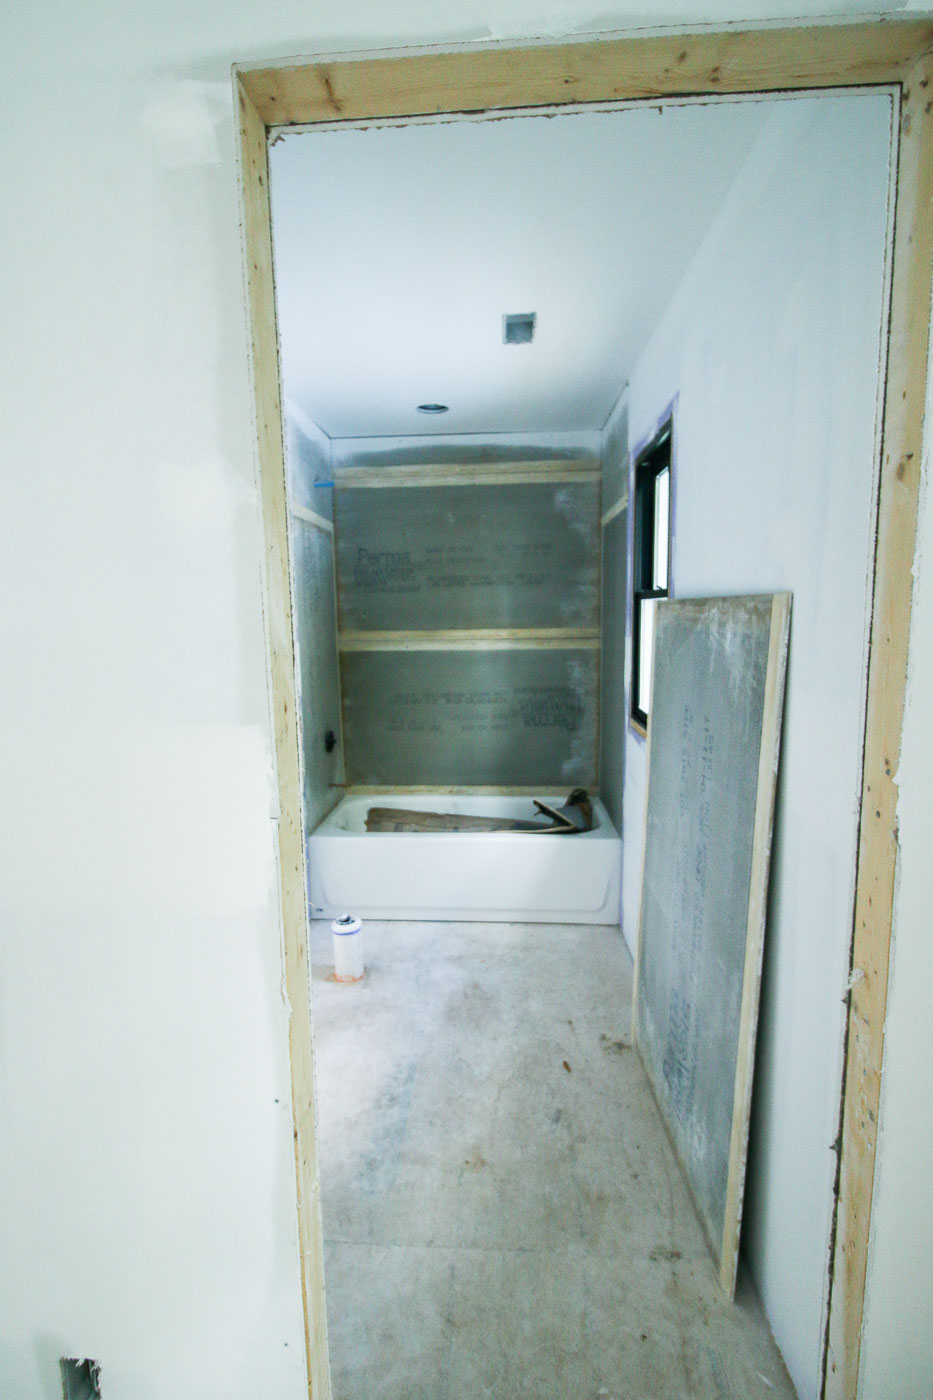
Once the plumbing and electrical rough-in inspections passed, the water and mold-resistant purple drywall was installed on the walls.
Then the PermaBase cement board was installed in the tub and shower area and it was time for tile!
After the tile floors were installed, we began putting in the fixtures. The vanity and vanity lights were set in place.
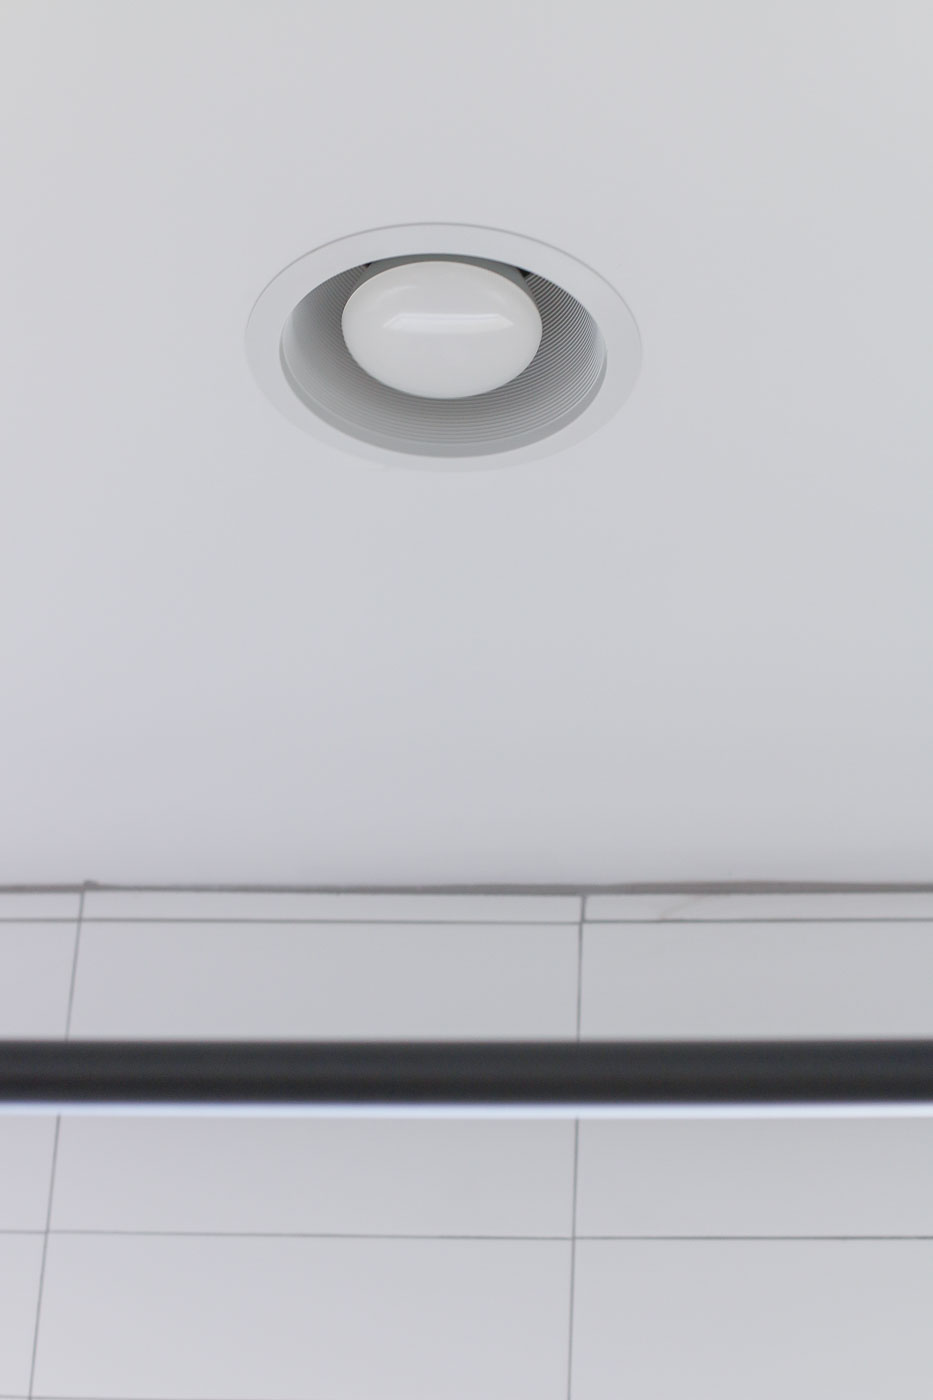
About the Combination Light and Exhaust Fan:
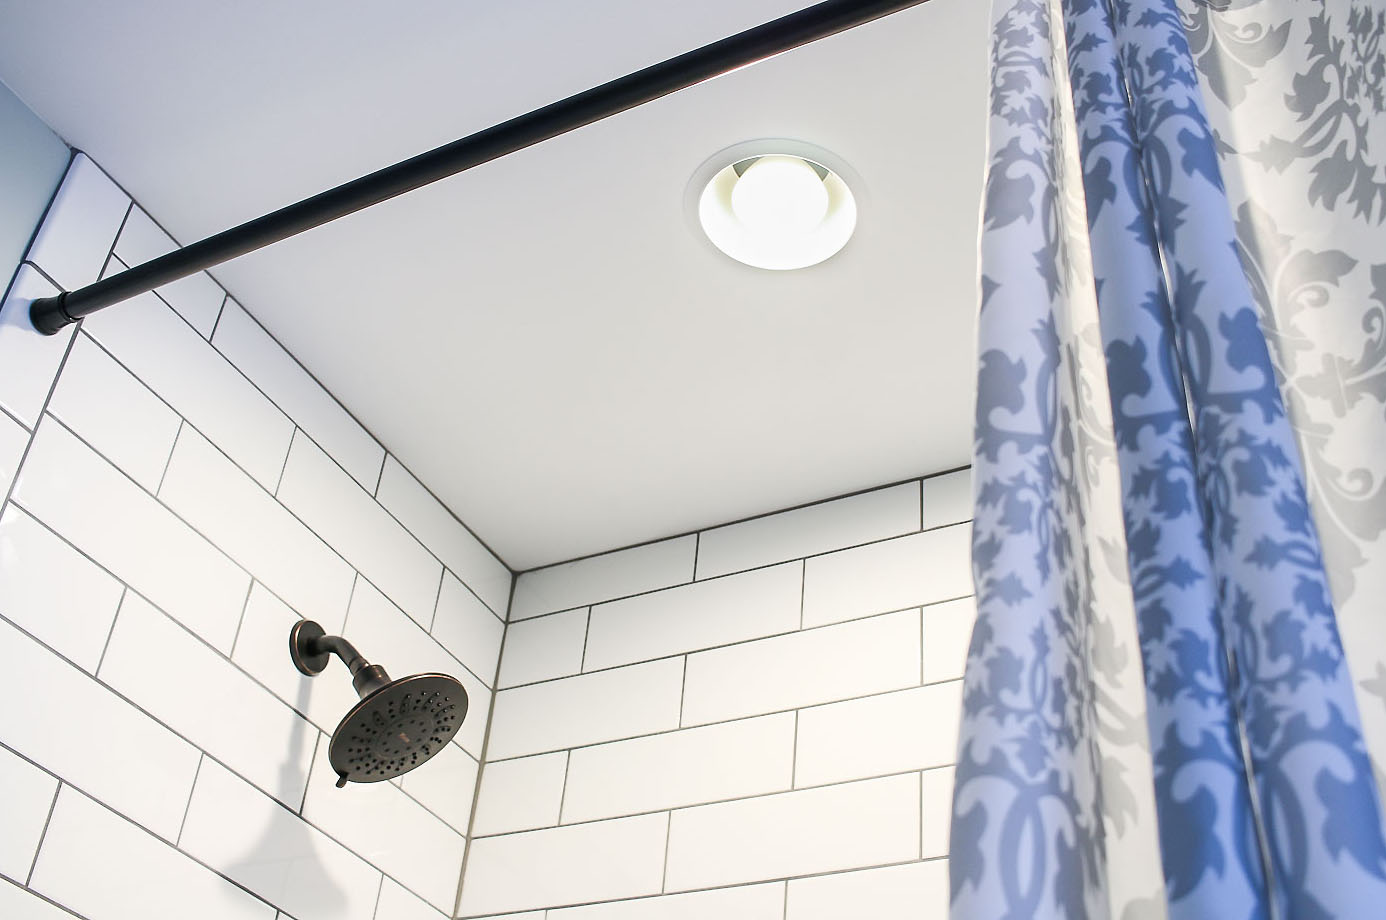
You may have seen me mention the Broan integrated light and exhaust fan in the downstairs shared bathroom reveal post. I thought you might like a few more details about this unique exhaust fan that hides in plain sight.
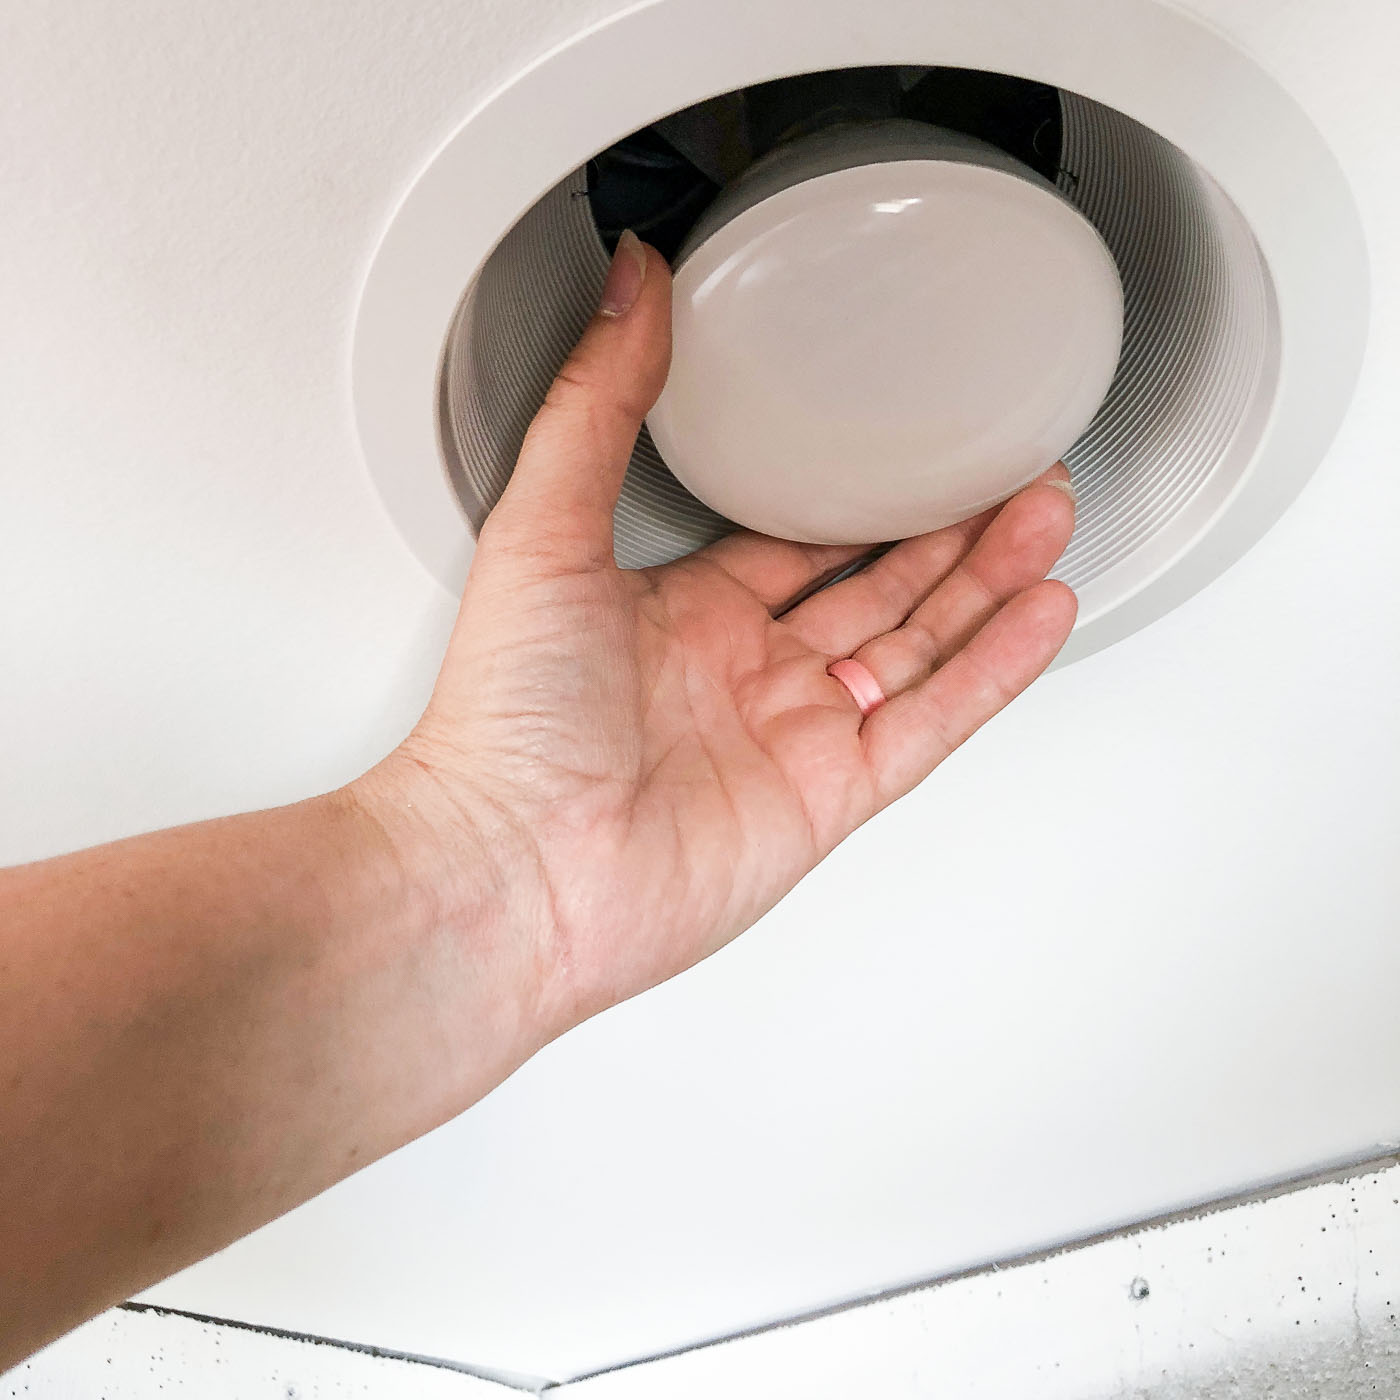
When completely installed, it looks like a regular recessed light.
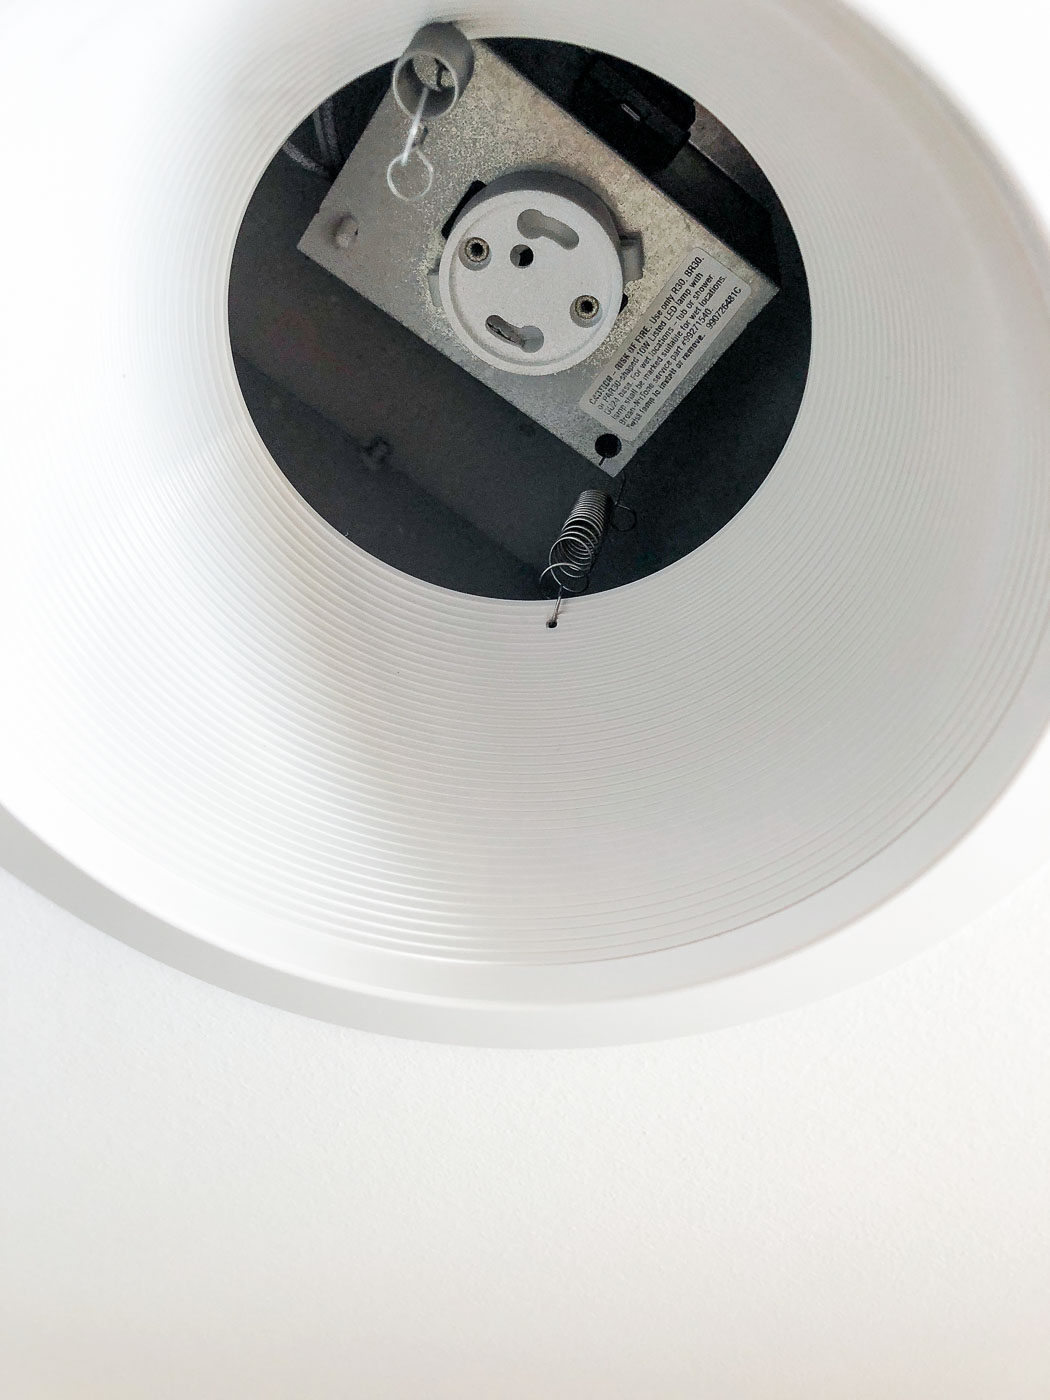
If you look at the rough installed recessed light exhaust fan, you can see the housing is actually square like a standard exhaust fan.
A baffle clips inside the fan housing to hide the metal box.
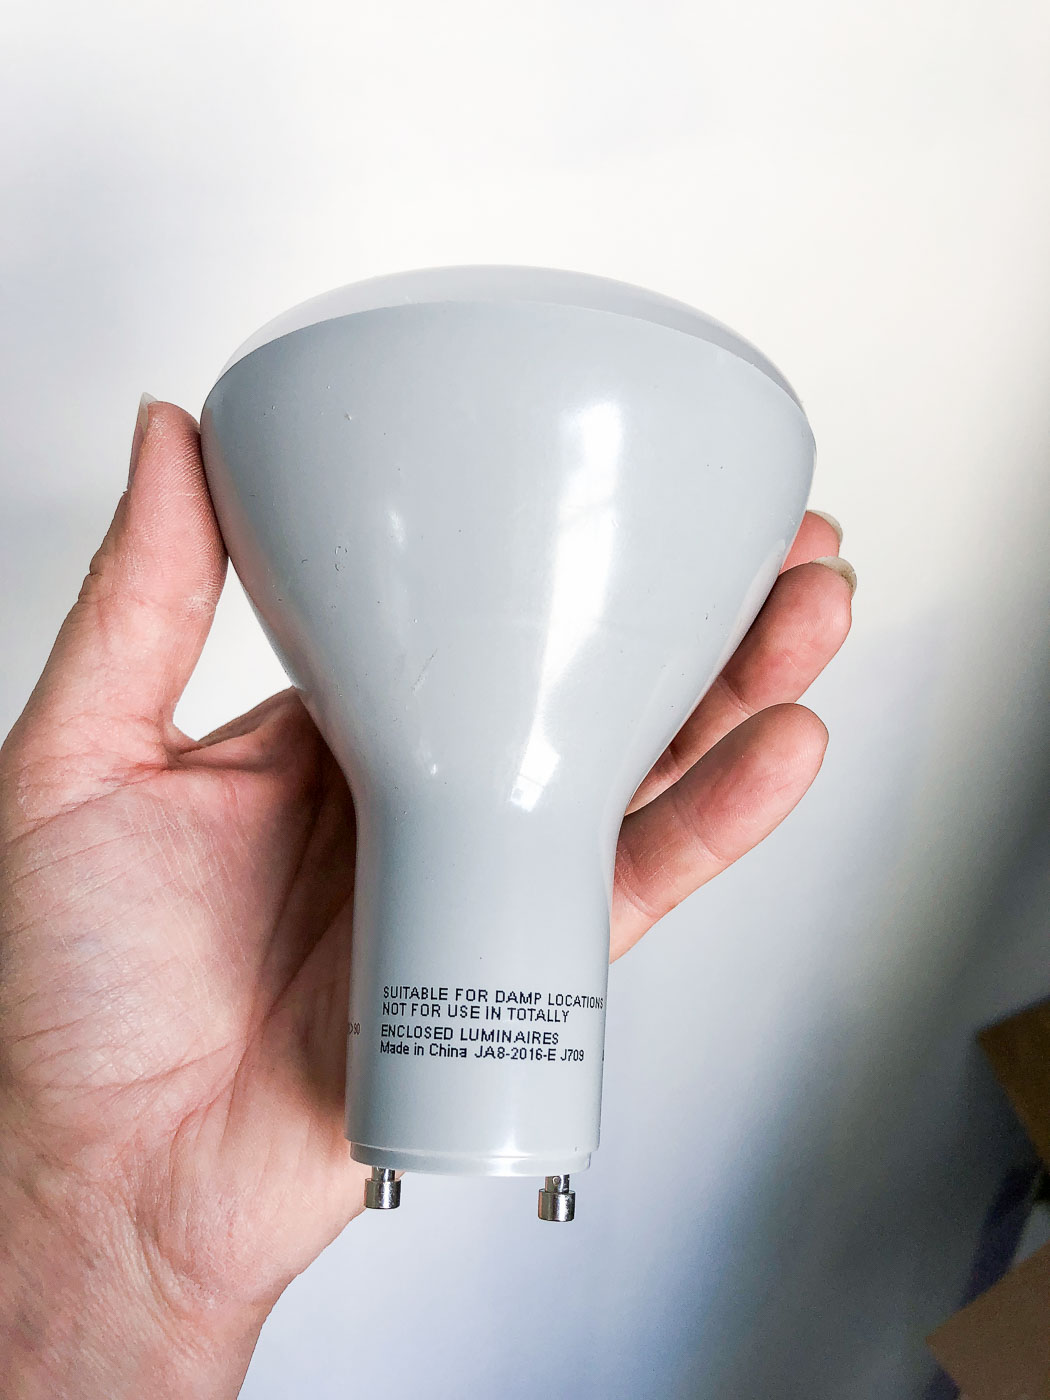
Because the recessed light fan can be installed inside a shower, it requires a special light bulb made for damp locations. (The light bulb is included with the fan/light kit.)
The bulb simply twists into the socket.
And the result is a light and exhaust fan in one. No need to cut extra holes in your ceiling!
Ready for the rest of the tour in the upstairs bathroom?
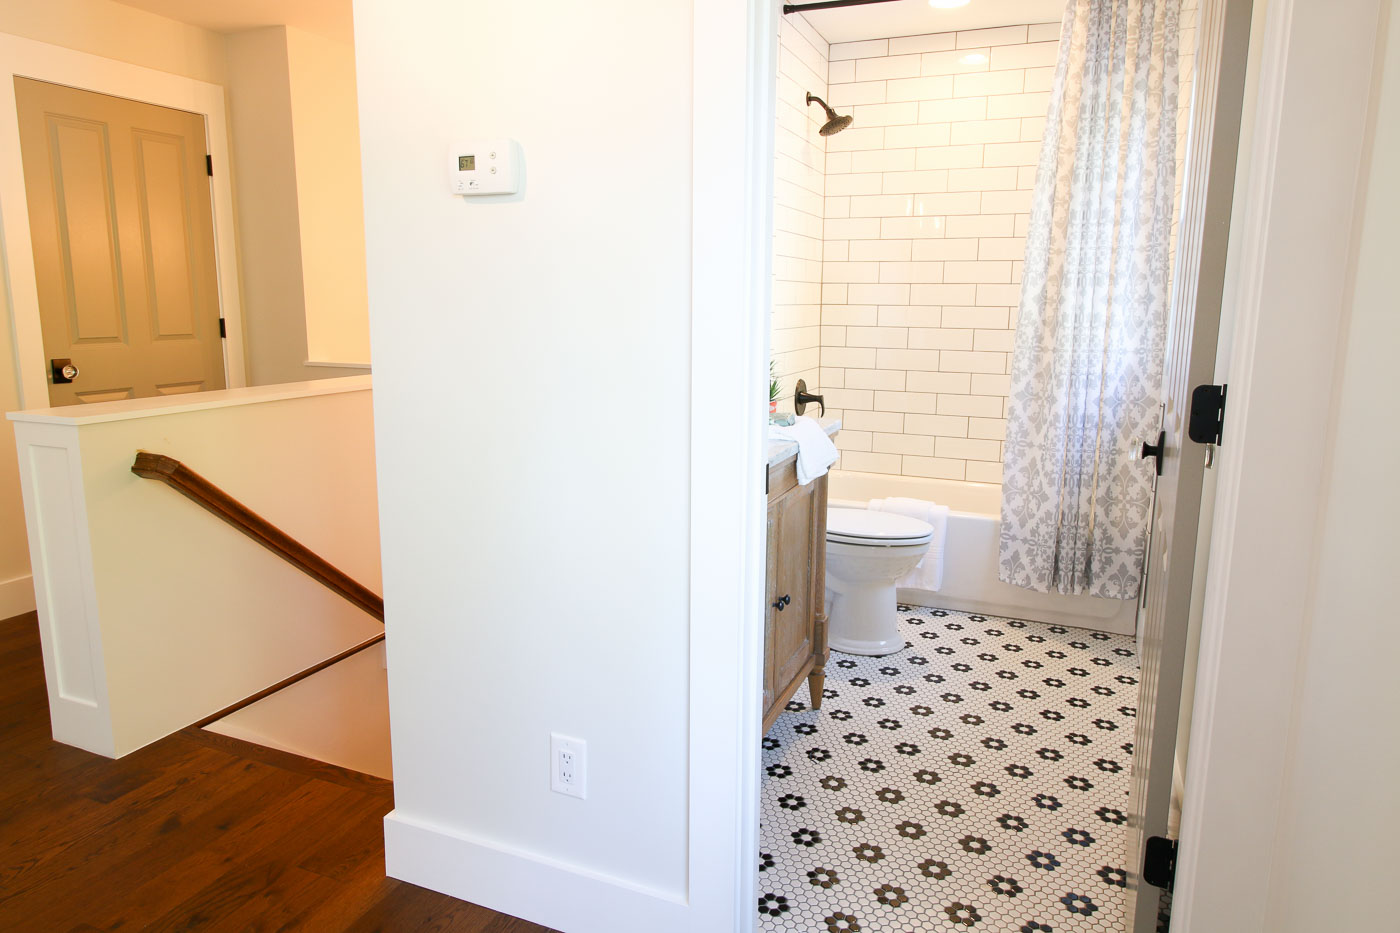
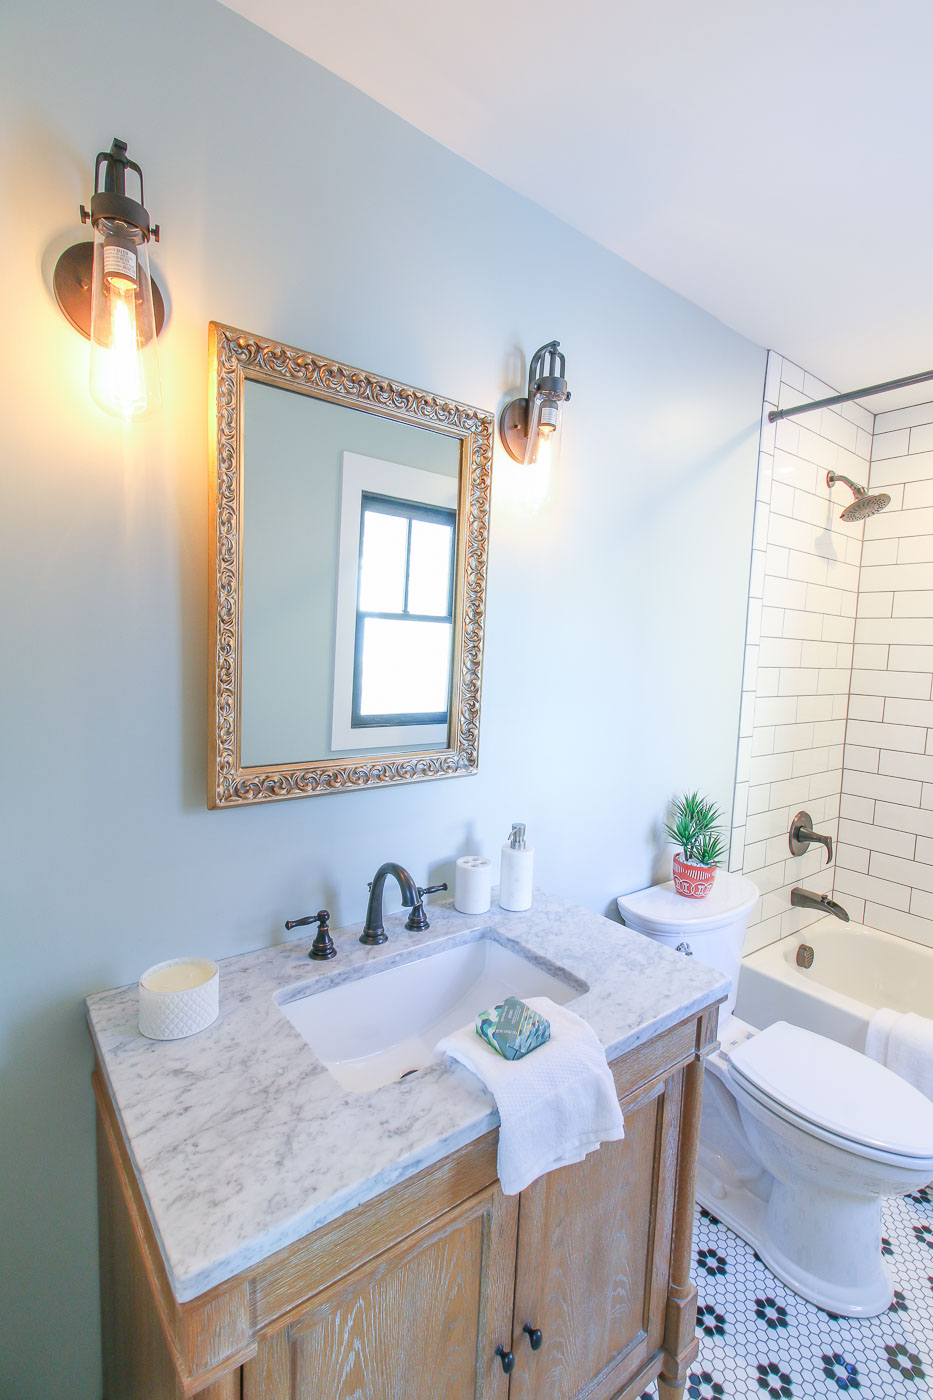
The upstairs bathroom is located at the top of the stairs one room away from the upstairs bedroom. The entire upstairs consists of the bedroom, an open room at the top of the stairs, and the bathroom. It makes the upstairs area feel like a separate apartment.
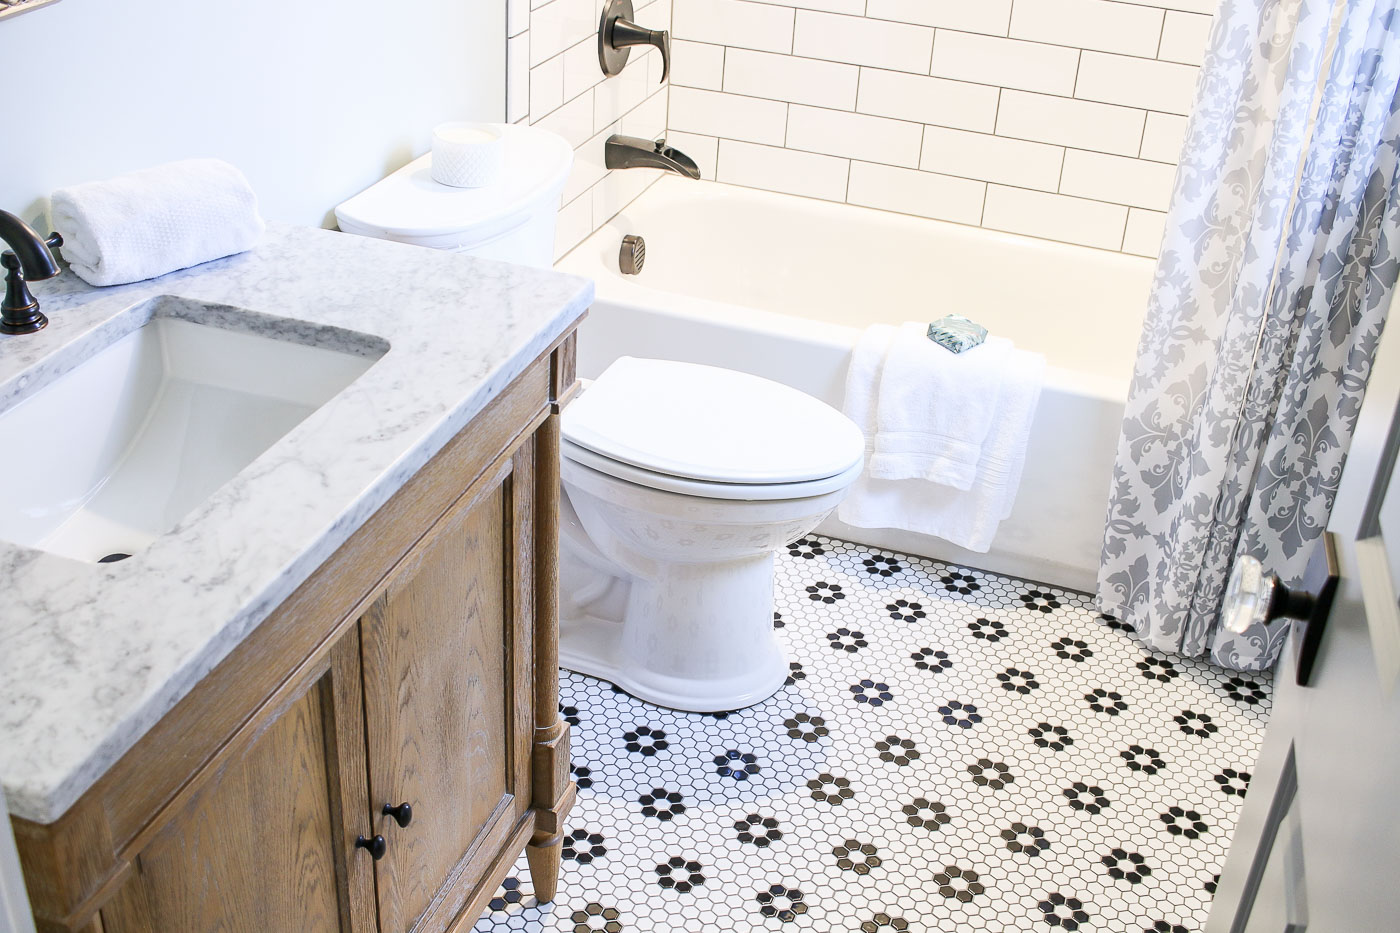
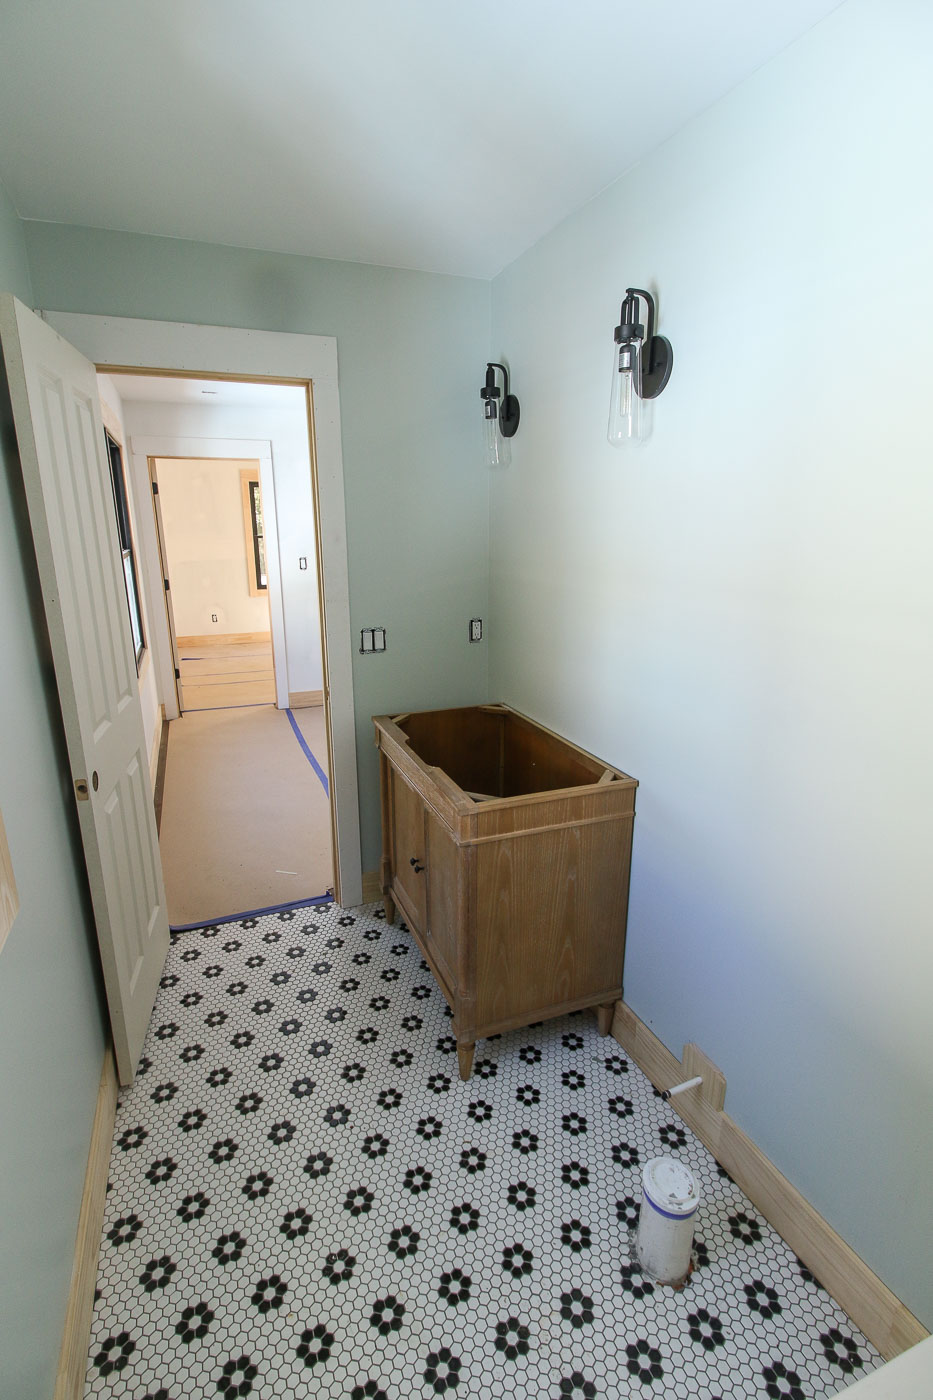
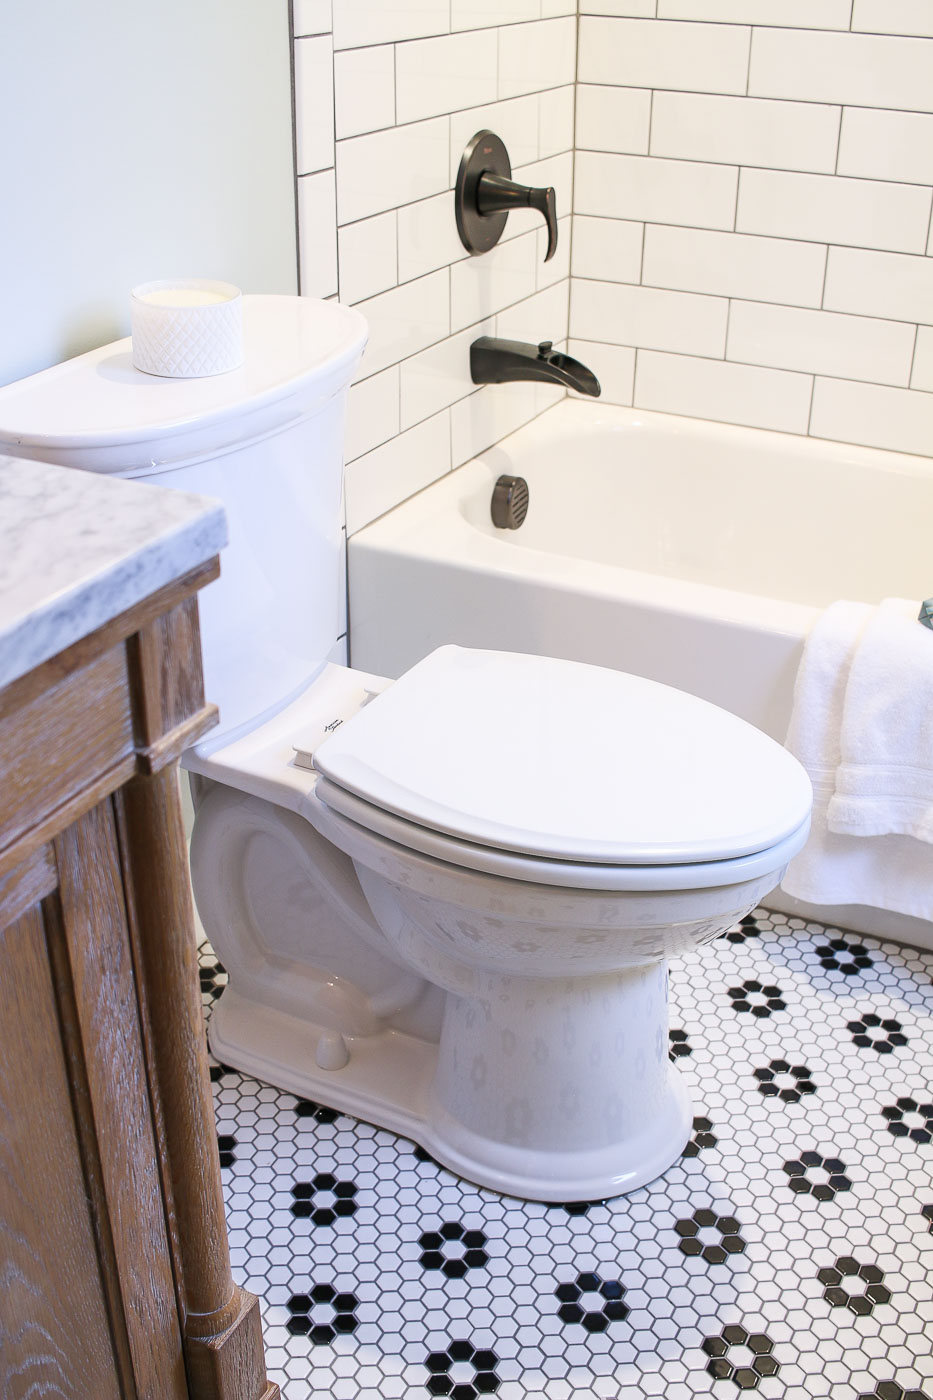
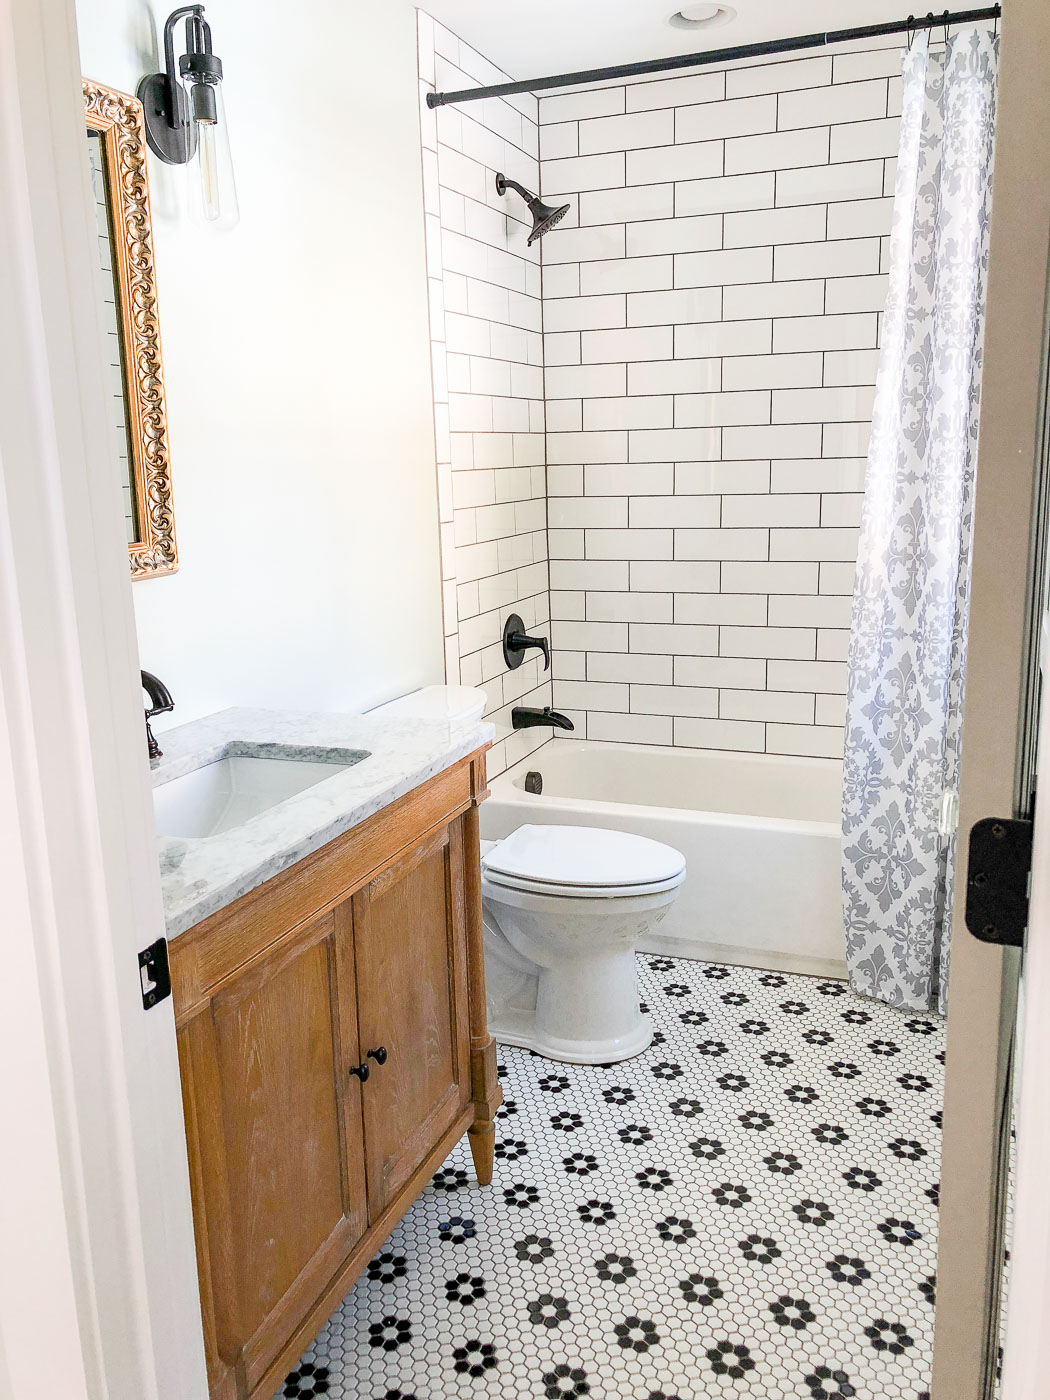
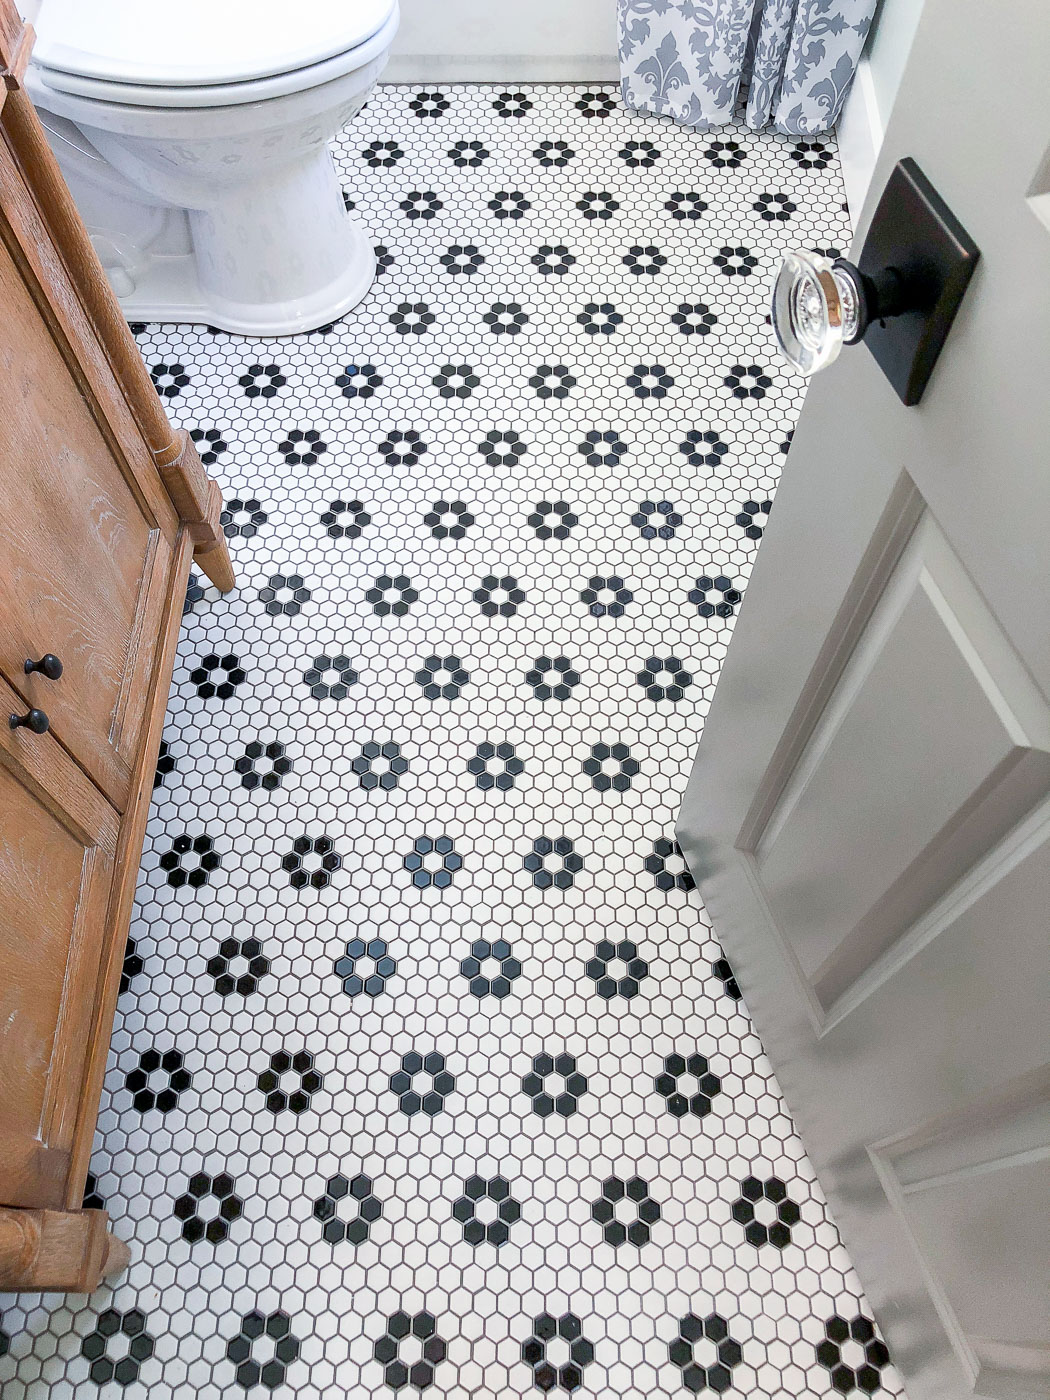
Inside the bathroom, the undeniable star is the floor. The tile I used was Jeffrey Court Floral Terrace (can be purchased at Home Depot). My tile setter was so relieved when he saw the floral pattern is already embedded into each sheet.
He told me about a job where the client made him pick out little white hex tiles and insert black ones for the flowers. I can’t even imagine how much extra time it would take to complete the patterned floor. Then again, based on the time Young House Love put into this beach house bathroom floor, I can image it.
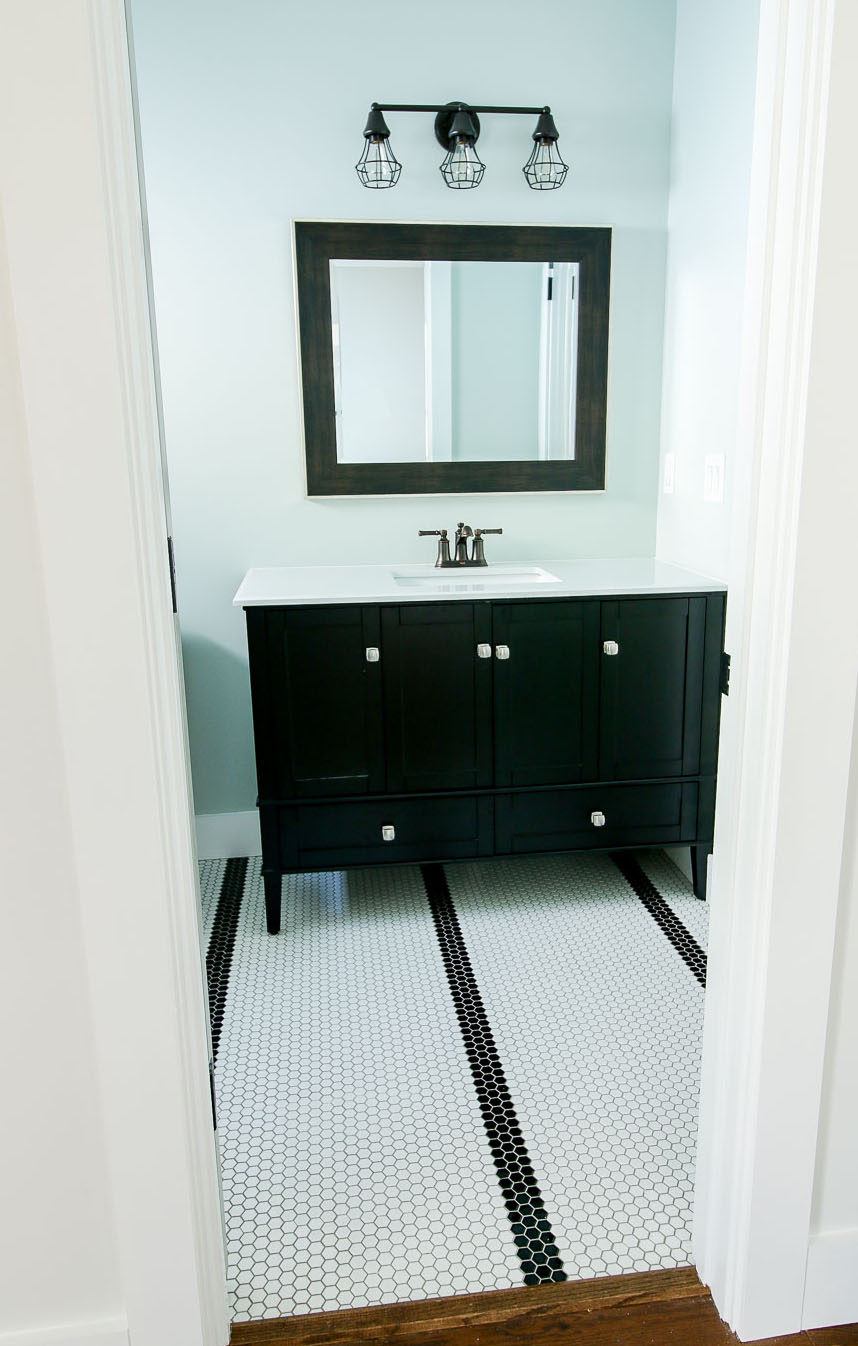
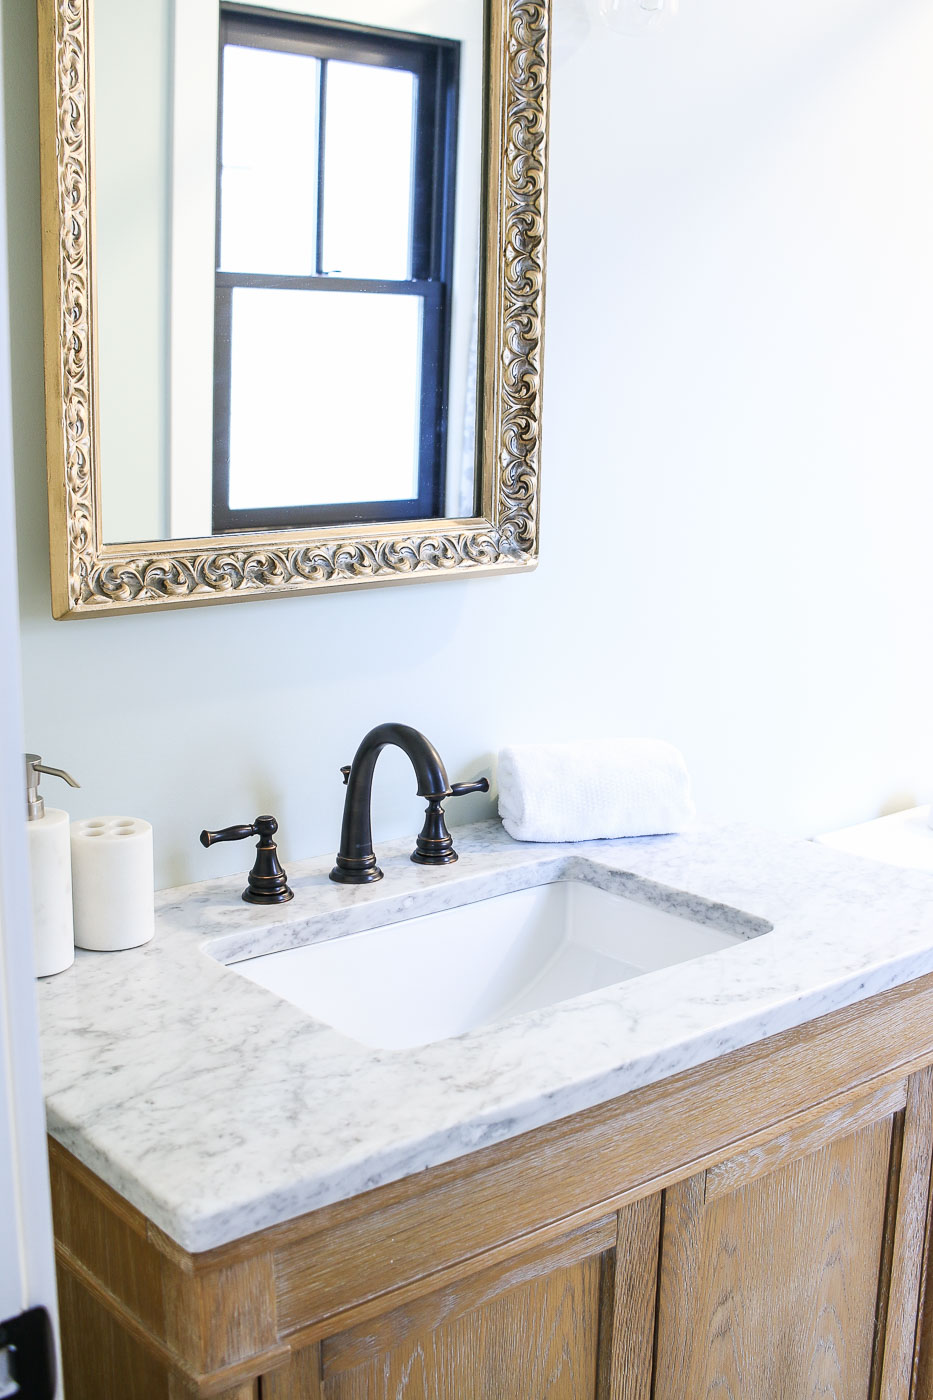
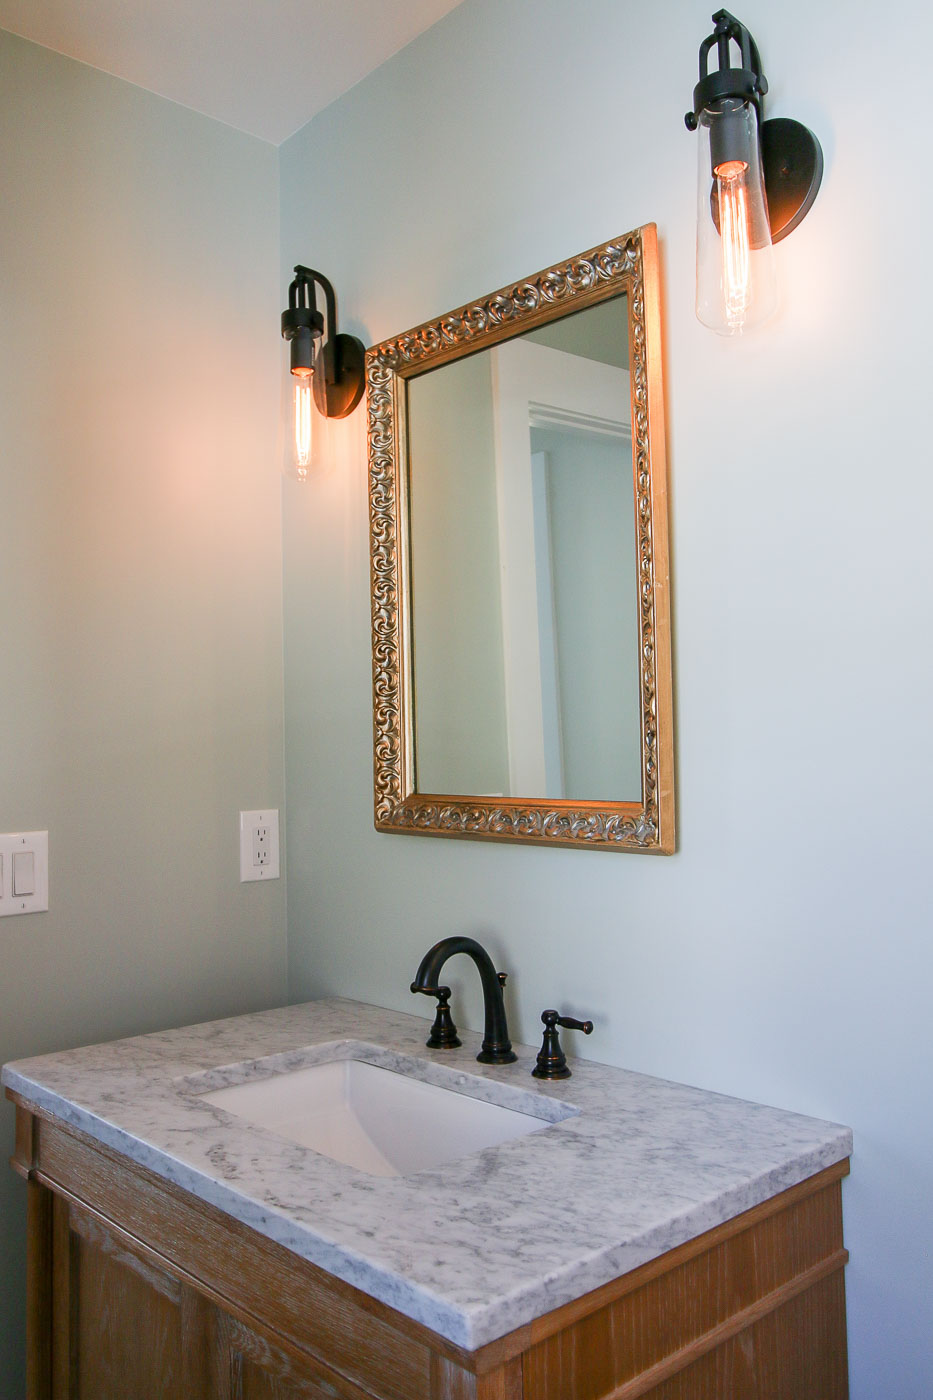
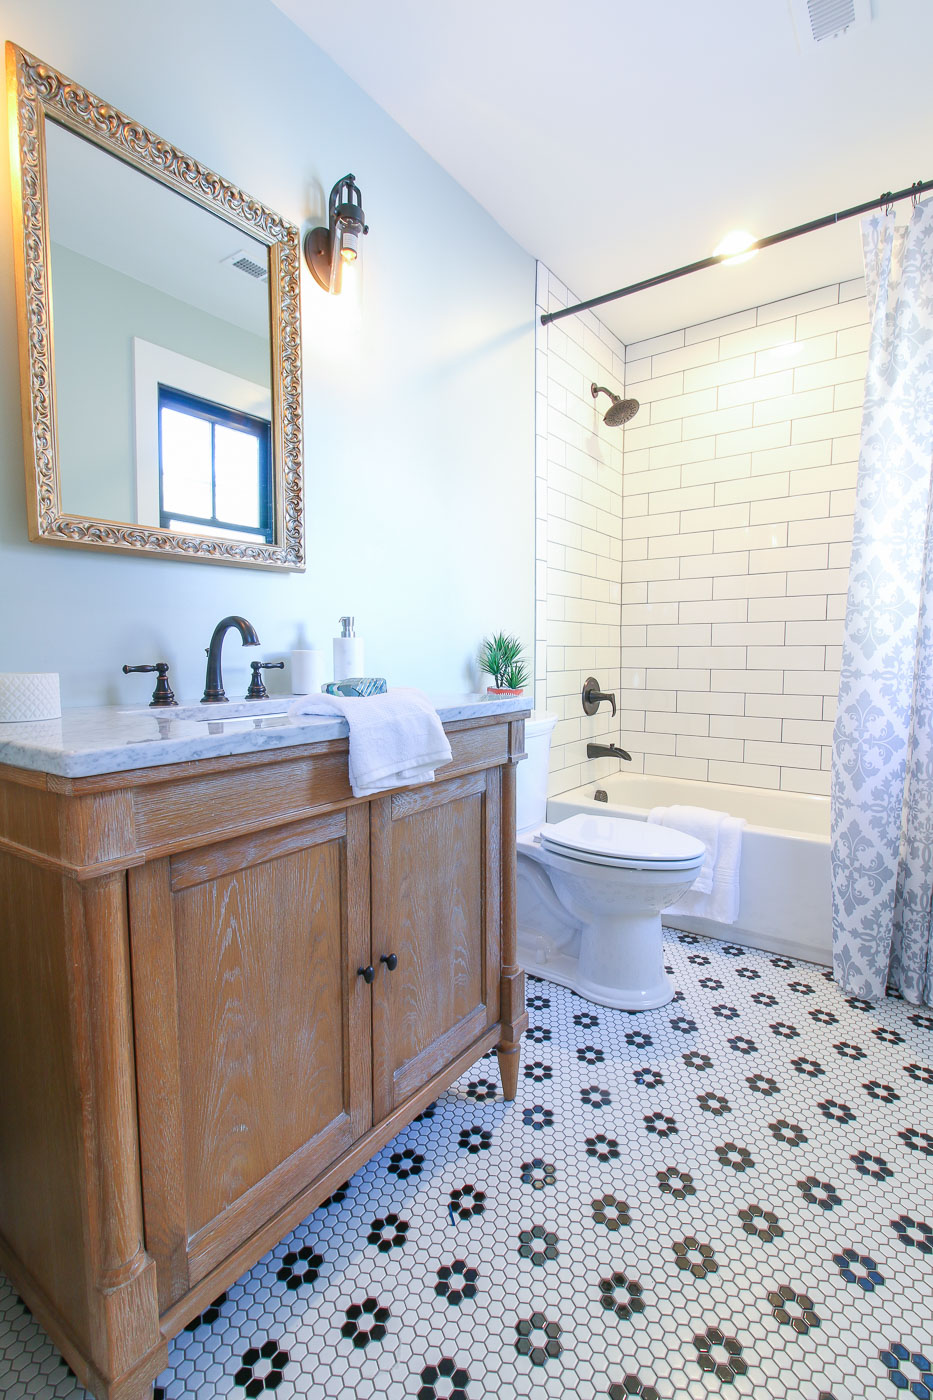
My second favorite element in this bathroom is the weathered bathroom vanity.
I love the weathered oak look and am hoping to recreate it for some projects in my own house. I’m thinking about making some test boards to try white wax, white-washing, and maybe even something crazy like joint compound! But, I’ll report back on this experiment at a later date.
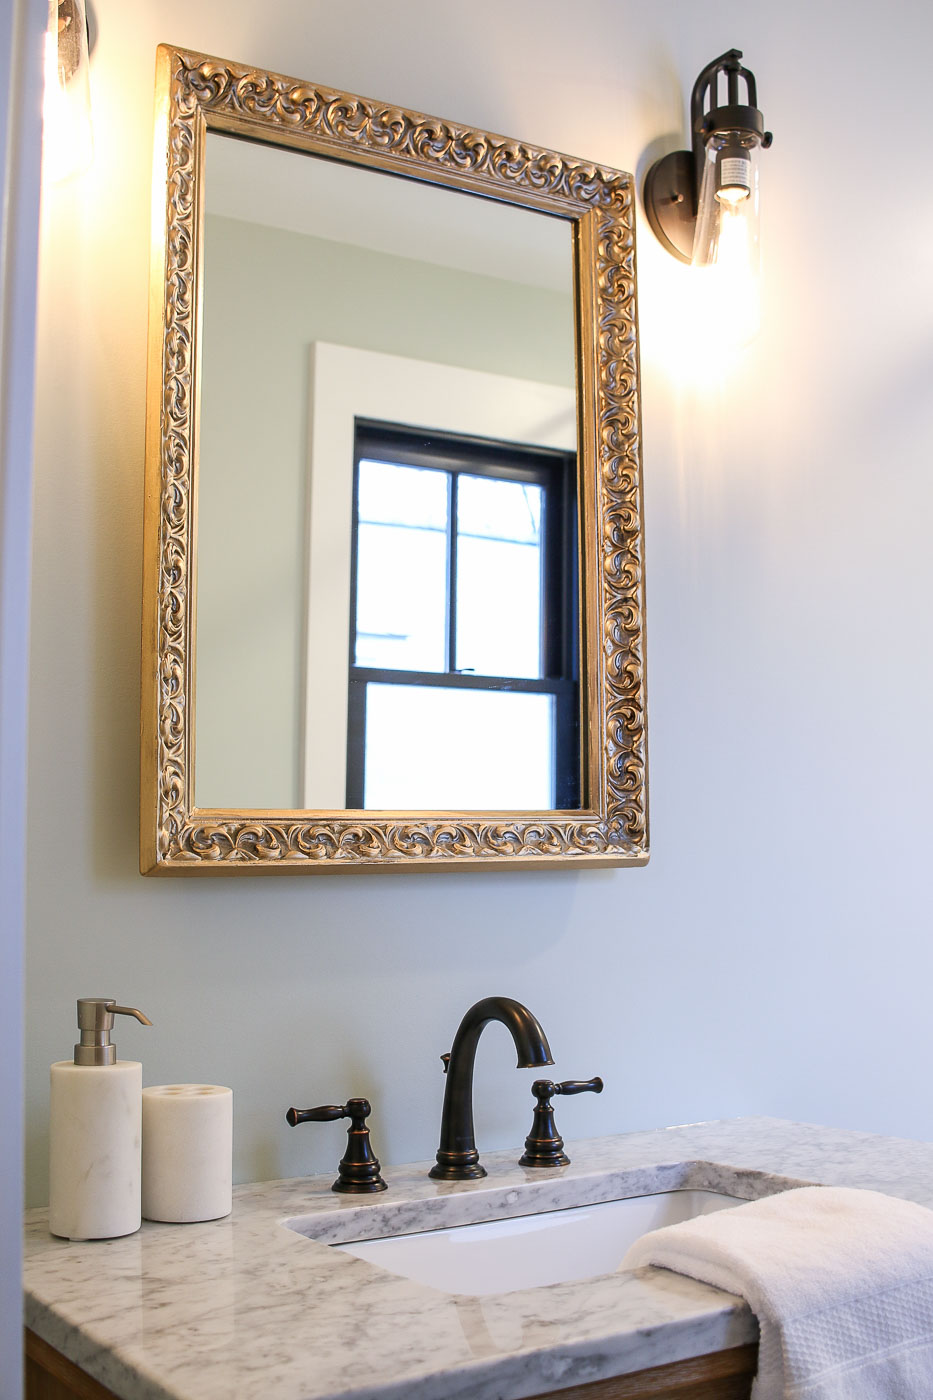
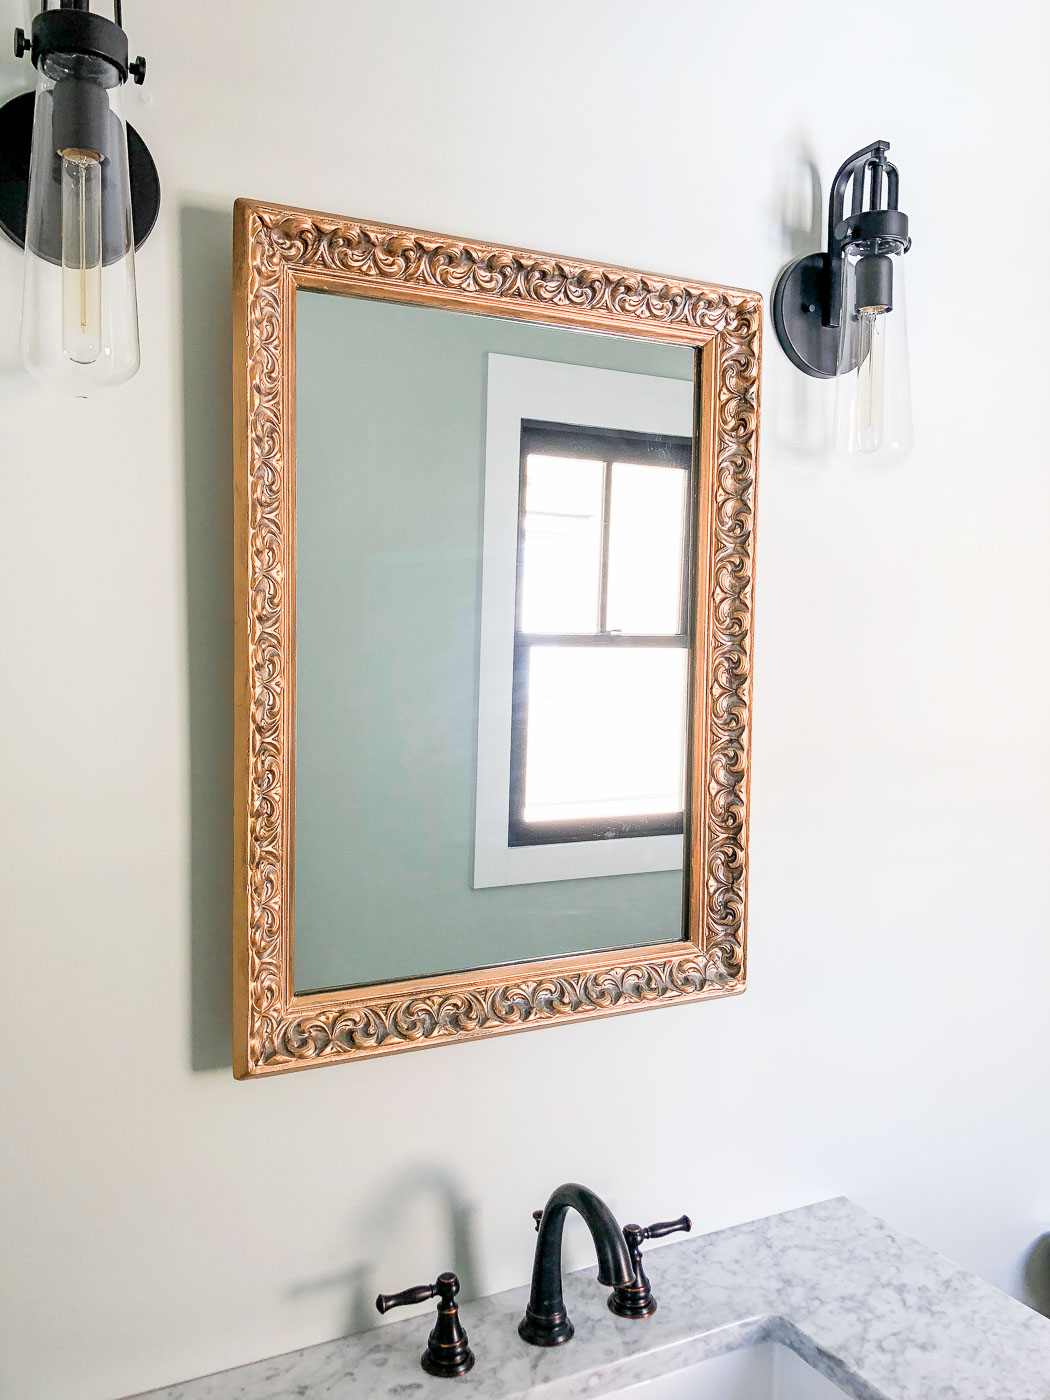
In my quest to save some money, I scoured local yard sales and thrift shops for an elegant mirror.
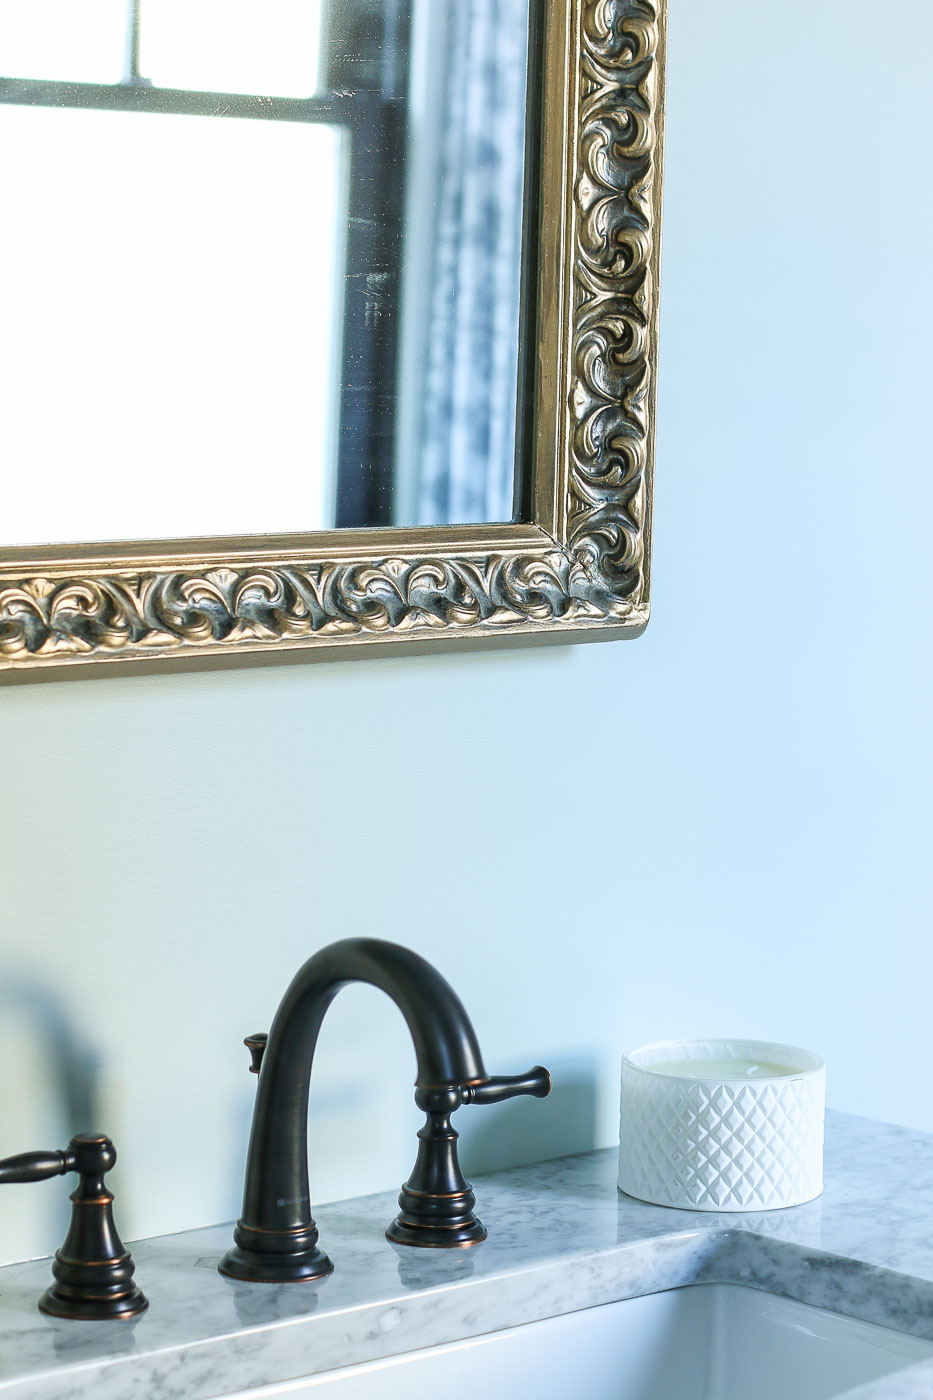
Luckily, I stumbled upon this gold framed mirror at a local thrift store. I think I paid $13 for it. The gold paint was chipping, but I didn’t let it deter me.
All it needed was a little sanding and brushing gold enamel paint over the high parts of the frame.
I love the vintage and elegant style it adds to this bathroom.
Speaking of vintage, the light fixtures on either side of the mirror add more vintage charm and additional lighting.
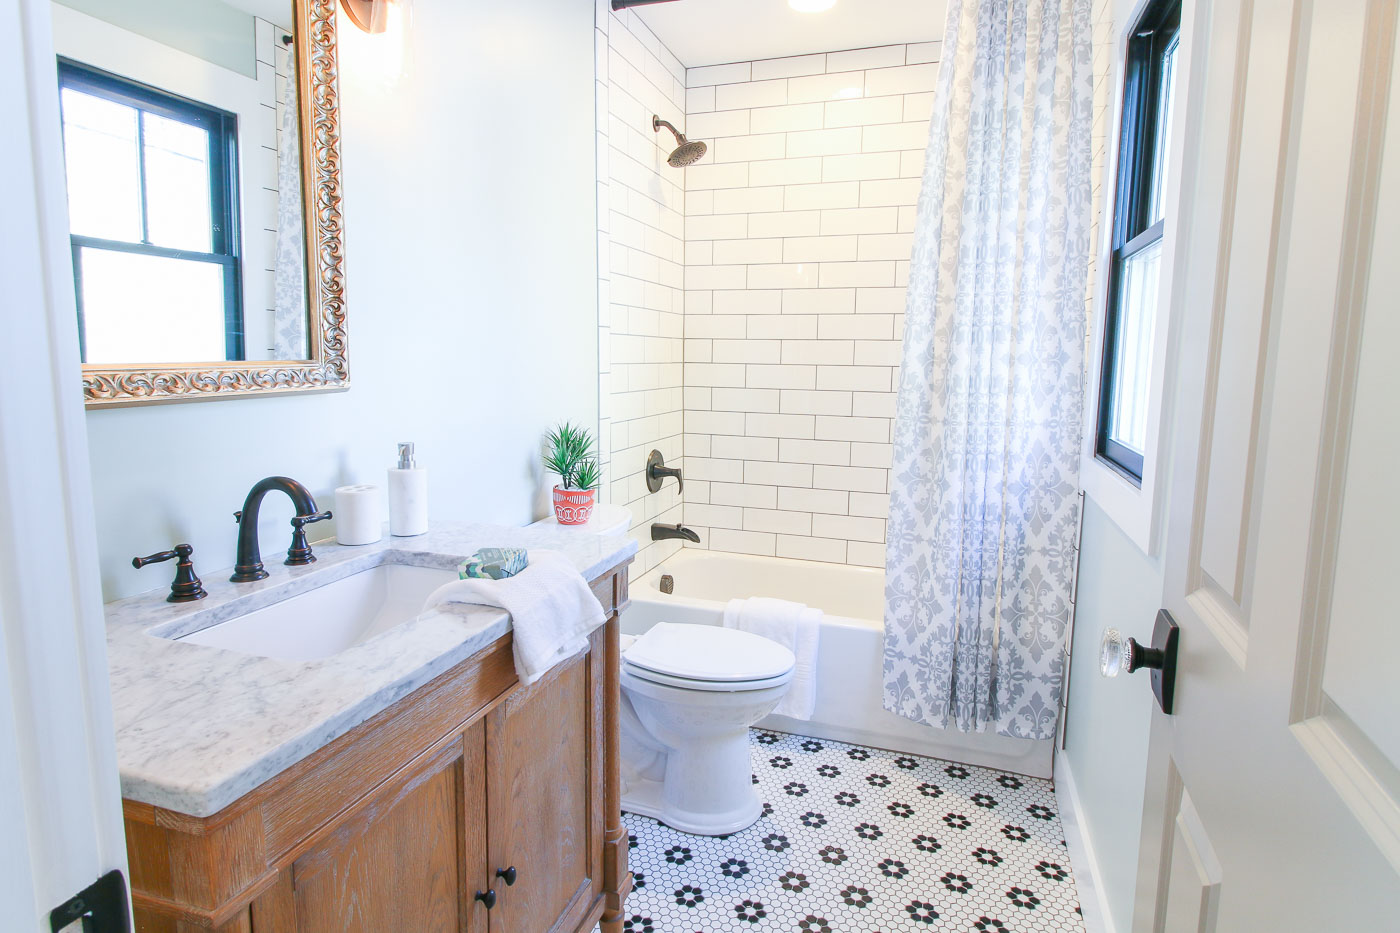
Now let’s talk about that pretty toilet. (Yes, I know toilets aren’t usually something you want to stare at.) But, this Heritage Vormax toilet provided by my friends at Wilkinson Plumbing Supply will certainly impress you.
The American Standard Heritage VorMax toilet has been designed to stay clean longer and reduces the dreaded under rim build up. Watch this video for more details:
Pretty cool, huh?! If you live in the Raleigh/Durham area of North Carolina, check out the Wilkinson Supply showroom and ask them about the American Standard Heritage VorMax toilet (and don’t forget to tell them I sent you.)
The bathroom door sports the beautiful Schlage Hobson Knob that completes the vintage look.
For the tub surround, I chose larger subway tiles. The Jeffrey Court 4″ x 12″ subway tiles are a classic choice that will keep this bathroom stylish for decades. I love the look of the larger tiles, plus it helped speed the installation.
I hope you enjoyed the tour of the upstairs bathroom.
We’re nearing the end of the Saving Etta room reveals. Do you have a favorite room yet?
See you soon with more Saving Etta updates and I’ll have a few home improvement tutorials as well.
Disclosure: I received materials and/or compensation from the sponsors of the Saving Etta project. These were the upstairs bathroom sponsors: Ask for Purple, Plygem, Broan-Nutone, Schlage, Wilkinson Supply Co., Magnolia Home Paint, KILZ, Jeffrey Court Tile. I was not told what to write. All opinions and words are my own. As always, I will notify you if you are reading as sponsored post or if I was compensated. Rest assured I am very particular about the brands I work with. Only brands I use in my own home or that I’ve had a positive experience with will be showcased on this blog.
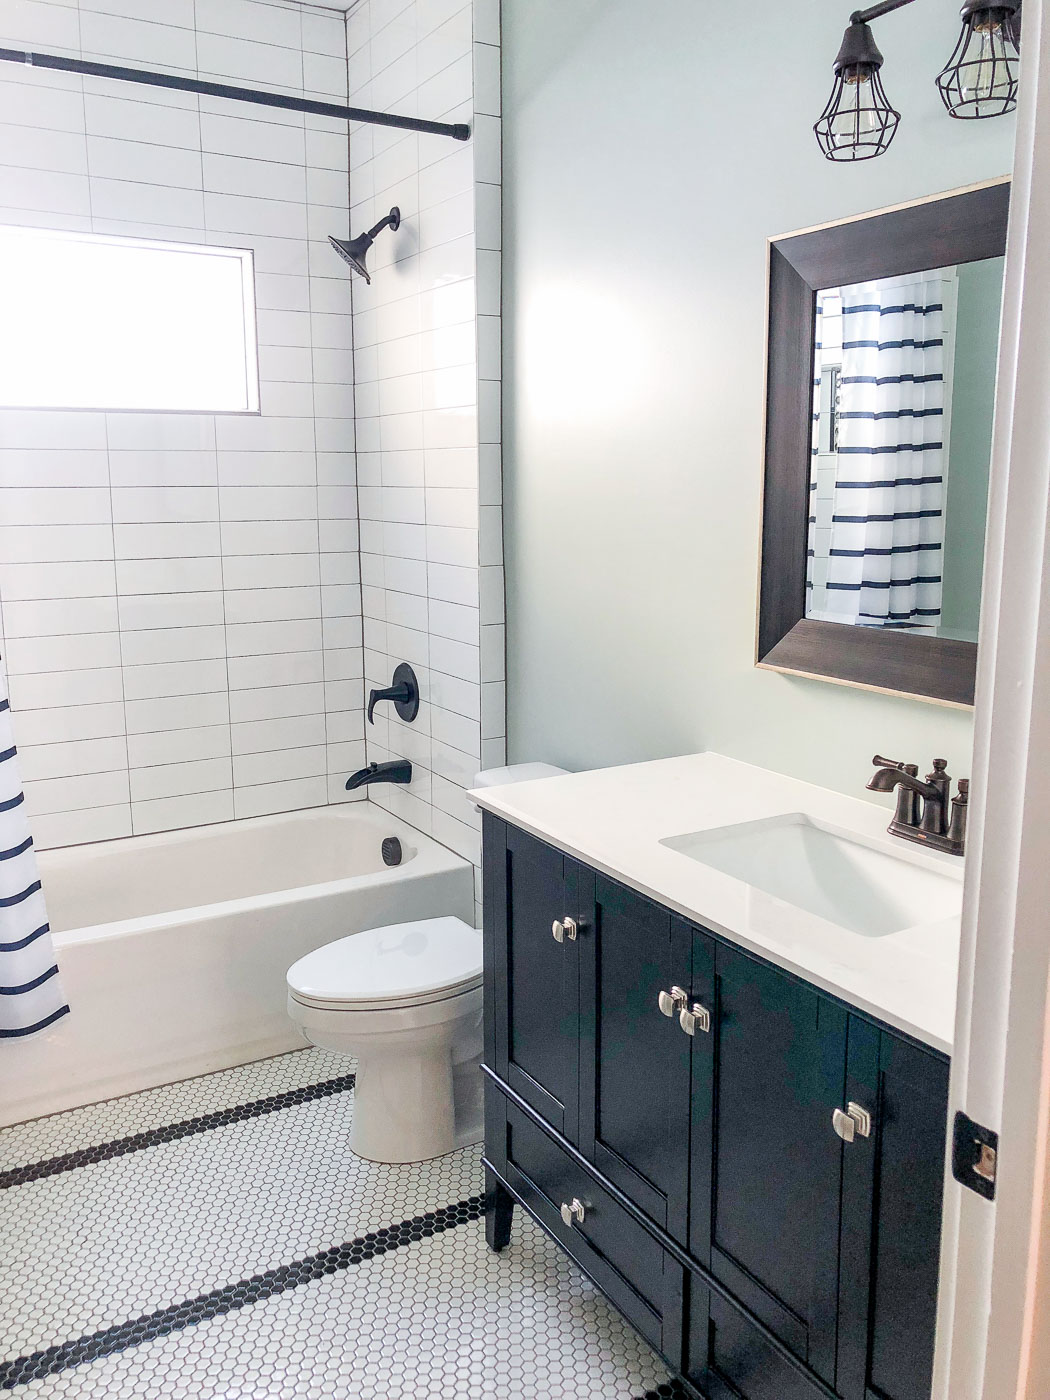
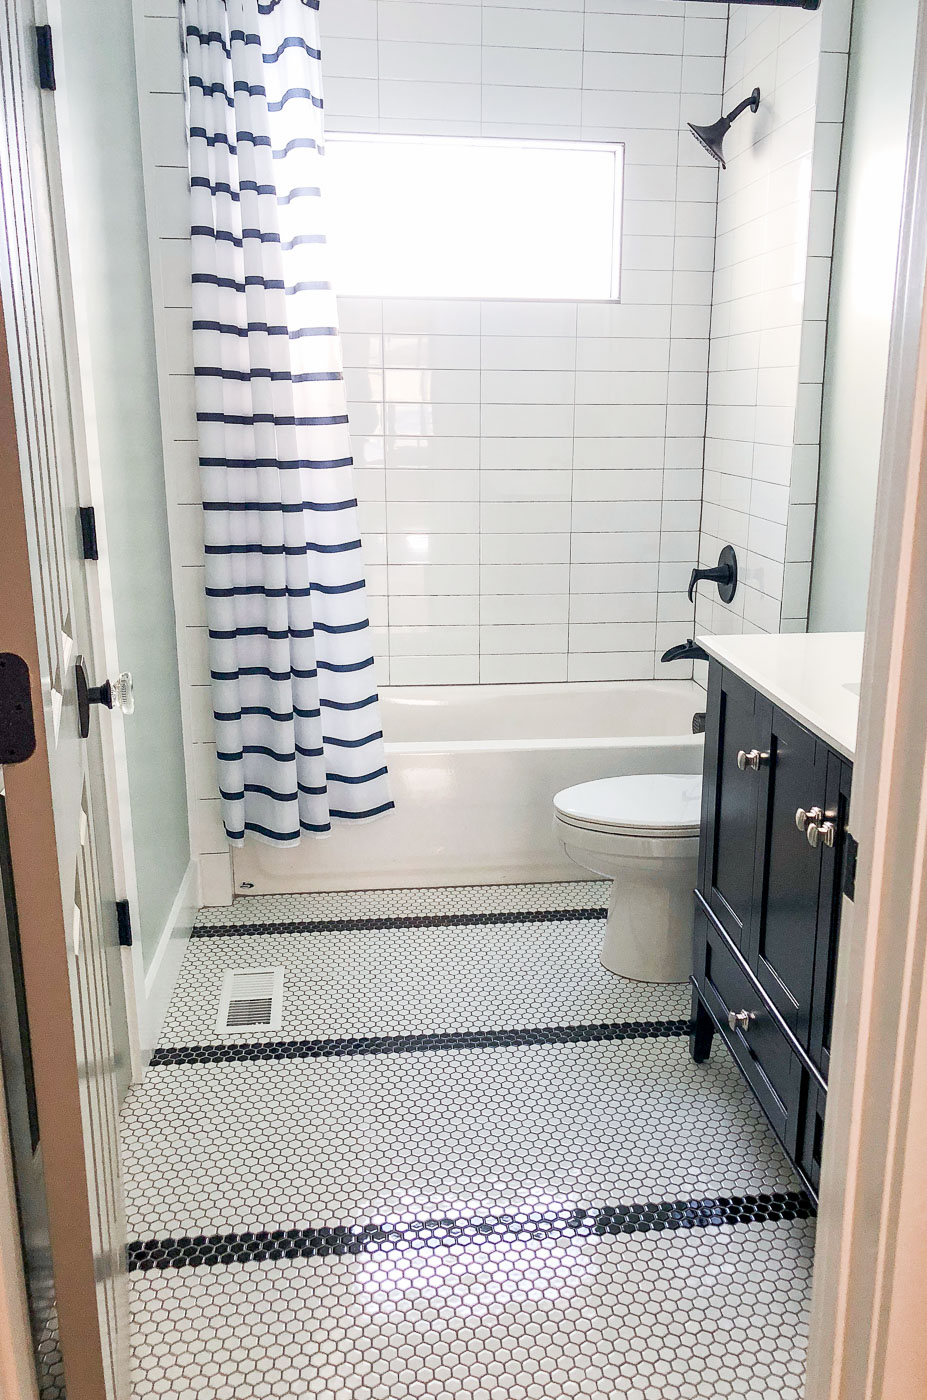
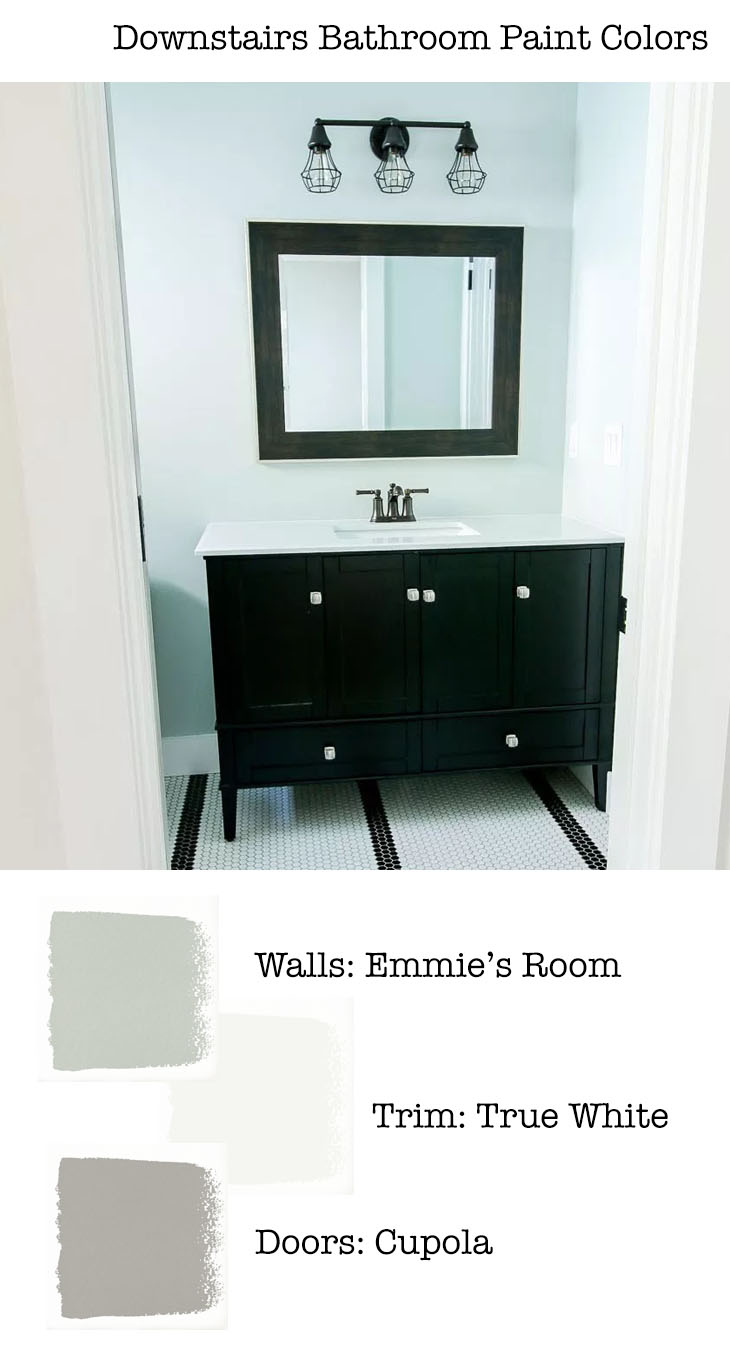
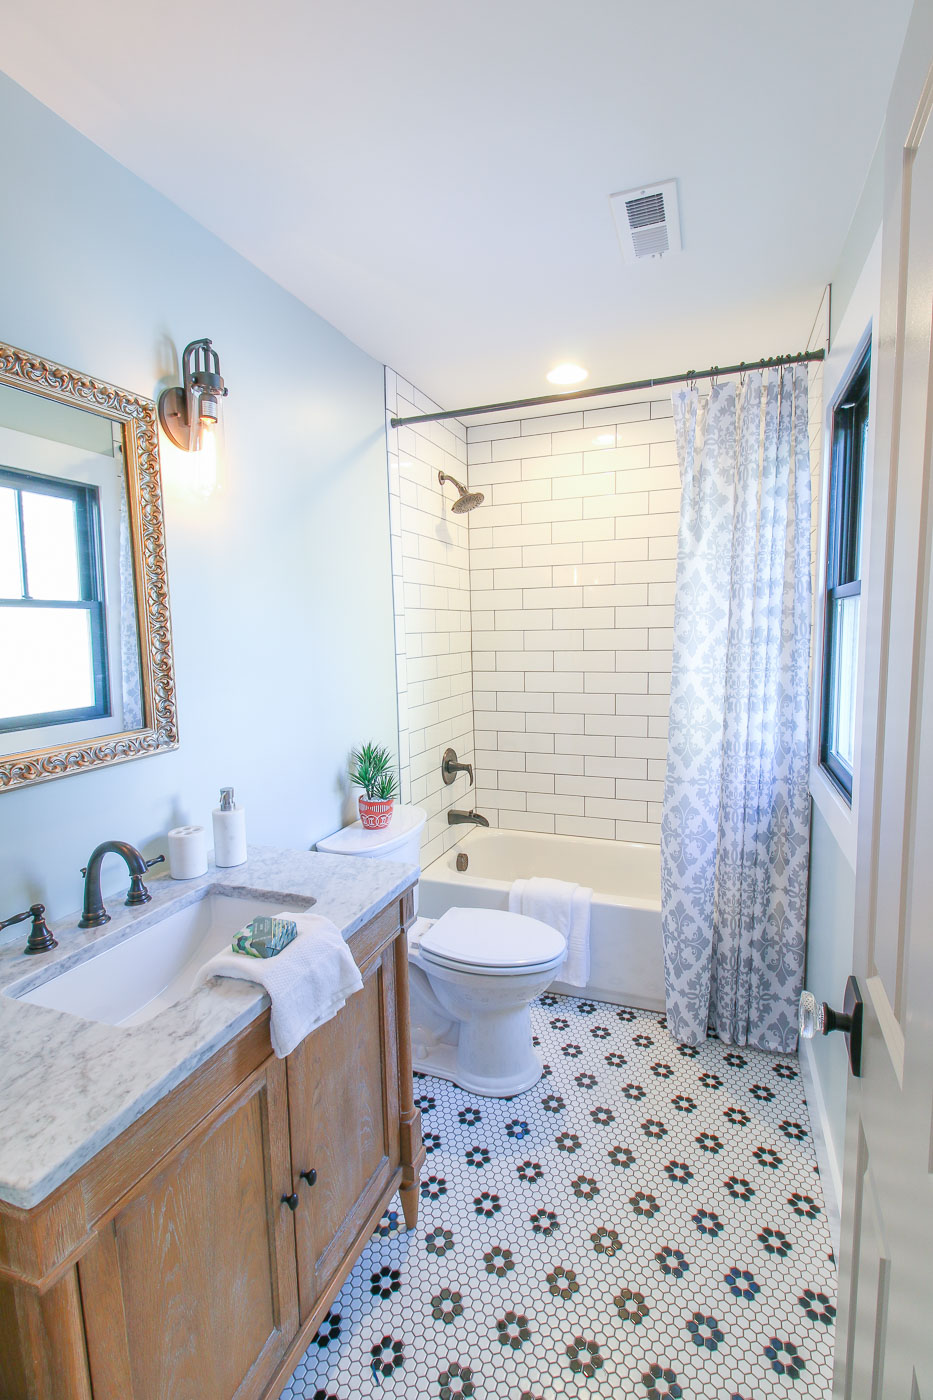
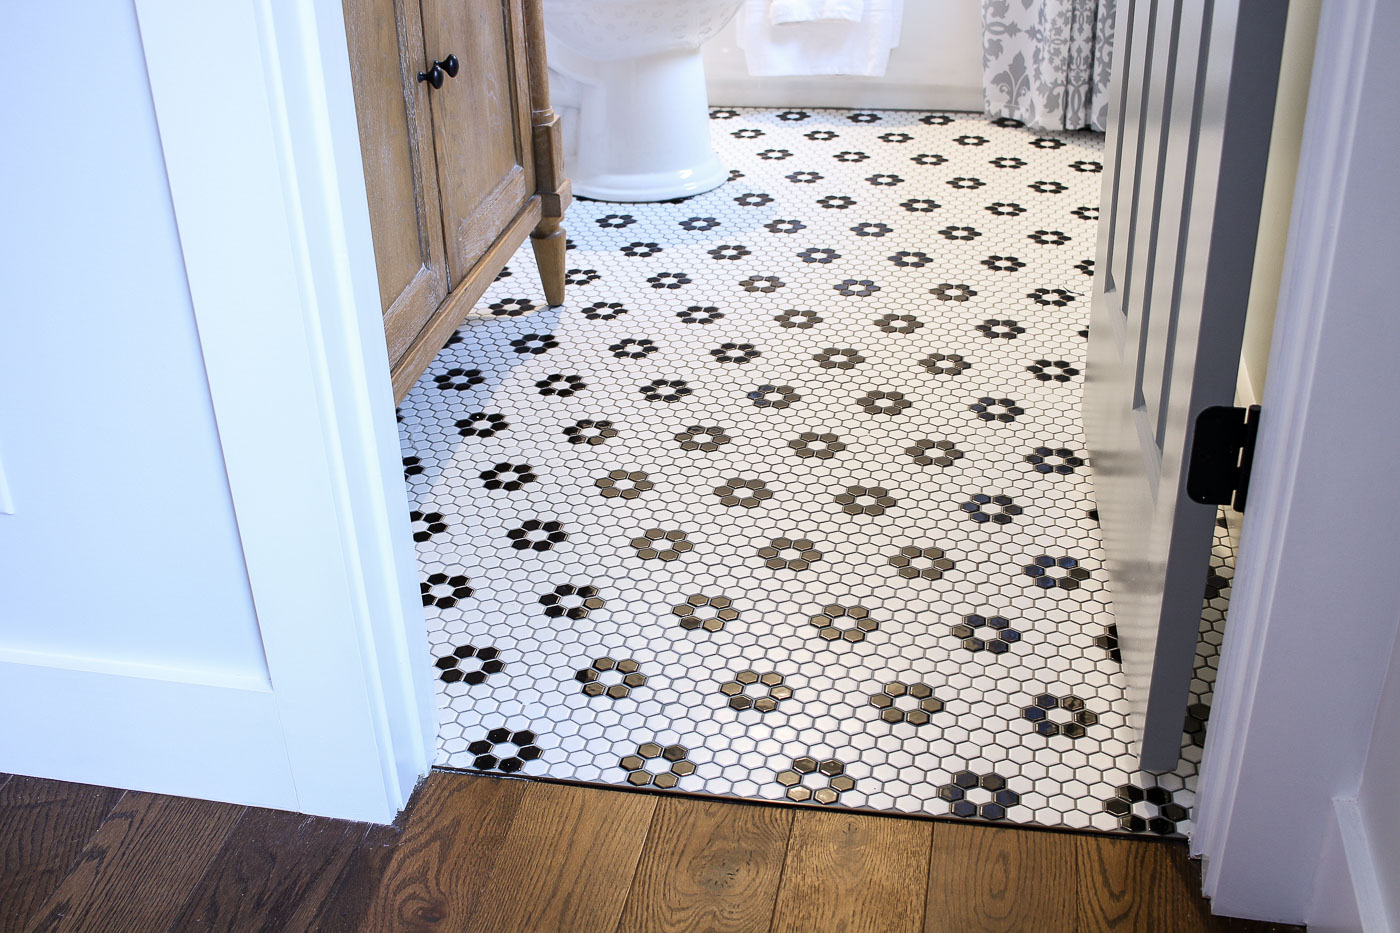
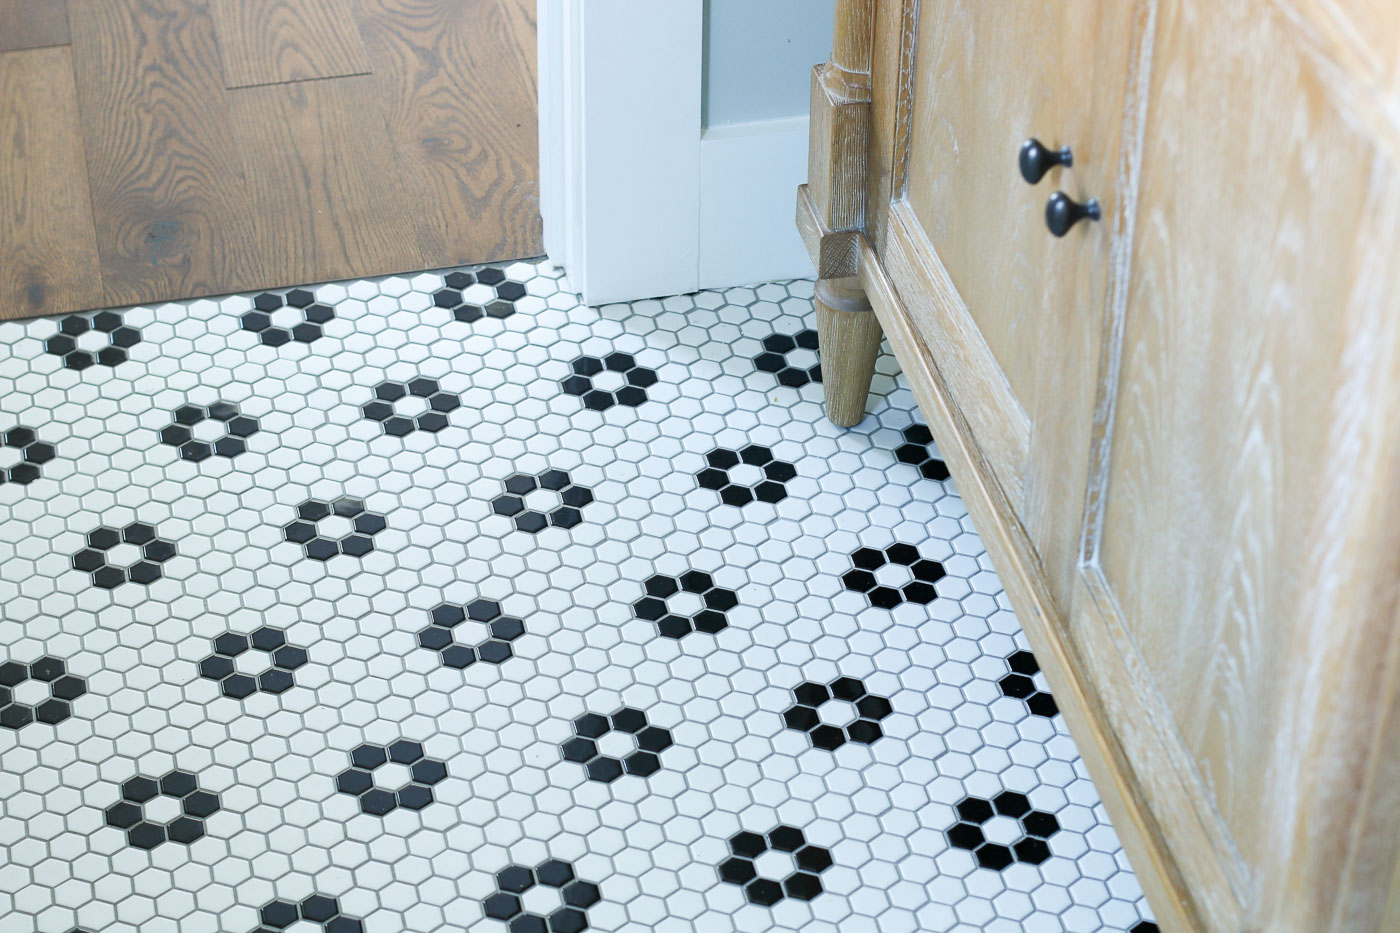
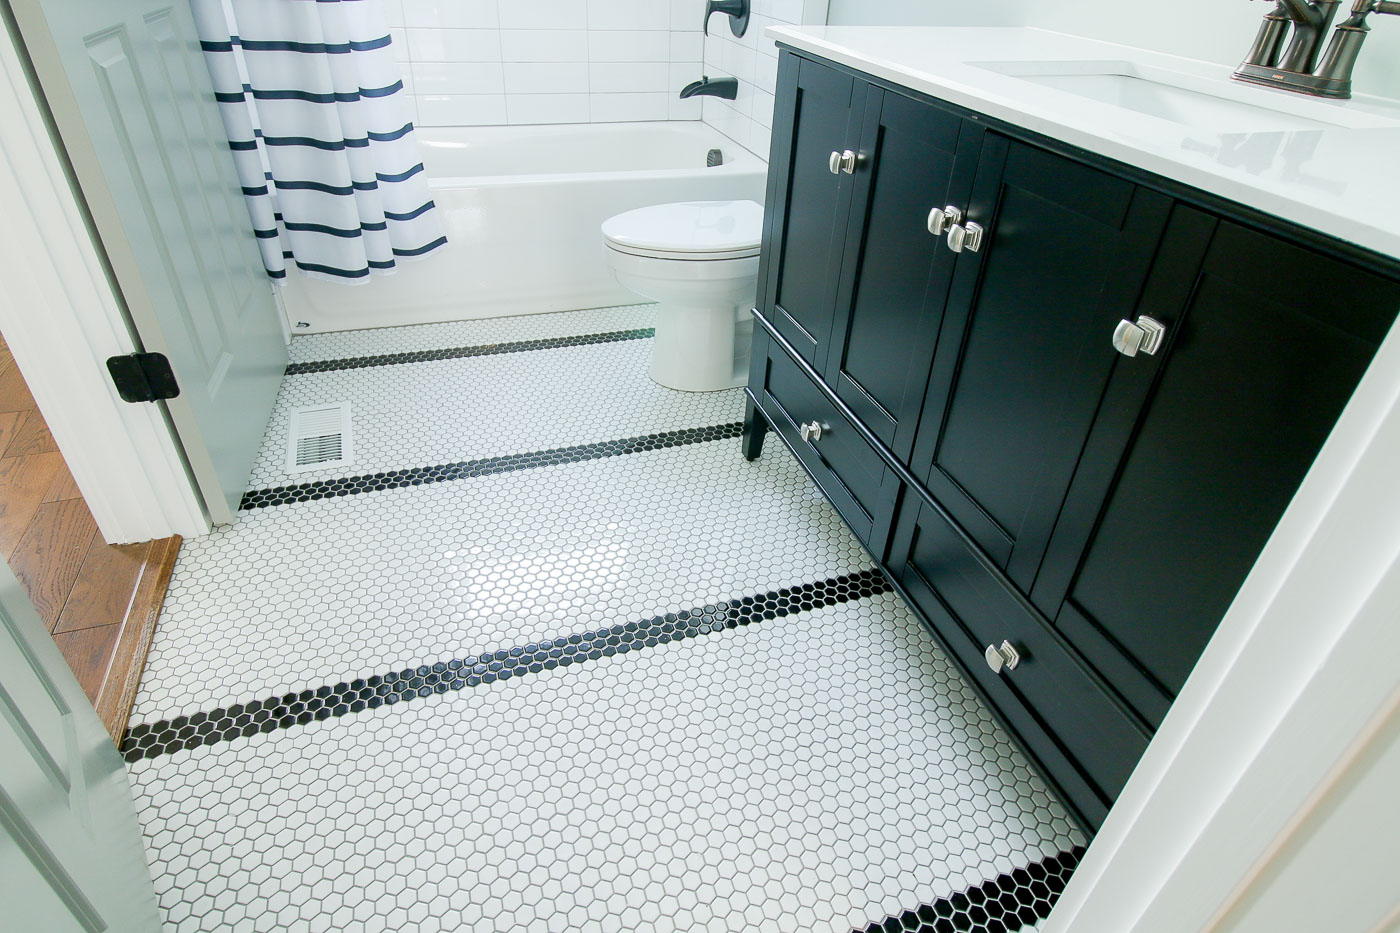
The downstairs shared bathroom in the Saving Etta house was designed to function as an en suite bathroom to one of the bedrooms, but also to have a second door opening to the main hallway for guests or for anyone to use. I can’t take credit for the architectural plans in the Saving Etta house, but I can take credit for the fun design choices I made when putting in the finishing touches on the house. (All product sources are listed at the end of this post.) The downstairs bathroom was one small room where I had lots of fun with the floor tile.
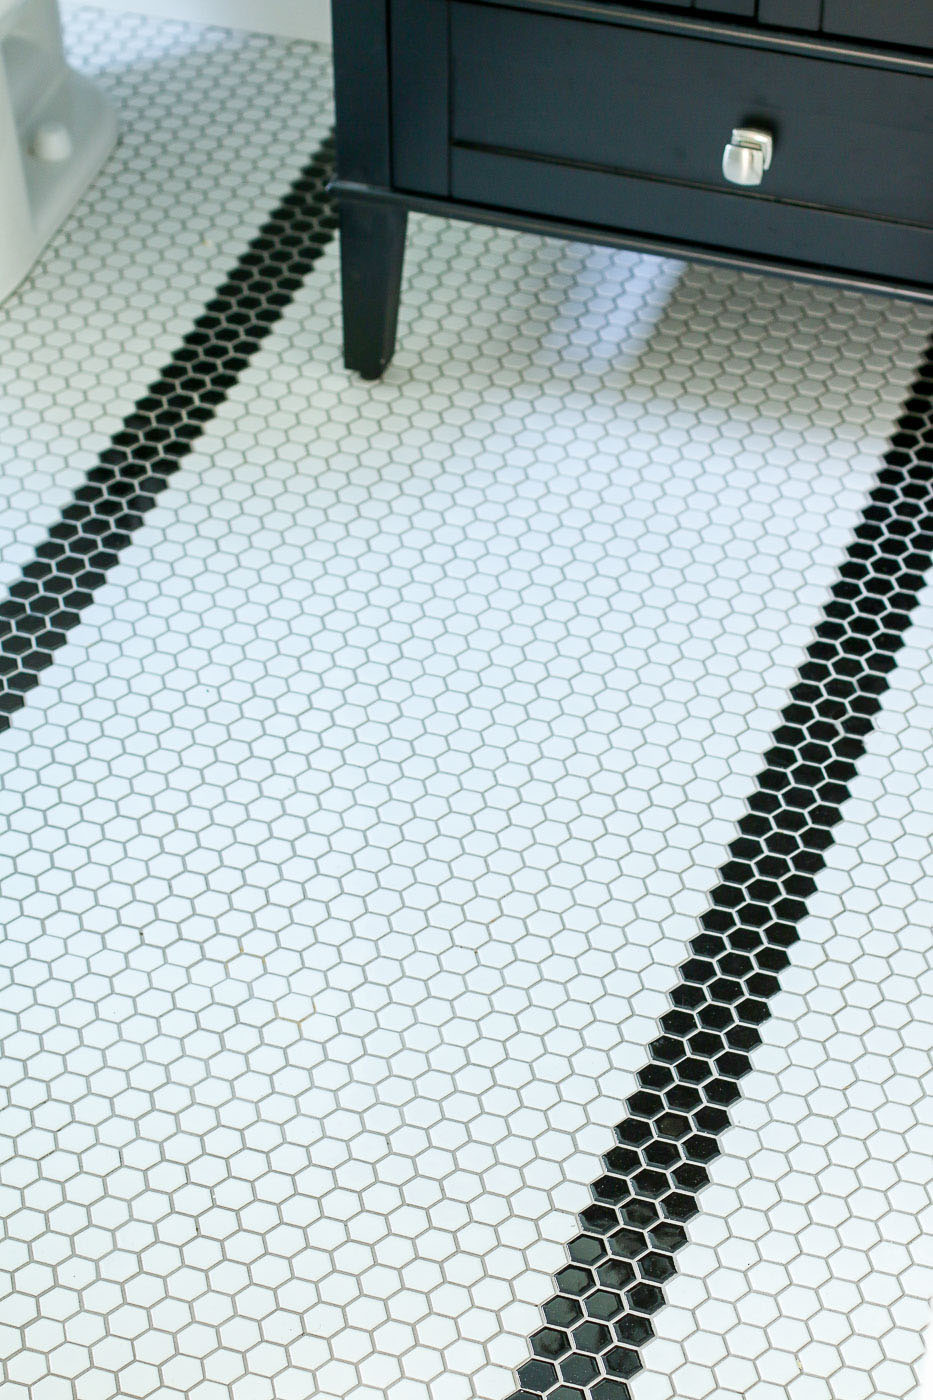
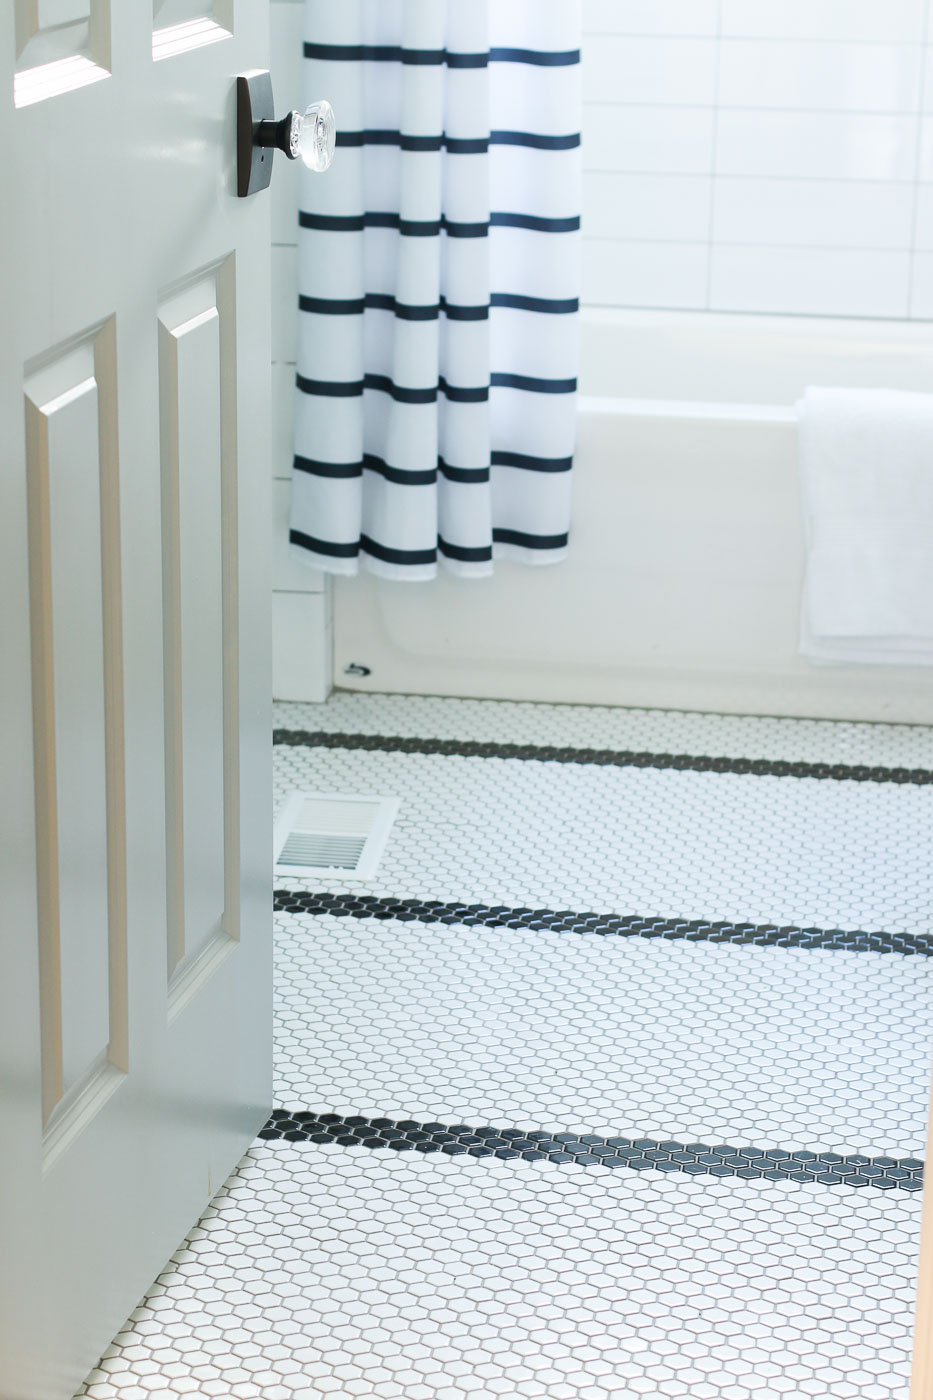
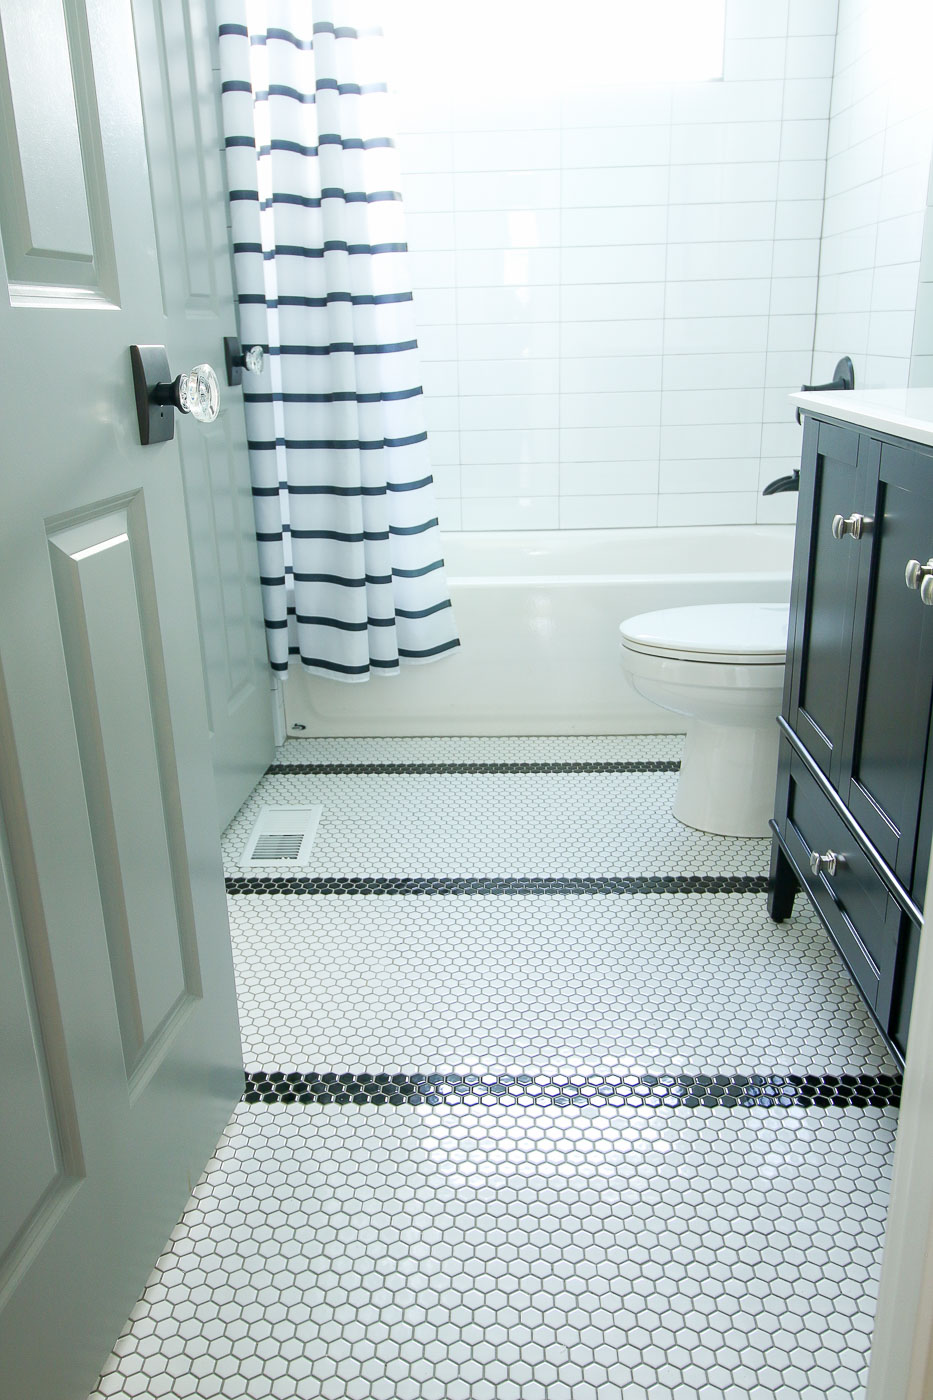
Stripes! From the beginning I knew I wanted to use classic tiles in the bathrooms. And possibly tile a border in one bathroom. If you’ve seen Mandi’s daughter’s bathroom in The Merc you’ll appreciate why I wanted to add a border to the floor.
But, if you’ve ever tried to design a border using little hex tiles, you’ll quickly learn that you can achieve a straight line from left to right, but when you try to create a straight line 90 degrees from the first stripe, it looks like a squiggly line. Bummer. However, sometimes it takes road blocks in your path to help you find a more creative solution you like even better.
I used Jeffrey Court mosaic tiles (available at Home Depot) in white and black to create this unique look. And my tile setter did a phenomenal job with the installation.
Before I take you further into the bathroom, I want to thank all the Saving Etta sponsors. As you all know, I’m very particular about the brands I work with and I can honestly say my sponsors are the cream of the crop when it comes to selling products for your home and lifestyle.
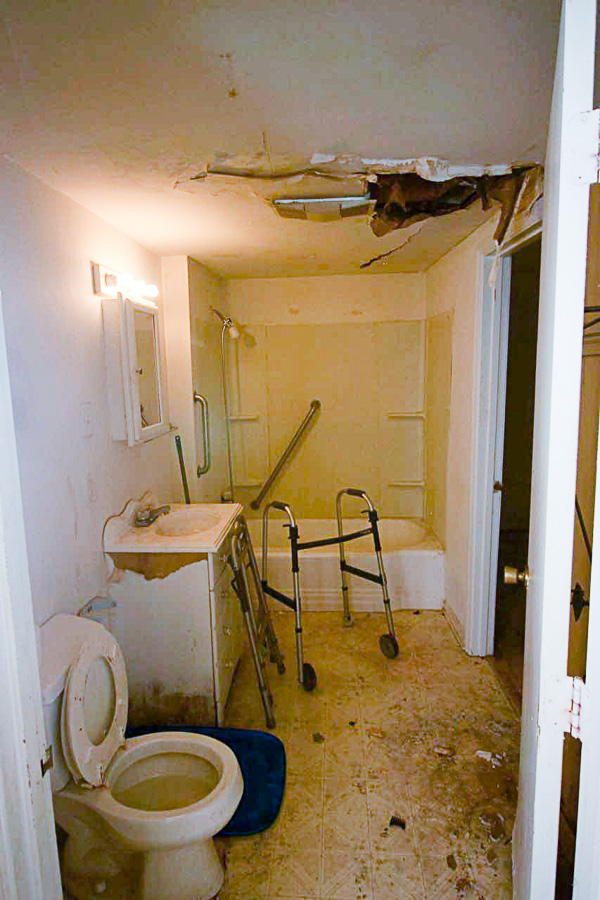
Bathroom Before:
As you learned the other day, the original house only had one bathroom and it was definitely not anything pretty.
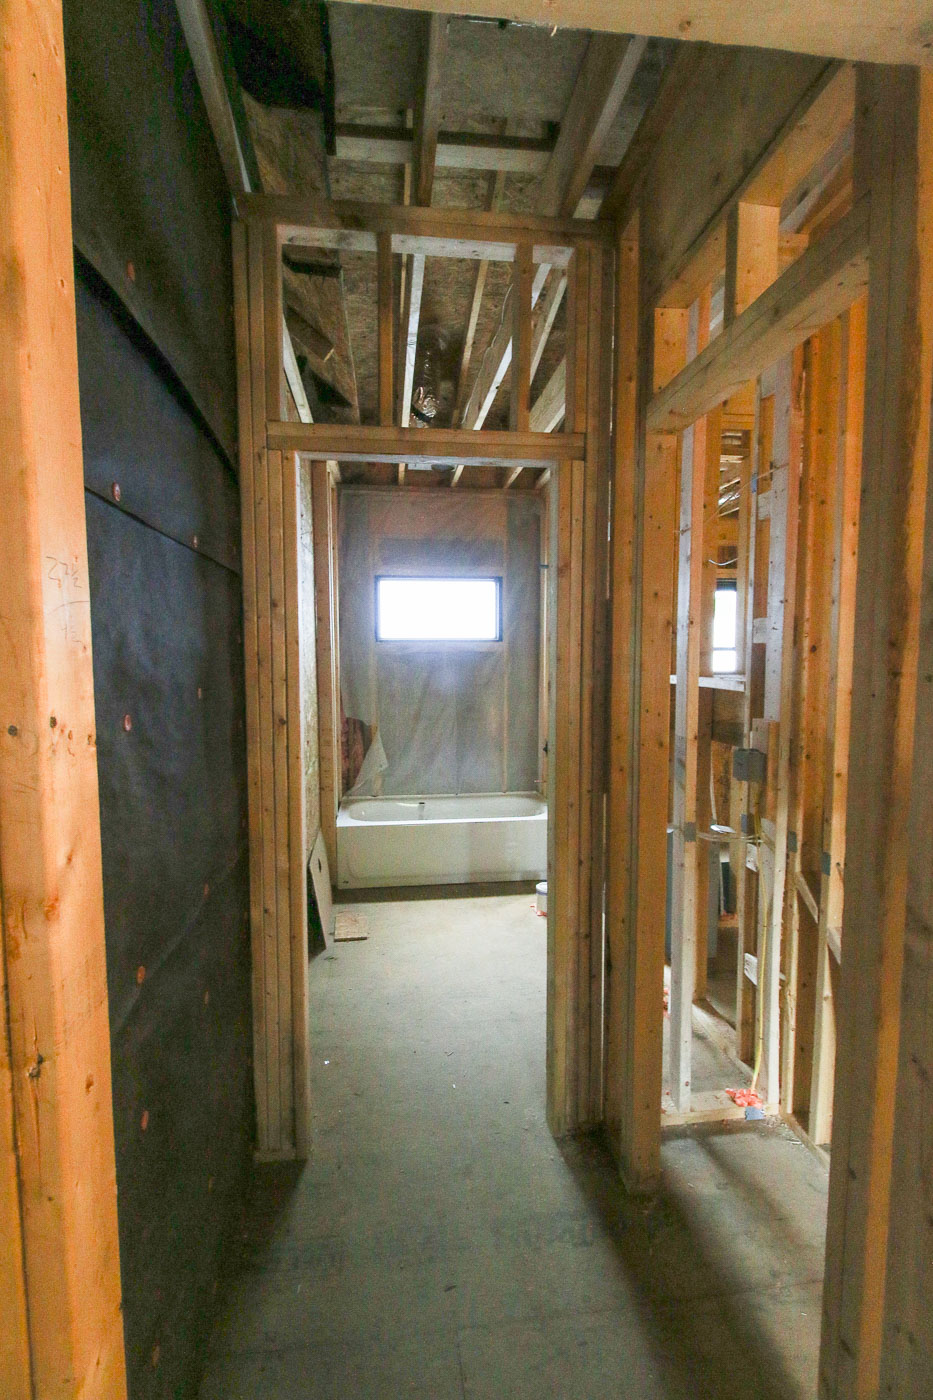
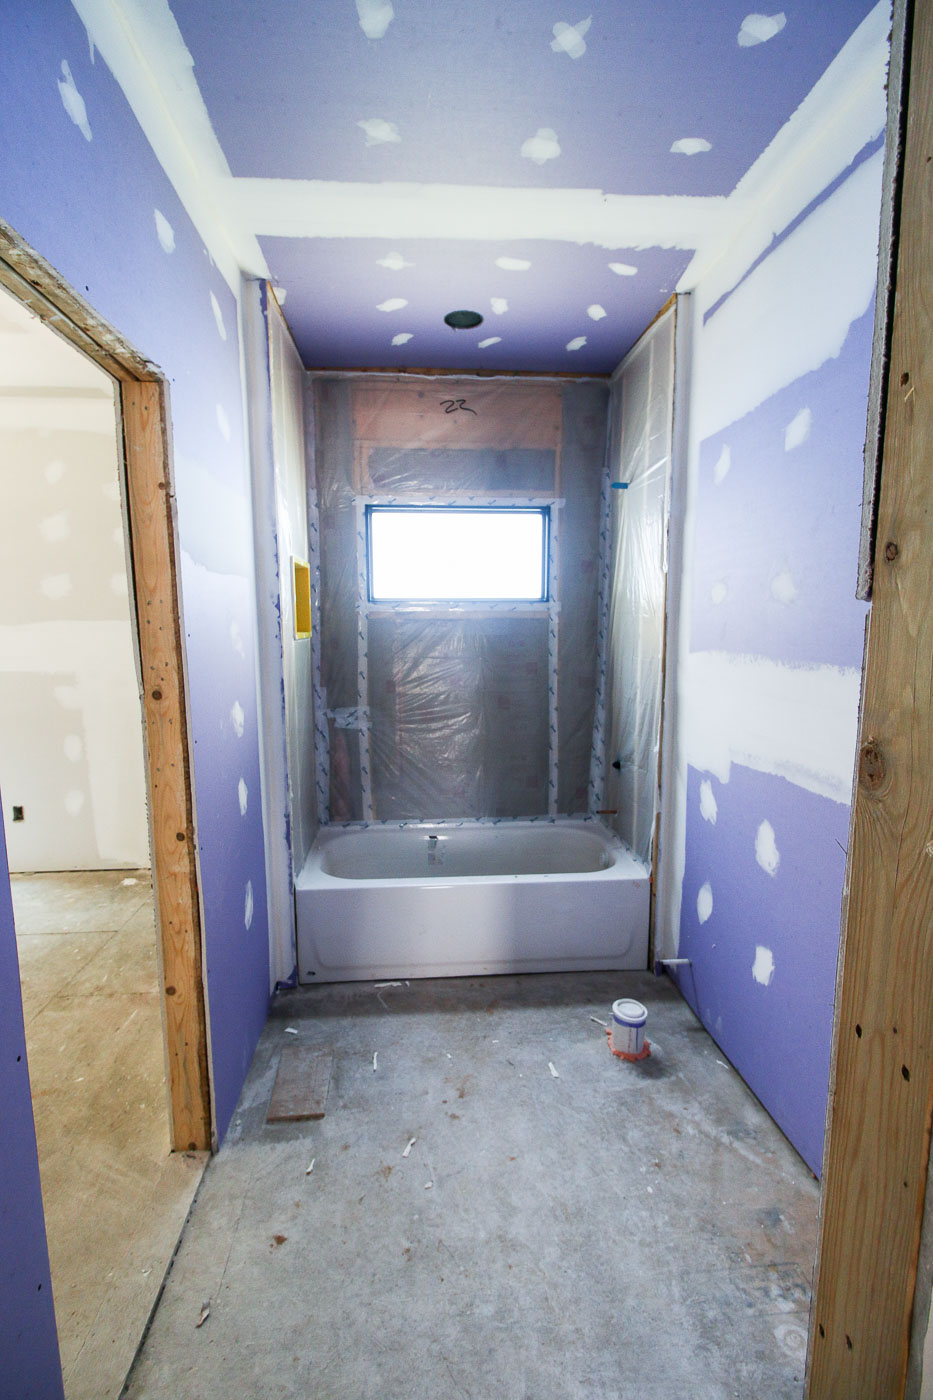
After the back of the house was removed, we began to build back in the same footprint. As you can see in the photo below, the wall on the left was the original back wall of the 1900 portion of the Saving Etta house.
The transom window over the tub lets in a ton of natural light, but no peeping eyes! It’s obscure glass from Plygem’s Mira window line.
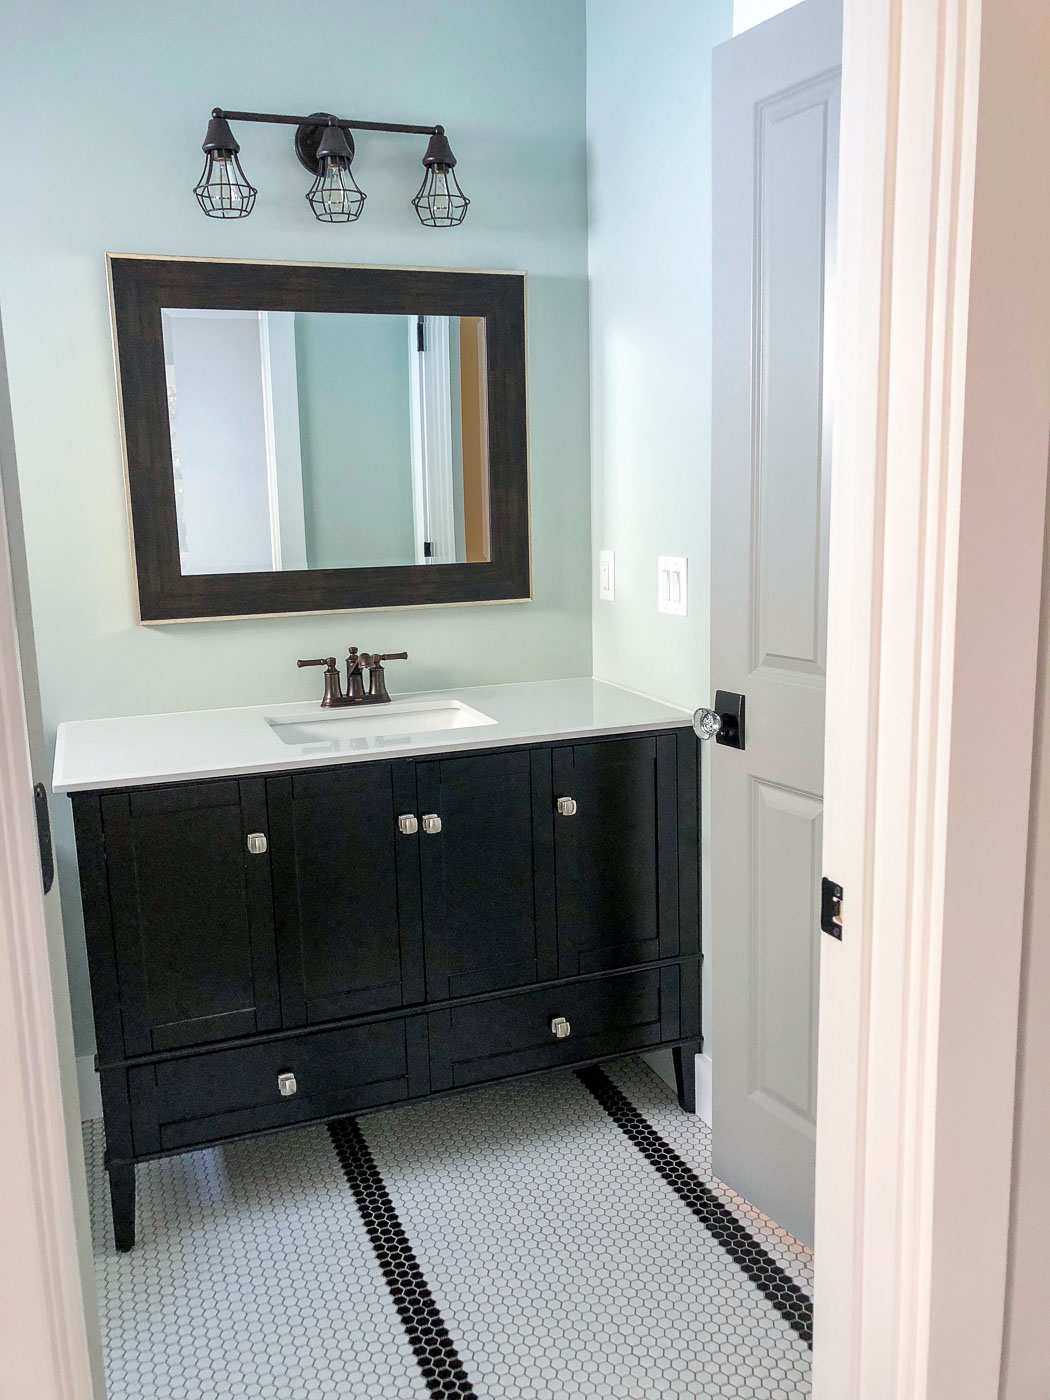
The Downstairs Shared Bathroom Reveal:
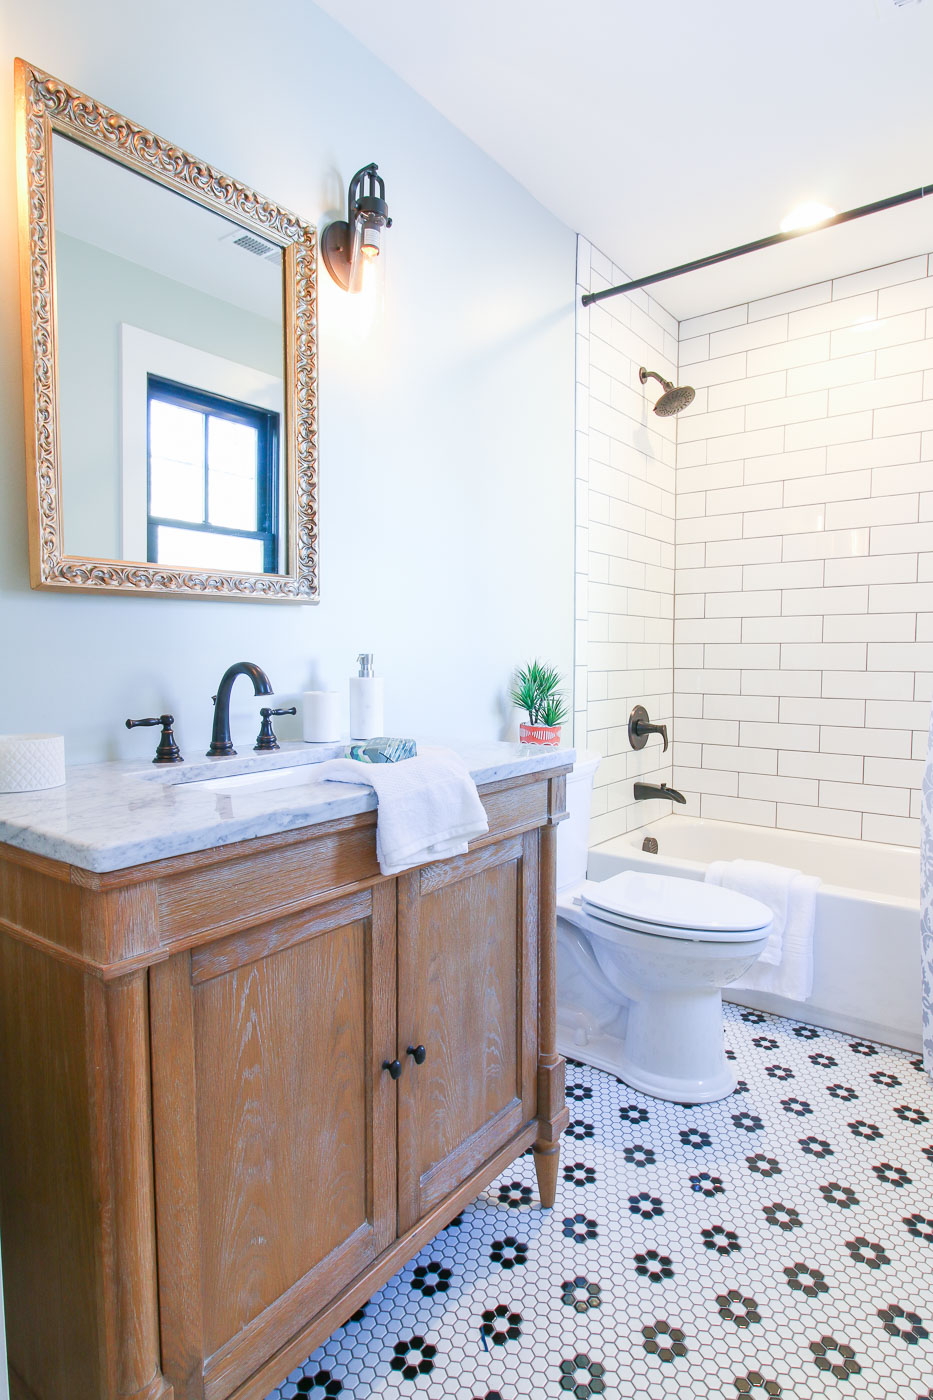
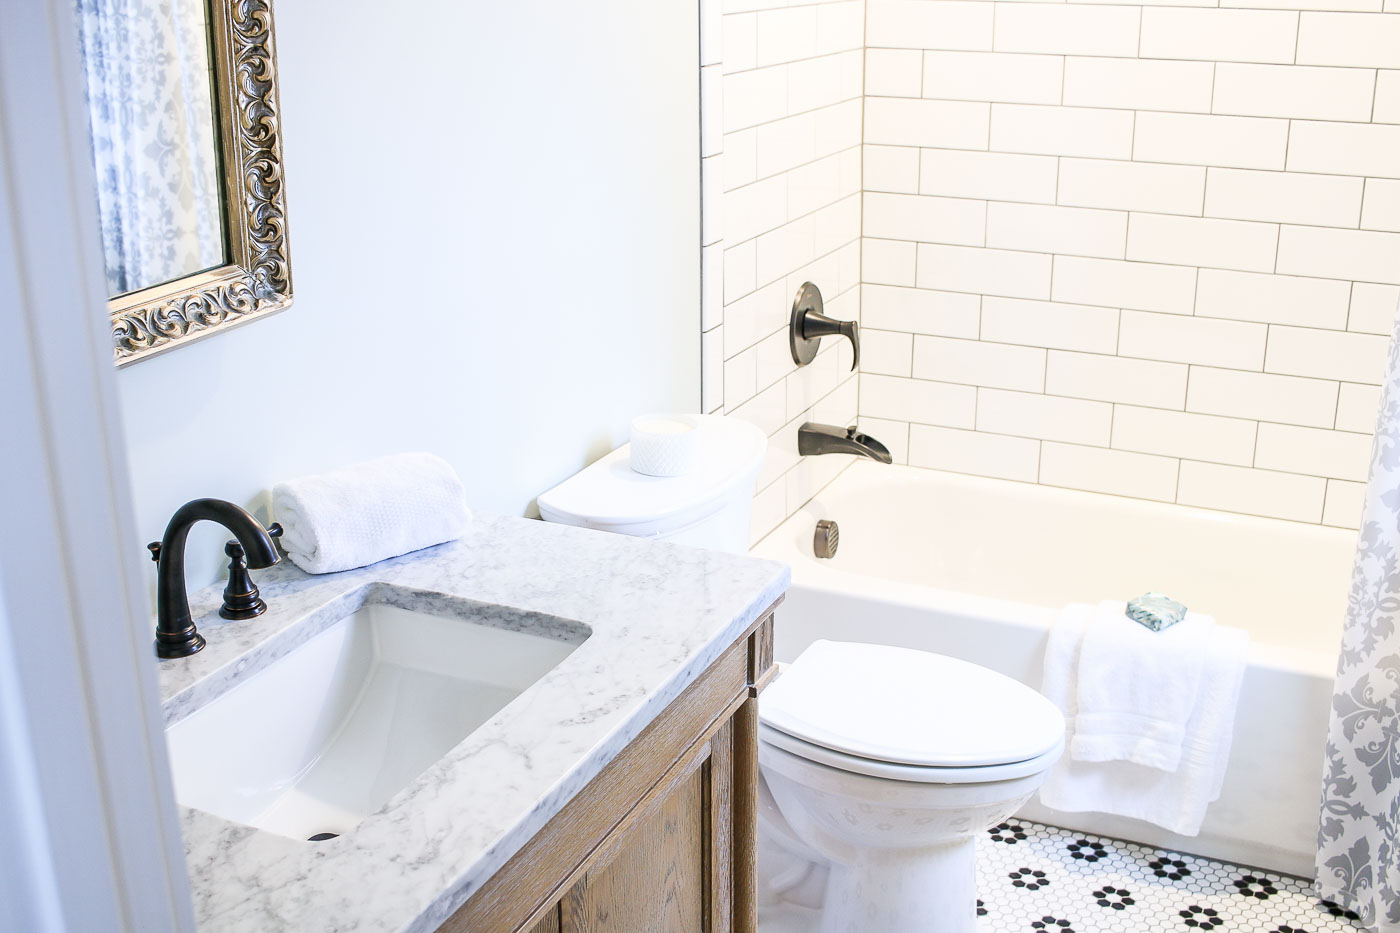
You’ve already seen the mosaic hex tile floor. Continuing with the black and white striped theme, I made sure to stage the bathroom with a striped shower curtain (could you ask for a more perfect match?) Of course, who can deny the beauty of the glass door knob. These Schlage Hobson knobs were used throughout the house and they are undeniably gorgeous and equally amazing to touch.
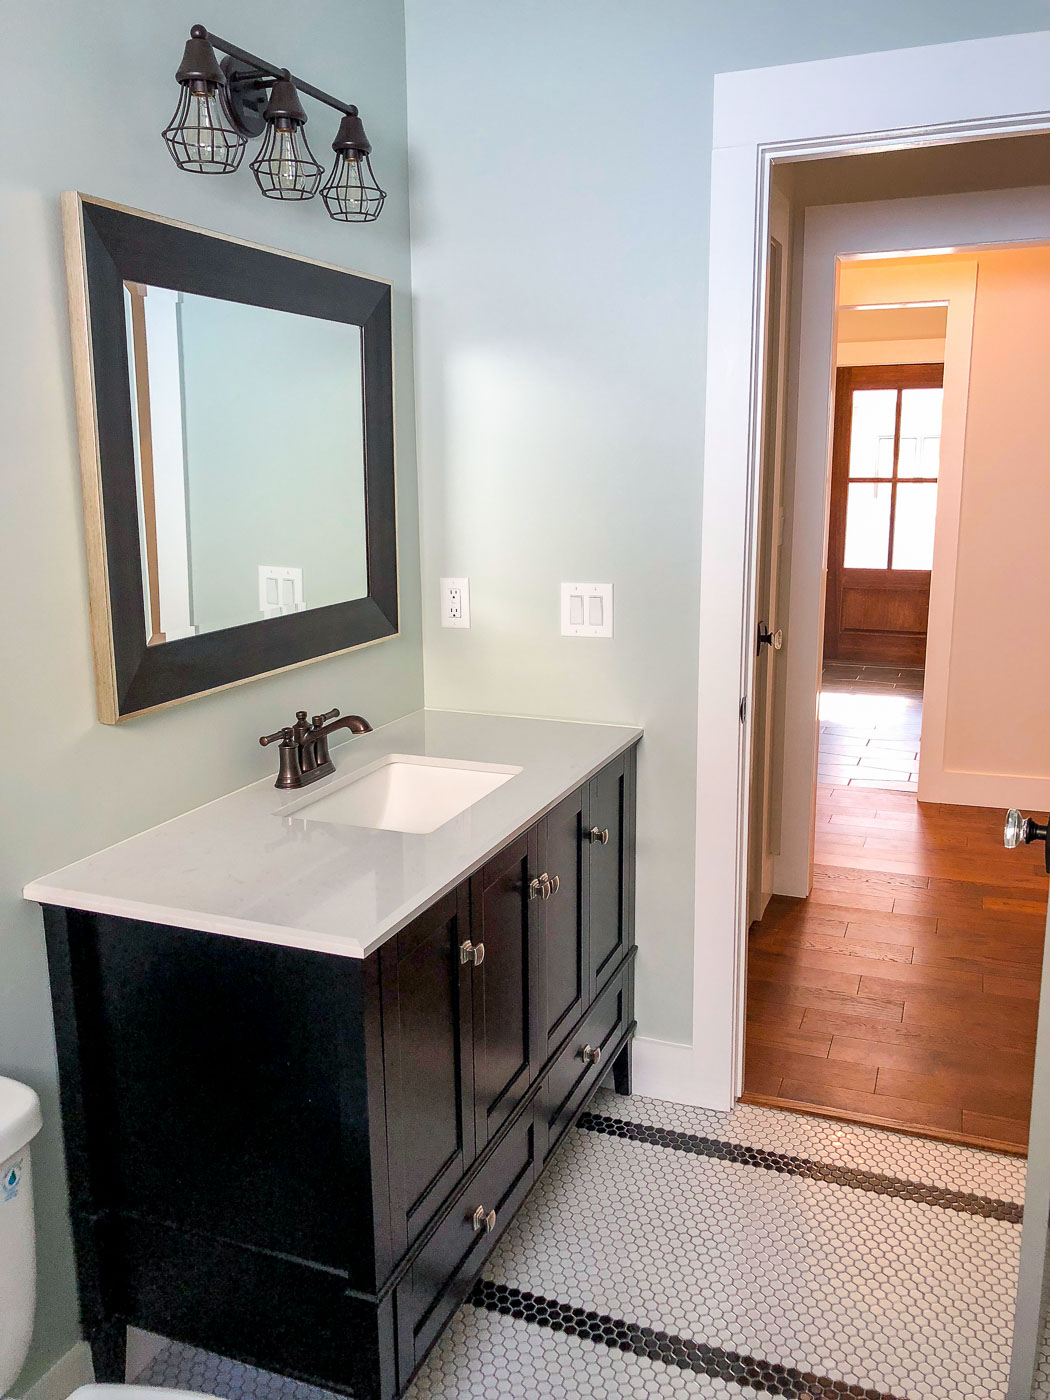
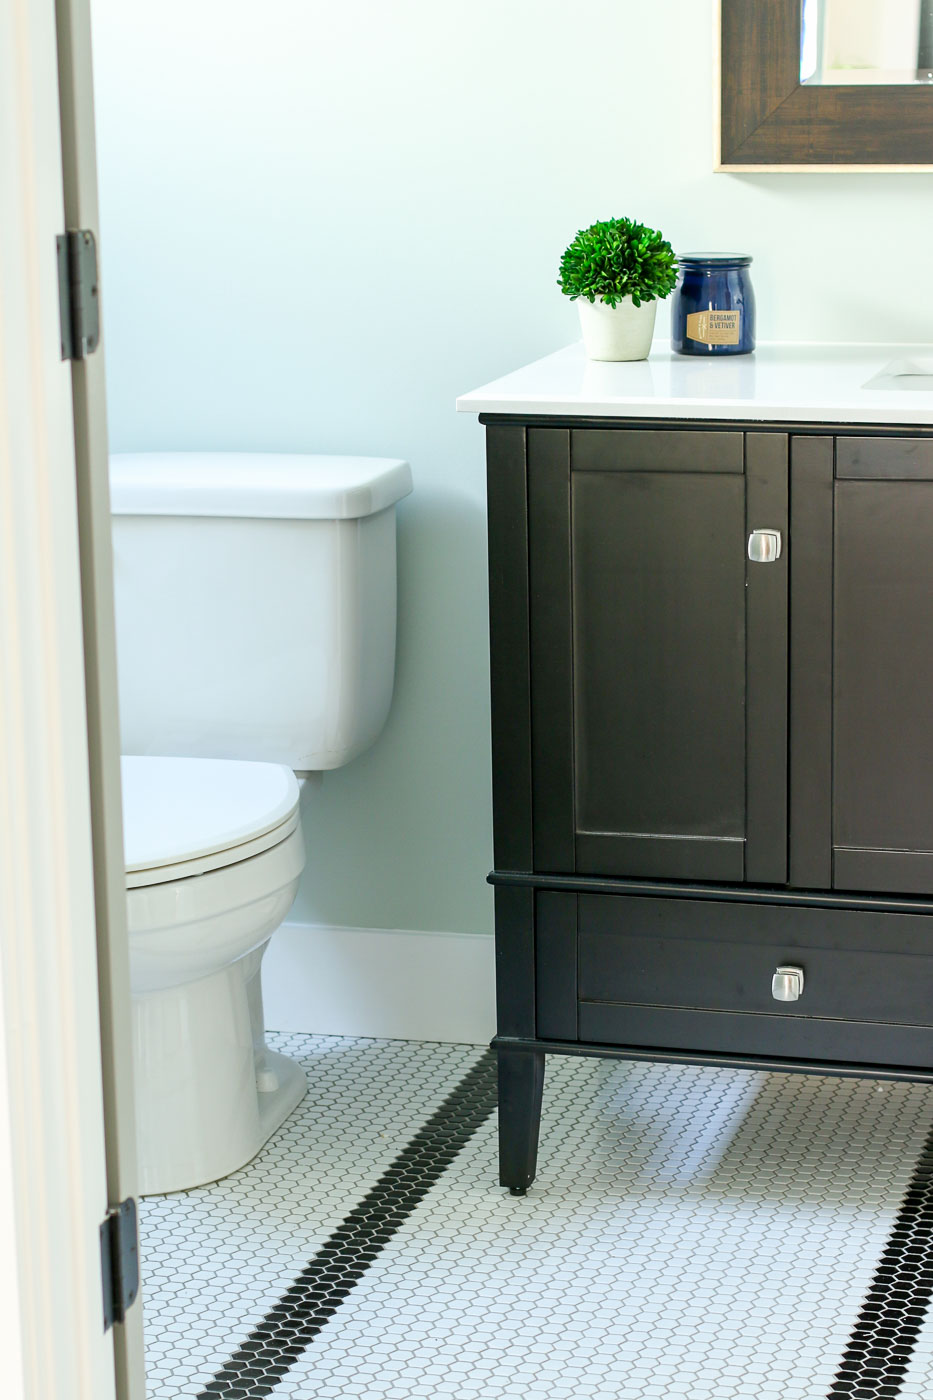
The vanity I chose for this bathroom was a wonderful surprise. The price was a steal compared to the master bathroom vanity. When it arrived, I expected a cheap quality vanity, but was relieved to find it had strong construction, adjustable hinges, and came complete with a quartz (marble look-a-like) countertop and integrated sink. In contrast, the vanity in the master bathroom didn’t come with a top or sink. You can read more about that vanity and my opinion of it here.
This vanity is heavy, so I was thrilled that the delivery from Wayfair included placing it in the room of your choice at delivery.
One lesson I learned from this bathroom was to double check measurements during framing. My plumber was the first to point out that the bathroom width was 6″ wider than the tub. After some creative brainstorming, I decided to take the easy route and add some framing on either side of the tub to make up the difference.
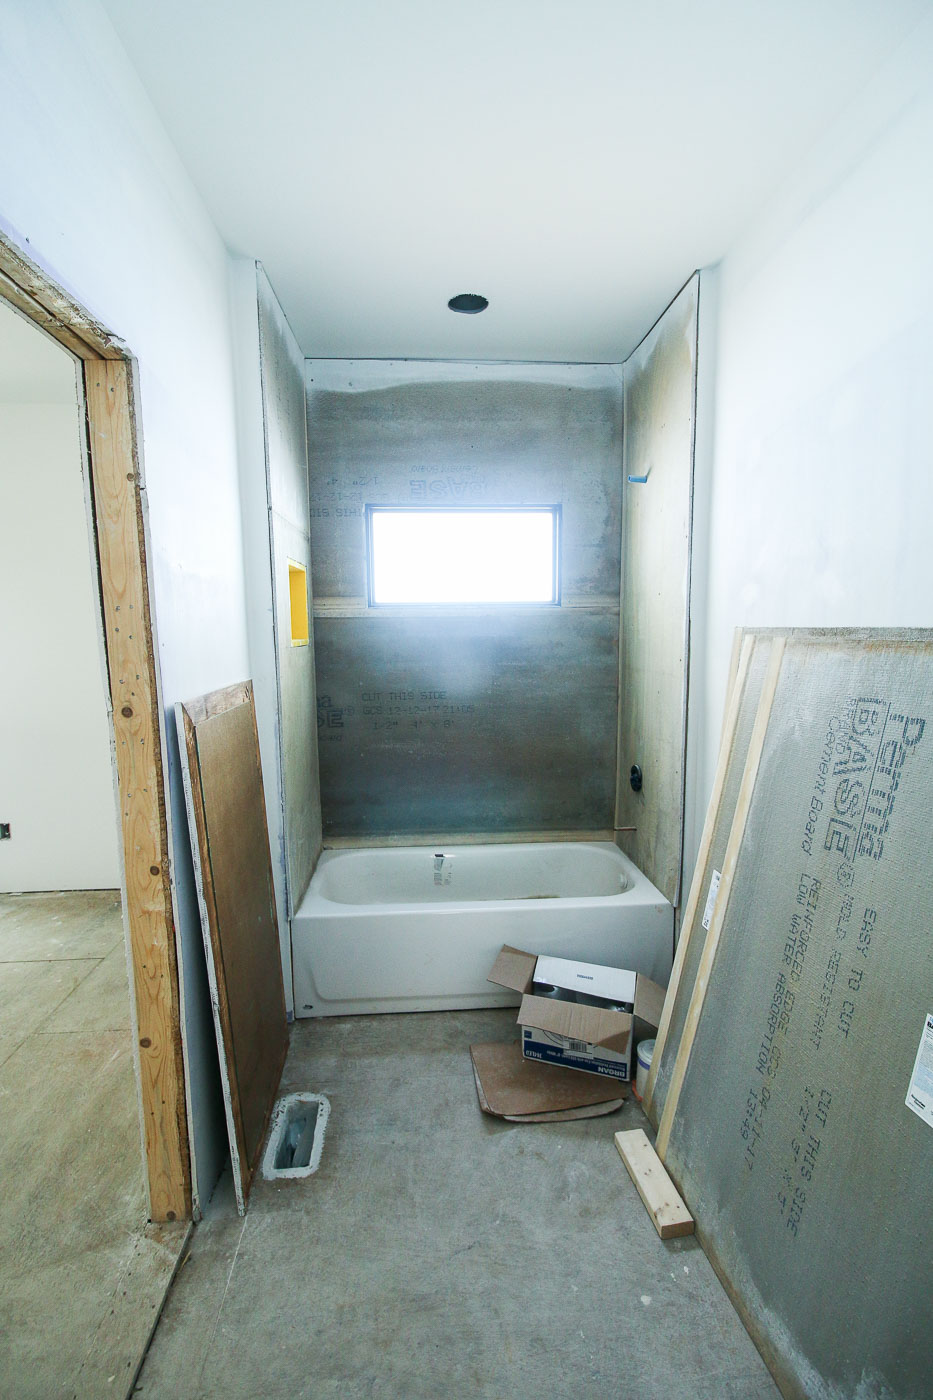
Obviously the tub surround turned out okay, but it wasn’t without challenges. Especially because I made the mistake of paying my drywallers to install the cement board. I learned after they left what a sloppy job they did. My tile installer had to perform some miracles to plumb and straighten the walls. I’ll definitely leave that task to the tile setter next time (and save money not paying for the same project twice.)
Time to talk dirty. Well, not exactly, but I want to share with you another inexpensive fixture that surprised me. The toilet!
It is a very modestly priced ProFlo toilet that really performs well. In fact, I’ll probably get the same toilet for our master bathroom. It doesn’t have any fancy features or look special, but frankly I just want it to work well under pressure (if you know what I mean.)
Speaking of things I will use in my own bathroom, I must install another Broan Exhaust Fan and Light. This low profile recessed light doubles as the exhaust fan! Talk about hard working.
Want to hear something funny? After my drywall installers finished the job, I discovered they had sealed the junction box for the vanity light into the wall. My electrician and I were able to find it and cut a hole. Then I realized I had forgotten to purchase the light fixture for this spot. Luckily he had enough work to keep him busy while I ran to purchase a light fixture for over the sink.
I’m so happy with how this bathroom turned out. It’s the perfect bathroom for the homeowners and their guests.
What are your favorite features? Would you change anything? Is there anything you learned while renovating your own bathroom? Please share!
Sources:
(I’ve included affiliate links for your convenience. I earn a small percentage from a purchase using these links. There is no additional cost to you. You can read more about affiliate links here.)
Disclosure: I received materials and/or compensation from the sponsors of the Saving Etta project. These were the bathroom sponsors: Ask for Purple, Plygem, Broan-Nutone, Schlage, Magnolia Home Paint, KILZ, Jeffrey Court Tile. I was not told what to write. All opinions and words are my own. As always, I will notify you if you are reading as sponsored post or if I was compensated. Rest assured I am very particular about the brands I work with. Only brands I use in my own home or that I’ve had a positive experience with will be showcased on this blog.
 Saving Etta: Paint Colors + Home Tour Guide


 Saving Etta: Living Room Reveal
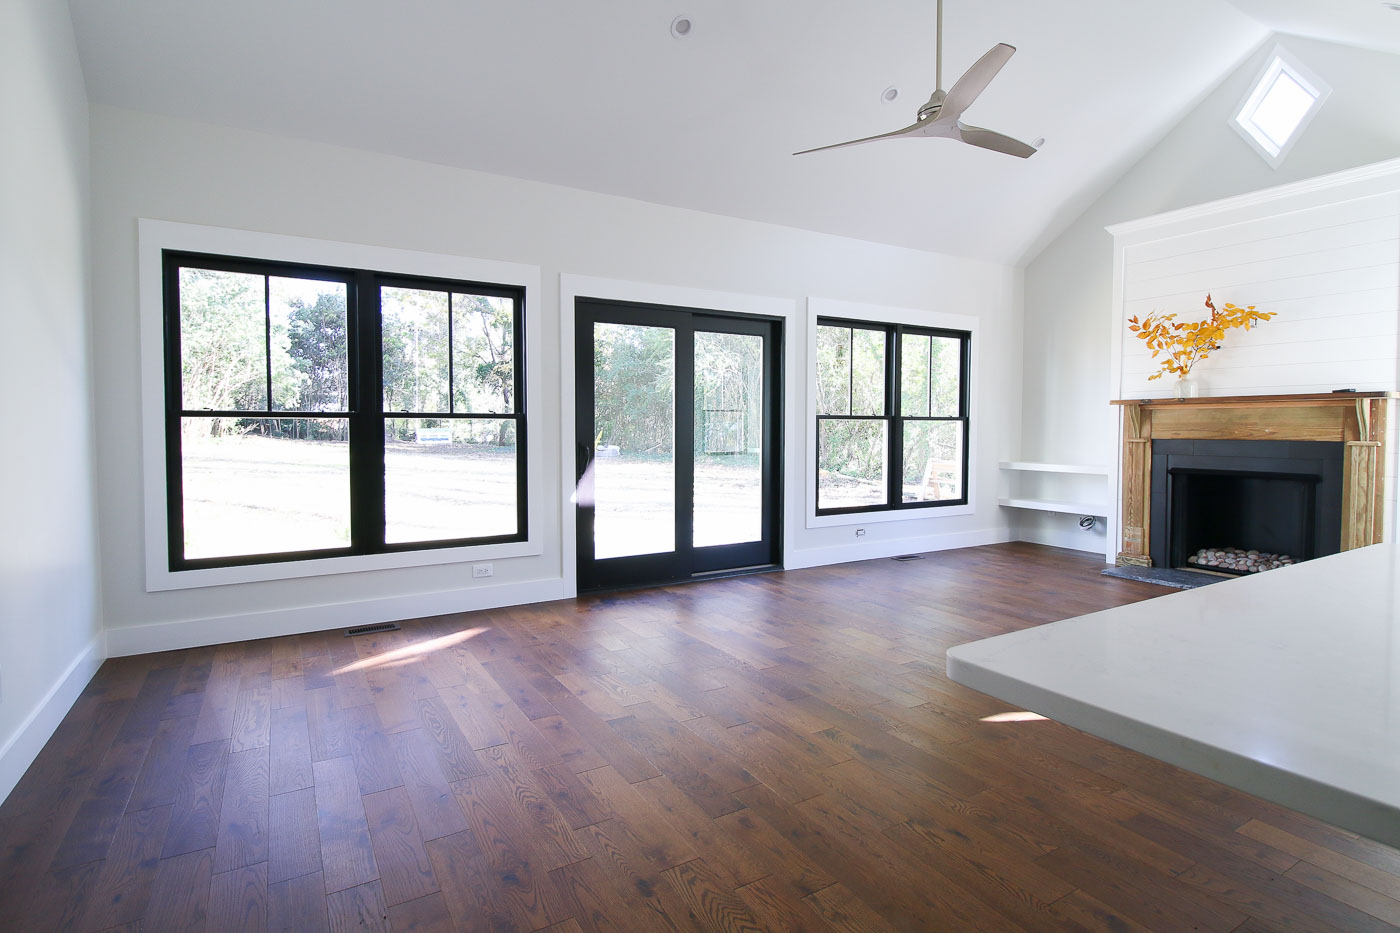


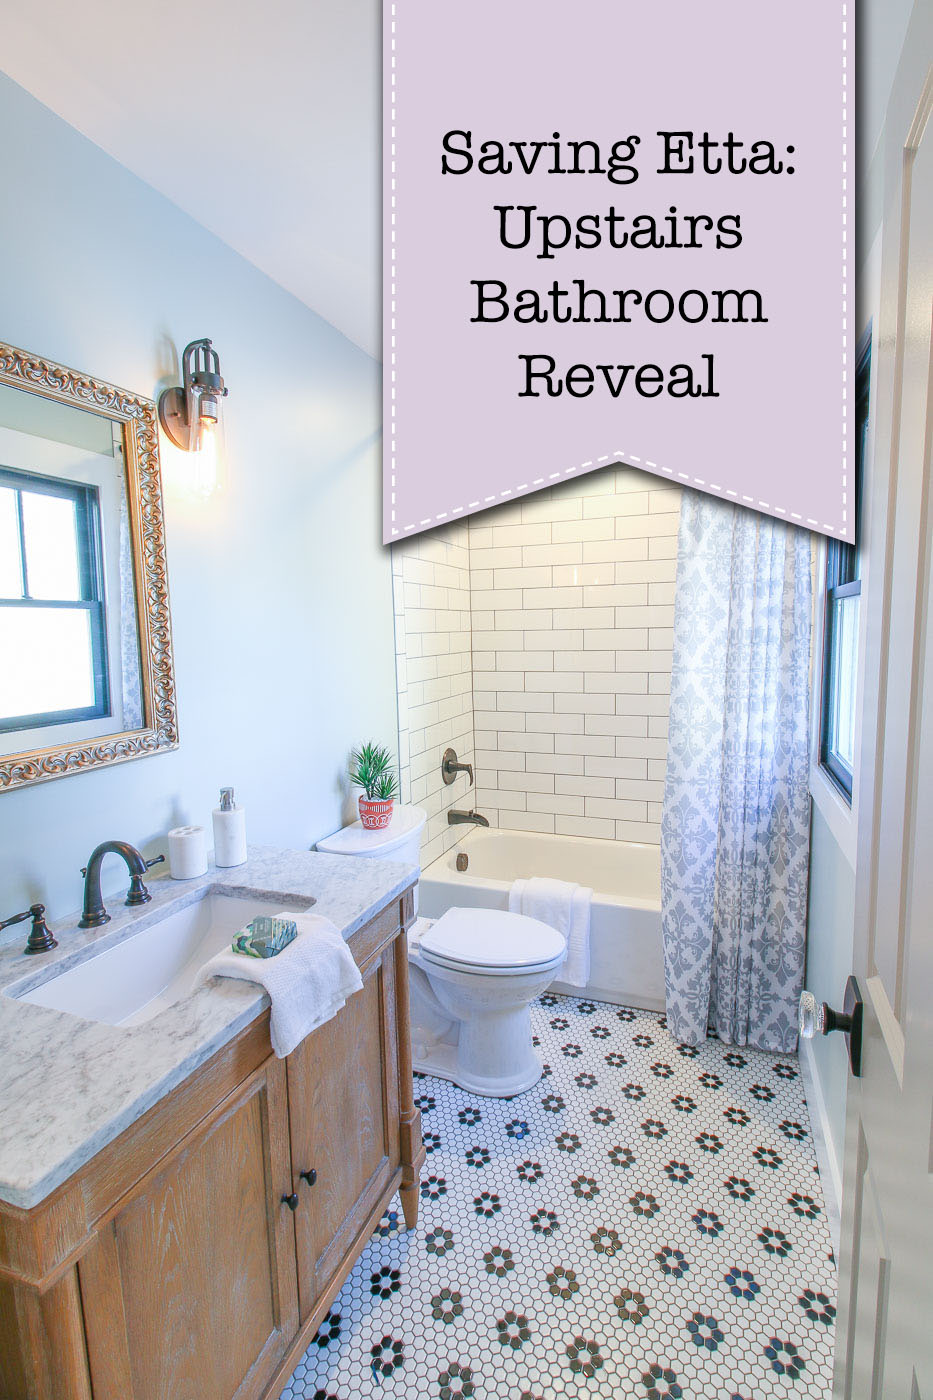 Saving Etta: Upstairs Bathroom Reveal
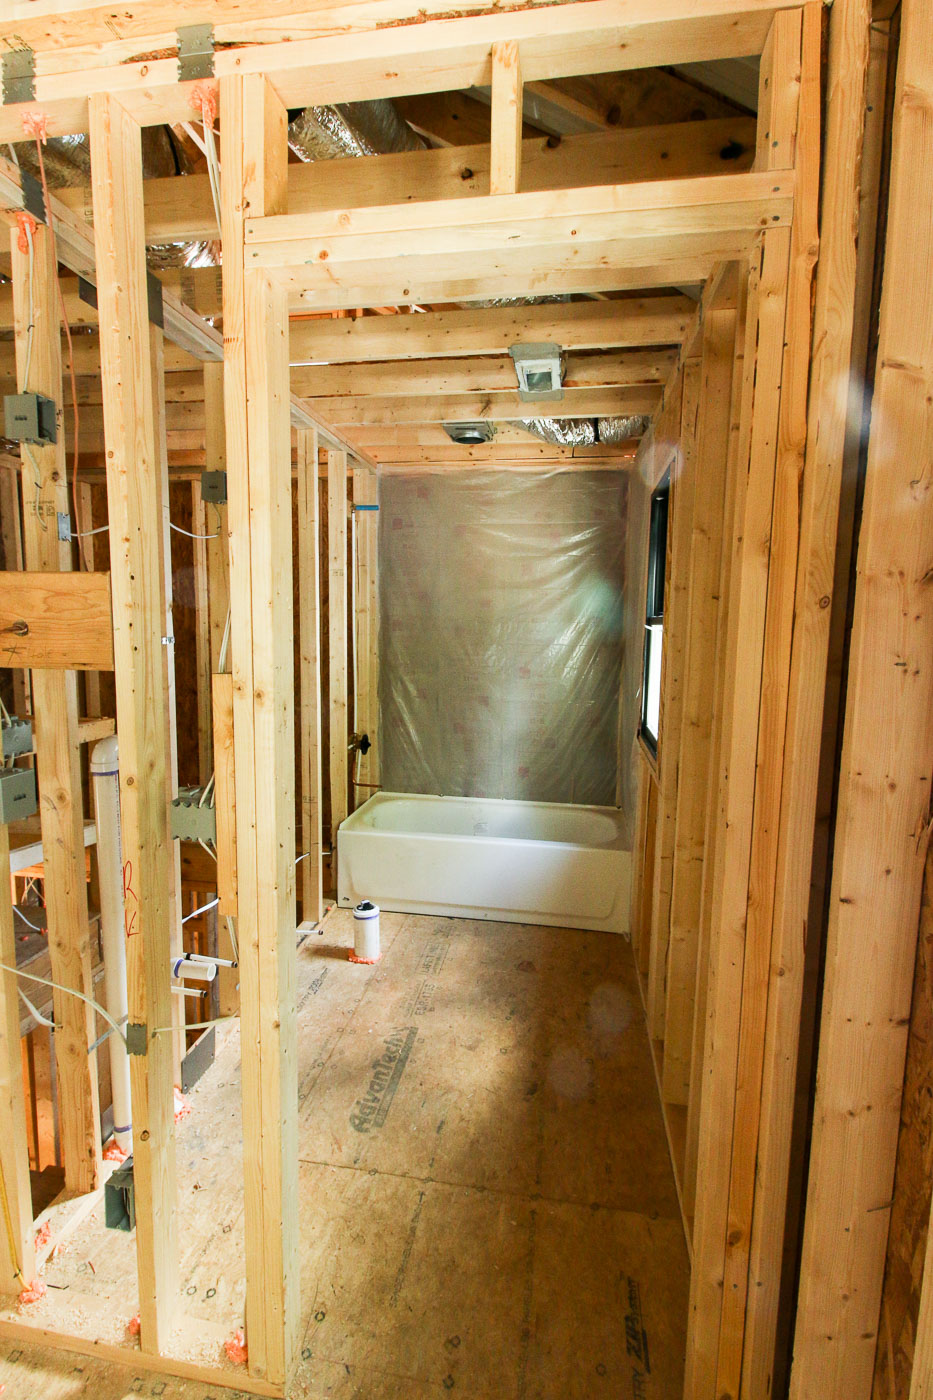


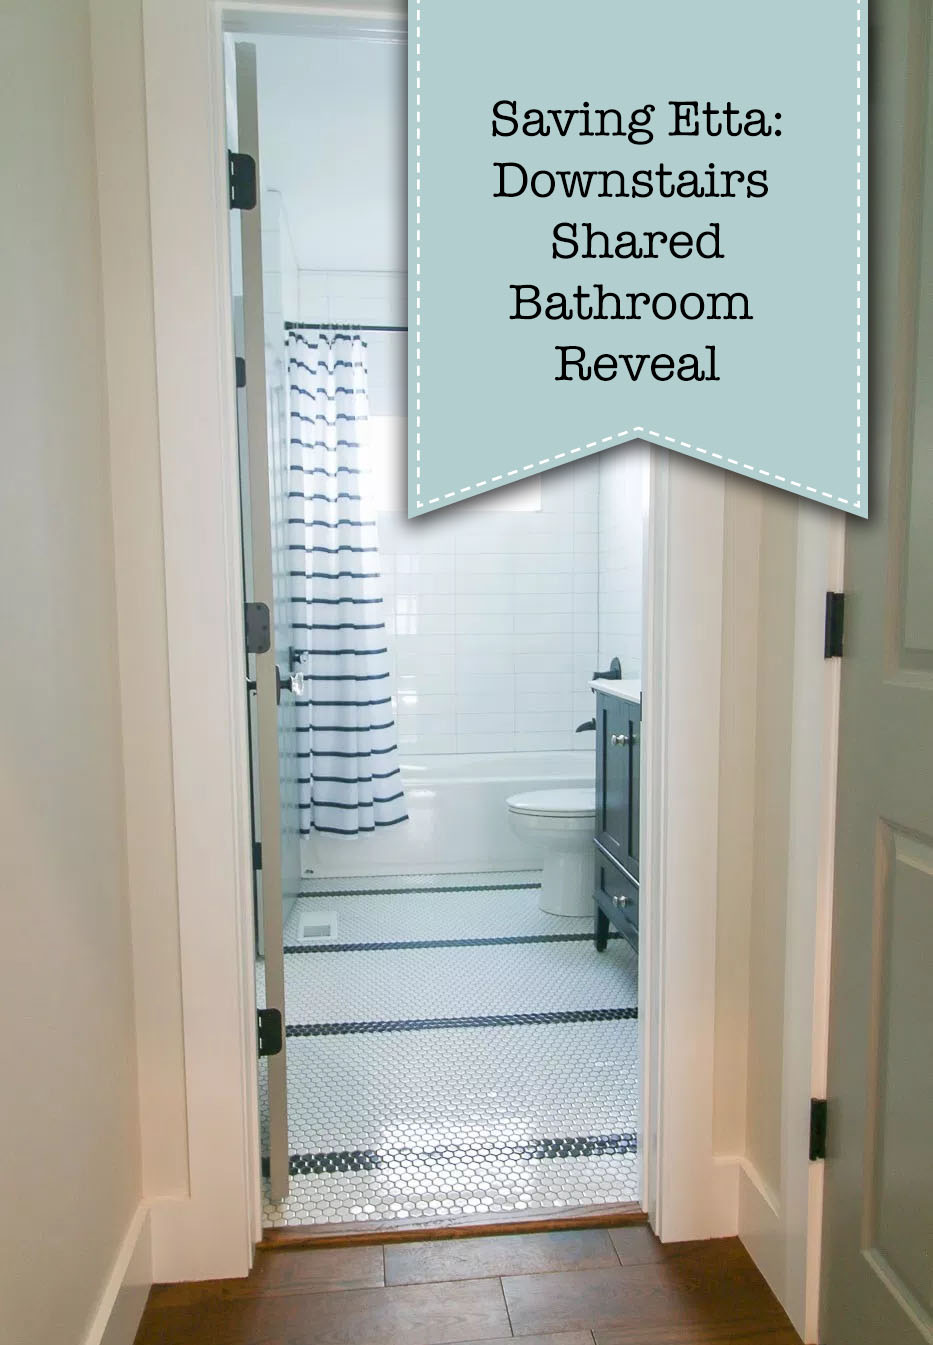 Saving Etta: Downstairs Shared Bathroom Reveal