Need a quick gift using scrap wood? A Creative Block Desk & Art Utensil Holder is an easy and fun gift to make and certainly a project that you can customize to meet your needs. Best of all, the kids can help with the painting step!

create_art_block_holders_sm

Creative Block Desk & Art Utensil Holder

Mother’s Day is this coming weekend! Have you decided how to show her your appreciation and love?! I did! My mother is a professional artist. She creates amazing paintings that inspire others and brightens their homes. For Mother’s Day I wanted to brighten her studio with these art utensil holders. I call them “Creative Blocks.”

Go ahead and raid your scrap pile and join us as we make these colorful and fun Creative Block Desk & Art Utensil Holders.

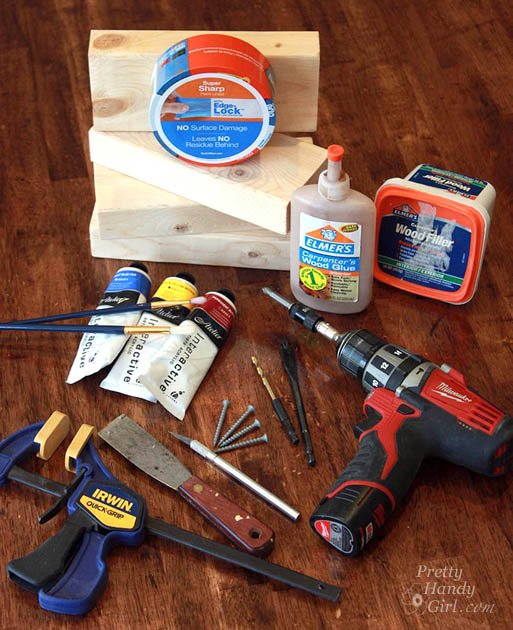
Materials:

(I’ve included affiliate links for your convenience. I earn a small percentage from a purchase using these links. There is no additional cost to you. You can read more about affiliate links here.)

materials_wood_blocks_sm

Instructions:

1. Block assembly: Select two 2×4″ scraps cut to the same length. Spread glue on one board and sandwich them together.

glue_blocks_together_sm

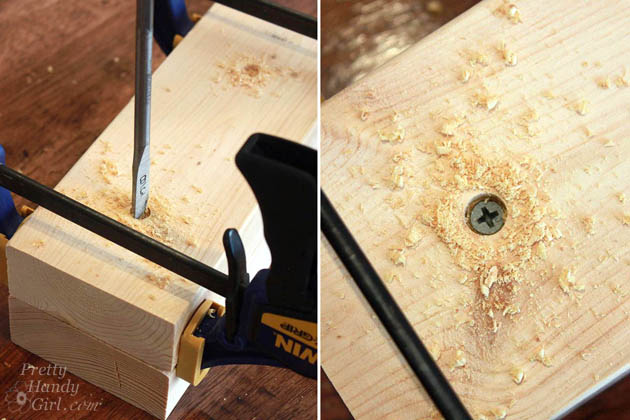
Clamp the wood together and drill two small holes to countersink the heads of the screws. Drive two screws into the bottom of the wood to hold the pieces together.

drill_blocks_together_sm

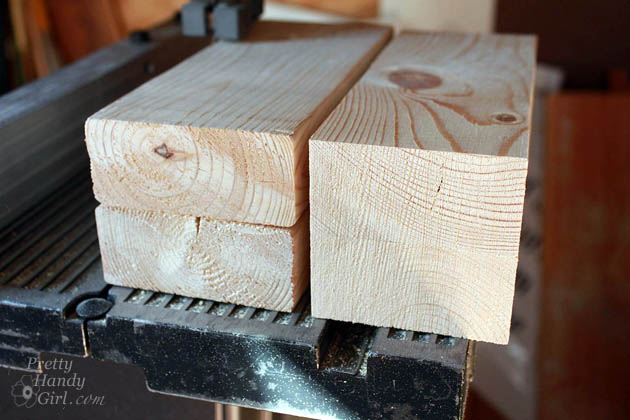
Use a band saw, jigsaw, or table saw to trim off the rounded edges of the wood so you have a square block of wood with straight corners.

square_off_2x4s_bandsaw_sm

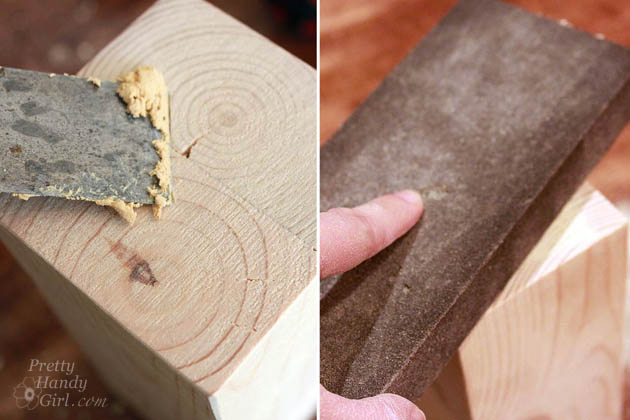
Putty any cracks or holes. Sand until smooth.

putty_and_sand_blocks_sm

2. Creating the mask:

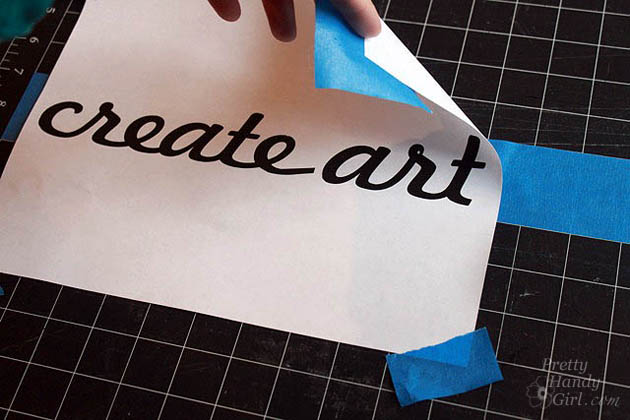
If you have a craft cutter (Silhouette or Cricut) you can create a mask in vinyl easily. But, if you don’t you can use the computer to print out your words. Lay the print out on top of a strip of Painter’s Tape. Use a few pieces of tape to secure the corners.

create_art_printout

Trace around the words with the X-acto knife (be sure to have a few fresh blades on hand.) Transfer the resulting cut-out tape onto the block of wood. Press the edges of the tape mask to secure the tape.

add_scotch_blue_tape_letters

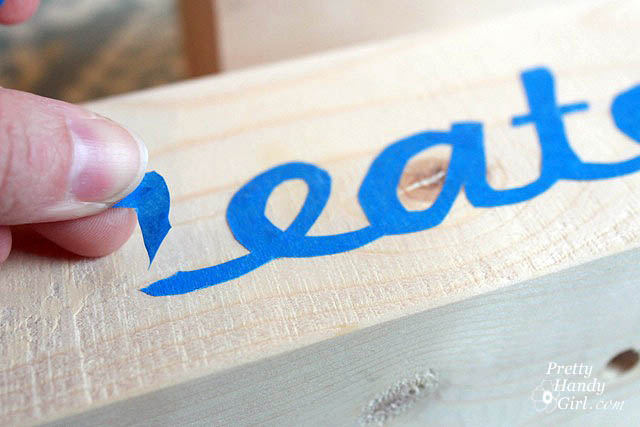
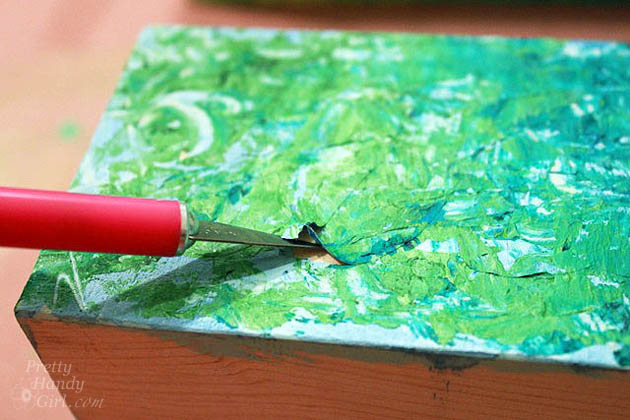
3. Painting the block: Paint a base color onto the block. Then use a brush and/or palette knife to dab thick paint over the block (minus the base.) Use the X-acto knife to gently peel off the tape mask. Let the paint dry thoroughly overnight.

lift_tape_up

4. Drilling Holes:  After the paint has dried completely, mark the location of the utensil holes with a pencil. Put a piece of painter’s tape on the drill bit to mark the depth of your holes. Clamp the block and drill holes at each pencil mark.

drill_holes

Dump sawdust out of the holes.

Wrap up the blocks in gift wrap and enjoy the look of joy as your Mom opens her Creative Block Mother’s Day gift!

create_pencil_holder_sm

art_brush_holder

You know, as an artist myself, I almost loved these too much to give them away. But, my Mom is worth it. (And I can make another set if I want ;-).)

create_art_block_holders_sm

For more last-minute Mother’s Day gift ideas and many other creative projects, check out the Gift Ideas section here on the blog.

PHGFancySignIf you liked this project, you’ll love these floating picture frames using more 2×4 scrap wood.

wood-block-picture-frames

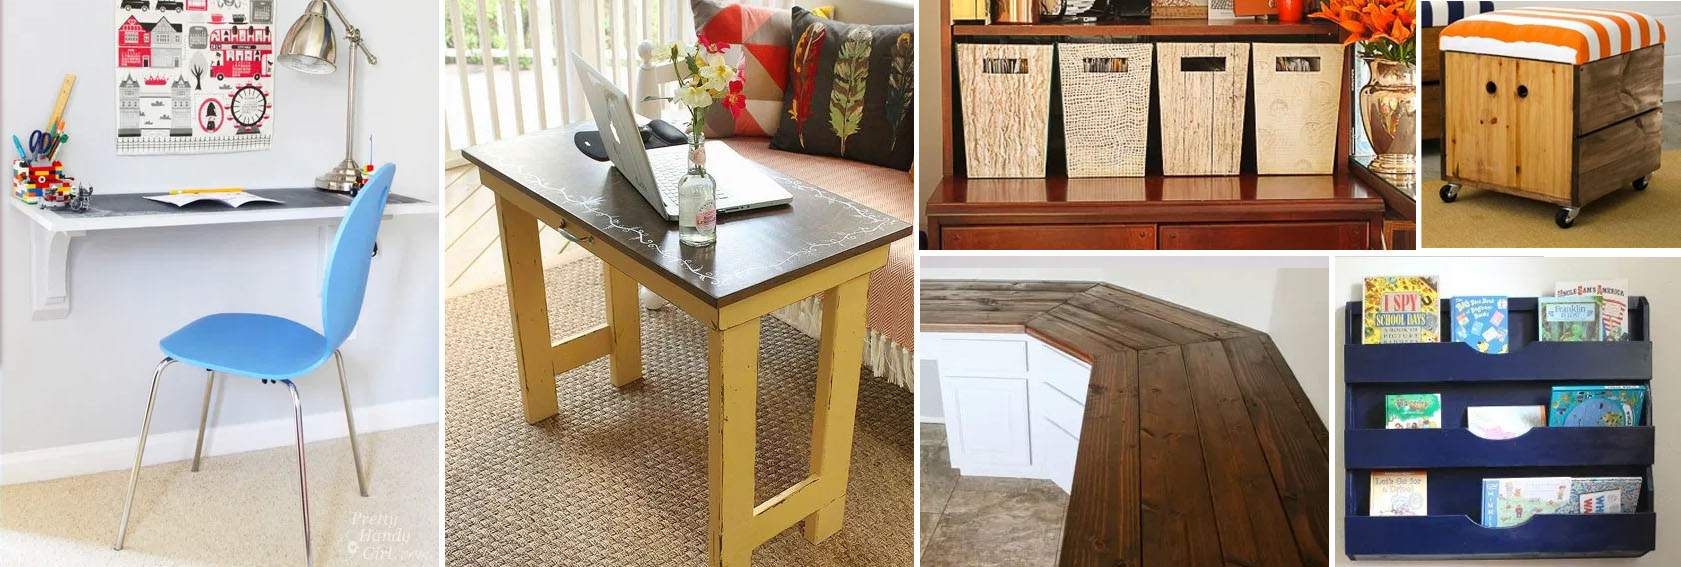
Many of you have suddenly found yourselves transitioning to a home office during this period of social distancing and feeling overwhelmed. No matter how much or how little space you have to work with, I’m here to help you create a cheerful and practical work space with these DIY Ideas for Setting Up a Home Office.

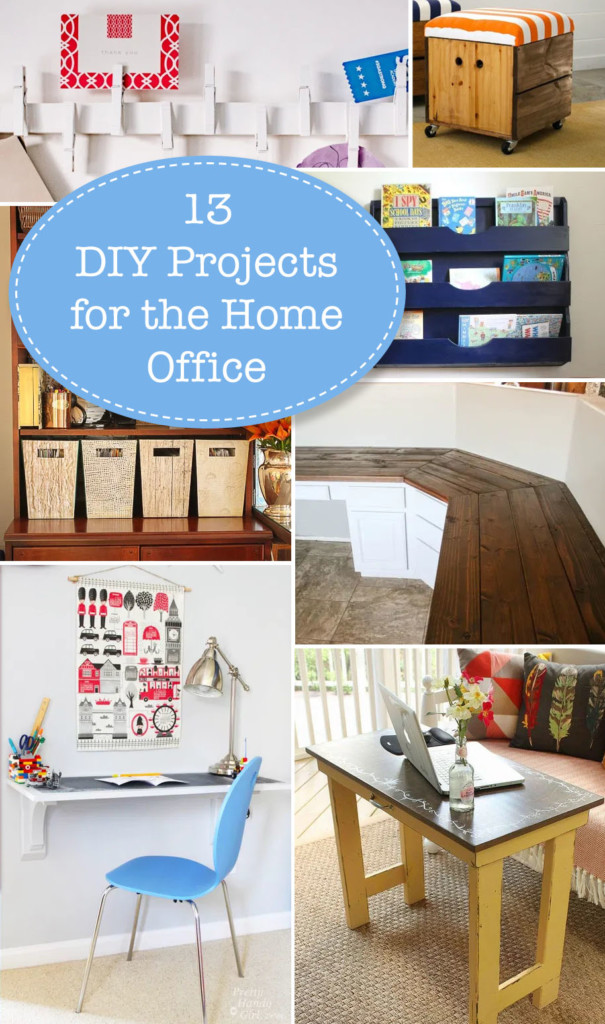
13 DIY Projects for Setting Up A Home Office
DIY Ideas for Setting Up A Home Office

I have been working out of a home office for quite a while now, so I thought I would share some of my most valuable ideas for getting organized to work at home. For inspiration, here are 13 easy, inexpensive, and practical projects to get you started.  Who knows, after you get set up, you may not want to return to your corporate office.

Wall-Mounted Desk Tutorial | Pretty Handy Girl

The great thing about this Wall-Mounted Desk is it can be small or large and it won’t take up any floor space!


Folding Laptop Writing Desk | Pretty Handy Girl

This Folding Laptop Writing Desk is the perfect height, and can fold up and store away when you’re not using it.


Build a Wood Plank Desktop for about $40

Here’s how you can create a simple (and most importantly, inexpensive) Wood Plank Desktop for about $40!


Magazine File Box Facelift | Pretty Handy Girl

Tired of your boring home office decor? Within minutes you could give a Magazine File Box a Facelift (or a storage box)!
I saved a lot of money reusing the old. Put ‘er there fellow savers!


DIY Wood Wall Organizer

If you’ve seen these cute Wall Organizers and thought: “I could totally make that,” I’m here to tell you, you can!


29 hacks to help you get more organized social media image

Here are 29 hacks to help you get more organized and help you transition to a better organized home office!


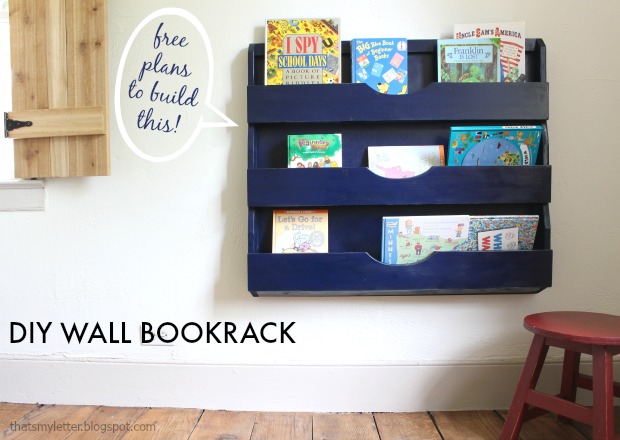
DIY Wall Bookrack

This Bookrack Building Project will have you organized and will free up space in no time.  The shelves are tapered and have plenty of depth for multiple books, files, or magazines.


File Cabinet Makeover Using Chalk Paint

Give a boring beige File Cabinet a SUPER cheap and quick makeover using chalk paint! I bet you can score a free file cabinet on your local buy, sell, or trade group. Or look on FreeCycle.org or Craig’s List.


12 DIY Home Storage Tutorials | Pretty Handy Girl

I’m taking advantage of these days at home to do a big “clean out”!  You’re sure to find one of these 12 DIY Storage Projects to help you organize your home useful.


Wall-Mounted Hutch Tutorial

This charming Cottage Style Desk and hutch is where I keep our lives organized! It takes up otherwise wasted space in the corner of our kitchen.


Scrap Wood iPad Tray

If you are accustomed to DIY projects, you probably amassed quite the stockpile of leftover wood. You’ll love this quick, easy, and cheap DIY iPad Holder!


rolling storage stool final

What’s better than getting organized with more storage? How about combining it with additional seating! Check out this easy tutorial for how to build a Rolling Storage Seat.


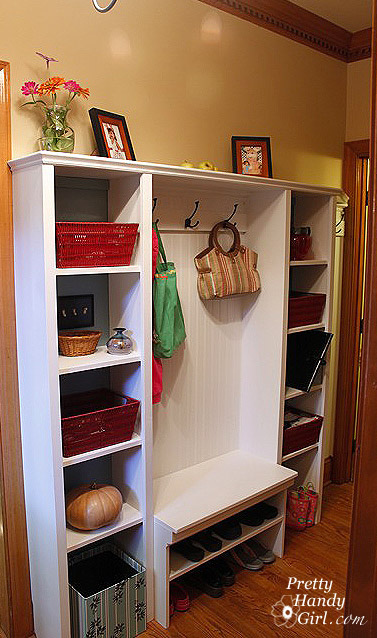
hallway storage unit

Although this wall Storage System was built custom for a mudroom, you can easily adapt it for a home office!

I hope you found some of these DIY Ideas for Setting Up a Home Office helpful. Gotta run and get set up for working tomorrow from home. Good luck to all of you, especially if you have family members who like to interrupt your workflow.

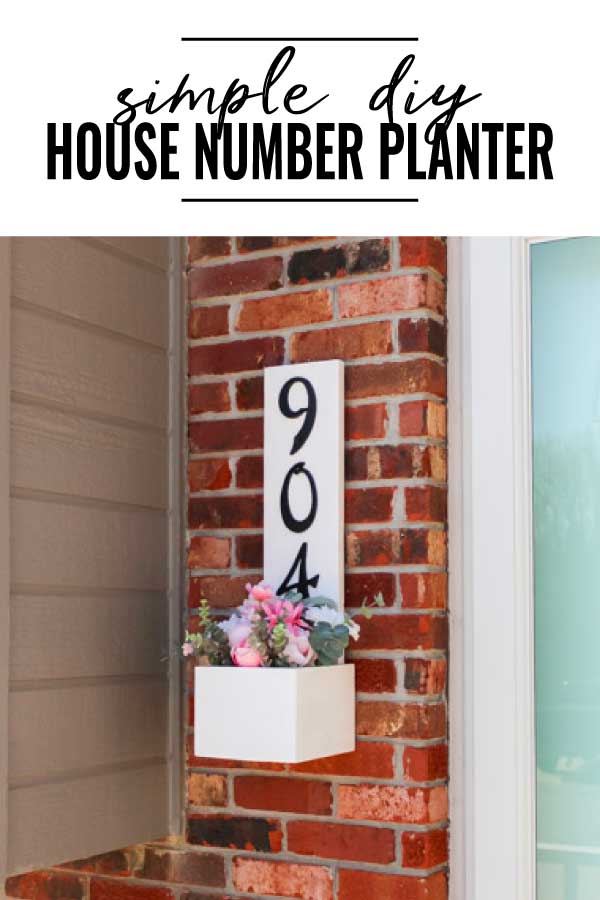
It’s important to have house numbers displayed on your home, especially if emergency crews need to locate your house. Today I’ll show you how to build your own DIY house number planter box.

diy house number planter box pin image

DIY House Number Planter Box

When we moved into our home in the Fall of 2018, I had no idea there were no house numbers on the exterior of it. I was clueless to the fact until a few months ago. A friend came to visit us from out of town and called from our driveway because she was uncertain if she was at the right house. All because we had no numbers on our home!

Ever since this issue was brought to my attention, I’ve been trying to come up with a creative way to add the numbers to our house, but make them stand out a bit. We have wood siding and brick around our front door, so I was also a little cautious about wanting to drill into either. I figured out a solution to all of those things with this DIY house number planter. It’s functional, creative, and I didn’t have to drill any holes into the side of our house.

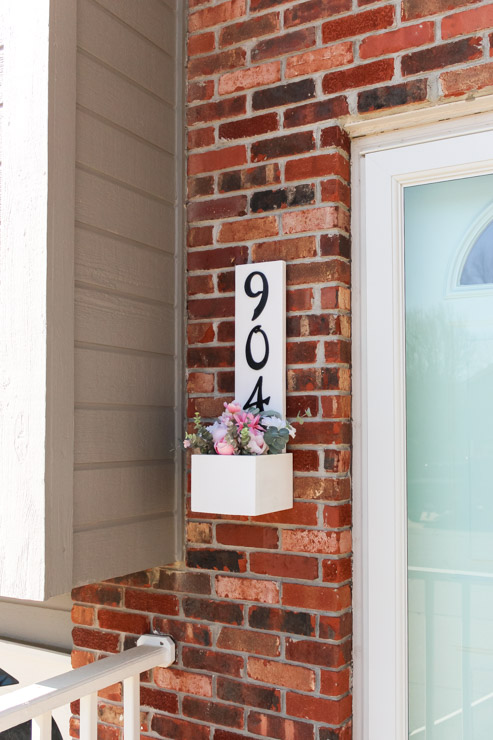
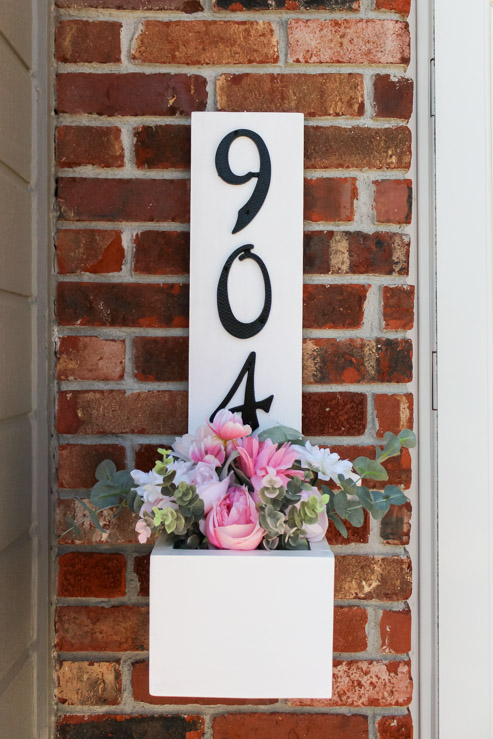
Finished view of house number planter box, filled with Spring florals
Let me show you how you can build your own house number planter. Don’t be intimidated by the number of materials needed for this project, it’s actually simple to build.

Materials:

(I’ve included affiliate links for your convenience. I earn a small percentage from a purchase using these links. There is no additional cost to you. You can read more about affiliate links here.)

Instructions:

Step 1

Measure and cut a piece of wood to 24” long for the back of the house number planter.

Step 1 measure and cut the wood pieces
If you have more than 3-4 numbers for your street address, you may need to cut the back piece longer.

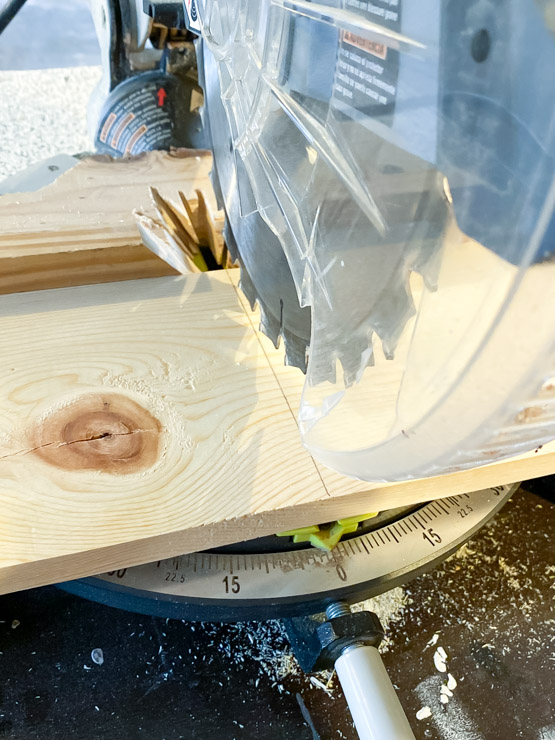
Cut the wood with a miter saw or circular saw
Cut three pieces of wood to 6 ¾” for the sides and bottom of the planter box, and one piece to 7″ for the front.

Step 2

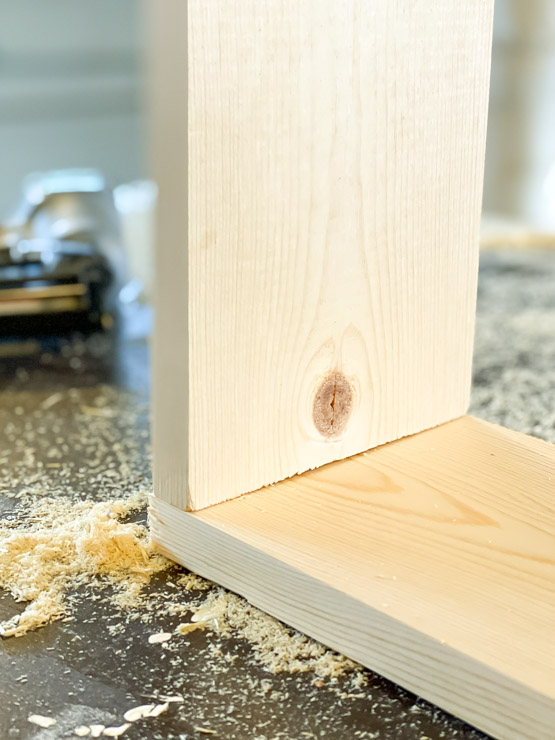
Using wood glue and a nail gun, attach one 6 ¾” piece to the bottom of the 24” board. This will be the bottom of the house number planter. Place a thin layer of wood glue between the two boards before securing with brad nails.

step 2 attach the planter box pieces together with a nail gun and wood glue
Repeat the step above to attach the other two 6 ¾” pieces to each side of the box, and finally add the 7” piece to the front of the box.

attach sides and front pieces of wood to complete the planter box

Step 3

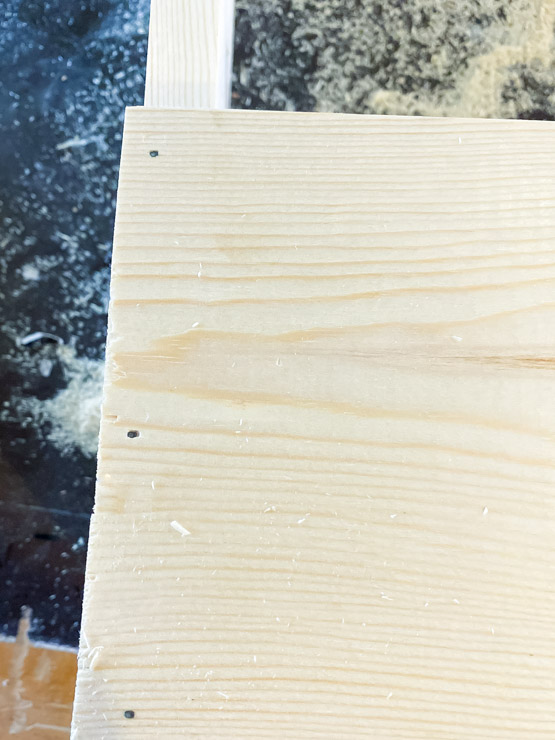
Fill in the holes left by the nail gun or any imperfections with wood filler using a putty knife. Let it dry completely before moving on to the next step.

Fill in nail holes and imperfections with wood filler

Step 4

Using a palm sander with 150 grit sandpaper, give the entire piece a good sanding (especially where wood filler was used). Follow with 220 grit and 320 grit if needed to achieve a smooth finish. Use a tack cloth to remove any sawdust left behind.

Prepped house number planter and ready for paint

Step 5

If your wood has any knots, prime them first with a strong primer like BIN primer. Otherwise, the knots will start to appear after a year or so. Now give the house number planter 2-3 coats of white (or color of your choice) outdoor paint using either a foam roller or a foam brush. Let the paint dry in between coats. Lightly sand using 320 grit sandpaper when finished for a smooth surface.

Step 6

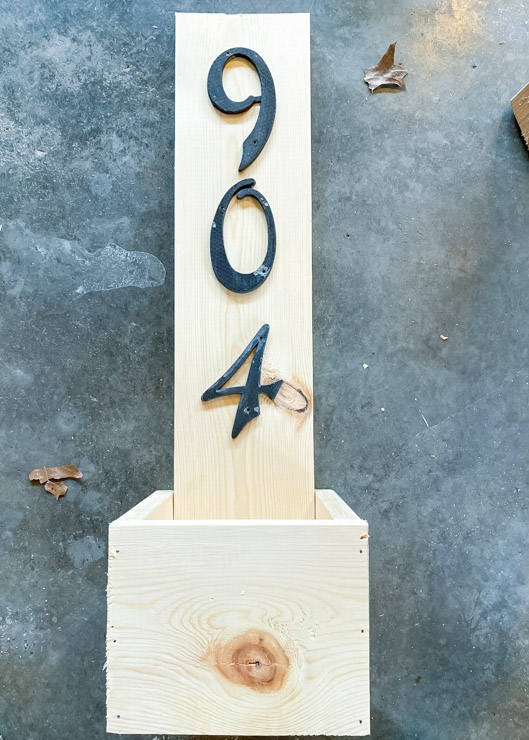
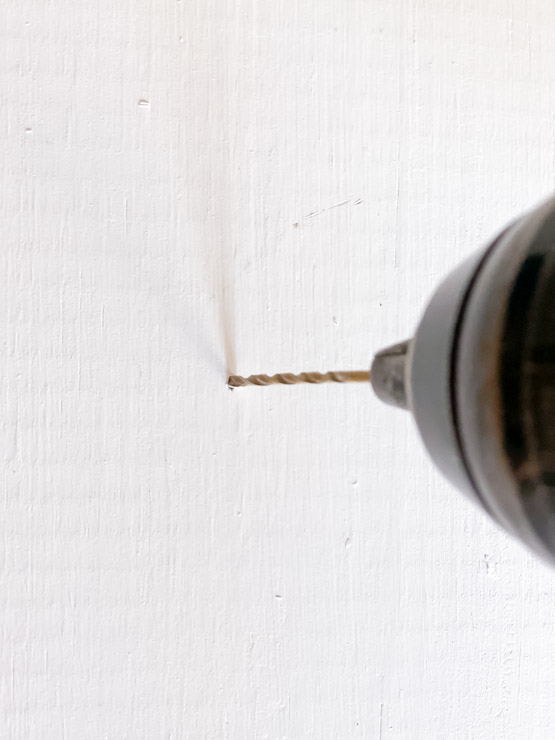
Attach the house numbers using the hardware provided. It may be necessary to pre-drill holes to avoid splitting the wood.

Drill small pilot holes for the house number screws to avoid splitting the wood

Step 7

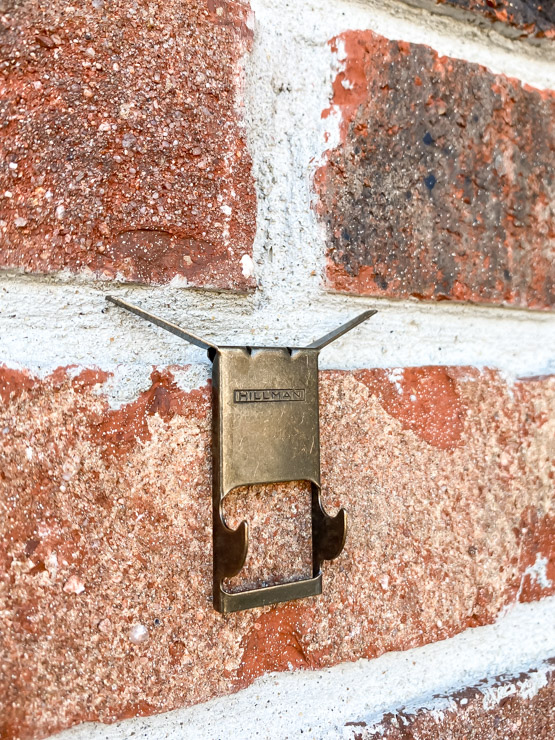
If the planter will be hanging on brick, using a brick clip can be a cost-effective way to hang without drilling into the brick or mortar.

Brick hanger placed and ready to use
Attach a large sawtooth hanger to the back of the house number planter. Place the brick clip onto the desired location and simply hang the planter onto the clip. No drilling required! You can also hang the planter on a wood surface by using wood screws. I’d recommend drilling directly through the planter into the wood surface behind using 1 ½” screws. Add a bit of paint to the screw head if necessary to hide them.

Finished exterior view of house number planter

Step 8

Add some flowers or greenery to the planter. I would recommend placing a few already potted plants inside the box, rather than planting directly into it.

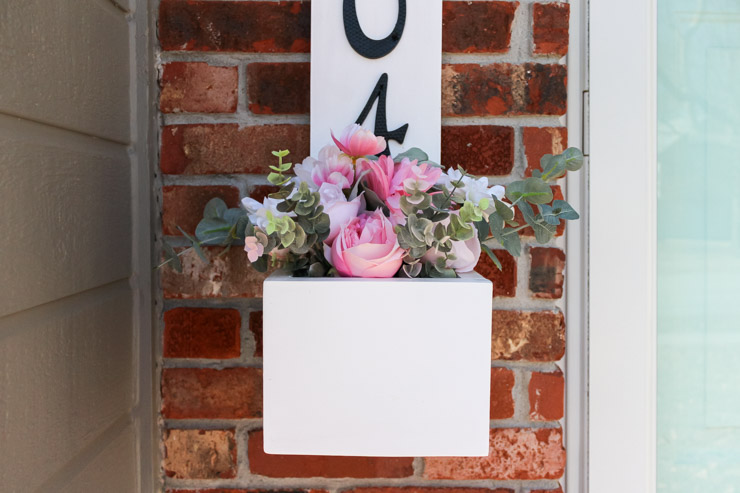
close up of fake Spring florals
Now you can have a beautiful planter box that is also functional. You should feel mighty proud you built it yourself! Depending on the season you may like to add different decor to the planter box.

Finished diy house number planter box

It’s still Winter in the Midwest, so fake flowers will have to do for now, but I plan to add some potted succulents to our house number planter for the Summer months. In the Winter you can use some evergreen trimmings, or even fill the box with colored ball ornaments. For Fall wouldn’t it be beautiful with some small mums tucked in there?

I’m Amanda, and I am the creator and voice behind the food and DIY blog, Domestically Creative. What started as a place to share updates with friends and family after we moved from Illinois to Tennessee and then to Texas, turned into a passion for finding creative and frugal ways to feed us and decorate our homes.

I have always had the “make it myself” attitude and I’m not afraid to bust out the power tools or get creative when it comes to decorating our home on a budget. You can usually find me scouring the local thrift stores, garage sales and estate sales looking for my next makeover (like this litter box cabinet), or dreaming up ways to make our new house feel more like home. My most recent project was giving my home office a much needed facelift. Some of the plans included creating a fun inspirational accent wall and adding pegboard to store my craft hoards.

I currently call Missouri home, where I live with my husband, dog, and 2 cats in a pretty dull, late 90’s split level. My husband and I both love to travel the U.S and recently purchased a small travel trailer to tag along in our journeys. In our free time together we can usually be found working together on a home project, exploring a new place, or just lounging with our pup, Delilah.

I’d love for you to connect with me on social media via Facebook, Instagram, Pinterest and Twitter!

See all of Amanda’s tutorials HERE.

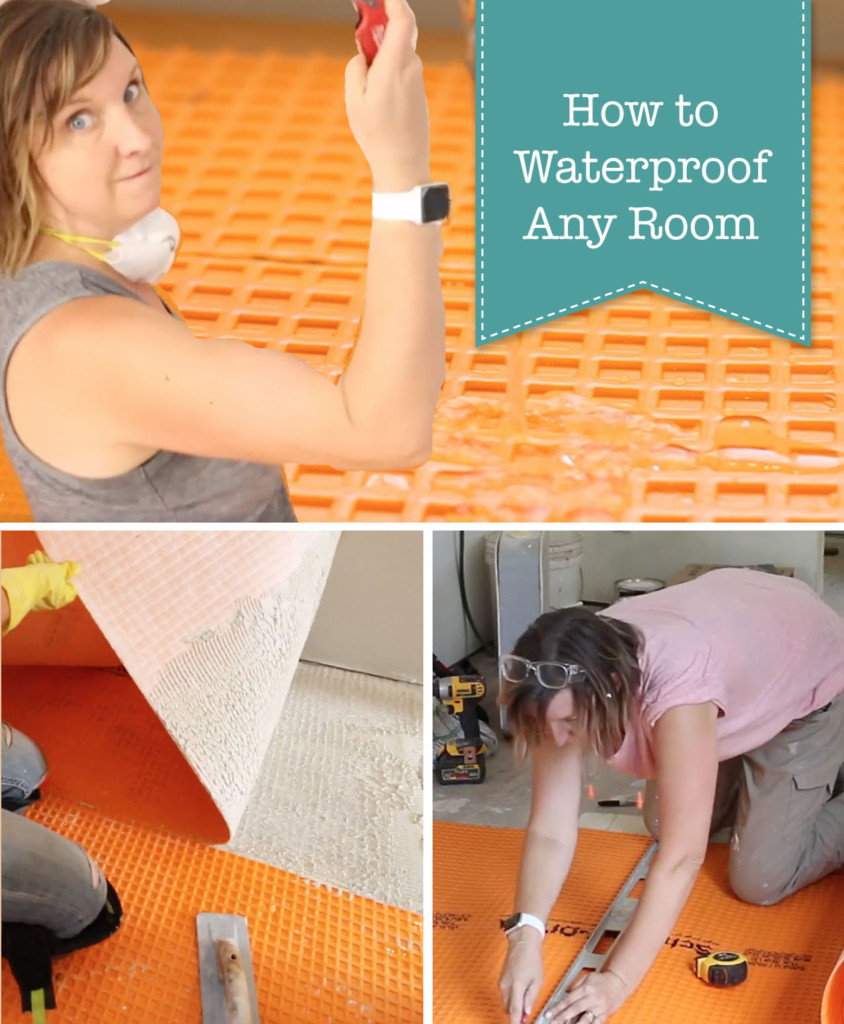
Today we’re prepping to tile in the kitchen and bathrooms. Having seen firsthand how much damage water can cause to a home, I want to show you this tutorial for How to Waterproof Floors!

Waterproofing Floors in Any Room
Renovations are finally moving forward at Millie’s Remodel. This is the point where I feel like we already hit rock bottom and now we’re finally on the rebound. You might remember we used a self-leveling concrete in the kitchen last week. Now it’s time to waterproof the floors to prevent damage from ever happening again!

Last year I took two Schluter classes and learned about waterproofing, uncoupling membranes, and tips and tricks to keep your tile job looking flawless for a lifetime. What I learned over the four days blew my mind. I learned why and how shower systems fail. But, most importantly, I learned how to properly prepare surfaces for tile using waterproofing membranes. Today we’ll just be talking about waterproofing a floor, but I’ll have another tutorial for you soon so you can learn how to waterproof walls too.

Materials:

(I’ve included affiliate links for your convenience. I earn a small percentage from a purchase using these links. There is no additional cost to you. You can read more about affiliate links here.)

Why should you waterproof a floor?

Before we get started, I want you to fully understand how waterproofing a room can actually save you money and save you from the headache of having a leak in your home.

If you have a kitchen or a bathroom, chances are you’re going to have a leak in your lifetime (or your home’s lifetime) if it hasn’t already happened. One of the best things you can do is to install waterproofing materials so water can never damage your floors or floor framing again. I believe so strongly in the Schluter products, that all the properties I’m working on (including my own) will have Ditra installed on the floor before tiling.

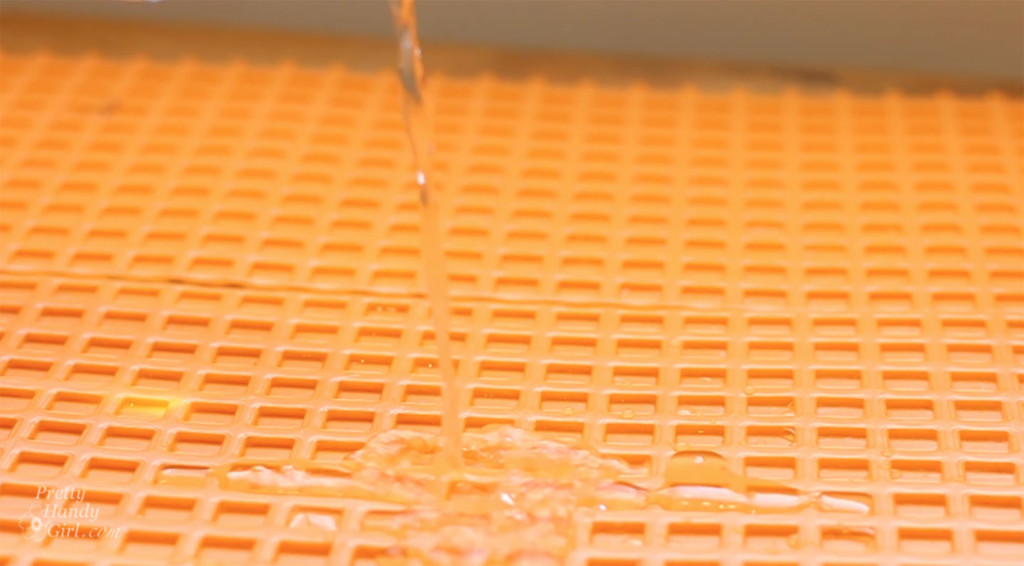
By using the Schluter Ditra uncoupling and waterproof membrane in conjunction with Kerdi band around the perimeter of the room, I can waterproof the entire floor. Which means I don’t have to worry about rot or mold happening. Any little leaks will sit on top of this membrane until I see it because the water will rise instead of seeping into your floor or walls.

Ready to get started? Let me show you how to waterproof any room in your house!

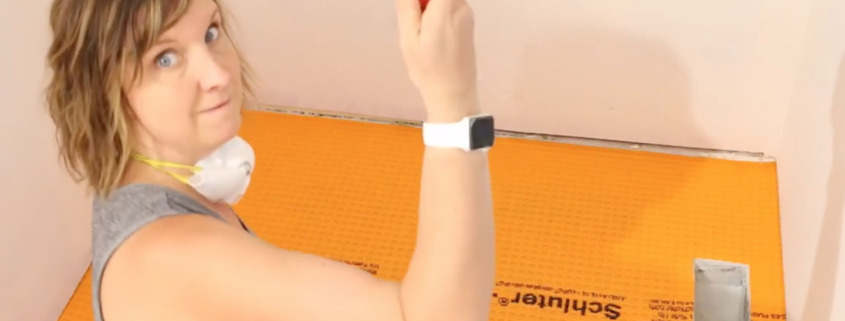
For your convenience, I made a video to help show how to install Schluter waterproofing products and how to fully waterproof a room!

Instructions:

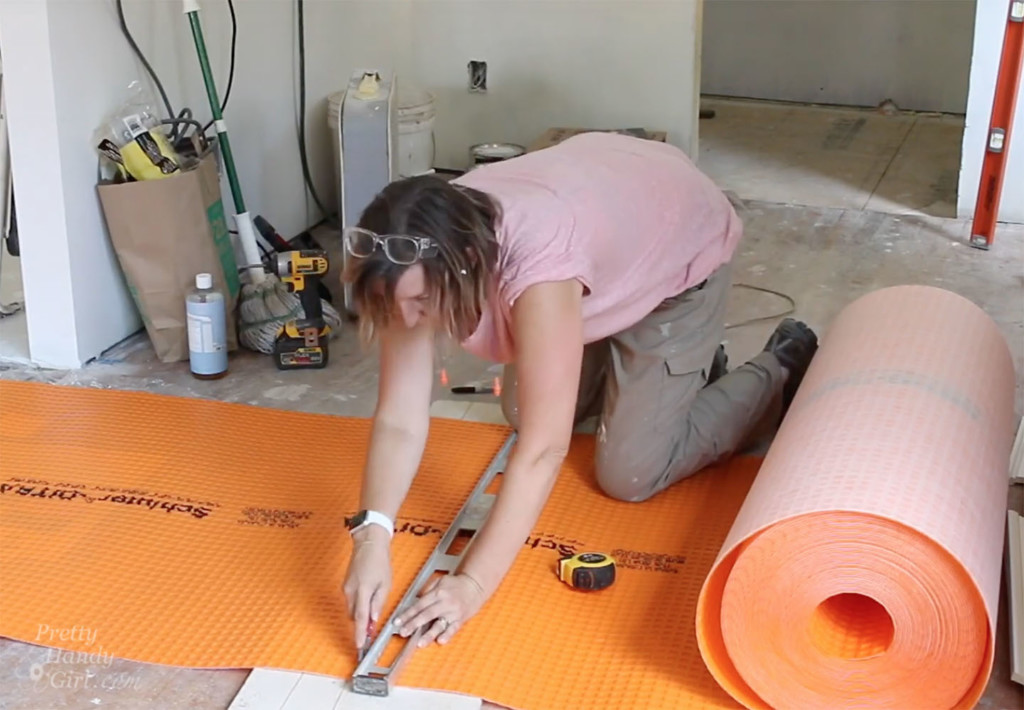
  1. Cut open your roll of Ditra and roll it out onto a scrap piece of wood or something you can cut on.
  2. Measure the room you want to waterproof and transfer the dimensions onto your Ditra membrane. Use a straight edge and a sharp utility knife to cut the Ditra. You might need to make a few passes with the knife to cut completely through the Ditra membrane.
  3. Test fit the Ditra in your room. Cut out a hole for your floor vents by pressing your knife through the membrane where the vent is and remove the material up to the edges of the duct. Cut the rest of the pieces to fill the room. Do not overlap the Ditra material.
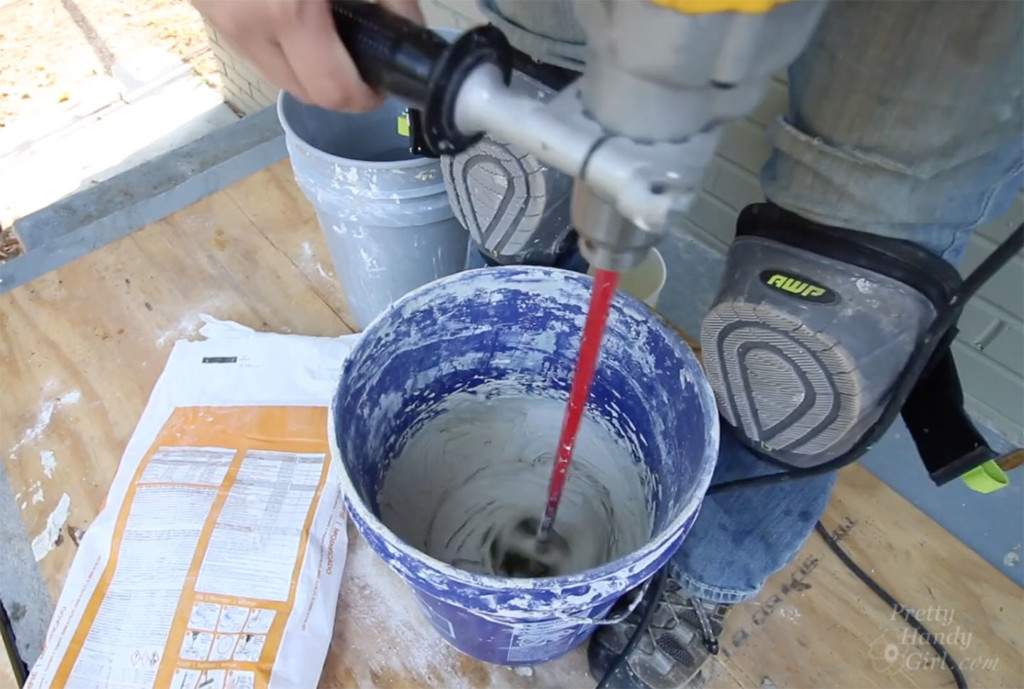
  4. Now it’s time to mix the thinset. When using Schluter Ditra it’s highly recommended to use the Schluter All Set. This mortar is specifically manufactured to cure against the waterproof membrane. Read the instructions on the packaging and mix your thinset as directed.
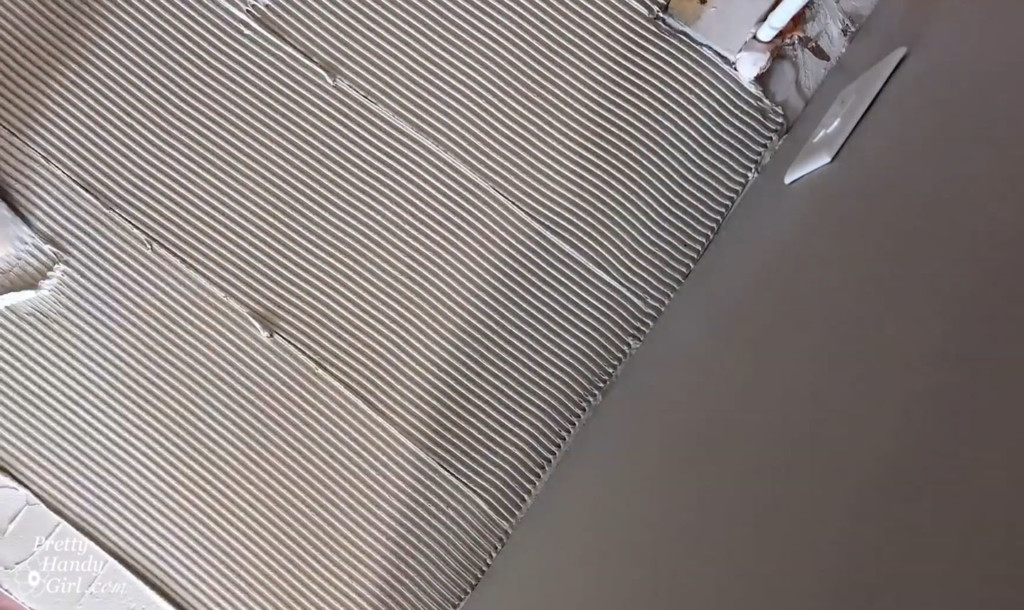
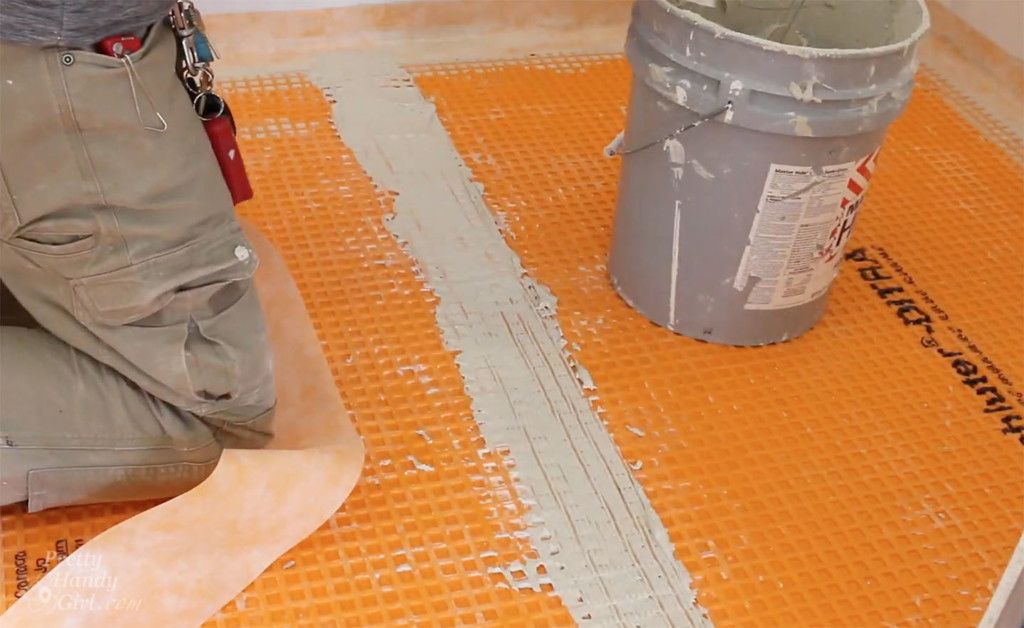
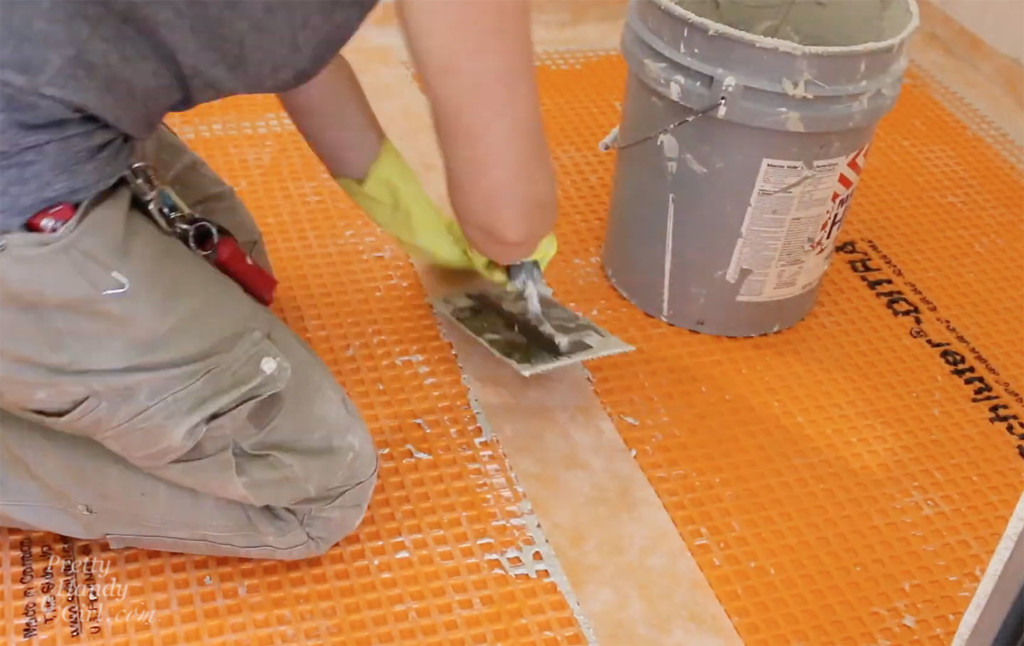
  5. Use a wet sponge and clean water to clean and wet the subfloor. Spread the thinset onto the floor using the Schluter Ditra trowel. Make sure you have good coverage on the floor.
    Then use the notched trowel to comb through the thinset at a 45° angle.
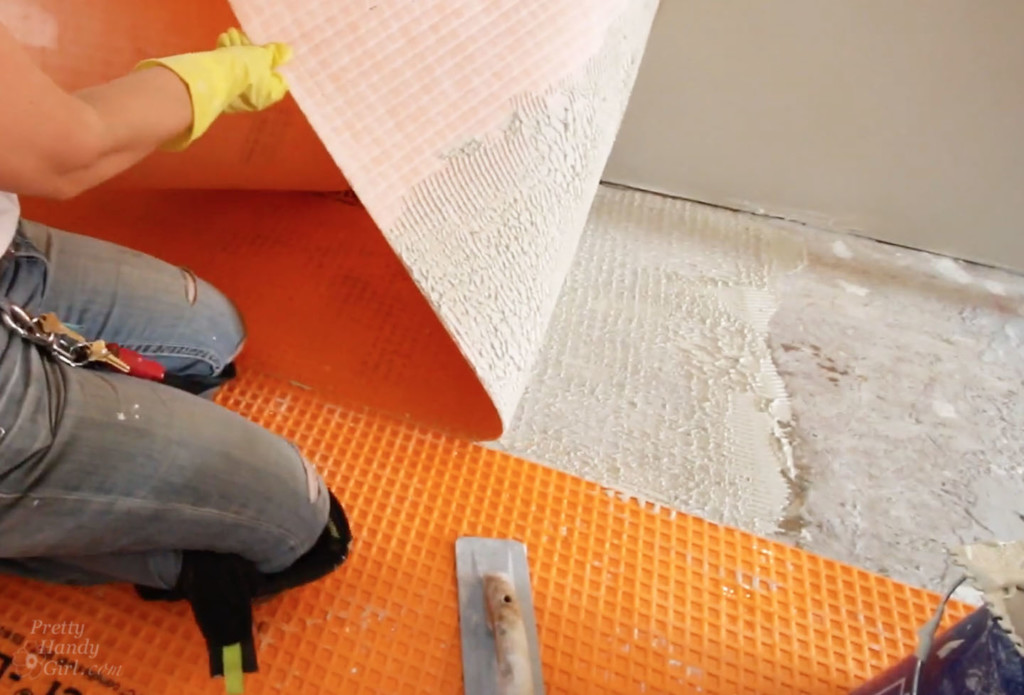
  6. Lay the Ditra membrane on top of the thinset and use a smooth float to press the membrane into the thinset. In the beginning, you should roll back a corner of the Ditra to make sure you have full coverage onto the backing of the membrane. Place the Ditra back down and use the float again to make sure the membrane is pressed into the thinset.
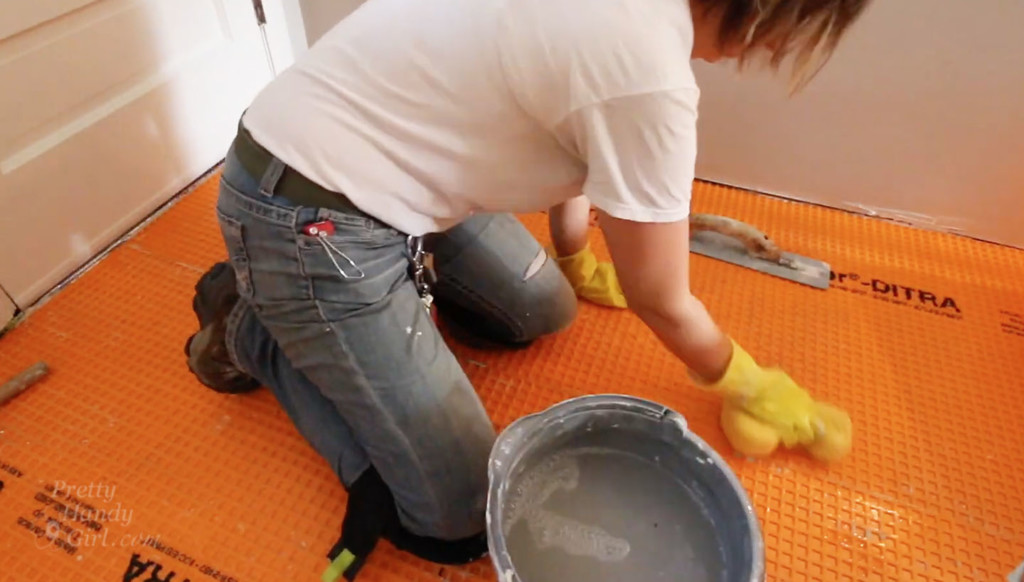
  7. Use a wet sponge to clean out any mortar that has squeezed out the seams or edges.
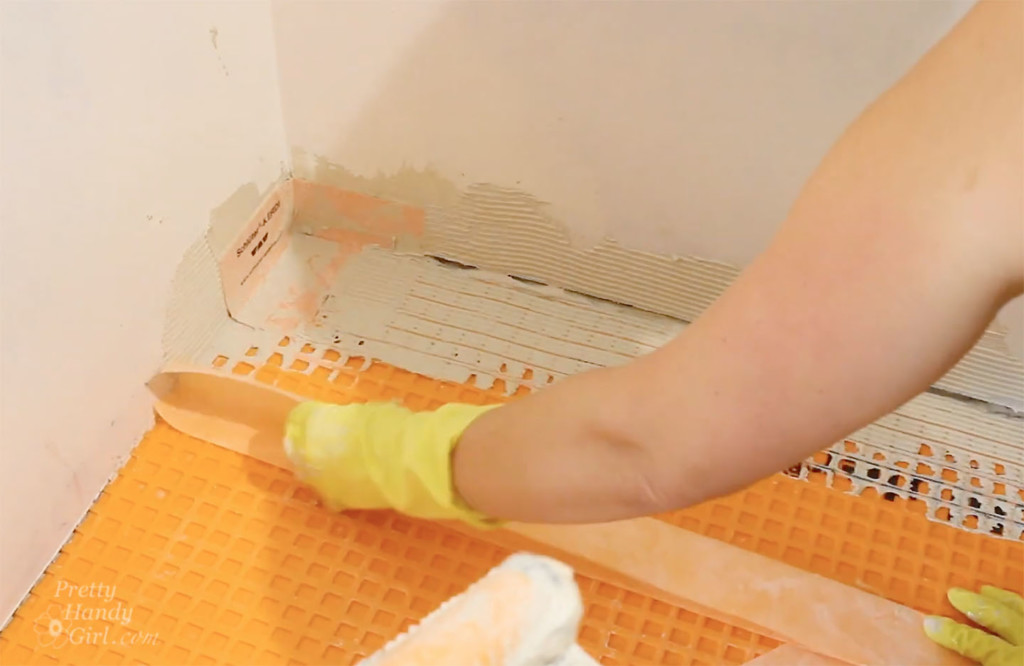
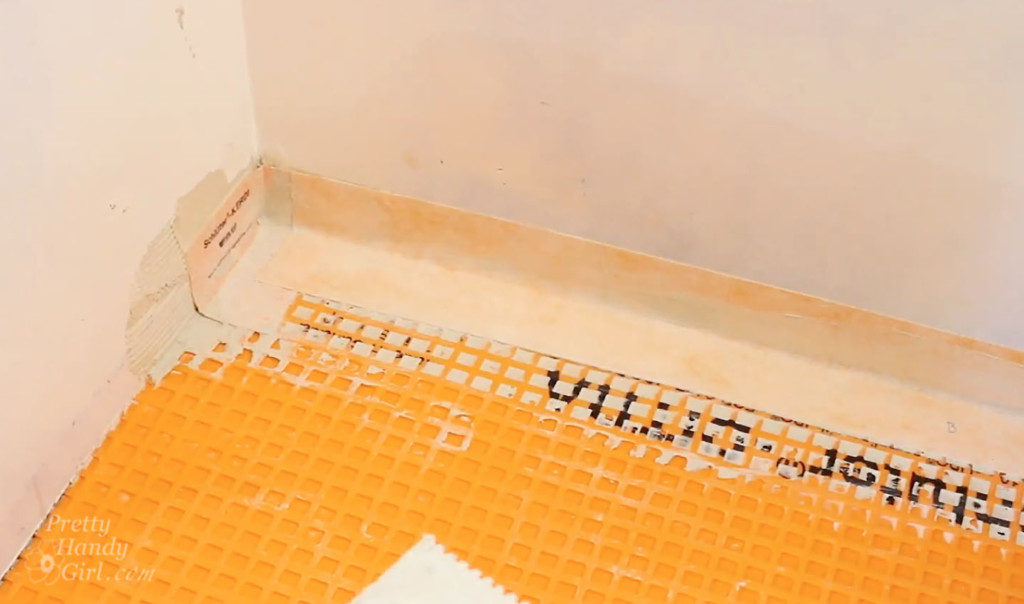
  8. Once all the Ditra has been installed into the subfloor, you’re ready to seal the perimeter and seams. Grab a Kerdi corner piece for each corner of the room. Using the Kerdi trowel, apply thinset mortar to the inside corner of the room. Use the notched side to comb through the thinset. Place the Kerdi corner into the thinset and use the flat side of the trowel to embed and scrape along the Kerdi.signature
  9. Now you’re ready to install the Kerdi Band on the straight sections of wall. Be sure to cut your Kerdi band so it overlaps the corner pieces by at least 2 inches. I like to pre-fold my Kerdi Band by creasing it in the middle so it’s easier to install in the corners. Apply the Kerdi Band to the wall and floor using the same technique as the corner.
  10. Clean up any excess mortar leaving a smooth surface for tile installation.
  11. Now it’s time to complete the waterproofing of the room by sealing the seams between the Ditra sheets. Cut your Kerdi Band so it overlaps any perimeter band by at least two inches. Apply the thinset over the seam, use the notched trowel to create ridges in the thinset.
    Then embed the Kerdi band into the mortar and run the flat side of the trowel over the band to smooth the thinset and embed the band.
  12. Clean up any excess and allow the thinset to cure before tiling.

Once the thinset has cured you can tile your room and rest easy knowing this room is waterproofed and there’s no way the subfloor will rot from a sneaky little leak. Or a big leak if you have kids that like to splash out of the bathtub. I know this risk all too well from my own boys.

I hope you found this tutorial helpful and you’ll consider using Schluter waterproofing materials before you renovate your next “water” room.

Disclosure: I was provided with some Schluter materials for this project. I was not told what to write. All opinions are my own. I am particular about the brands I represent and will always let you know when you are reading a post with complementary products or a sponsored post.

After demolition, I realized several water leaks left some low spots in the kitchen floor at Millie’s Remodel.  Today I’m going show you how to use self-leveler to fix a sagging floor.  I’ll also show you a few tools you’ll find helpful when pouring self leveler.

Tips & Tricks to Self-Level a Floor at Millie’s Remodel

Can I level with you? LOL. Seriously, when I bought the Millie’s remodel house I knew there were some plumbing leaks. But, I had no idea how much damage the water had done to the floor in the kitchen. I discovered a pretty decent hump in the middle of the room with low spots on either side. To combat the hump my assistant, Stephanie, and I secured cedar shakes to the floor in one of the low spots. Then we laid 1/2″ OSB plywood on top. This helped a little bit with the bow, but we still had some issues.

One corner of the room was 3/4 of an inch lower than the other corner. Plus you could still detect the hump. I decided the best way to deal with the dips, hump, and creating a flat surface to tile onto was to pour a self-leveling concrete in the kitchen.

Prepping the Room for Self-Leveling Concrete Pour

Before pouring self-leveler, you should understand the properties of this mix. When you first mix the product, it’s very liquid and will flow to the lowest spot in your floor. It’s important to seal any cracks or gaps in the floor or your mix will seep through the cracks. You also need to cover any vents or you’ll watch all the mix pour into your ducts (no bueno!)

I like to use rigid foam insulation to prep the perimeter of the room. This creates a form and keeps the liquid from flowing outside the room. I use a sharp utility knife to cut strips from a big 4×8 sheet of rigid foam insulation. I found it easiest to use my trim nailer to nail the pieces to the perimeter of the room. Then I sealed the joint where the insulation and subfloor meet with a line of caulk. If you’ve never mastered spreading caulk quickly and cleanly, you’ll want to see my tutorial for using a caulk gun.

Now that the prep work is done, you’ll need to gather a few tools for this project.

(I’ve included affiliate links for your convenience. I earn a small percentage from a purchase using these links. There is no additional cost to you. You can read more about affiliate links here.)

materials for self-leveling concrete project

Materials:

Optional: Work boots you can clean off easily

Priming the Floor:

Self-Leveling floor primer

Before pouring the self-leveling concrete, read the directions on the bag. Most leveling mixes specify you apply one coat of primer to a clean floor and let it dry before pouring the self leveler.

Tips for Spreading Self-Leveler:

Watch this video to see how we quickly and efficiently spread the self-leveling concrete mix:

Can you believe how helpful a simple garden rake is for spreading self-leveler? Me either!

After pouring your self-leveler, use a long level to check to see if you need to pour in more areas. Finally, use the concrete float to smooth and feather the edges of the self-leveling material into the floor.

Stay off your concrete pour until it has hardened. Make sure you clean any self-leveler off your tools, boots, or areas you don’t want it to harden onto.

After the self-leveling concrete has hardened, you are ready to tile or install your flooring!

I hope you found this tutorial helpful! Are you subscribed to my YouTube channel? If not, you’re missing out.

P.s. You might also find this tutorial helpful if you have a concrete floor that is damaged or chipping. Follow this tutorial for patching a damaged concrete floor.


A special thank you to the Millie’s Remodel Sponsors:

The Millie’s Remodel project sponsors have donated materials for the Millie’s Remodel project. As you know I am very particular about the brands I work with and recommend. As a general contractor, I choose the products used on my projects wisely to make sure they last a lifetime. Therefore, I have no reservations putting my name behind each and every one of these sponsors.

millies remodel sponsors logos