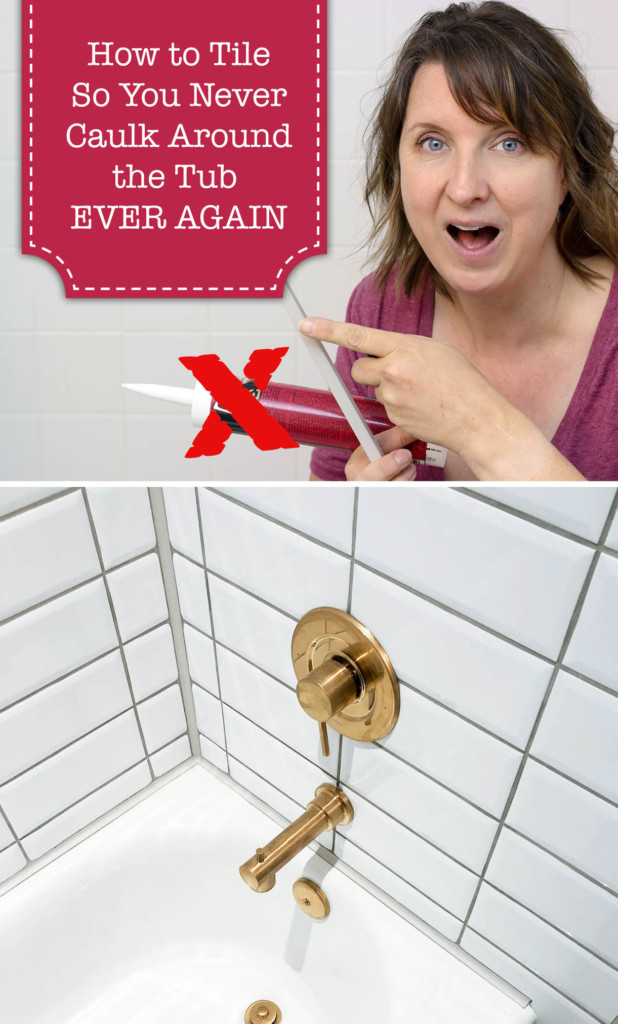
I’m back with another Millie’s Remodel update. This time we’ll be tiling, and I’ll share how to tile so you’ll never have to caulk around your tub ever again!
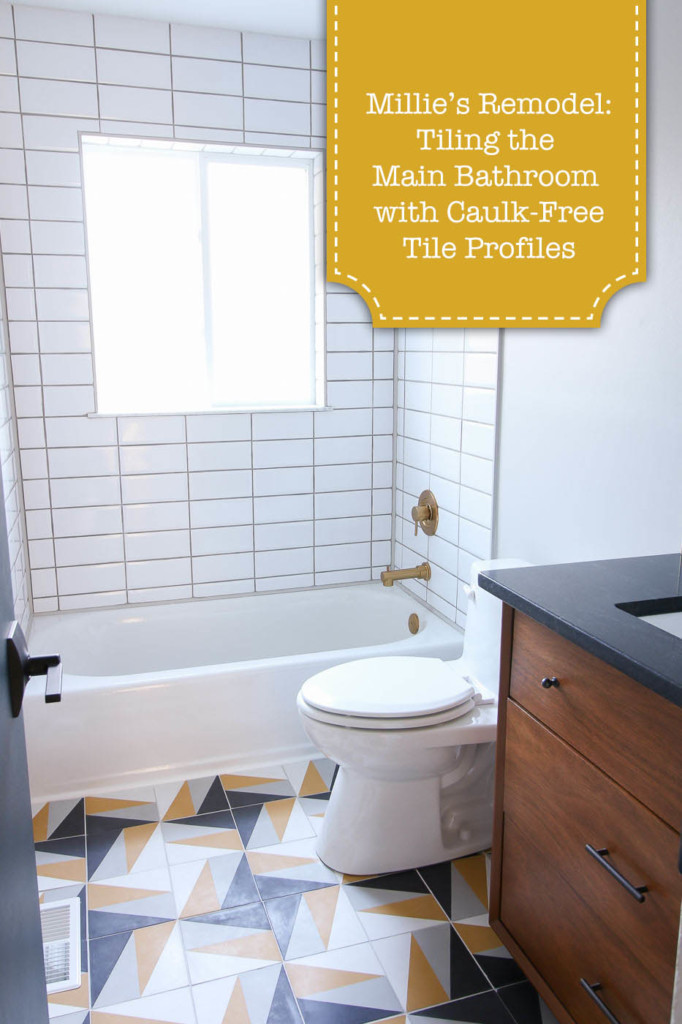
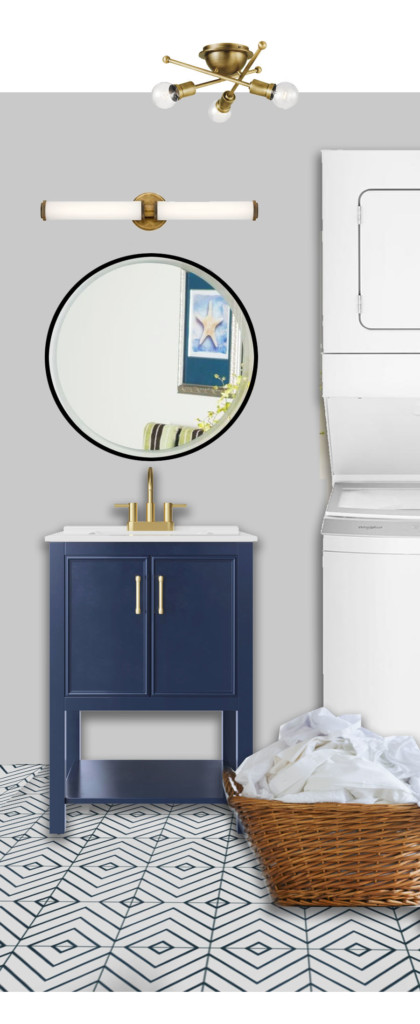
Millie’s Remodel: Main Bathroom Tiling with No Maintenance Profiles
How are you doing? I’m so happy to be back with another Millie’s Remodel update for you. If you missed my post the last week, this is why I disappeared for six months. Thankfully I’m back to working and posting tutorials and updates for you here on the blog. Thank you for your support over the years, I feel like we are family by now, which is why I have some game-changer news to share with you. If you do this one thing on your next tile job, you can forget about ever having to replace or re-caulk EVER AGAIN!
A while ago (seems like a decade ag0 because 2020 has dragged on too long), I took some professional tile classes with Schluter. I learned a lot, but on the last day of the course, we learned about tile profiles. Since I was just finishing up the Millie’s Remodel project, I knew I had to implement them into the main bathroom tub/shower combo. This one decision prevents me from ever having to caulk around the tub or the walls in that bathroom. As a landlord, this is one less thing I’ll have to maintain at the house!
These are the materials I used to tile the main bathroom. I’ve also linked to the profiles I used, but you’ll want to scroll down and watch the video for more details.
Materials:
(I’ve included affiliate links for your convenience. I earn a small percentage from a purchase using these links. There is no additional cost to you. You can read more about affiliate links here.)
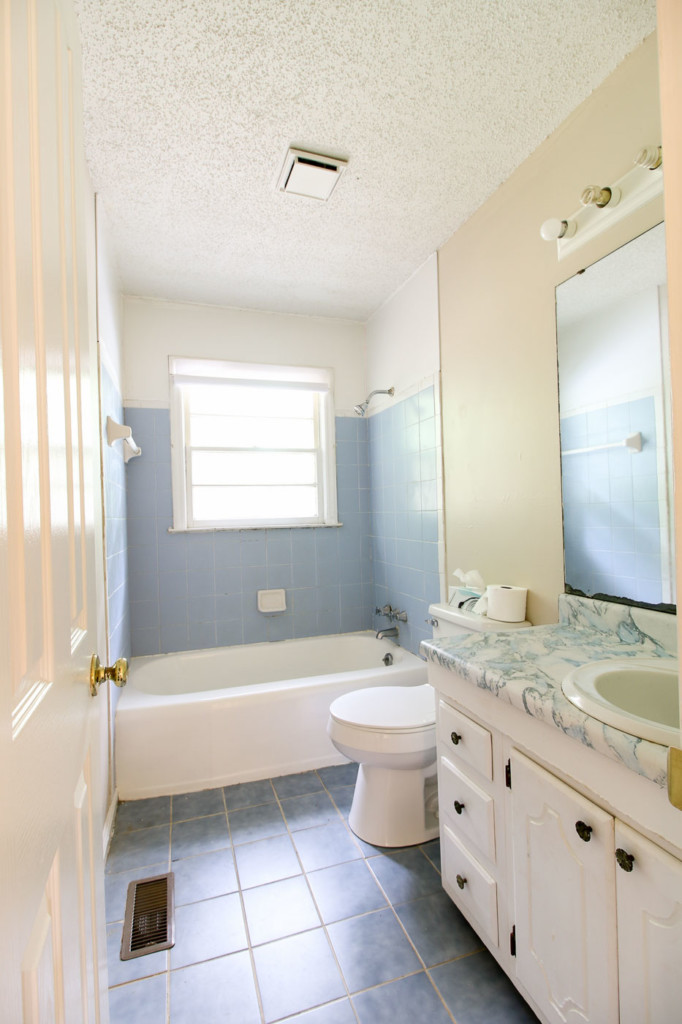
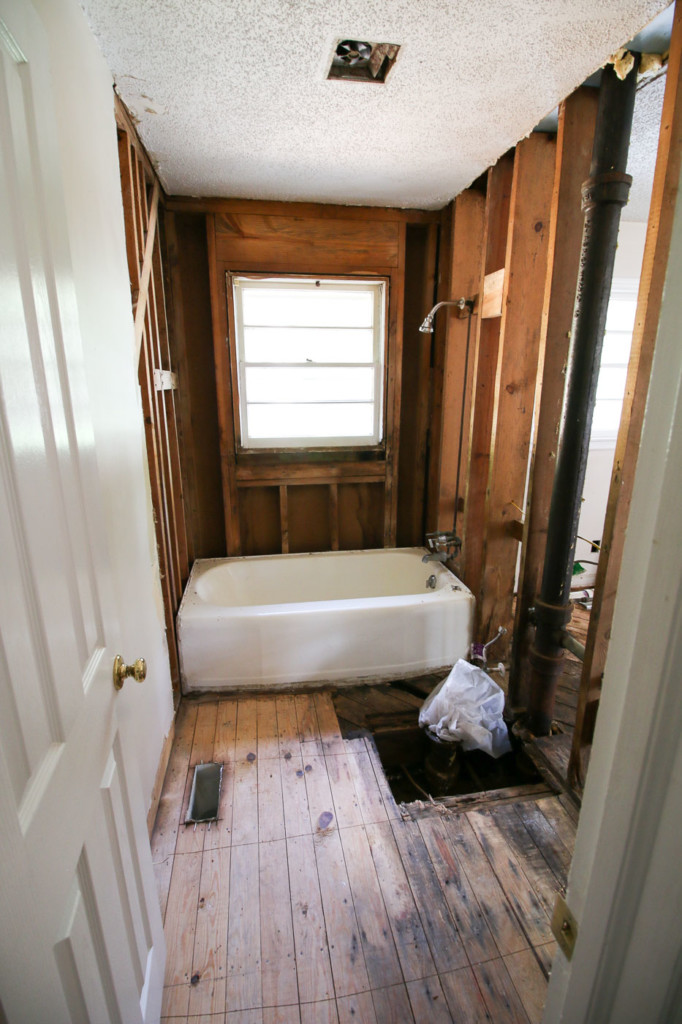
Before we get into the tutorial, I think it’s only fair to take you back in the time machine to show you where the Millie’s Bathroom started.
When I bought the house, it had this fabulous powder blue tile and the faux blue marble countertop was vintage! You probably can’t tell from the pictures, but the counter came up to mid-thigh height. This is not exactly conducive to comfortably using the sink for anything but hand washing.
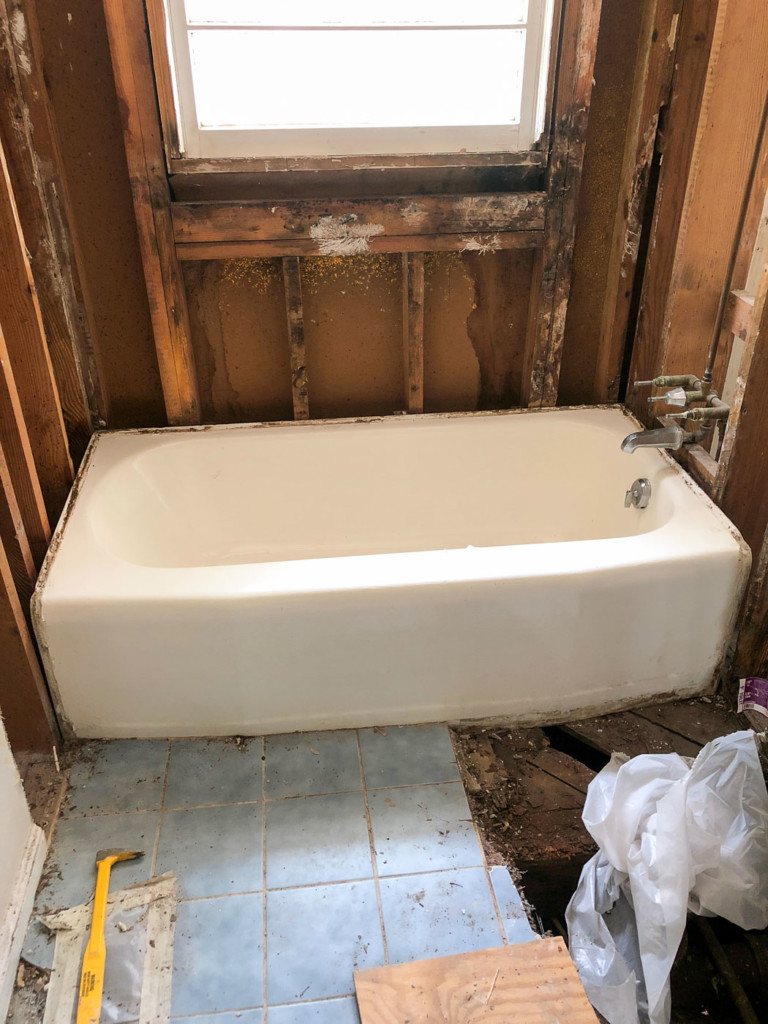
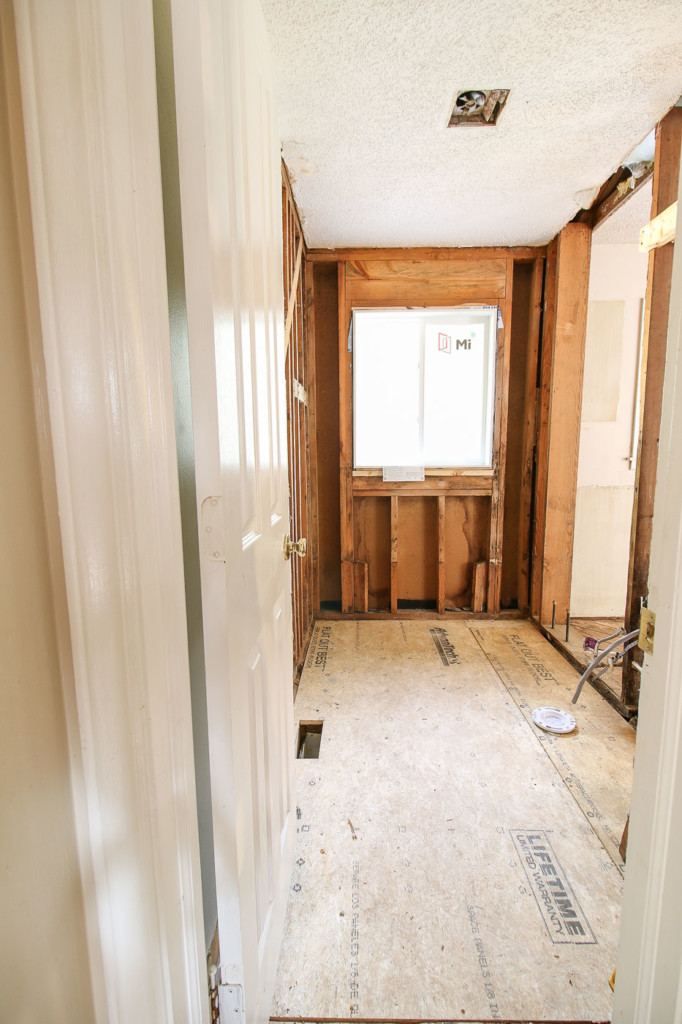
I knew I was working on an old house with a host of potential environmental issues, so I took all the precautions during demolition.
During demolition, I discovered a multitude of leaks and rotting flooring. The only thing keeping the toilet from falling into the crawlspace was the cast iron waste pipe it was perched on. It was so rotted, I stuck my hand right through the subfloor. You can watch my exciting demolition video here.
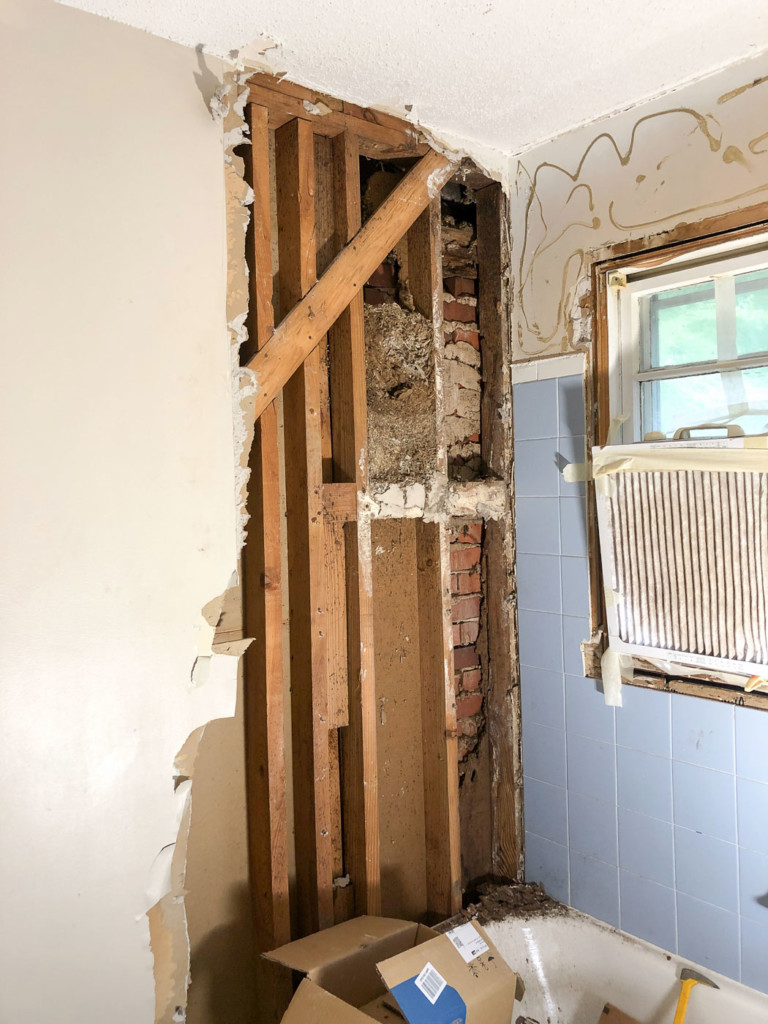
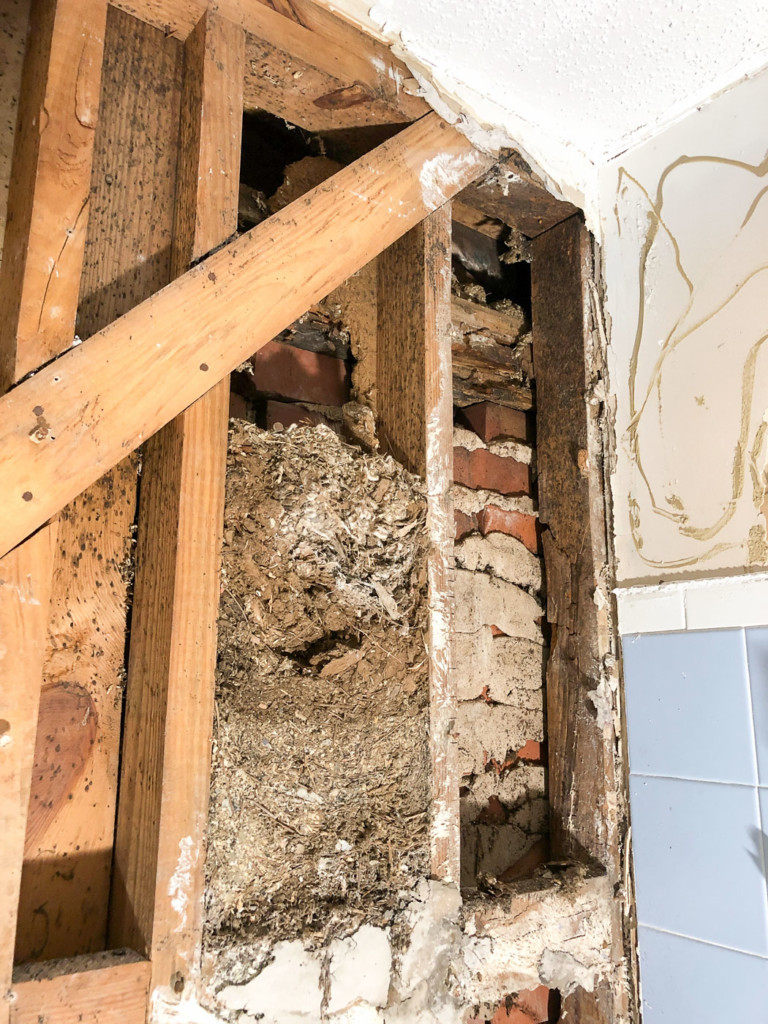
Behind the shower walls was a gigantic animal nest in one of the wall cavities.
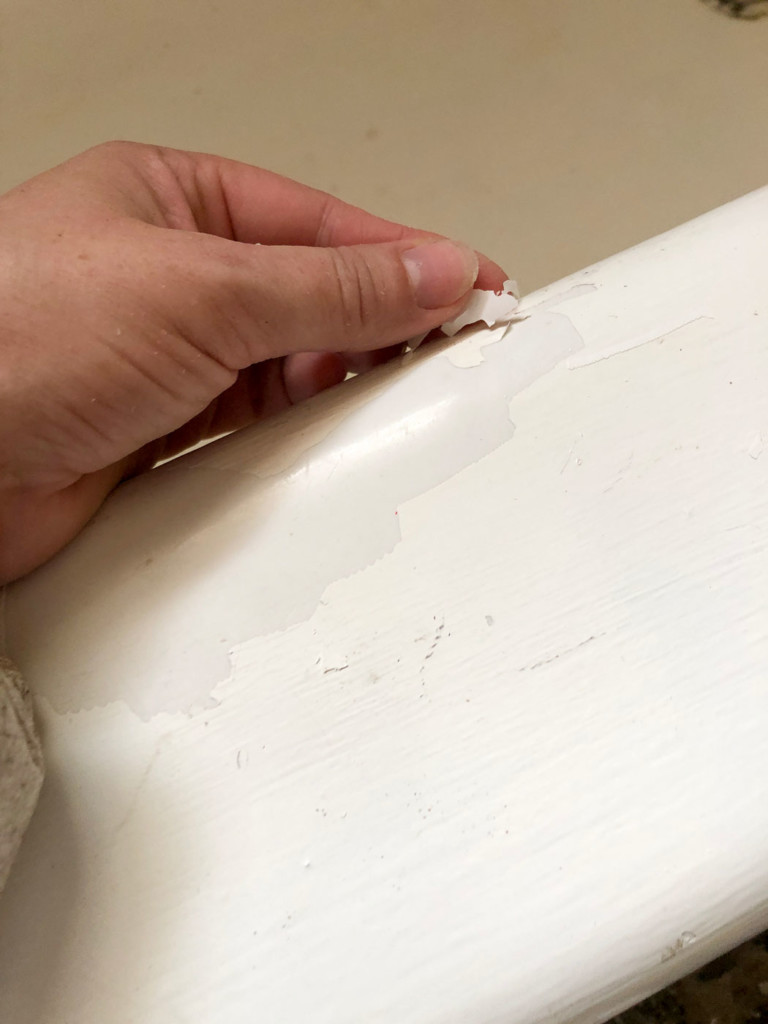
The tub was cast iron and I wanted to try to save it, but it was going to cost me more to pay for a professional tub refinisher to strip the DIY paint job and refinish it than it was to replace the tub with a brand new one. Because this was going to be a rental house, I didn’t want to have to refinish the tub every few years.
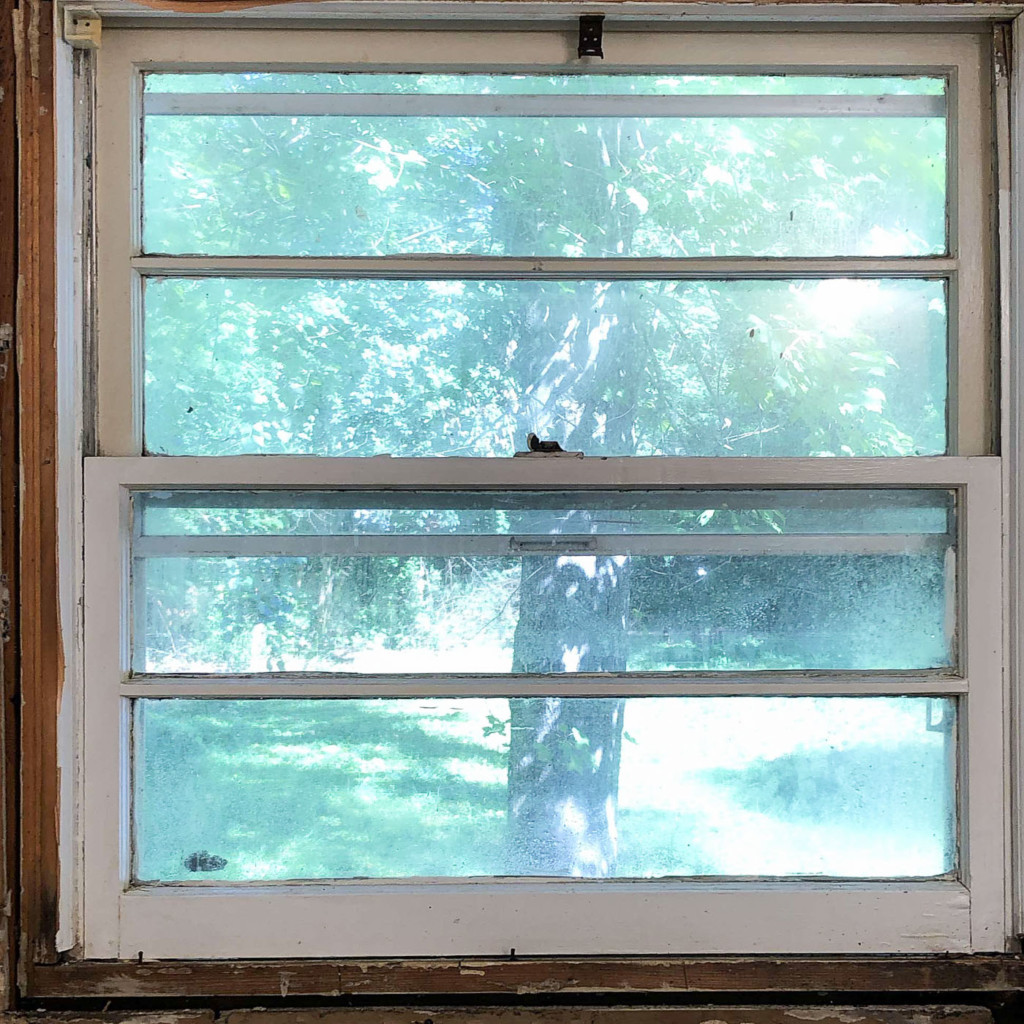
Sadly the tub was pulled out and scrapped for metal. The window was something I also wanted to scrap! I knew it had to be replaced from the start, (even though I have no idea how it hadn’t rotted since it was constantly exposed to water during showers).
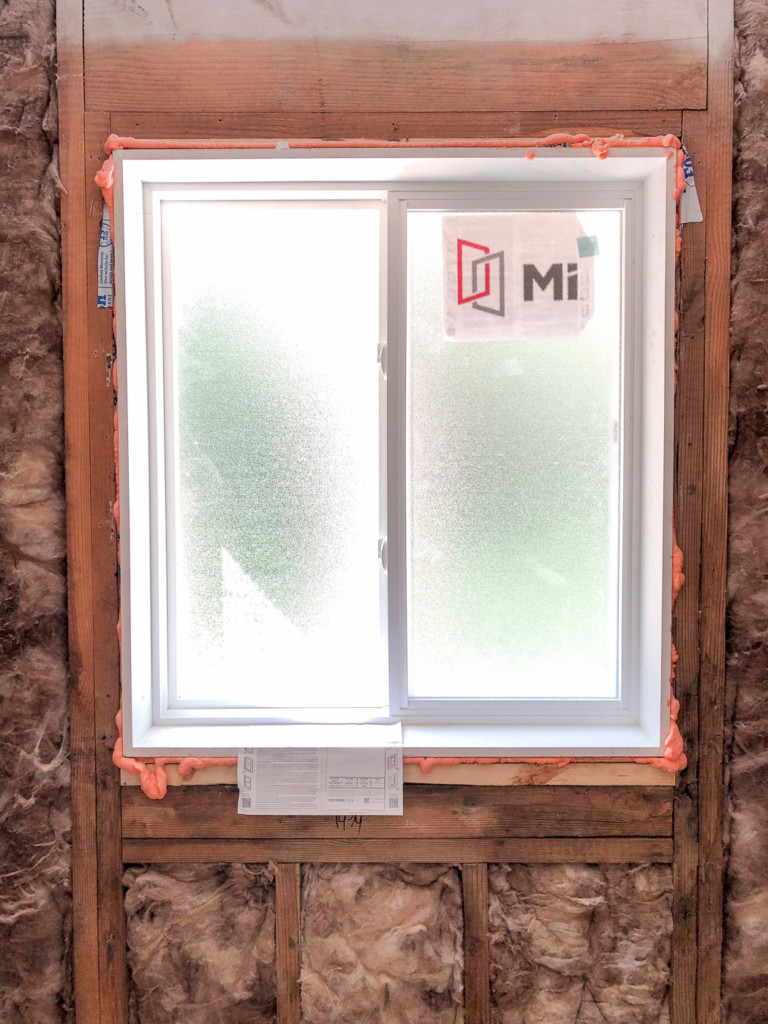
A new vinyl window was ordered, and what arrived was a vinyl window on the exterior with wood trim inside. I could have cried because the goal was to get rid of any material that could rot inside the shower.
Ultimately, I dealt with the mold, rotted floors, leaking plumbing, and new window to start building back.
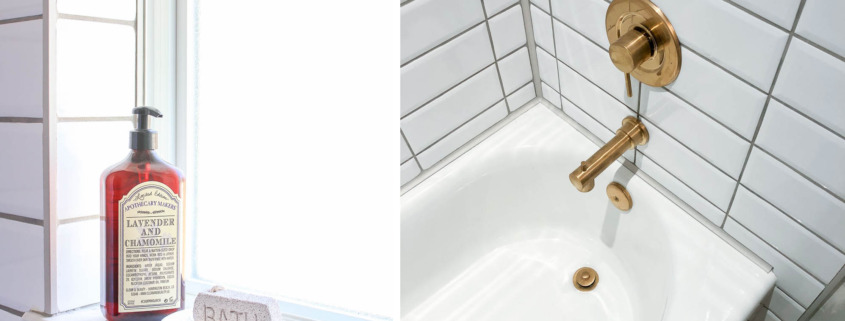
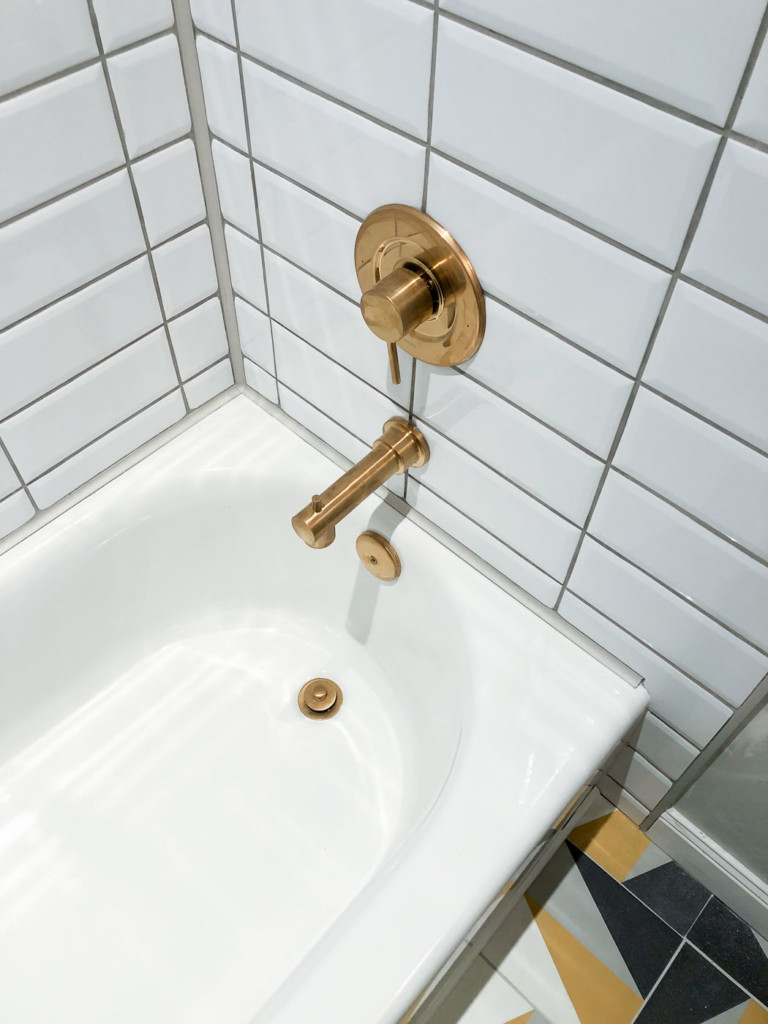
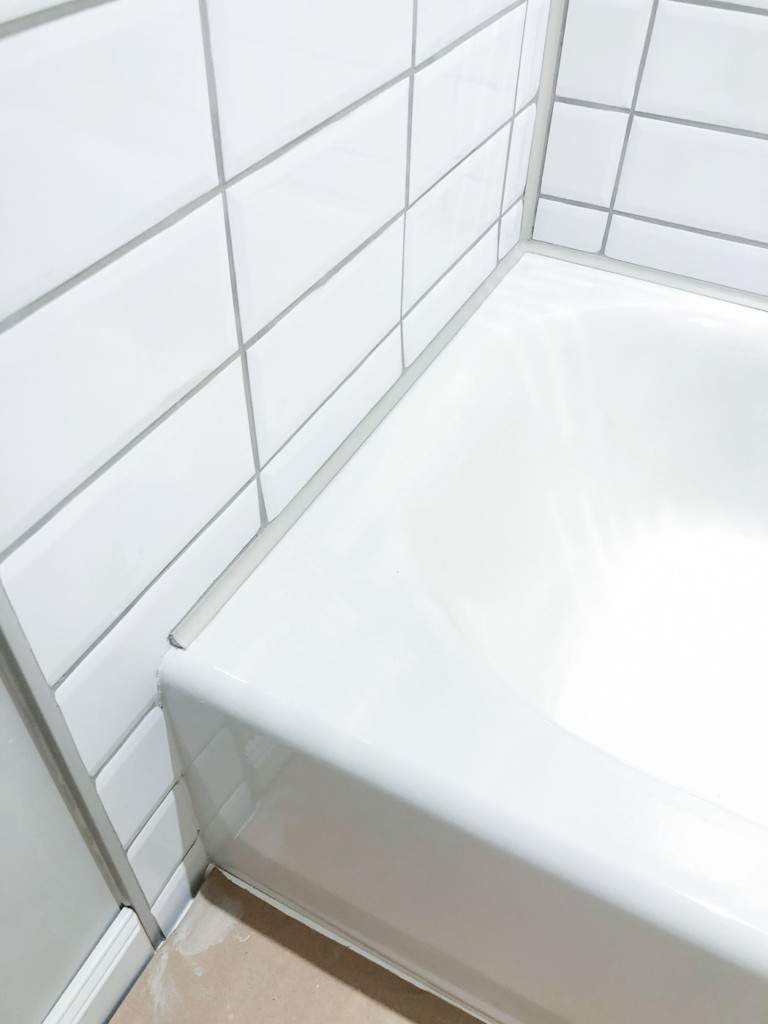
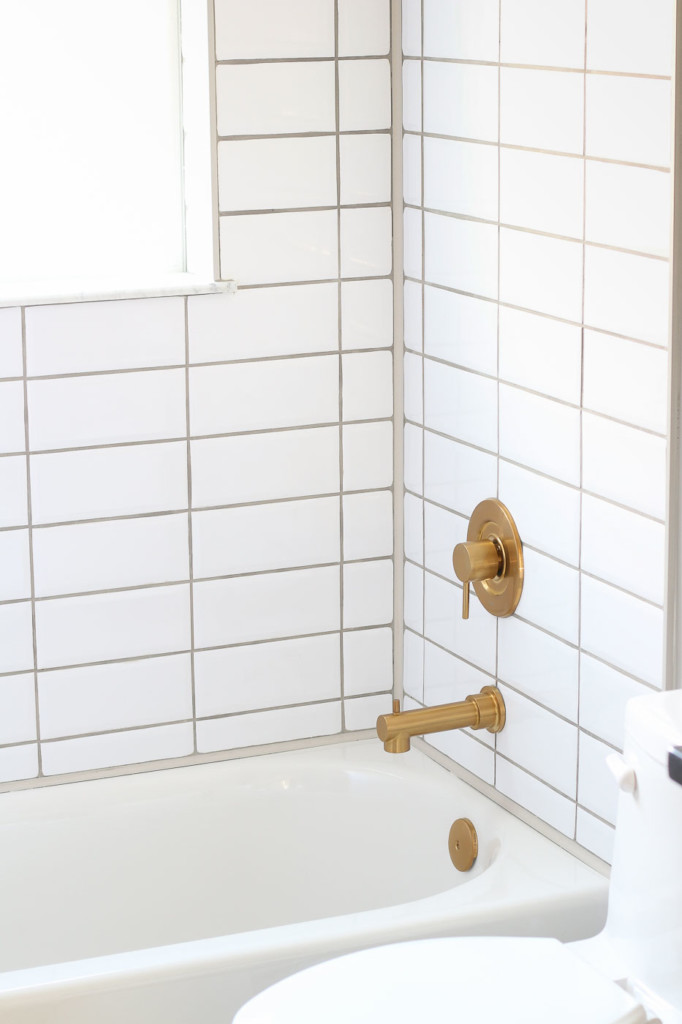
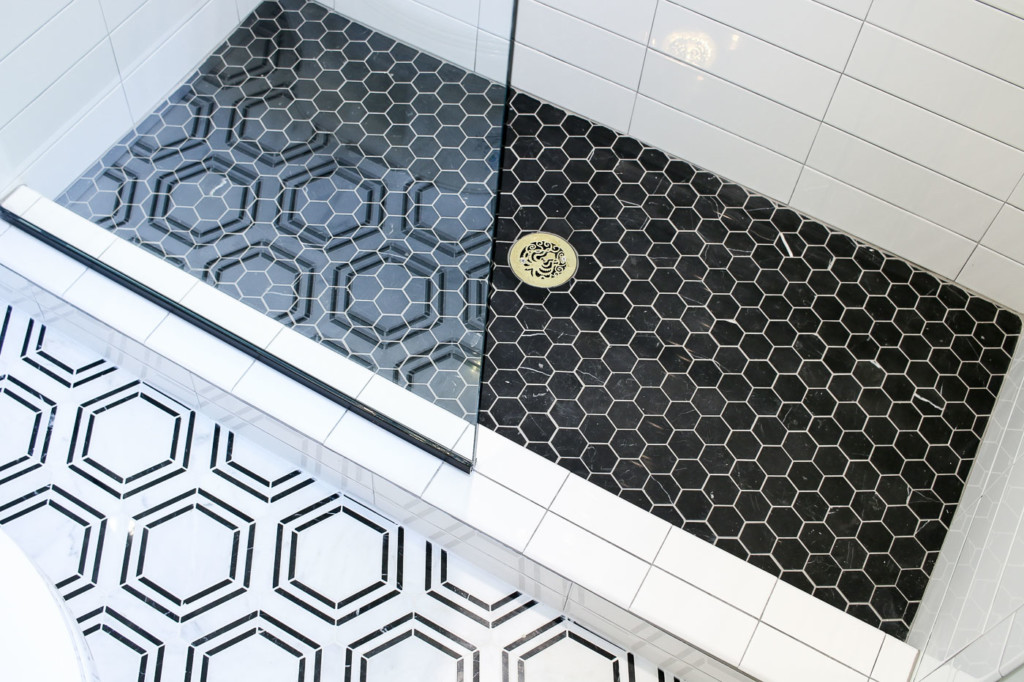
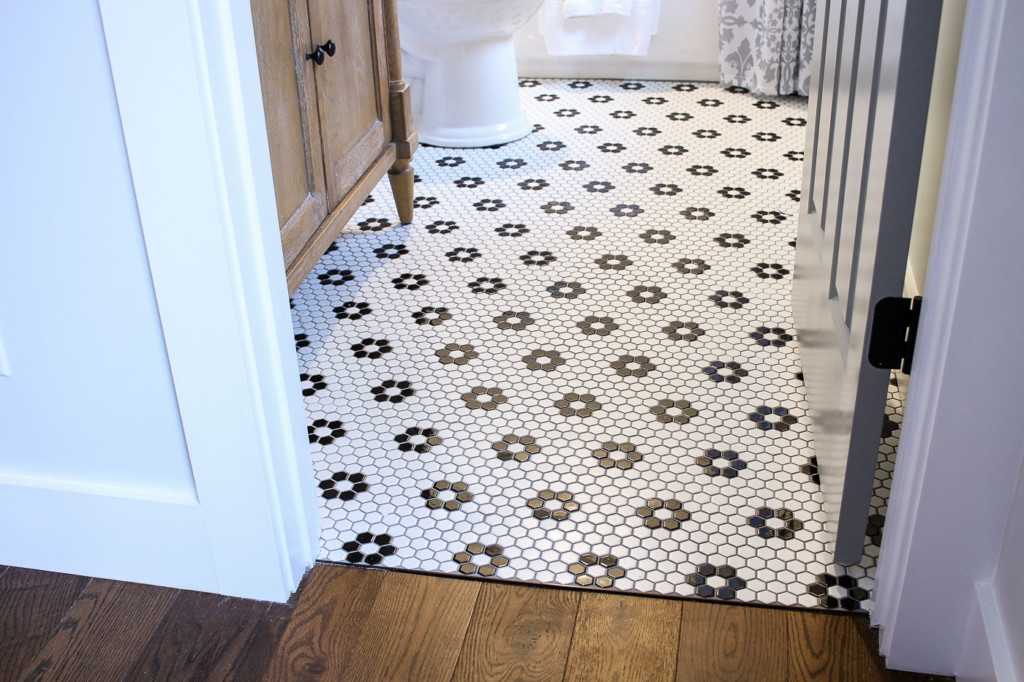
What do you think? Would you like to try tiling with profiles in your bathroom? I took this close-up picture of the profiles so you can see how sleek they look on the tub deck and in the corners of the shower.
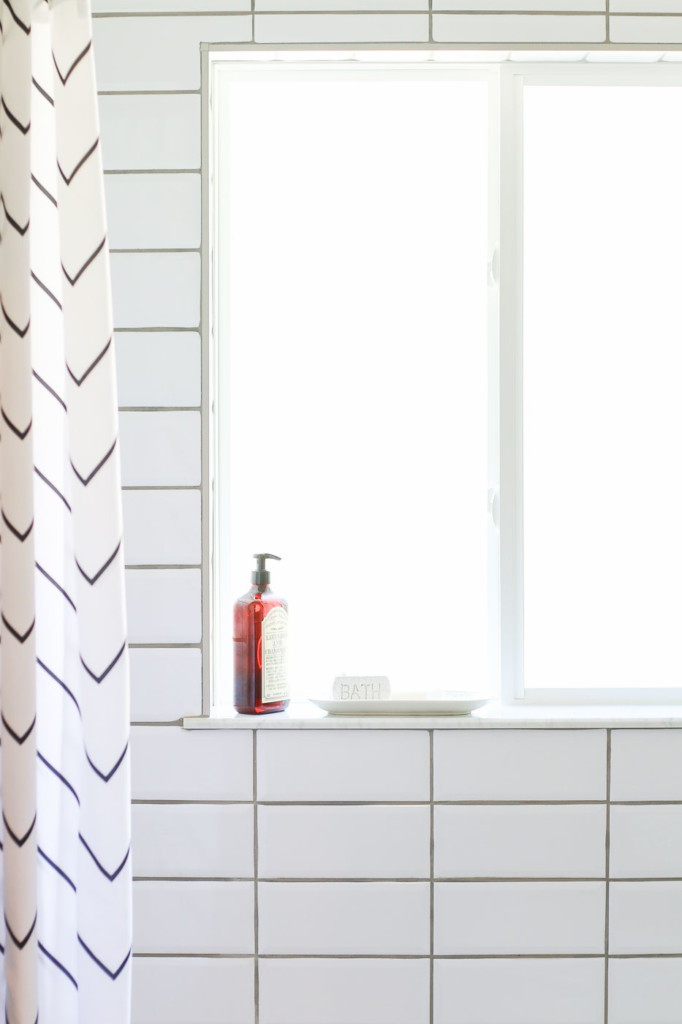
The profiles also frame the window nicely and hide the cut edges of the tiles.
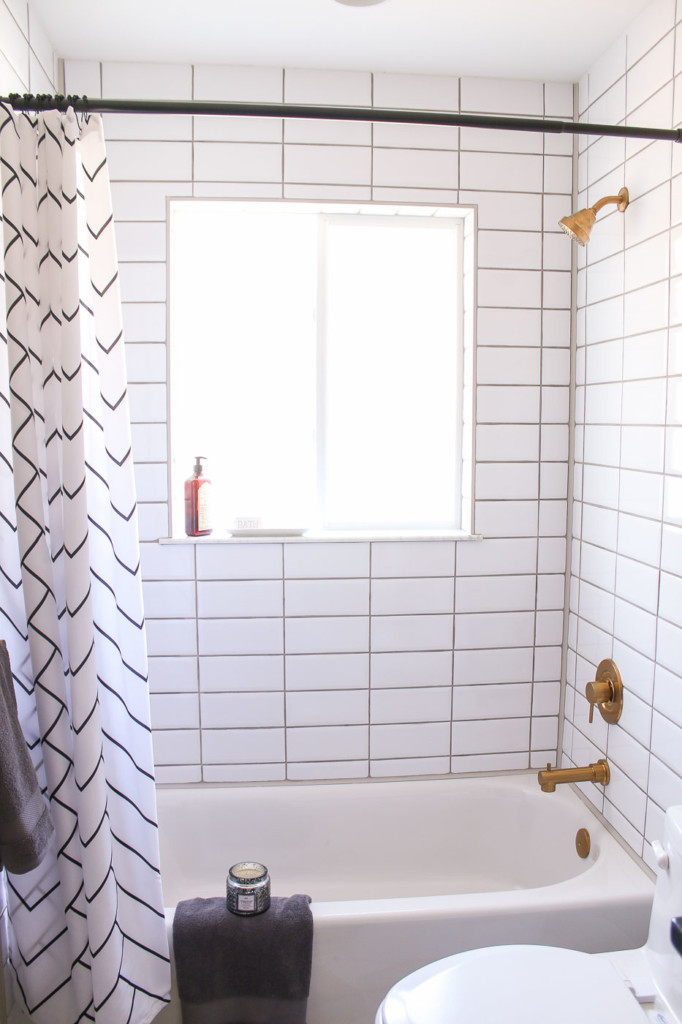
This main bathroom at Millie’s Remodel turned out much better than I imagined.
I’ll be back soon with another little tutorial for you. It’s going to have something to do with a trick my tile setter taught me. After that, I have a really fun tutorial coming up to show you how to turn a dresser into a sink vanity. This mid-century dresser worked out perfectly as a sink vanity!
Before you go, let’s have a heart-to-heart conversation. Do you enjoy the videos I’ve been sharing? Are you subscribed to my YouTube channel? This is one simple way you can thank me for sharing this content with you for free. Click here to subscribe to my channel.
Psst, if you really want to follow my daily adventures, you can follow me on Instagram. I share most of the projects I’m working on in real-time there.
https://prettyhandygirl.com/wp-content/uploads/2021/05/tiling-profiles-millies-remodel-feature.jpg9801995Brittany Baileyhttps://prettyhandygirl.com/wp-content/uploads/2021/07/PHG-logo-tagline-2020-1030x211-R.jpgBrittany Bailey2021-05-21 07:00:002025-01-22 22:15:25Millie’s Remodel: How to Tile a Shower/Tub Surround and Never Replace Caulk Again
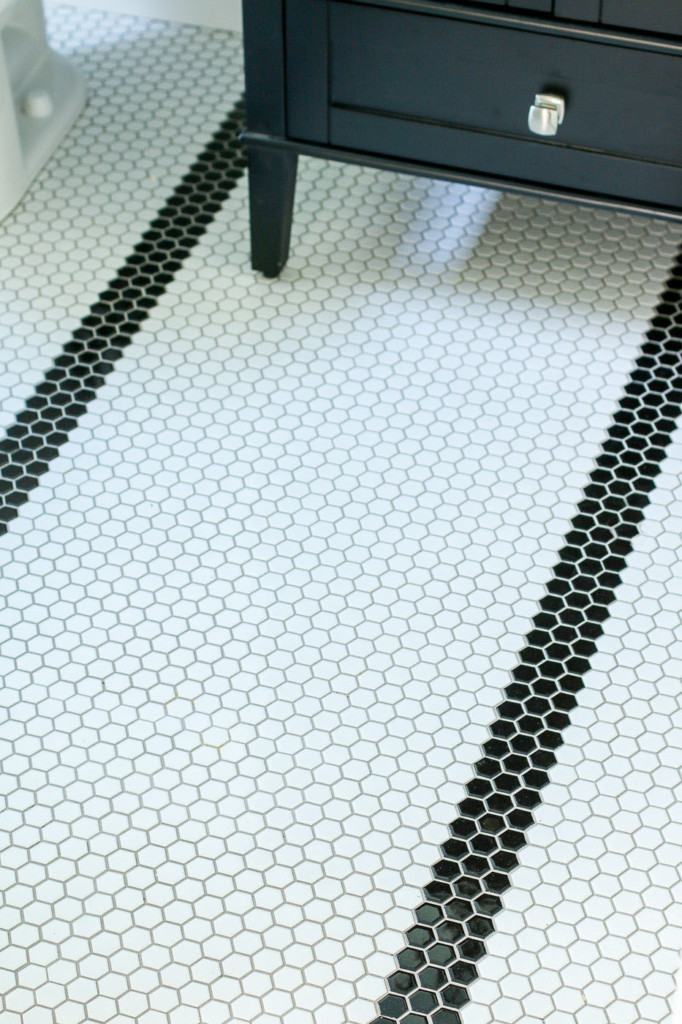
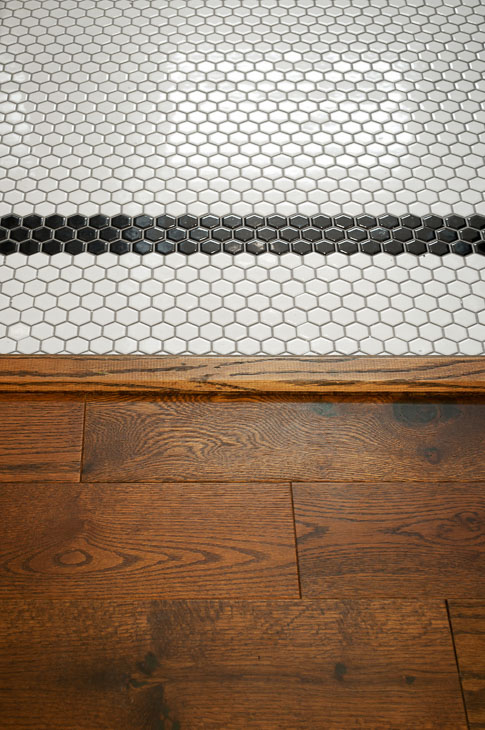
I’m definitely tired of using a port-a-potty at the Millie’s Remodel house. It’s high time we get the bathroom floors tiled so my plumber can install a toilet! Come along with me today as I install the cement tile floors in the bathrooms.
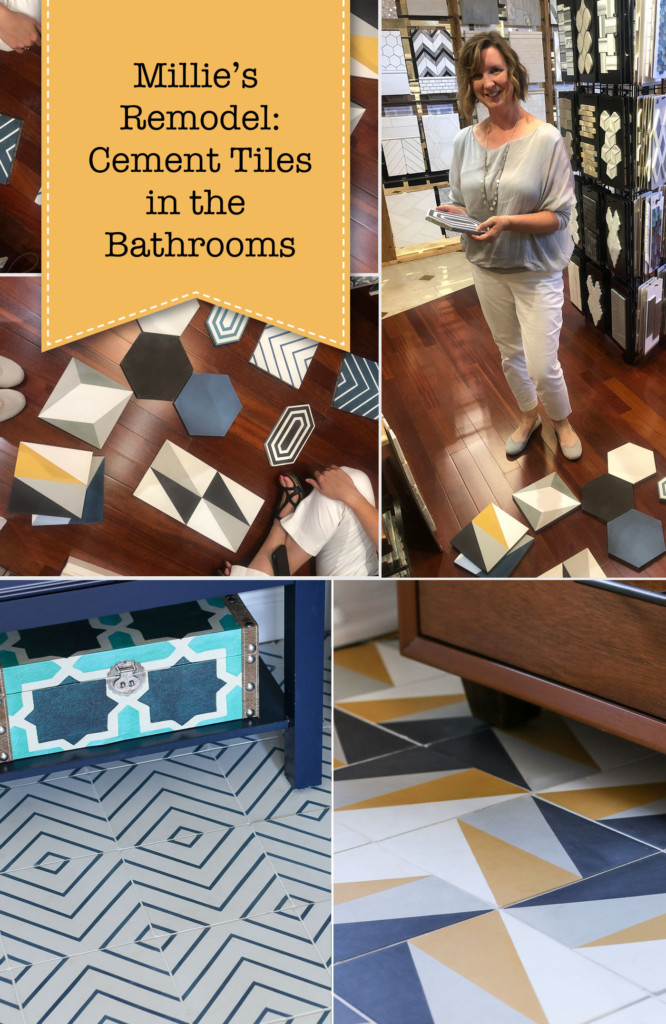
Millie’s Remodel: Cement Tiles in the Bathrooms
If you remember my last Millie’s Remodel update, I shared the only working bathroom was the port-a-potty in the front yard. I was definitely done with sharing it with my subcontractors and the MAILMAN! Ugh, I lost track of how many people were using it.
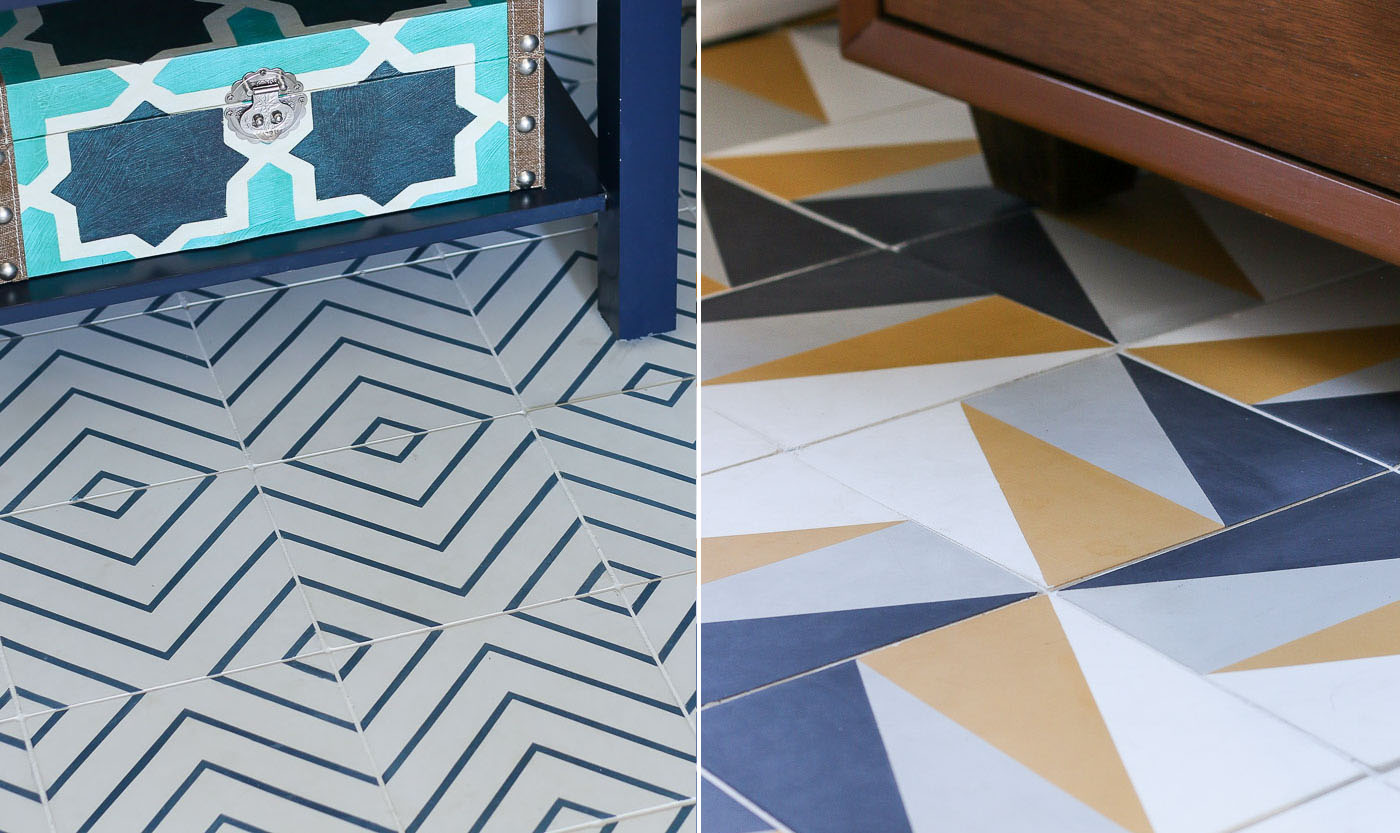
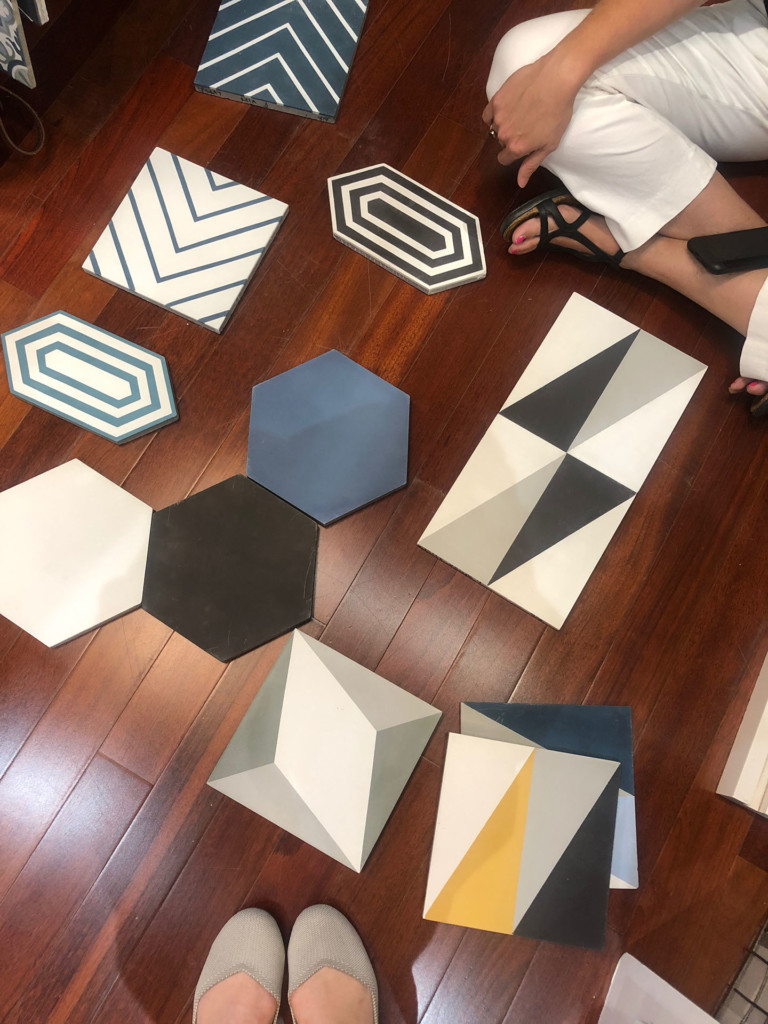
Being able to finally install the tiles is one of my favorite stages in a home renovation. Especially because when the Lili Cement tiles I ordered arrived, and I couldn’t wait to see them installed on the floors. I should mention, Lili Tiles is one of the Millie’s Remodel sponsors. When the company contacted me, I was thrilled with their bright-colored tiles and the variety of shapes and patterns. Frankly, it was tough to choose just two tile patterns.
Here are some other things I love about the Lili Cement Tiles: Each tile is handmade! You can watch the process here. And if you want to see more inspiring photos of Lili Cement tiles installed in a variety of spaces, follow Lili Cement Tiles on Instagram! Plus, I love supporting small companies, especially one founded by a woman.
Okay, now it’s time to show you these beautiful cement tiles installed. Go ahead and watch this video to see them in the Millie’s Remodel bathrooms and watch how much fun I had installing them! Seriously, it was more fun than you can imagine.
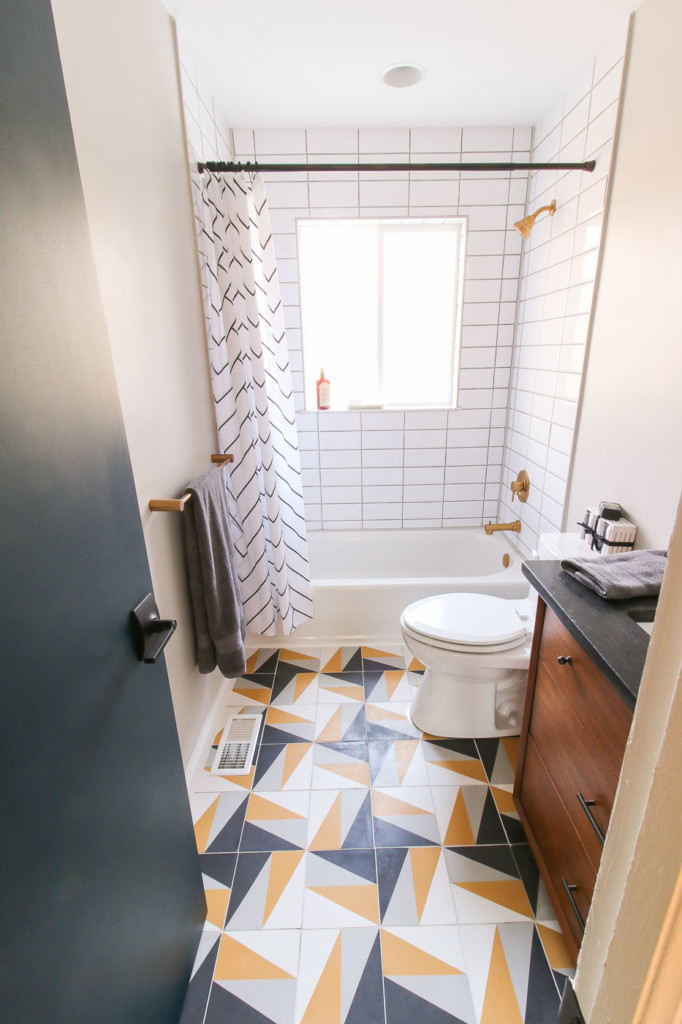
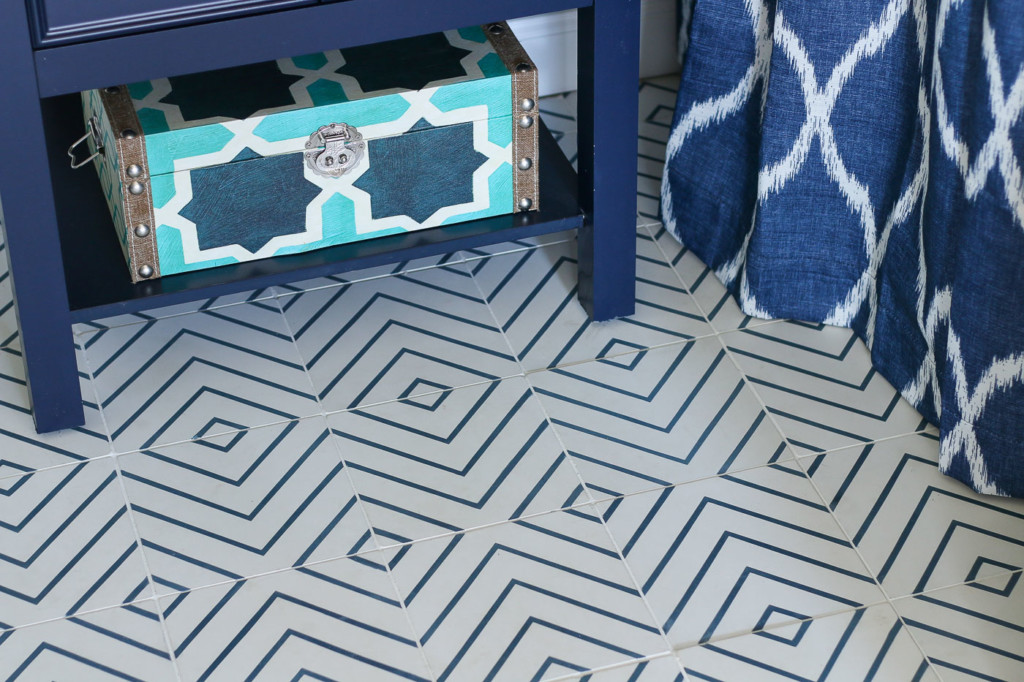
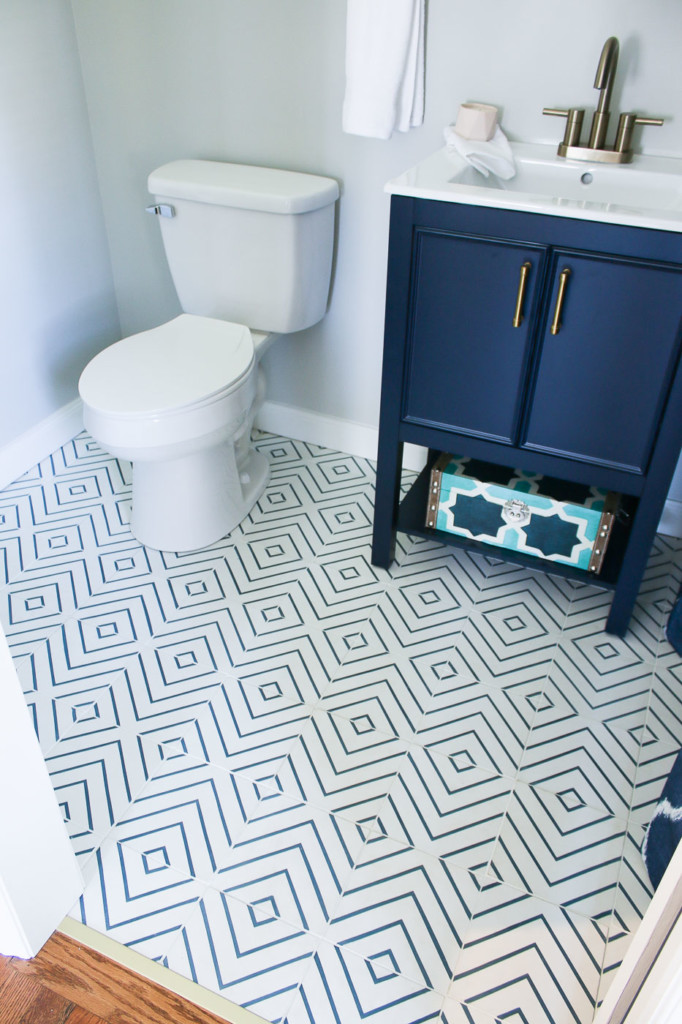
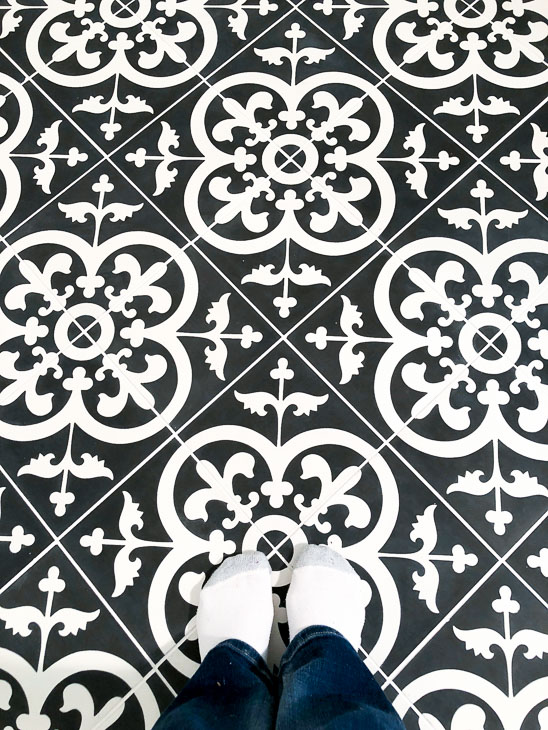
What do you think? Do you love the patterns? Think they work for a mid-century modern beauty? I can’t pick my favorite because I love the subtle star pattern in the Vegas 3 tile installation.
But, I’m equally excited by the classic navy diamond pattern in the Mia 4 tile installation.
However, what is making me jump for joy, is the toilet and sink hooked up in the powder room. I could have kissed my plumber when he showed up to install the toilet and sink in the house.
Time to say goodbye to the port-a-potty. See you soon with another Millie’s Remodel update!
Disclosure: Thank you to Lili Cement Tiles for sponsoring the Millie’s Remodel project. I was sent complimentary products in exchange for mentioning Lili Tiles in my project. All opinions and ideas are my own. As you know, I’m very particular about the brands I work with, and Lili Cement Tiles is a brand I’m happy to recommend!
If you want professional-looking tile floors (regardless if you want to do it yourself or hire someone), you must read this article to find out what tiles to buy, how to avoid cracked tiles, and risk a finished tile floor that is less than professional-looking.
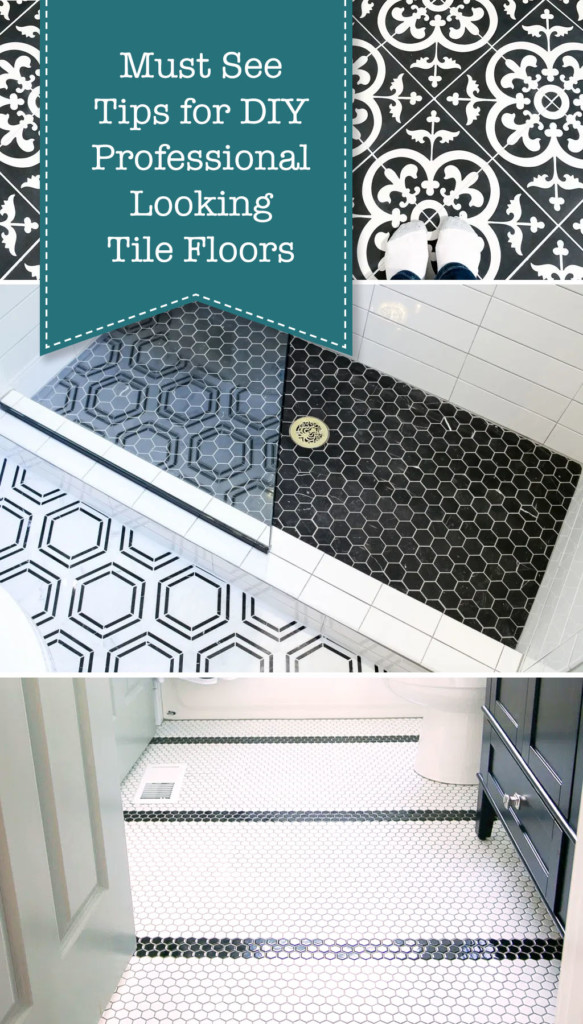
11 Must-See Tips for Professional Looking Tile Floors
I’m here to tell you, YES, you can lay your own floor tile and achieve professional-looking results if you learn a few tips and tricks. First, can I share a secret with you? Seven years ago I thought I had to hire a tile installer when we had our mudroom tiled. I wish I knew then what I know now because I would have kicked that installer out of my house immediately. I still have to look at some of the issues he left behind pointing to a less than professional looking tile job. (Insert Angry Face Emoji!)
But, I completely understand if you still want to hire a professional tile installer for any number of reasons:
No time
Don’t have the tools
Physical disabilities (tile-setting is tough on the back and body)
No desire to install tile
Did I miss any reasons? If I did, leave me a comment below letting me know why someone wouldn’t want to embark on a DIY tile flooring project.
Before we get to my tips, I want to give you a little education on tiles. Especially if you had problems previously and thought it was your fault the tile job didn’t look professional. Believe it or not, your issues may have been caused by cheap or poor quality tiles. Say what?!
How to Spot Poor Quality (Cheap) Tiles:
Did you know those tiles you are saving a boatload on may not be quality tiles? Did you even know there were inferior quality tiles? Yes, it’s true. A few years ago I hired a tile installer to help me tile some of the bathrooms in the Saving Etta project. (Yes, I could have done it myself, but I’d still be tiling if I did everything myself.) When I first met the installer, he asked me about the tiles I had purchased. I showed him the boxes and he opened several to inspect them. This is what he was looking for to determine if they were cheap tiles:
Color – Pull tiles from several boxes (if possible) and check to see that the color is consistent for one color tiles. (Obviously, if they are supposed to vary in color and pattern that’s okay.) Regardless, you should always pull tiles randomly from several boxes when laying tile.
Size – Pull random tiles from several boxes and stack them together. They should be identical. Poor quality tiles can vary up to 1/8″ in size. This will cause issues especially if you are using a small grout joint.
Printing – Many ceramic or porcelain tiles are printed to look like real stone today. Take a close look at the surface. Is the printing evident? Do you see small dots like a printed newspaper photo? If you can’t see them easily, the printing was well done.
Thickness – In addition to the overall dimension of the tiles, you should check the consistency of thickness.
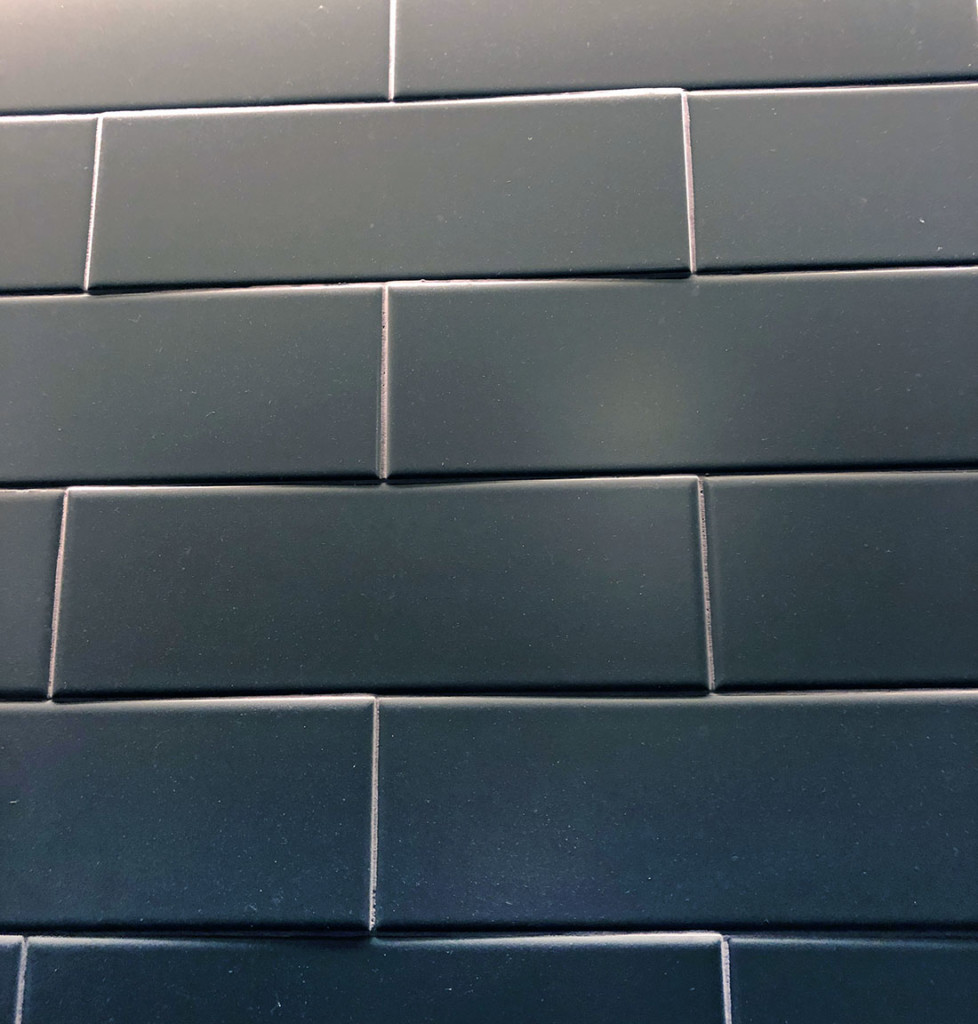
Warping – Are your tiles perfectly flat or do they bend? See below for a picture of two 4″ x 12″ tiles that show some bowing in the center of the tiles.
(To eliminate accentuating this defect, you wouldn’t want to install these tiles with a 50% offset (shown below). Instead, a 25 or 33% would be a better staggered joint pattern.)
Wedging – Square and rectangular tiles should be cut square. Out of square tiles could would impact your tile job and show up especially in the grout joints.
Typically you can expect good quality from tiles that are labeled as Standard or First Grade. Second grade tiles will have more variations in appearance. Independent tile shops are the best place to purchase good quality tiles. They typically sell to designers and tile installers, but also sell to the general public. Granted, you will likely pay more. But, you know the old saying, you get what you pay for.
Picking Tiles:
Tiles are tiles, right? Wrong, there are many tiles that would not be suitable for a floor. And some tiles are not good for high traffic areas. Finally, some tiles are not a good fit for showers. How can you tell which tiles are best for use in specific areas?
Floor Tiles vs. Wall Tiles:
Floor tiles must be strong enough to handle walking on and an occasional dropped item. Did you know there’s a rating for tile strength? It’s called a PEI rating.
A PEI of 1 is ideal for walls. PEI of 2 is best for bathrooms and kitchens. And a PEI of 3 is appropriate for all residential applications. Meanwhile, PEIs of 4 and 5 are applicable for commercial and heavy commercial applications. When shopping for tiles, they may not have the PEI rating displayed, but there should be a notation if they are acceptable for floors and walls. If you don’t see a notation, ask a salesperson or check with the manufacturer.
How Slippery Are Your Tiles?
Floor tiles must meet certain criteria for COF or coefficient of friction (basically how slippery the tile is.) But, different areas need different COF values. Let’s talk strictly for residential purposes (because commercial and business sites are a whole other beast). Floor tiles in a bathroom with a shower or tub must meet a greater than .42 DCOF test. Tiles that score less than .42 would only be appropriate for areas that will be kept dry or walls.
Polished tiles tend to be more slippery. Tiles that have texture usually score better on the DCOF test, but depending on how textured, they can be harder to clean.
Are marble and natural stone tiles good for floors?
Oh the beauty of real marble! I know, I know, I love marble too, but would it be a good choice for your floor? This depends on several factors. The first being the use of the room. If using in a kitchen or room with a lot of traffic and opportunities for spills, you’ll want to steer clear of marble and stone products that can wear or stain easily. Of course, you can seal your tiles, but the upkeep will be a lot more than porcelain or ceramic tile. But, if you are okay with your floors showing off natural wear and patina, go for it.
Porcelain vs. Ceramic – What’s the Difference?
Porcelain tiles are stronger and more dense than ceramic tiles. They don’t absorb as much moisture as ceramic tiles (Porcelain tiles must be tested and absorb at 0.5% or less to be certified porcelain.) Because they absorb less, porcelain tiles are more ideal for shower floors or areas that stay damp or humid. While porcelain tiles will usually be stronger, thicker, and less porous, they can be tougher to cut and more expensive. Ultimately you can use ceramic tiles on your floor, as long as they meet a 3 or higher PEI rating (as discussed above).
How Many Tiles Should I Order?
Typically most tilers would suggest you order anywhere from 15% -20% extra for your job. If you are using small tiles, you can order as little as 10% overage. Usually, I order 15% because it’s better to have a few left over to keep on hand should you ever have to replace a tile. Besides, it’s a real pain if you run out of tiles mid tile job.
Know Your Finished Height:
If you are picking out tiles, be sure you know the difference in height of adjoining rooms. Choosing your floor tile can mean the difference between perfectly matched floor levels or the need for a transition strip (or worse, a step up or down!) Luckily there is a transition strip for most floor differences.
Tools:
(I’ve included affiliate links for your convenience. I earn a small percentage from a purchase using these links. There is no additional cost to you. You can read more about affiliate links here.)
I’m a big advocate of having good tools. Having a good tile cutter means the difference between flying through a tile job or having it drag on for an eternity. A good tile cutter also reduces waste because they cut tiles cleanly.
When possible, I prefer cutting the majority of tiles with a scoring tile cutter. It’s quicker, a lot less messy, and clean up is as simple as brushing off the platform.
Occasionally I’ve run into tile that resisted cutting on my scoring cutter (thick porcelain tiles usually fall into this category). For those tiles, I use my wet saw. A wet saw can also cut angled and corner cuts into the tiles. I’ve used the same inexpensive wet saw for years, but when it dies I’ll upgrade to a bigger wet saw.
Recently I started using an angle grinder with a diamond blade for more precise intricate cuts or to knock off a small amount. It works faster and is less clean up than the wet saw for those intricate cuts.
Finally, if you are tiling a shower, you’ll inevitably need to cut a hole in your tiles around a pipe. For that task, I use a drill with a diamond hole saw.
Now it’s time to learn my top tips for a professional-looking tile floor. If you are a newbie and want to learn the basics of tiling, you’ll find these two lessons helpful: Learn How to Set Tile
Okay, let’s learn how to get those professional tile results that will even fool the pros!
11 Must See Tips for Professional Looking Tile Floors:
Over the years I’ve taken several courses on tile setting and worked directly with several professional tile setters. From each experience, I’ve learned a lot and now I want to share the things I’ve learned with you so your next tile job comes out beautifully.
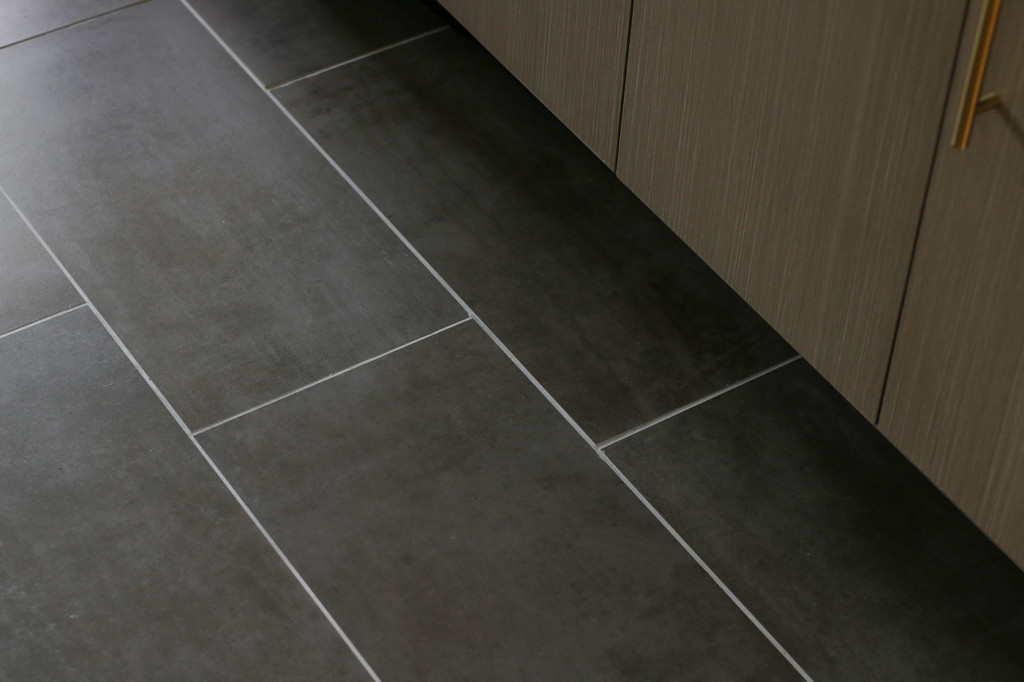
In my video you’ll get to see the progress at the Millie’s Remodel project as I tiled the kitchen floor. I decided to incorporate the tiling tips I’ve learned into the video for you.
Watch the video for the tips and how I install floor tiles:
You can also watch the video on YouTube if you prefer (especially if you want to click on the links to the other videos I mention).
1. Flat and Sturdy Subfloor:
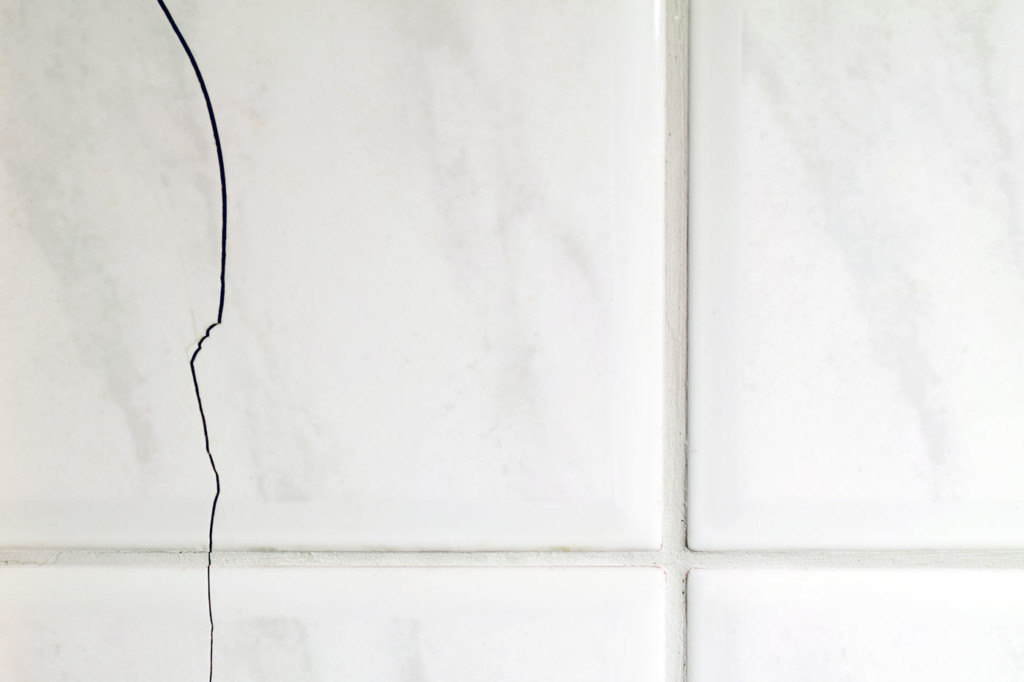
Like building a sturdy house, your foundation is super important. When you walk on your floor does it flex, bounce, or squeak? If so, you need to solve these issues now. Use a level and rest it in several different areas (and directions on your subfloor). Are there low spots, high spots, or a slope? If you have dips or valleys in your subfloor, you can’t get a good tile job that will last. If your floor isn’t sturdy and flexes, you will have cracked grout, or worse cracked tiles.
If you have a wood subfloor, make sure your wood substrates have the manufacturer’s recommended spacing (typically 1/8″ gap between plywood sheets.) Backer board or uncoupling membranes should be laid onto the subfloor before tiling.
Never tile directly onto new concrete. In fact, keep reading to learn why I use uncoupling membranes and how to prevent your tile job from being ruined by expanding or contracting concrete.
After taking the Schluter workshops, I will never tile a room without an uncoupling membrane again. As a bonus, their membranes are waterproof. No more need to worry about water soaking into your subfloor and causing mold to build up.
3. Use a Good Tile Cutter
Using good tools will help your tile job go smoothly and it will keep your tile cuts from looking like a jagged mess. If you can’t afford to buy good tools, look into renting some, or ask a fellow DIYer if you can borrow theirs. (Always clean their tools before returning them. Nothing irks me more than dirty tools.)
4. Layout Tiles Ahead of Time
If you’ve heard that spending time doing the prep work will save you time in the long run, nothing could be more true than when tiling. Before I start any tile job, I always lay out my tiles first. I dry lay them out to see what I’m dealing with. First I layout a run of tiles along the length of the room and position the tiles to avoid having to cut a small sliver of a tile at either end. Then I layout a run along the width of the room making adjustments to avoid the same situation.
If I have printed tiles, I separate them into piles by their individual print design. Then when I pull tiles later I pull from different stacks. I also step back to make sure two of the same tiles aren’t next to each other (like in the example below thanks to that so-called professional I hired).
Nothing screams rookie tiler louder than two printed tiles being installed next to each other. And in the same orientation!
5. Leave an Expansion (or Movement) Joint
Despite what you might think (especially if you have perfectionist tendencies), you do not want to cut and install your tiles tight against the wall (or other objects in your room like columns, pipes, or walls.) You must leave at least 1/4 inch around the perimeter of your room or around immovable objects. Not adhering to this rule can lead to your tile floor popping up or tenting (See this article for a photo of tenting tile.) Additionally, you need to install a movement joint in any interior room at every 25 feet in each direction. However, if this room is exposed to direct sunlight or heat, you’ll need an expansion joint at every 12 feet in each direction.
6. Use Recommended Trowel Size
Tiles come in all shapes and sizes and therefore they require a variety of trowels. Be sure to check with the specifications on your tile to find out the trowel size. Or ask your tile shop representative for their recommendation. Using a too-small trowel with large tiles would cause the tiles not to adhere to the surface. And too big a trowel with smaller tiles will make it difficult to level the tiles.
7. Back Butter Large Tiles
When tiling a floor with large tiles, back buttering is a must. Typically I’ll spread the thinset mortar onto the floor and trowel through it. I’ll use the excess to scrape a thin layer over the back of the floor tile. This accomplishes two things:
It keys mortar into any voids on the back of the tile.
It ensures full coverage on the back of the tile.
If you don’t back butter large tile, you run the risk of having air pockets behind your tile which can sound hollow when walked on or cause the tile to pop up.
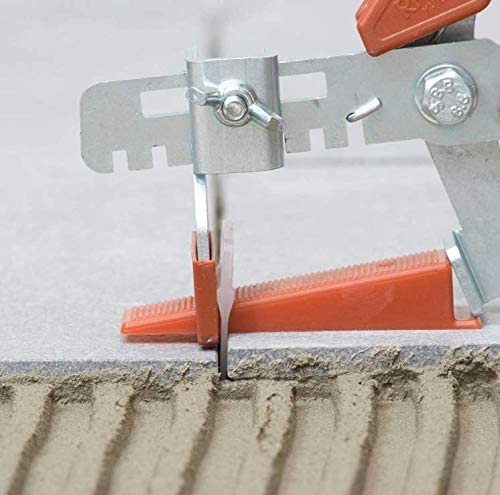
8. Use Leveling Spacers
Leveling spacers are a relatively new product, but I will never tile a floor without them again. I’ve tried several brands but prefer the wedge-shaped leveling spacers. The wedges are inserted into the tile spacer and ratcheted tight to bring tiles to the same height as the adjacent tiles. You can see how they work and how to remove the spacers in my video above. (It’s a lot of fun removing them as you’ll see!) Using leveling spacers virtually eliminates lippage on tiles.
9. Clean Thinset Off Tiles
Anyone who has had to clean dried thinset mortar off tiles will never make the mistake of letting it dry on tiles. When tiling, keep your area clean. Be sure to clean off any mortar on surrounding tiles. In addition, make sure to clean thinset that squeezes up between the tiles. You want to make sure you have enough room for grout to set on top of the mortar.
10. Use Grout with Sealant
Grouting is the final step for any tile job, but if you didn’t add a sealant additive to your grout, you will need to seal the grout after the fact. I don’t know about you, but the last thing I want to do after tiling a floor is hand paint sealant on all the grout lines. And if you skip sealing all together you’re going to hate keeping the grout clean.
11. Plan Your Transition Pieces Ahead of Time
One thing that will truly set your tile floor job a notch above is using sleek transitions. Personally, I prefer using Schluter profiles strips for my floor transitions. There are a variety of finishes, sizes, and styles. Some of the profile strips are laid under the tiles for a stronger bond. Others are installed after the grout has cured. In the Millie’s Remodel kitchen, we had a big change in height between floors. I ended up using the the Schluter Reno-V profile which has an L shaped piece that slides under the tile edge during installation. (You can see the way it works in my video.)
However, in the Saving Etta house, I used simple Schluter Schiene profile strips between tile and wood flooring.
How to Speed Up Your Tile Job:
It helps to have a helper when tiling. Once you mix thinset or grout, you’re on the clock. Both will harden within a set time. If you have a helper, you can give your helper the task of cutting tiles or changing out your dirty water buckets, or mixing more thinset mortar. Speaking of mortar, never mix more than you can spread before hardening. As an experienced tiler I try not to mix more than 1/3 of a 50 pound bag of mortar. Otherwise, you’ll be left with a big boulder of thin set when it hardens.
If you can’t get a helper, make sure to fill multiple buckets with clean water before you begin. It also helps to cut some of your perimeter tiles ahead of time.
Tip for Working with Grout: You can slow the curing time of your grout if you set your mixed grout into a second bucket filled with ice water to slow the curing process. I show this in more detail in my grouting tutorial.
Best of luck tiling your floor. I know you can do this.
https://prettyhandygirl.com/wp-content/uploads/2020/04/must-see-tips-for-professional-looking-tile-floors-feature.jpg4901109Brittany Baileyhttps://prettyhandygirl.com/wp-content/uploads/2021/07/PHG-logo-tagline-2020-1030x211-R.jpgBrittany Bailey2020-04-24 07:05:002020-06-05 12:44:4811 Must See Tips for Professional Looking Tile Floors
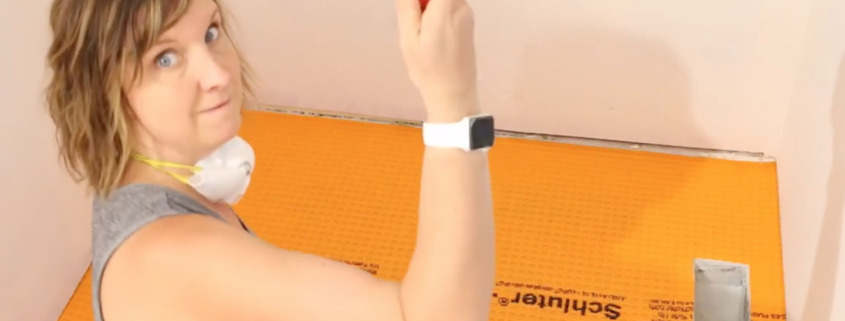
Today we’re prepping to tile in the kitchen and bathrooms. Having seen firsthand how much damage water can cause to a home, I want to show you this tutorial for How to Waterproof Floors!
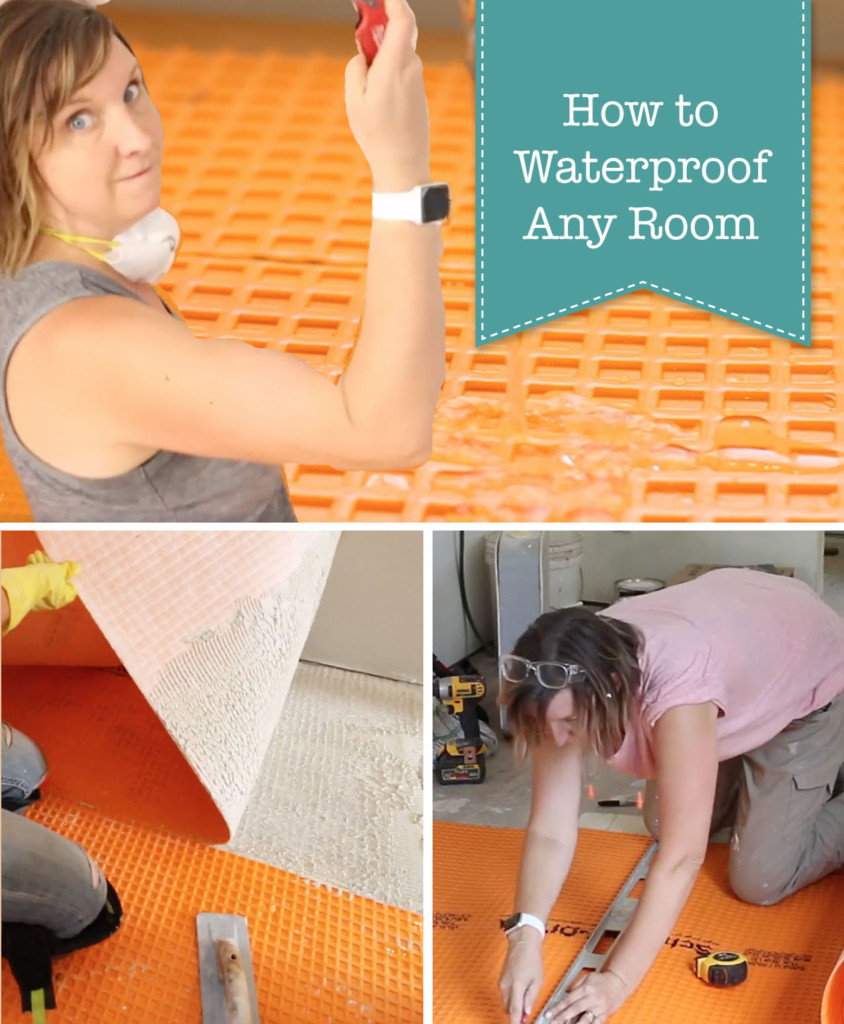
Waterproofing Floors in Any Room
Renovations are finally moving forward at Millie’s Remodel. This is the point where I feel like we already hit rock bottom and now we’re finally on the rebound. You might remember we used a self-leveling concrete in the kitchen last week. Now it’s time to waterproof the floors to prevent damage from ever happening again!
Last year I took two Schluter classes and learned about waterproofing, uncoupling membranes, and tips and tricks to keep your tile job looking flawless for a lifetime. What I learned over the four days blew my mind. I learned why and how shower systems fail. But, most importantly, I learned how to properly prepare surfaces for tile using waterproofing membranes. Today we’ll just be talking about waterproofing a floor, but I’ll have another tutorial for you soon so you can learn how to waterproof walls too.
Materials:
(I’ve included affiliate links for your convenience. I earn a small percentage from a purchase using these links. There is no additional cost to you. You can read more about affiliate links here.)
Before we get started, I want you to fully understand how waterproofing a room can actually save you money and save you from the headache of having a leak in your home.
If you have a kitchen or a bathroom, chances are you’re going to have a leak in your lifetime (or your home’s lifetime) if it hasn’t already happened. One of the best things you can do is to install waterproofing materials so water can never damage your floors or floor framing again. I believe so strongly in the Schluter products, that all the properties I’m working on (including my own) will have Ditra installed on the floor before tiling.
By using the Schluter Ditra uncoupling and waterproof membrane in conjunction with Kerdi band around the perimeter of the room, I can waterproof the entire floor. Which means I don’t have to worry about rot or mold happening. Any little leaks will sit on top of this membrane until I see it because the water will rise instead of seeping into your floor or walls.
Ready to get started? Let me show you how to waterproof any room in your house!
For your convenience, I made a video to help show how to install Schluter waterproofing products and how to fully waterproof a room!
Instructions:
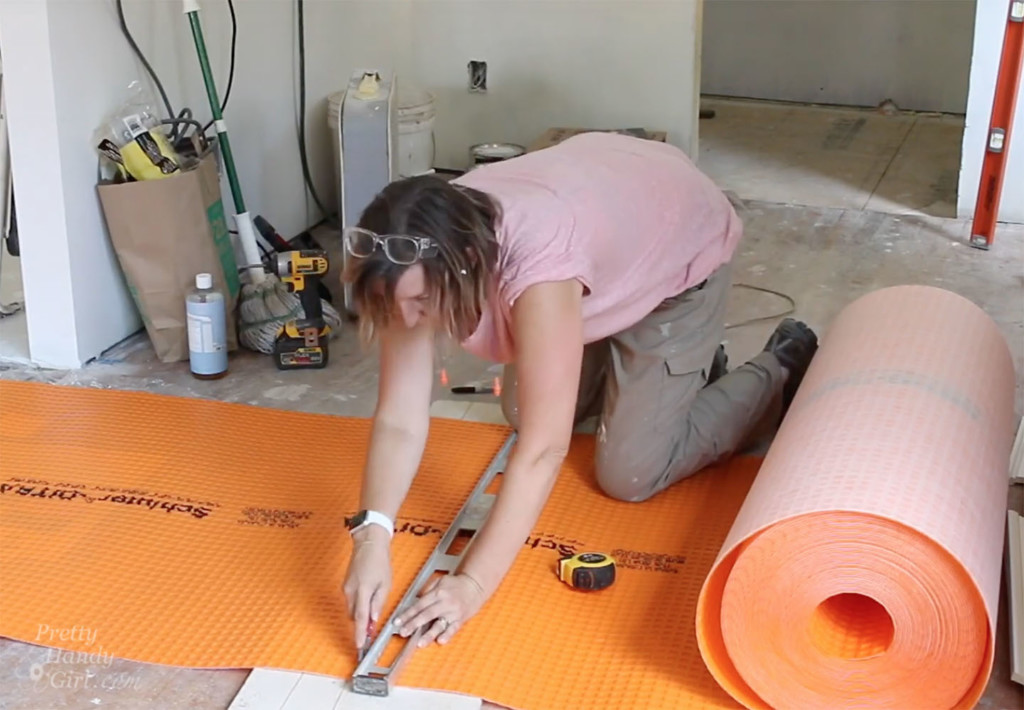
Cut open your roll of Ditra and roll it out onto a scrap piece of wood or something you can cut on.
Measure the room you want to waterproof and transfer the dimensions onto your Ditra membrane. Use a straight edge and a sharp utility knife to cut the Ditra. You might need to make a few passes with the knife to cut completely through the Ditra membrane.
Test fit the Ditra in your room. Cut out a hole for your floor vents by pressing your knife through the membrane where the vent is and remove the material up to the edges of the duct. Cut the rest of the pieces to fill the room. Do not overlap the Ditra material.
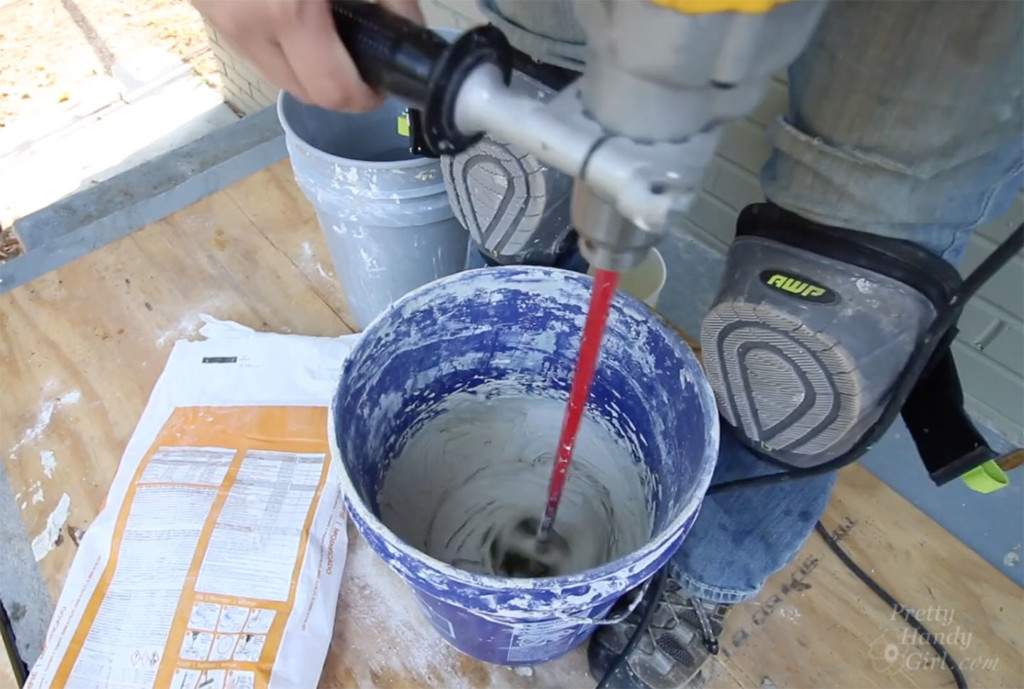
Now it’s time to mix the thinset. When using Schluter Ditra it’s highly recommended to use the Schluter All Set. This mortar is specifically manufactured to cure against the waterproof membrane. Read the instructions on the packaging and mix your thinset as directed.
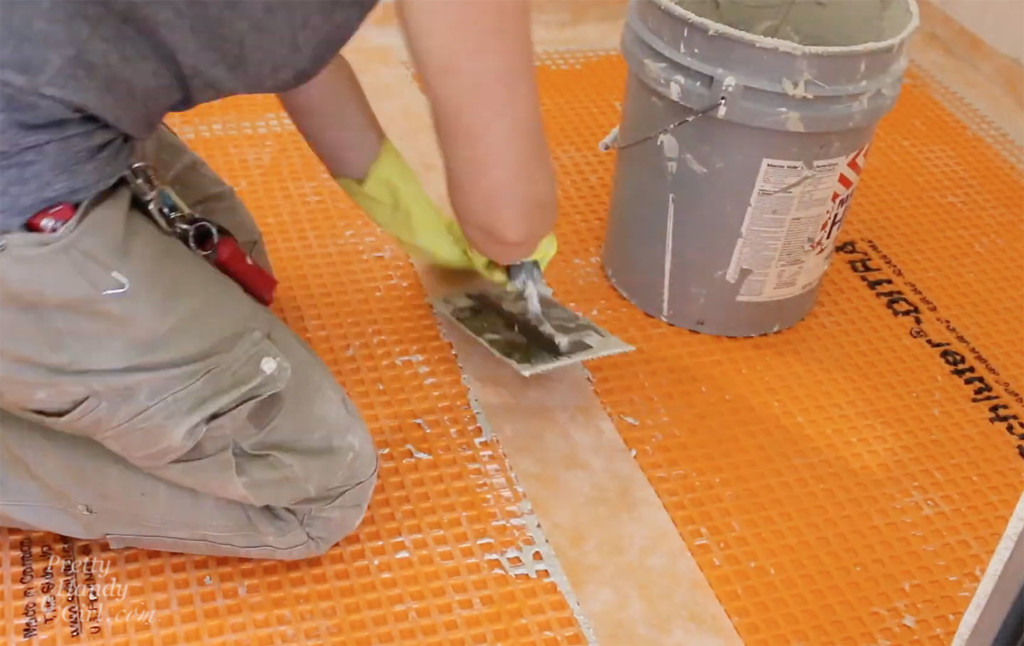
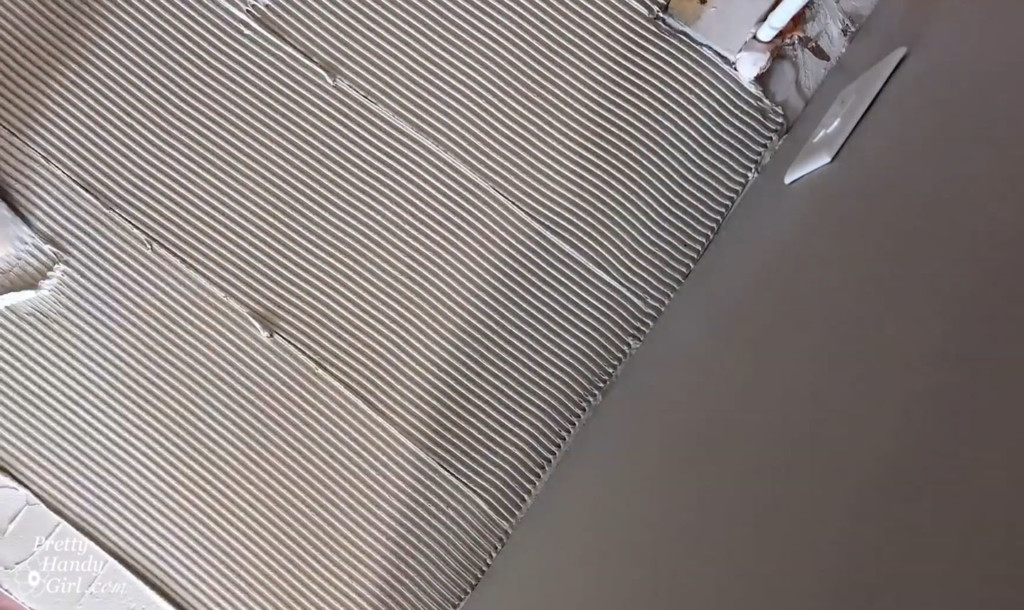
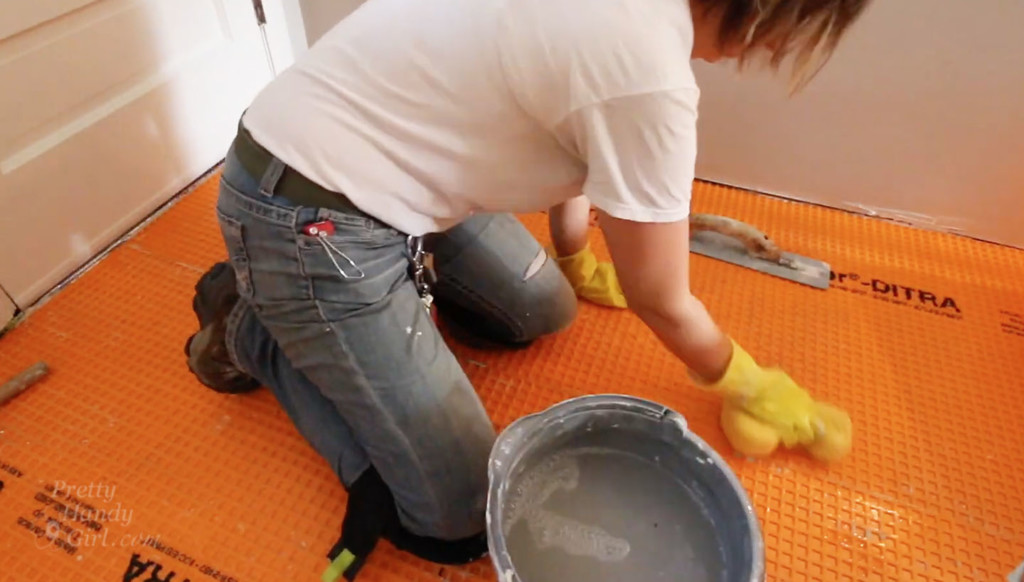
Use a wet sponge and clean water to clean and wet the subfloor. Spread the thinset onto the floor using the Schluter Ditra trowel. Make sure you have good coverage on the floor.
Then use the notched trowel to comb through the thinset at a 45° angle.
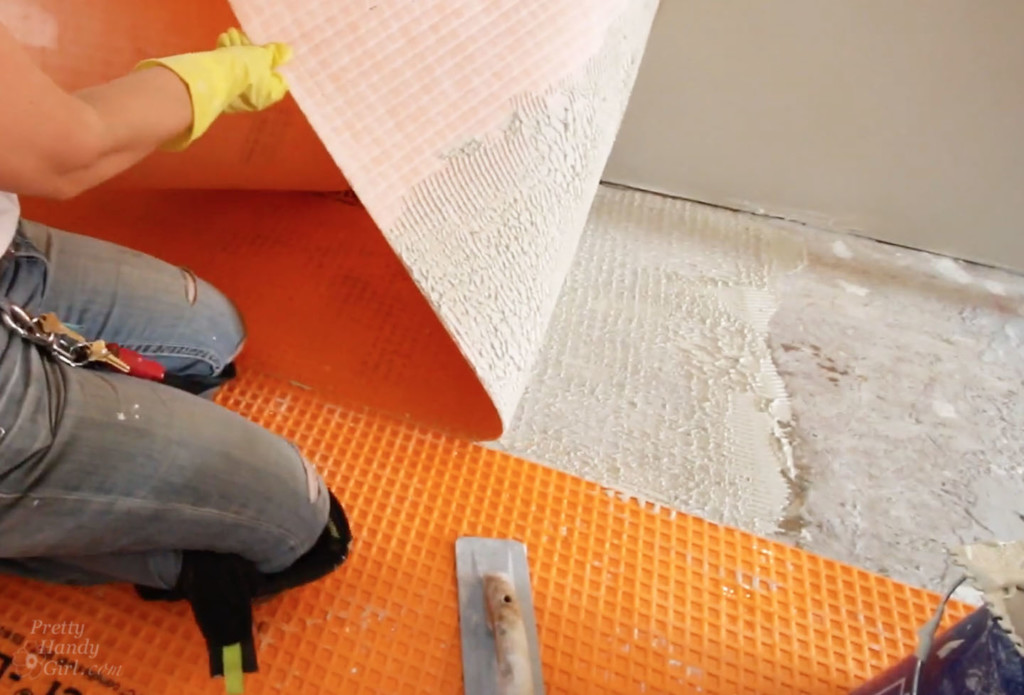
Lay the Ditra membrane on top of the thinset and use a smooth float to press the membrane into the thinset. In the beginning, you should roll back a corner of the Ditra to make sure you have full coverage onto the backing of the membrane. Place the Ditra back down and use the float again to make sure the membrane is pressed into the thinset.
Use a wet sponge to clean out any mortar that has squeezed out the seams or edges.
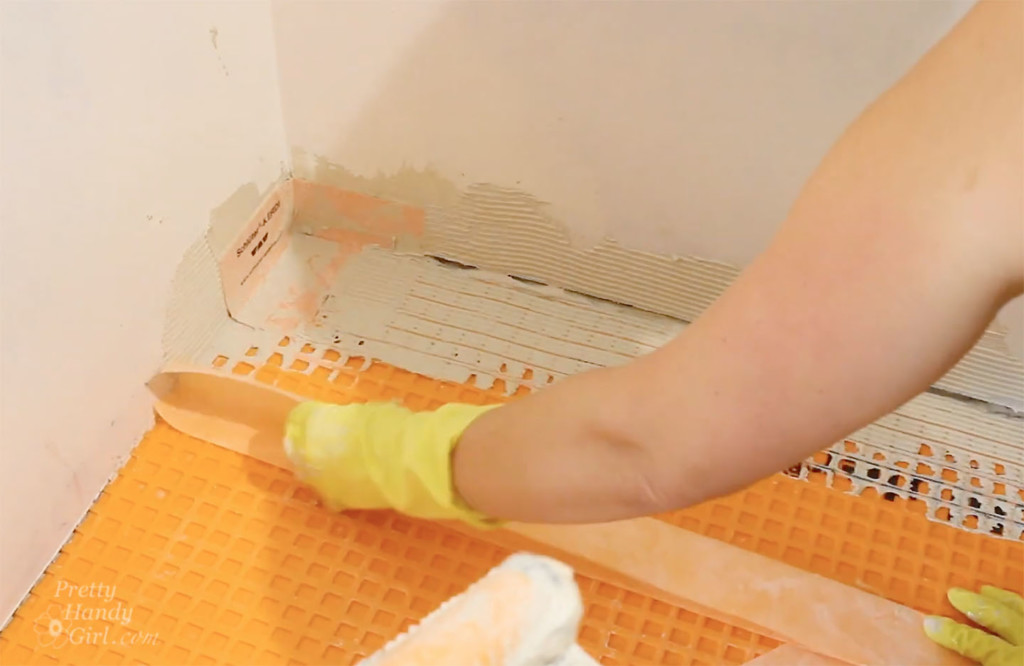
Once all the Ditra has been installed into the subfloor, you’re ready to seal the perimeter and seams. Grab a Kerdi corner piece for each corner of the room. Using the Kerdi trowel, apply thinset mortar to the inside corner of the room. Use the notched side to comb through the thinset. Place the Kerdi corner into the thinset and use the flat side of the trowel to embed and scrape along the Kerdi.
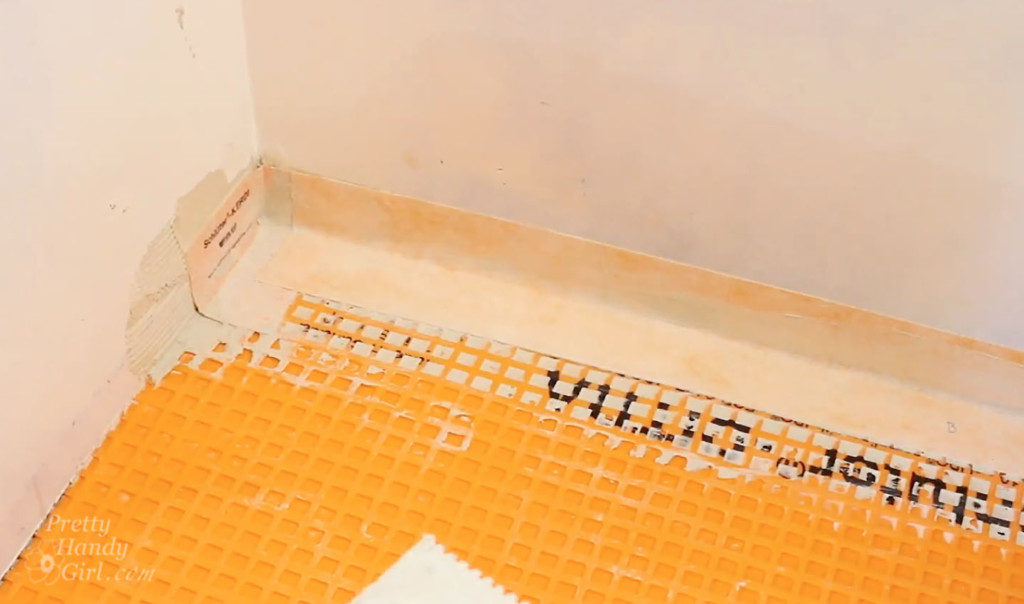
Now you’re ready to install the Kerdi Band on the straight sections of wall. Be sure to cut your Kerdi band so it overlaps the corner pieces by at least 2 inches. I like to pre-fold my Kerdi Band by creasing it in the middle so it’s easier to install in the corners. Apply the Kerdi Band to the wall and floor using the same technique as the corner.
Clean up any excess mortar leaving a smooth surface for tile installation.
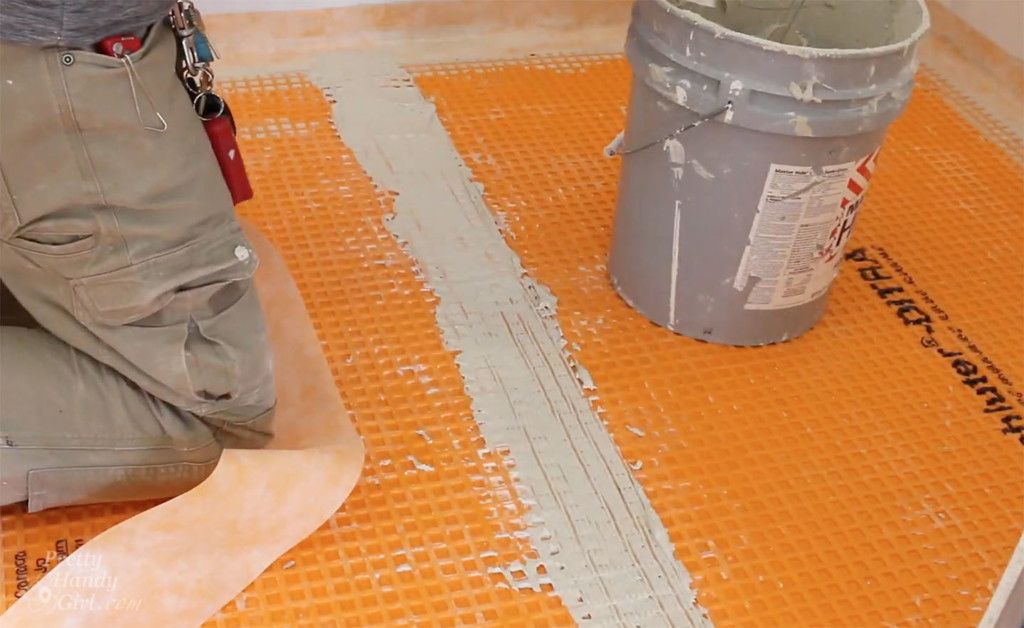
Now it’s time to complete the waterproofing of the room by sealing the seams between the Ditra sheets. Cut your Kerdi Band so it overlaps any perimeter band by at least two inches. Apply the thinset over the seam, use the notched trowel to create ridges in the thinset.
Then embed the Kerdi band into the mortar and run the flat side of the trowel over the band to smooth the thinset and embed the band.
Clean up any excess and allow the thinset to cure before tiling.
Once the thinset has cured you can tile your room and rest easy knowing this room is waterproofed and there’s no way the subfloor will rot from a sneaky little leak. Or a big leak if you have kids that like to splash out of the bathtub. I know this risk all too well from my own boys.
I hope you found this tutorial helpful and you’ll consider using Schluter waterproofing materials before you renovate your next “water” room.
Disclosure: I was provided with some Schluter materials for this project. I was not told what to write. All opinions are my own. I am particular about the brands I represent and will always let you know when you are reading a post with complementary products or a sponsored post.
https://prettyhandygirl.com/wp-content/uploads/2020/03/phg-holding-utility-knife-over-ditra.jpg8711440Brittany Baileyhttps://prettyhandygirl.com/wp-content/uploads/2021/07/PHG-logo-tagline-2020-1030x211-R.jpgBrittany Bailey2020-03-04 07:00:002020-06-11 22:27:06How to Waterproof Floors in Any Room
Saving Etta: Installing the Tile Backsplash & a Mistake I’ll Never Make Again
Last week you got to see how the range hood was installed (and how I averted disaster during the installation.) Today I’m sharing more kitchen updates. We’re going to dive into tiling a backsplash and one mistake I’ll never make again.
Before we get started, I want to give a big shout out to my sponsors! These brands came together to help me save Etta and I am incredibly grateful.
(I’ve included affiliate links for your convenience. I earn a small percentage from a purchase using these links. There is no additional cost to you. You can read more about affiliate links here.)
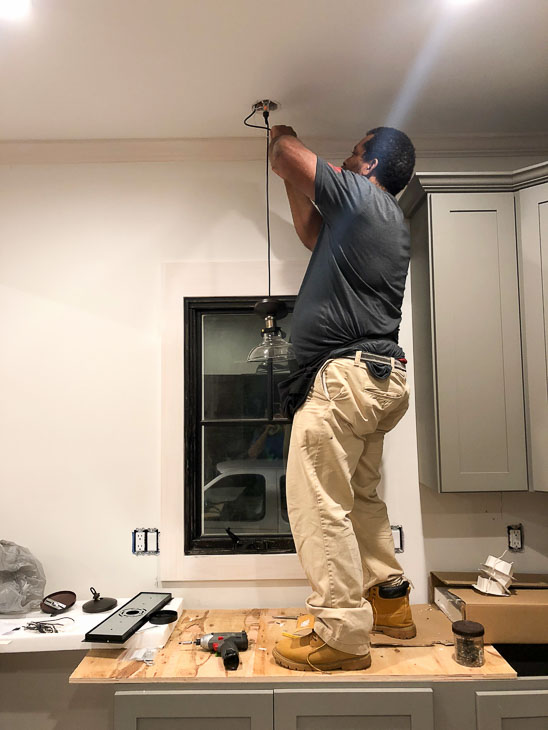
Shortly before tiling, my electrician joined me late one night to finish installing the light fixtures in the kitchen. My sons and I had already installed all the recessed can lights. But, I let my electrician handle the remaining fixtures. Especially because I was on a tight deadline to get the house finished and on the market before the holidays.
This guy standing on plywood at 9pm at night, is my knight in shining armor. Harvey has been my electrician for over six years and he’s helped me solve electrical problems on multiple occasions. The thing I love most about him is he always pushes me to take on the smaller electrical projects myself. When I wanted to hire him to install a switch for an automatic door activated light in our pantry, he explained the process then left me with these parting words, “Call me if you get stuck.”
Most light fixture installations are straight forward and simple, but we had several issues with the lights I ordered for the Saving Etta house. One of them was missing parts to attach the hanging hardware to the canopy that attaches to the ceiling box. Harvey sent me to a nuts and bolts store. I kid you not, it was an obscure hardware store I never knew existed in Raleigh. Walking through the door, was like walking back in time. Picture Michael J. Fox stepping into the soda shop in Back to the Future. The gentleman working the counter looked at my light fixture parts and started searching through aisles of fasteners, nuts, bolts, screws, and who knows what else. Ultimately he found a nut that would work for our light. Hallelujah.
The gentleman took my credit card and I nearly laughed as he ran it through one of the old carbon copy credit card machines. If you’re too young to know what this is, I leave you this video for your education. For the rest of us, enjoy a trip back in time.
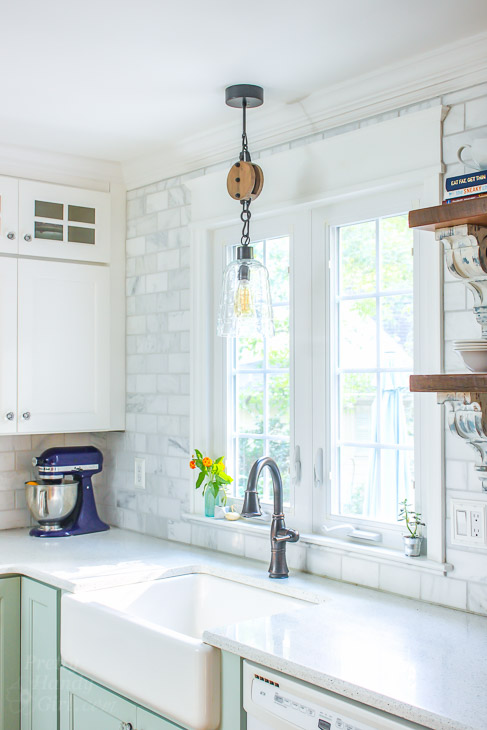
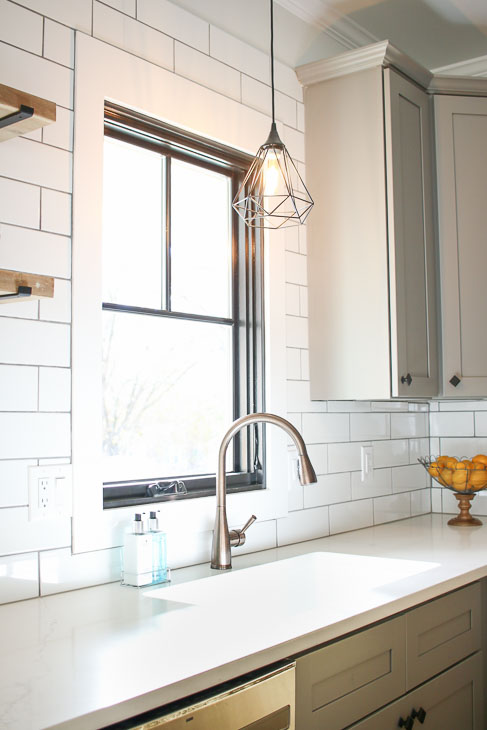
Back at the house, Harvey had finished installing the pendant light over the sink. But, something looked off. The pendant shade wouldn’t hang level no matter what we tried. Ultimately, I took it down and replaced it with a modern geometric pendant and pendant light kit from Lowe’s. In my opinion, the light is perfect for the modern farmhouse look I was envisioning for Etta.
Countertops:
After the cabinets and range hood were installed it was time to call the countertop fabricators. The owner arrived and took measurements, then he sent me to look at slabs in the local granite and stone warehouse. I took my youngest with me and we watched in awe as a huge robotic arm lifted giant slabs of quartz and granite for customers to view. You can join us as we are looking through the slabs in my Facebook Live video:
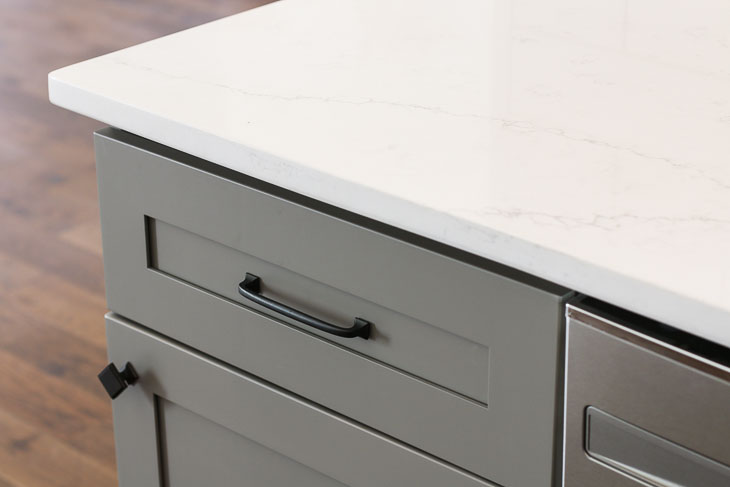
Can I share something with you? I’m not a big granite fan, although I saw some amazing slabs at the warehouse. Instead of granite, I chose a marble looking quartz. The quartz is called Carrara Venatino from Cosmos. I think Cosmos has it manufactured especially for them. If you like the countertops, you can see if there is a Cosmos distributor near you.
The countertops are one of my favorite finishes in the kitchen. I almost wish I had used them in our own kitchen instead of the recycled glass quartz countertops. My only complaint about the Carrara Venatino is it tends to scuff easily. Belt buckles and rivets leave gray lines that look almost like pencil marks on the edges. It’s not a huge deal as they seem to wipe off with a rag and some cleanser.
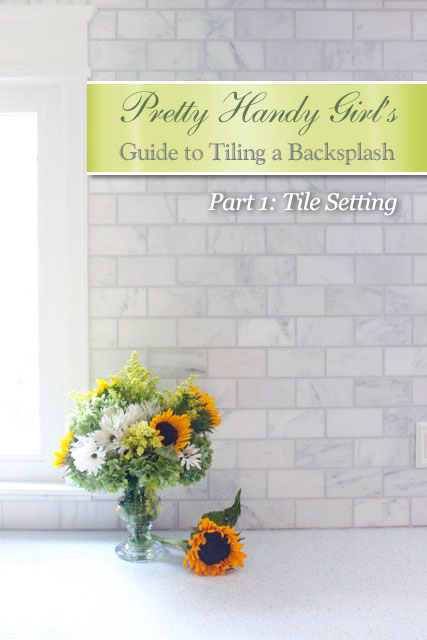
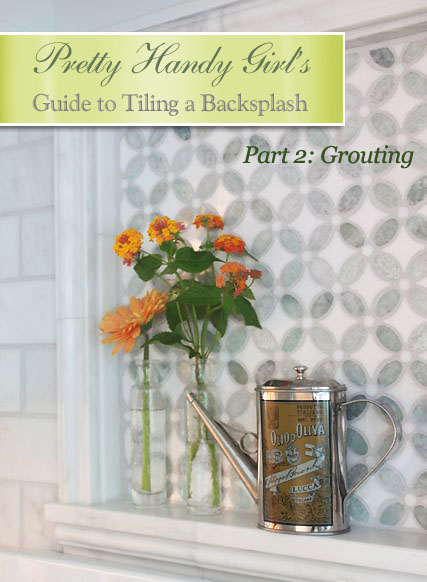
Tiling the Backsplash:
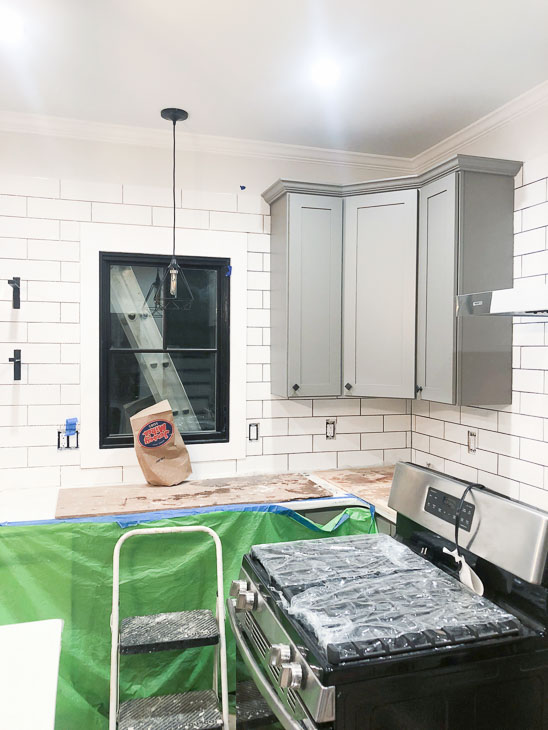
The backsplash turned out beautiful and definitely attracted a lot of attention in this open concept kitchen. I used Jeffrey Court 4″ x 12″ white subway tiles from Home Depot. The subway tiles have a timeless classic look and the larger size meant the install was a little faster than standard 3×6 subway tiles.
There were two particular evenings I stayed crazy late. I had to bust my butt to finish the tiling. Pretty Handsome Guy came one night to help, and brought Jersey Mike’s for dinner (see if you can spot my ingenious use of the trash as a faucet cover). The hubby got a crash course on using the wet saw and after about a dozen practice cuts, he finally got the hang of cutting tiles. (He still has to pick up some more skills before he can have the name Pretty Handy Guy. Have I mentioned he’s not the handy person in this marriage?) But, without his help I might still be tiling that backsplash! (Okay, that might be a bit of an exaggeration.)
Tiling can be a solo job, but it really helps to have one person cutting the tiles and the other one setting them. Especially because the thinset will eventually harden. At least the hardening process was slowed by the cold temperatures inside the house and out. (We still didn’t have the gas hooked up for the heat yet.)
The second night I worked by myself until about midnight. By the time I left, I was cold, tired, and sore. Climbing up and down on top of countertops is tough work. But, also rewarding as you can see by this progress after the first evening.
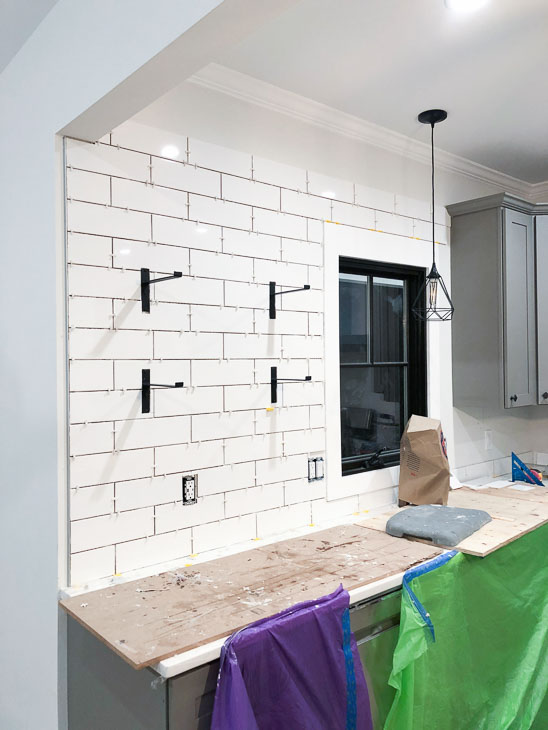
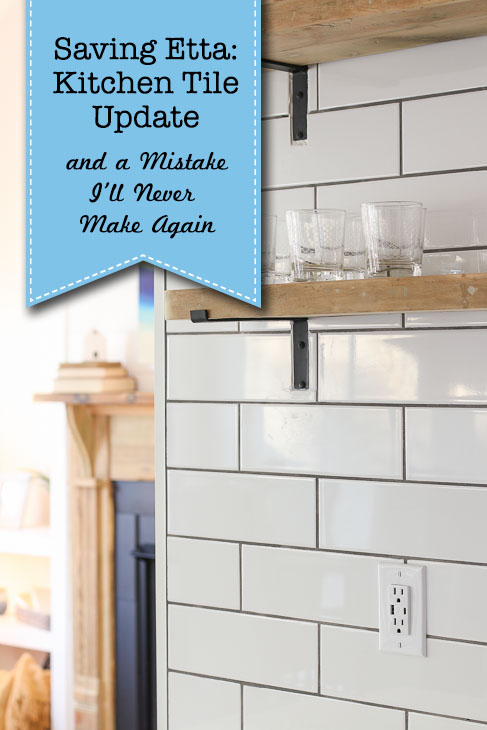
Installing Open Shelf Brackets:
Having open shelving in the Saving Etta kitchen was a no brainer. In my own kitchen I have two open shelves and I love them! For my shelves, I installed corbel shelf bracketsafter the tile was installed.
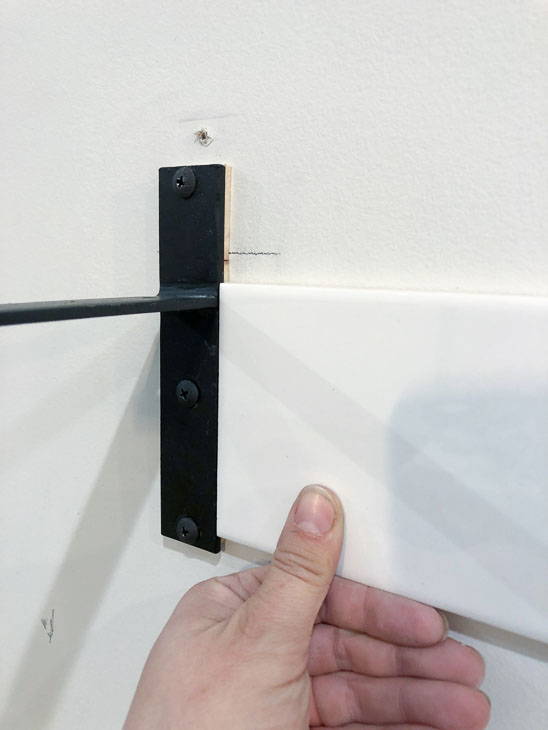
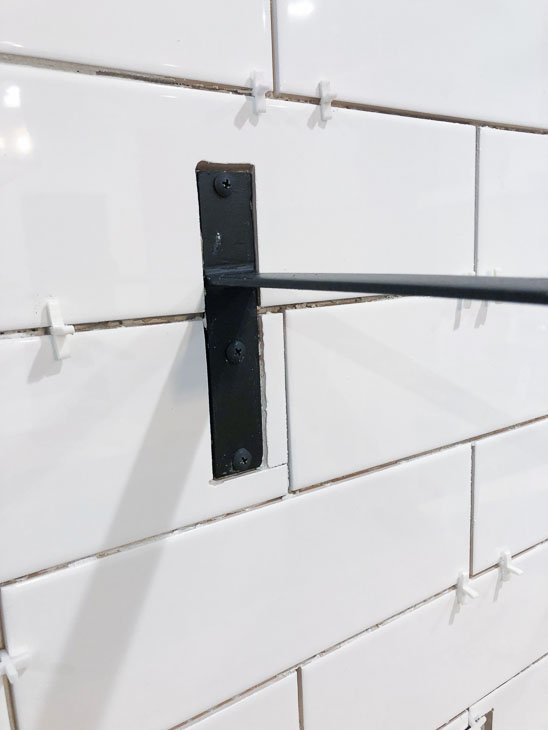
I was planning on doing the same at the Etta house. But, shortly before tiling I stumbled across a tile setter on Instagram who had installed the shelf brackets before tiling. Thinking this guy was a professional and knew what he was doing, I decided to try doing the same thing. After all, it would be easier to locate the studs and blocking before tiling. Truth be told, I had added blocking in the wall where the shelves were going to be mounted, and took a picture before the drywall was hung. (Smart, right?!)
Continuing my claim of having smart ideas, I decided to put a paint stick behind the shelf bracket before securing it to the wall. This would insure the bracket would be at the same depth as the tiles. In theory it seemed like a good idea. Can anyone guess what my mistake was?
There were actually two issues. The first was I failed to allow for mortar thickness. Depending on the size notched trowel you use, the thinset can add anywhere from 1/8″ – 1/4″. I guess I can be thankful at least I put something behind the brackets or they would have been horribly recessed.
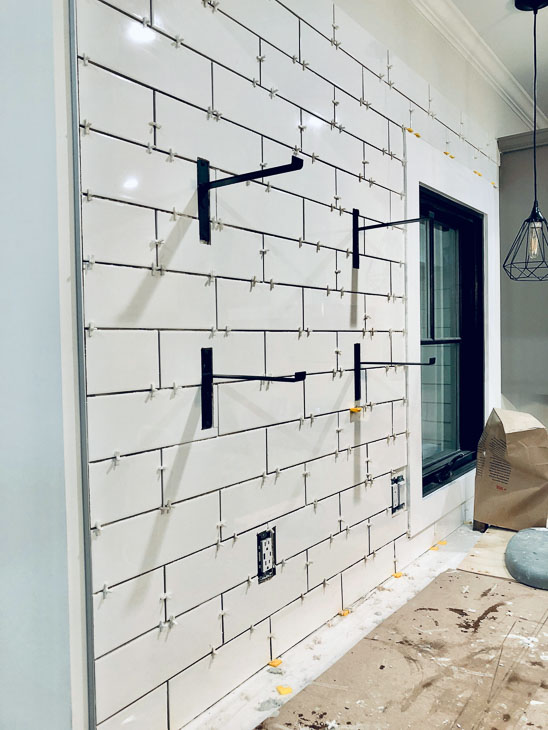
It wasn’t until I began grouting that I realized the second issue with installing the shelf brackets first: sloppy cuts.
Cutting tiles is not like cutting wood. Where it’s fairly easy to cut shapes in wood, it’s not that easy with tiles. Making perfect 90˚ cuts into tile is tough. As you can see above, I had one tile that needed to be notched. The small leg on the right kept breaking. So I ended up piecing the tile around one of the brackets.
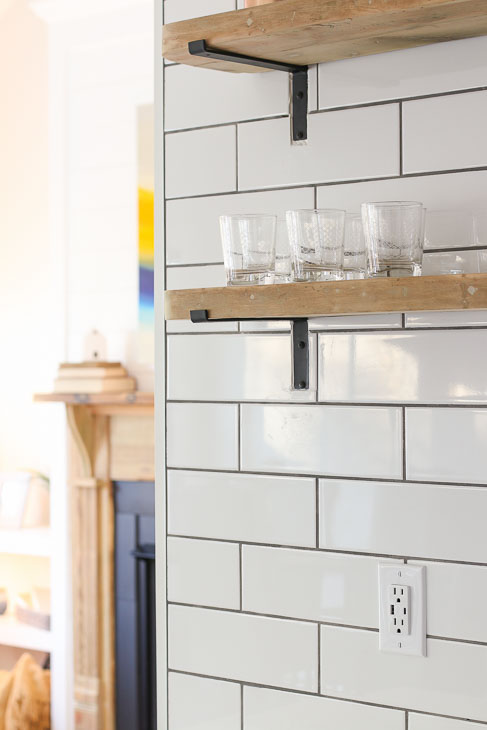
Next came the challenge of grouting around the brackets. After much mental exercise, I chose to put white caulk around the brackets to minimize the cut lines. The caulk hides some of the imperfections, but it still bugs me that they don’t look perfect. In DIY, there are plenty of opportunities to be creative and it also provides plenty of learning opportunities.
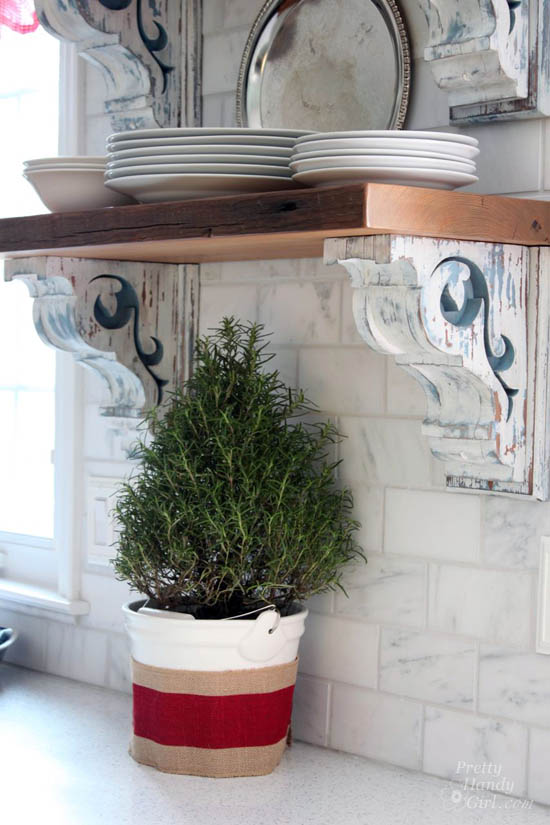
I will never make the mistake of tiling around brackets. Next time I will tile first and install the shelf brackets afterwards. (In case you are wondering, these are the brackets I used. They are sufficiently strong to hold shelves with glasses and dishes, but I wouldn’t use them to hold super heavy items like hand weights.)
The next day I finished tiling around the range hood and was able to grout the wall with the open shelves (but needed to wait for the newly set tiles to cure overnight.) By the end of day three I had completely tiled and grouted the backsplash!
Despite the few cut tiles around the shelf brackets, I am pleased with the backsplash. I’m keeping you in suspense with the rest of the kitchen reveal until Friday. But, here’s a close up of the tiling around the brackets. It looks okay from a distance, which is all that really matters, right?
Stay tuned, the next Saving Etta update will be the full kitchen reveal and I can’t wait to share it with you!!!
Disclosure: I worked with Jeffrey Court for Home Depot on this project. I was provided with the subway tiles for the kitchen backsplash. I will always let you know if I was sponsored or compensated. You should also note that I’m very particular about the brands I work with.
https://prettyhandygirl.com/wp-content/uploads/2019/02/tile-backsplash-feature-image.jpg353730Brittany Baileyhttps://prettyhandygirl.com/wp-content/uploads/2021/07/PHG-logo-tagline-2020-1030x211-R.jpgBrittany Bailey2019-02-18 10:00:002019-03-04 21:47:09Saving Etta: Installing the Tile Backsplash & a Mistake I’ll Never Make Again


 11 Must-See Tips for Professional Looking Tile Floors
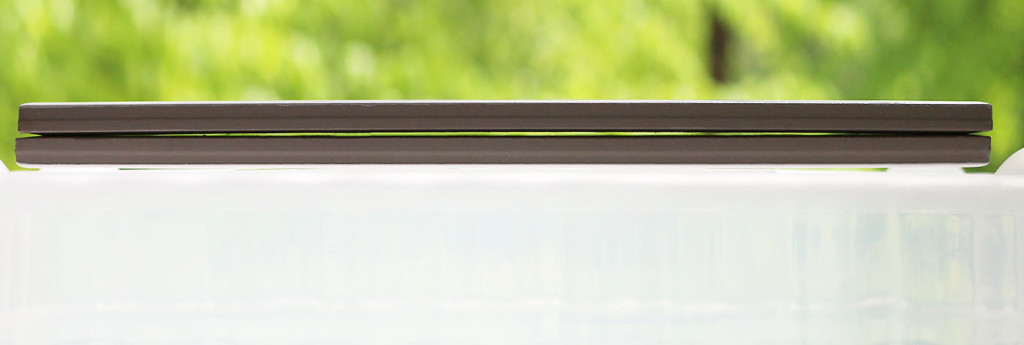
 Waterproofing Floors in Any Room
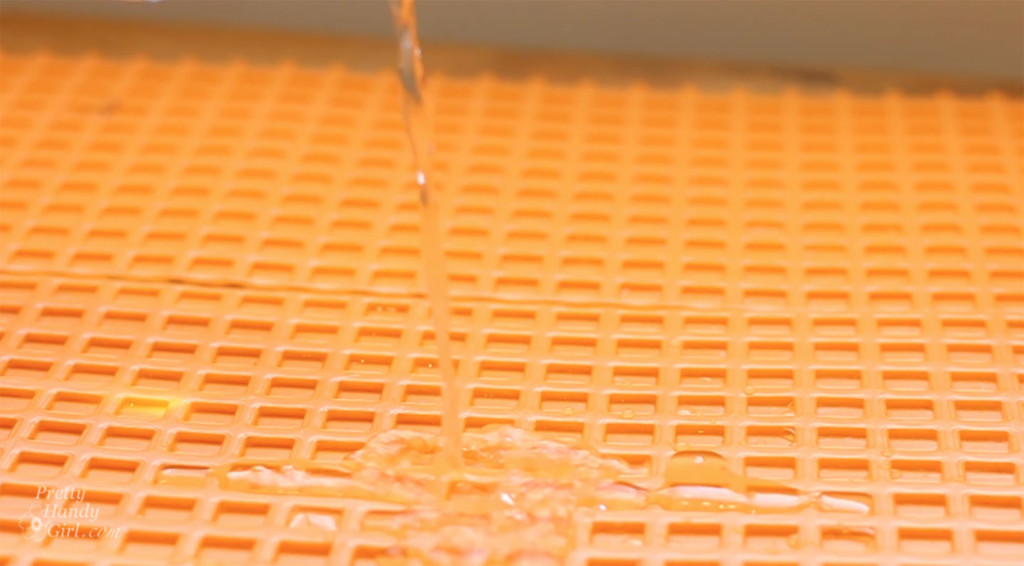


 Saving Etta: Installing the Tile Backsplash & a Mistake I’ll Never Make Again