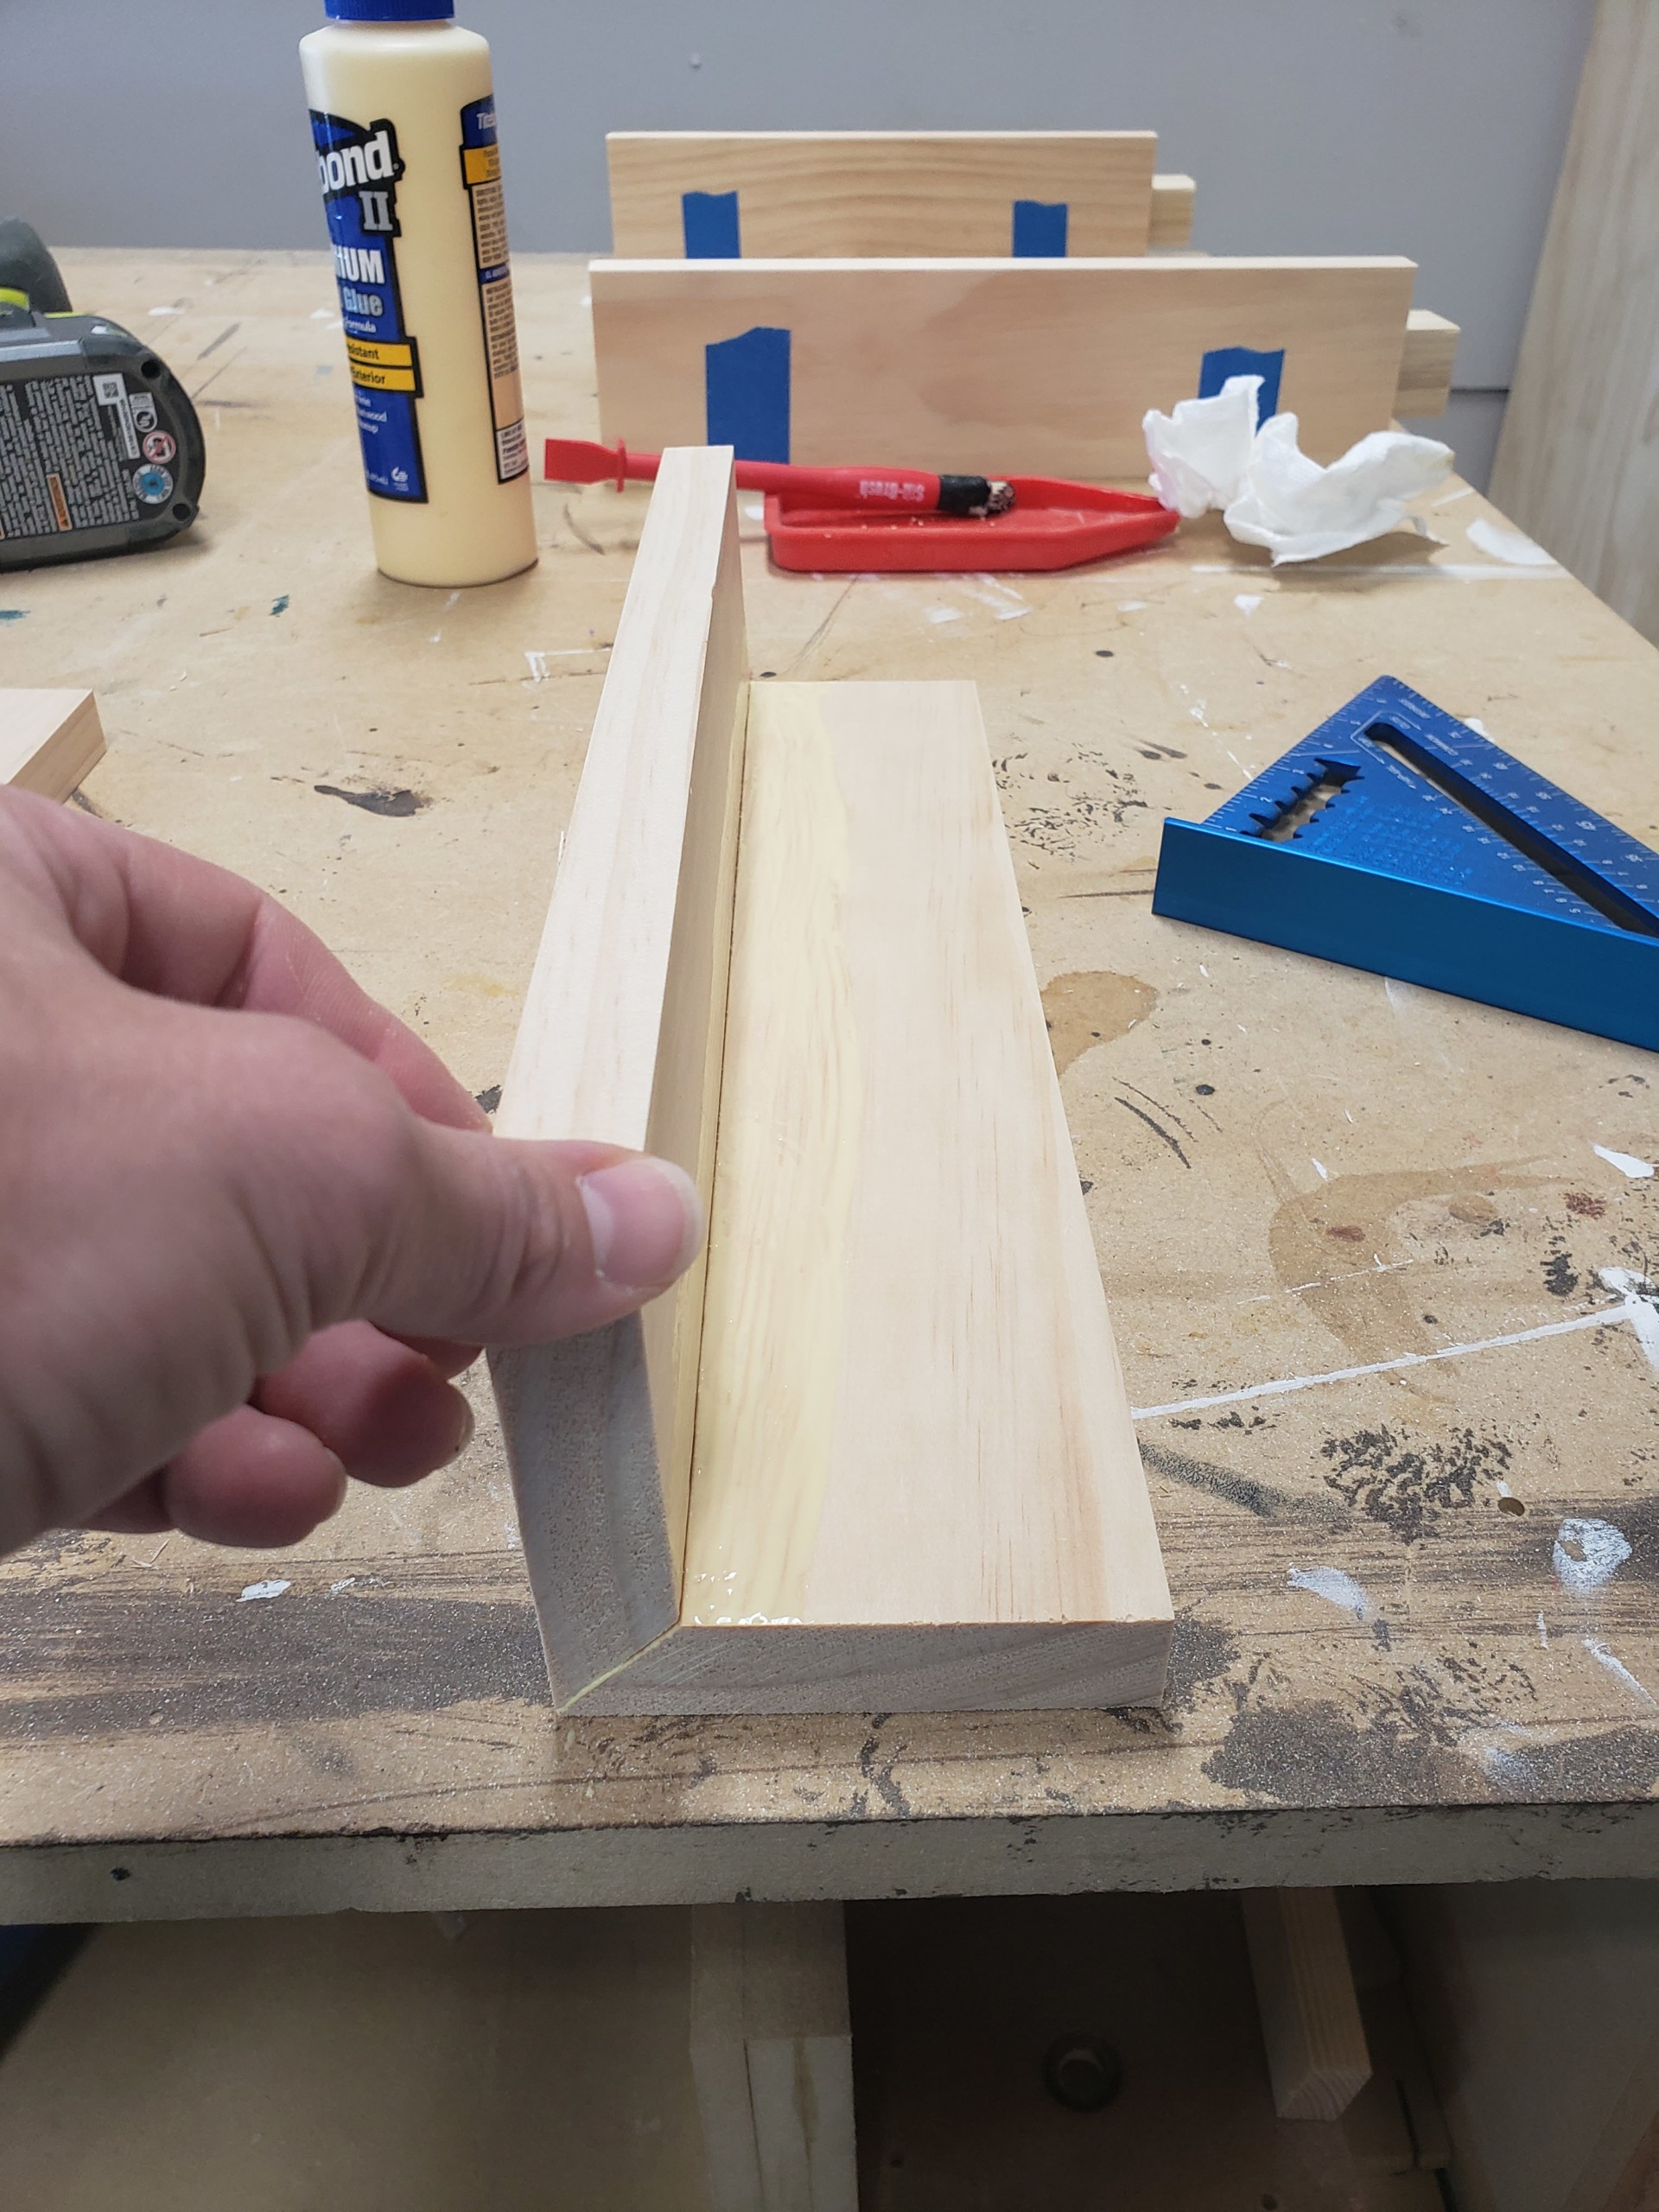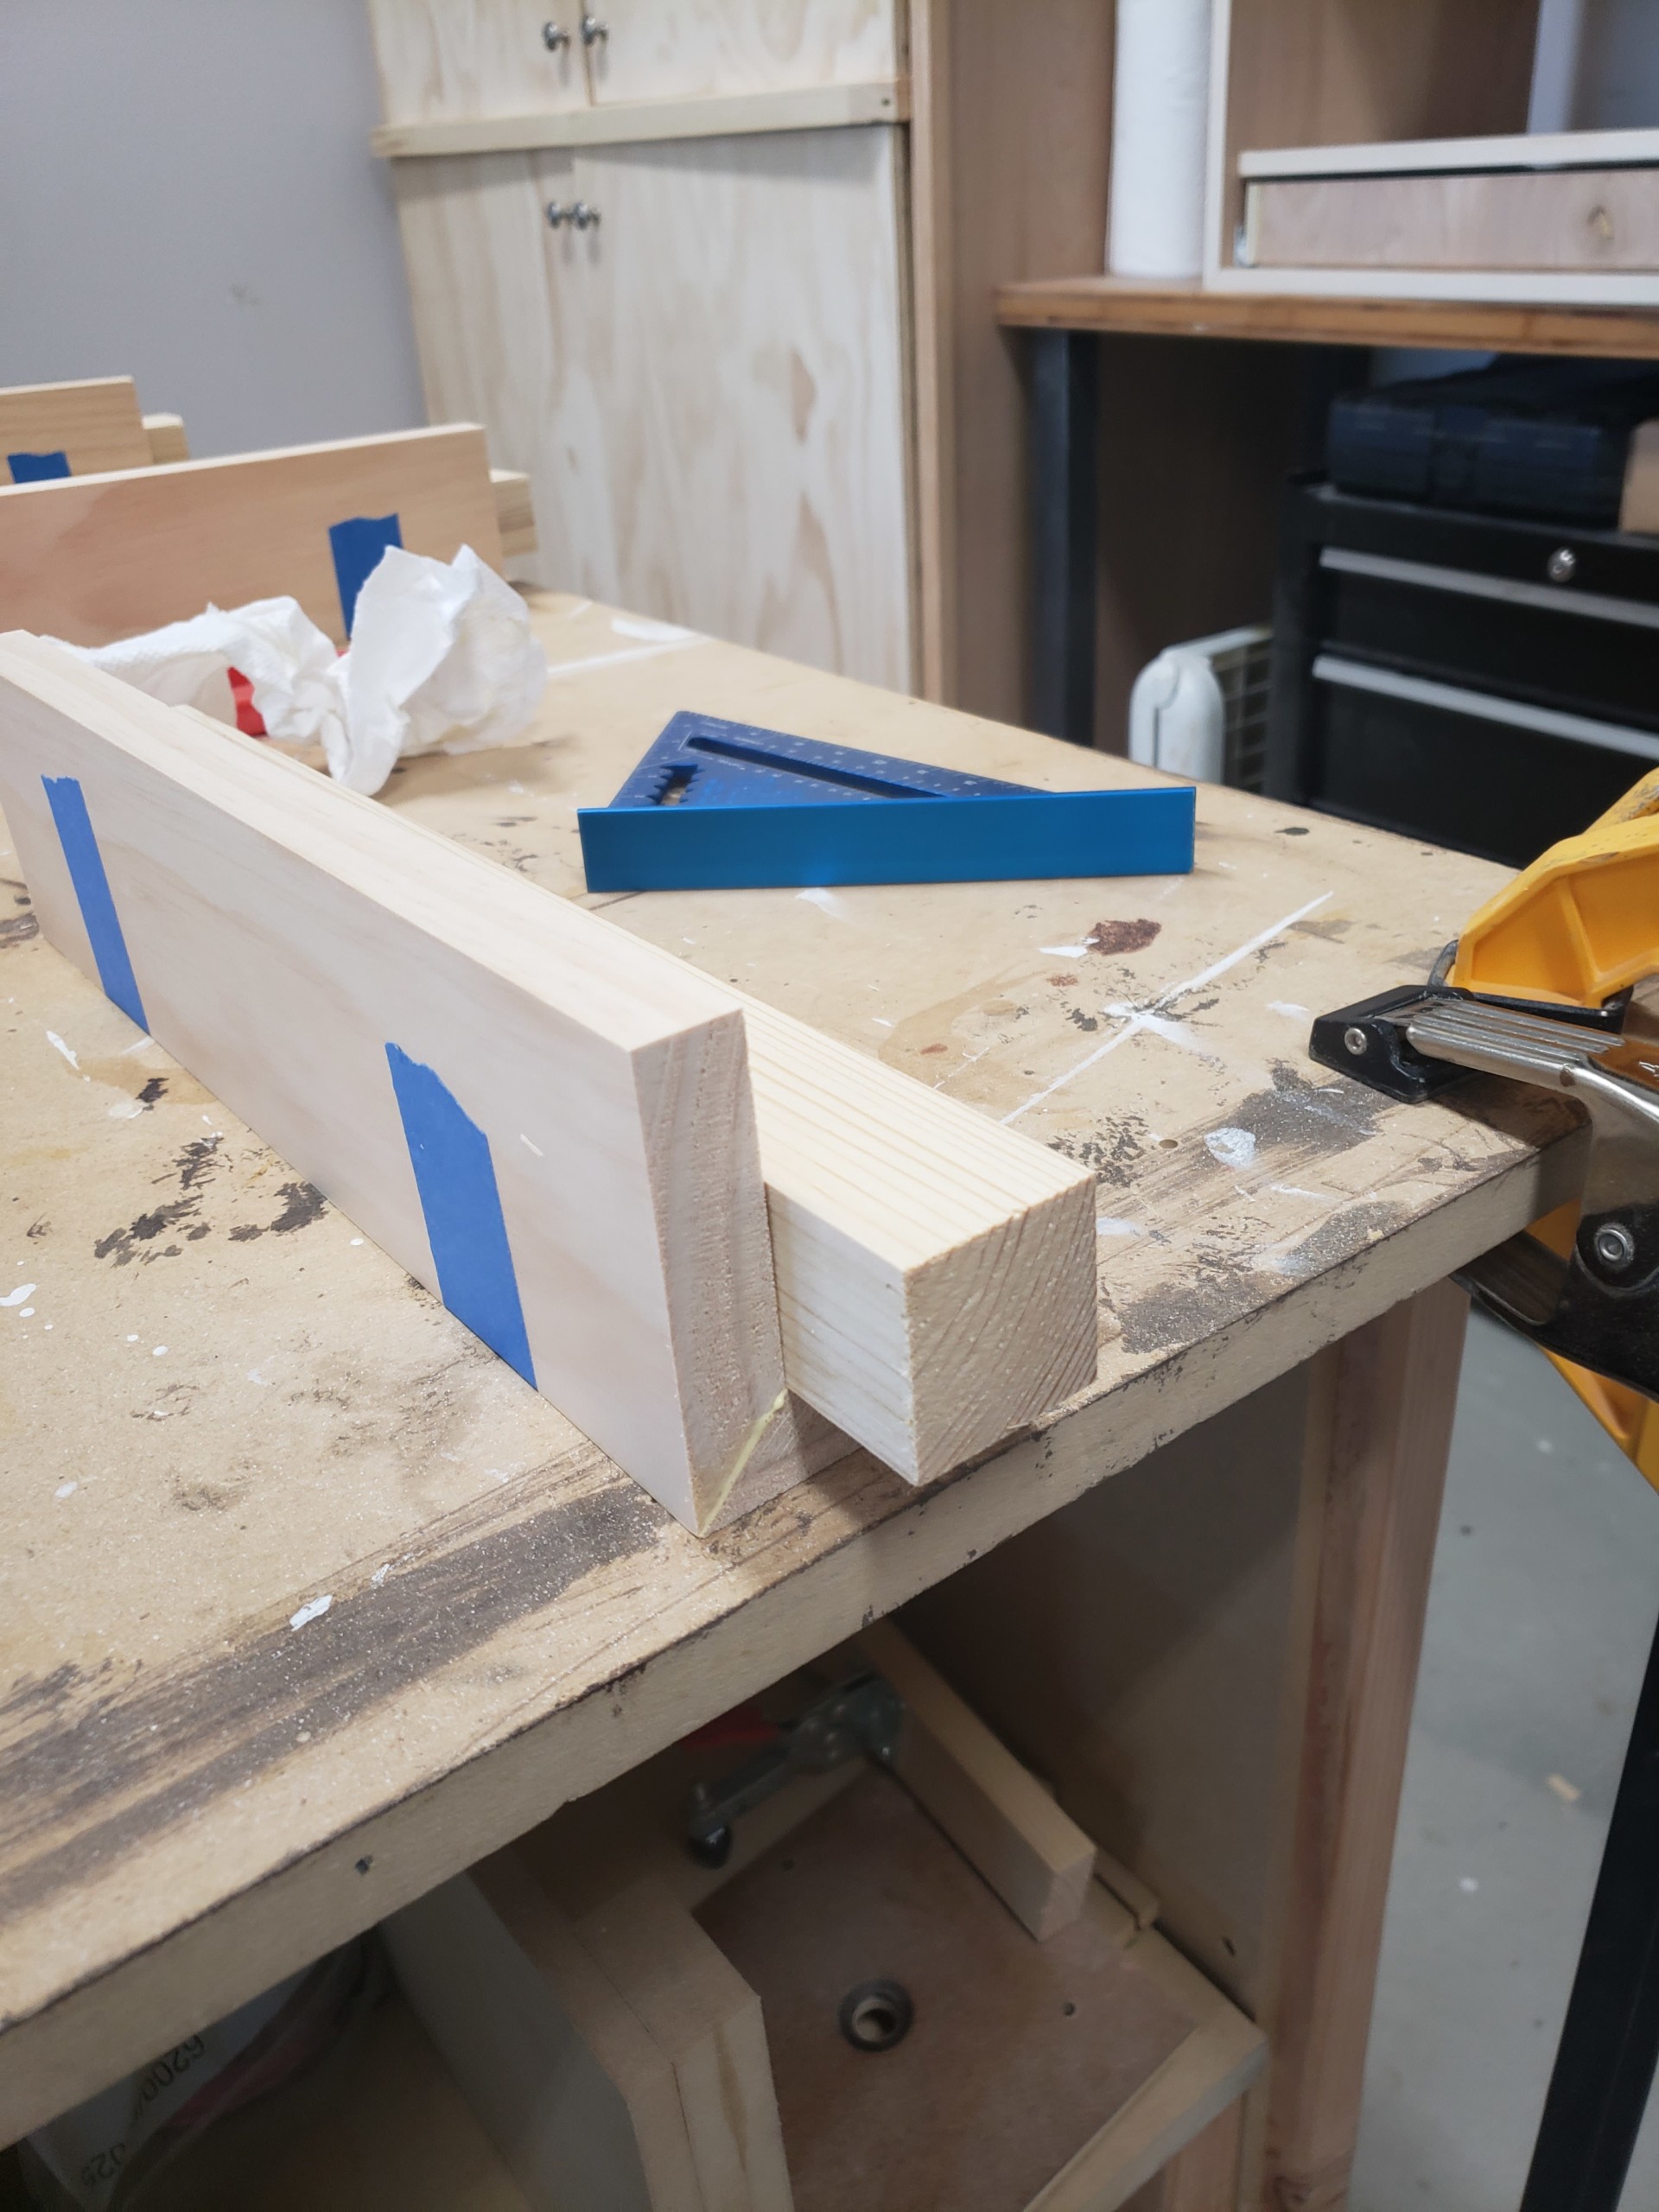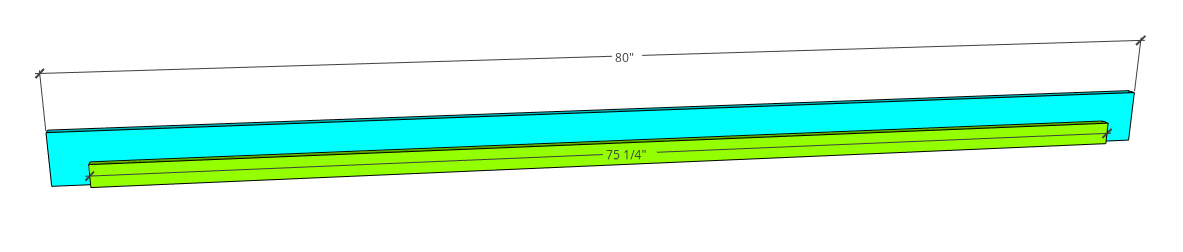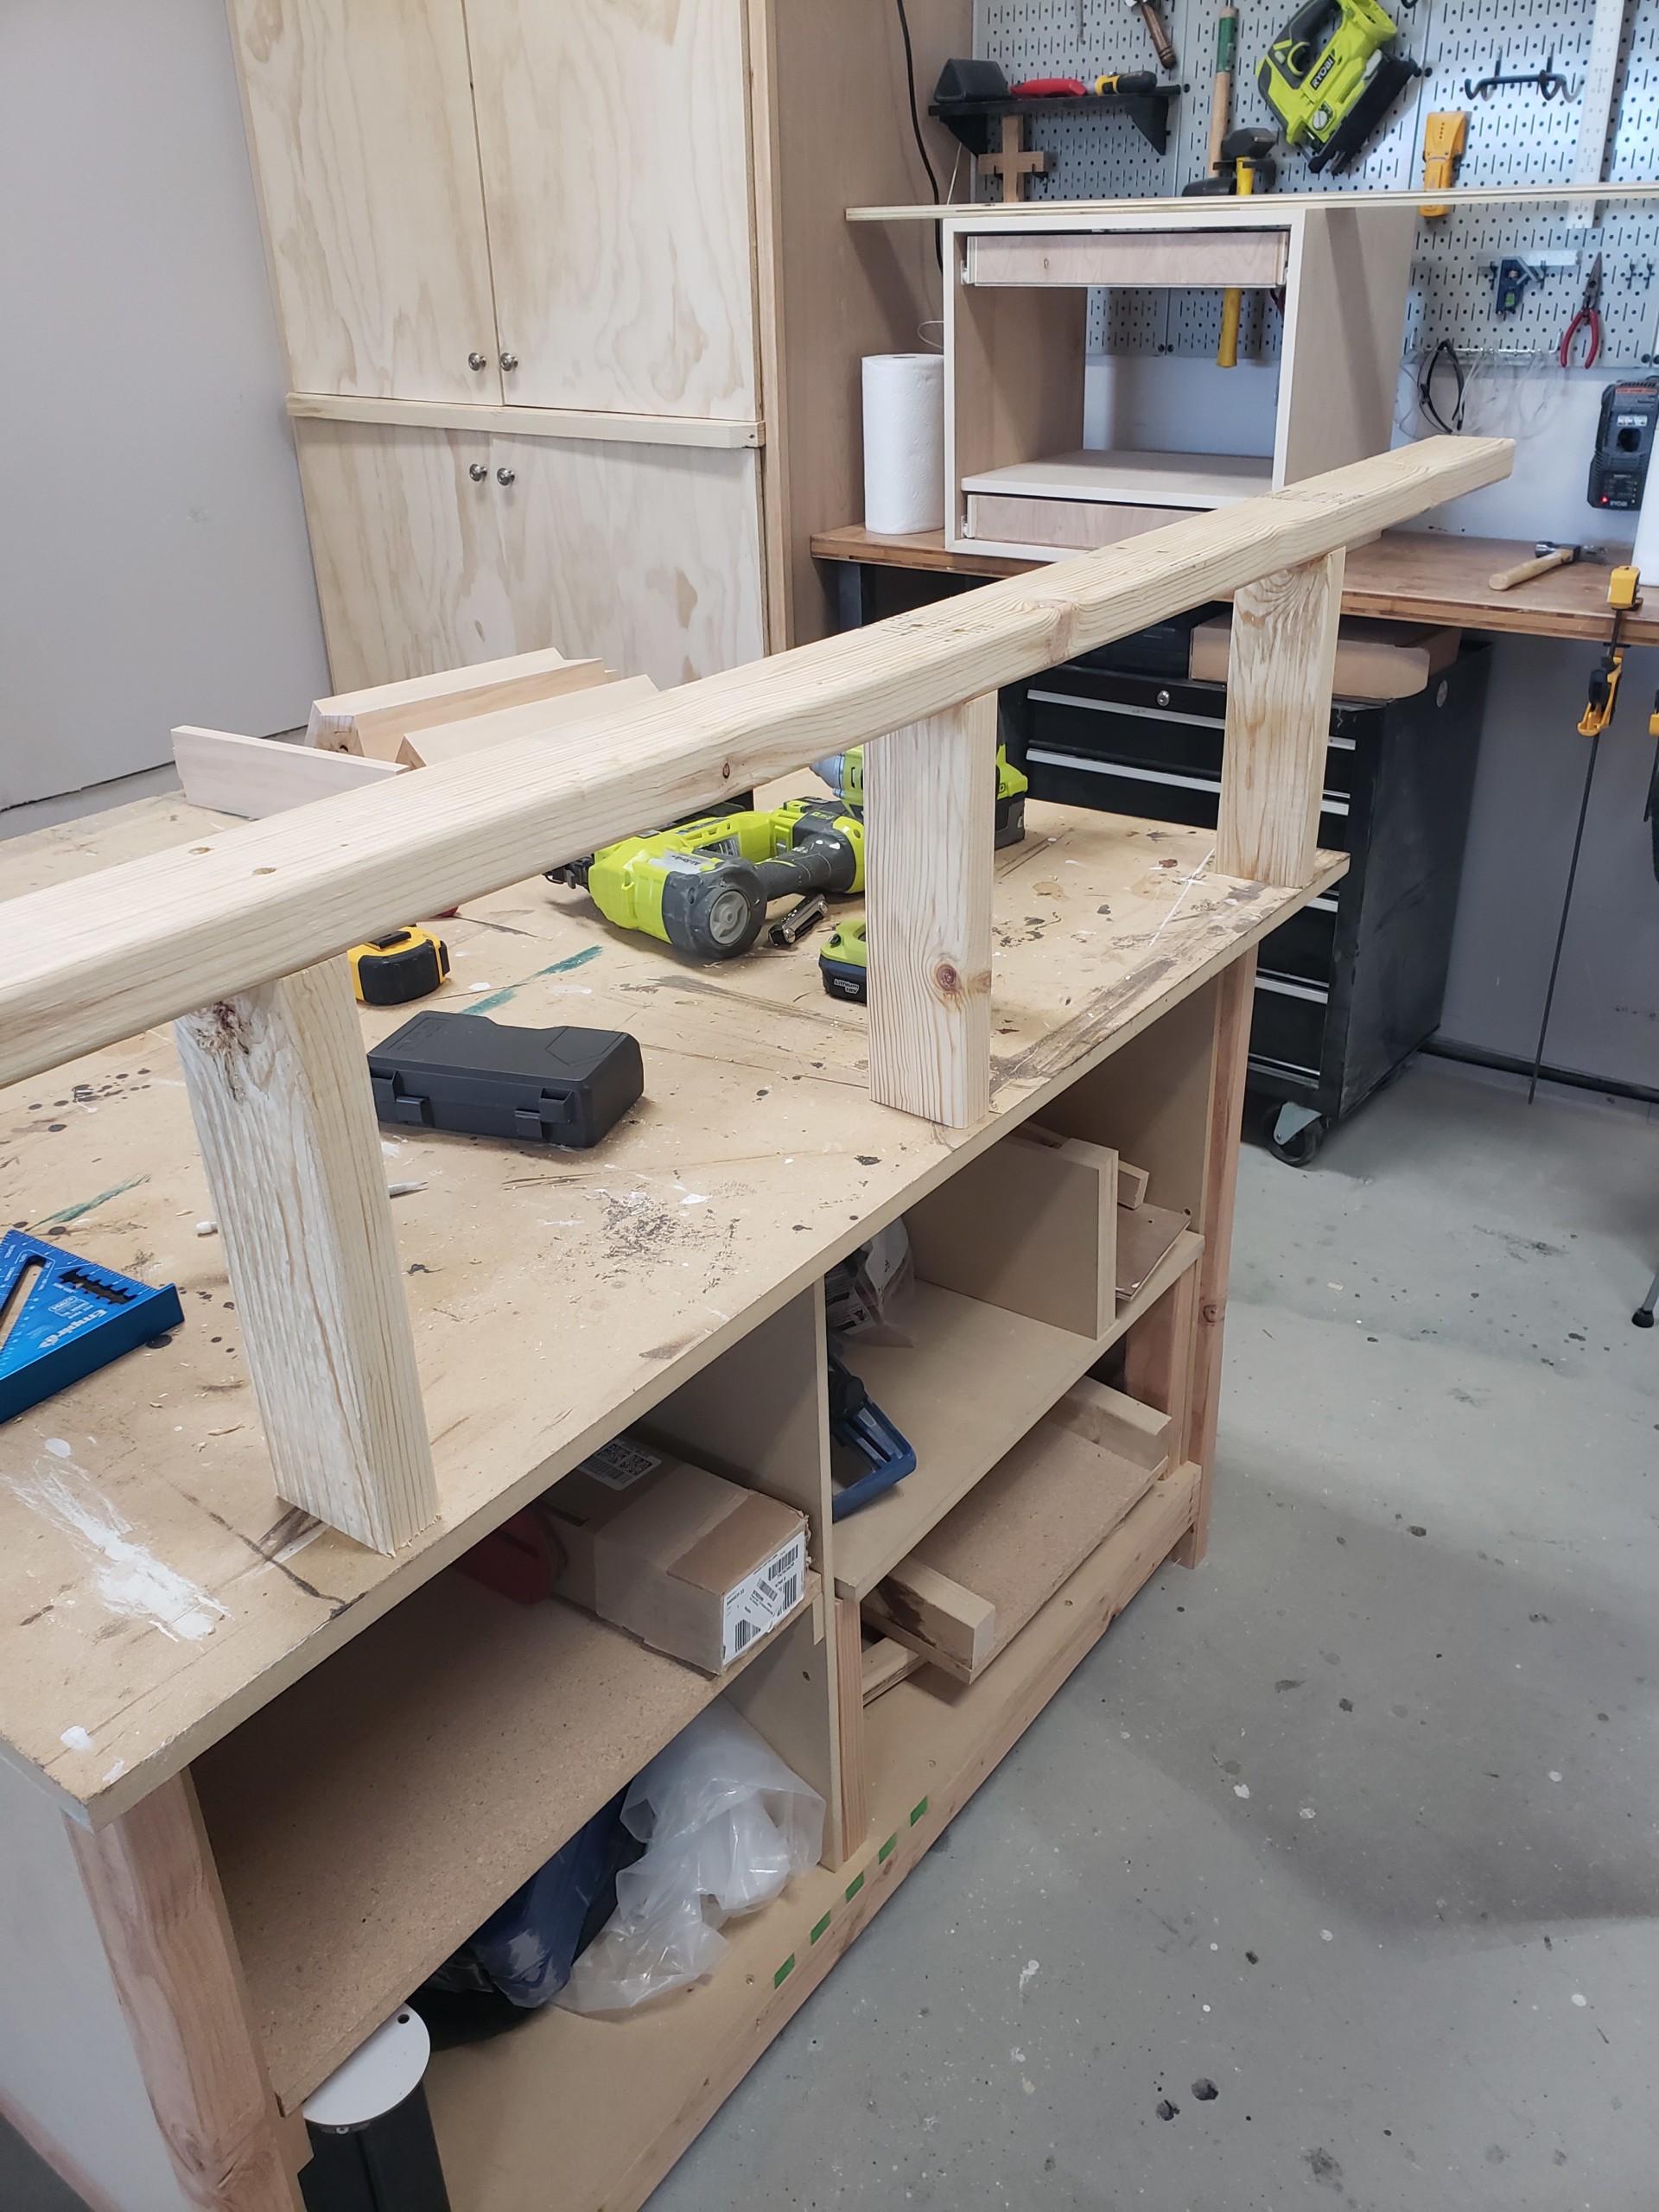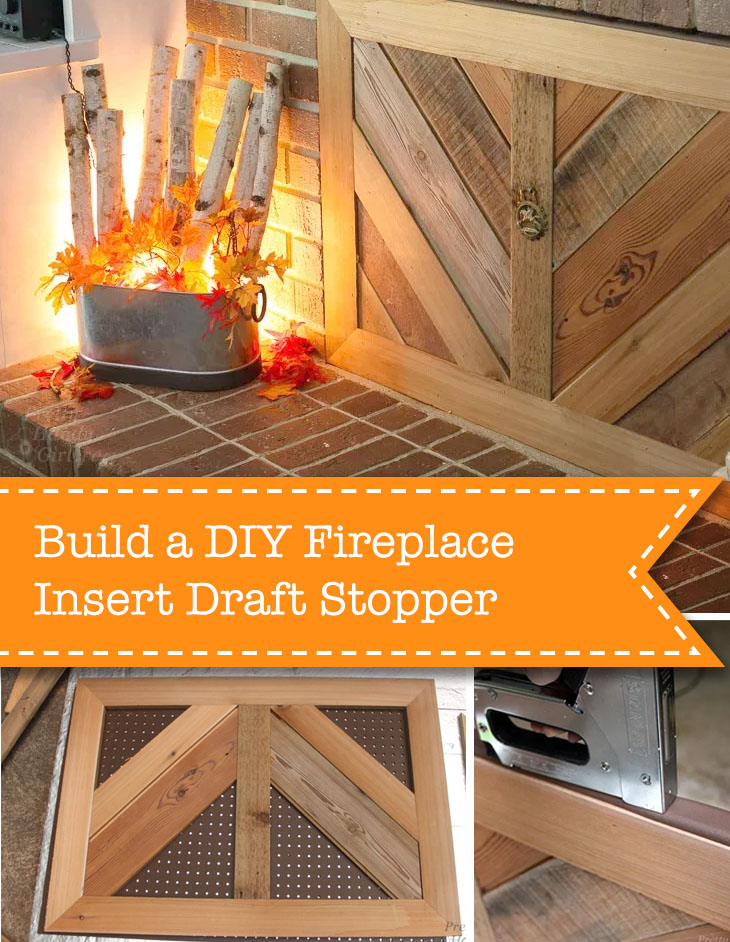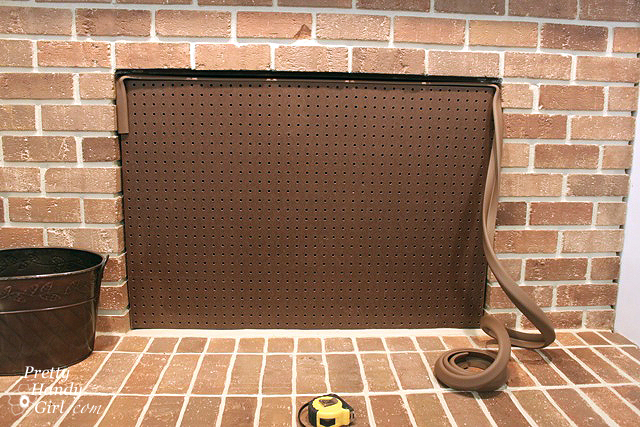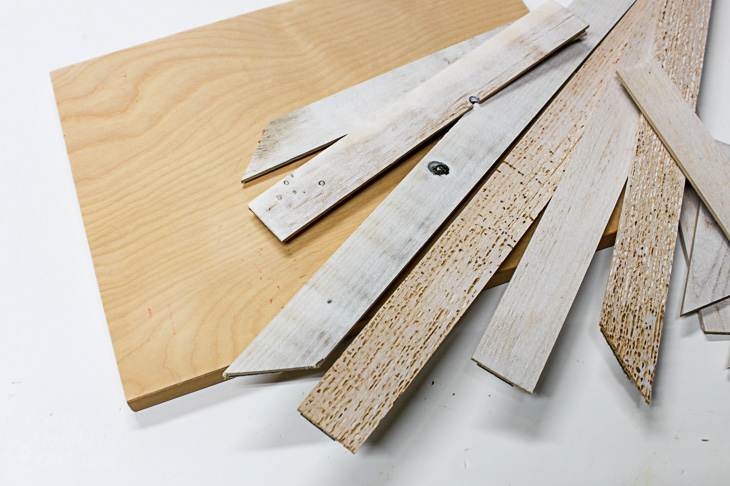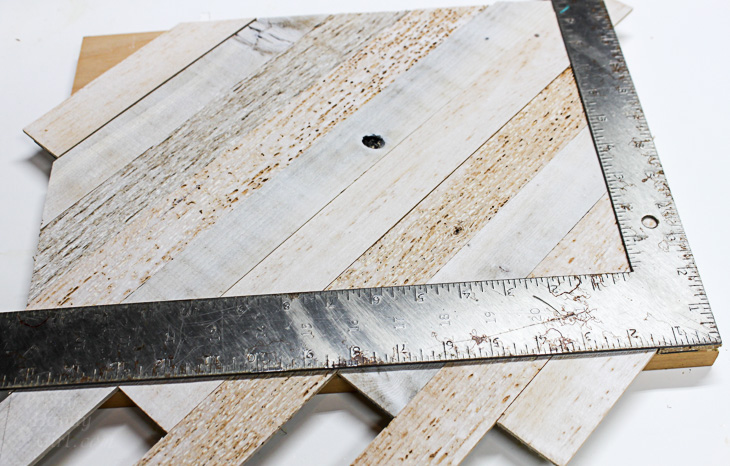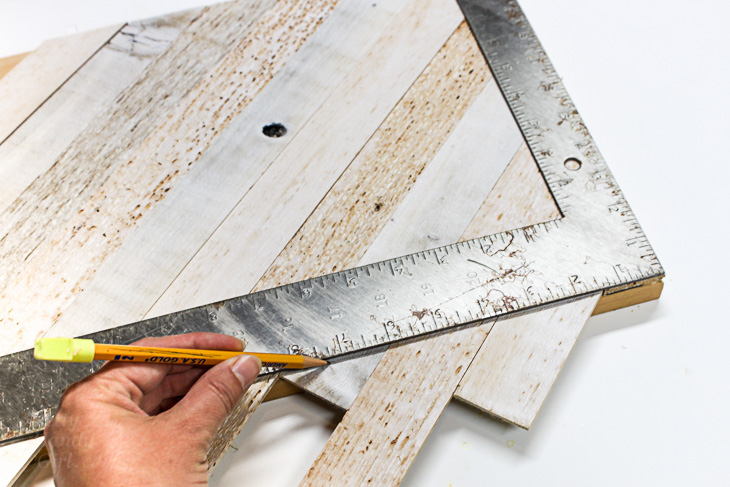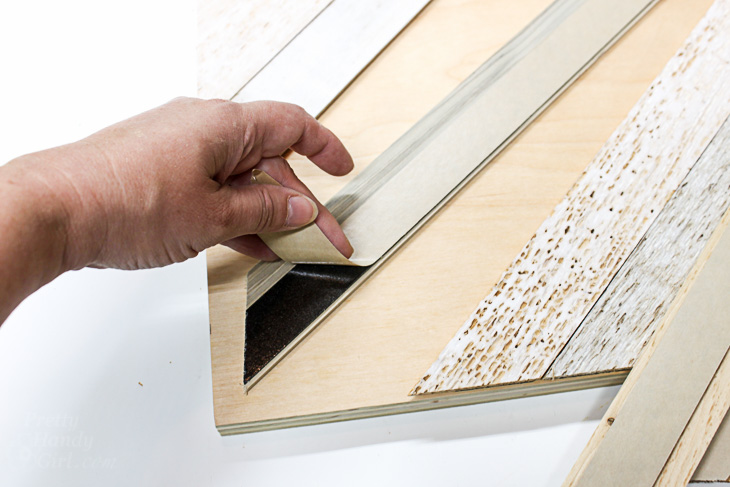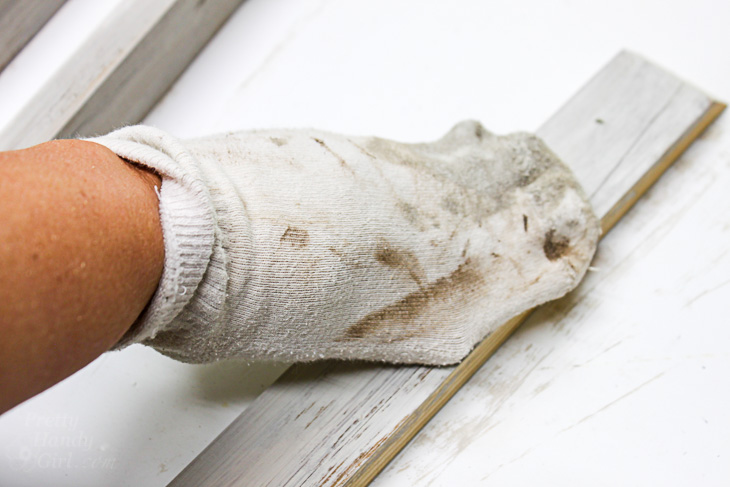
I’m a little bit of a fanatic when it comes to drafts. (Remember the time I weather-stripped my garage doors?) Over time I’ve addressed most of the pesky cracks and crevices that invite cold air into our home. But, there was one draft that I’ve been meaning to serve an eviction notice to since the first winter we lived in our house. Today I’ll show you how to build a fireplace insert draft stopper!

build a diy fireplace insert draft stopper

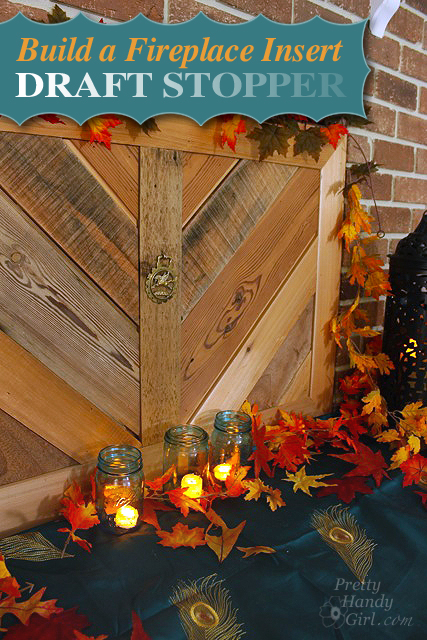
Build a Fireplace Insert Draft Stopper

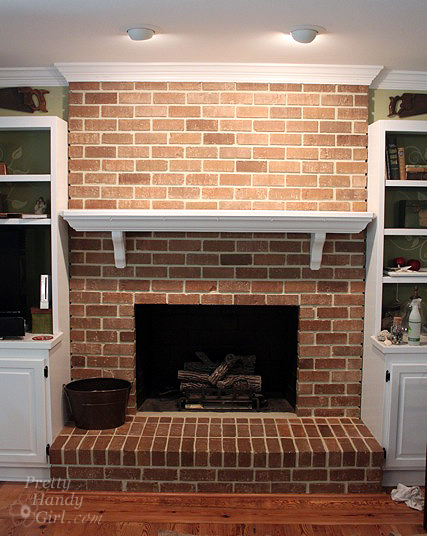
If you have an old wood-burning stover, or even one converted to gas logs, you likely know this old fireplace can be the source of cold air and drafts in the winter. Even with the damper closed, there is a draft that escapes into the room.

Build a Fireplace Insert Draft Stopper with Reclaimed Lumber | Pretty Handy Girl

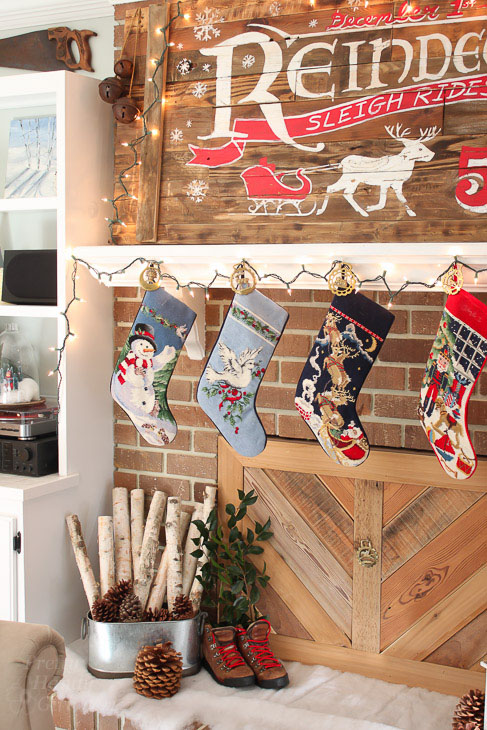
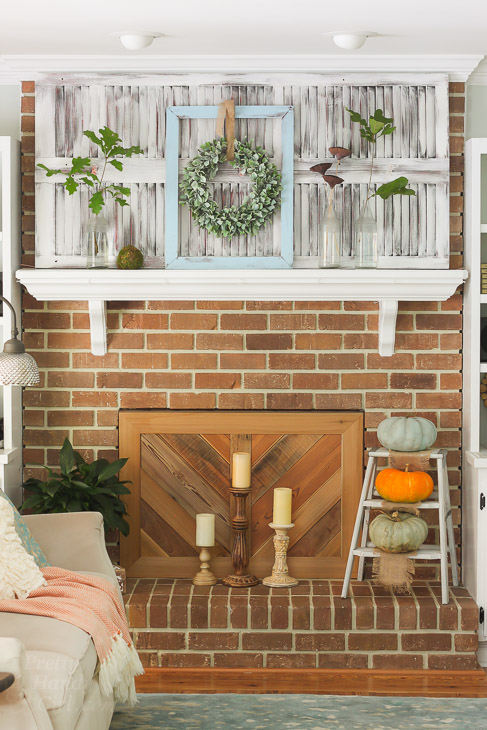
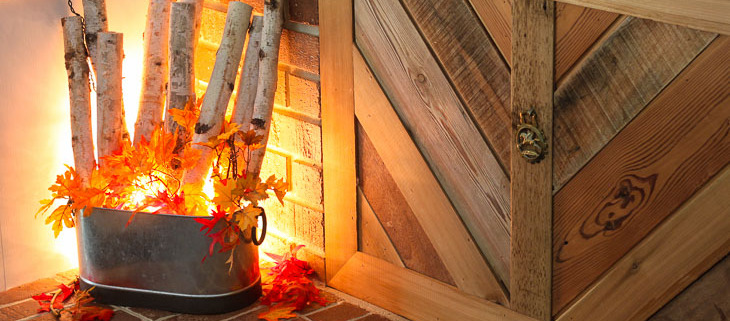
You can’t weatherstrip the damper (that would be a fire hazard), so I solved the issue by building a rustic reclaimed wood fireplace insert to stop the draft.

How to Make a Vintage Rustic Sleigh Ride Sign | Pretty Handy Girl How cool! You can use this technique to make or transfer any sign graphic.

Want to build your own fireplace insert draft stopper? It’s not hard and you can complete it in an afternoon!

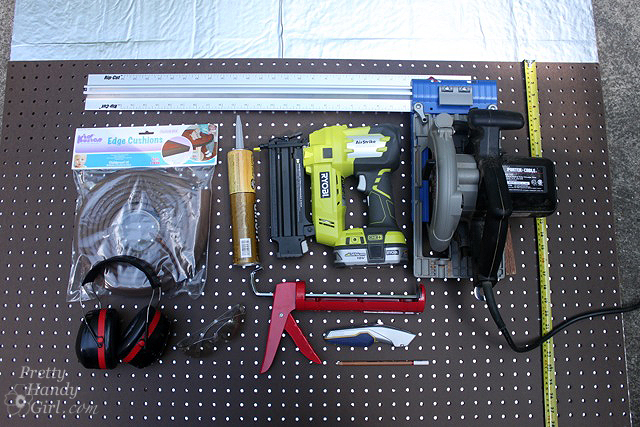
Fireplace Insert Draft Stopper Materials:

Build a Fireplace Insert Draft Stopper with Reclaimed Lumber | Pretty Handy Girl

(I’ve included affiliate links for your convenience. I earn a small percentage from a purchase using these links. There is no additional cost to you. You can read more about affiliate links here.)

Notes: I chose pegboard because it was slightly cheaper and weighed less than the masonite but was still rigid enough to hold the reclaimed wood. You can ask a Lowe’s employee to cut down the rigid foam insulation for you so you can fit it in your car. You can also have your pegboard cut at Lowe’s if you know your measurements upfront. I chose to use the Kreg Rip Cut because I was anxious to try it out. I liked how it worked and it was a good option if you don’t have a table saw or track saw. Finally, adding the reclaimed lumber is not necessary, I just like the look.  Another option would be to buy foam insulation and wrap it with fabric and batting and simply fit it in the fireplace opening.

Instructions:

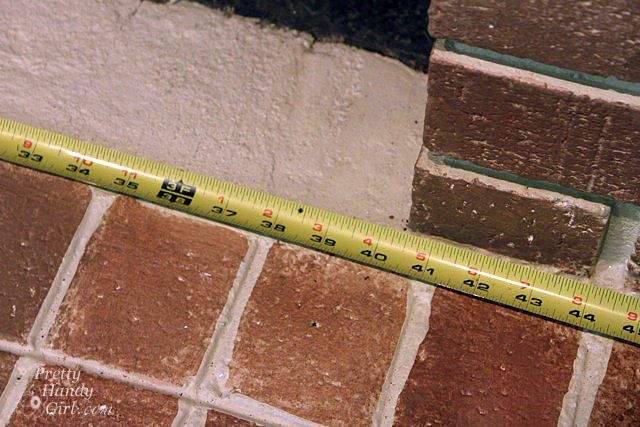
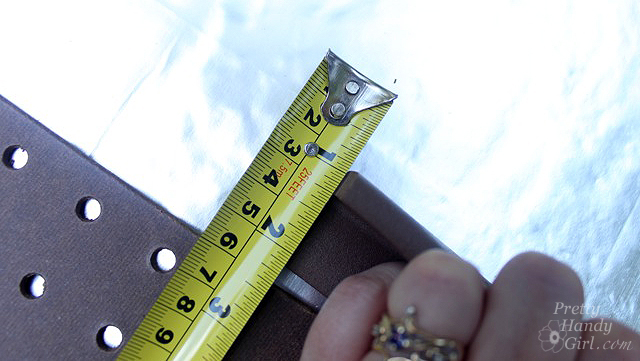
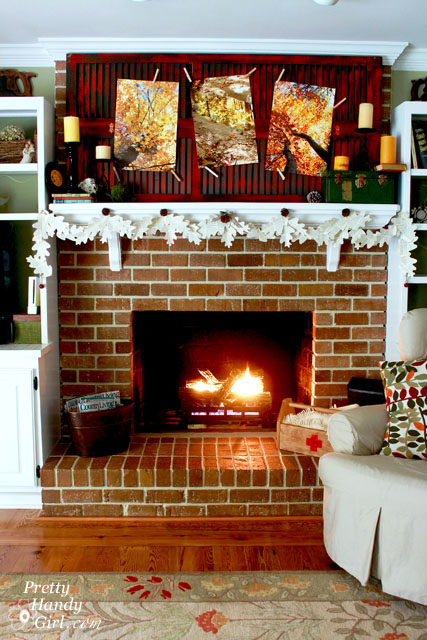
Start by measuring your fireplace opening. (Pssst. You can see that our bricks are faux painted in this picture. Learn how I painted my fireplace back to brick without sand-blasting!)

Build a Fireplace Insert Draft Stopper with Reclaimed Lumber | Pretty Handy Girl

Check the width of the edge bumper (the one I used is 1/4 inch) and subtract that amount from three sides of the fireplace opening measurements.

Build a Fireplace Insert Draft Stopper with Reclaimed Lumber | Pretty Handy Girl

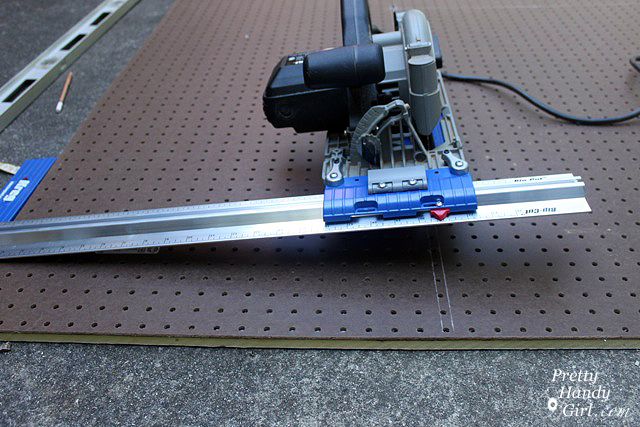
Mark the cut lines on your pegboard material.

Build a Fireplace Insert Draft Stopper with Reclaimed Lumber | Pretty Handy Girl

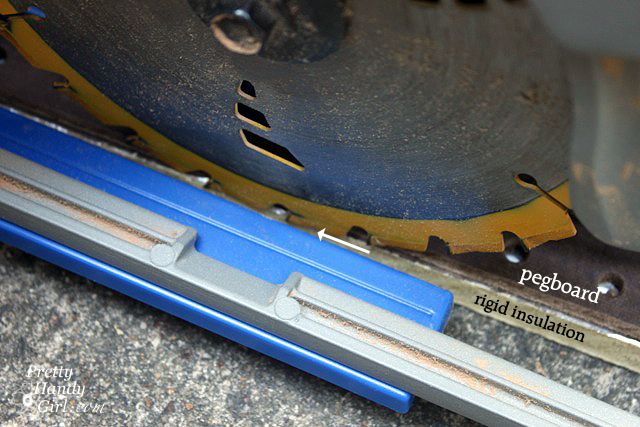
Lay the pegboard on top of the excess foam insulation and set the saw blade depth just below the pegboard.

Build a Fireplace Insert Draft Stopper with Reclaimed Lumber | Pretty Handy Girl

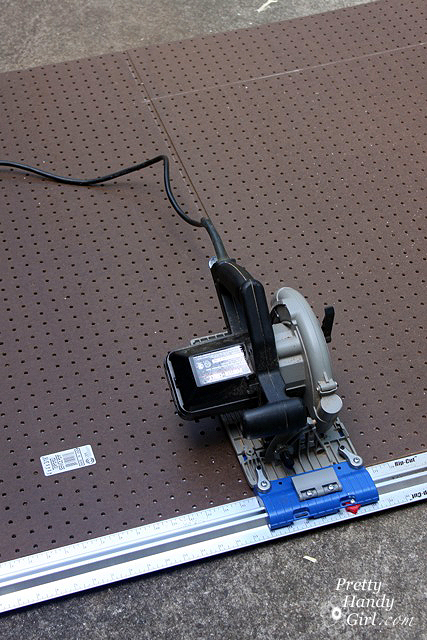
Cut the pegboard to size. (If you don’t own a rip cut or track saw, you can make your own DIY Track Saw for your circular saw here!)

Build a Fireplace Insert Draft Stopper with Reclaimed Lumber | Pretty Handy Girl

Check the fit of the cut pegboard with the edge bumper inside the fireplace opening. The pegboard should be loose, but allow the edge bumper to compress against the sides for a snug fit.

Build a Fireplace Insert Draft Stopper with Reclaimed Lumber | Pretty Handy Girl

Building the Reclaimed Lumber Frame:

Using the same dimensions as the pegboard, cut your frame pieces (miter cut the corners for a clean look). 1″ x 4″ cedar boards worked well for the frame.

Build a Fireplace Insert Draft Stopper with Reclaimed Lumber | Pretty Handy Girl

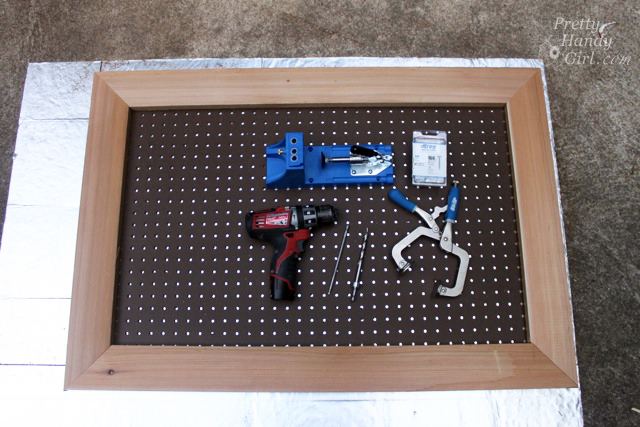
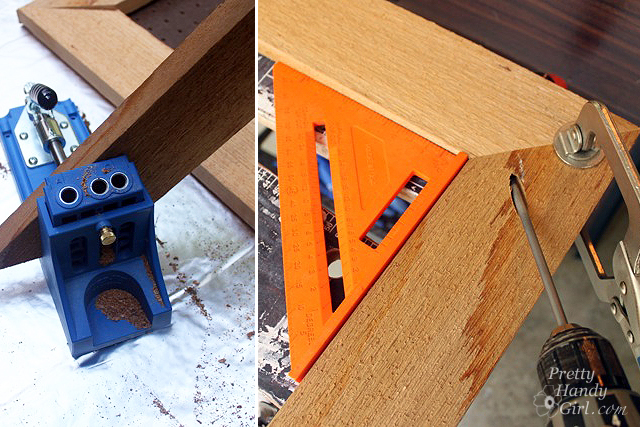
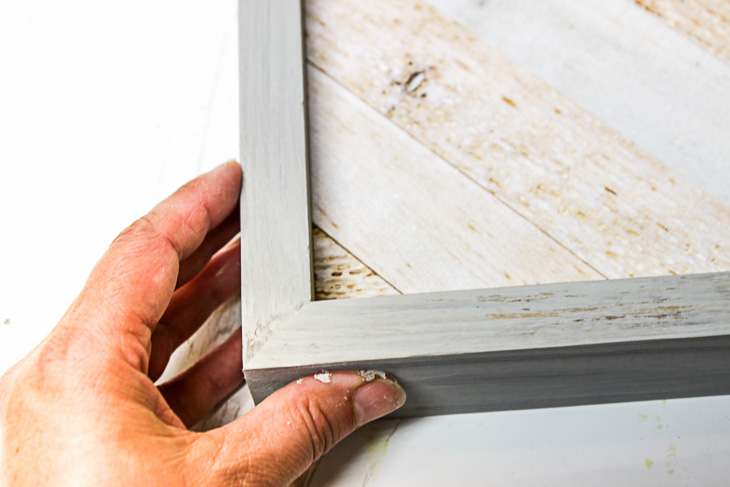
Use a Kreg Jig to make pocket holes in the corners. Clamp the corners (use a square to maintain true 90 degree angles) and drive the pocket screws into place.

Build a Fireplace Insert Draft Stopper with Reclaimed Lumber | Pretty Handy Girl

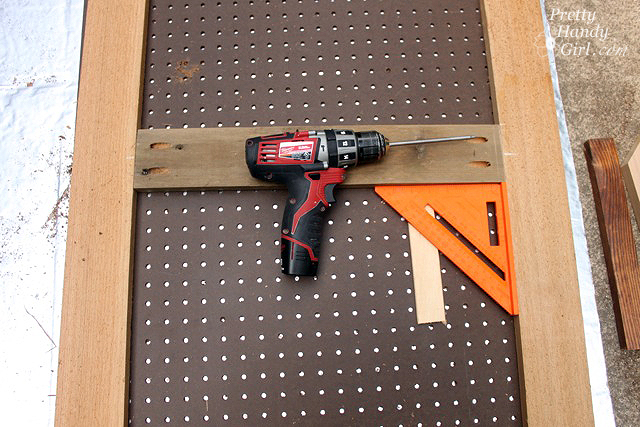
Cut a vertical support piece for inside the center of the frame and attach it with pocket hole joinery.

Build a Fireplace Insert Draft Stopper with Reclaimed Lumber | Pretty Handy Girl

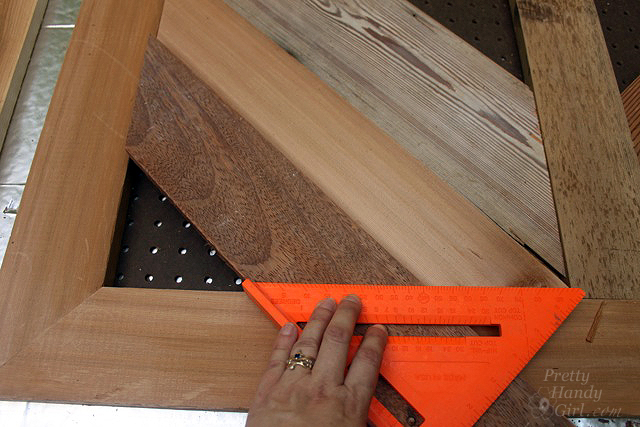
Cut your reclaimed lumber edges at 45 degree angles. Lay each piece inside the frame and use the speed square to scribe a line where you need to cut.

Build a Fireplace Insert Draft Stopper with Reclaimed Lumber | Pretty Handy Girl

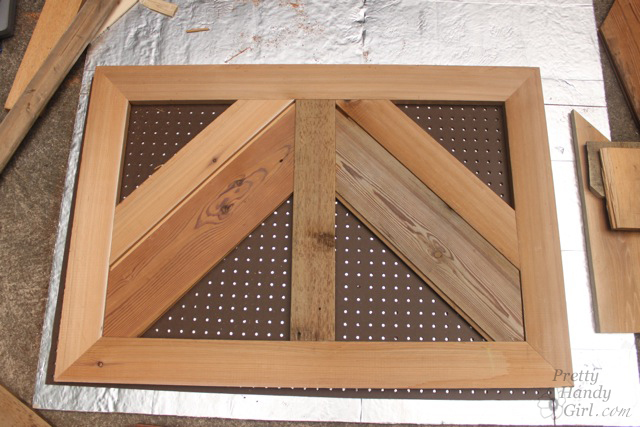
Dry fit each piece and continue until you’ve filled the frame.

Build a Fireplace Insert Draft Stopper with Reclaimed Lumber | Pretty Handy Girl

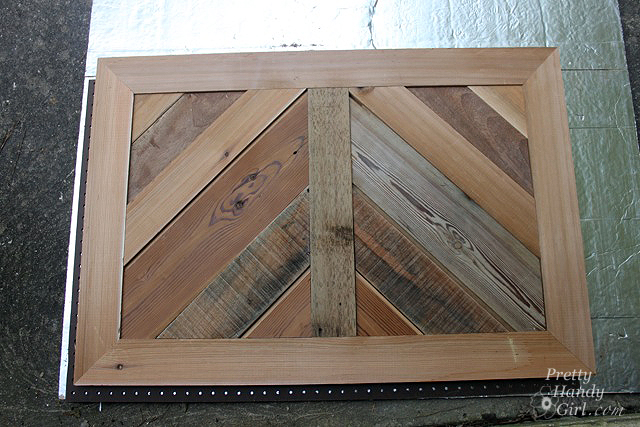
When all the pieces are cut, set them in the frame.

Build a Fireplace Insert Draft Stopper with Reclaimed Lumber | Pretty Handy Girl

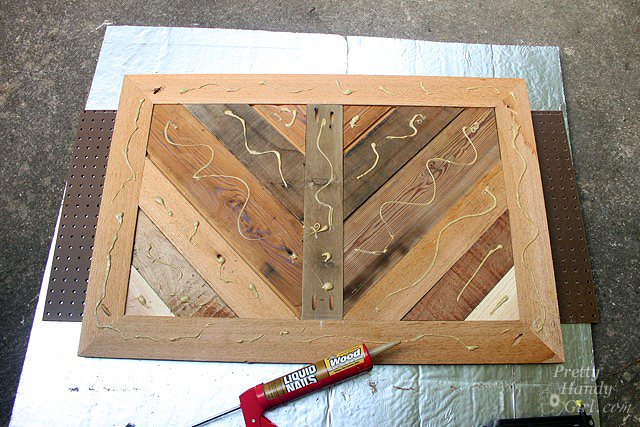
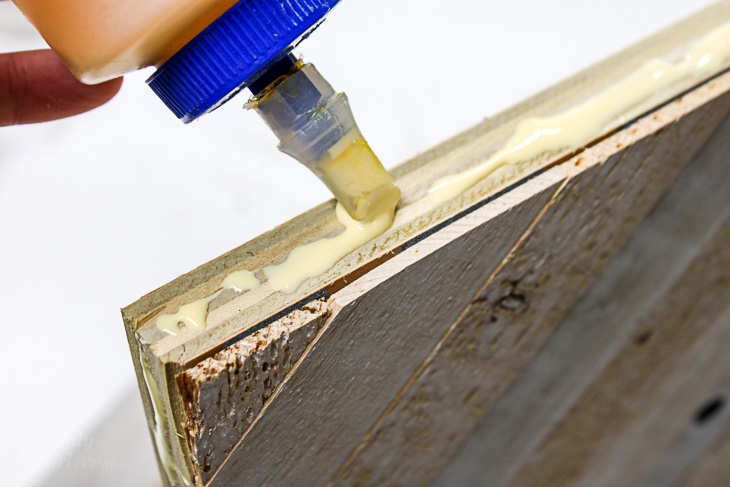
Time to assemble the “sandwich”. Lay something (scrap plywood, pegboard or foam insulation) on top of the reclaimed lumber design and flip it over so the backside is facing up. Use a liberal amount of construction adhesive on the back of the reclaimed lumber frame.

Build a Fireplace Insert Draft Stopper with Reclaimed Lumber | Pretty Handy Girl

Lay the pegboard onto the reclaimed lumber and press firmly in place.

Build a Fireplace Insert Draft Stopper with Reclaimed Lumber | Pretty Handy Girl

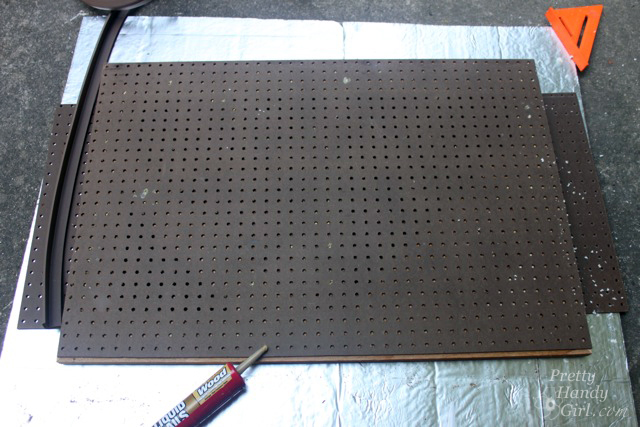
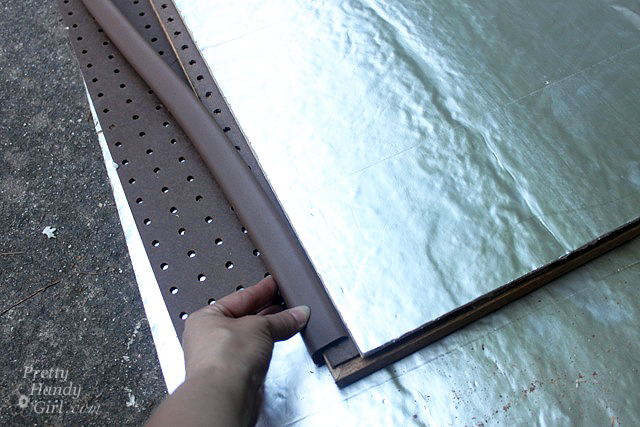
Lay the rubber edge bumper onto the side of the frame/pegboard sandwich and measure the area for the rigid foam insulation. Cut insulation to size. It should be inset on the sides and top to allow room for the bumper (as shown in the photo below.)

Build a Fireplace Insert Draft Stopper with Reclaimed Lumber | Pretty Handy Girl

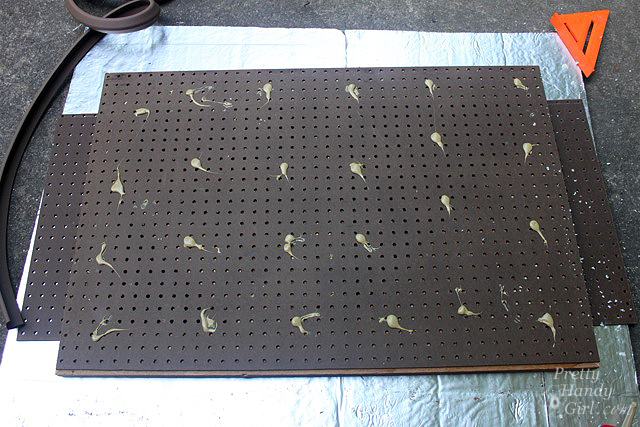
Add construction glue to the pegboard. Then lay the rigid foam on top of the pegboard.

Build a Fireplace Insert Draft Stopper with Reclaimed Lumber | Pretty Handy Girl

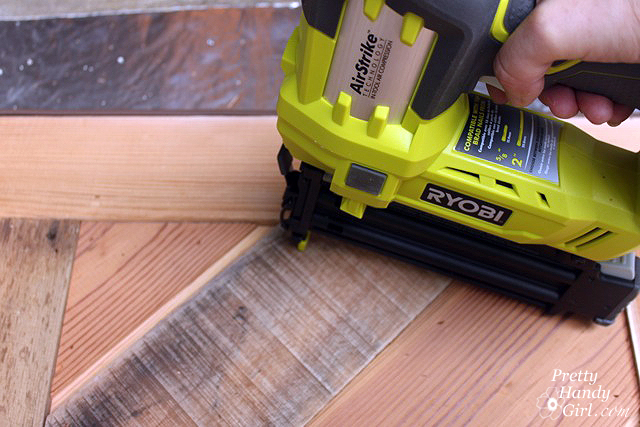
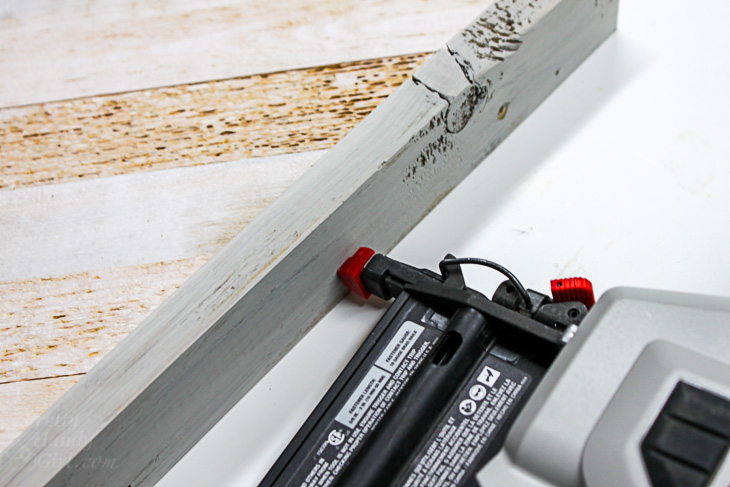
Flip the frame over and double secure the frame to the pegboard with finish nails. Be sure that the air pressure is turned down so the nails don’t pierce through the back of the insulation.

Build a Fireplace Insert Draft Stopper with Reclaimed Lumber | Pretty Handy Girl

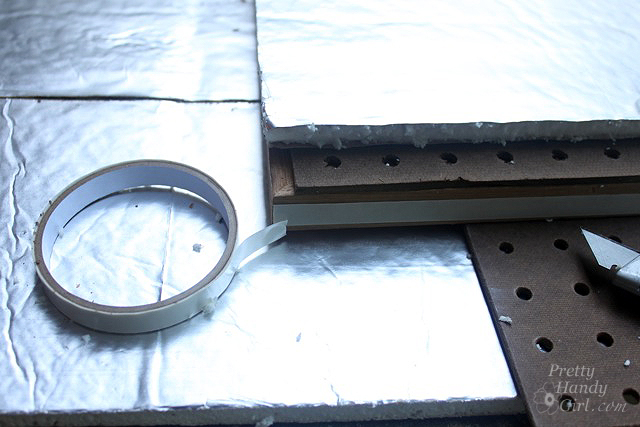
Apply the double-stick tape that came with the bumper to the sides of the frame.

Build a Fireplace Insert Draft Stopper with Reclaimed Lumber | Pretty Handy Girl

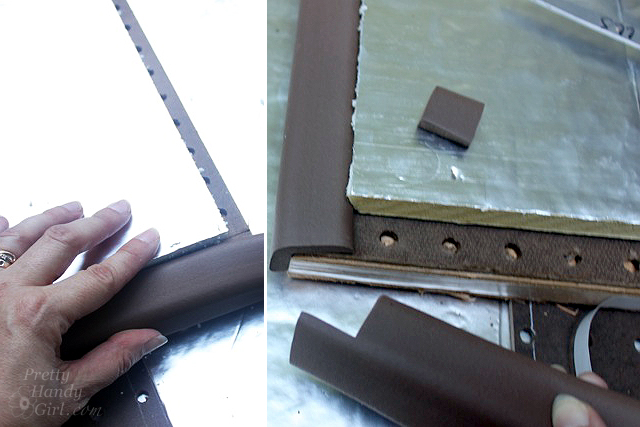
Cut the foam bumper for the first side and press it onto the double-stick tape.  Cut the next side and notch out where there are any overlaps.

Build a Fireplace Insert Draft Stopper with Reclaimed Lumber | Pretty Handy Girl

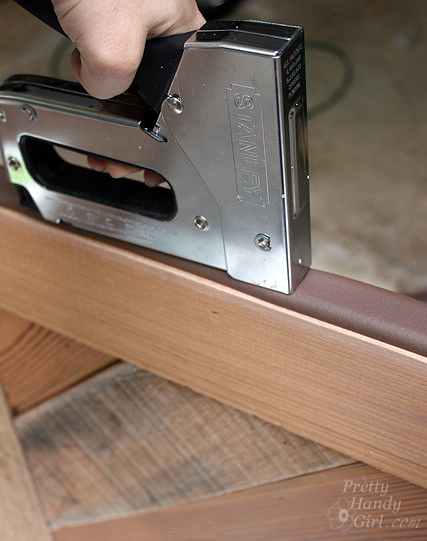
Firmly secure the bumper to the sides of the frame with a staple gun. This is a necessary step because with repeated removal of the insert, the bumper will eventually come off.

Build a Fireplace Insert Draft Stopper with Reclaimed Lumber | Pretty Handy Girl

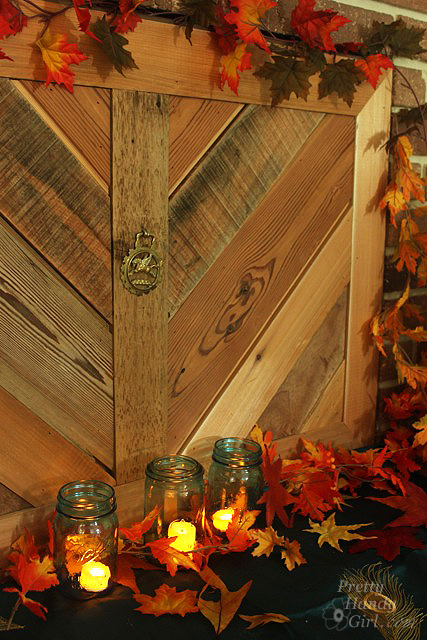
Feel free to add a handle or decorative pull to the front of your insert.

Build a Fireplace Insert Draft Stopper with Reclaimed Lumber | Pretty Handy Girl

Press the insert into your fireplace and stop the drafts forever!

As a bonus, it also eliminates that big gaping black hole in the living room. And the insert is easily removed to enjoy a warm fire.

This Fireplace Insert Draft Stopper looks good year-round. My only regret is not making it sooner.

Pretty Handy Girl's Colorful Fall Home Tour

PHGFancySignWinter is coming, help a friend stop drafts too by pinning this image!

Build a Fireplace Insert Draft Stopper with Reclaimed Lumber | Pretty Handy Girl

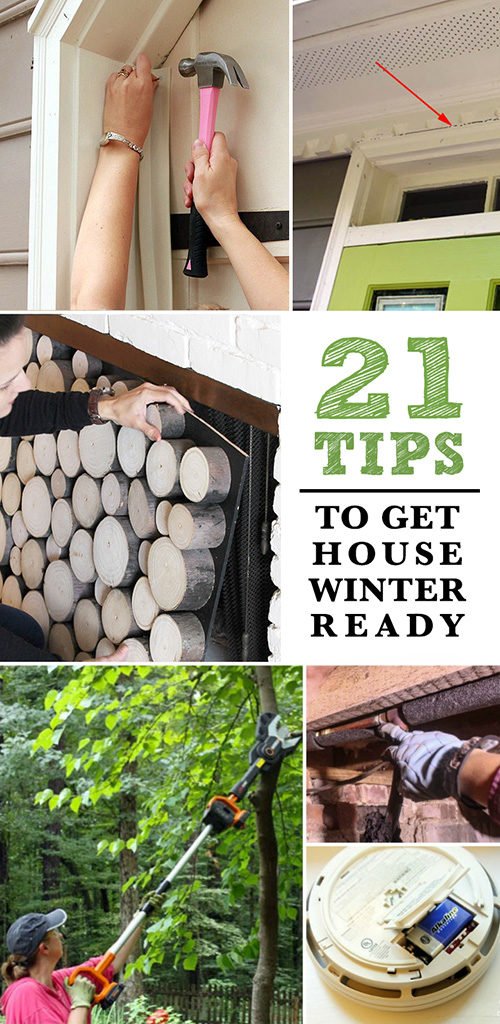
Want more ways to save on energy bills and prepare for winter? Here are 21 Ways to Get Your Home Ready for Winter.

21 Tips to Get Your House Winter Ready

how to move a shed

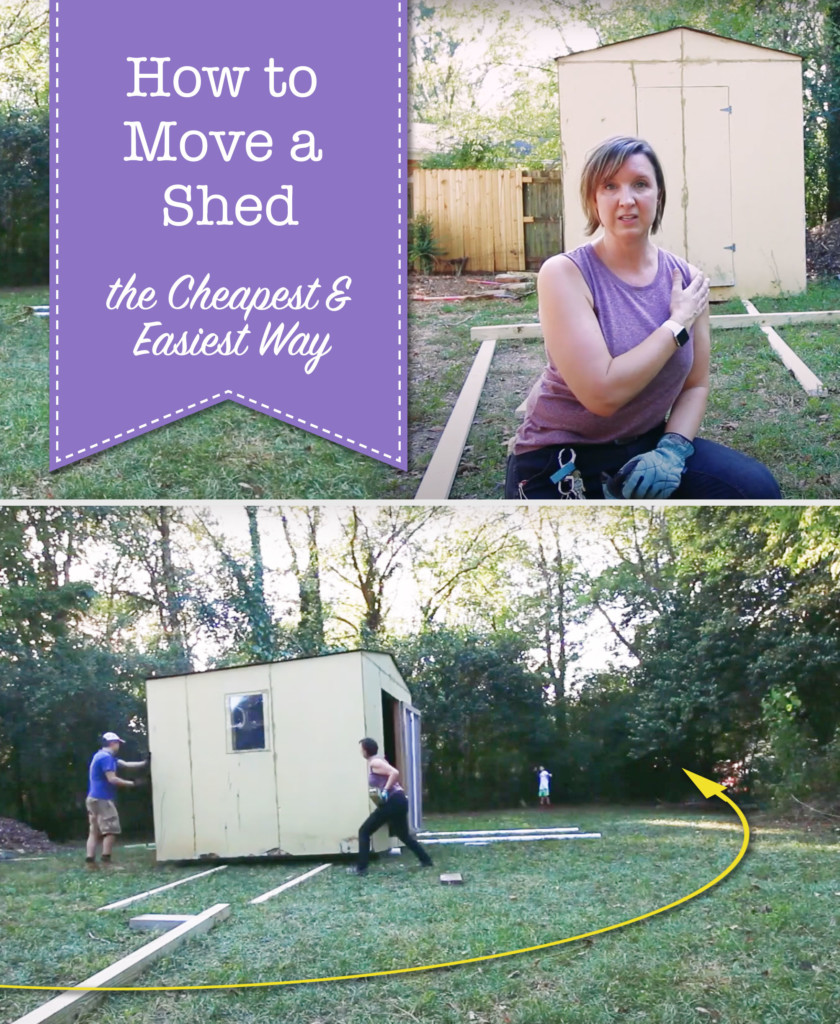
You might remember the ugly Frankenshed behind the Millie’s Remodel house. It’s finally time to try to move this ugly monster. Whether we’re successful or not, I’ll share the Easiest & Cheapest Way to Move a Shed!

Millie’s Remodel: The Easiest & Cheapest Way to Move a Shed

A long long time ago (back before we had children), Pretty Handsome Guy and I were making a move from Philadephia to Charlottesville, VA. We packed our rented UHaul full to the brim and were ready to start the new adventure.

We were backing the truck out when we heard a loud scraping sound and suddenly the truck was stuck. The front wheels were still in the driveway, but the back of the truck had bottomed out on the crowned pavement (turns out a road really isn’t flat from side to side.) We were blocking traffic and didn’t know what to do. I tried calling UHaul but they said it was operator error and we needed to call a large truck tow company.

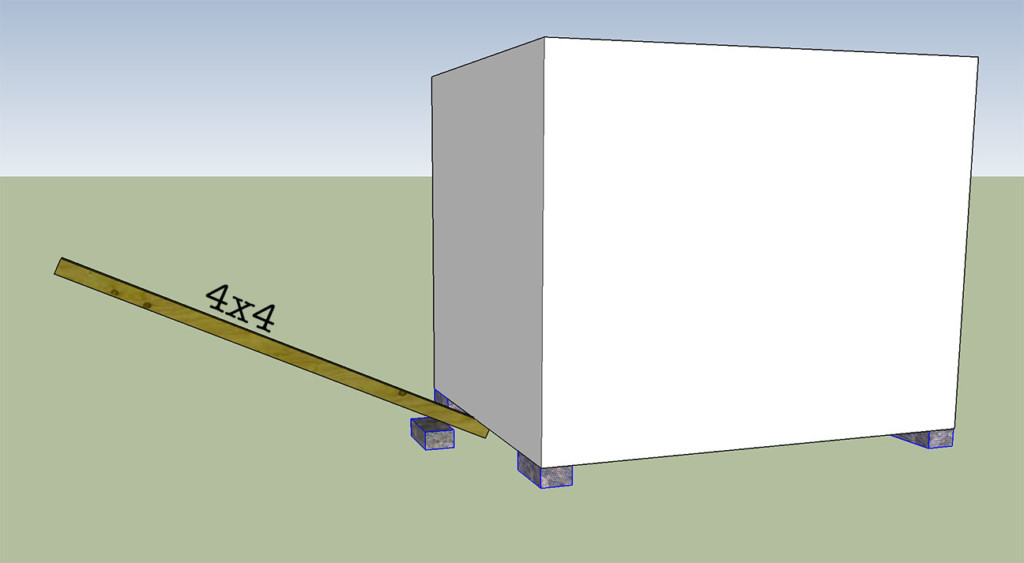
As I was searching around for someone to help, our neighbor took one look at the situation and ran to the back of the driveway. He came back and created a lever with some blocks and a 4×4 post. Then he put one end under the bumper and proceeded to perch on the other end of the 4×4 bouncing up and down. He told Pretty Handsome Guy to give the truck a little gas. Although my neighbor couldn’t have weighed more than 125 lbs., the lever gave us enough lift to get us unstuck.

Here we are about twenty years later, and I still remember that 4×4 lever trick! But, I have a few more tricks up my sleeve, because although you might be able to lift a shed with a 4×4 and some blocks, how do you move it from one side of your yard to the other?

The Easiest & Cheapest Way to Move a Shed:

Today, in the Millie’s Remodel updates we will attempt to move the Frankenshed.

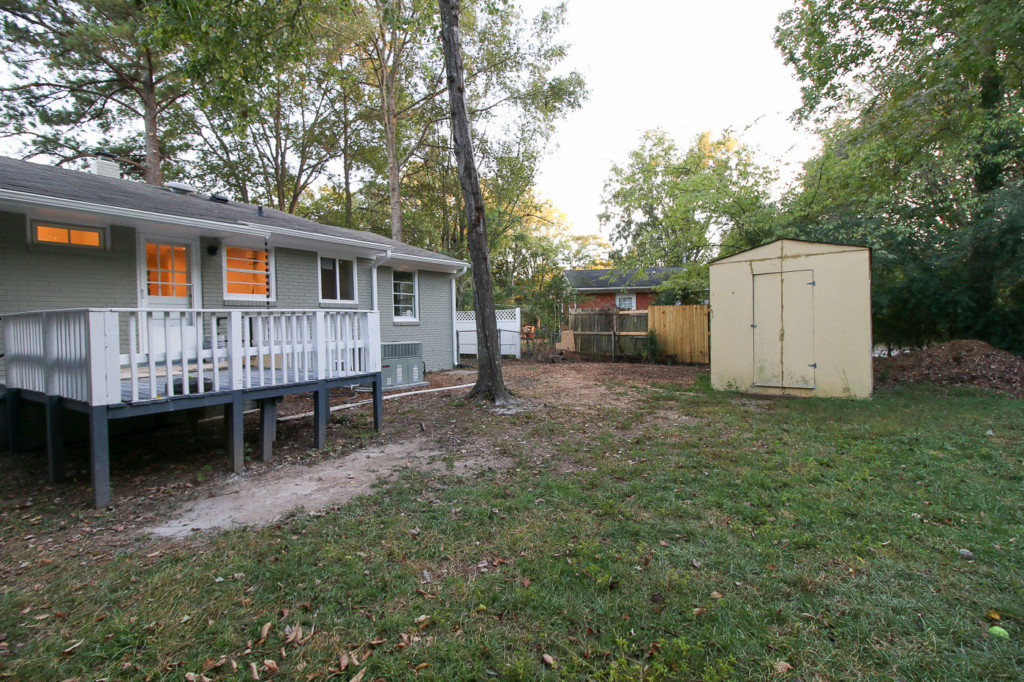
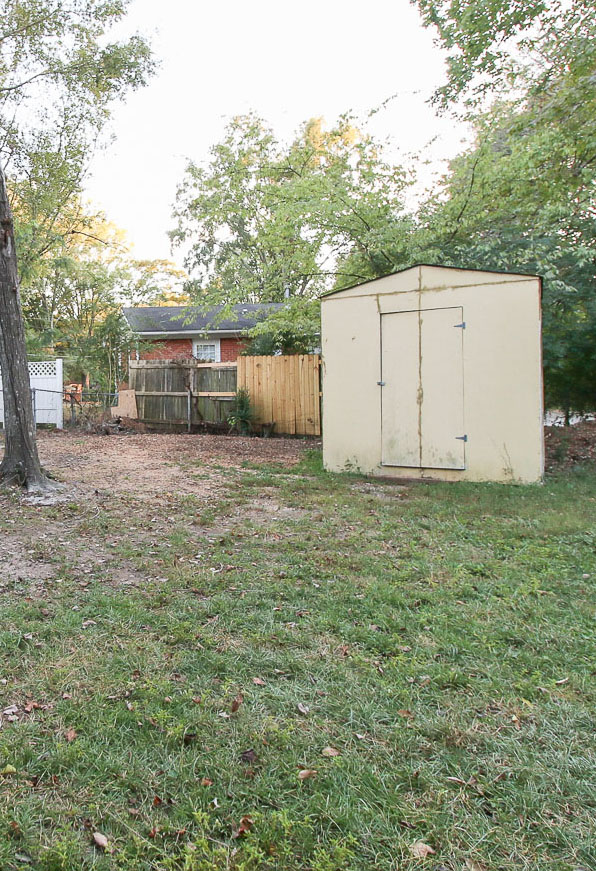
ugly shed and patchy fence

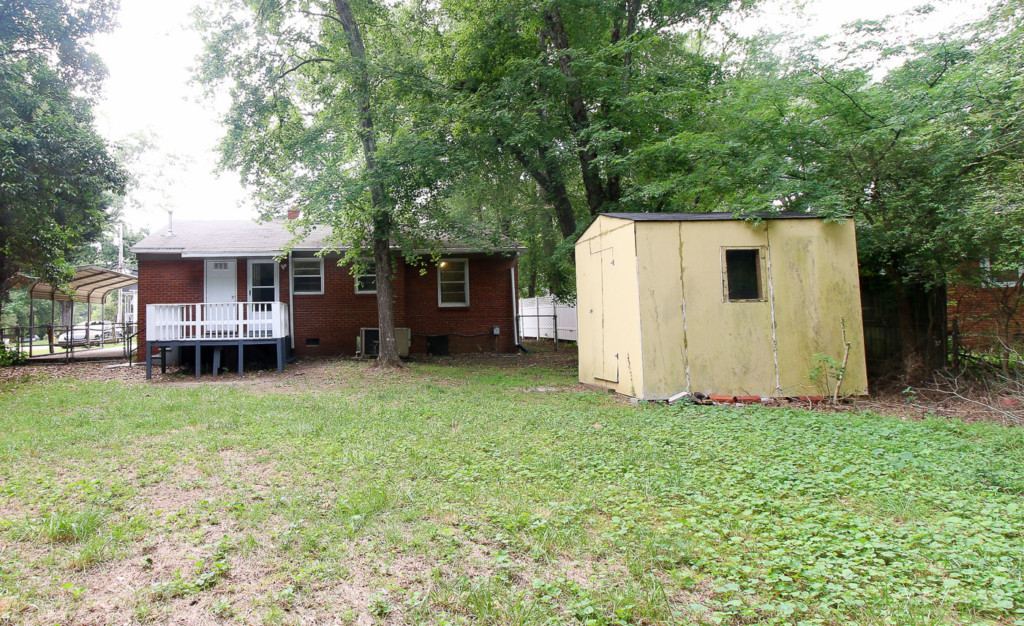
This eyesore sits directly outside the back bedroom and I can’t even express how ugly it is with poor construction and ugly siding. Then there’s the piece of plexiglass screwed over the window opening.

ugly shed in backyard

But, the worst thing about this shed is the siding that is cracked, and the caulk used to fill the seams. Now you can understand why I don’t have high hopes for moving this monster in one piece. I kept the dumpster over the weekend because I think there’s a very good chance this shed will fall apart the minute we try to move it. If that happens, I’ll cut it apart in pieces and top off the dumpster.

But, hey, you’re no idiot. I’m sure you are thinking, “Brittany, if you title this post How to Move a Shed, that means you probably were successful. ”

Well, you’ll just have to see if you’re right and watch the video:

Materials:

  • 2 – 2″ x 4″ x 16′ (or as long as you can transport)
  • 3 – 4″ x 4″ x 10′
  • 6-8 Cinderblocks (depending on the size of your shed, you need least 6 to set the shed)
  • 4 – 3″ PVC pipes (at least as long as the length of your floor joists)
  • Drainage Gravel
  • Carjack
  • Level

Tips on Moving a Shed:

  1. Empty the shed (less weight is better)
  2. Have a helper or two
  3. Use longer lumber for better leverage
  4. Measure and determine the final resting location
  5. Make sure the final location is clear of obstacles (especially low branches)
  6. Pick a path and clear any obstacles
  7. Use 2x4s to act as tracks
  8. Use large PVC pipes to act as rollers
  9. PVC pipes roll best when perpendicular to the floor joists
  10. Elevate the shed on blocks off the ground (to prevent rot) unless you have a concrete pad

How to Move a Shed:

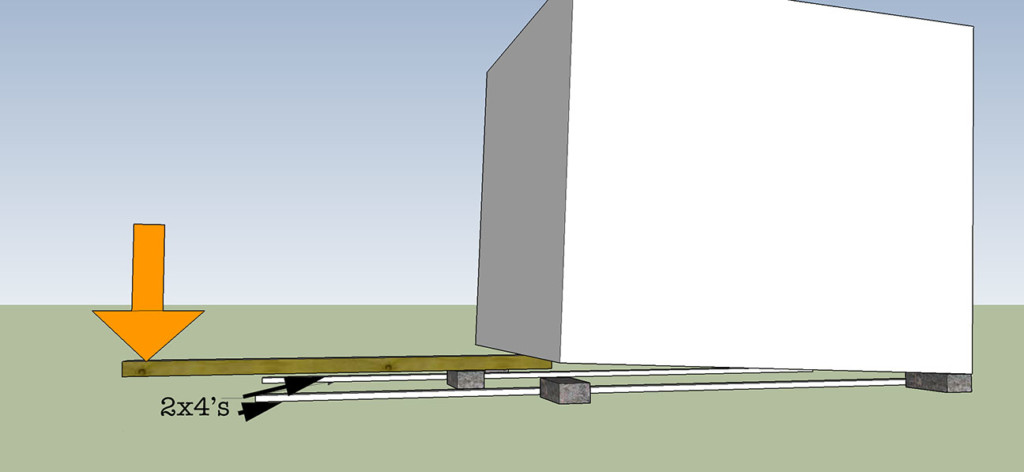
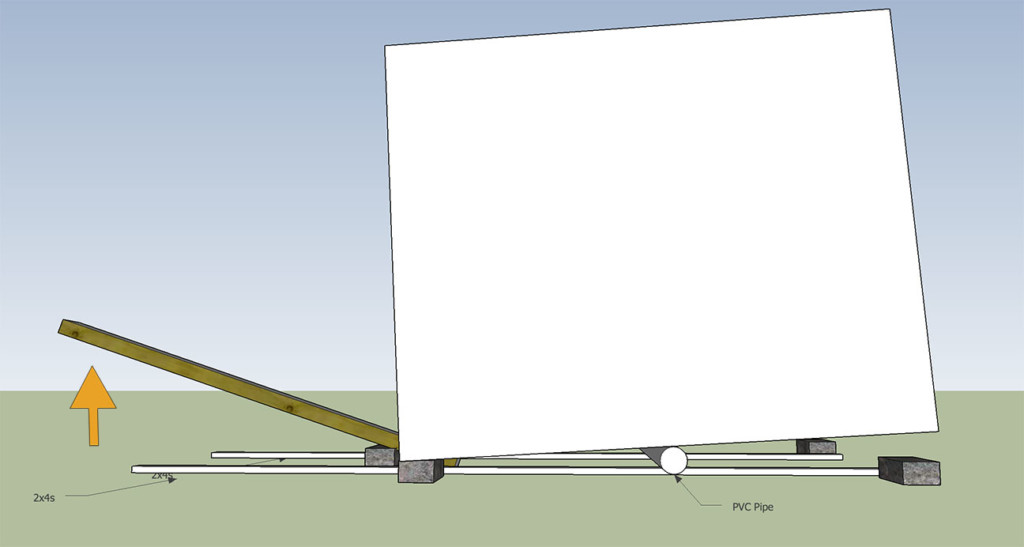
Set a block near the shed and slip the end of a 4×4 under the shed while resting on the block If you can’t get the 4×4 underneath, raise the shed up with a car jack, then slip the 4×4 underneath.

Lift the shed and slide 2x4s under the shed in the direction you want to roll the shed.

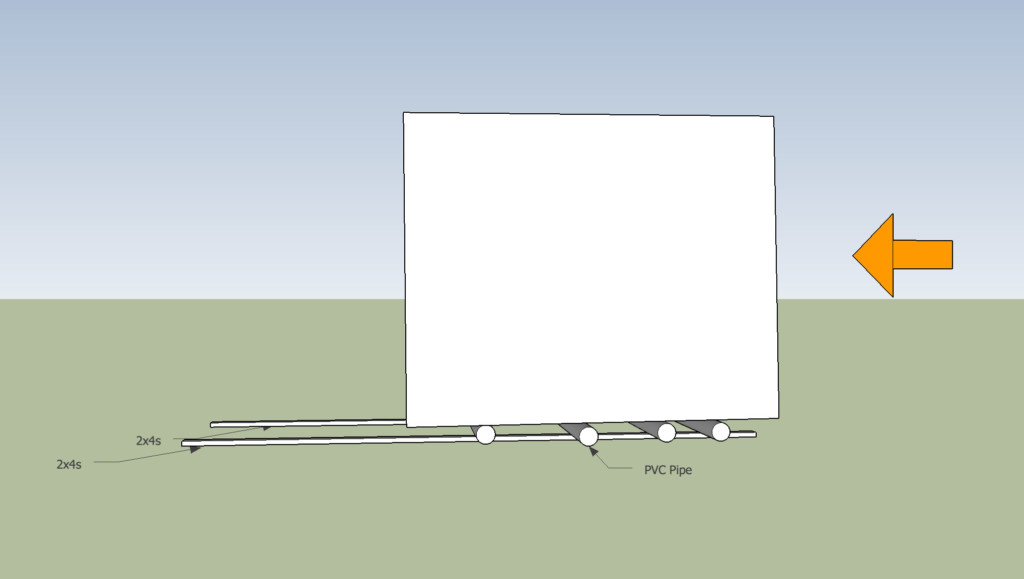
Set one PVC pipe under the shed in the middle of the shed. Release the 4×4 slowly. If the shed doesn’t tip toward you, you can add a little weight to the front to help it tip.

Lay two more PVC pipes on top of the 2x4s under the shed perpendicular to the 2×4’s and to the floor joists. Then slip one more PVC pipe in toward the front.

Remove the blocks and the 4×4 (but keep it nearby). Push your shed and let the PVC pipes roll underneath. As soon as one PVC pipe pops out the back, bring it to the front and roll onto it.

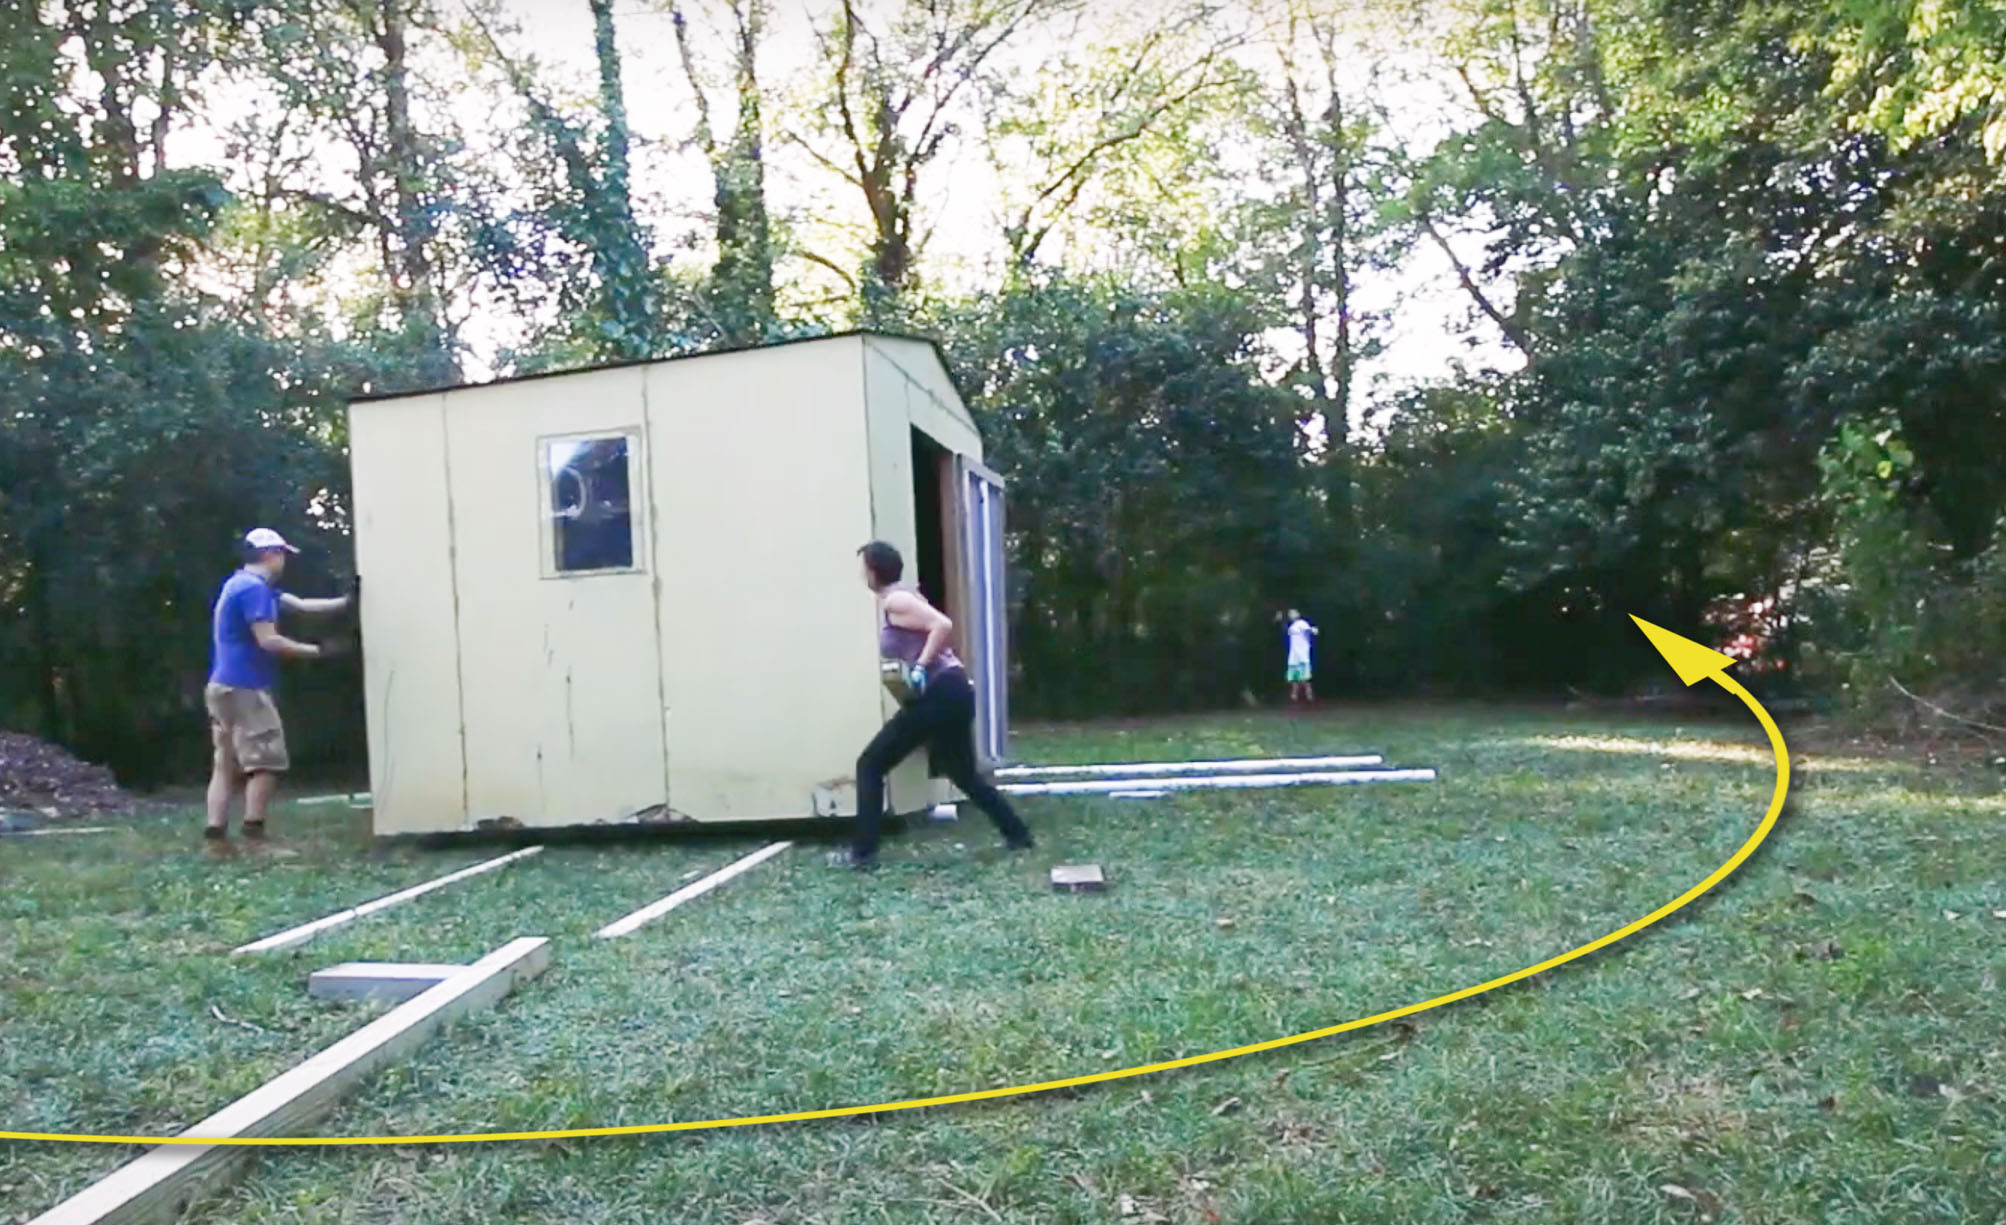
To turn the shed, put the 4×4 inside the door frame against one corner. Press against the other end of the 4×4 outside the door frame to pivot the shed. (You can see how this is done in the video.) Adjust your 2×4 tracks and place the PVC pipes perpendicular to the floor joists, then push the shed.

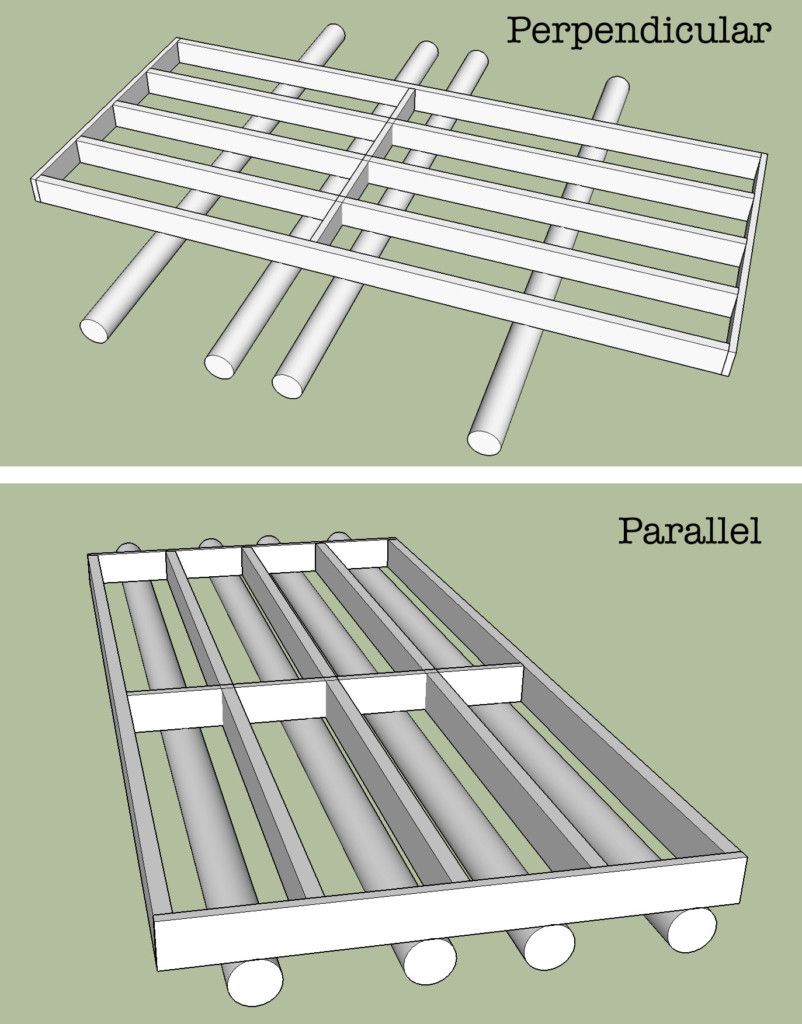
Perpendicular or Parallel to the Joists, why does it matter?

When the PVC pipes are placed perpendicular to the joists, the floor framing touches the pipes in multiple spots (as shown below.) This allows the shed to roll very easily.

The pipes can roll when parallel to the joists, but it’s much harder because the framing is not resting on the pipes at as many points, and the PVC may bow in between the blocking. You can certainly use the pipes parallel to the joists for pushing the shed out into an open area where you can then set the pipes perpendicular to the joists.

A Makeover for Frankenshed:

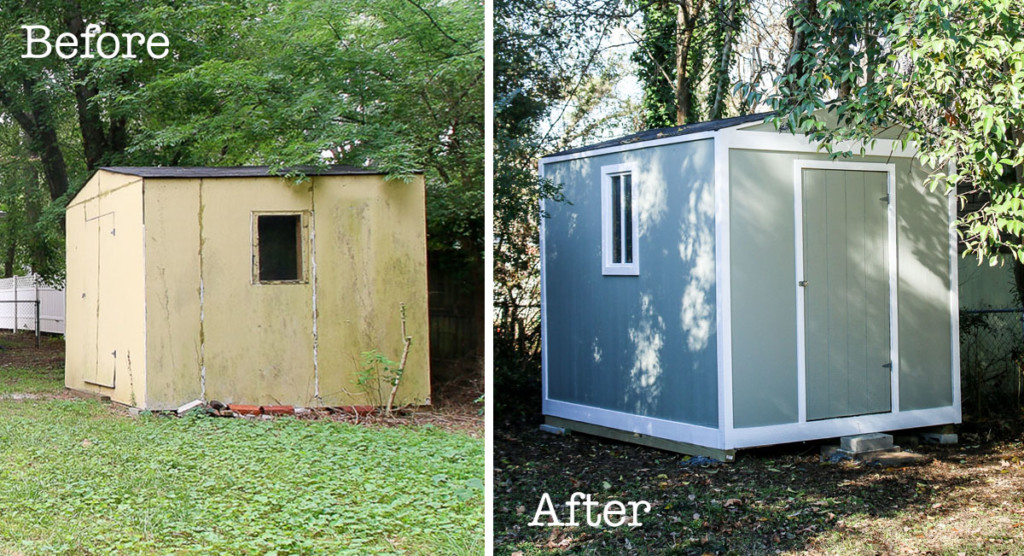
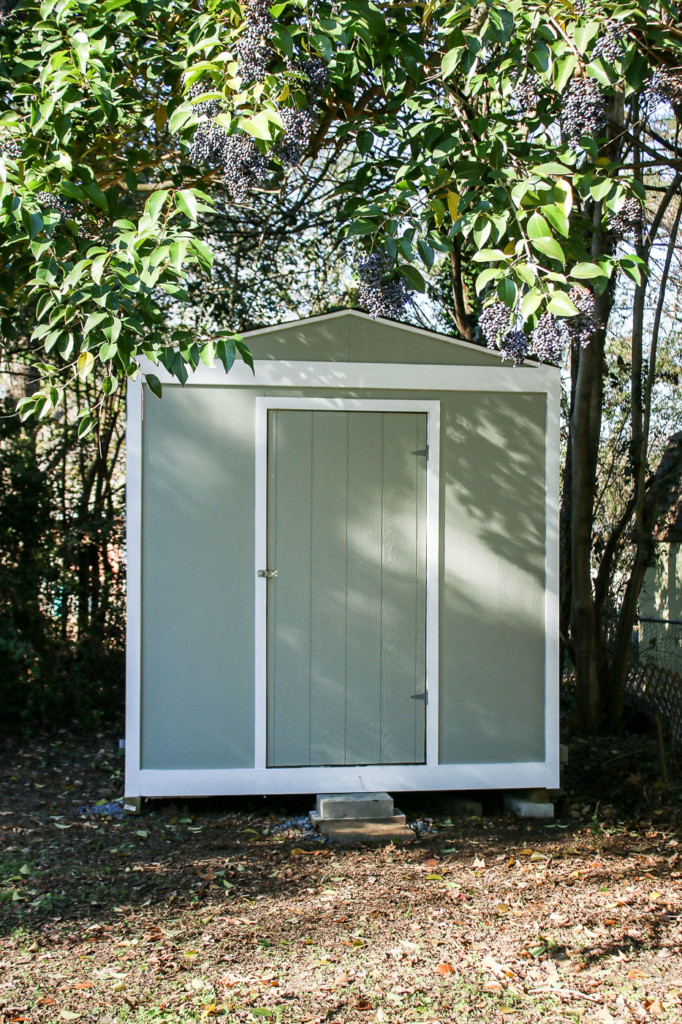
To clean up the look of the shed, my assistant Brett built a new door. Then he added trim and used the old bathroom window for a new window. Once my painter painted the trim and siding to match the house, it was unrecognizable.

before and after shed makeover

I can’t believe this is the same shed, can you?

before and after shed makeover

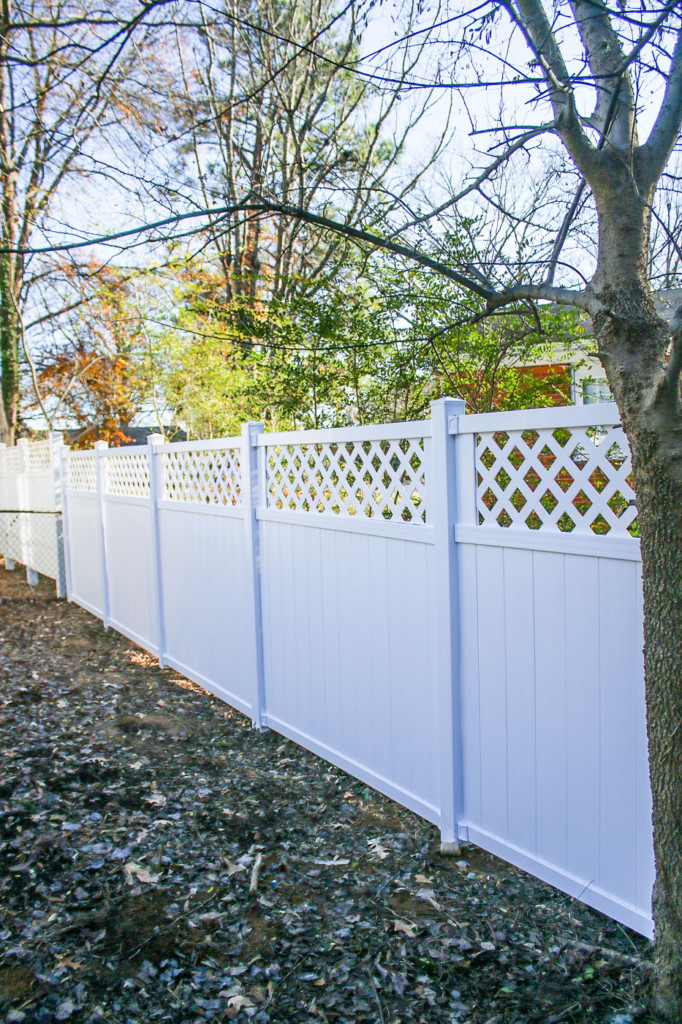
The old patchy privacy fence between the neighbor’s property was removed (it practically fell down when we removed the patched section).

Brett installed a new PVC privacy fence to match the one in the front of the property.

PVC privacy fence

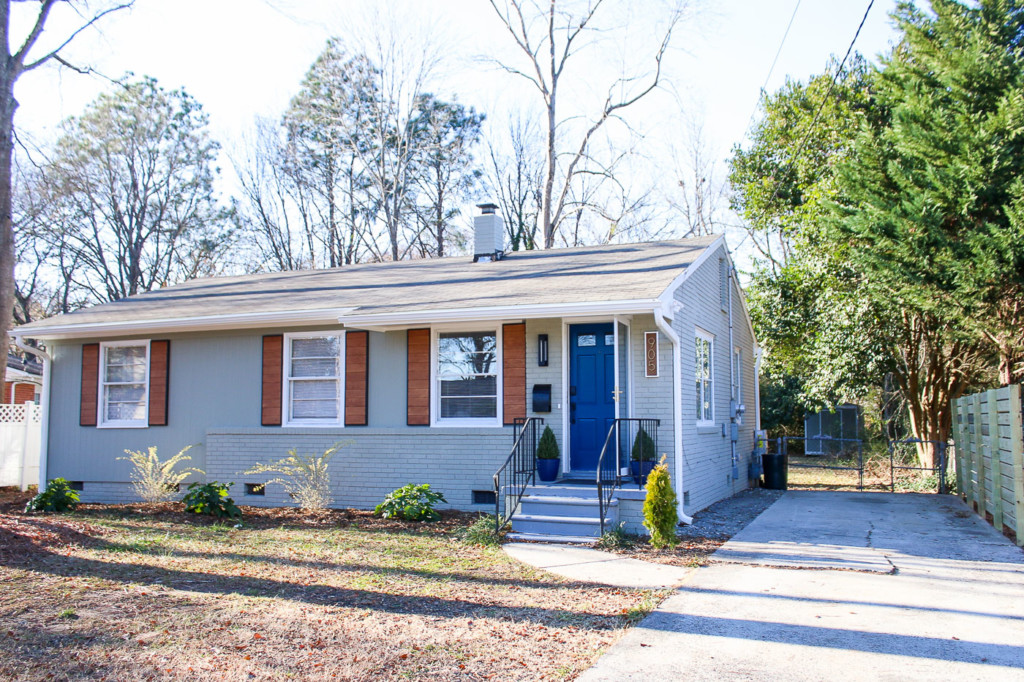
Now that the exterior has a beautiful front and backyard, it’s time to start focusing on finishing the interior. Stay tuned for more Millie’s Remodel updates!

A special thank you to the Millie’s Remodel Sponsors:

The Millie’s Remodel project sponsors have donated materials for the Millie’s Remodel project. As you know I am very particular about the brands I work with and recommend. As a general contractor, I choose the products used on my projects wisely to make sure they last a lifetime. Therefore, I have no reservations putting my name behind each and every one of these sponsors.

millies remodel sponsors logos
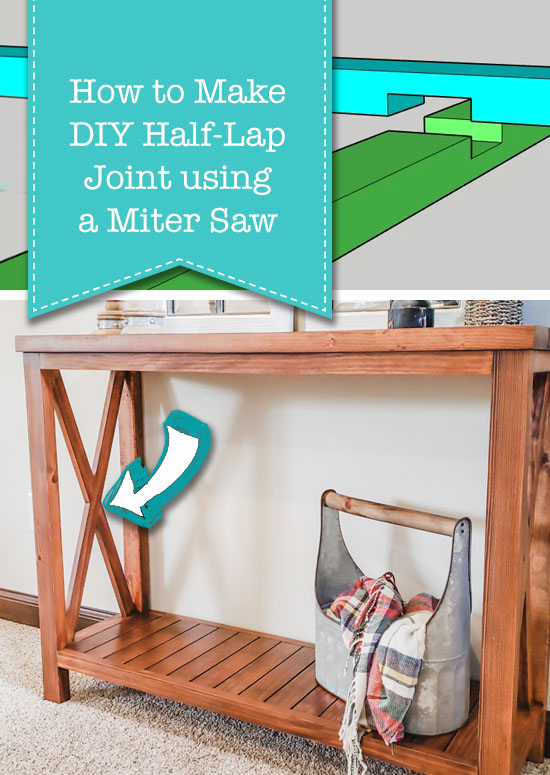
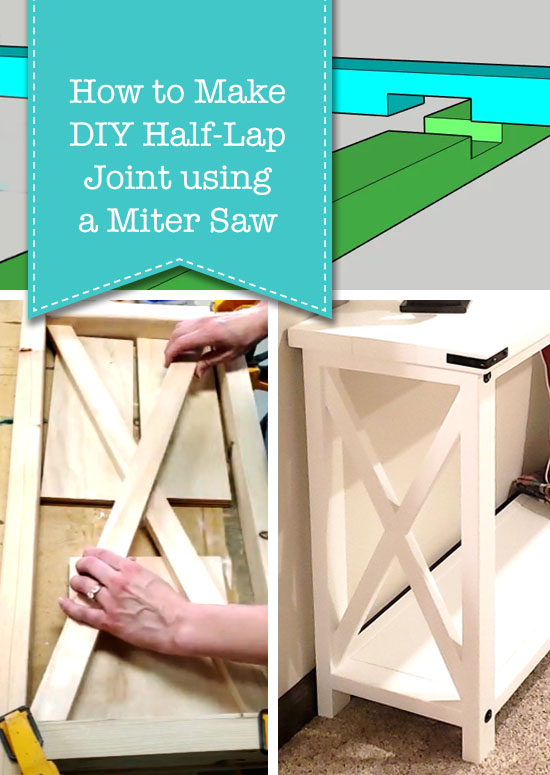
How to Make a DIY Half Lap Joint using Miter Saw

Want to add another joint to your woodworking skillset? Today I’ll show you how to create a simple DIY half-lap joint with your miter saw.

How to Make a DIY Half Lap Joint using Miter Saw

Half-Lap Joint with your Miter Saw

Hi! It’s Kristen from In Her Garage and I am going to teach you an easy way to create a half-lap joint to add to your DIY skill set. The half-lap joint is versatile and super strong.

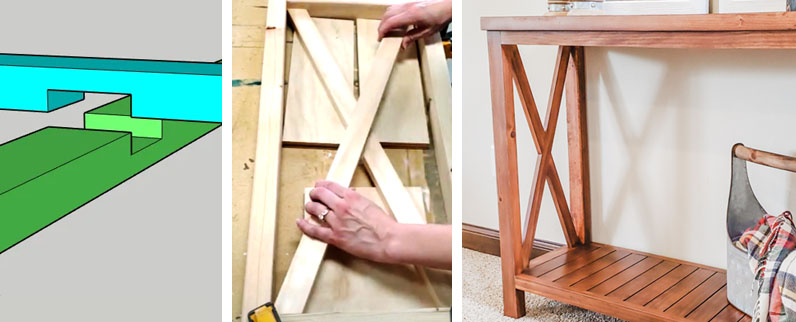
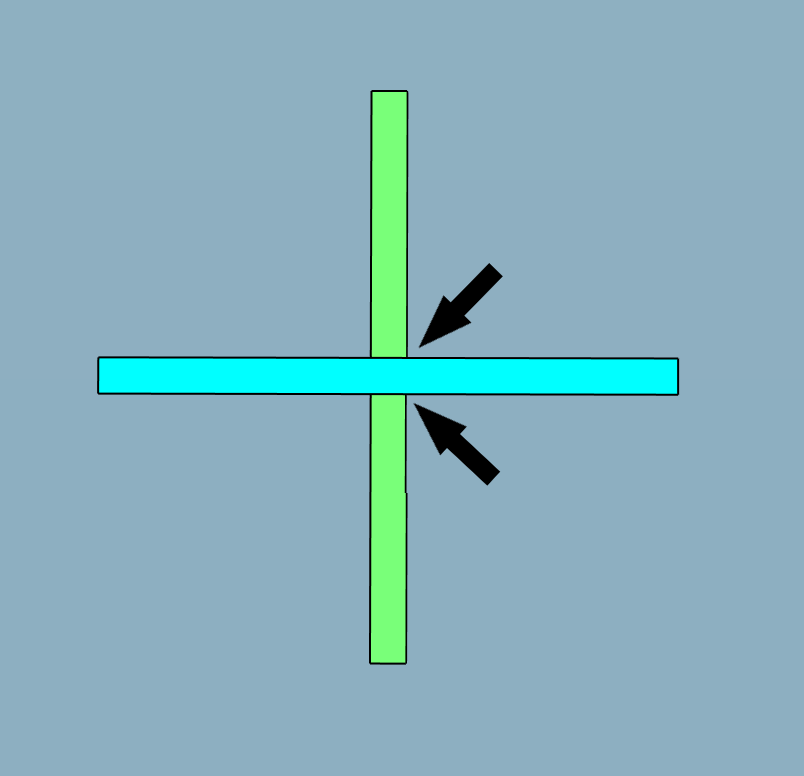
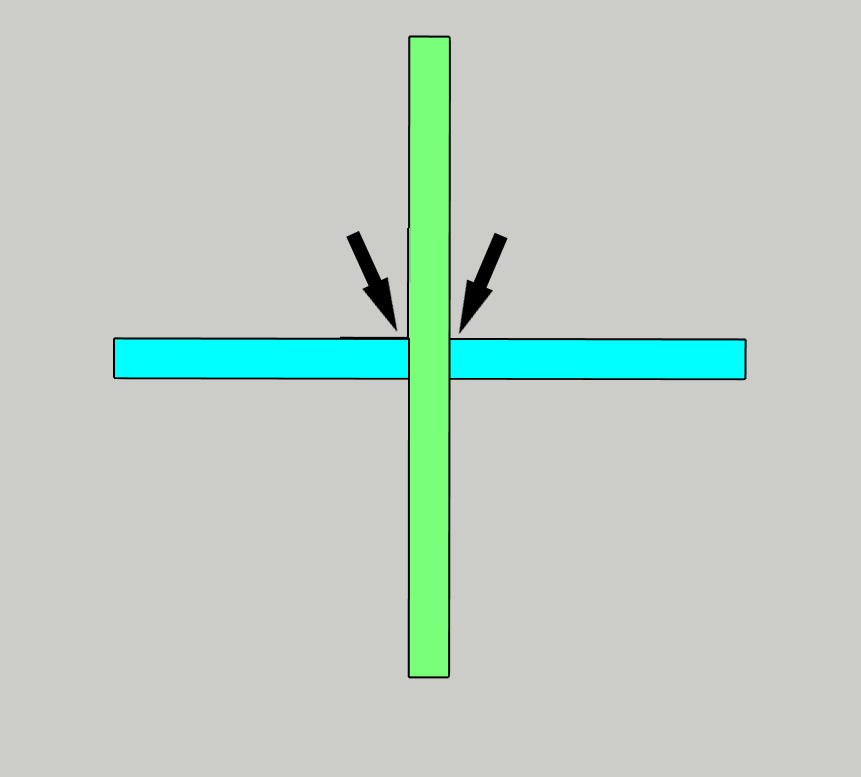
Wondering what a half-lap joint even is? Put simply, a half-lap joint is a joint between two boards that are halved together so that a flush surface results. Check out the pictures below for two popular ways half-lap joints are used. Best of all this joint only requires wood glue to hold it together.


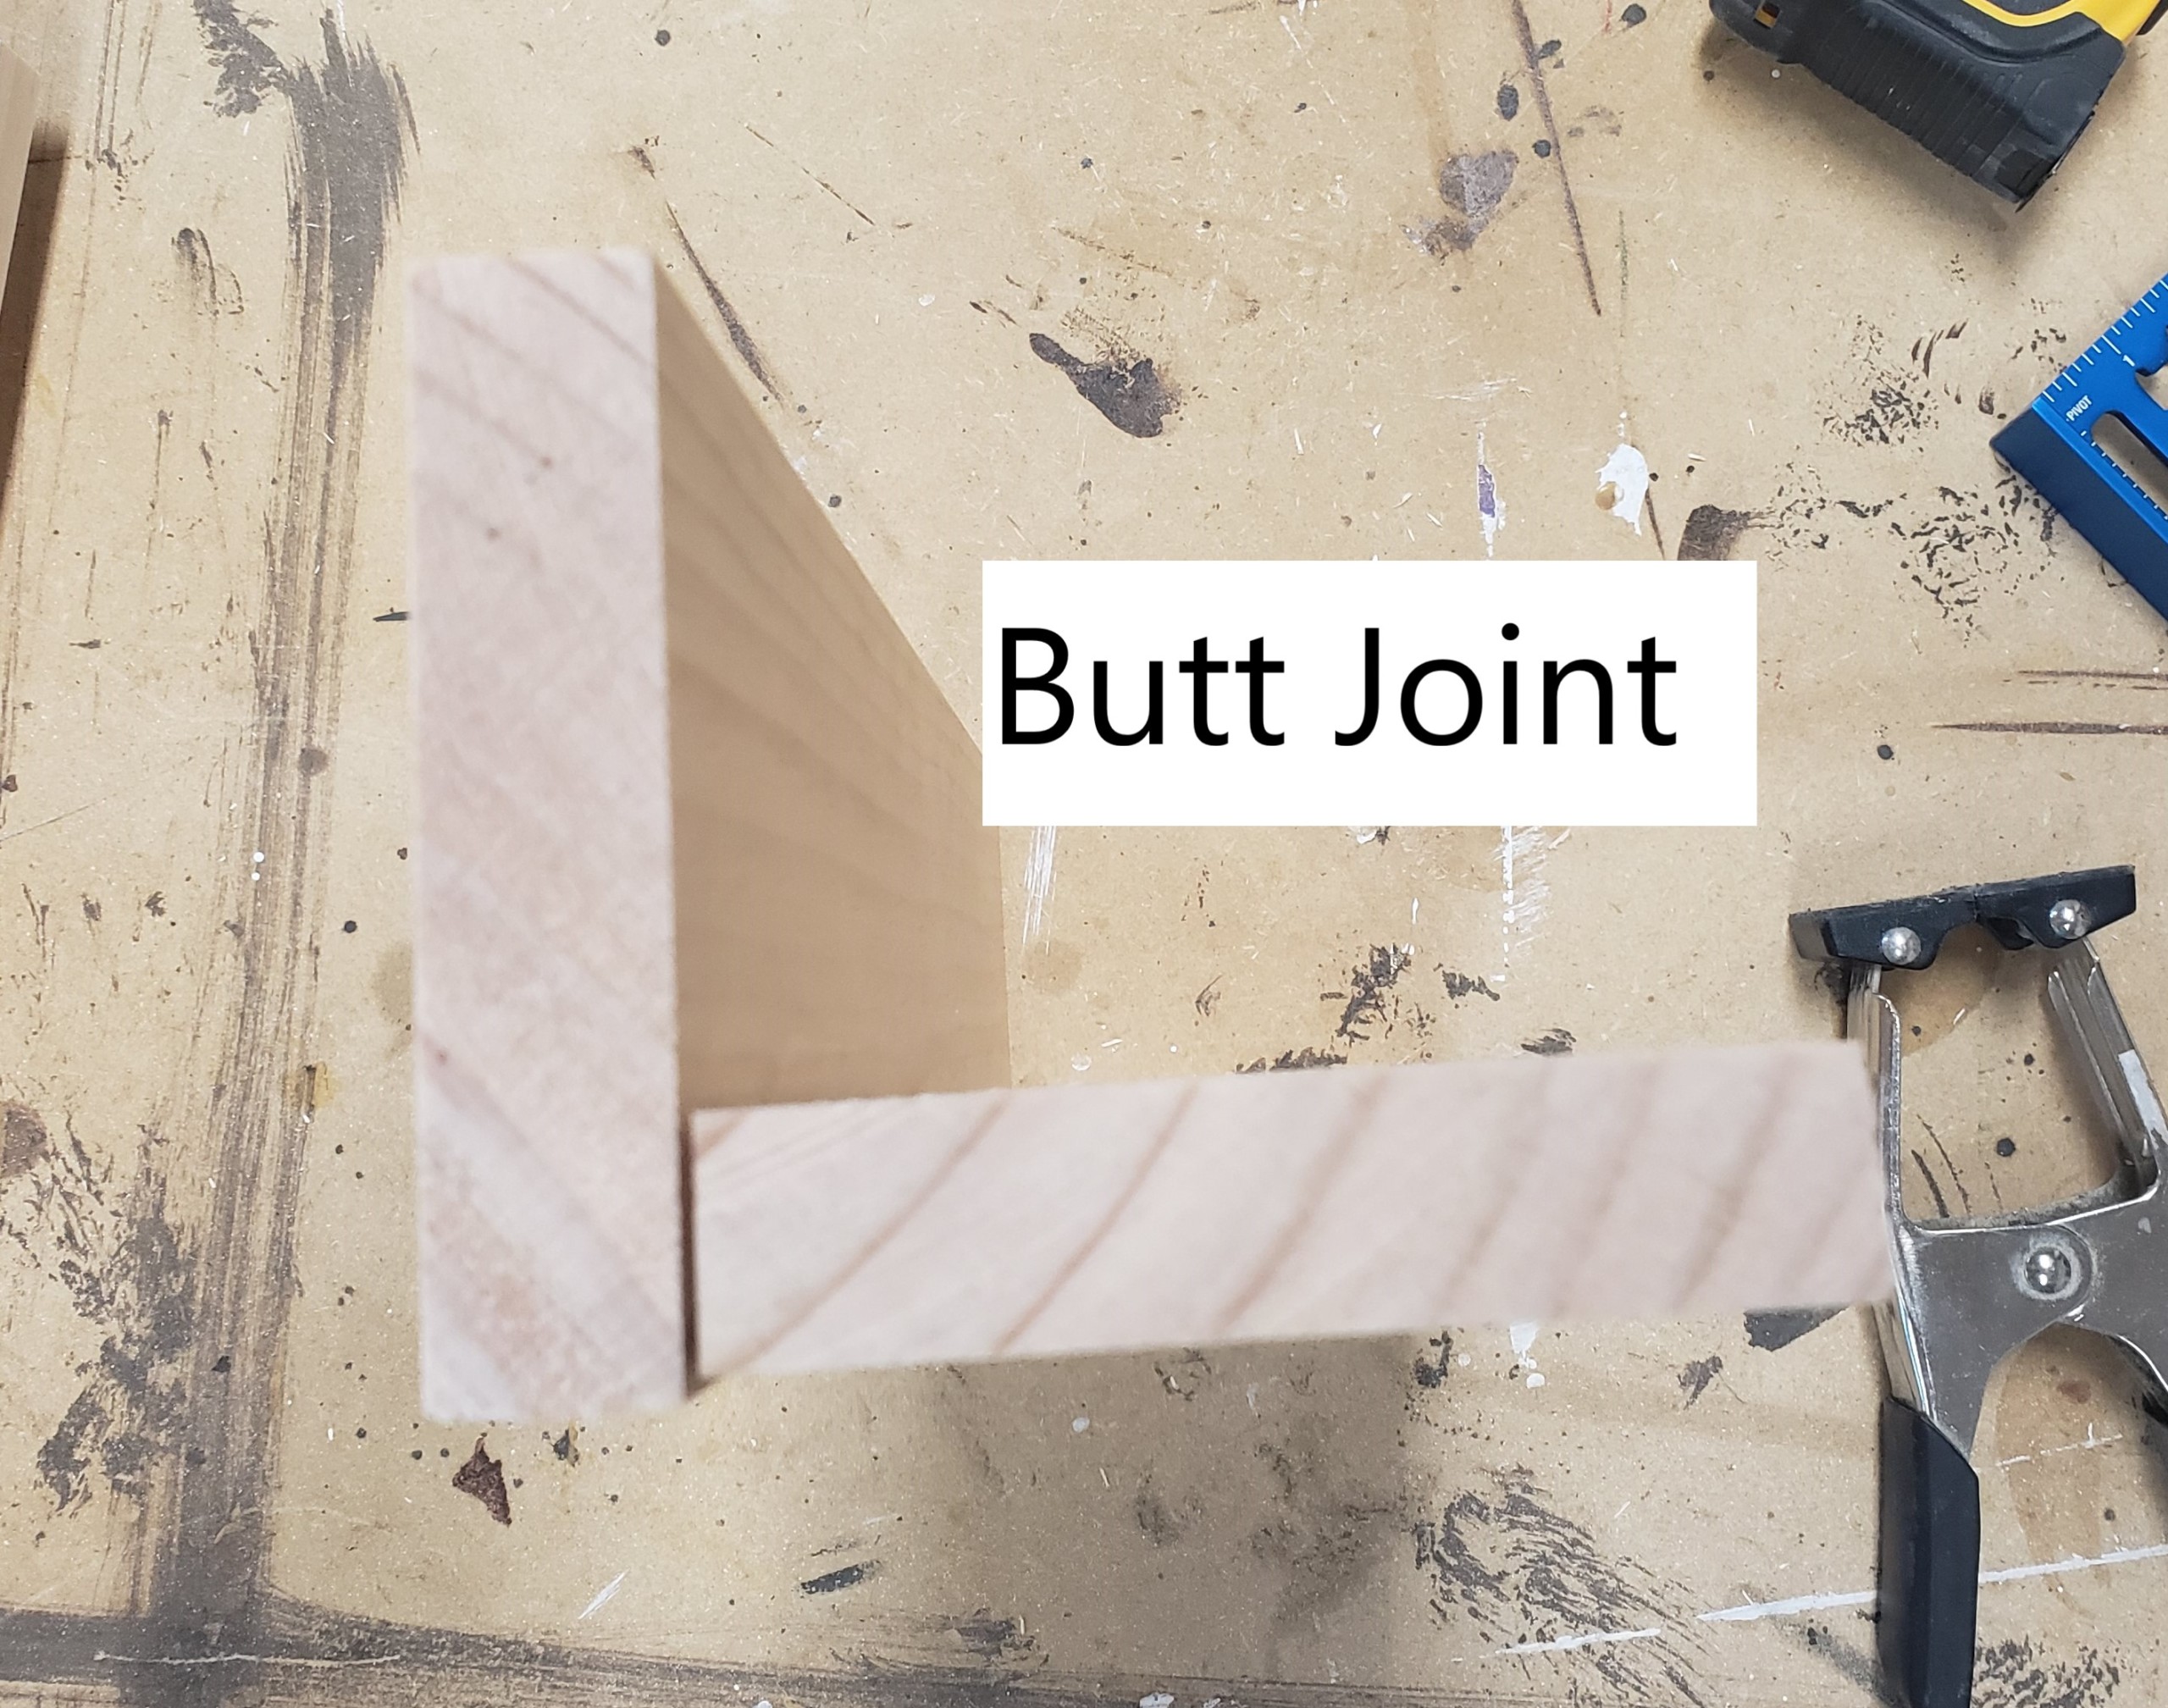
I have used this style of joint when a butt joint or pocket-hole joint isn’t possible. It’s helpful to use when working with thinner material or in tight spaces. Let’s learn how to make a half-lap joint!

Materials:

(I’ve included affiliate links for your convenience. I earn a small percentage from a purchase using these links. There is no additional cost to you. You can read more about affiliate links here.)

Tools:

Instructions:

Step 1: Mark your boards

  • Place your boards over one another in the orientation they will be joined.
  • Mark out the width of the overlap on each board.


Step 2: Set up your miter saw

  • Place a sacrificial board against the miter saw fence, with the face flat (as seen in the video below).  This board should be flat and square. You will need this because you are not cutting through the board to be used in your project and thus the miter saw will not cut the back portion of the board you are cutting. The scrap piece will push your board out so that the miter saw will cut halfway down from the front to the back. If you do a test cut without the scrap board you’ll see what I mean.
  • Next, use your saw’s depth stop control and adjust the depth to cut approximately halfway down into the first board to be cut. Use a scrap piece of wood for this step to make sure you have the depth you want before using the board that will be used in your project.
  • Adjust the miter angle at this time as well if you are not planning to cut at 90 degrees.

Step 3: Cut the first board

  • With your depth set and scrap board in place make your first cut into your board. Make sure you are minding which side of the marked lines your blade needs to cut!
  • After the first cut move the board slightly (about 1/8”) and create another cut right next to the first.
  • Continue moving and cutting until you have created all the cuts needed between the two width lines you marked out previously.
  • Dry fit the second board into the first to make sure the width is correct and make any necessary adjustments.
  • Use sandpaper to smooth out any ridges left from the saw.

Step 4: Cut the second board

  • If you cut exactly halfway through the first board then you will not have to do any adjustments for this step and you can cut the second board exactly as you cut the first.
  • But, if you are like me you didn’t cut the first board perfectly and the depth will need to be adjusted slightly for the second board. This is simple.
  • The cut for the second board will need to be the depth of what you DIDN’T cut from the first board. Use a piece of scrap to fine-tune this depth before cutting the board you will use.
  • Now that the depth has been set for the second board you can cut the half-lap into the board just like you did for the first. Again, being mindful of which side of the lines your blade is cutting.
  • Dry fit the two boards together to be sure you have a snug fit and the boards create a flat surface.

Step 5: Glue together

  • Apply glue to both lap joints in each board and fit them together.
  • Apply downward pressure to the joint and allow the glue to dry.

There you have it!! You have expanded your talents and created a very strong half-lap joint for your next project. Nice work!

Pin this graphic for future reference:

How to Make a DIY Half Lap Joint using Miter Saw

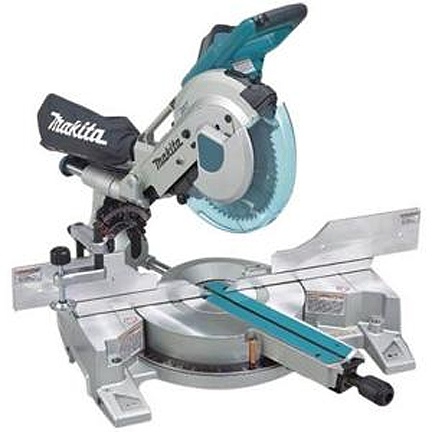
New to using the miter saw or need a refresher? Check out the Pretty Handy Girl’s How to Use a Miter Saw tutorial to get you all caught up!

Hi! I’m Kristen, from In Her Garage, and I am a self-taught woodworker and DIY fanatic from Minnesota where I live with my husband and our two daughters. Between being a wife, mom, and registered nurse, I try to make as much time for DIY as possible. My love for building came after our family built our current home in 2015. After we moved in, we needed furniture, and instead of spending massive amounts of money to order the items we wanted I decided that I would build them myself. I started with a buffet table plan from the fabulous Ana-white and quickly set out to remodel my entire home office.

Since then I have started a side business building furniture for the people in my community. I love hearing my clients talk about the pieces they wish they had whether it be a rustic buffet table, a one drawer side table, or a toy box and then making it a reality for them. While starting my small business it made perfect sense that I would document my building journey so I simultaneously launched the In Her Garage blog and I love sharing my plans, tips, and tricks.

I am so glad that you found me here and please feel free to connect with me on PinterestInstagram, and Facebook to see what I am working on right now.
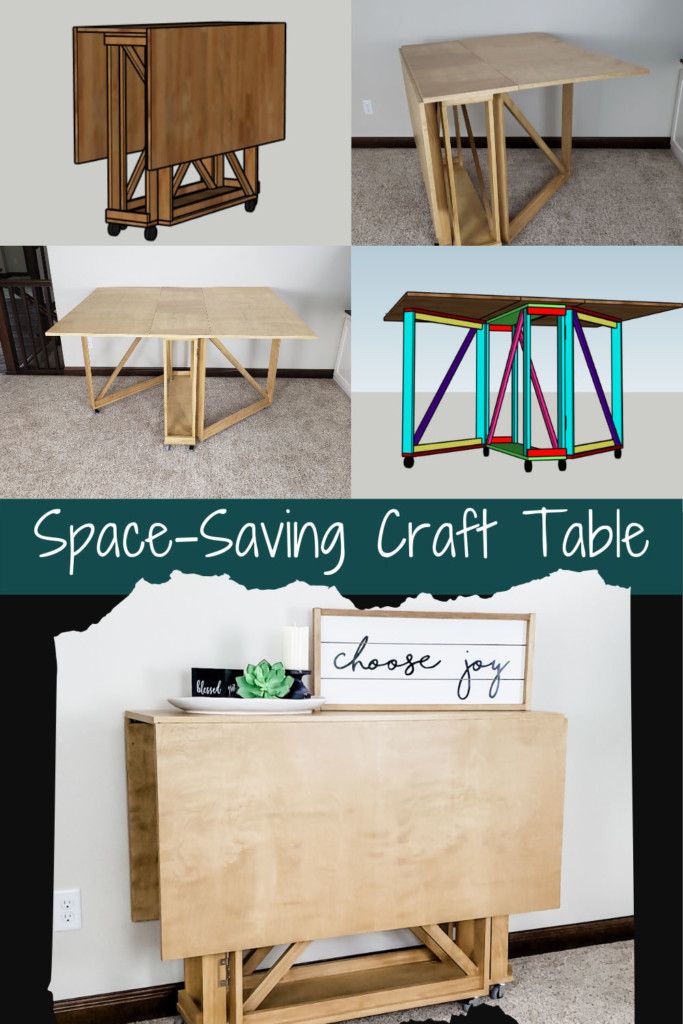
Check out my latest blog post about building a DIY Folding Craft/Sewing Table! This table is large enough for any craft project but folds down when you don’t need it. Perfect for anyone with a small space but large crafting ambitions!

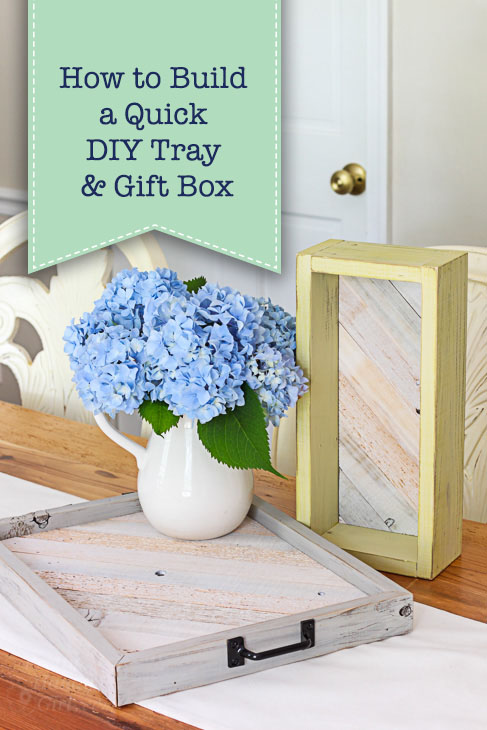
How to Build a Quick DIY Tray & Gift Box | Pretty Handy Girl

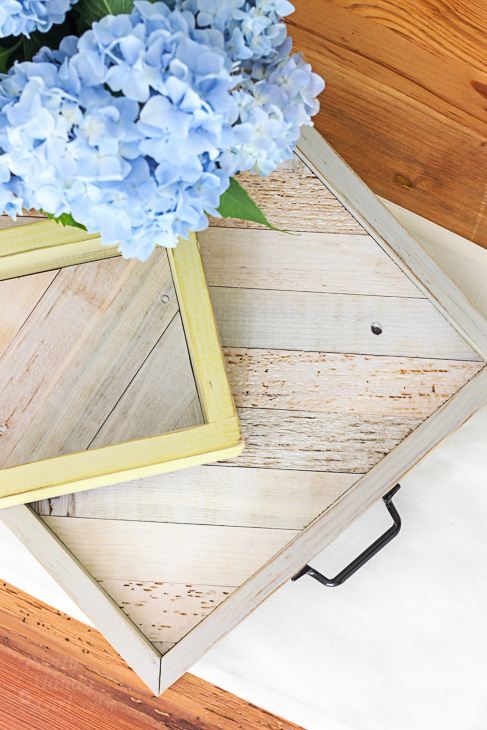
Growing up, my parents always told me homemade gifts meant more to the recipient than a store-bought gift. If you’re like me, and enjoy making things and have a lot of wood scraps, you’ll love making many of these Quick DIY Trays and Gift Boxes!

How to Build a Quick DIY Tray & Gift Box | Pretty Handy Girl

How to Build a Quick DIY Tray & Gift Box

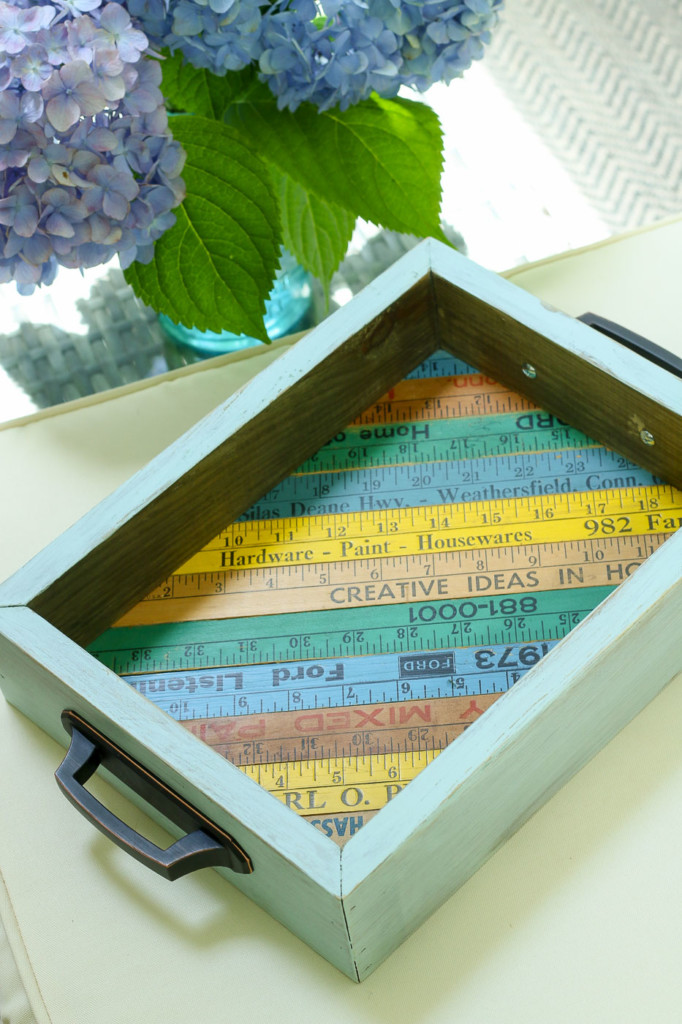
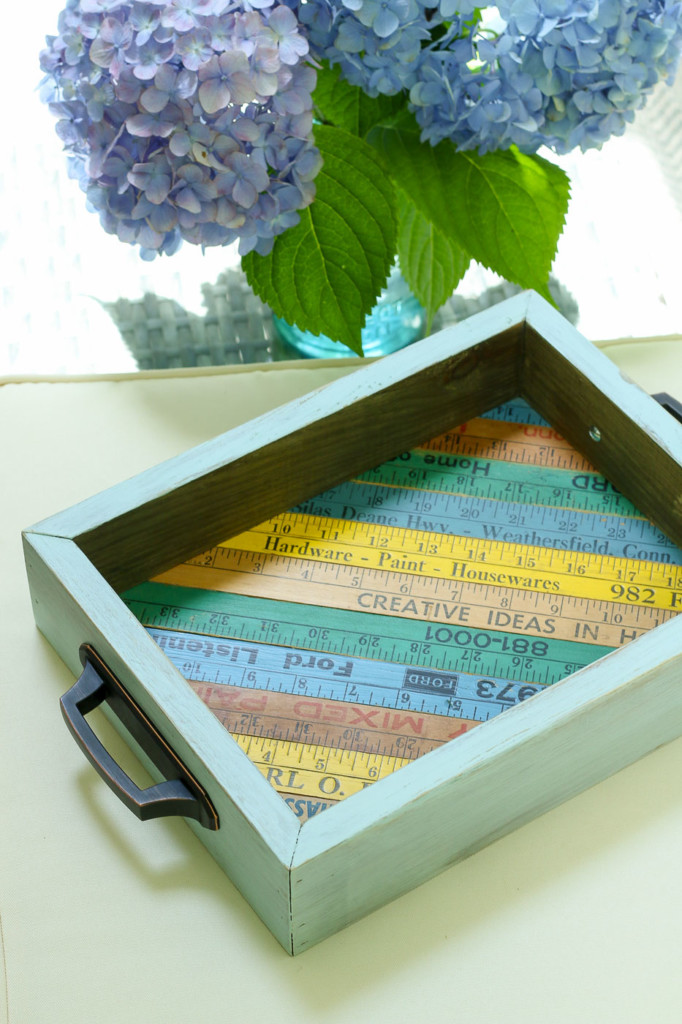
Several years ago I shared this tutorial, but I’m updating the post to show you an alternative base for your tray. You can use a variety of thin woods to cover the plywood for a more decorative look. Previously I used leftover Timberchic end caps. But, this past weekend I whipped up a tray for my girlfriend’s birthday using vintage rulers and I couldn’t be happier with the results.

vintage-rulers-on-tray-bottom

Instead of the self-adhesive Timberchic, use wood glue to affix any thin wood to a plywood base. Then build the sides and you have yourself a beautiful gift tray (or gift box if you make your sides taller.)

diy-vintage-ruler-tray-on-ottoman

Now it’s time to share the tutorial with you because this will be easy, quick, and frugal (all things I like in a good DIY project!) Let’s learn How to Build a Quick DIY Tray & Gift Box.

Question: What’s better than giving a one-of-a-kind gift? What’s better than giving a gift basket that will be useful long after the contents have been consumed? And what’s better than spending money on a gift basket?

Answer: Building your own Quick DIY Tray & Gift Box that will be used long after the contents are gone and it doesn’t have to cost you an arm or a leg when you are using scraps from your workshop! #Winning

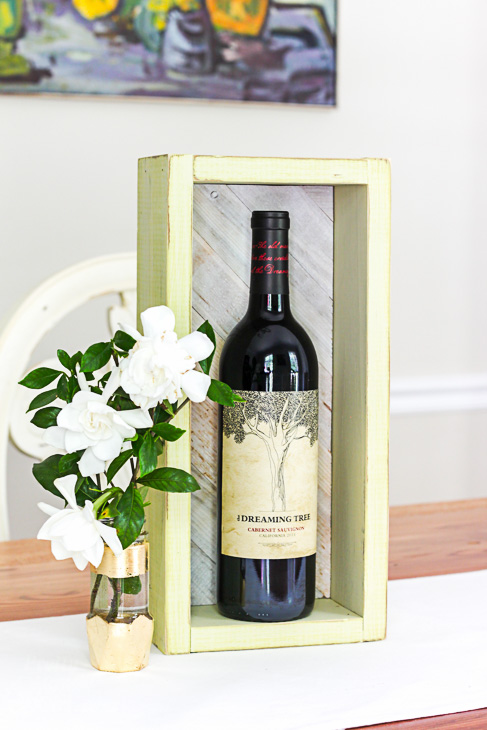
These rustic beauties are perfect for filling with a bottle of wine or to use as the base for a cellophane-wrapped gift basket.

How to Build a Quick DIY Tray & Gift Box | Pretty Handy Girl

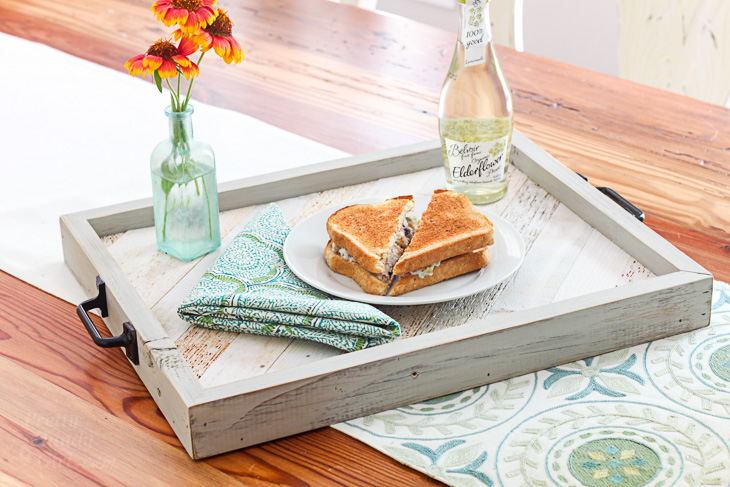
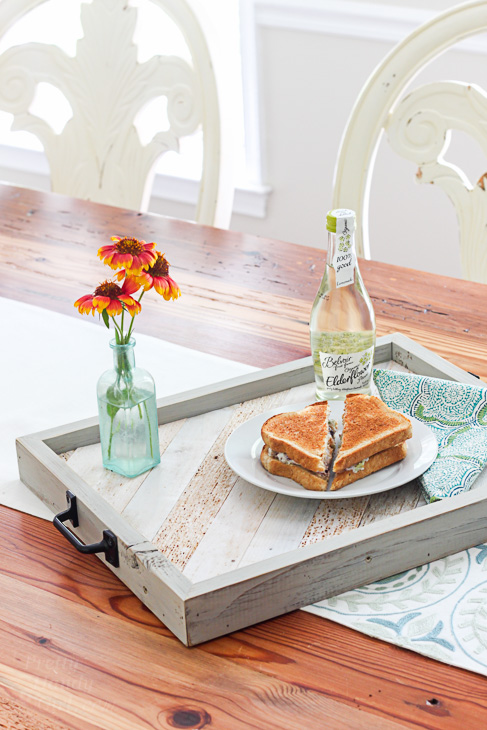
The tray is probably my favorite because you can use it to serve lunch on the porch (or breakfast in bed.) And who doesn’t love a good tray to corral loose items in your living room, bedroom, or kitchen?

How to Build a Quick DIY Tray & Gift Box | Pretty Handy Girl

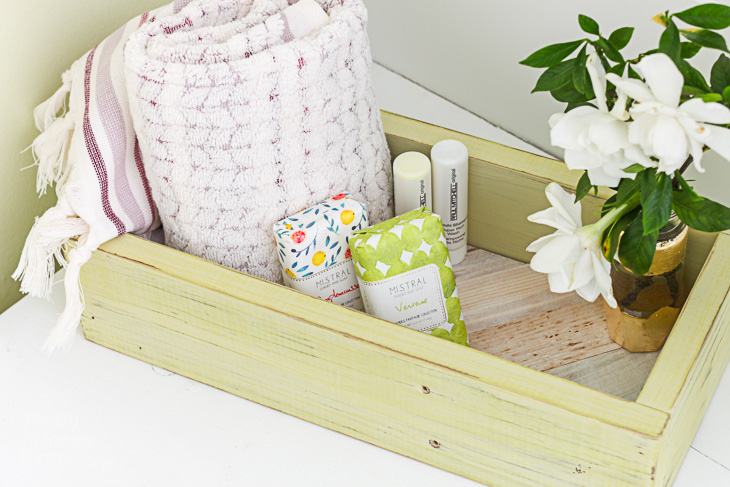
The crate is a close second in my heart because it makes the perfect place to store toiletries for a guest. But, we all know it can also be used to organize desk supplies and much much more.

How to Build a Quick DIY Tray & Gift Box | Pretty Handy Girl

What do you need to make this Quick DIY Tray & Gift Box you ask? Well here’s the 411 on this project.

Materials:

(I’ve included affiliate links for your convenience. I earn a small percentage from a purchase using these links. There is no additional cost to you. You can read more about affiliate links here.)

How to Build a Quick DIY Tray & Gift Box | Pretty Handy Girl

Optional:

Instructions:

Cut your plywood base to size. (My tray was 11″ x 15″ and the gift box was 4″ x 10″.)

Set your slats on top of the plywood to figure out their ideal placement.

How to Build a Quick DIY Tray & Gift Box | Pretty Handy Girl

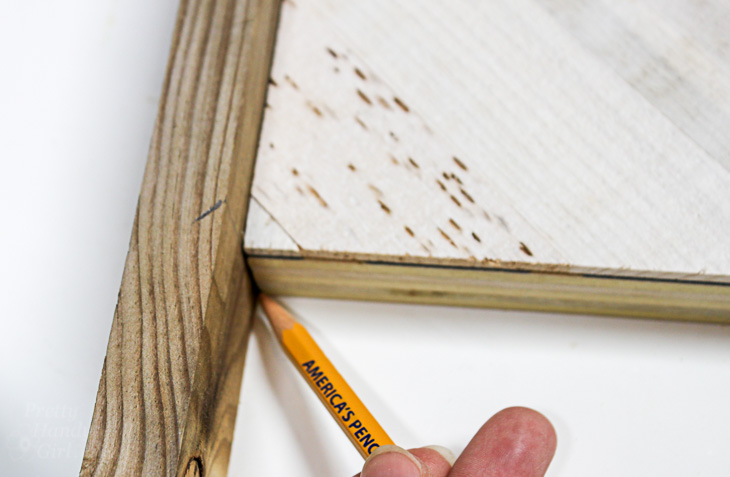
Use a ruler or square and your pencil to mark the cut offs.

How to Build a Quick DIY Tray & Gift Box | Pretty Handy Girl

Cut the slats and return to the plywood base. If you are using the TimberChic end caps, remove the adhesive backing and place the slat on the plywood. (If using other slats, use wood glue to adhere them to the base.)

How to Build a Quick DIY Tray & Gift Box | Pretty Handy Girl

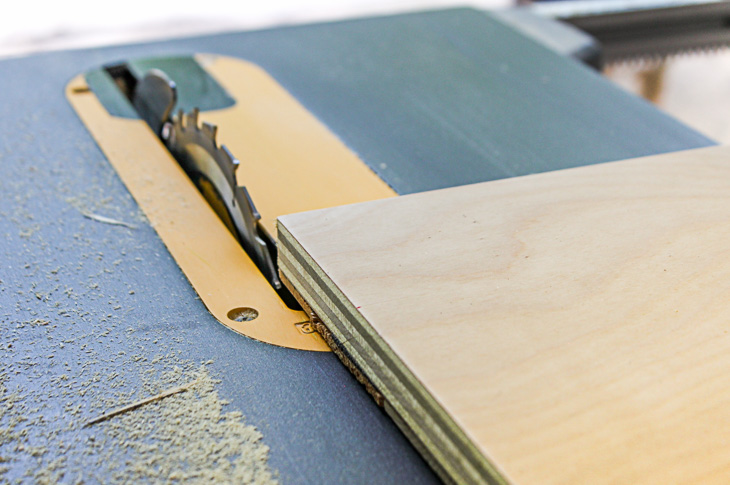
For a perfect edge, you can turn your base upside down and trim the edges on the table saw. (Not necessary, but gives you a cleaner edge.)

How to Build a Quick DIY Tray & Gift Box | Pretty Handy Girl

Line up your side material against the base and mark where to cut each piece.

How to Build a Quick DIY Tray & Gift Box | Pretty Handy Girl

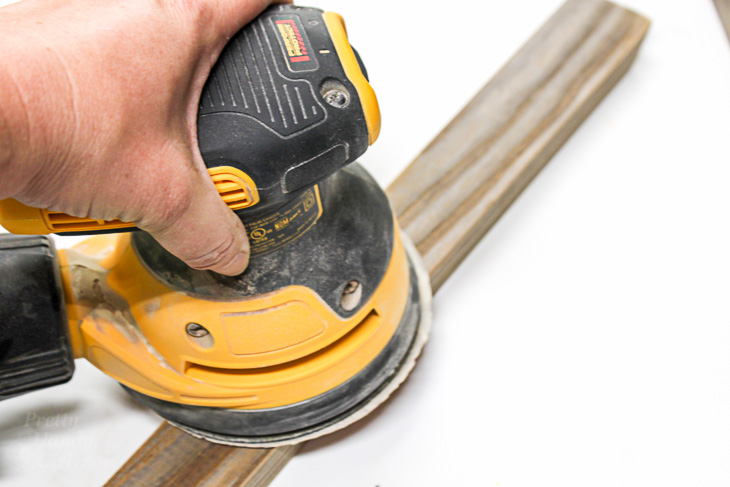
Cut the sides at a 45 degree angle to create mitered edges (or simplify the project by cutting 90 degree ends). Test fit the sides to make sure you have a tight miter at each corner. Sand the sides smooth to remove any rough spots.

How to Build a Quick DIY Tray & Gift Box | Pretty Handy Girl

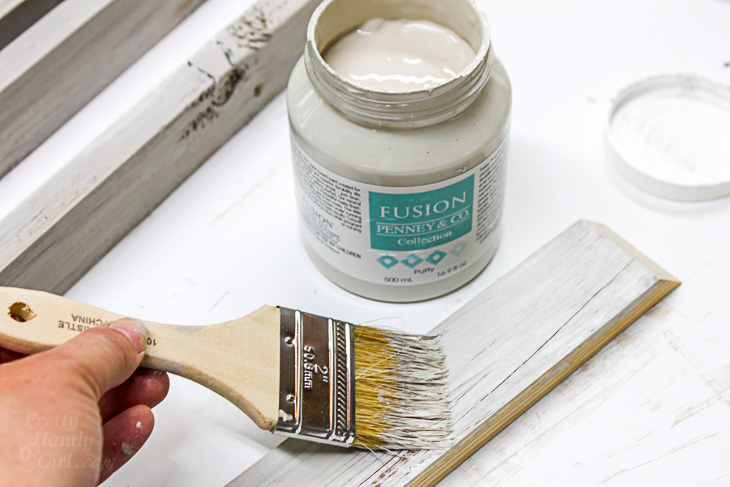
Paint your sides with Fusion paint (or chalk paint of your choosing.)

How to Build a Quick DIY Tray & Gift Box | Pretty Handy Girl

Wipe off immediately for a rustic look.

How to Build a Quick DIY Tray & Gift Box | Pretty Handy Girl

Run a line of wood glue along the side of your base.

How to Build a Quick DIY Tray & Gift Box | Pretty Handy Girl

Press the sides in place.

How to Build a Quick DIY Tray & Gift Box | Pretty Handy Girl

Nail brad nails through the sides and into the base to secure the sides while the glue dries.

How to Build a Quick DIY Tray & Gift Box | Pretty Handy Girl

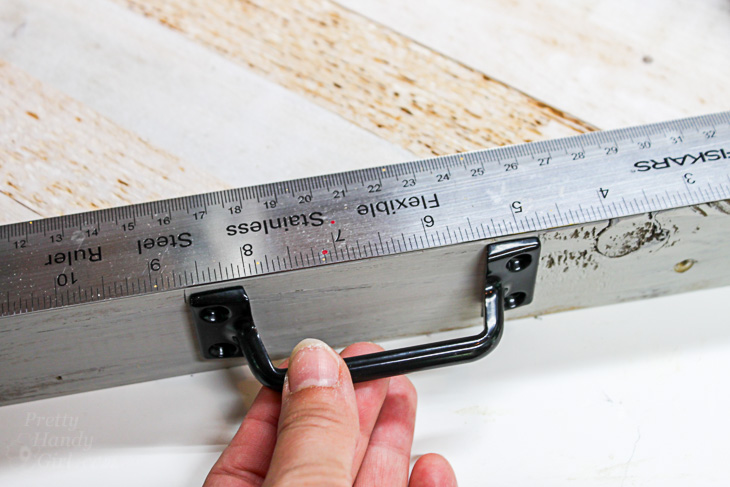
Find the centers on the two smaller sides of your tray. Center the door pulls on the sides.

How to Build a Quick DIY Tray & Gift Box | Pretty Handy Girl

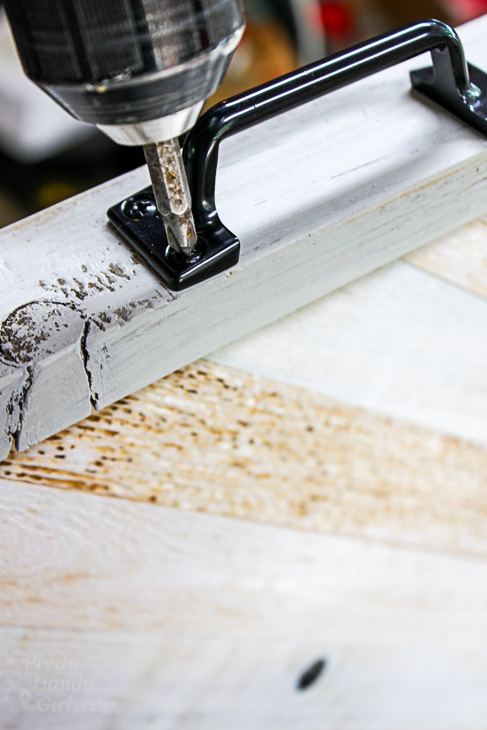
Attach the handle to the side of the tray with provided screws.

How to Build a Quick DIY Tray & Gift Box | Pretty Handy Girl

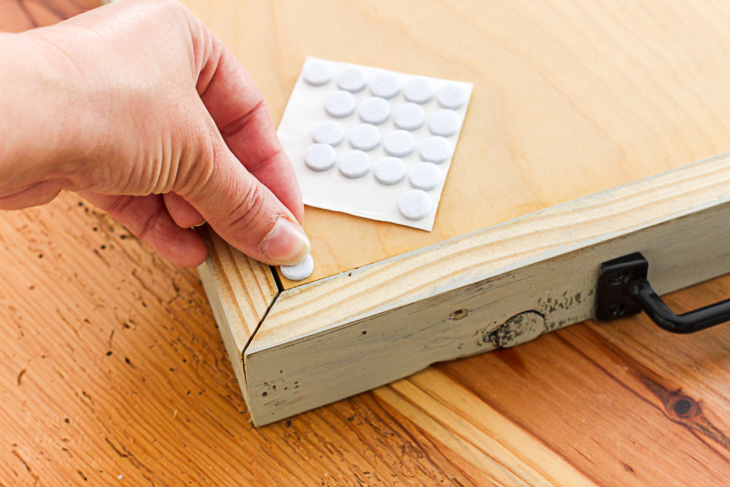
Add felt pads to the bottom of the tray to prevent scratching of surfaces.

How to Build a Quick DIY Tray & Gift Box | Pretty Handy Girl

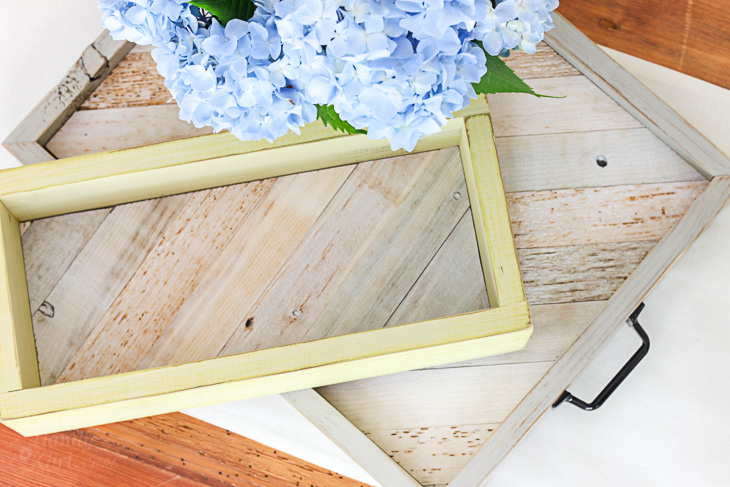
Your tray and gift box are done! Fill them up with goodies your recipient will love.

How to Build a Quick DIY Tray & Gift Box | Pretty Handy Girl

diy-vintage-ruler-tray-on-ottoman

A bottle of wine should fit nicely in the gift box:

How to Build a Quick DIY Tray & Gift Box | Pretty Handy Girl

And when the gift tray and box are empty, they will be enjoyed for years to come.

How to Build a Quick DIY Tray & Gift Box | Pretty Handy Girl

How to Build a Quick DIY Tray & Gift Box | Pretty Handy Girl

Did you like this simple gift idea? Well, there’s lots more where that came from! Here’s a gallery of other DIY Gift Ideas!

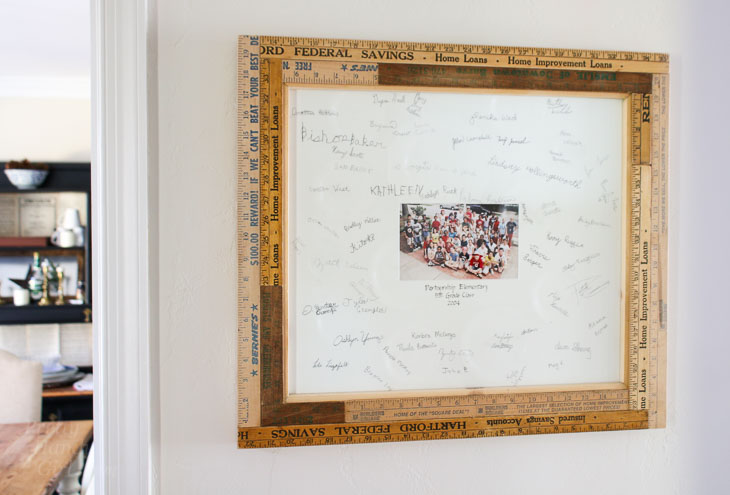
Like using vintage rulers? Check out this frame I made with more vintage rulers:

How to Custom Build a Vintage Ruler Picture Frame

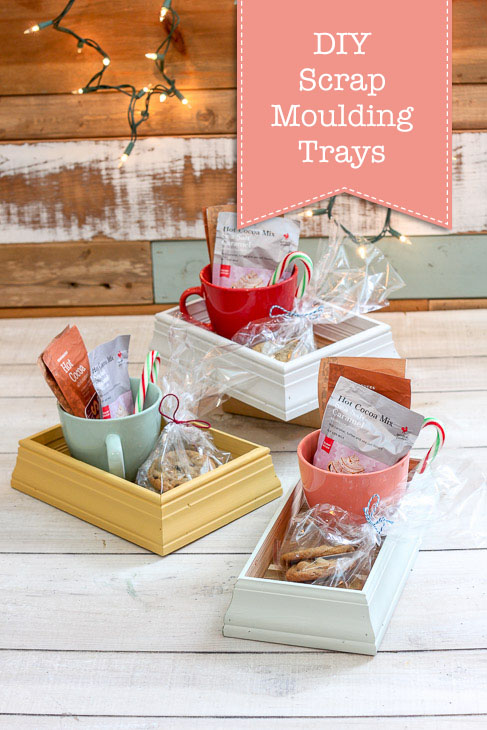
Or these scrap molding trays:

DIY Scrap Moulding Trays | Pretty Handy Girl

Happy gifting!


diy beverage center housing mini fridge

It’s 5 o’clock somewhere! Whether it’s 5 am or 5 pm this DIY Beverage Center will hold whatever it is that gets you going in the morning and winds you down in the evening.

DIY Beverage Center

DIY Beverage Center

Hi there! This is Kristen from In Her Garage and I am going to teach you how to build a DIY beverage center for your home. I have built a couple of these and each client who received this beverage center loves to tell me how appreciative they are to have a separate space to hold their coffee supplies and adult beverages. Plus, a beverage center freed up space needed in their kitchen refrigerator.

This beverage center measures approximately 40”h x 38 ½”w x 24 ½”d and I built it to house the Whirlpool JC 103EZY Mini-fridge that a client had purchased. Feel free to modify the dimensions for the mini-fridge of your choice, just keep in mind there should be an allowance on the sides and top for proper airflow around the fridge (usually specified in the owner’s manual). This particular mini-fridge requires 2” on both sides and top.

Materials:

(I’ve included affiliate links for your convenience. I earn a small percentage from a purchase using these links. There is no additional cost to you. You can read more about affiliate links here.)

Tools:

Board Cuts:

  • 2- 2×3 @ 36″
  • 3- 2×3 @ 20¼”
  • 2- 1×2 @ 39 ¼”
  • 1- 1×2 @ 34 ¼”
  • 1- 1×2 @ 34 ½”
  • 1- 1×4 @ 34 ½”
  • 2- 1×2 @ 23″ – drill two pocket hole’s in both ends
  • 2- 1×2 @ 12 ¼” – drill two pocket hole’s in both ends

Cut list and corresponding pocket-hole placement:

To make plywood cuts easier while using a circular saw please check out my tutorial for creating your own DIY Track Saw Jig for your circular saw. It will make cutting plywood simple and foolproof!

Instructions:

Step 1: Create the beverage center base

  • First, build a base frame using the cut 2×3 studs, wood glue, and 2 ½” wood screws. Pre-drill your holes to prevent splitting.

  • Next, Secure the bottom plywood panel on top of the base frame and secure it with wood glue and brad nails

Step 2: Attach beverage center sides

  • On a flat surface, stand both sides on their backs with the pocket-holes pointing to the ceiling.
  • Apply glue to the sides of the beverage center base and stand it on its back.
  • Sandwich the base between the two sides aligning the bottoms and fronts of the sides and base.  If you have clamps use them to squeeze the sides to the base or have someone help hold them in place until they are secured.
  • Now pre-drill three holes in each side, drilling from the inside of the base frame 2×3 out into the sides, and attach using 2″ screws.
  • Stand the piece up

Step 3: Attach center divider

  • Grab both 1 x 2 x 23″ support boards and use those as spacers for the center divider.
  • Place a small bead of glue along the bottom of the center divider panel (the short edge with pocket-holes) and place it over the base spaced by the 1×2 boards. Be sure that the long edge with the pocket-holes is facing the front just like the pocket-holes on the sides.
  • Attach the center divider with 1 ¼” Kreg pocket screws

Step 4: Attach the top spacer supports

  • Using the same two 1 x 2 x 23″ support boards you used to space the center divider and 1 ¼” pocket screws, attach the boards to the front and back of the side and center divider at the top of the panels to create even spacing.
  • Repeat with the 1 x 2 x 12 ¼” boards spacing between the center divider and the opposite side.

Step 5: Build the Face Frame

  • If you haven’t cut the boards for the face frame yet do that now according to the cut list or the diagram below.
  • Refer to the diagram below for pocket-hole placement.
  • Use wood glue and 1 ¼” pocket screws to attach the face frame pieces as depicted.

Step 6: Attach the face frame to the beverage center box and plug pocket-holes

  • Attach using wood glue and 1 ¼” pocket screws aligning the sides, top, and bottom. You can either lay the carcass on its back or clamp the face frame to the carcass while it is standing up.
  • If you choose to plug the pocket-holes do that now. You will only need to plug the pocket-holes in the refrigerator compartment of the beverage center because the other pocket-holes won’t be visible within the drawer compartment.
Step 7: Attach drawer slides

  • I used eight 1 x 2 x 23” strips of plywood to create runners to attach the drawer slides to.  To evenly space each runner vertically I use a couple of pieces of scrap cut to the same height. When the runner is spaced and level, attach it using glue and brad nails.
  • Now attach your drawer slides to these runners keeping the front of the drawer slide just behind the face frame.
  • This step can be done in a couple of ways and most people have their preference for installing drawers and drawer slides but this is my method.

Step 8: Build the drawer boxes and apply drawer slides

  • There are several different ways to build drawer boxes and you will need to decide on dimensions based on the drawer slides that you’ve chosen to use. I have provided a diagram for a simple method of building drawer boxes. (Or you can follow this tutorial for building drawers.)

  • If you choose to add edge banding to the top edge of your drawer boxes I recommend doing this after the box components are cut but before assembly to make the process easier.  New to edge banding? Pop over to see a tutorial on finishing raw plywood edges.
  • After the drawer boxes are built apply the drawer slides to the boxes and slide into place to check for fit. Make any necessary adjustments to make sure the drawer boxes are level and flush to the back of the face frame. You’ll want to make those adjustments now because it can be very difficult to do after the drawer faces are attached.  I have learned this the hard way.
  • EXTRA! One great addition to the beverage center is to add a DIY Drawer in a Drawer to keep small items such as corkscrews, bottle openers, K-cups, and wine corks organized.  Check out my tutorial for how to build this because now would be the perfect time to incorporate it into the beverage center.

Step 9: Cut the drawer faces and beverage center top

  • Using the remaining plywood cut out the beverage center top,  and drawer faces. You WILL need to edge band these pieces to hide the unsightly edge!
  • Cut the top to overhang the base by 1/2″ on either side and the front.
  • The drawer faces should be cut to fit within the face frame and cover each drawer box with a 1/16″ gap around each drawer face. A tip is to use playing cards or nickels to get even spacing.

Step 10: Finishing

  • You’ve gotten as far as you possibly can without putting it all together which means it’s time to sand everything smooth and apply the finish you’ve chosen.
  • Remember, if you are staining then you should be using a pre-stain wood conditioner which will help the plywood absorb the stain evenly and prevent blotchy discolorations.
  • Apply a protective topcoat. A wipe-on polyurethane (over oil-base stain) or polycrylic (over water-based paint) is a great choice for this build.

Step 11: Attach drawer faces and drawer hardware

  • Start by removing all drawer boxes except the bottom and then work your way up.
  • Use your playing cards or nickels to help you evenly space the drawer face with the face frame, then pre-drill 2 holes from the inside of the drawer box out into the drawer face.
  • Next, use two 1 ¼” screws to attach each drawer face to the drawer box.
  • Once all drawer faces are attached, you can install your drawer pulls according to the manufacturer’s directions.
  • Finally, cut the 1/8″ backer board to size to cover the back of the drawer compartment and attach it with brad nails.

Step 12: Attach the top

  • Using the figure-eight fasteners and matching size Forstner bit attach two figure-eight fasteners to each side and the center divider. If you’re unsure how to attach figure-eight fasteners here is a quick video to help you out:

Note: This is a very heavy piece of furniture and should not be moved by lifting from the top. Always lift from the sides or bottom.

Step 13: Install the mini-fridge!

  • Once the beverage center has been carried to where it will be placed in your home slide the mini-refrigerator into place and fill it with your favorite beverages.  I already know what mine would be! 😉

diy beverage center housing mini fridge

Great job!! This is going to be such a cool piece to have in your home and you’ll enjoy the extra space in your kitchen refrigerator.

Check out my latest blog post about building a DIY Folding Craft/Sewing Table! This table is large enough for any craft project but folds down when you don’t need it. Perfect for anyone with a small space but large crafting ambitions!

Hi! I’m Kristen, from In Her Garage, and I am a self-taught woodworker and DIY fanatic from Minnesota where I live with my husband and our two daughters. Between being a wife, mom, and registered nurse, I try to make as much time for DIY as possible. My love for building came after our family built our current home in 2015. After we moved in, we needed furniture, and instead of spending massive amounts of money to order the items we wanted I decided that I would build them myself. I started with a buffet table plan from the fabulous Ana-white and quickly set out to remodel my entire home office.

Since then I have started a side business building furniture for the people in my community. I love hearing my clients talk about the pieces they wish they had whether it be a rustic buffet table, a one drawer side table, or a toy box and then making it a reality for them. While starting my small business it made perfect sense that I would document my building journey so I simultaneously launched the In Her Garage blog and I love sharing my plans, tips, and tricks.


I am so glad that you found me here and please feel free to connect with me on PinterestInstagram, and Facebook to see what I am working on right now.