I’ve been busy updating our 1978 dutch colonial house and I can’t wait to share all the updates, but today I’m here to show you how we added a window to the side of our existing house.
A Desire to Add a Window to Our House

Do you have a room in your house that you wish you had a window in? Whether it be for natural light or to be have a better view, I get it! Our home office was always one of the darkest rooms in our house. It didn’t help that there were only two windows on a north facing wall and that was it for natural light. For some reason, most of the houses in our neighborhood do not have side facing windows. No, we don’t live in a new community where you can barely drive a truck between you and your neighbor’s house. Our houses are on wooded 1/2 – 1 acre lots with a decent amount of space between houses. But, we don’t have windows on the sides of the house! Strange, I know. Maybe in the 1970’s they didn’t add windows on the side of houses? Anyway, I want to share how I added a window to our house where there wasn’t one before.

Being a licensed general contractor, I knew that adding a window to the side of our house wasn’t super difficult as home improvement projects go. Yes, I’d have to frame the opening and remove some of the siding, but as projects go, this one was not super difficult. The hardest step in adding a new window was deciding how big of a window to install. (If this is your first time framing or installing a new window, you might want to seek the help of a professional contractor.)

Back Story on Our Home Office

If you’ve been around for a while (a decade or more) you may remember that this home office has been a constant struggle for me. I’ve been trying to lighten up this room since we moved into the house.
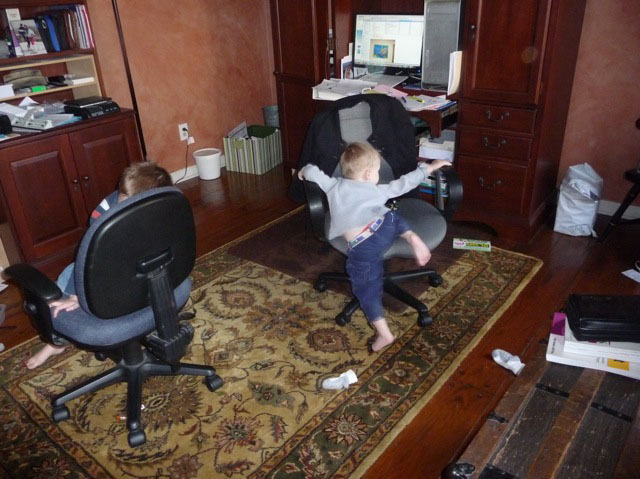
When we moved in, this room had dark orange mottled walls. There were zero ceiling lights, only a switch that controlled the wall outlets. Obviously this didn’t bother the two little boys who just liked to spin on our office chairs. I can’t believe those two monkeys are now in college and over six feet tall now! WHAT?!!!

Attempts to Lighten Up the Dark Office
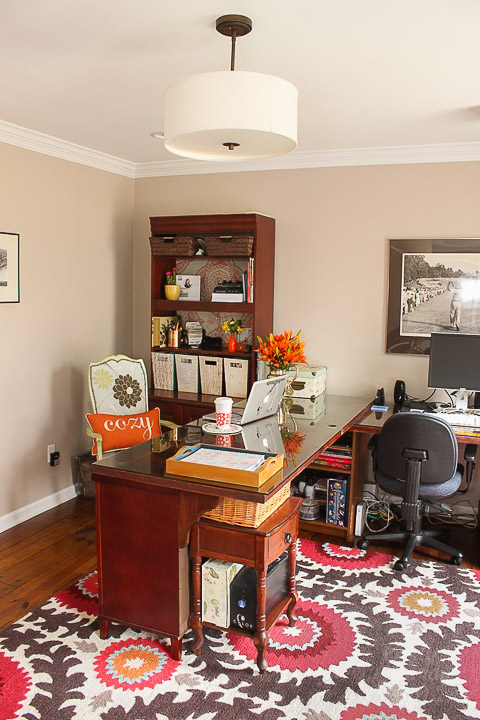
For the first makeover we scraped the ceilings and repainted the entire room a lighter color. I had my electrician add four can lights, and a center ceiling mounted light. This helped brighten the space up a lot at night.

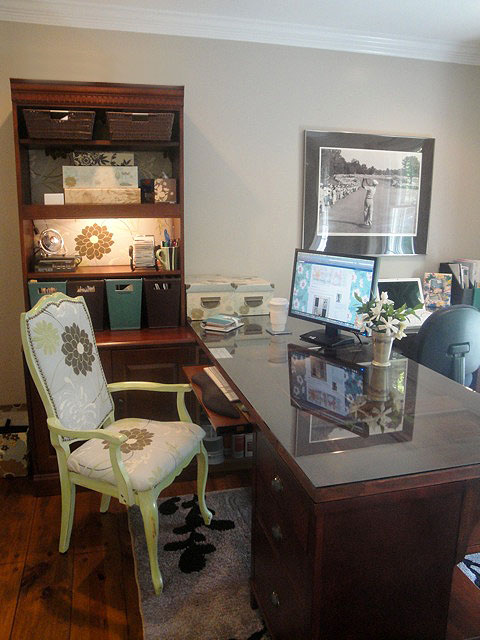
But, the room still felt darker than the rest of the house, especially on overcast days. After several years, I added a cheery rug and put fabric into the back of the shelving unit. Can you tell I was really trying to find budget solutions? On a sunny day, the light wasn’t too bad, especially in the winter when the tree outside the window had no leaves.
But, ultimately no amount of updates were going to make up for the lack of natural light coming in the windows. The answer was to add a window on the west side of our house. The bonus of adding a window, meant we got to look out the window and see our veggies growing in my new raised garden beds with arched trellis (now with downloadable build plans!) And admire the shed I built.

Before running out to order your new window, you need to consider a number of factors. 

Ordering Your New Window:

Believe it or not, there are a lot of decisions you need to make when ordering a new window.

Location of Your New Window

First, you need to decide where the window will be installed on the outside of your home. Are there windows on a second floor or adjacent to the new window? If so, you may want to line it up with your existing windows and make sure it doesn’t stand out from the others. Make sure your new window won’t interfere with exterior features like pipes, electrical conduit, gas appliances, etc. If you have any questions, it’s a good idea to discuss adding a new window with a licensed general contractor in your area. Also, be aware there are a lot of building codes that pertain to windows. And they will vary by your geographical location and the room the window is being installed in.

Type of Window to Order:

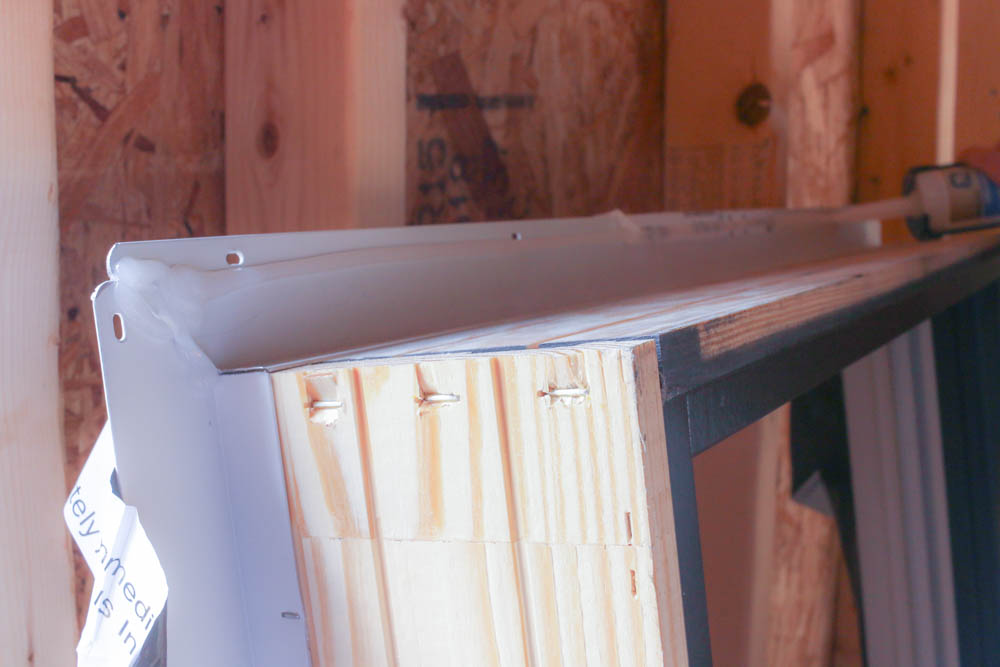
When you’re ordering a new window for the exterior wall, you’ll want to order a new construction window that has a nailing flange. The opposite type of window would be a replacement (or insert) window made to fit inside an existing window frame. By the way, DON’T EVER put replacement windows in your house without reading this article.

Note: We have a wood framed house with exterior siding. If you have a brick house, adding a new window is going to involve brick work and a different style of window.
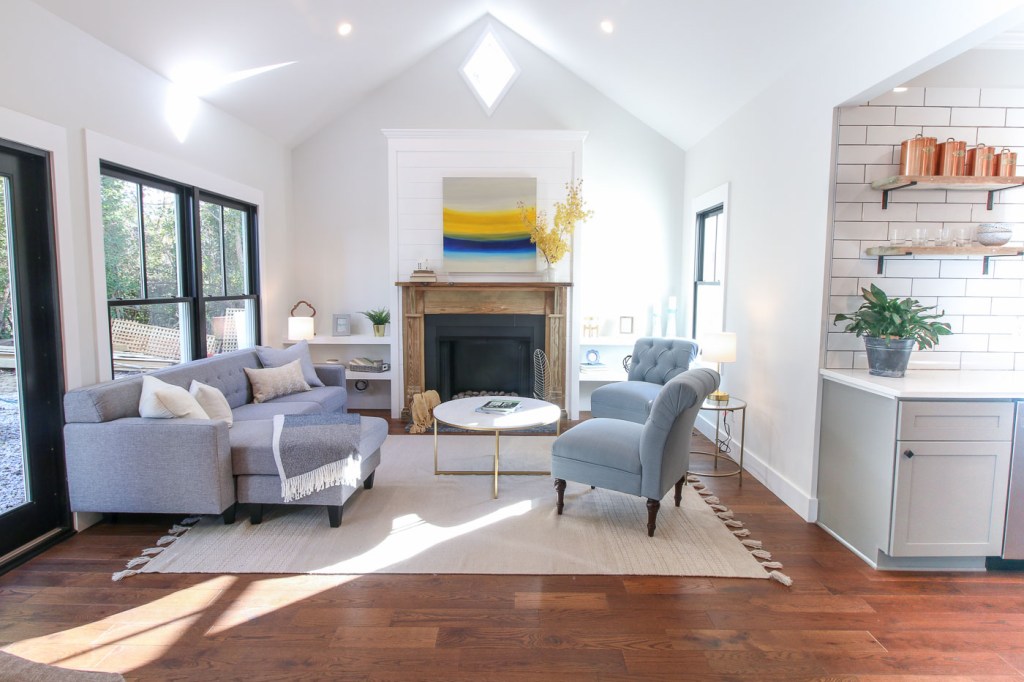
Luckily, I already knew the window manufacturer and model I wanted for our house. You may remember when I was working on the Saving Etta house, I chose beautiful Plygem Mira windows for the new windows. They have the look of historic windows with simulated divided light grille profiles, but with modern features such as double-pane glass with argon gas between the layers. Low-E coating on the glass helps deflect heat in the summer and keeps warmed air inside during the winter. Plus, wood interior parts and extruded aluminum features on the exterior provide better durability.

Disclaimer: Plygem has been a long time sponsor of this website, and they agreed to work with me on installing a new window into our home office.

What Size Window Do I Order?

From the inside, look at existing windows in your room and try to match the width and style of the existing windows. Ideally, you want all the tops of windows to be even in the room. If the window will be the same functional style as the other windows (i.e. double hung windows or casement windows), you will probably want them to be the same width.
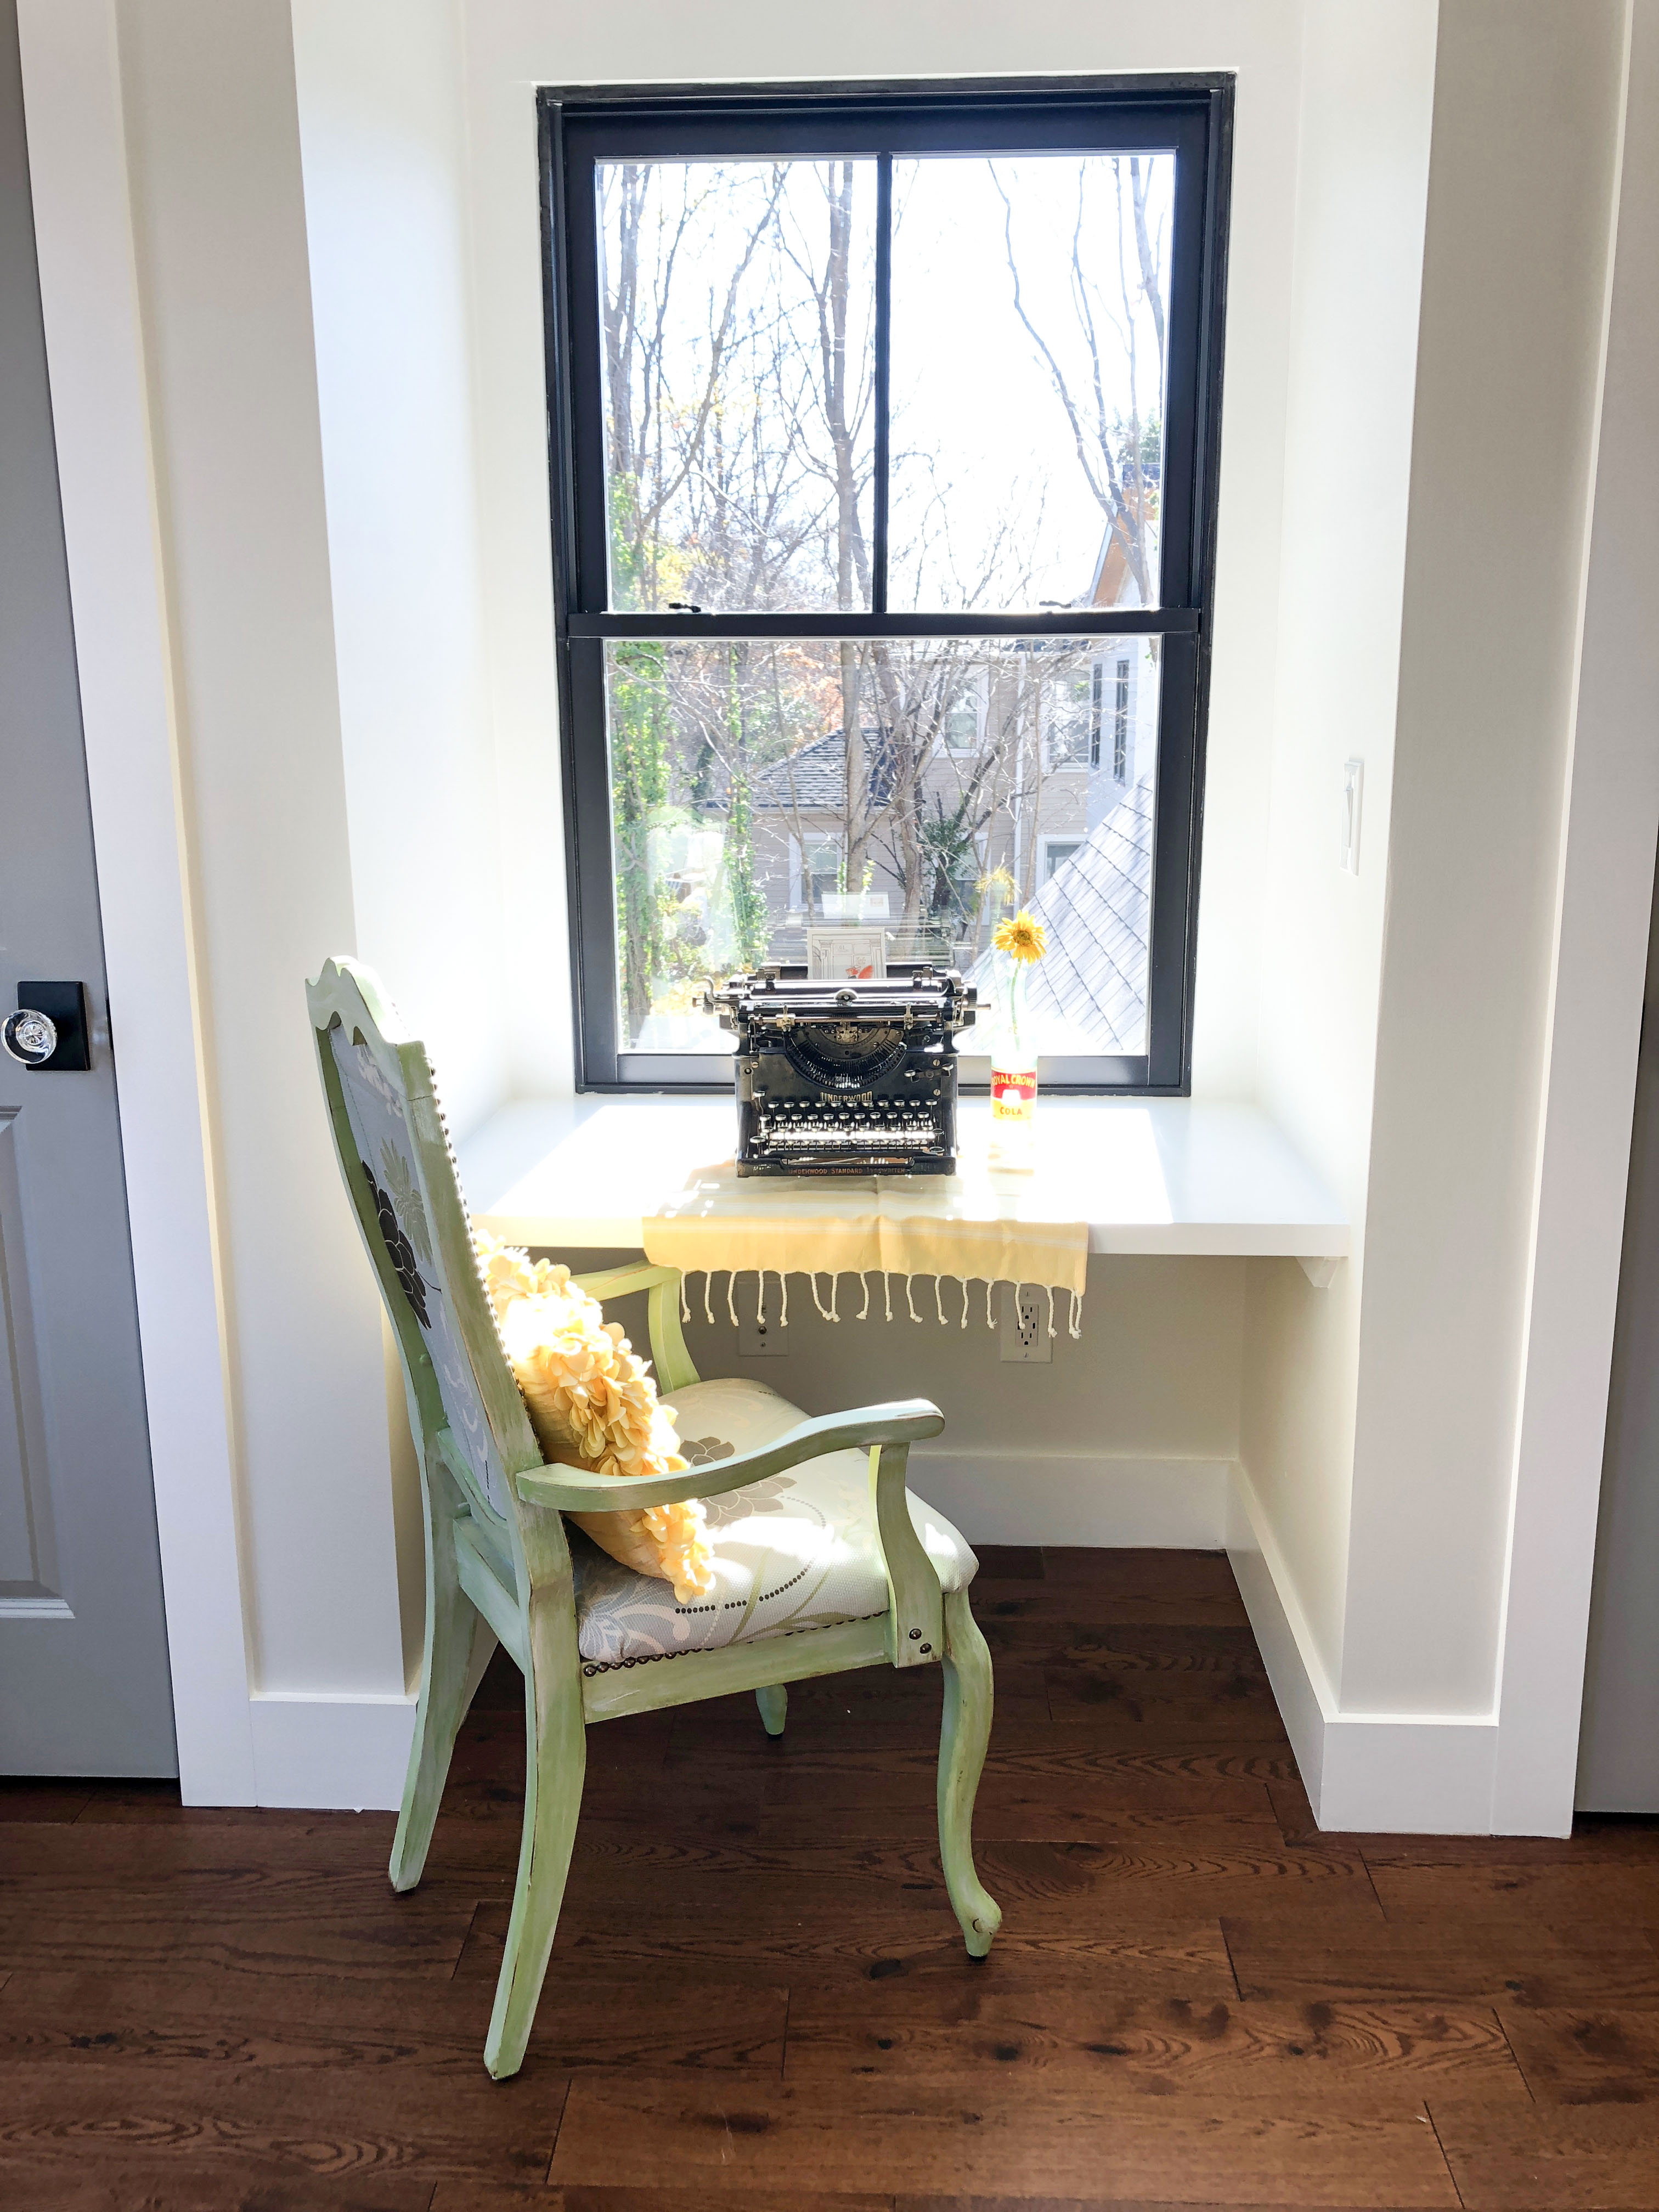
Next, ask yourself if you have a desk, bed, cabinet, or furniture that needs be in front of that window? If so, you may want a window that’s bottom is located higher on the wall. For our home, I used the existing windows as a guide for the width and style for the new window.
Next you need to know the thickness of your wall framing before ordering. Standard construction in the US is either 2×4 framing or 2×6.

How will the window open?

Determine how you want the window to function.

  • Double hung (allows the top of the window to lower for more air flow)
  • Single hung (only the bottom sash opens)
  • Non-opening (picture or decorative window)
  • Casement opening (a window that swings open from the side)
  • Sliding Window (like a double hung window by on it’s side)
  • Awning (a window that angles out from the bottom.)
  • Tilt-In for easy cleaning (an option on some newer windows for easy maintenance)

Glass Privacy Concerns:

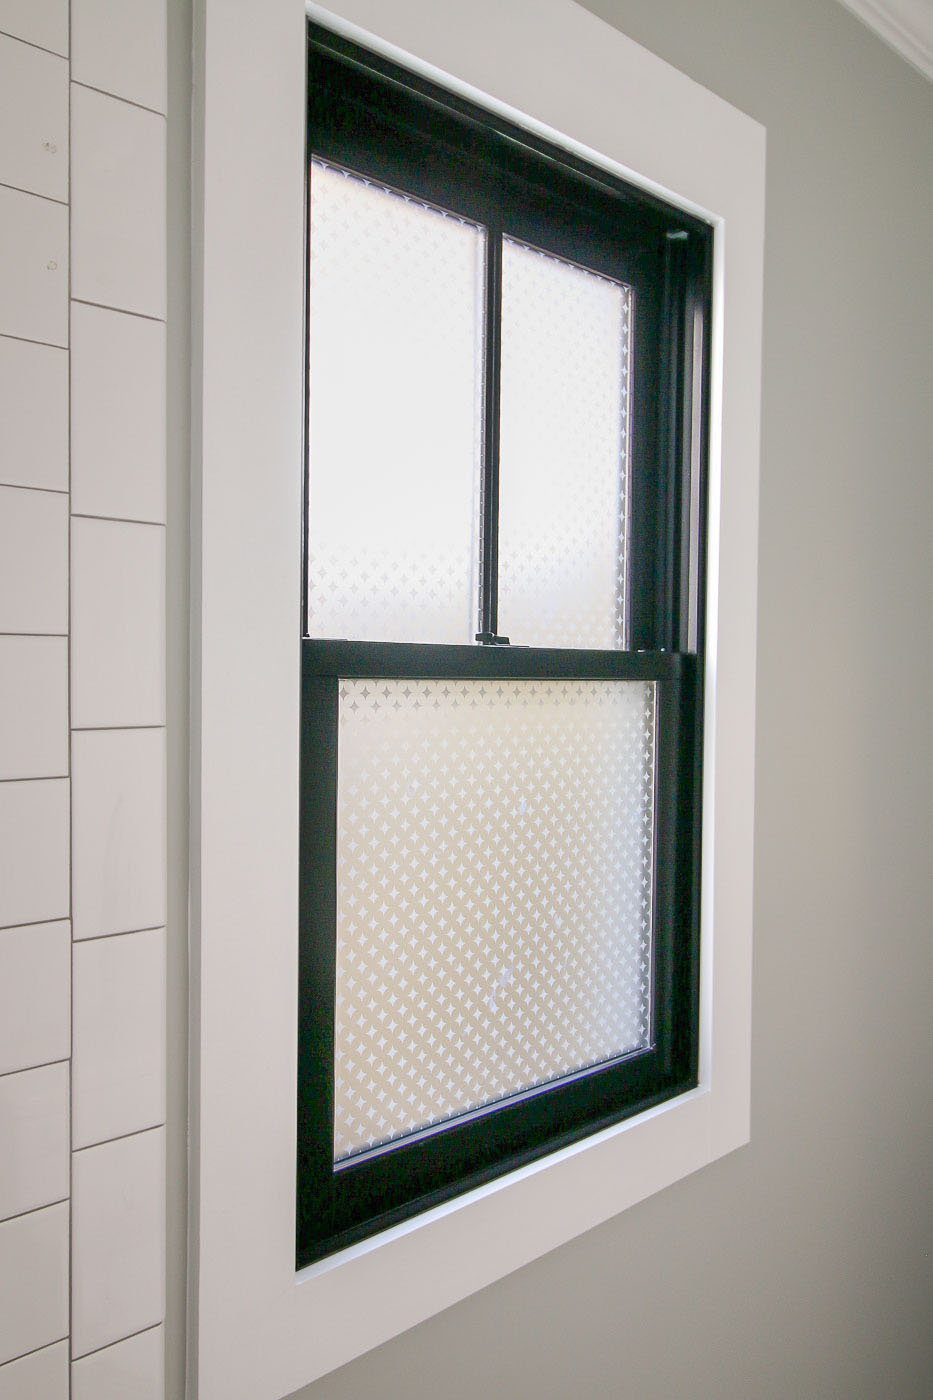
Is your window in a bathroom or near a street where you will need privacy? If so, order a window with enclosed blinds, textured, or obscure glass. Or have a plan for adding window treatments or a frosted film (like I added in the Saving Etta bathroom).
Finally, be aware of any building codes to address?

  • Does the window meet egress standards for a bedroom?
  • Is the window in a location that requires tempered glass?
  • How far is the window from the ground? (Does it need to have a safety stop?)
  • Do you need a permit to replace your windows?

Do you want screens for your window?

Oh how could you forget screens? In the south I don’t think this is even a question, it’s a necessity.

Preparing to Add a Window to the House

I began talking to my siding contractor about adding a window to our home office. We’ve worked together on many projects and he trusts me to do some of the work ahead of time. We agreed on a time frame and work distribution (I’d cut into the sheetrock and reframe inside the wall for the window opening. He would prep from the outside and perform a professional window installation from the exterior.
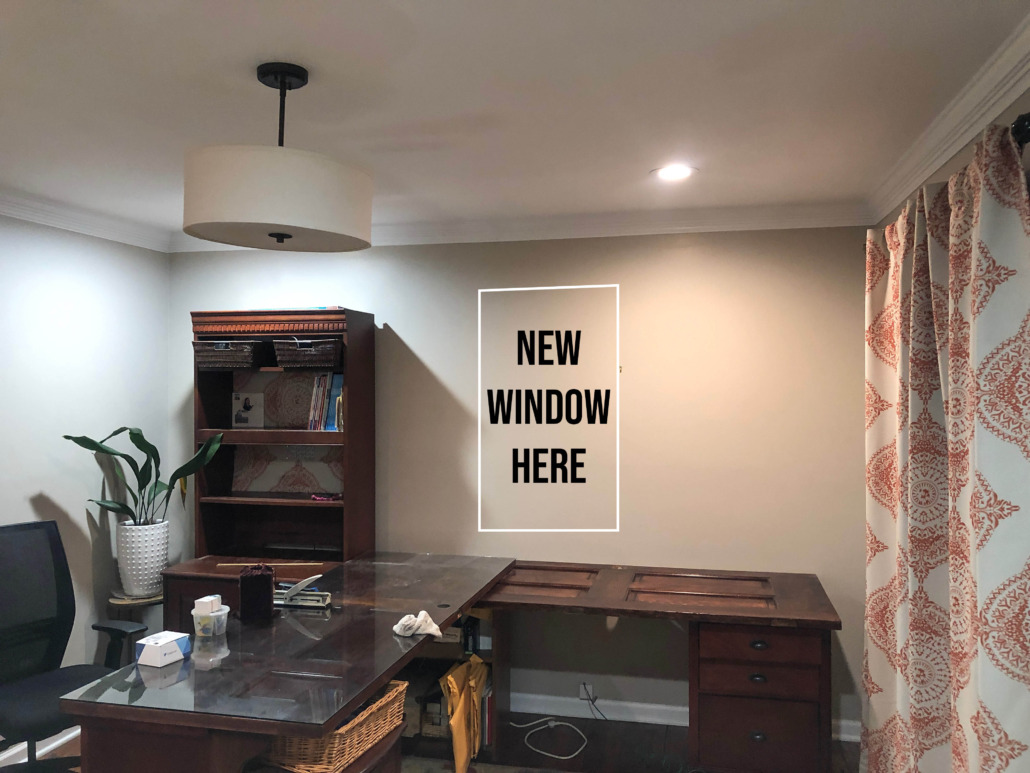
Before you do any work, be sure to move any furniture, rugs, art, and protect anything that has to stay with plastic.

To prep for the window, I chose to tarp off half of the office because I knew I’d be making a big dusty mess and this way I could leave the furniture in the other half of the room outside the work zone.

Cut out window – I began by cutting into the drywall around where the window opening would go. Using my oscillating tool, I was able to cut a neat section of drywall and save it for patching later. This will be the first peek you’ve had into your walls. Look for any utility lines that need to be relocated. If you have plumbing, mechanical, or electrical lines that need to be moved, hire a licensed professional to give you advice and an estimate.

Framing for a New Window

Once the wall is opened (and any utility lines moved), you can then assess framing needs – determine which studs needed to be moved and how much further open you need to make the window opening to accommodate the rough opening (usually specified by the window manufacturer. Be sure to brace your wall if it’s not on a gable end (or is a load bearing wall.)

Framing for a window requires at least two jack studs, two king studs, and a header. Depending on the width of your window, you may need more jack and king studs, and you may need a larger header to carry the load. It’s best to check with a general contractor or structural engineers to recommend your framing needs.

Ideally your rough opening should be an inch wider than the window. Your window manufacturer should have information for all the dimensions of your new window including the rough opening. Plygem has a great table for the Mira window specifications on their website.
Installing a New Window on an Old House

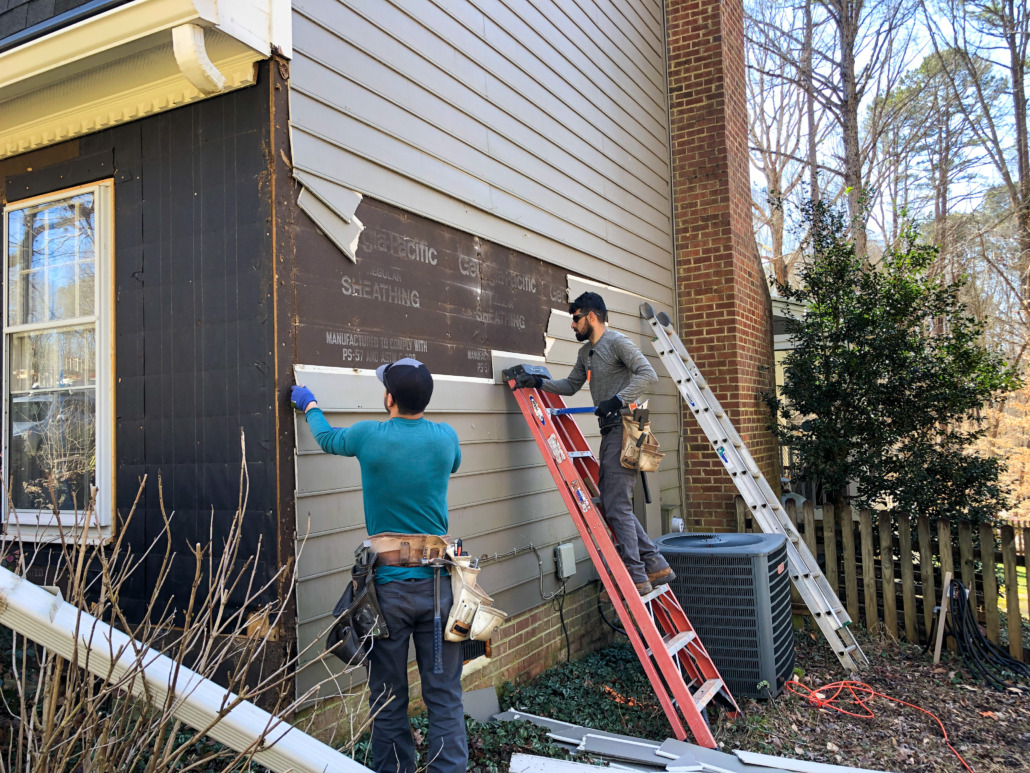
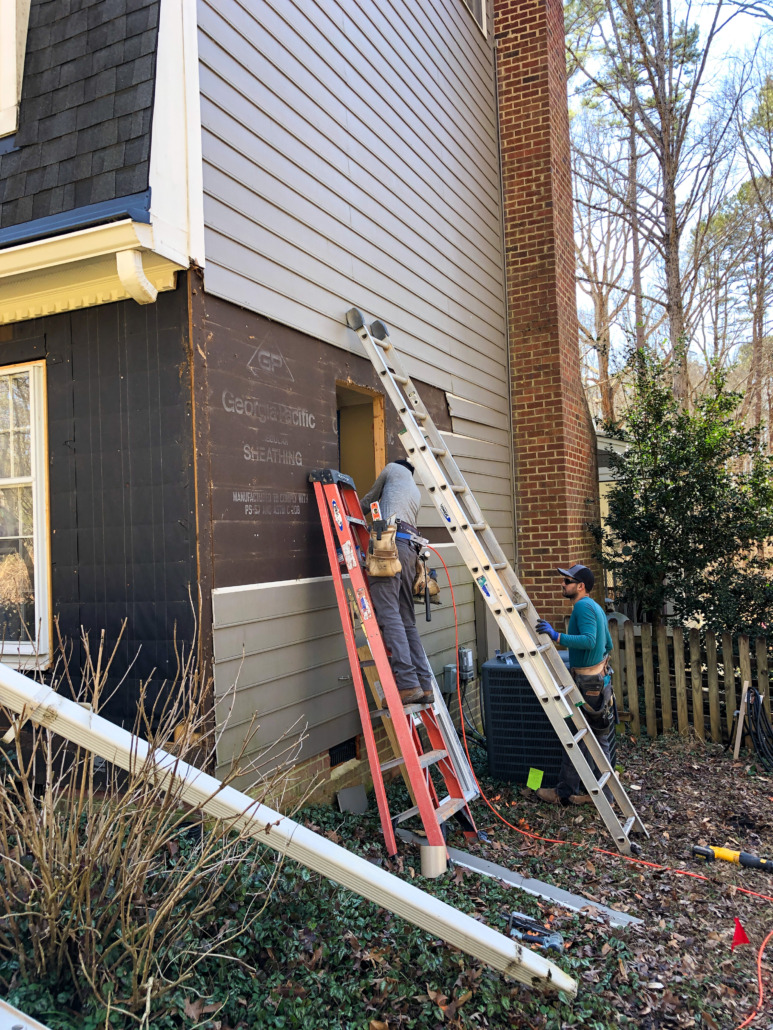
Finally the day came for my siding contractor to install the window. He began by pulling off the siding from the side of the house. We were originally going to cut just around the opening, but the siding was in poor shape and not installed correctly, so we decided to remove it and re-side the house after installing the window.

Proper installation of a new window into an existing wall is important for energy efficiency and maintaining operation of your new window. I have a very detailed tutorial with photos you can read to learn how to properly install, flash, and finish the window installation from the exterior.
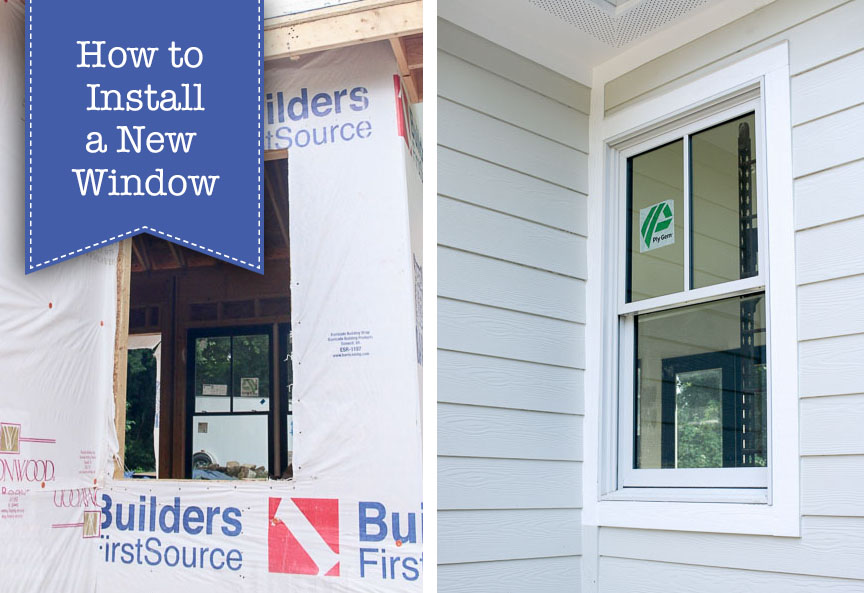
How to Install a New Window


Insulating a New Window

After the window was installed I left the siding guys to their work installing the new siding and trim outside while I focused on the inside portion of this installation.

Did you know that a new window is only as energy efficient as the installation and insulation around it? If you don’t add spray foam insulation between the rough opening and the window, you’ll get horrible drafts. In fact, you may want to peel off the trim around your existing windows and see if your windows have insulation around them.

I put the batt insulation back into the stud bays and used expanding spray foam insulation between the new window and the rough opening.
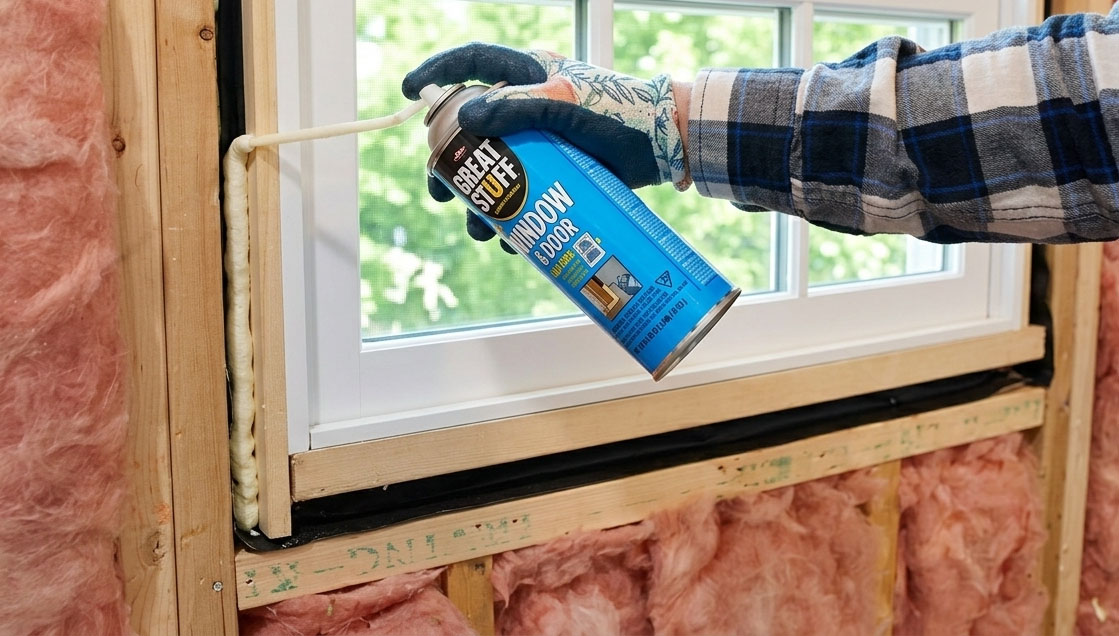
adding spray foam insulation around window frame

Before replacing the drywall, I decided to add a few outlets under the window (where there was only one before) since this would be a long work surface area and we’d need access to power in different locations.

Drywall and Other Finishes

Then I patched the wall with new drywall and finished the seams over the next few days. I’ve learned that good drywall finishing requires patience and several days of mudding and sanding. You can’t rush drywall finishing!
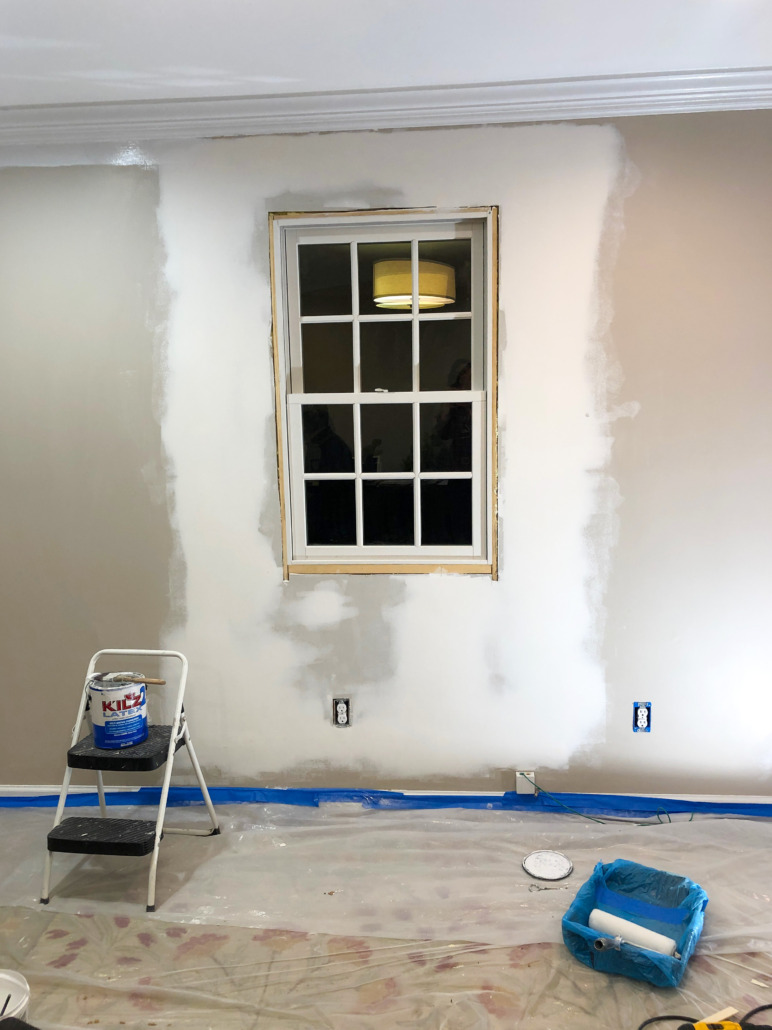
Next step was to add the window trim. I have a tutorial to help you add window casing. Here’s a tutorial for adding decorative header window casing.

How to Install Window Trim & Casing

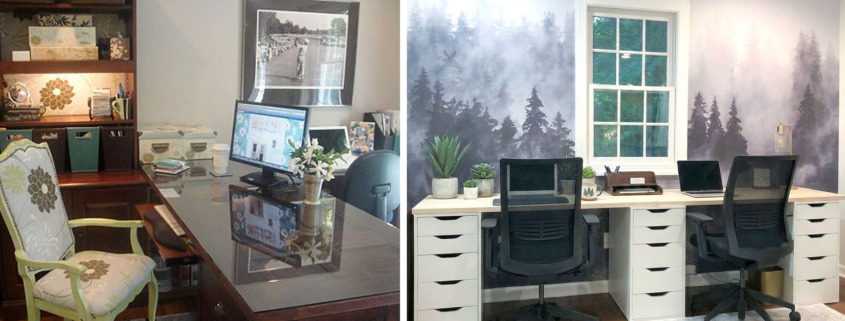
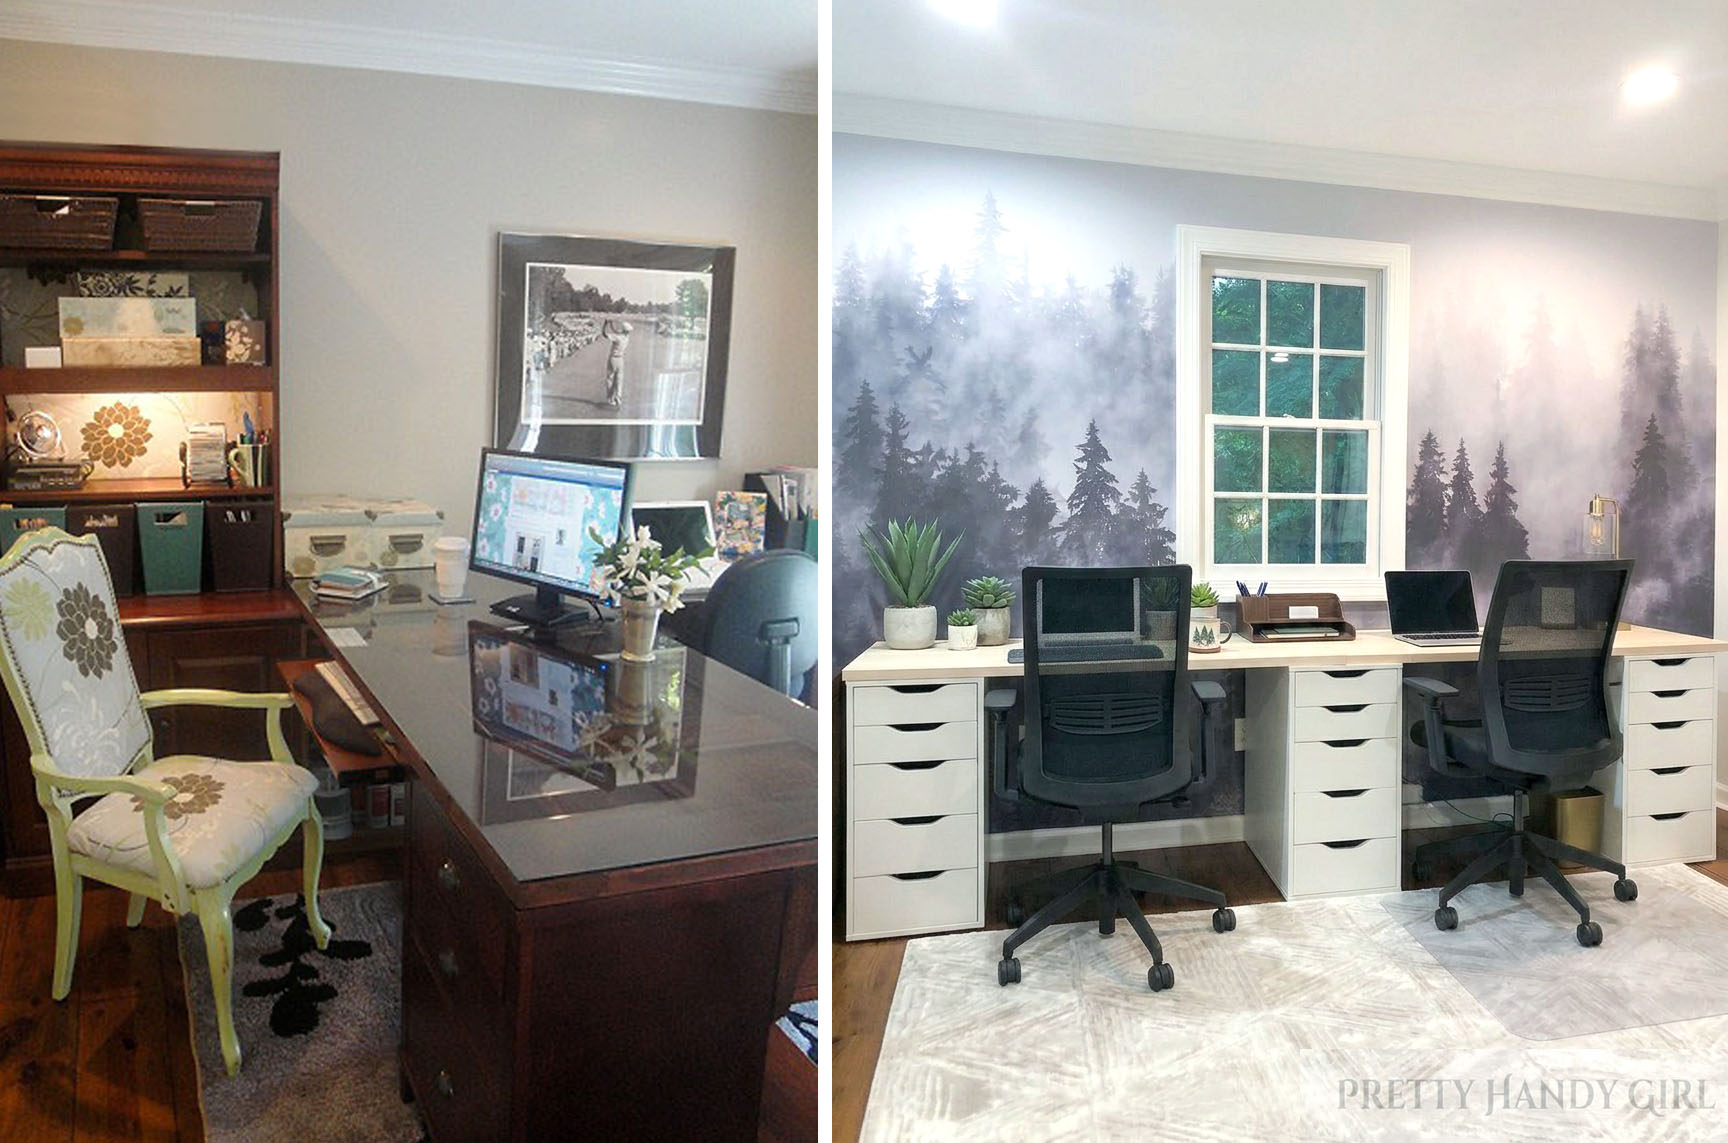
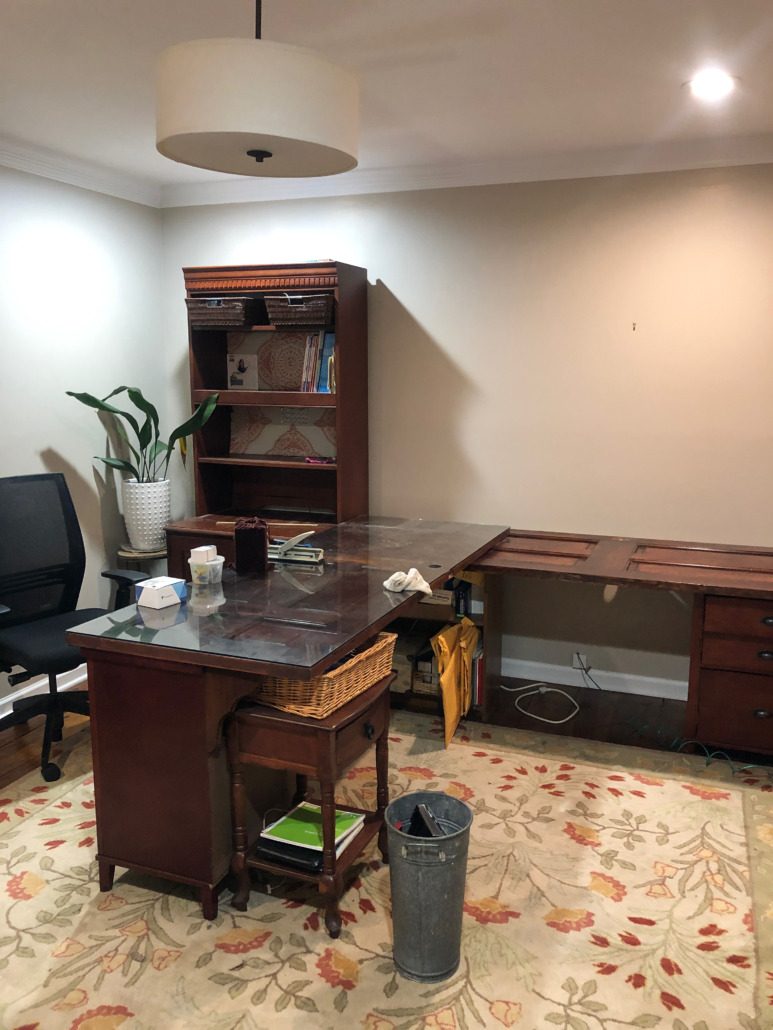
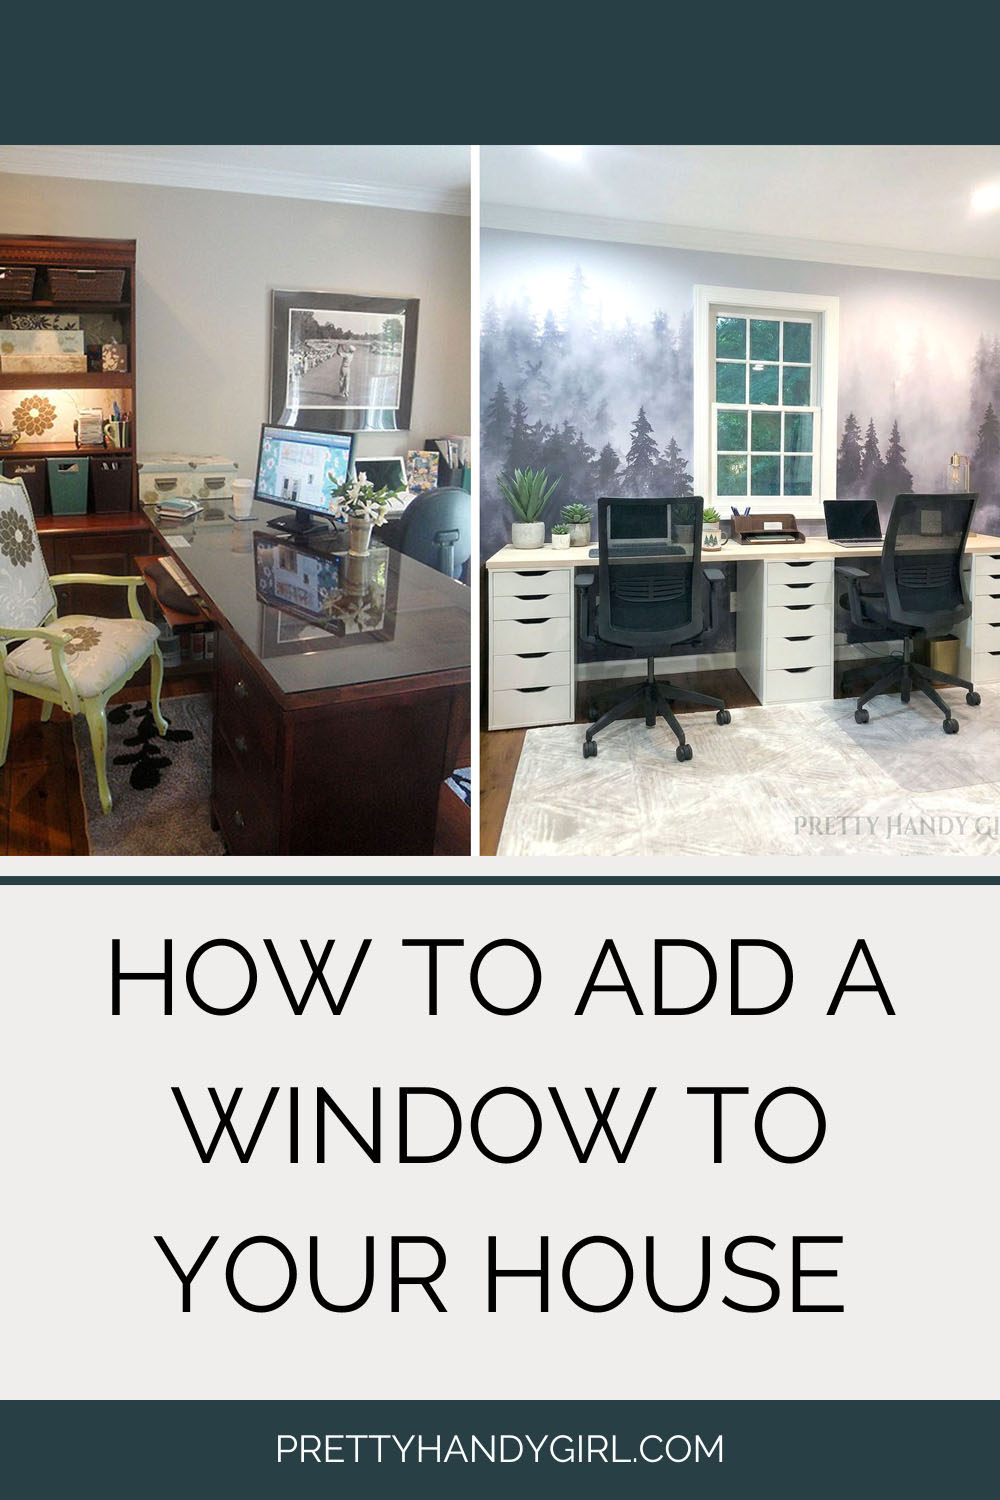
As a reminder, here’s the room before the window.
And here it is after:
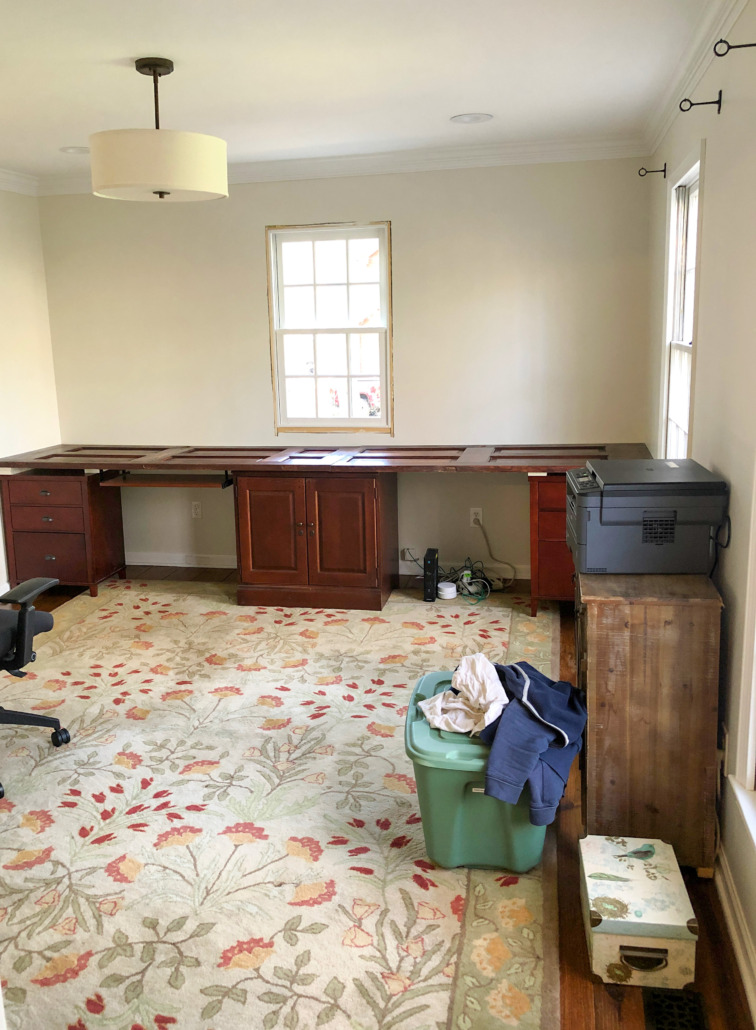
We still have some work to do on this space, but already I love how much natural light comes into the home office now.
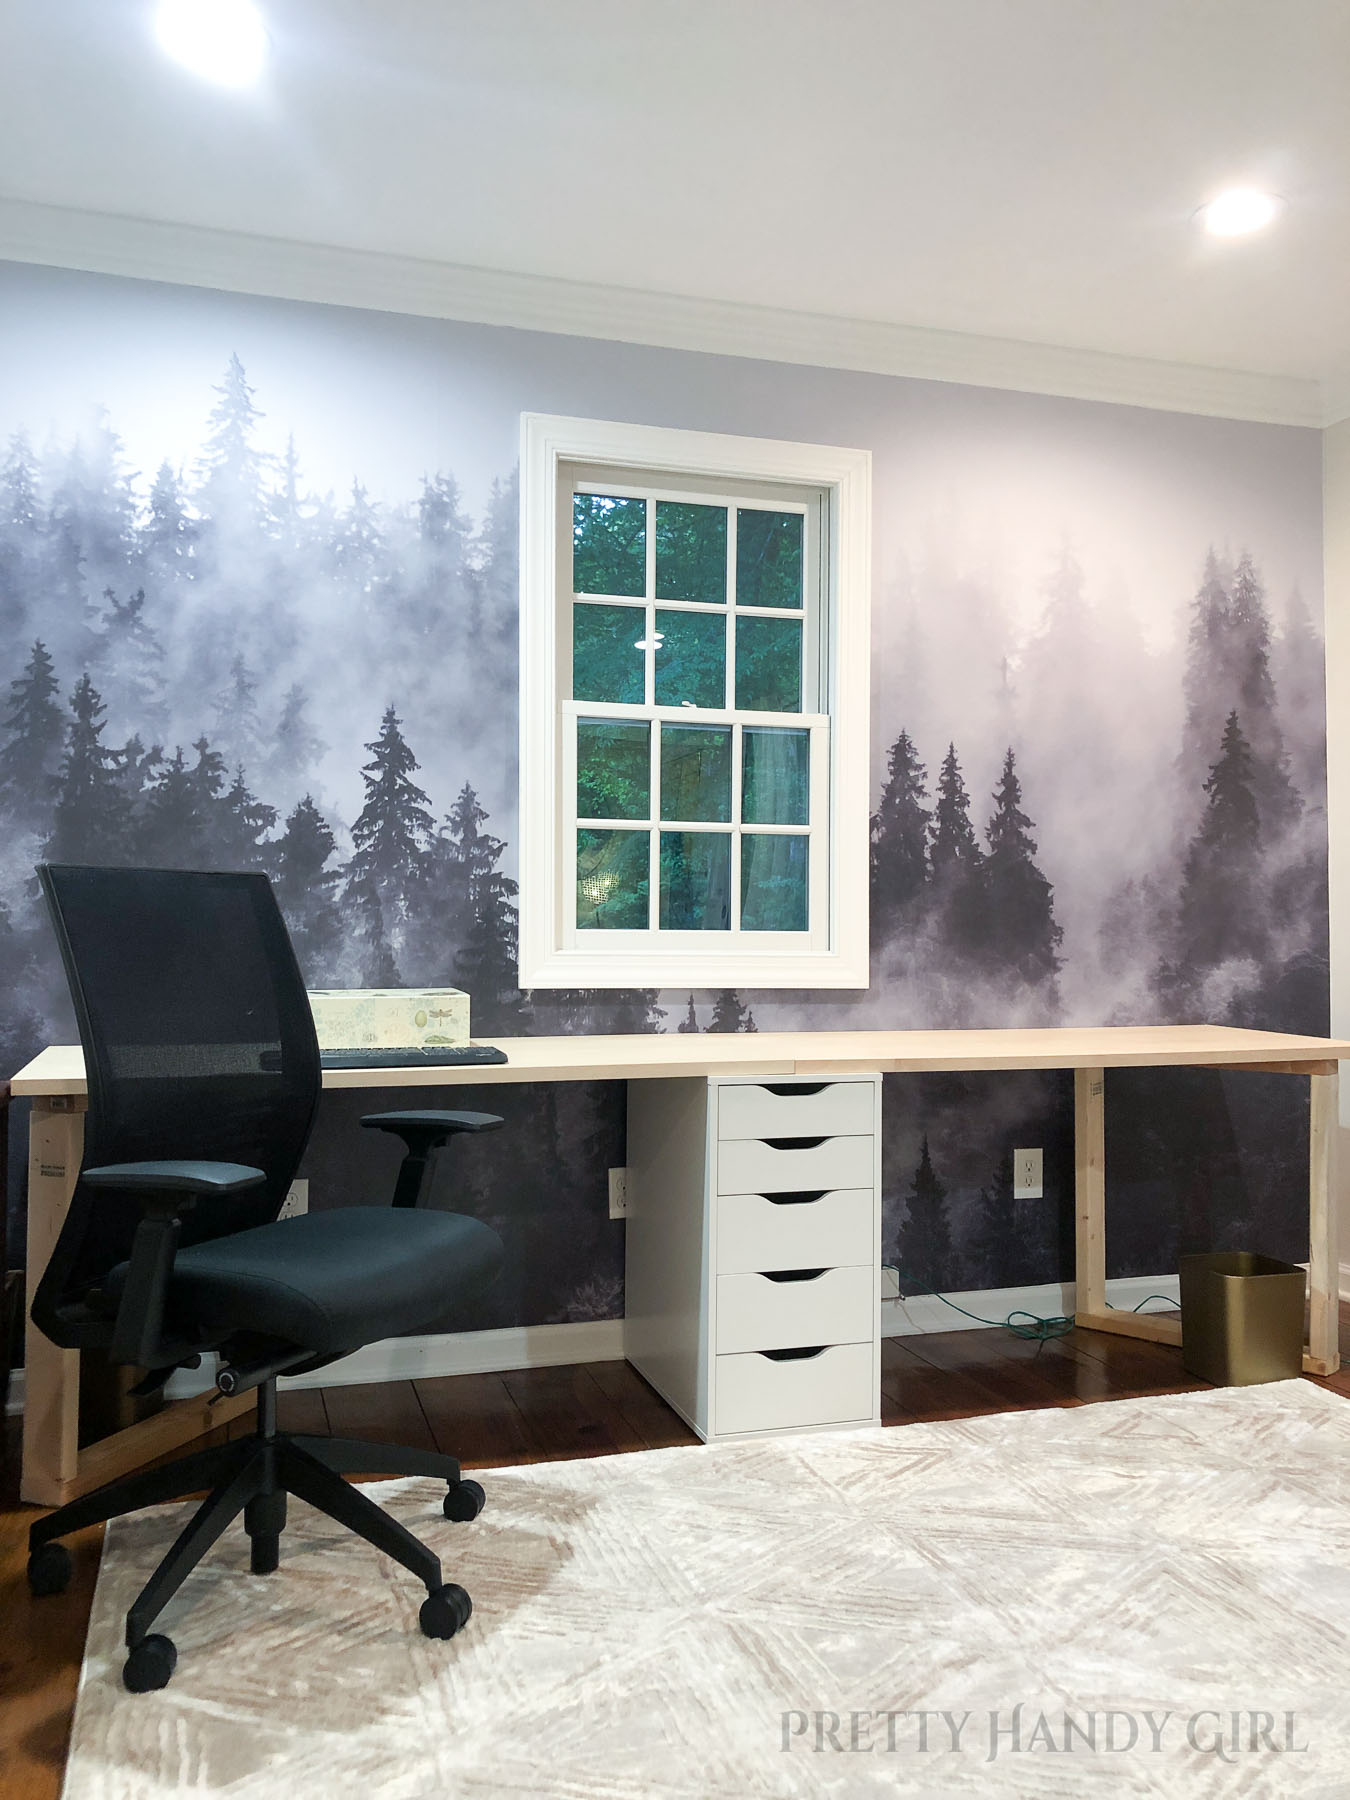
We opted to install a wall mural on this wall and I’m in love with it. The before and after of this wall makes my heart sing.

What do you think? A lot more light, right? Do you have a dark room in your home that could use another window?

signature

Share this post with someone by pinning this image:
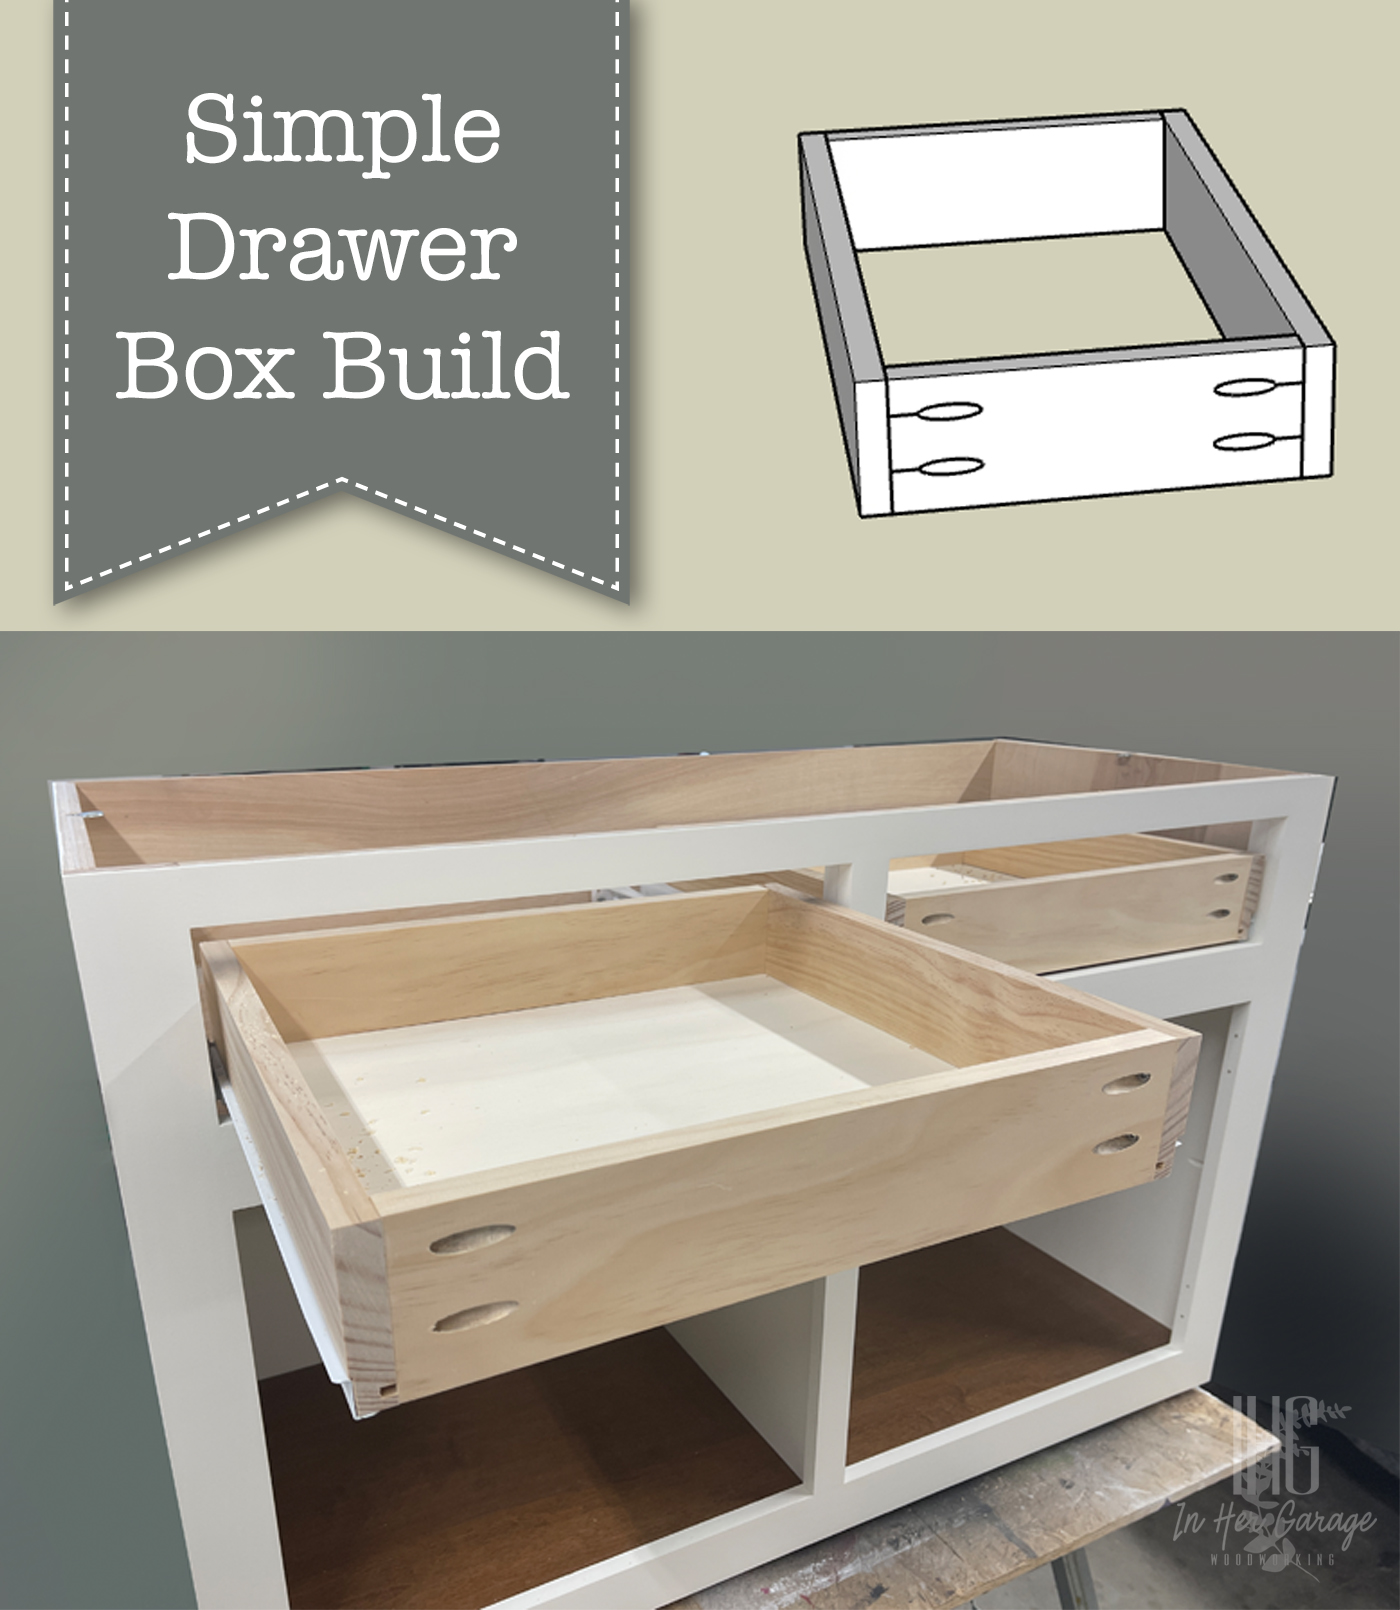
Learn the simplest and most accurate way to build drawer boxes with this easy tutorial.

Drawer Box Build

Welcome back, this is Kristen from In Her Garage Woodworking here with another build plan for you.  When I first began my DIY woodworking journey over 5 years ago I was most intimidated by building drawers. I avoided them because I thought there were too many measurements and too much room for error. But, with a simple plan and a lot of practice, I now make drawers consistently and accurately.  These are the exact plans I use to this day to make drawer boxes for all of my commissioned furniture pieces because when you’re able to make something quickly and easily that is solid and looks great, why would you ever change it?

Materials

(I’ve included affiliate links for your convenience. I earn a small percentage from a purchase using these links. There is no additional cost to you. You can read more about affiliate links here.)

Tools

Instructions:

Your drawer can be any depth you wish, but before building the drawers, rip your 3/4″ material to the drawer height you desire (if you are using plywood or if your 3/4″ material is wider than your finished drawer.

Step #1: Cut drawer box sides

Using your miter or circular saw, cut two identical 3/4” boards to the same length of the drawer slides you’ll be using.

Step #2: Cut drawer box front and back

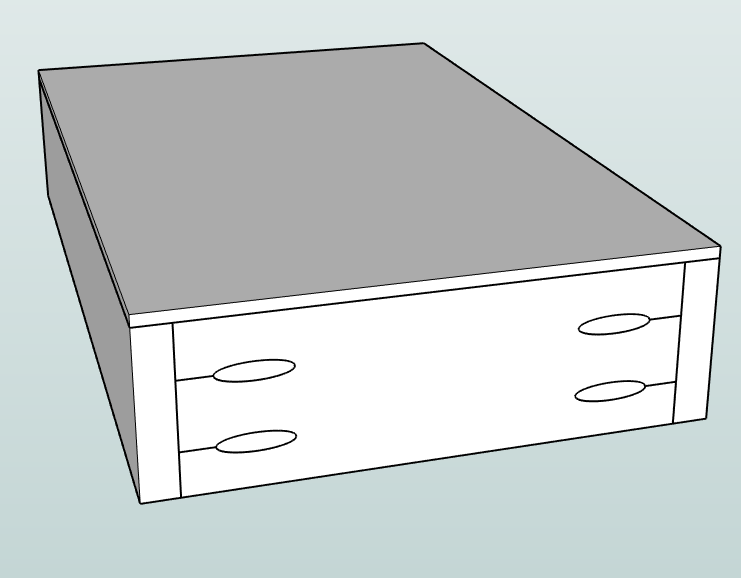
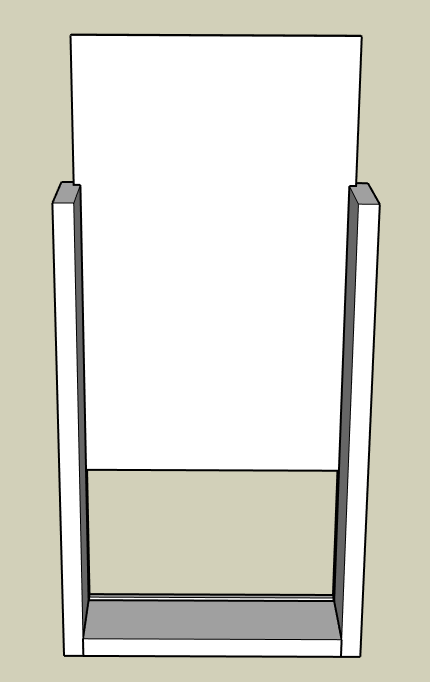
Cut two pieces of the 3/4 inch material for the front and back of the drawer box.  If you’re using ¾” material to build the drawer box then the length of the front and back can be calculated as follows (see equation and picture below):

Width of drawer box – 1½” = width of front and back drawer box boards

Drawer Box Diagram

Step #3: Add groove for drawer bottom (optional)

Taking all four 3/4″ boards to the table saw cut a groove 1/4” from the bottom of all sides that is 1/4” deep. Run the 3/4 board through one time, then adjust the fence (or your saw) to cut another groove next to the first. (A standard saw blade is 1/8” wide so you will need to make two passes in each board to achieve a 1/4″ groove for the 1/4″ drawer bottom material.

Dry-fit the plywood to check for fit.


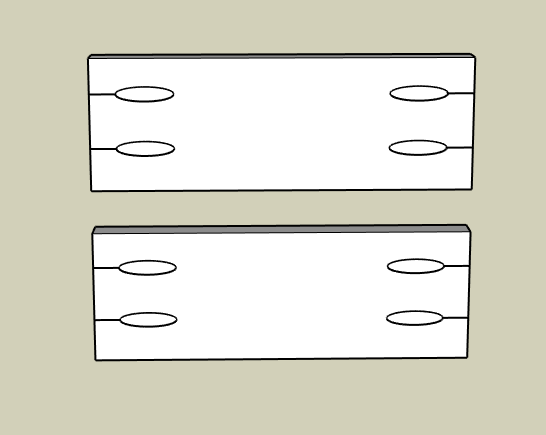
Step #4: Create pocket-holes

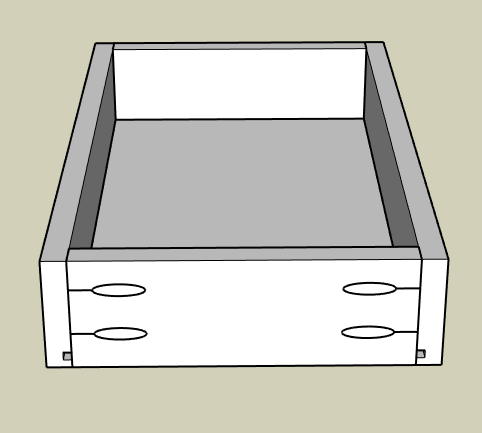
Using your Kreg jig make 2 pocket-holes at either end of the front and back boards on the opposite side as the plywood bottom groove if you chose to do this step. Be sure to avoid the groove.

Step #5: Assembly

If you DID NOT cut a groove to accept the plywood bottom, then you can assemble the drawer box using wood glue and 1 ¼” pocket screws.

Then, you will cut your bottom 1/4″ panel to the length and width of the drawer box and simply glue and nail it to the bottom of the drawer box

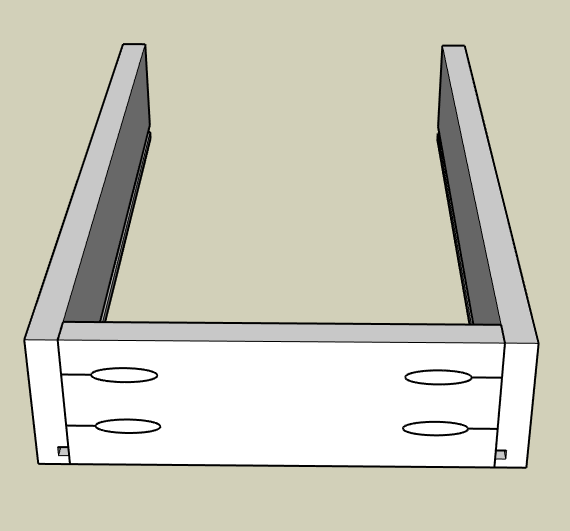
If you DID create a groove for the bottom panel assemble the front and both sides using wood glue and 1 ¼” pocket screws.

Next, cut the ¼” plywood to fit into the bottom of the drawer box groove dry fitting the back panel to check for fit.

Once you have the correct size for the plywood bottom then slide it into the groove and attached the back piece of the drawer box using wood glue and 1 ¼” pocket screws.  There is no need to apply glue into the panel groove.  The plywood bottom will “float” in place.

No need to worry about filling the pocket-holes because you will be applying a drawer face directly over them.

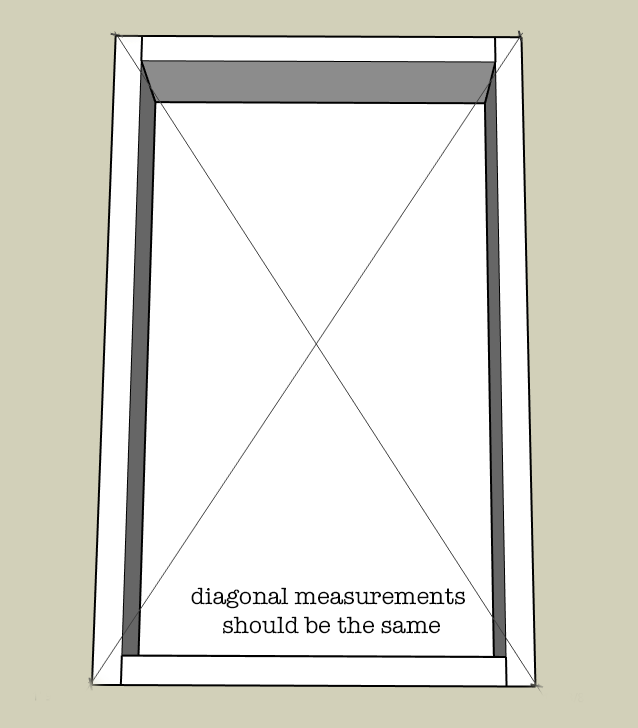
Be sure to check for square by measuring both diagonals of the drawer box.  If one measurement is longer simply squeeze the longer diagonal until both are the same.

Allow drawer box to dry.

That is the basic drawer box build that I use and it is strong and easy to put together. I hope this tutorial gives you the confidence to tackle that project you’ve been putting off.  Next, I will teach you my favorite method for installing drawers and how I troubleshoot drawer boxes that just aren’t quite the right fit!

Finishing Tips:

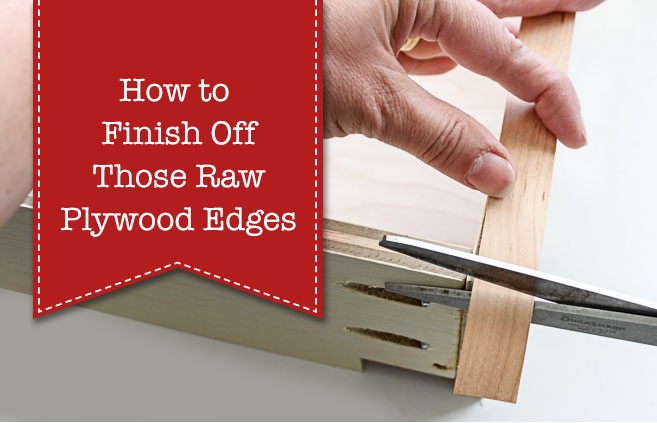
If you are making your drawer boxes out of plywood then check out Brittany’s Edge Banding Tutorial and learn how to cover that unsightly plywood edge.

Wondering how, or if, you should apply a protective finish to the drawer box? If I am working with solid wood for the drawer sides then I will give the material a quick finish sanding and that’s it. But, for plywood, I typically do one of two things, depending upon what I have on hand at that time.

  • Option 1: Apply 1 or 2 coats of sanding sealer to raise the grain of plywood and sand smooth. Sanding sealer is clear, easy to apply, and dries quickly. If I have the time and patience I may also apply a quick spray of clear, semi-gloss, water-based topcoat to give it a little shine but it isn’t necessary.
  • Option 2: Apply 2 to 3 coats of spray shellac to seal the plywood.  Spray shellac dries quickly and won’t leave any chemical smell behind. But be aware that it will give the plywood a slight amber tone which typically isn’t big deal.  Remember to lightly sand between coats.

Hi! I’m Kristen, from In Her Garage, and I am a self-taught woodworker and DIY fanatic from Minnesota where I live with my husband and our two daughters. Between being a wife, mom and, registered nurse, I try to make as much time for DIY as possible. My love for building came after our family built our current home in 2015. After we moved in, we needed furniture and instead of spending massive amounts of money to order the pieces we wanted I decided that I would build them myself. I started with a buffet table plan from the fabulous Ana-white and quickly set out to remodel my entire home office.

Since then I have started a side business building furniture for the people in my community. I love hearing my clients talk about the pieces they wish they had whether it be a rustic buffet table, a one drawer side table, or a toy box, and then making it a reality for them. While starting my small business it made perfect sense that I would document my building journey so I simultaneously launched the In Her Garage blog and I love sharing my plans, tips, and tricks.

Making something beautiful with your own two hands through a little preparation and determination is an amazing feeling and I hope to bring inspiration and know-how to those looking to tackle a big or small project.

I am so glad that you found me here and please feel free to connect with me on PinterestInstagram, and Facebook to see what I am working on right now. And check out the brand new In Her Garage Etsy shop for other plans or to have a furniture item made especially for you!

diy french cleat

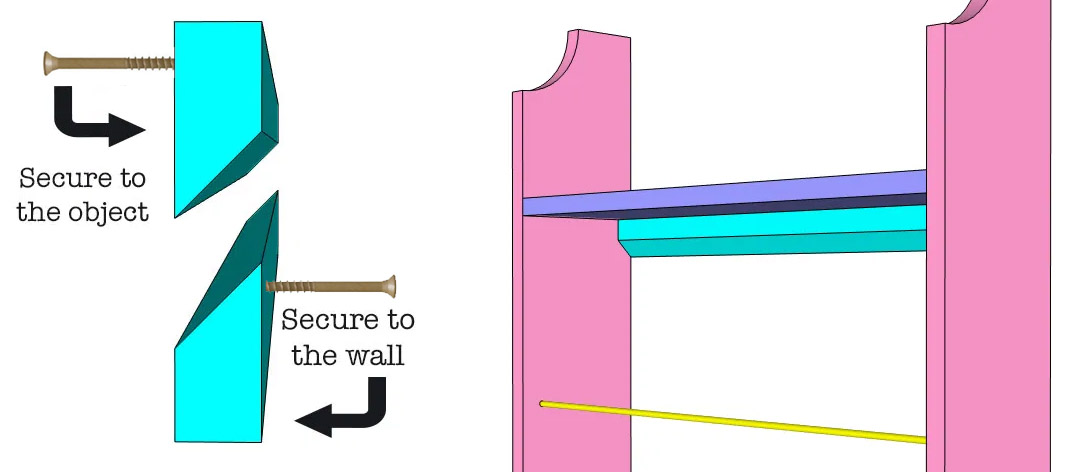
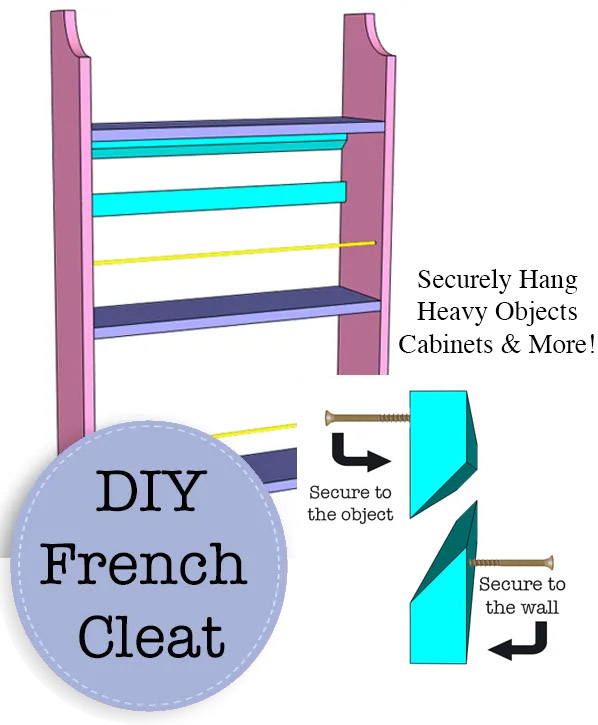
I am going to teach you how to securely hang heavy objects on the wall with a board and a few screws. Using a French Cleat has been a tried and true method for hanging heavy objects and is used by professional cabinet makers and DIYers alike. It can be incorporated into the item being built or added after the fact.

DIY French Cleat

How to Make a French Cleat

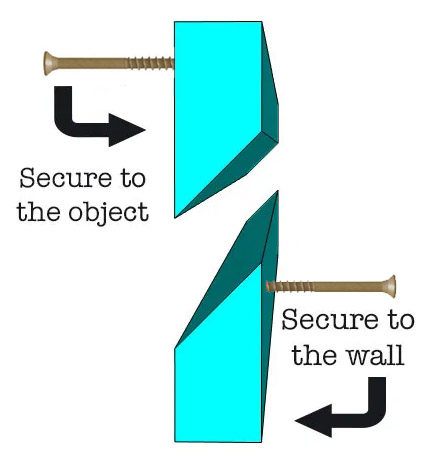
What is a French Cleat?  A French Cleat is a board or molding with a 30°-45° bevel cut attached to the wall along with a corresponding beveled board or molding attached to the object to be hung on the wall. That sounds a little confusing but check out the diagram below and it will all make sense. First let’s grab a few supplies.

DIY French Cleat

Materials:

(I’ve included affiliate links for your convenience. I earn a small percentage from a purchase using these links. There is no additional cost to you. You can read more about affiliate links here.)

  • 1″ x 3″ board or 3/4″ plywood strip (3″ minimum width)
  • 2″ screws

Tools:

Instructions:

Step 1:

Measure the length that you need your French cleat to be. Typically a french cleat is the length of the item to be hung on the wall and spans the length of at least 2 studs in the wall that the item will be secured to.

Step 2:

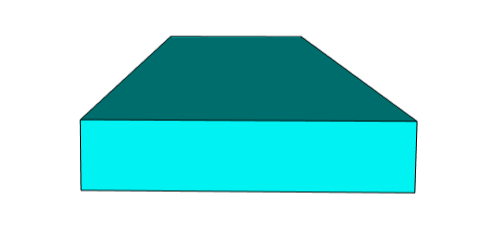
Adjust your table saw or circular saw to a 30°-45° bevel and rip your board along the center. (For tips on using a table saw safely, read this article.)

Step 3:

Secure the top piece of the cleat to the item to be hung (see diagram shown below). This can be done with pocket-holes, glued under a shelf, or with screws to the back of the item. (You may want to pre-drill your holes to avoid splitting the wood.)

DIY French Cleat

Step 4:

Choose the height at which you want to hang the item on the wall and mark where the bottom cleat will be placed. Mark the studs that the cleat will be screwed into and secure the cleat to the wall using wood screws and a level in the orientation shown above. (Again, you may want to pre-drill your holes to avoid splitting the wood.)

Step 5:

Gently place the object above the wall cleat and lower until the two pieces are securely nested together.

Often times the weight of the object and the angle of the beveled cleat is enough to keep the object securely in place. But, if you’re worried about children lifting the item, you can add a screw through the hanging object into the cleat or a wall stud for peace of mind.

DIY French Cleat

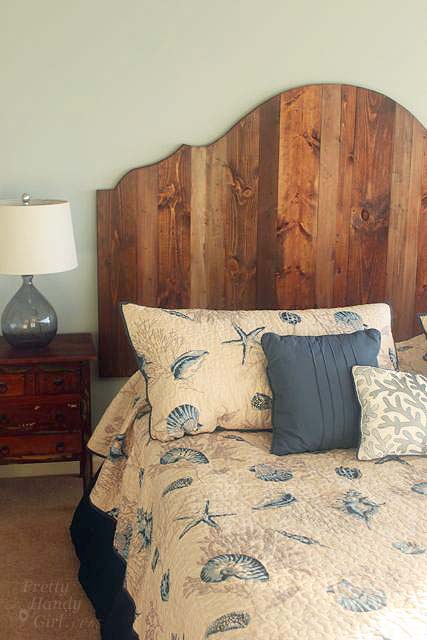
And if you’re excited about using a French Cleat, you might like to make a headboard that is hung on the wall using a French Cleat!

rustic-king-headboard-side-view

This is a great tip for hanging cabinets on the wall as well. I hope you try your hand at making and using a French Cleat soon. Let me know how it goes!

Hi! I’m Kristen, from In Her Garage, and I am a self-taught woodworker and DIY fanatic from Minnesota where I live with my husband and our two daughters. Between being a wife, mom and, registered nurse, I try to make as much time for DIY as possible. My love for building came after our family built our current home in 2015. After we moved in, we needed furniture and instead of spending massive amounts of money to order the pieces we wanted I decided that I would build them myself. I started with a buffet table plan from the fabulous Ana-white and quickly set out to remodel my entire home office.

Since then I have started a side business building furniture for the people in my community. I love hearing my clients talk about the pieces they wish they had whether it be a rustic buffet table, a one drawer side table, or a toy box and then making it a reality for them. While starting my small business it made perfect sense that I would document my building journey so I simultaneously launched the In Her Garage blog and I love sharing my plans, tips and tricks.

Making something beautiful with your own two hands through a little preparation and determination is an amazing feeling and I hope to bring inspiration and know-how to those looking to tackle a big or small project.
I am so glad that you found me here and please feel free to connect with me on PinterestInstagram, Facebook, and Youtube to see what I am working on right now.


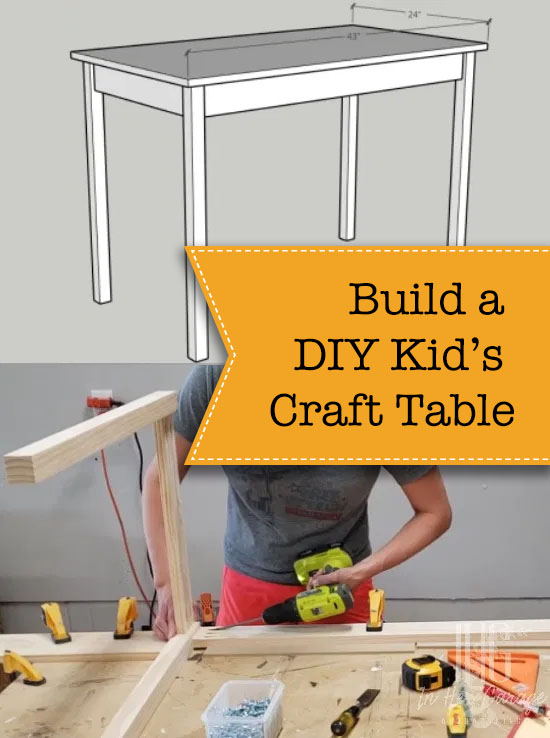
Have the kids taken over your kitchen table or island? Need somewhere to let the kids get creative? Today I am going to show you how to make a simple DIY kid’s craft table (or desk). Let’s get building.

Build a DIY Kid's Craft Table

DIY Kid’s Desk and Craft Table

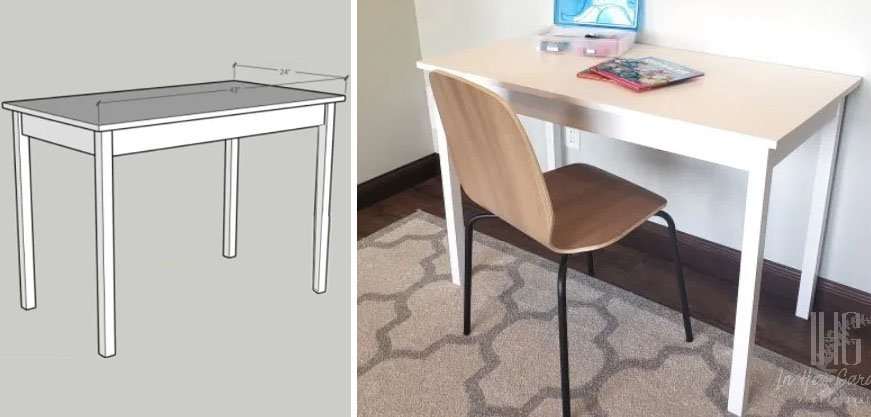
If your children are going to be home this fall for distance learning or you just want a spot they can call their own, then it is time to get a space ready for them!! This DIY Kid’s Craft Table is the perfect size for whatever your child will need and it is small enough to fit in a spare corner in your home. Let’s make it!

I made this particular table for a client and it measures 30”h x 43”w x 23”d but you can modify these measurements to fit your needs. Of course, the quality of lumber you use is your choice but I used clear pine from my local big box store because it paints better than using common pine boards. It may be more expensive but the boards tend to be straighter, it saves time on sanding, and I feel it yields a better-finished product. It doesn’t matter what wood you use as long as you love it.

Materials:

(I’ve included affiliate links for your convenience. I earn a small percentage from a purchase using these links. There is no additional cost to you. You can read more about affiliate links here.)

Tools:

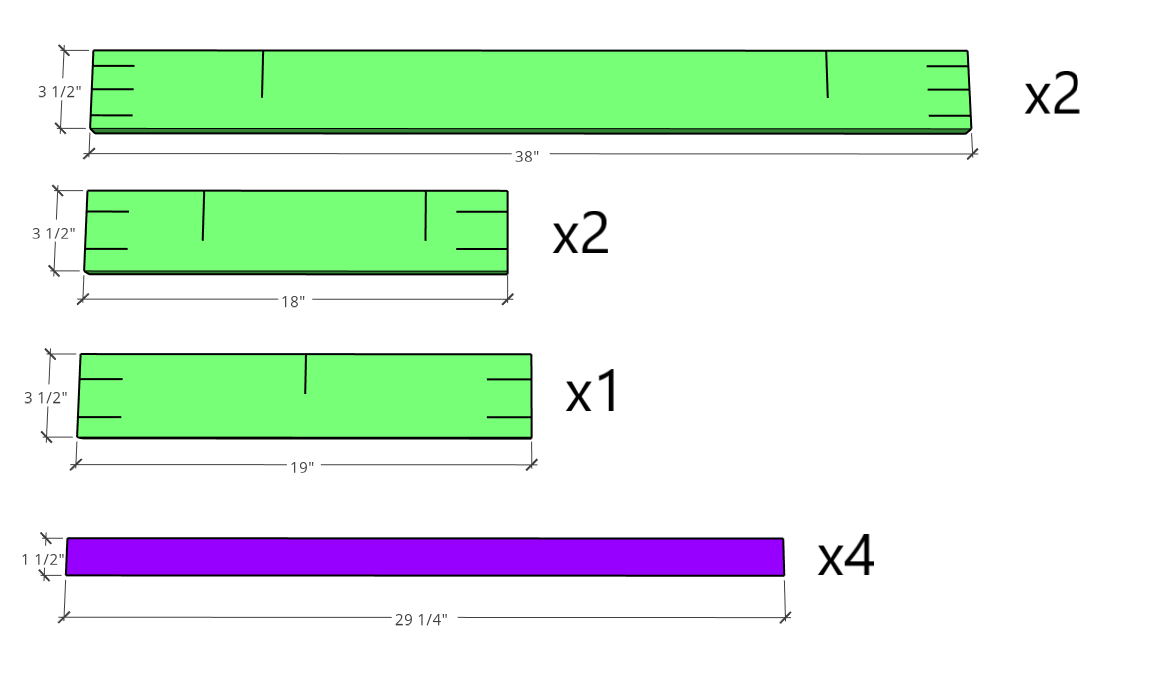
Cut list and pocket-hole placement:

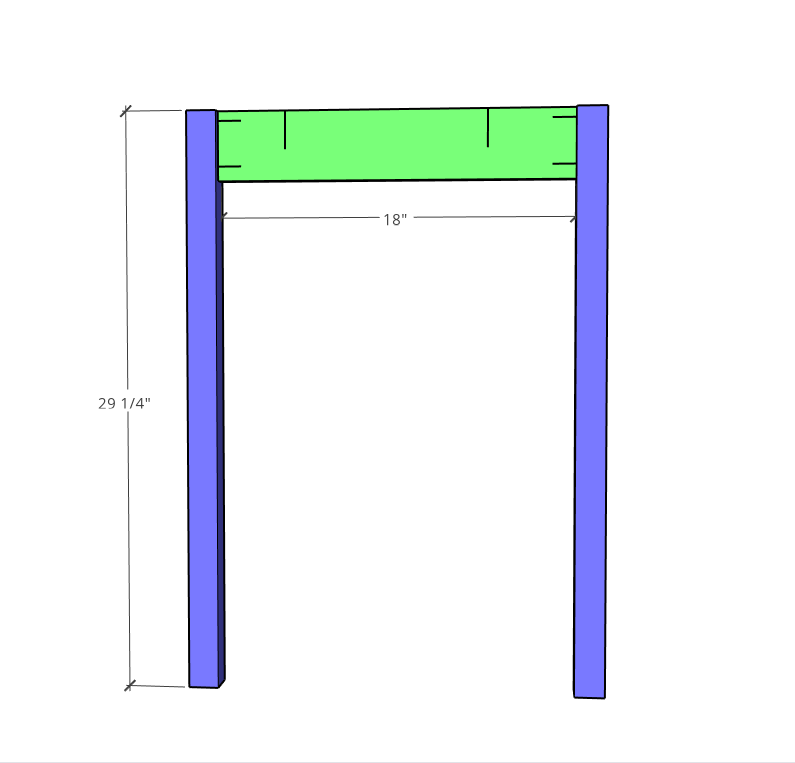
  • 4- 2×2 @ 29 ¼”
  • 2- 1×4 @ 38” (3 pocket-holes in each end)
  • 2- 1×4 @ 18” (2 pocket-holes in each end)
  • 1- 1×4 @ 19” (2 pocket-holes in each end)
  • 3/4”x 43”x 23” birch plywood

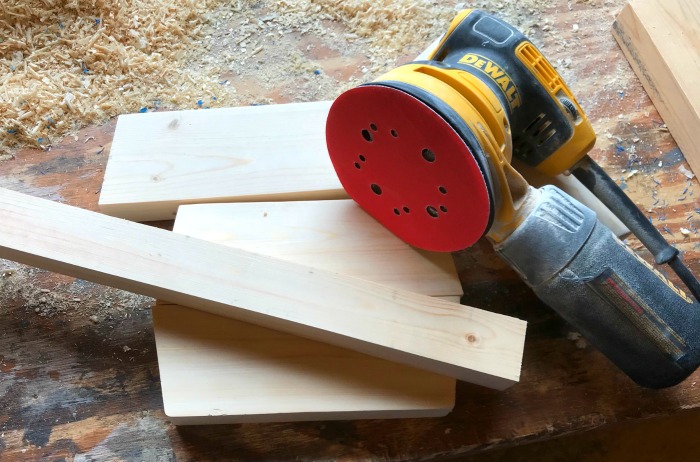
Step 1: Sand table components

  • I know it seems odd to start with this step but trust me when I tell you it is much easier to sand these boards before they are in place. Depending on how rough your lumber is, begin using 60-80 grit sandpaper and incrementally work your way up to 220 grit sandpaper.  I chose to use clear pine found at my local big box store so I was able to start with 120 grit sandpaper, which cut down my sanding time. This makes the extra money spent, well worth it!

Step 2: Assemble both table sides

  • Sandwich one 1 x 4 x 18” (apron) board between two 2 x 2 x 29 ¼” (leg) boards. Pocket-holes should be facing up.
  • To add a little detail, place a ¼” piece of scrap beneath the 1×4 board to inset it slightly. This will create a shallow reveal looks nice and also gives you a little grace because now the three boards don’t have to be flush to the same surface perfectly.
  • Clamp the legs and apron boards together and join them using wood glue and 1 ¼” pocket screws.
  • Repeat these steps for the other side of the table.

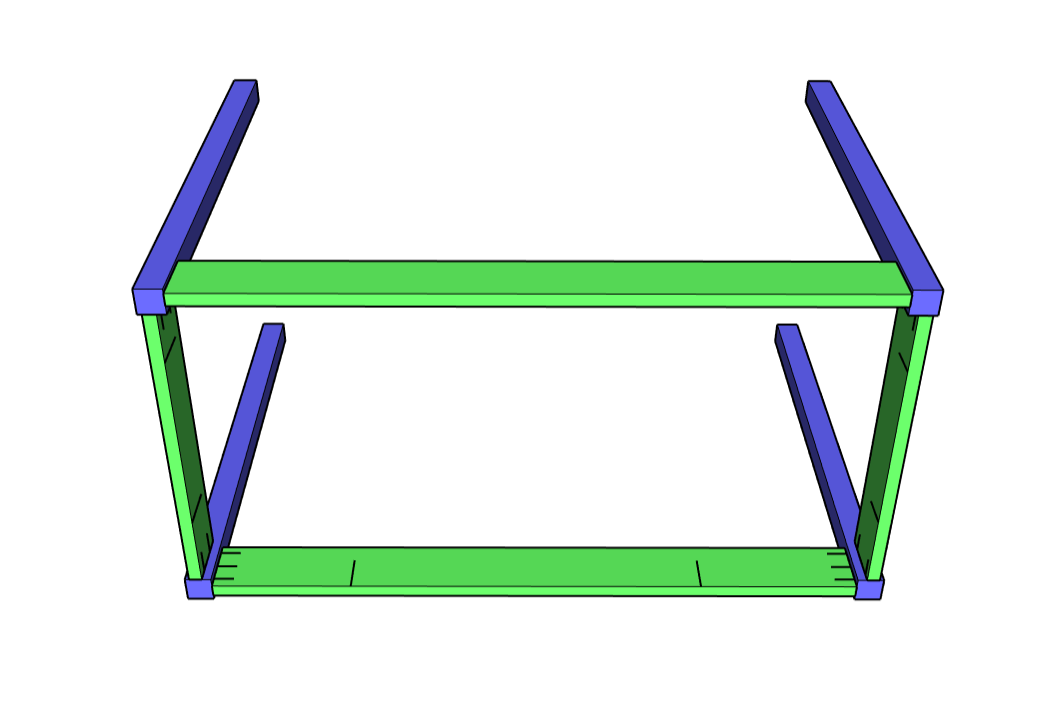
Step 3: Attach the front and back table aprons

  • With both side components standing on their sides sandwich a 1 x 4 x 38” (apron) board between them, again placing a ¼” board beneath the apron to inset it slightly.
  • Align the top of the 1×4 with the top of the side components.
  • Clamp and attach using wood glue and 1 ¼” pocket screws.
  • Carefully flip the piece over and repeat the above steps to attach the second 1 x 4 x 38” apron board.

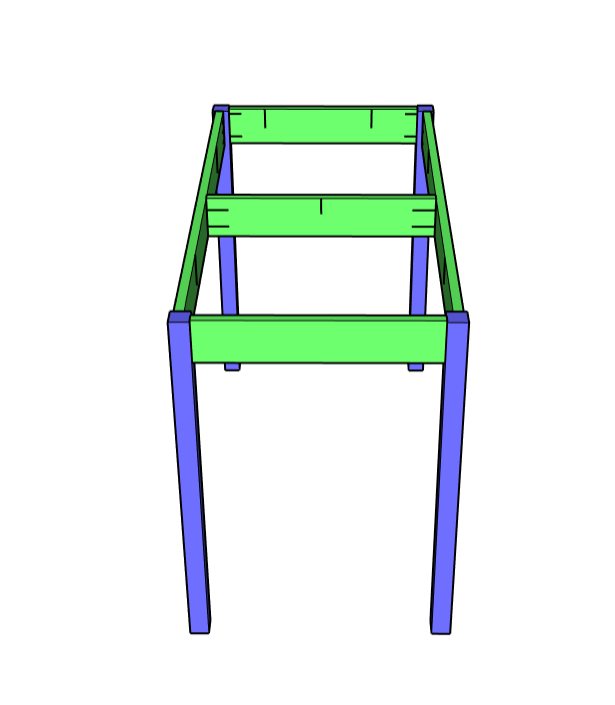
Step 4: Attach center support

  • Attach the center support using wood glue and pocket screws between the two 1 x 4 x 38” boards centered in the middle.

Step 5: Clean up

  • With a putty knife or chisel gently remove any glue squeeze out and sand smooth.

Step 6: Edge banding

  • Once the plywood top is cut to size you will need to edge band to cover up the unsightly edges. I won’t go over all of the steps here but if you are new to edge banding please check out this tutorial on How to Finish Raw Plywood Edges.


Step 7: Finish

  • Time to paint or stain and topcoat!! My client wanted this piece painted white, so I chose a premium latex paint and used a water-based topcoat to protect the paint and prevent yellowing of the finish in the future.

Step 8: Attach the top

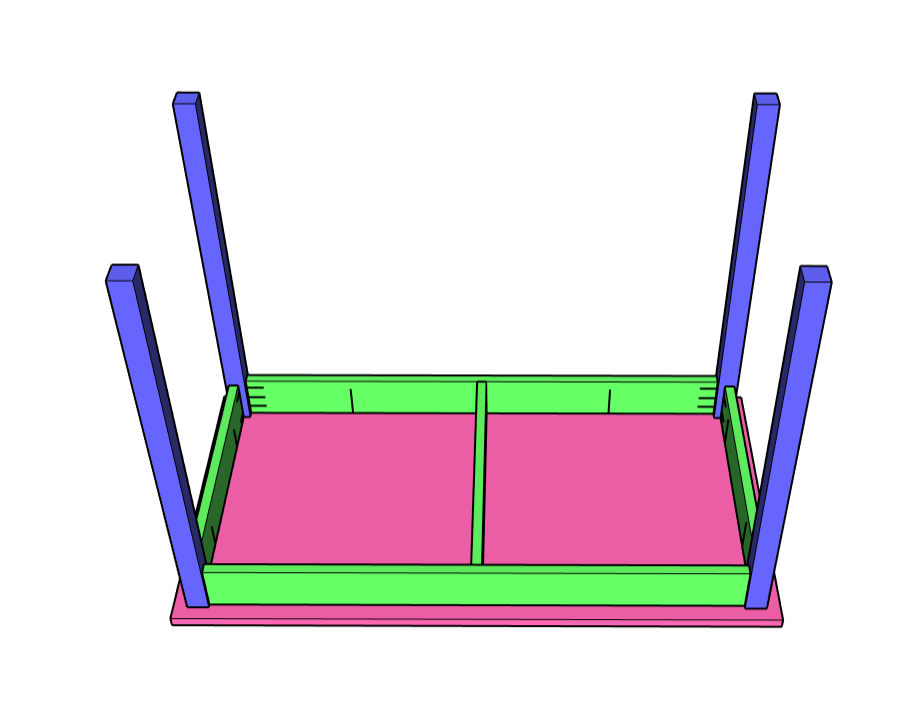
  • Place the tabletop on a flat surface (bottom side up) and center the base over the top upside down.
  • This plan allows for a 1” overhang of the top on all sides of the table base.
  • Using the pocket-holes that are shown in the diagrams below, attach the top with 1 ¼” pocket screws.

    • Note: Normally I would not recommend attaching a tabletop using pocket screws IF that top were made of solid wood because of wood’s tendency to expand and contract. However, this top is made of plywood and the amount of expansion and contraction that will happen over time is negligible and should not affect the structure of the table base.  If you are uncomfortable using pocket-holes to attach the top then feel free to attach it in some other way, such as with figure-8 fasteners or Z-clips.

Flip it over and admire your handy work!! Isn’t this DIY Kid’s Craft Table adorable?!

Check out my latest blog post about building a DIY Folding Craft/Sewing Table! This table is large enough for any craft project but folds down when you don’t need it. Perfect for anyone with a small space but large crafting ambitions!

Hi! I’m Kristen, from In Her Garage, and I am a self-taught woodworker and DIY fanatic from Minnesota where I live with my husband and our two daughters. Between being a wife, mom, and registered nurse, I try to make as much time for DIY as possible. My love for building came after our family built our current home in 2015. After we moved in, we needed furniture, and instead of spending massive amounts of money to order the items we wanted I decided that I would build them myself. I started with a buffet table plan from the fabulous Ana-white and quickly set out to remodel my entire home office.

Since then I have started a side business building furniture for the people in my community. I love hearing my clients talk about the pieces they wish they had whether it be a rustic buffet table, a one drawer side table, or a toy box and then making it a reality for them. While starting my small business it made perfect sense that I would document my building journey so I simultaneously launched the In Her Garage blog and I love sharing my plans, tips, and tricks.


I am so glad that you found me here and please feel free to connect with me on PinterestInstagram, and Facebook to see what I am working on right now.


If you enjoyed this tutorial and are looking for other cute ideas for kid’s desk or craft table check out these two fun projects. Both of these could be great projects you could do with the kids to keep the fun going.

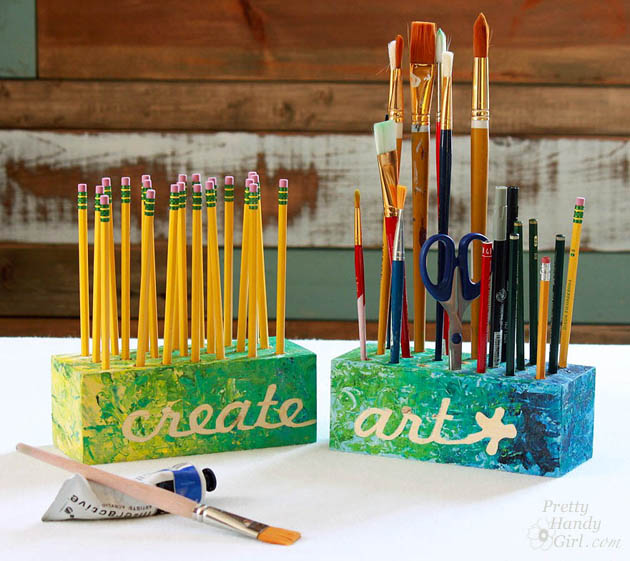
Creative Block Desk & Art Utensil Holder

create_art_block_holders_sm

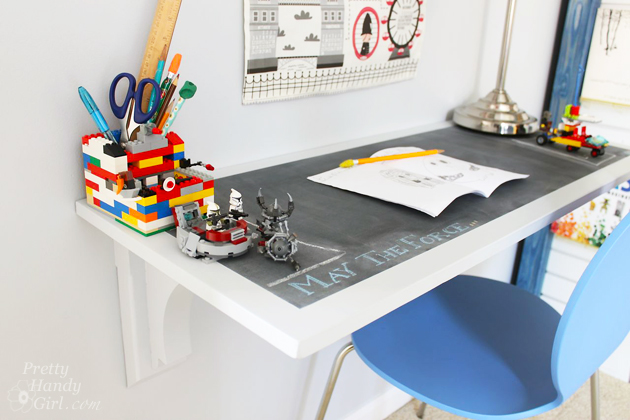
Creating a Chalkboard Desktop.

How to Make a Chalkboard Surface Desk | Pretty Handy Girl

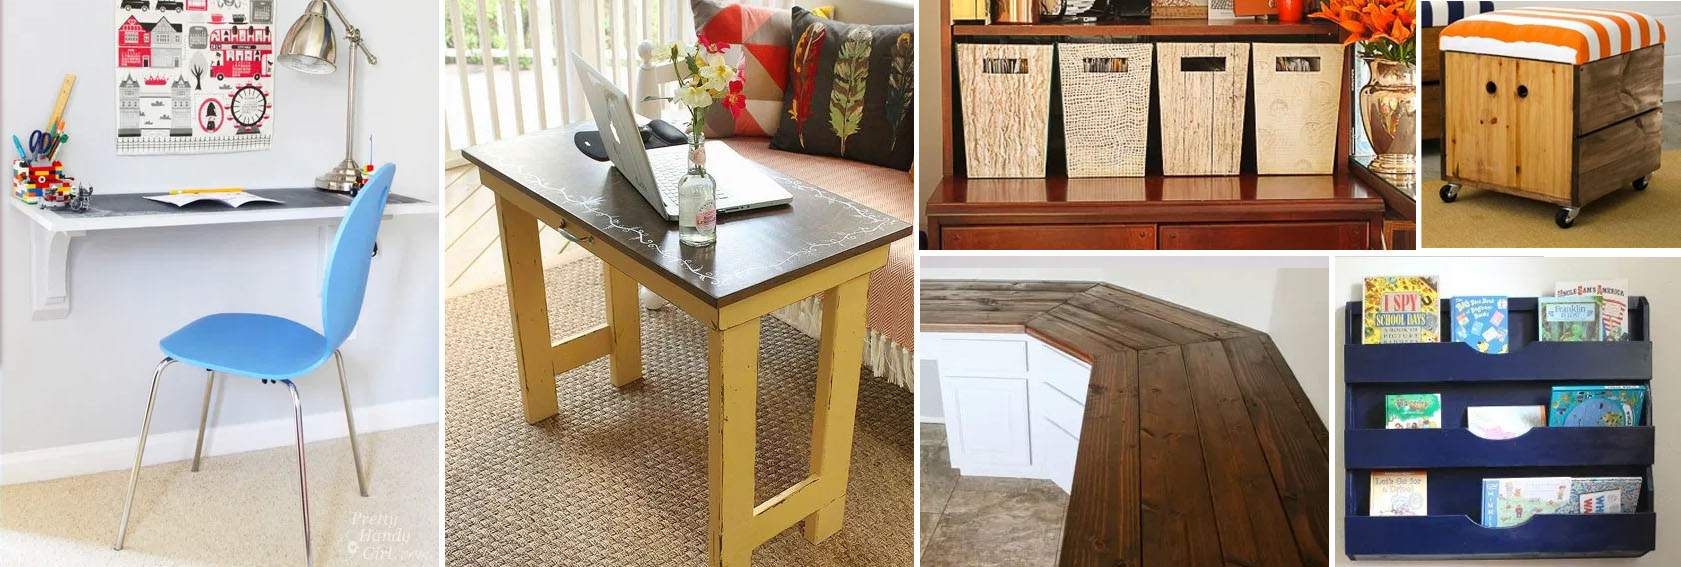
Many of you have suddenly found yourselves transitioning to a home office during this period of social distancing and feeling overwhelmed. No matter how much or how little space you have to work with, I’m here to help you create a cheerful and practical work space with these DIY Ideas for Setting Up a Home Office.

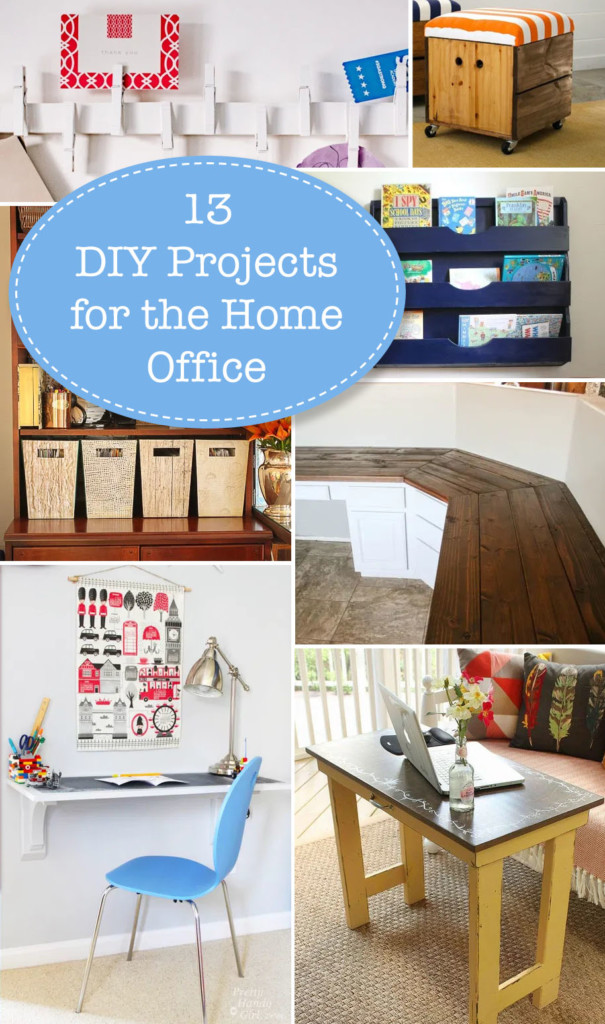
13 DIY Projects for Setting Up A Home Office
DIY Ideas for Setting Up A Home Office

I have been working out of a home office for quite a while now, so I thought I would share some of my most valuable ideas for getting organized to work at home. For inspiration, here are 13 easy, inexpensive, and practical projects to get you started.  Who knows, after you get set up, you may not want to return to your corporate office.

Wall-Mounted Desk Tutorial | Pretty Handy Girl

The great thing about this Wall-Mounted Desk is it can be small or large and it won’t take up any floor space!


Folding Laptop Writing Desk | Pretty Handy Girl

This Folding Laptop Writing Desk is the perfect height, and can fold up and store away when you’re not using it.


Build a Wood Plank Desktop for about $40

Here’s how you can create a simple (and most importantly, inexpensive) Wood Plank Desktop for about $40!


Magazine File Box Facelift | Pretty Handy Girl

Tired of your boring home office decor? Within minutes you could give a Magazine File Box a Facelift (or a storage box)!
I saved a lot of money reusing the old. Put ‘er there fellow savers!


DIY Wood Wall Organizer

If you’ve seen these cute Wall Organizers and thought: “I could totally make that,” I’m here to tell you, you can!


29 hacks to help you get more organized social media image

Here are 29 hacks to help you get more organized and help you transition to a better organized home office!


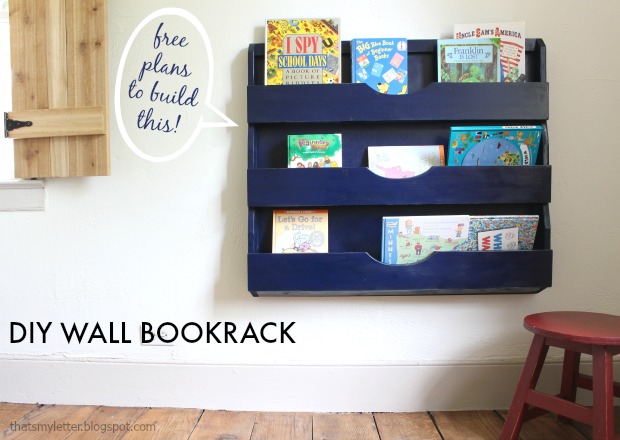
DIY Wall Bookrack

This Bookrack Building Project will have you organized and will free up space in no time.  The shelves are tapered and have plenty of depth for multiple books, files, or magazines.


File Cabinet Makeover Using Chalk Paint

Give a boring beige File Cabinet a SUPER cheap and quick makeover using chalk paint! I bet you can score a free file cabinet on your local buy, sell, or trade group. Or look on FreeCycle.org or Craig’s List.


12 DIY Home Storage Tutorials | Pretty Handy Girl

I’m taking advantage of these days at home to do a big “clean out”!  You’re sure to find one of these 12 DIY Storage Projects to help you organize your home useful.


Wall-Mounted Hutch Tutorial

This charming Cottage Style Desk and hutch is where I keep our lives organized! It takes up otherwise wasted space in the corner of our kitchen.


Scrap Wood iPad Tray

If you are accustomed to DIY projects, you probably amassed quite the stockpile of leftover wood. You’ll love this quick, easy, and cheap DIY iPad Holder!


rolling storage stool final

What’s better than getting organized with more storage? How about combining it with additional seating! Check out this easy tutorial for how to build a Rolling Storage Seat.


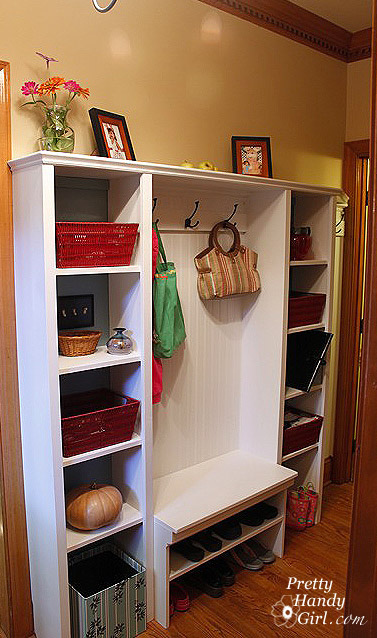
hallway storage unit

Although this wall Storage System was built custom for a mudroom, you can easily adapt it for a home office!

I hope you found some of these DIY Ideas for Setting Up a Home Office helpful. Gotta run and get set up for working tomorrow from home. Good luck to all of you, especially if you have family members who like to interrupt your workflow.