
Floating Wood Block Picture Frames {Lowe’s Creative Idea}
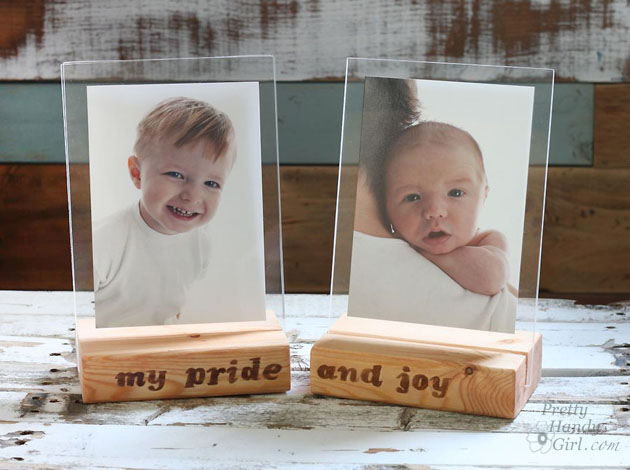
We are days away from Christmas and I’m sure there is someone on your list that you just can’t figure out what to get for them. I have the perfect solution! Make them a wood block floating picture frame using scrap 2×4″ lumber and plexiglass.
If you don’t have scrap 2×4’s lying around, you can purchase a 2x4x8 foot stud for less than $4! You could make 16 photo frames out of that one board! (Granted, you’ll need to buy the plexiglass for each.)
Materials:
- 2 – 2 x 4s (cut to 6″ lengths)
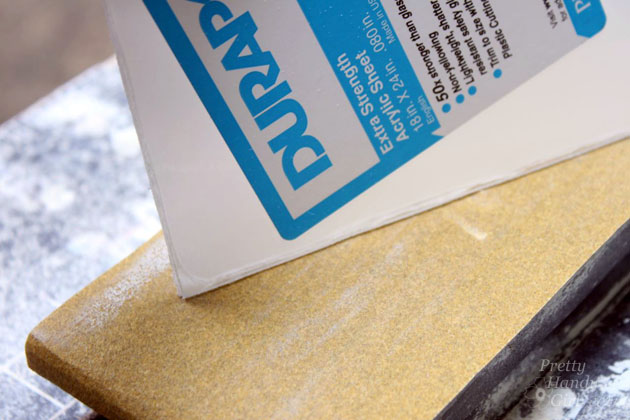
- 4 – 6″ x 9″ pieces of plexiglass (3/32″ thickness)
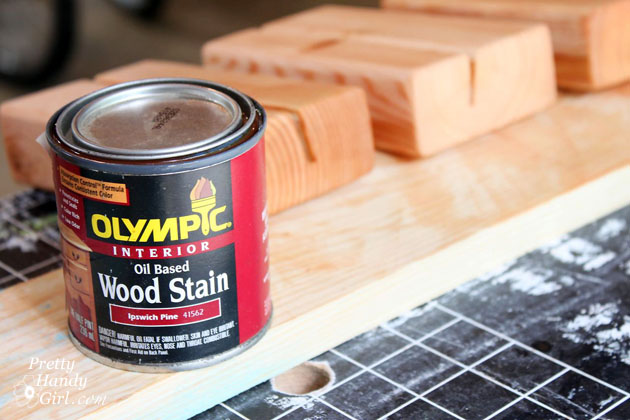
- Ipswich Pine Stain
- gel stain or Minwax Express color
- small detail paint brush
- pencil or pen
- photos
- tape
- rag
- optional: scrapbook paper, double stick tape
Tools:
- Miter saw
- Table saw
- Jigsaw or bandsaw or a plexi-cutter
- Sander with sandpaper
- GRR-Ripper 3-D Pushblocks
Instructions:
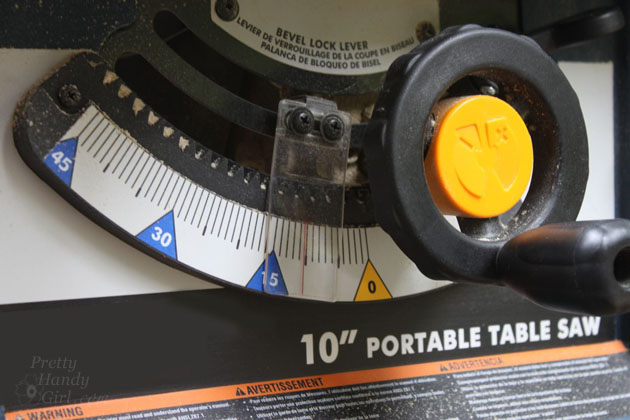
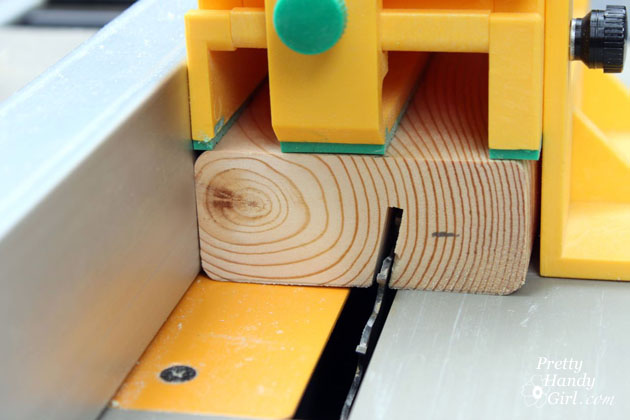
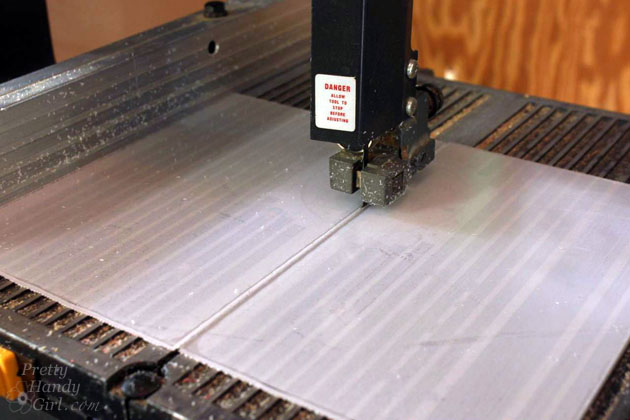
Set your table saw to a 10 degree bevel.
Set the saw blade to a depth halfway through your block (about 7/8″ deep.) Set the fence to 2″ from the blade.
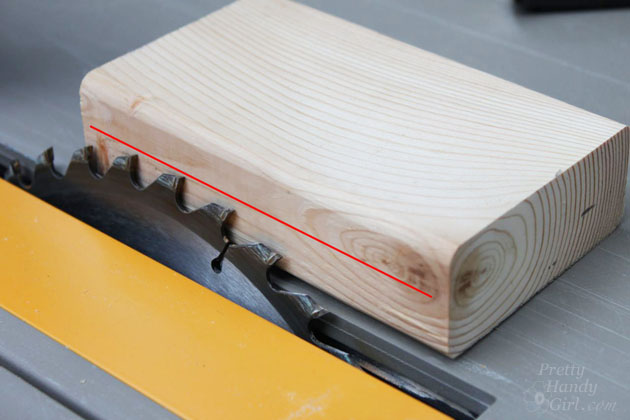
Use your GRR-RIPPER to safely guide the 2×4 over the saw blade. Check to see if two pieces of plexiglass will fit in the groove created by the saw blade.
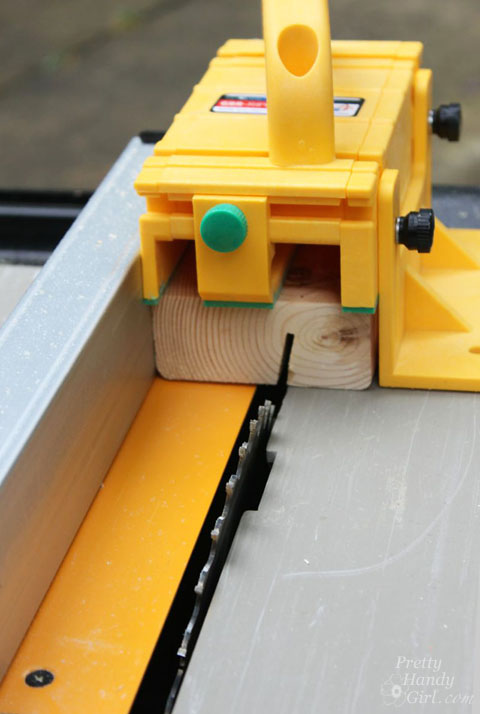
If not, nudge the fence over slightly and make a second pass over the blade. Check to see if the plexiglass will fit now. If not, repeat the process until they fit snugly.
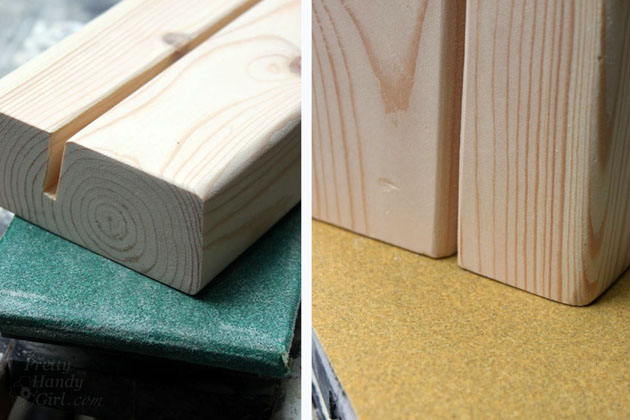
Sand all sides of the 2×4 block.
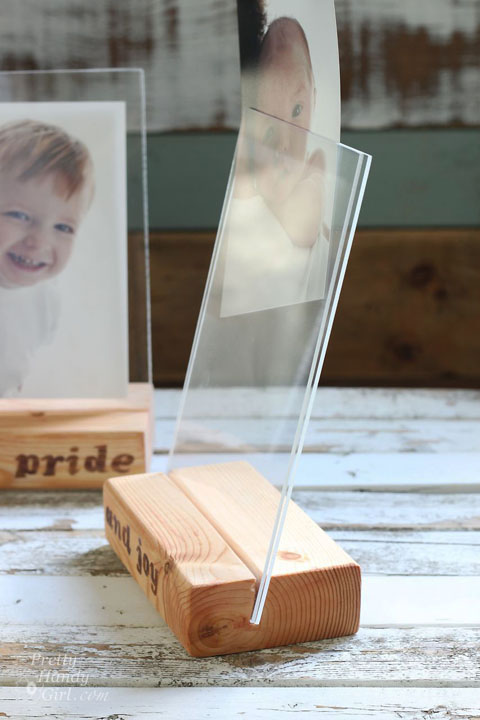
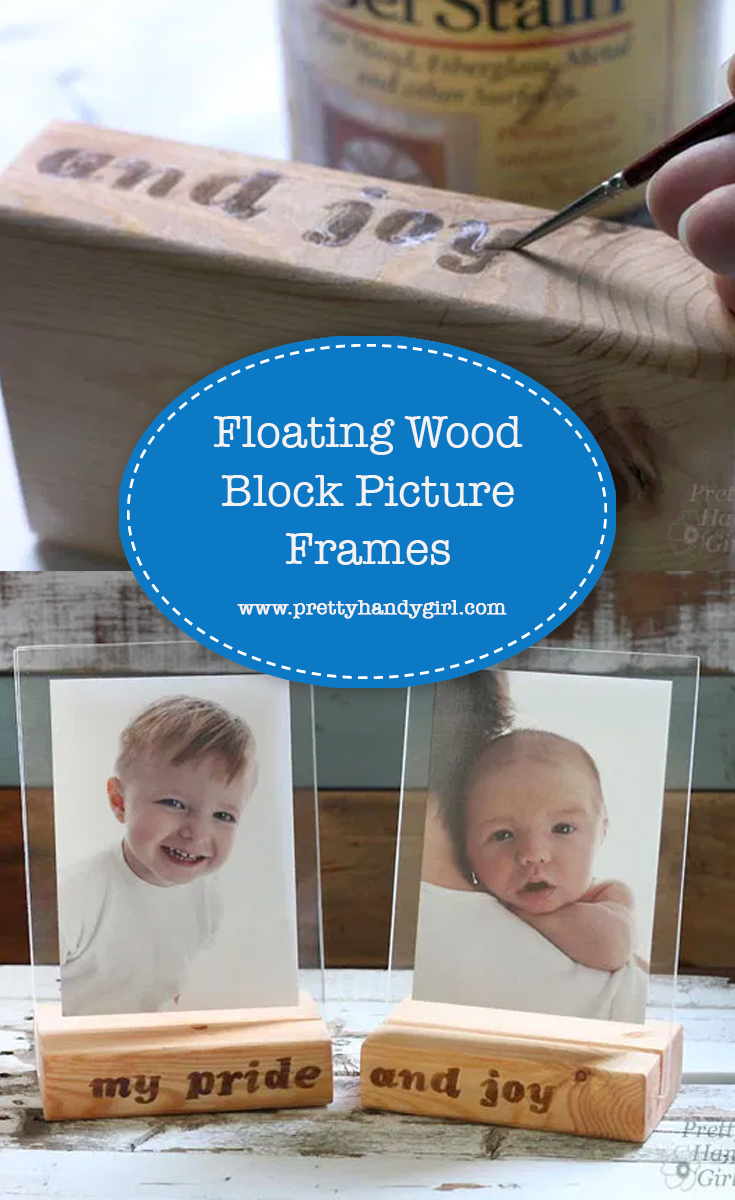
Stain the blocks any color you like. I used a natural stain to give the wood a slight glow.
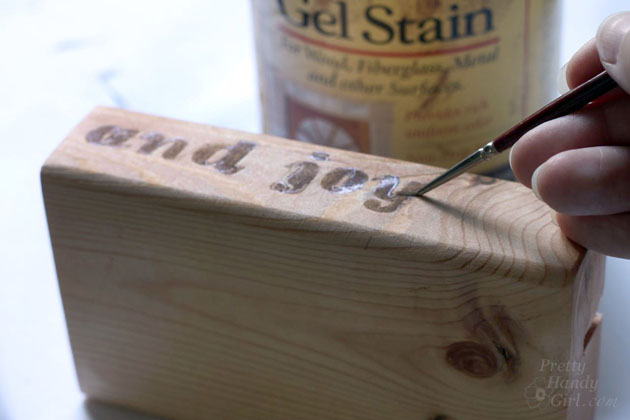
While the blocks are drying, print out your words using a computer. Cut out the words. After the blocks have dried, position and tape the words onto your blocks.
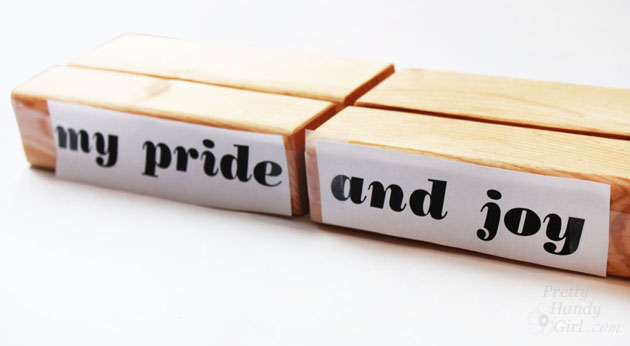
Use a pen or pencil to trace the letters. Use firm pressure while tracing.
Remove the paper and you should be able to see the tracing on your blocks.
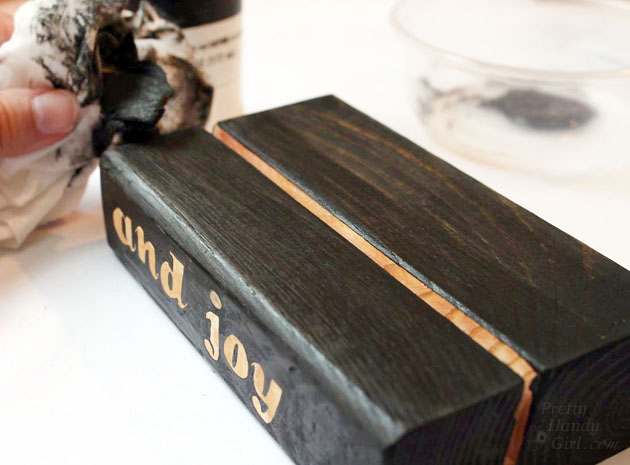
Paint inside the letters with your stain. A gel stain works well because it doesn’t spread as much and it has a thicker consistency.
Alternatively, you could outline the letters and use the stain to color the rest of the block.
Wipe stain onto the rest of the block sides.
Sand the edges of your cut plexiglass until they are smooth.
Sandwich a photo between the two pieces of plexiglass and insert it into the groove in the block.
This project is a great way to use up your wood scraps and give something unique to someone you love.
If you prefer, you can slip a piece of scrapbook paper (cut to the same size of the plexiglass) behind the photos.
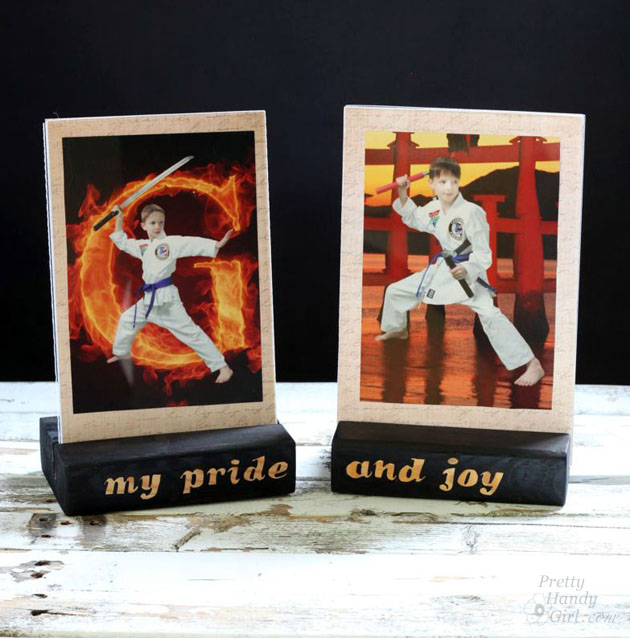
Which do you like better? The natural blocks or the black ones? Scrapbook paper or none?
Want more creative gift and woodworking ideas? Subscribe to the Lowe’s Creative Ideas magazine:
![]()
Or view more creative ideas from the Lowe’s Creative Idea bloggers !
There’s also a magazine app so you can have inspiration on the go! And, don’t forget to follow Lowe’s on Pinterest or on Instagram!
![]()
Disclosure: As a #LowesCreator, I was provided with a Lowe’s gift card to purchase supplies for this post. I was not told what to write. All ideas and words are my own.
Pin for later!

Loving the natural look without paper!! Thank you for sharing this tutorial!
This is not only brilliant but oh so sweet Brittany! Thank you for this little gem, my head is now busy planning this!