Today we’re prepping to tile in the kitchen and bathrooms. Having seen firsthand how much damage water can cause to a home, I want to show you this tutorial for How to Waterproof Floors!
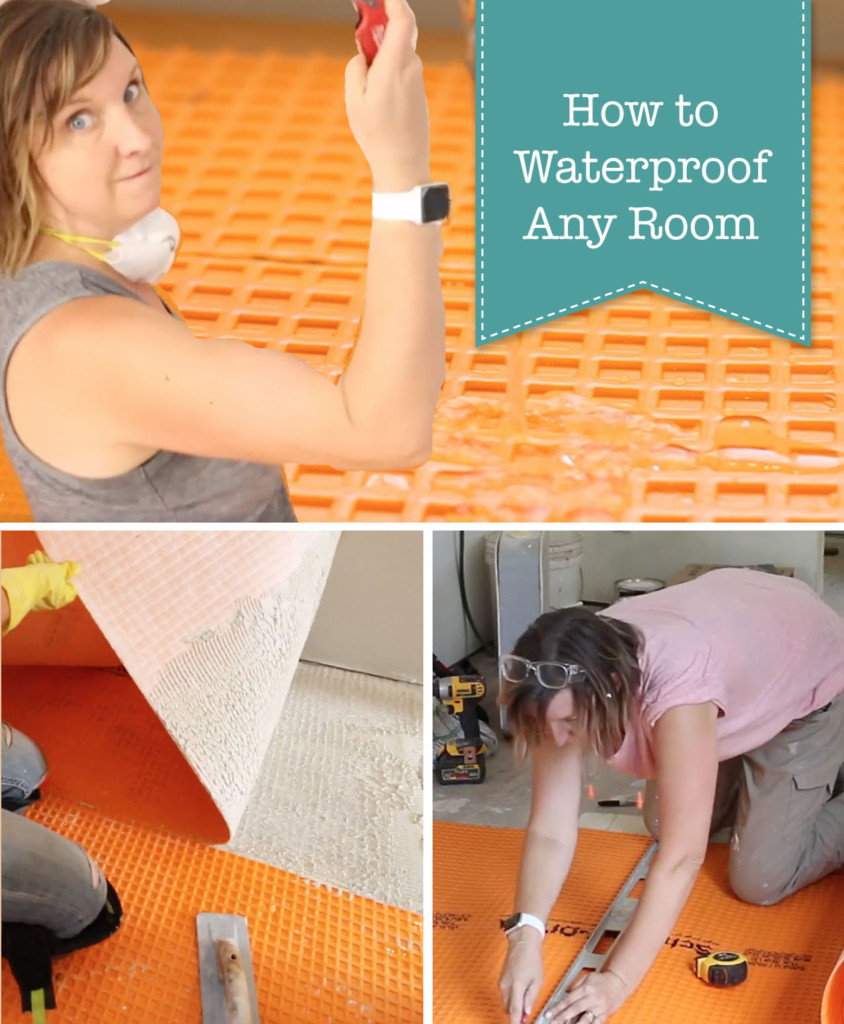
Waterproofing Floors in Any Room

Renovations are finally moving forward at Millie’s Remodel. This is the point where I feel like we already hit rock bottom and now we’re finally on the rebound. You might remember we used a self-leveling concrete in the kitchen last week. Now it’s time to waterproof the floors to prevent damage from ever happening again!

Last year I took two Schluter classes and learned about waterproofing, uncoupling membranes, and tips and tricks to keep your tile job looking flawless for a lifetime. What I learned over the four days blew my mind. I learned why and how shower systems fail. But, most importantly, I learned how to properly prepare surfaces for tile using waterproofing membranes. Today we’ll just be talking about waterproofing a floor, but I’ll have another tutorial for you soon so you can learn how to waterproof walls too.

Materials:

(I’ve included affiliate links for your convenience. I earn a small percentage from a purchase using these links. There is no additional cost to you. You can read more about affiliate links here.)

Why should you waterproof a floor?

Before we get started, I want you to fully understand how waterproofing a room can actually save you money and save you from the headache of having a leak in your home.

If you have a kitchen or a bathroom, chances are you’re going to have a leak in your lifetime (or your home’s lifetime) if it hasn’t already happened. One of the best things you can do is to install waterproofing materials so water can never damage your floors or floor framing again. I believe so strongly in the Schluter products, that all the properties I’m working on (including my own) will have Ditra installed on the floor before tiling.
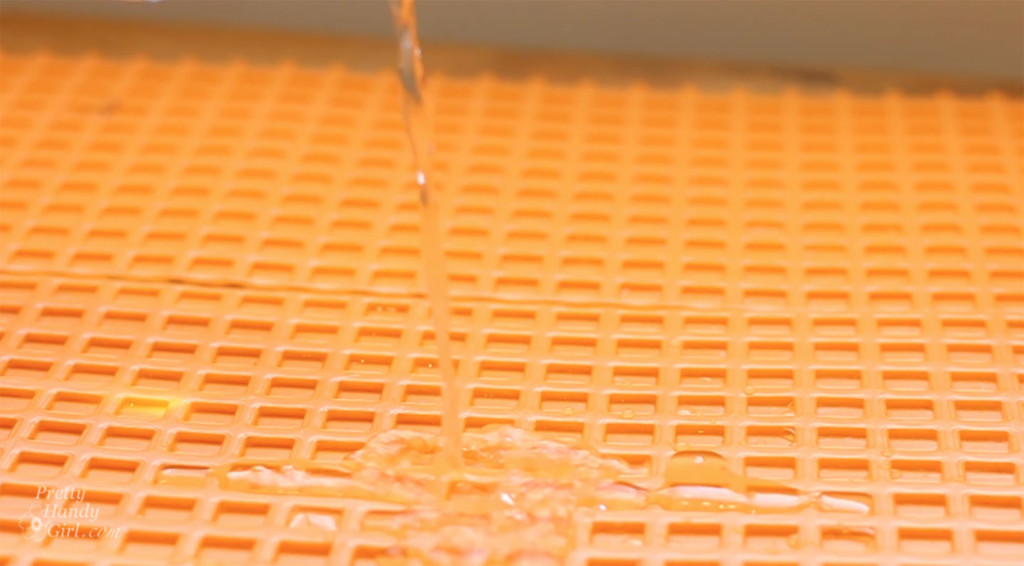
By using the Schluter Ditra uncoupling and waterproof membrane in conjunction with Kerdi band around the perimeter of the room, I can waterproof the entire floor. Which means I don’t have to worry about rot or mold happening. Any little leaks will sit on top of this membrane until I see it because the water will rise instead of seeping into your floor or walls.

Ready to get started? Let me show you how to waterproof any room in your house!

For your convenience, I made a video to help show how to install Schluter waterproofing products and how to fully waterproof a room!

Instructions:

  1. Cut open your roll of Ditra and roll it out onto a scrap piece of wood or something you can cut on.
  2. Measure the room you want to waterproof and transfer the dimensions onto your Ditra membrane. Use a straight edge and a sharp utility knife to cut the Ditra. You might need to make a few passes with the knife to cut completely through the Ditra membrane.
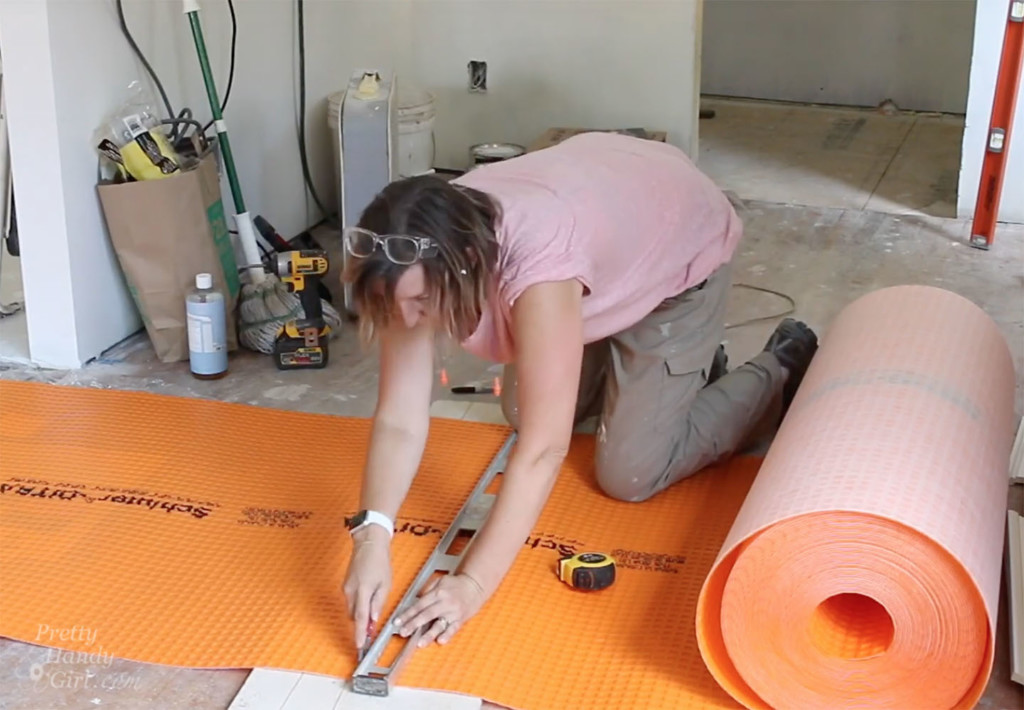
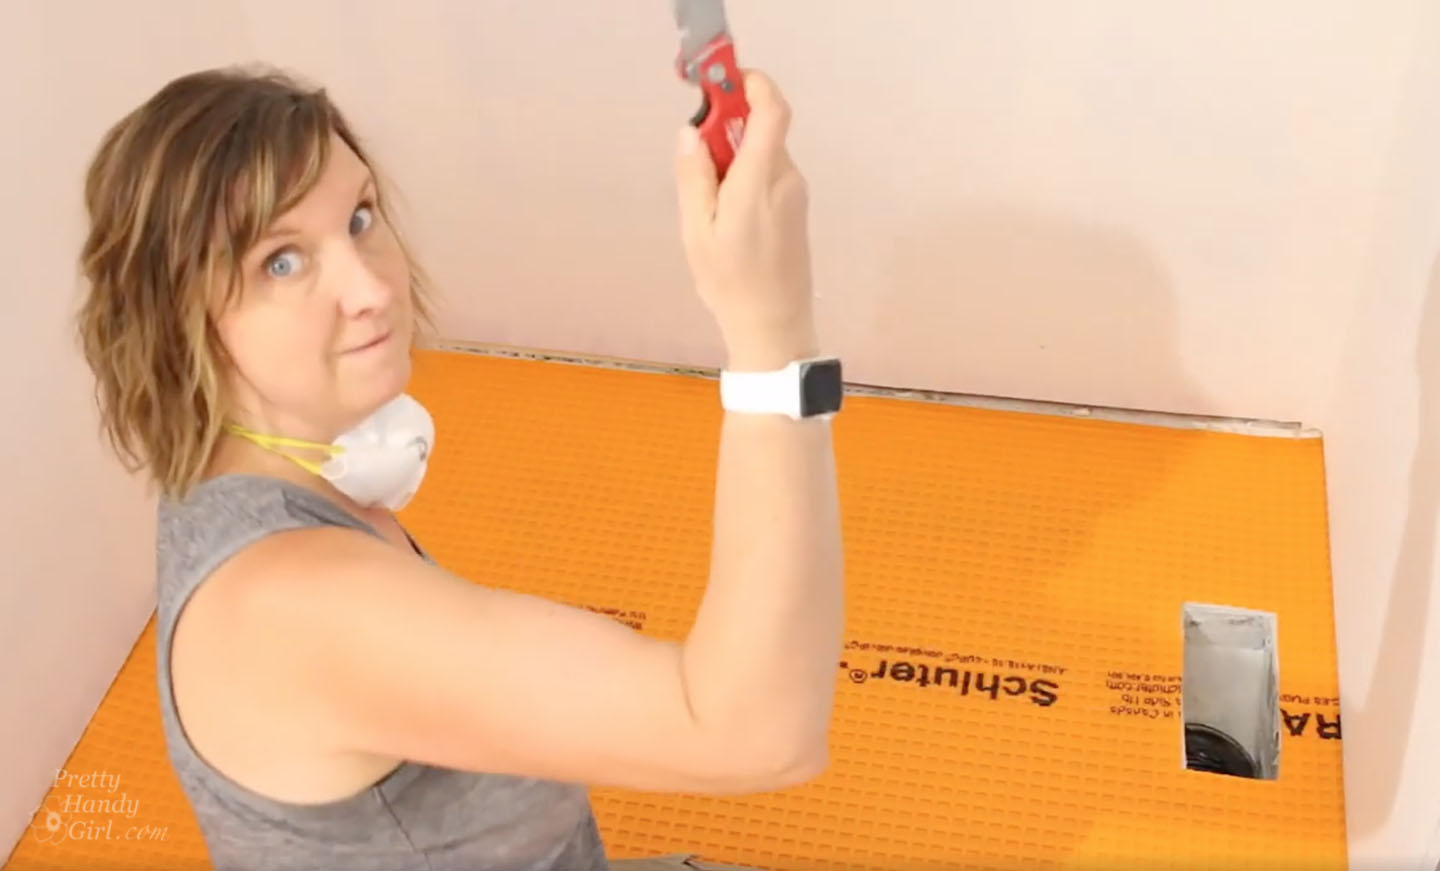
  3. Test fit the Ditra in your room. Cut out a hole for your floor vents by pressing your knife through the membrane where the vent is and remove the material up to the edges of the duct. Cut the rest of the pieces to fill the room. Do not overlap the Ditra material.
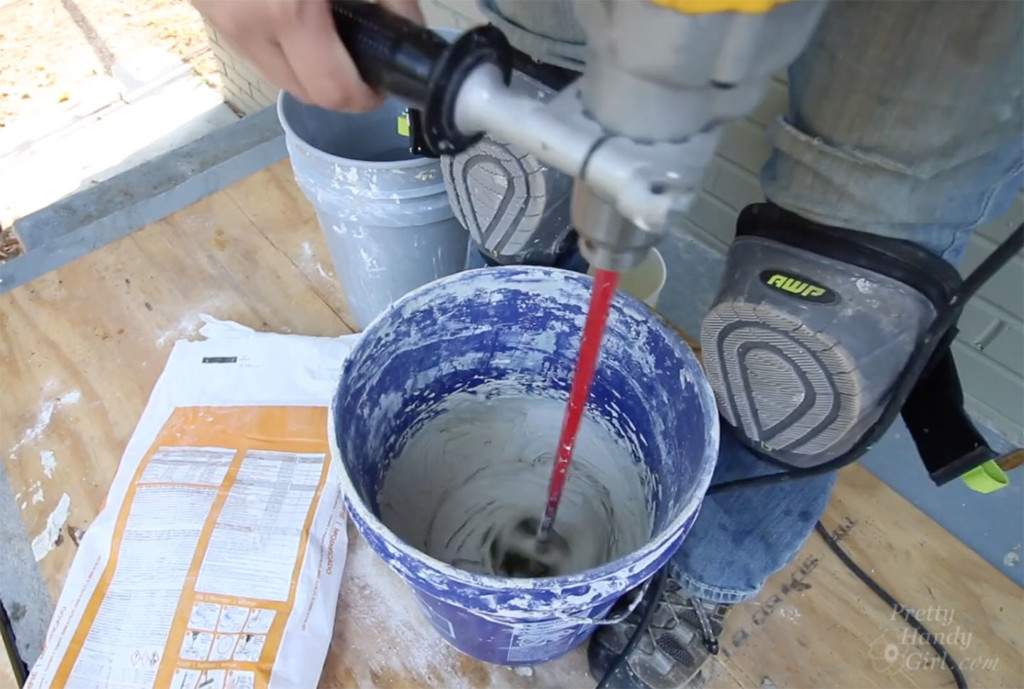
  4. Now it’s time to mix the thinset. When using Schluter Ditra it’s highly recommended to use the Schluter All Set. This mortar is specifically manufactured to cure against the waterproof membrane. Read the instructions on the packaging and mix your thinset as directed.
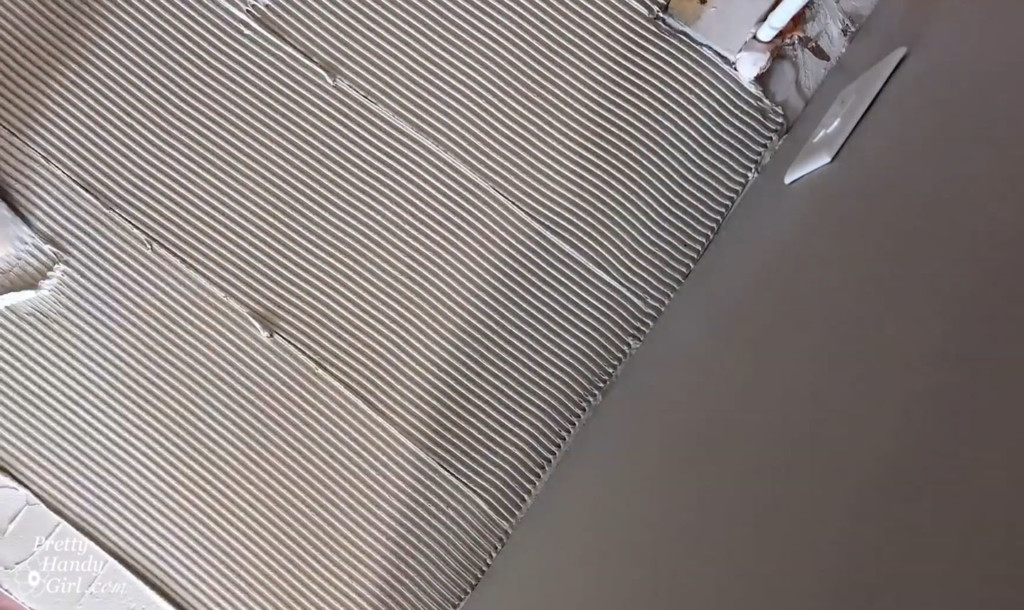
  5. Use a wet sponge and clean water to clean and wet the subfloor. Spread the thinset onto the floor using the Schluter Ditra trowel. Make sure you have good coverage on the floor.
    Then use the notched trowel to comb through the thinset at a 45° angle.
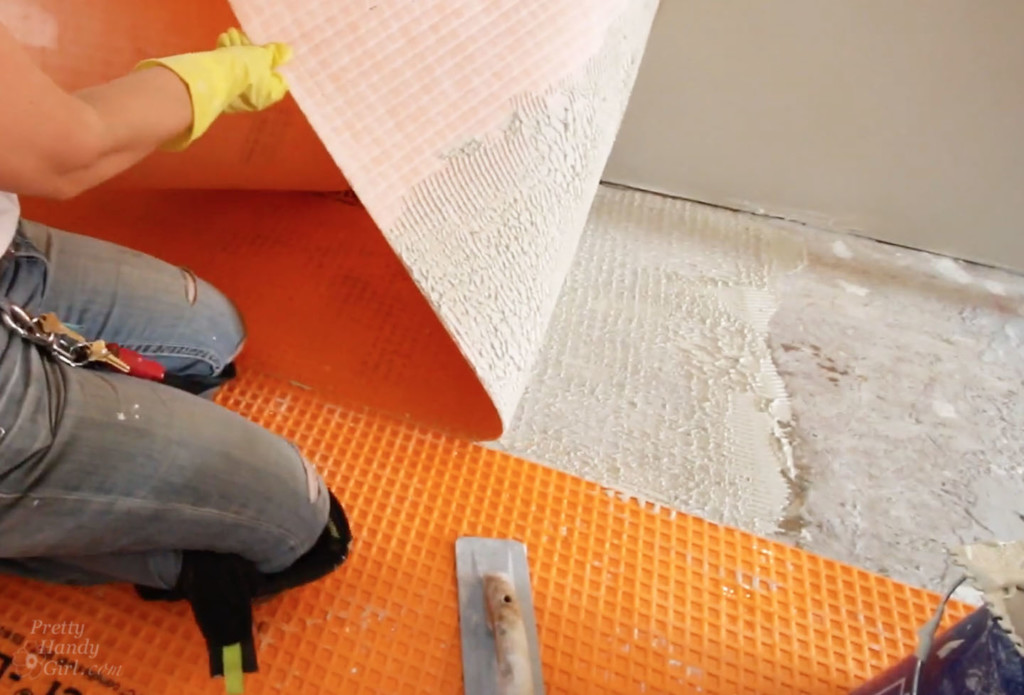
  6. Lay the Ditra membrane on top of the thinset and use a smooth float to press the membrane into the thinset. In the beginning, you should roll back a corner of the Ditra to make sure you have full coverage onto the backing of the membrane. Place the Ditra back down and use the float again to make sure the membrane is pressed into the thinset.
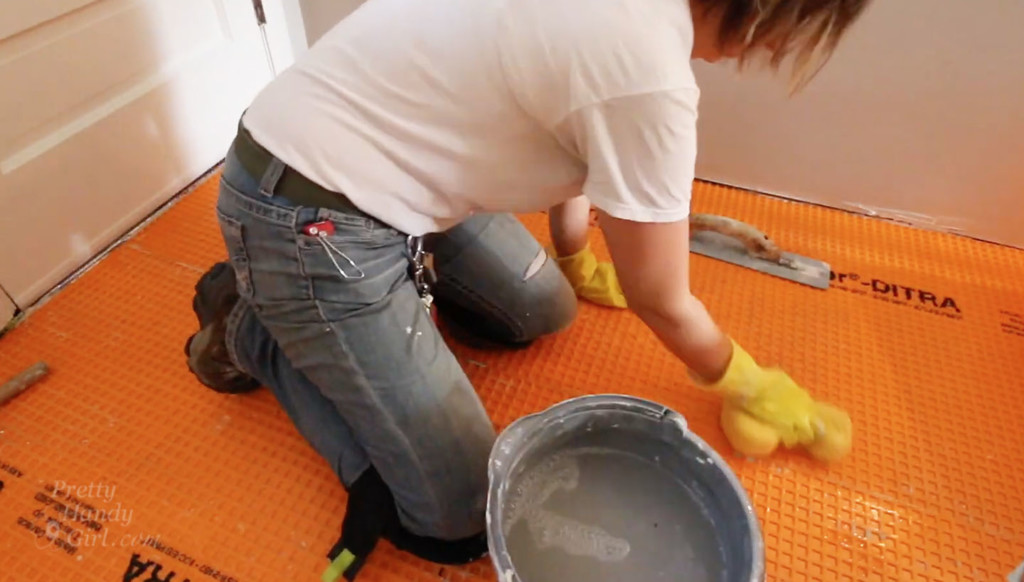
  7. Use a wet sponge to clean out any mortar that has squeezed out the seams or edges.
  8. Once all the Ditra has been installed into the subfloor, you’re ready to seal the perimeter and seams. Grab a Kerdi corner piece for each corner of the room. Using the Kerdi trowel, apply thinset mortar to the inside corner of the room. Use the notched side to comb through the thinset. Place the Kerdi corner into the thinset and use the flat side of the trowel to embed and scrape along the Kerdi.
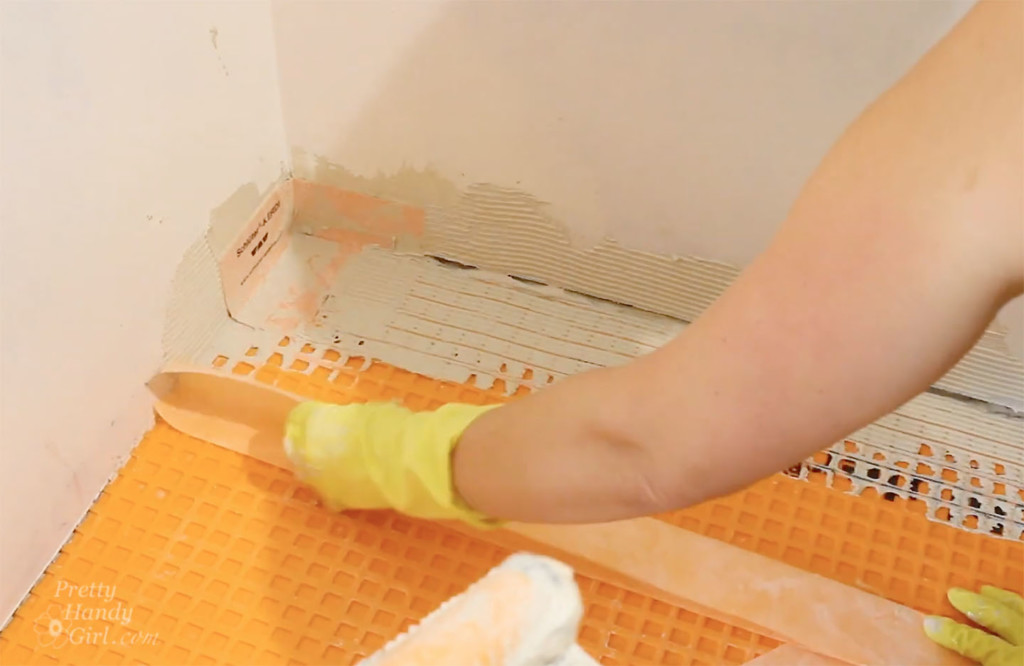
  9. Now you’re ready to install the Kerdi Band on the straight sections of wall. Be sure to cut your Kerdi band so it overlaps the corner pieces by at least 2 inches. I like to pre-fold my Kerdi Band by creasing it in the middle so it’s easier to install in the corners. Apply the Kerdi Band to the wall and floor using the same technique as the corner.
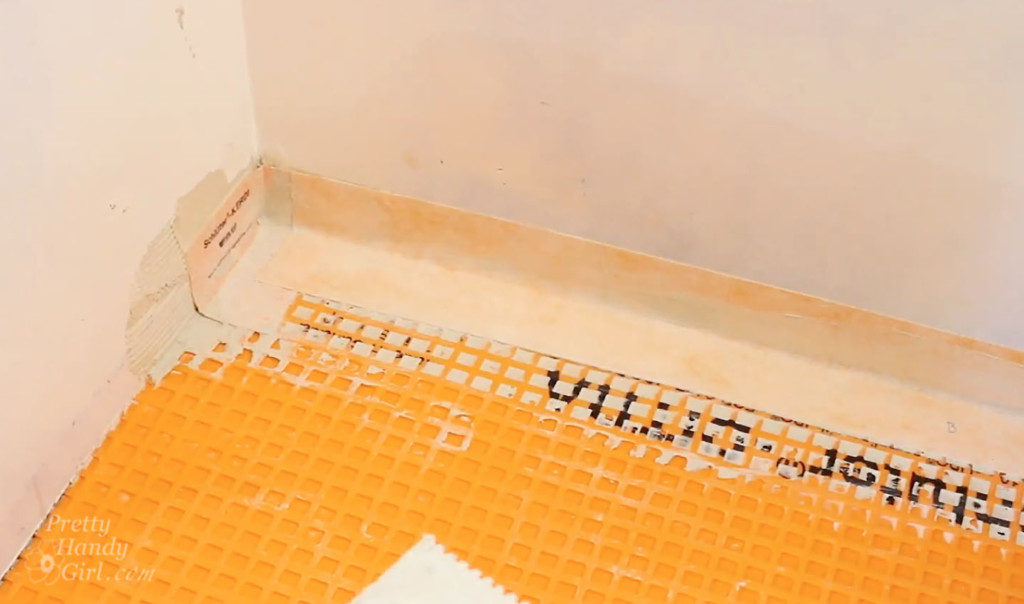
  10. Clean up any excess mortar leaving a smooth surface for tile installation.
  11. Now it’s time to complete the waterproofing of the room by sealing the seams between the Ditra sheets. Cut your Kerdi Band so it overlaps any perimeter band by at least two inches. Apply the thinset over the seam, use the notched trowel to create ridges in the thinset.
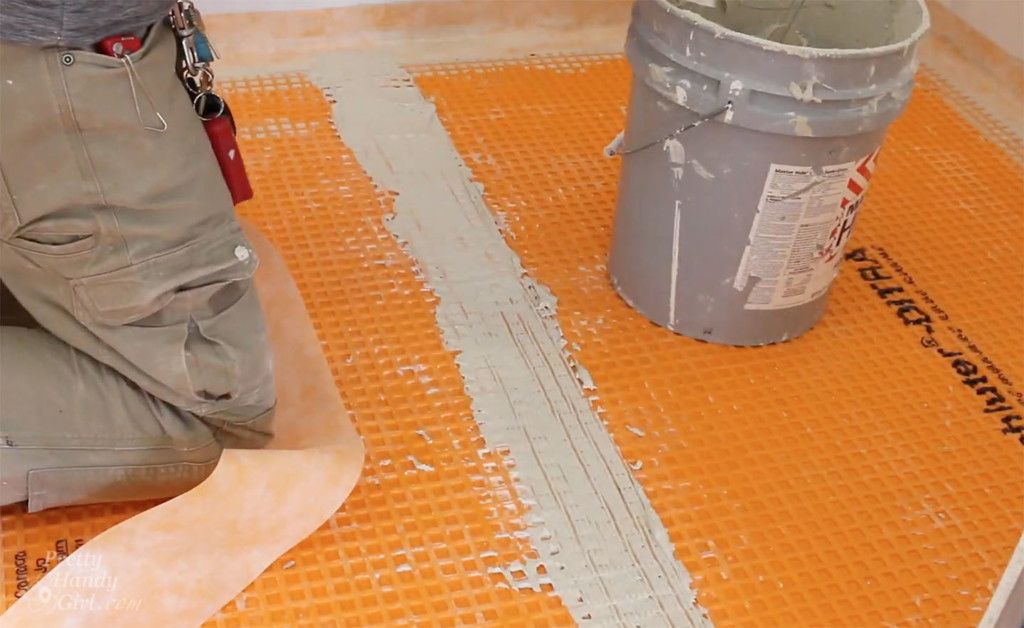
    Then embed the Kerdi band into the mortar and run the flat side of the trowel over the band to smooth the thinset and embed the band.
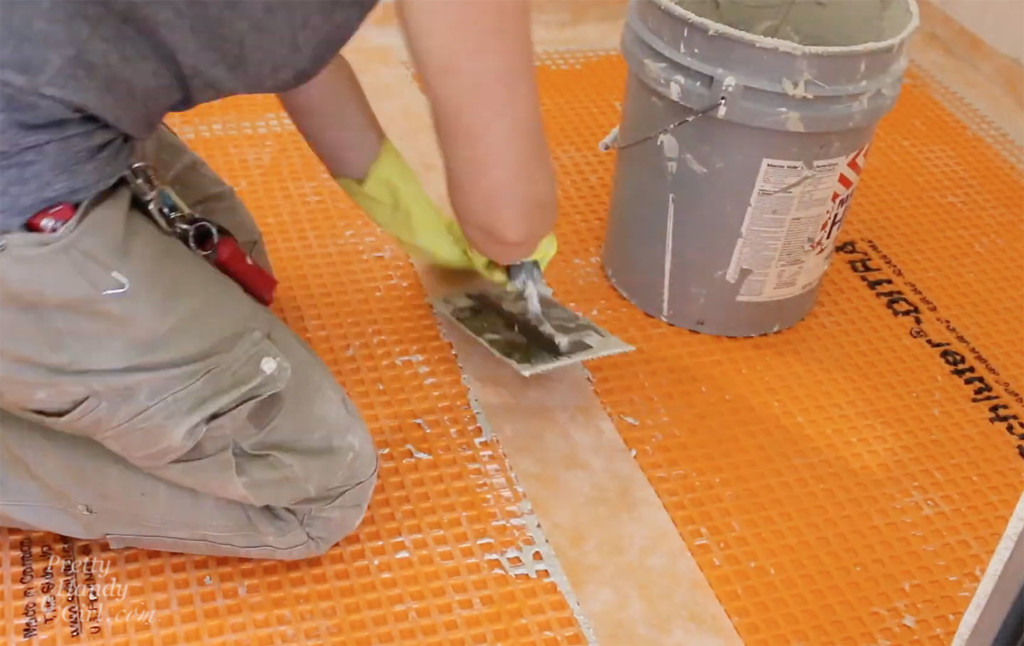
  12. Clean up any excess and allow the thinset to cure before tiling.

Once the thinset has cured you can tile your room and rest easy knowing this room is waterproofed and there’s no way the subfloor will rot from a sneaky little leak. Or a big leak if you have kids that like to splash out of the bathtub. I know this risk all too well from my own boys.

I hope you found this tutorial helpful and you’ll consider using Schluter waterproofing materials before you renovate your next “water” room.

Disclosure: I was provided with some Schluter materials for this project. I was not told what to write. All opinions are my own. I am particular about the brands I represent and will always let you know when you are reading a post with complementary products or a sponsored post.

After demolition, I realized several water leaks left some low spots in the kitchen floor at Millie’s Remodel.  Today I’m going show you how to use self-leveler to fix a sagging floor.  I’ll also show you a few tools you’ll find helpful when pouring self leveler.

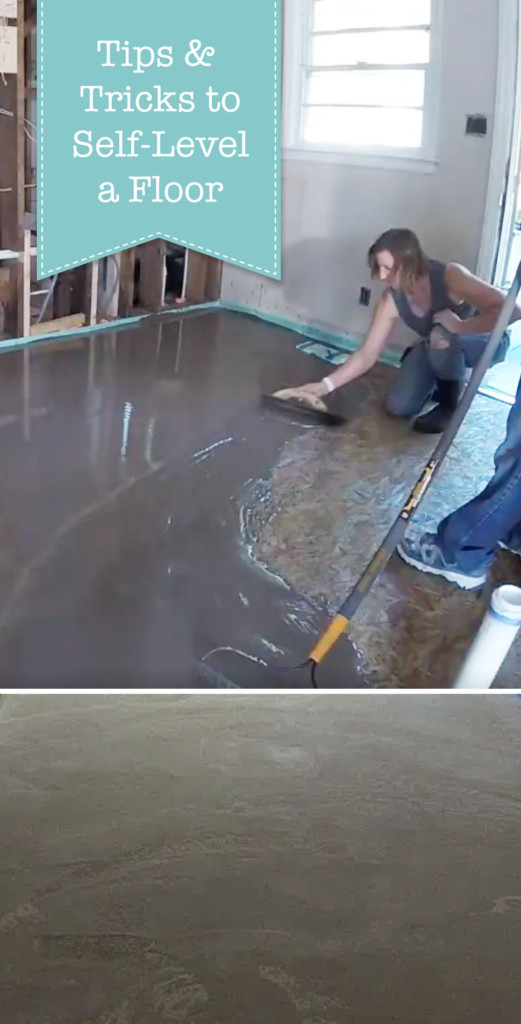
Tips & Tricks to Self-Level a Floor at Millie’s Remodel

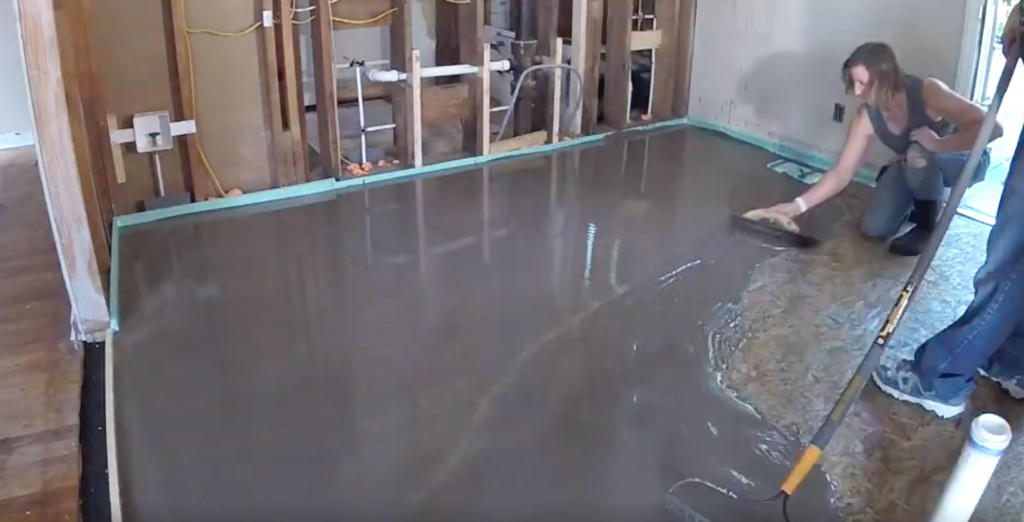
Can I level with you? LOL. Seriously, when I bought the Millie’s remodel house I knew there were some plumbing leaks. But, I had no idea how much damage the water had done to the floor in the kitchen. I discovered a pretty decent hump in the middle of the room with low spots on either side. To combat the hump my assistant, Stephanie, and I secured cedar shakes to the floor in one of the low spots. Then we laid 1/2″ OSB plywood on top. This helped a little bit with the bow, but we still had some issues.

One corner of the room was 3/4 of an inch lower than the other corner. Plus you could still detect the hump. I decided the best way to deal with the dips, hump, and creating a flat surface to tile onto was to pour a self-leveling concrete in the kitchen.

Prepping the Room for Self-Leveling Concrete Pour

Before pouring self-leveler, you should understand the properties of this mix. When you first mix the product, it’s very liquid and will flow to the lowest spot in your floor. It’s important to seal any cracks or gaps in the floor or your mix will seep through the cracks. You also need to cover any vents or you’ll watch all the mix pour into your ducts (no bueno!)

I like to use rigid foam insulation to prep the perimeter of the room. This creates a form and keeps the liquid from flowing outside the room. I use a sharp utility knife to cut strips from a big 4×8 sheet of rigid foam insulation. I found it easiest to use my trim nailer to nail the pieces to the perimeter of the room. Then I sealed the joint where the insulation and subfloor meet with a line of caulk. If you’ve never mastered spreading caulk quickly and cleanly, you’ll want to see my tutorial for using a caulk gun.

Now that the prep work is done, you’ll need to gather a few tools for this project.
(I’ve included affiliate links for your convenience. I earn a small percentage from a purchase using these links. There is no additional cost to you. You can read more about affiliate links here.)
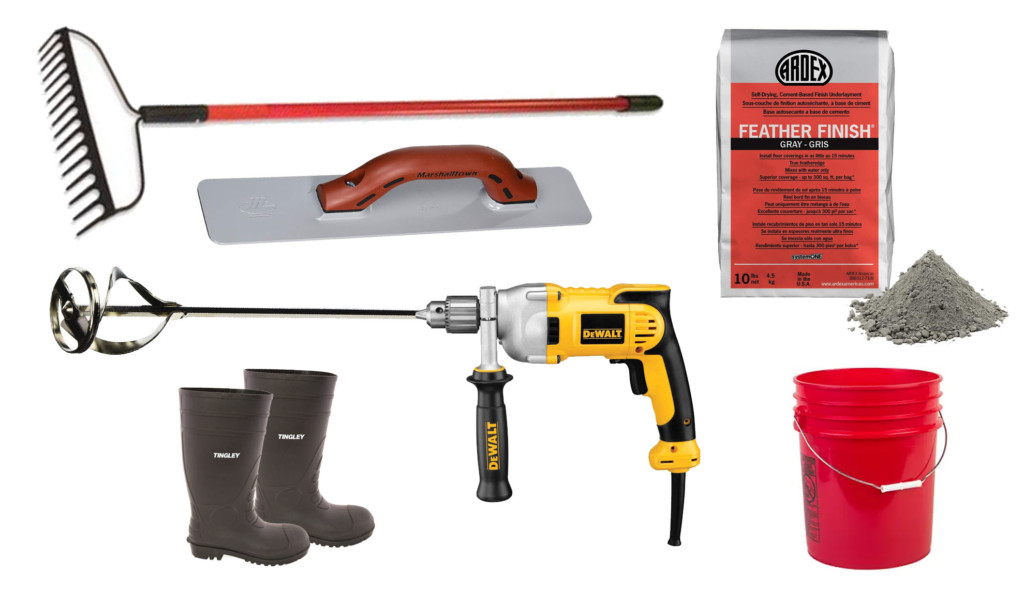
materials for self-leveling concrete project

Materials:

Optional: Work boots you can clean off easily

Priming the Floor:

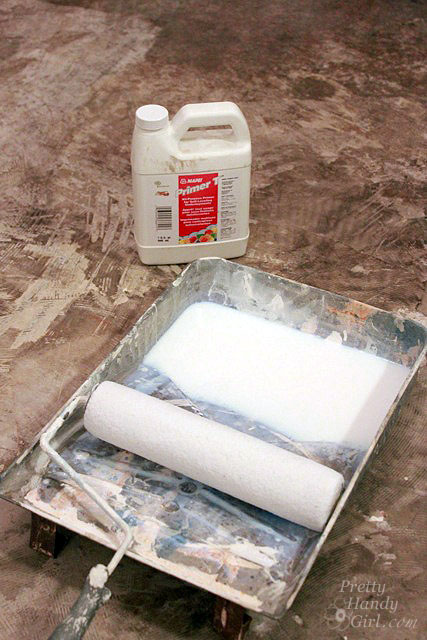
Self-Leveling floor primer

Before pouring the self-leveling concrete, read the directions on the bag. Most leveling mixes specify you apply one coat of primer to a clean floor and let it dry before pouring the self leveler.

Tips for Spreading Self-Leveler:

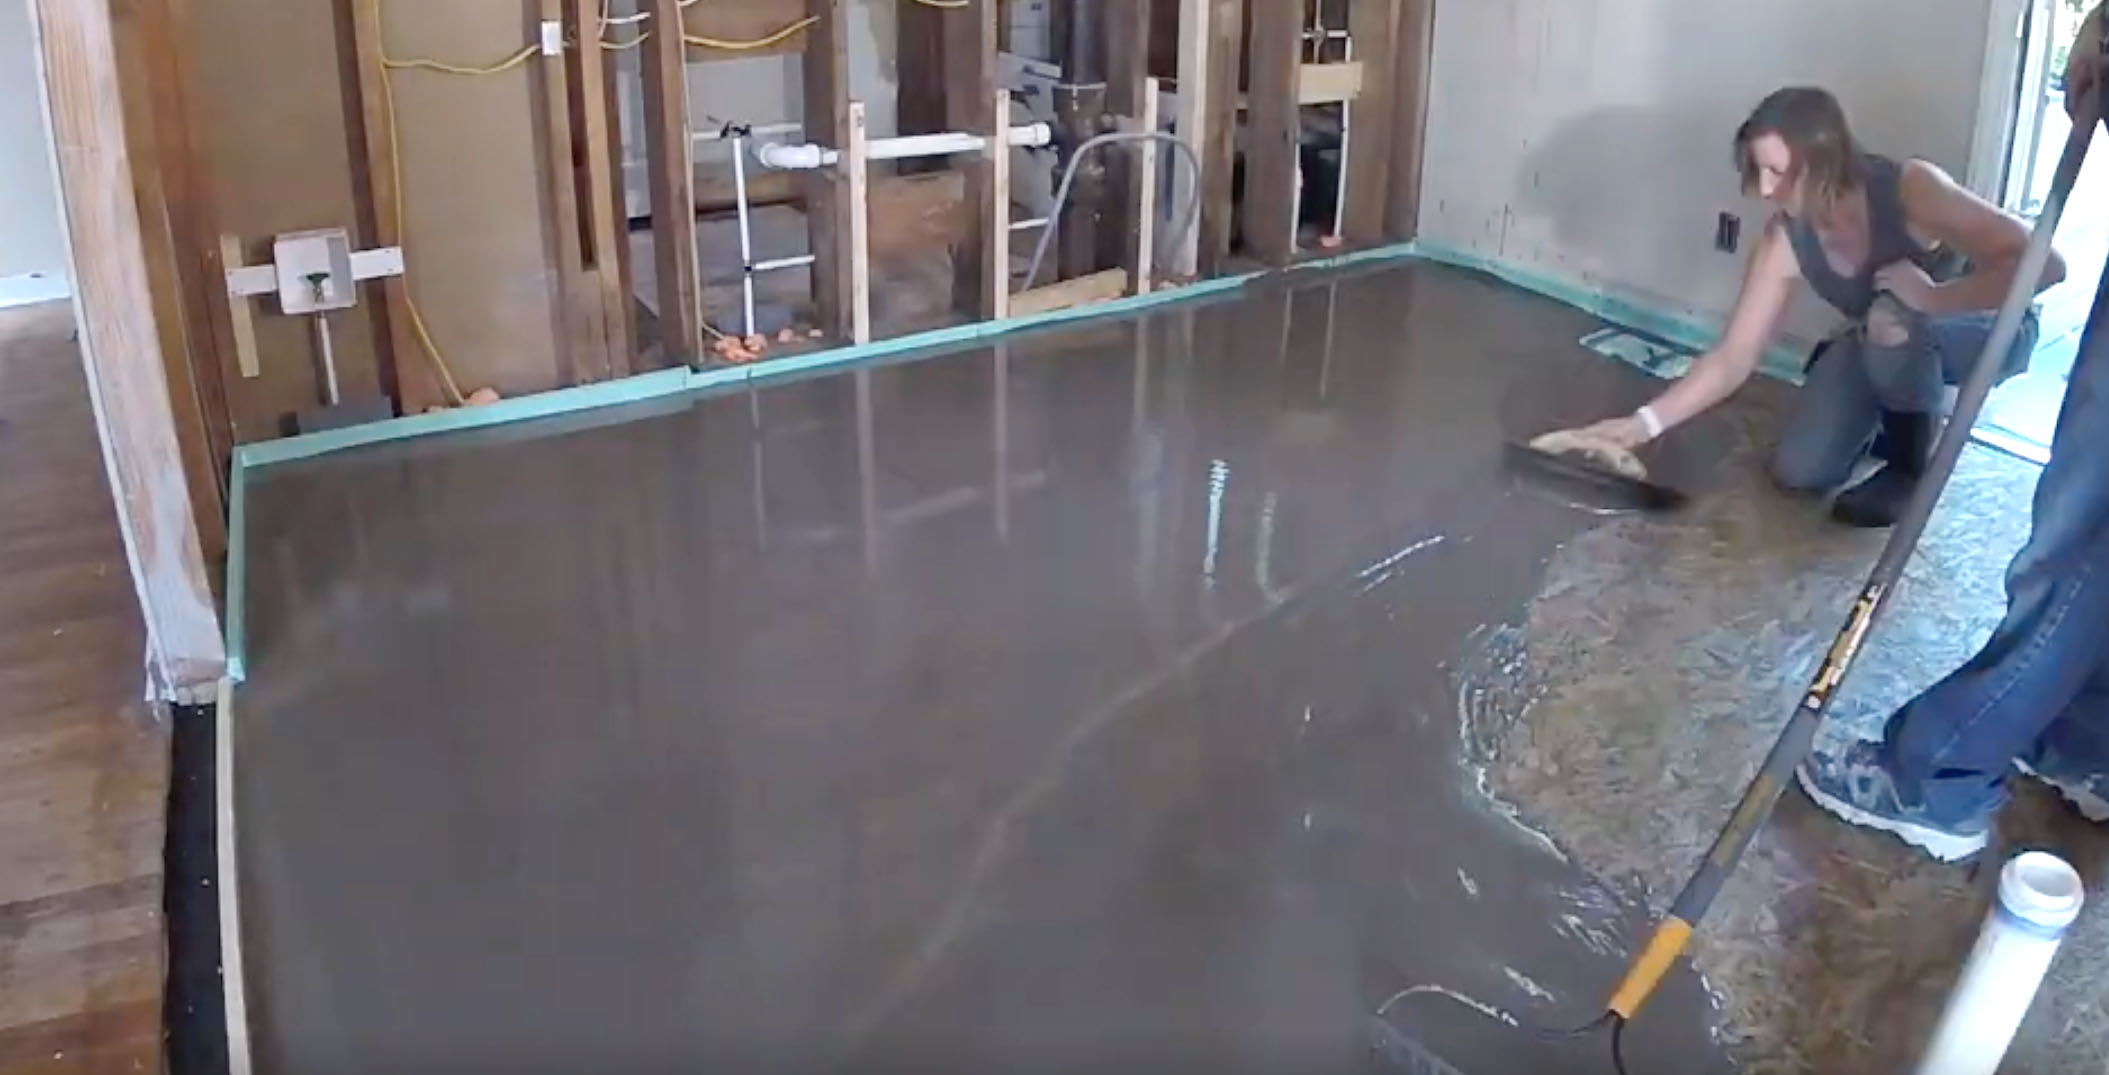
Watch this video to see how we quickly and efficiently spread the self-leveling concrete mix:

Can you believe how helpful a simple garden rake is for spreading self-leveler? Me either!

After pouring your self-leveler, use a long level to check to see if you need to pour in more areas. Finally, use the concrete float to smooth and feather the edges of the self-leveling material into the floor.

Stay off your concrete pour until it has hardened. Make sure you clean any self-leveler off your tools, boots, or areas you don’t want it to harden onto.

After the self-leveling concrete has hardened, you are ready to tile or install your flooring!

I hope you found this tutorial helpful! Are you subscribed to my YouTube channel? If not, you’re missing out.

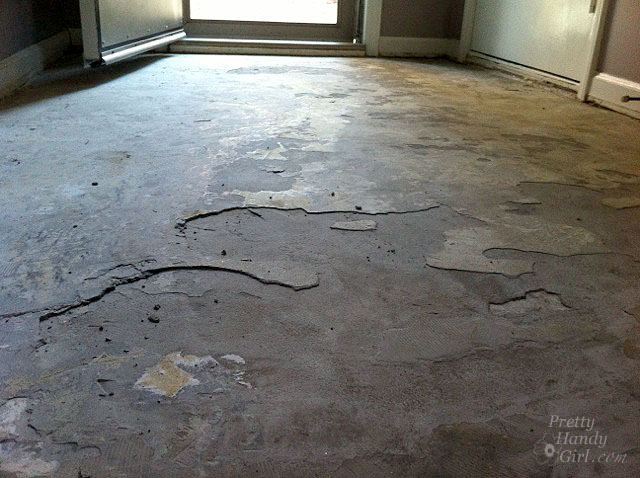
P.s. You might also find this tutorial helpful if you have a concrete floor that is damaged or chipping. Follow this tutorial for patching a damaged concrete floor.


A special thank you to the Millie’s Remodel Sponsors:

The Millie’s Remodel project sponsors have donated materials for the Millie’s Remodel project. As you know I am very particular about the brands I work with and recommend. As a general contractor, I choose the products used on my projects wisely to make sure they last a lifetime. Therefore, I have no reservations putting my name behind each and every one of these sponsors.

millies remodel sponsors logos
How to Repair Your Dishwasher - Control Panel Replacement

How to Repair a Dishwasher: Control Panel

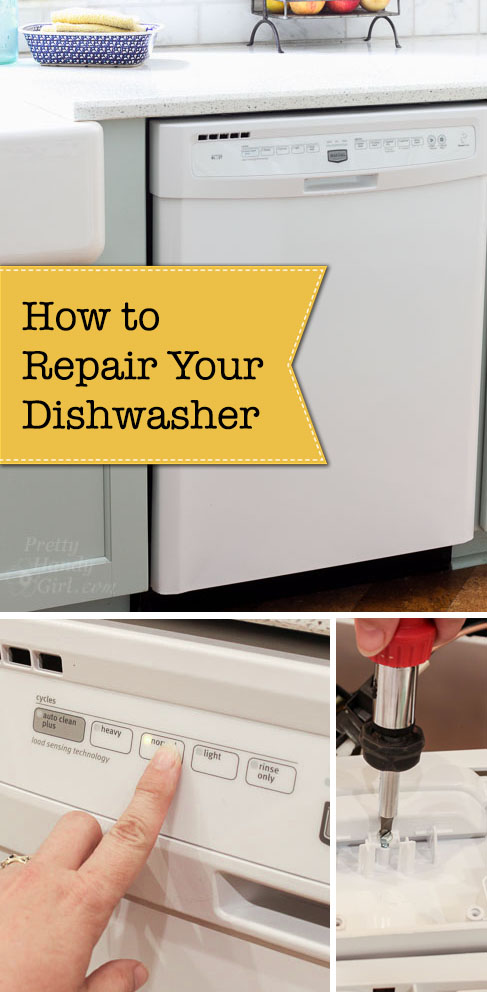
The holidays are here and your kitchen will surely be getting a work out! Now is NOT the time for your dishwasher to break. Recently we found ourselves with a non-functional dishwasher. The control panel buttons stopped working and nothing I did would start it working again. You may recall that I fixed our grill igniter a few months ago by ordering the parts from Sears Parts Direct. As smoothly as that repair went, I knew exactly where to turn to order parts for our dishwasher. Once again I’ve partnered with Sears Parts Direct to bring you this tutorial for Repairing Your Dishwasher – Replacing the Control Panel.

How to Repair a Dishwasher - Control Panel Replacement

Before we start, let’s talk real quick about how much you think it would cost to hire a repairman to come fix your dishwasher. If the average appliance repair person charges $75 per hour, the initial diagnosis visit fee would be $75. When the repair person diagnoses the issue as the control panel, he or she will have to order the part and come back a second time. Automatically you are in for $150 for the two visits. Now, factor in the cost of the part ($125 – $200 depending on any mark up that may be added.) In the end you are looking at repair costs in the range of $300 or more.

At this point many homeowners will make the decision to buy a new dishwasher instead of paying $300. But, what if I told you that you can repair your own dishwasher for only the cost of the part?  You are probably excited to hear that, and are ready to get fixin’.

Diagnosing the Problem:

To diagnose the problem, visit the Sears Parts Direct Repair Center and answer a few questions about your dishwasher problems. You can also view these 5 Easy Dishwasher repairs to see if the symptoms match your problem. You may end up with a few suggested fixes, but hopefully you can narrow down the issue with some logic. For our dishwasher, I knew it was likely a control panel problem since the buttons had been acting up a few weeks before it stopped working all together.

To order the part for your dishwasher, locate the model number. (Hint: It’s usually located inside the door.) If you have any problems locating the model number, Sears Parts Direct has some recommendations. Write down the model number and head over to Sears Parts Direct to order your part.

How to Repair a Dishwasher

After entering the model number, you’ll get a list of parts for your dishwasher. Locate the control panel and order it. The panel will usually arrive in a week. Hopefully you can suffer through hand washing dishes for a few days. (Don’t complain too much, I suffered through it for 4 months when we were without a kitchen.)

How to Replace Your Dishwasher Control Panel:

Preparation: Hooray, you have the part in hand. Now send the spouse away with the kids and tell them you need complete concentration for 2 hours while you repair your dishwasher! (Truth: It’s going to take you less than 10 minutes! So enjoy the rest of your hour and 50 minutes by binge watching Grace & Frankie on Netflix.)

Materials:

How to Repair a Dishwasher

Instructions:

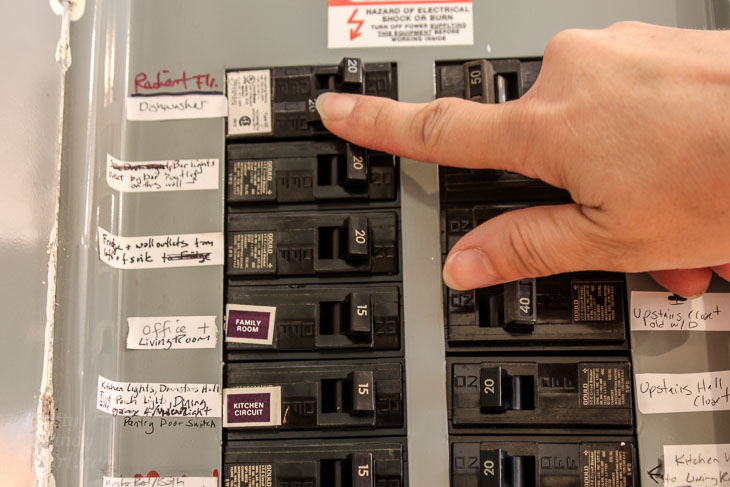
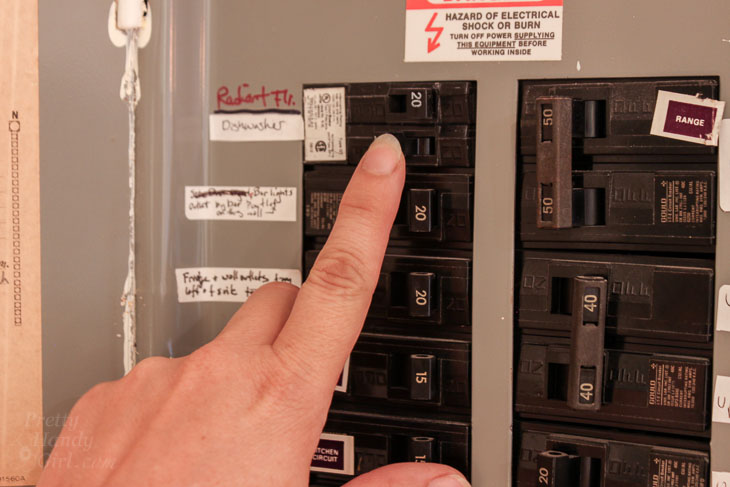
Always start by turning off the circuit breaker for your dishwasher.

How to Repair a Dishwasher

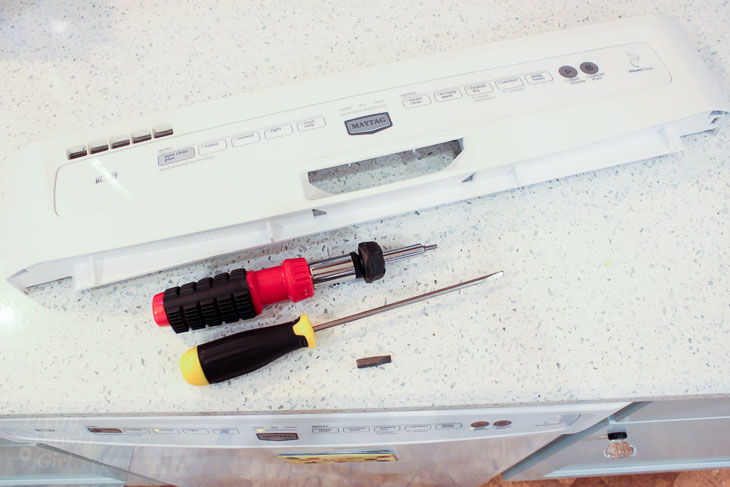
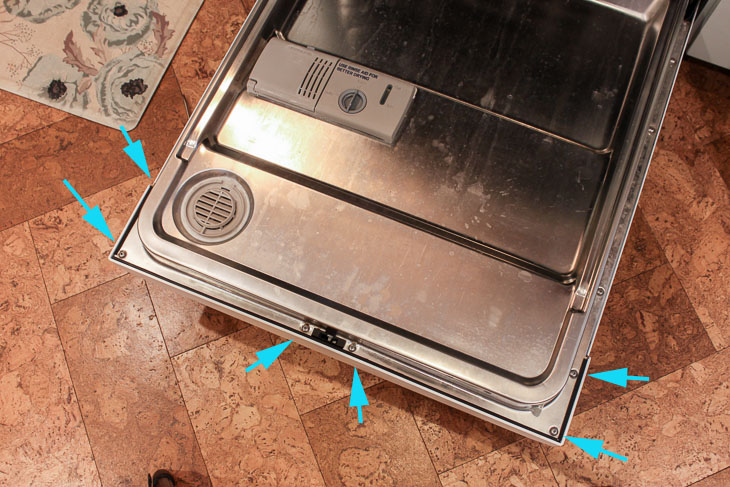
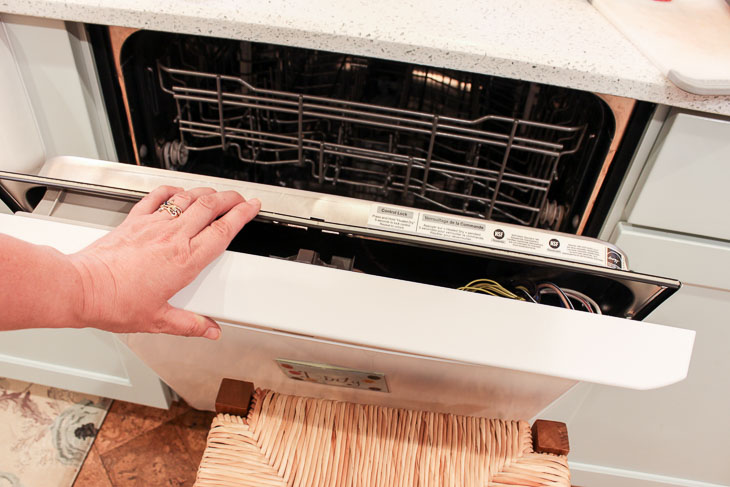
Open your dishwasher and locate the torx screws securing the door panel.

How to Repair a Dishwasher

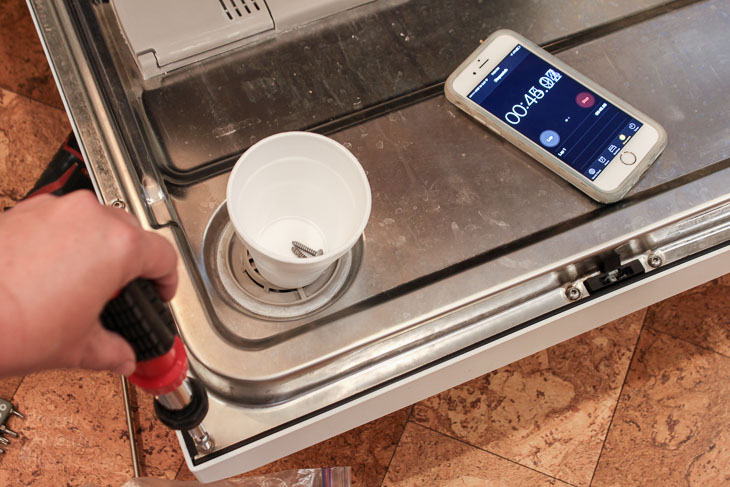
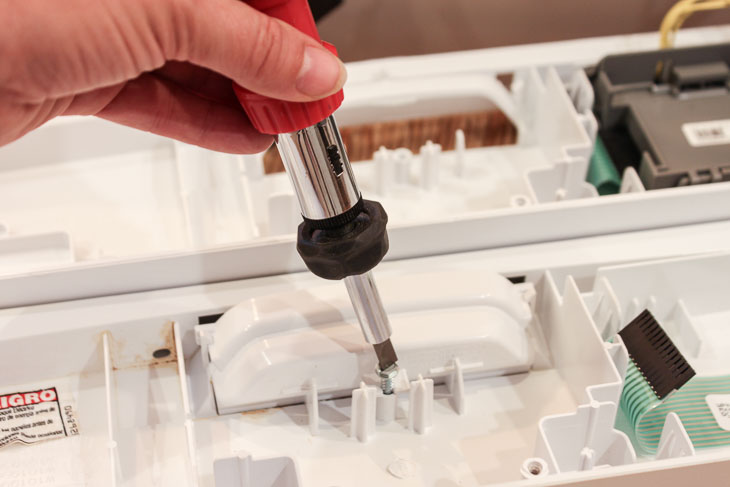
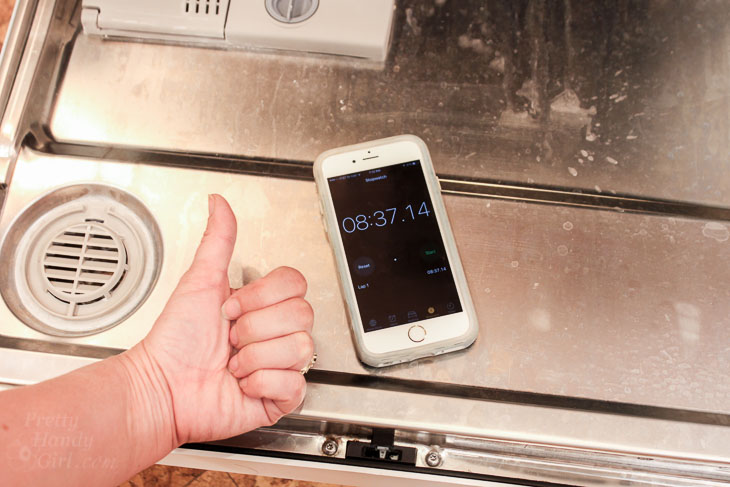
Remove the screws using a torx head screwdriver. Place the screws in a cup or bowl to prevent from losing them. (Yes, I started a timer to show you how long this repair will actually take.)

How to Repair a Dishwasher

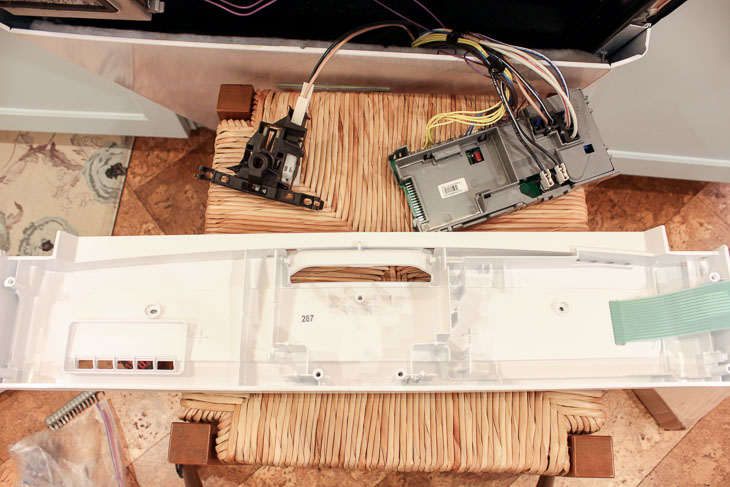
For simplicity, you may be able to remove only the control panel and set it on a stool while keeping all the parts wired.

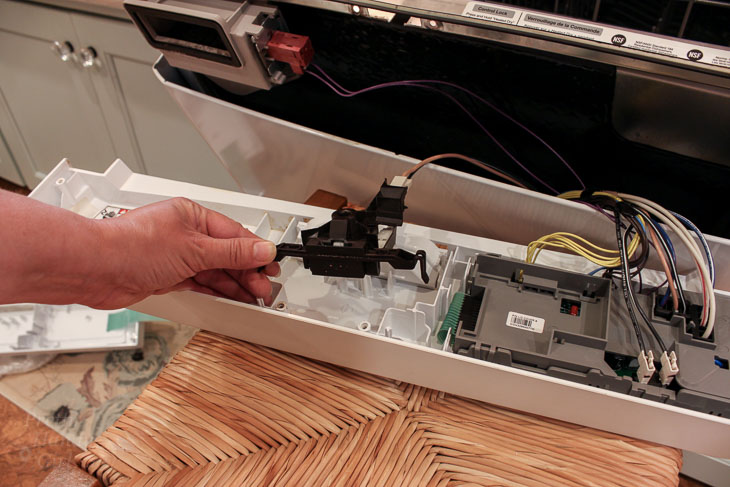
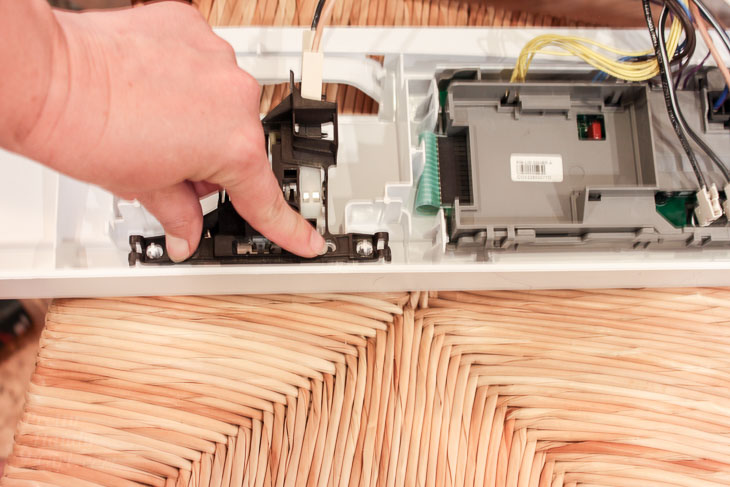
Remove the door latch wiring by lifting it off one side at a time.

How to Repair a Dishwasher

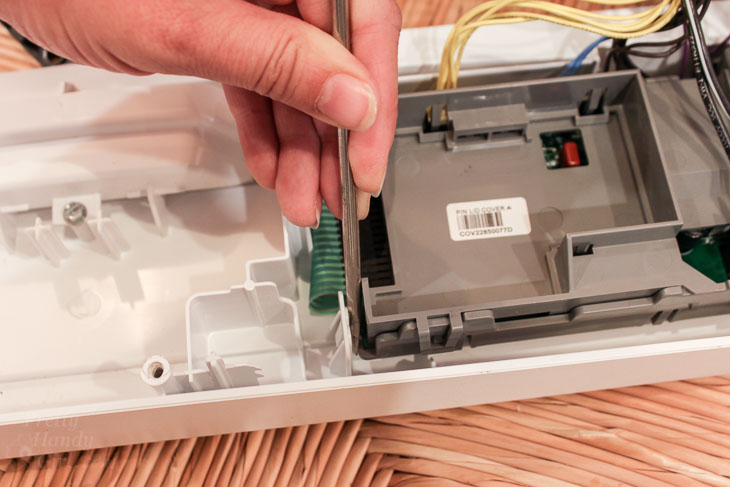
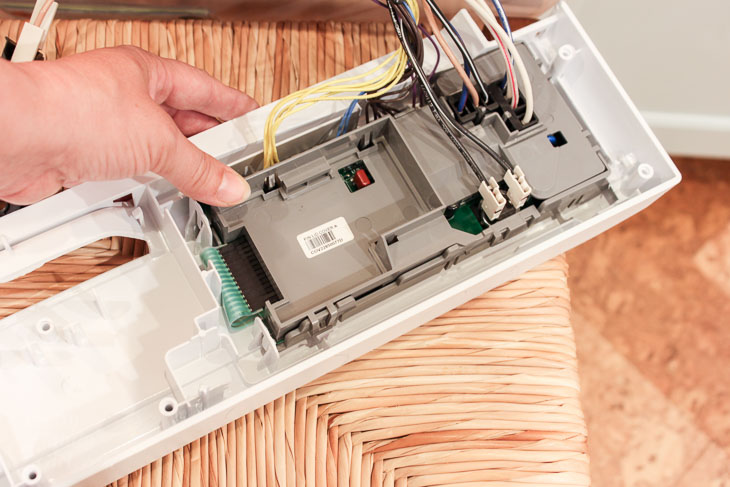
Use a flathead screwdriver to gently release the electronic control board.

How to Repair a Dishwasher

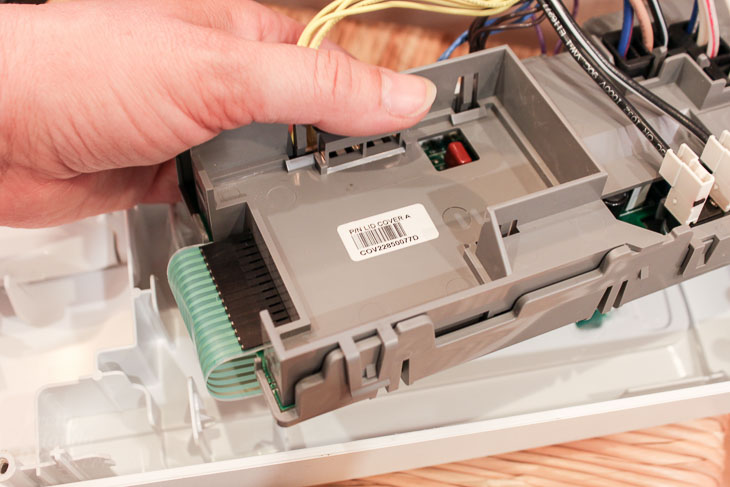
Lift the control board off the control panel.

How to Repair a Dishwasher

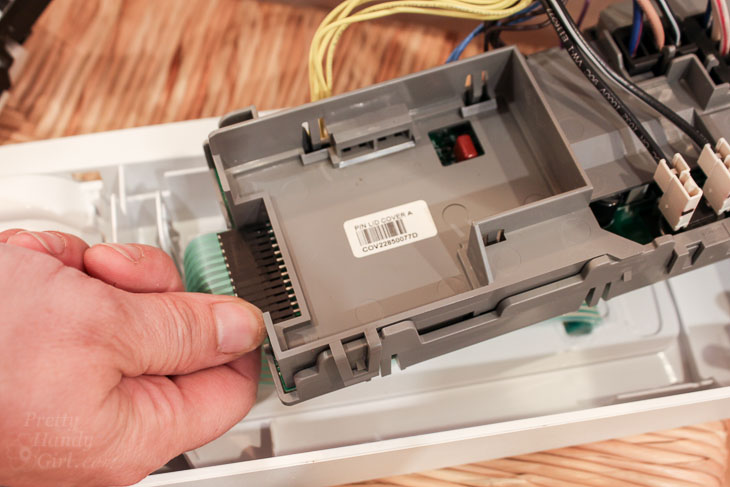
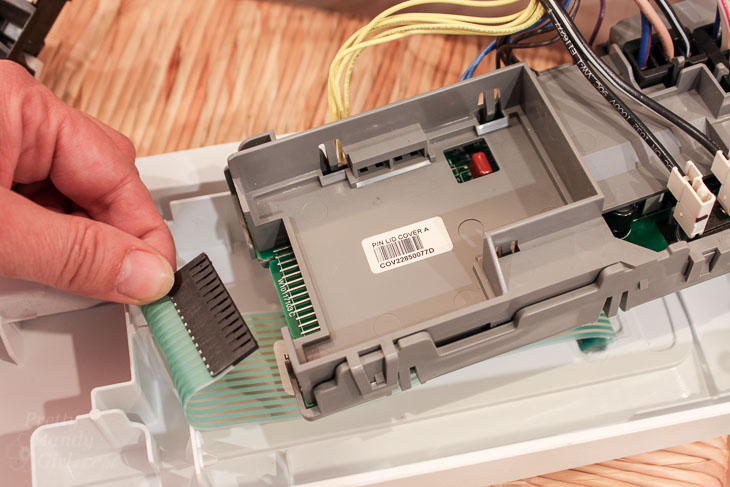
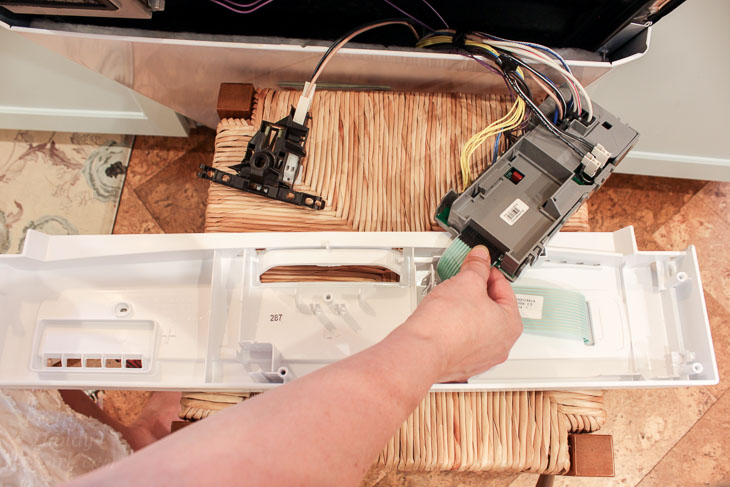
Gently disconnect the control board from the control panel by sliding off the ribbon wiring.

How to Repair a Dishwasher

You might need to wiggle it back and forth a few time to release.

How to Repair a Dishwasher

Check for any other parts that need to be removed from the control panel (like the handle) and remove them.

How to Repair a Dishwasher

Set the new control panel in place of the old panel on the stool.

How to Repair a Dishwasher

Work in the reverse order of the parts removed. Add the handle onto the new control panel.

How to Repair a Dishwasher

Attach the ribbon wiring from the new control panel to the electronic control board.

How to Repair a Dishwasher

Press the control board into place in the new control panel.

How to Repair a Dishwasher

Reset the door latch wiring in place.

How to Repair a Dishwasher

Set the new control panel onto the door.

How to Repair a Dishwasher

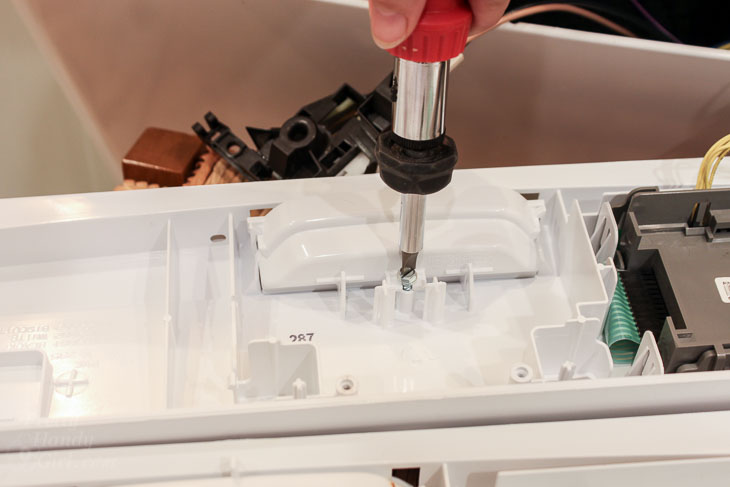
Drive the torx screws in place to secure the new control panel. And, BADABOOM, you are done! Let’s check that timer please: 8 minutes and 37 seconds!

How to Repair a Dishwasher

Go ahead and turn the power back on for your dishwasher.

How to Repair a Dishwasher

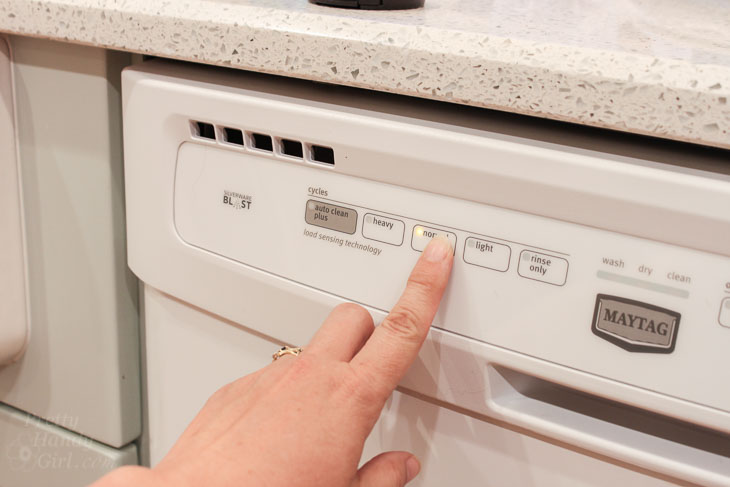
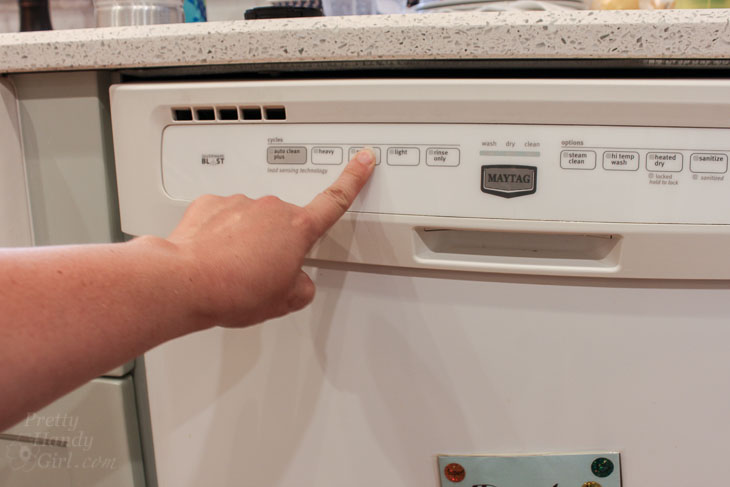
Check the buttons to see if it works. YES! We have a working dishwasher again.

How to Repair a Dishwasher

Didn’t that take a lot less time than you originally thought? Plus you are richer because you didn’t have to pay a repair person or replace your dishwasher! What are you going to do with that money you saved? Why not go ahead and buy yourself that present you really want.

Now that your dishwasher is working, did you know there is a right way to load your dishwasher? Or that there are items you should NEVER wash in your dishwasher?

If you haven’t already, you really need to check out SearsPartsDirect.com to find that part to fix all your broken appliances and more! Follow Sears Parts Direct on Facebook, Twitter, or YouTube to see a variety of repair articles and videos.

How to Repair a Dishwasher

I’m ready for the holiday baking rush now that our dishwasher is working, how about you? I’m also feeling relieved knowing that when my Mom visits for Christmas, she won’t feel guilty about our broken dishwasher and try to wash all our dishes by hand. Moms will always be moms, won’t they?!

Have a Happy Holiday y’all! I’m off to clean the baseboards around our dishwasher. I’m so embarrassed to see dirt and dog hair in that photo above. Ack!

Save your friends $$$ on dishwasher repairs by pinning this image:

How to Repair a Dishwasher

Disclosure: This is a sponsored post for Sears Parts Direct. I was not told what to write. All opinions are my own. I was compensated for my time and efforts to create this tutorial. I am very particular about the brands I represent. Because I value your trust, you will always be notified when you are reading a sponsored post on PrettyHandyGirl.com.

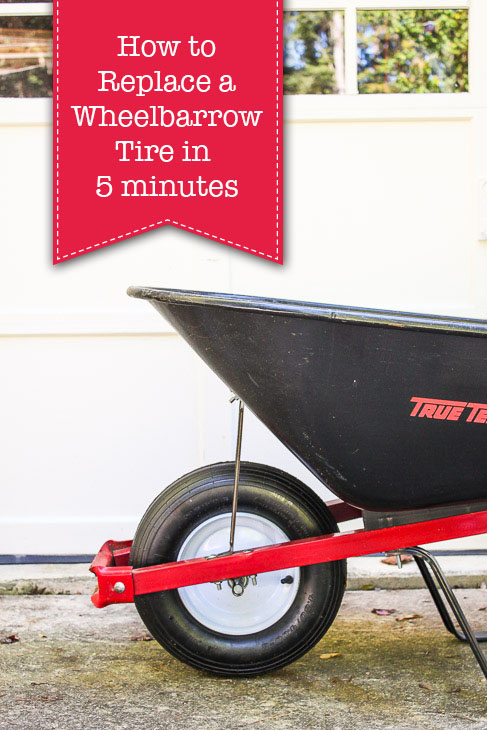
How to Replace a Wheelbarrow Tire in 5 Minutes | Pretty Handy Girl

How to Replace a Wheelbarrow Tire in 5 Minutes | Pretty Handy Girl

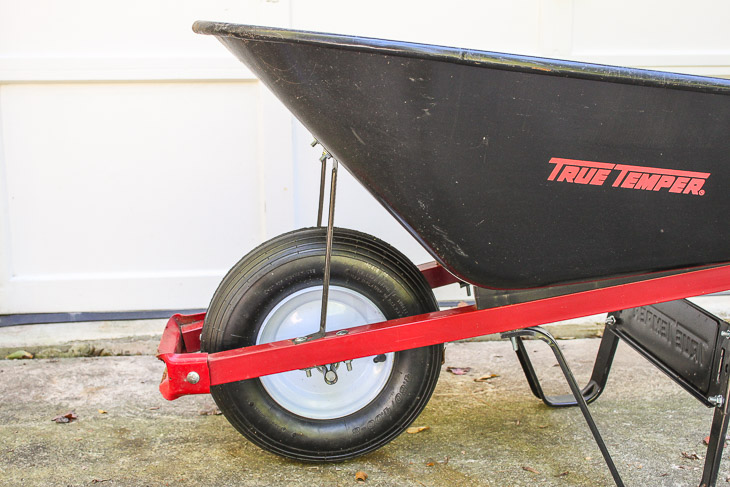
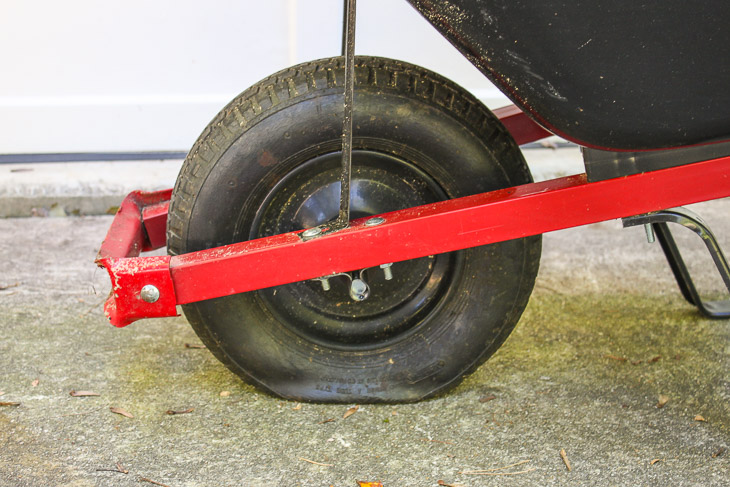
What happens when you are ready to do some work in the yard and discover your wheelbarrow has a flat tire? You pump it up. But, then you realize the tire is dry-rotted and no air will stay in the wheel. Trust me when I say you don’t want to muscle the tire off to replace it (because that is a pain in the “you know what” and it’s much faster to replace the whole wheel.) Have no fear, I have a tutorial for How to Replace a Wheelbarrow Tire in 5 Minutes!

How to Replace a Wheelbarrow Wheel in 5 Minutes | Pretty Handy Girl

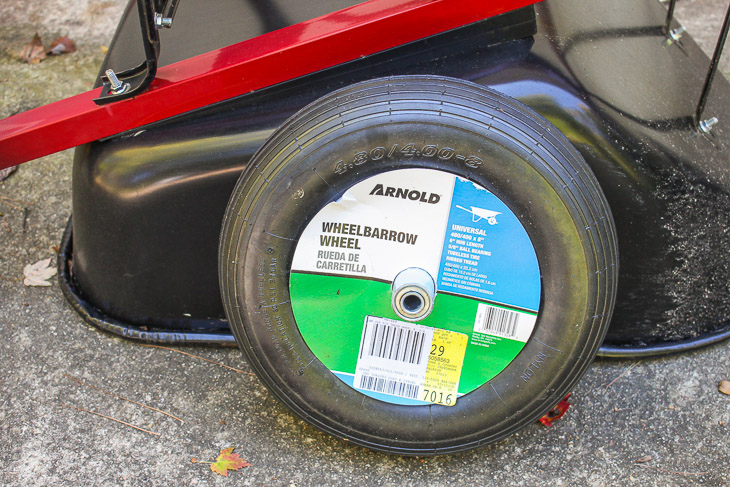
Grab two items and let’s get to it.

(I’ve included affiliate links for your convenience. I earn a small percentage from a purchase using these links. There is no additional cost to you. You can read more about affiliate links here.)

Materials:

How to Replace a Wheelbarrow Wheel in 5 Minutes | Pretty Handy Girl

Instructions:

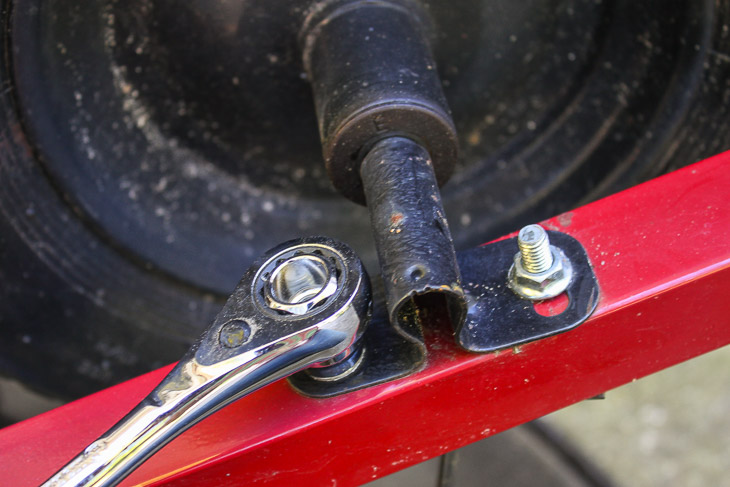
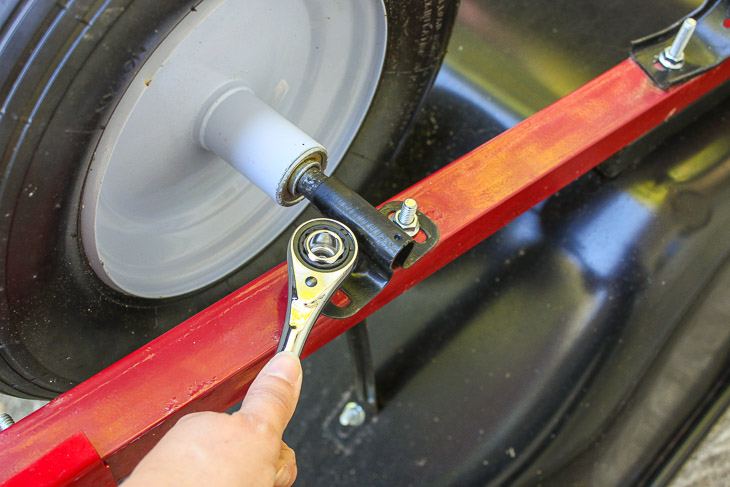
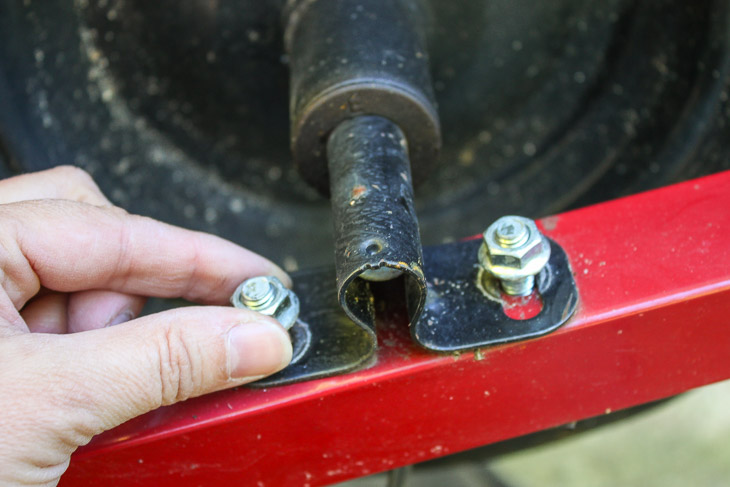
Flip the wheelbarrow over and loosen the nuts on the axle bracket.

How to Replace a Wheelbarrow Wheel in 5 Minutes | Pretty Handy Girl

Remove the nuts from the bolts. Repeat for the opposite bracket.

How to Replace a Wheelbarrow Wheel in 5 Minutes | Pretty Handy Girl

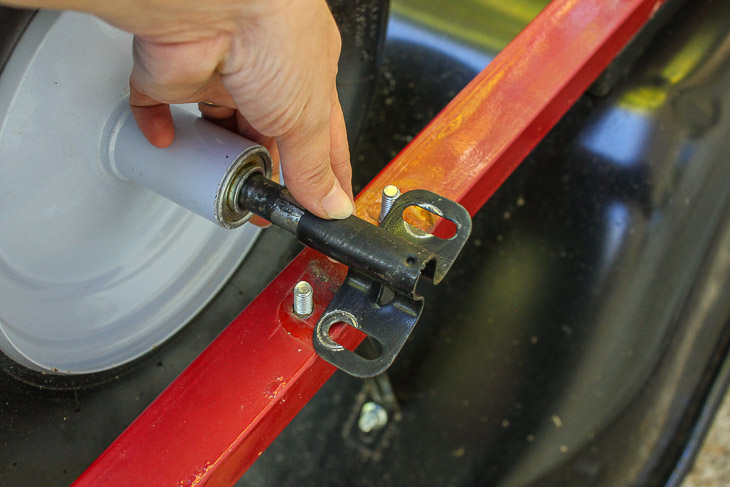
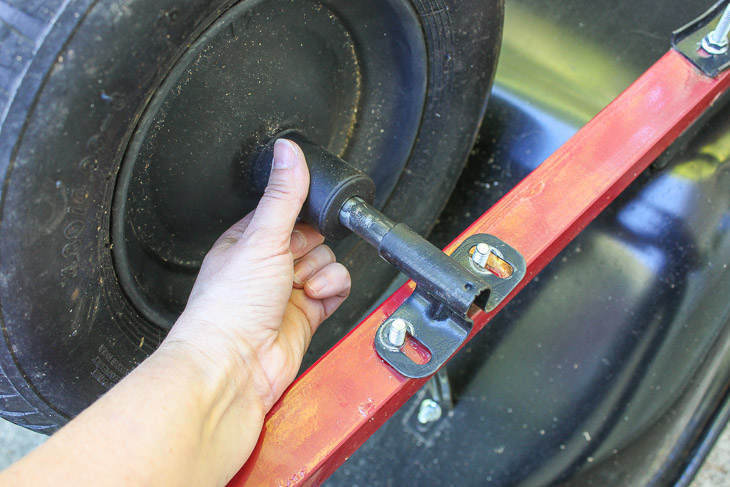
Lift the wheel off the wheelbarrow frame.

How to Replace a Wheelbarrow Wheel in 5 Minutes | Pretty Handy Girl
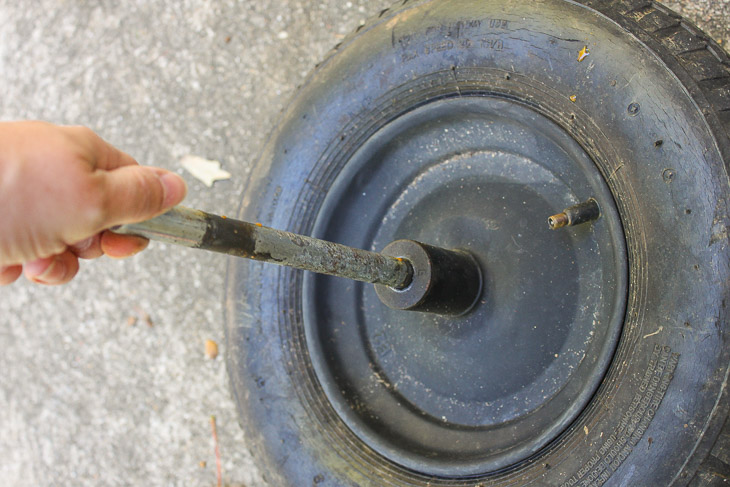
Remove the axle from the old wheel.

How to Replace a Wheelbarrow Wheel in 5 Minutes | Pretty Handy Girl

Slide the new wheel onto the axle.

How to Replace a Wheelbarrow Wheel in 5 Minutes | Pretty Handy Girl

Set the wheel back onto the frame, replace the bracket and the nuts. Tighten the nuts.

How to Replace a Wheelbarrow Wheel in 5 Minutes | Pretty Handy Girl

Flip the wheelbarrow back upright and get to work!

How to Replace a Wheelbarrow Wheel in 5 Minutes | Pretty Handy Girl

And that’s the easiest way to replace a wheelbarrow flat tire in 5 minutes or less.

PHGFancySign

4 Ways to Remove a Broken Light Bulb | Pretty Handy Girl

4 Ways to Remove a Broken Light Bulb | Pretty Handy Girl

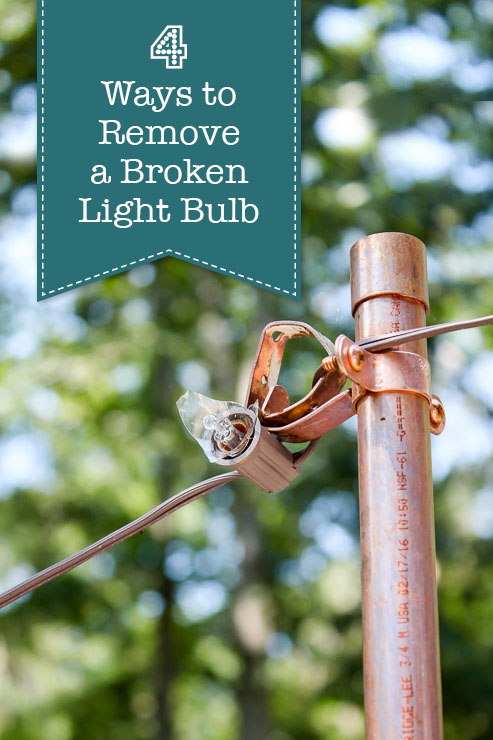
Have you ever found yourself staring down the base of a broken light bulb? You must resist the temptation to reach up and unscrew it with your fingers. Not a smart idea. Instead you can safely remove it using one of these 4 Ways to Remove a Broken Light Bulb.

Let’s get to it! Before you begin, make sure the light switch is turned off or the power has been turned off to the light.

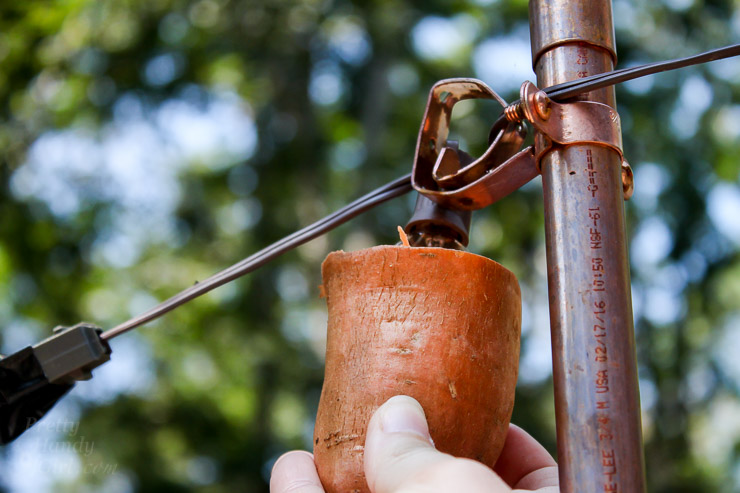
The Potato Method:

4 Ways to Remove a Broken Light Bulb | Pretty Handy Girl

The old method that has always been touted as the best way to remove a broken light bulb has been to use a potato. Push the potato onto the broken shards and turn clockwise to remove. This works well if there’s enough shards, but if the glass is gone you’ll need to try another technique.

The Sponge Method:

4 Ways to Remove a Broken Light Bulb | Pretty Handy Girl

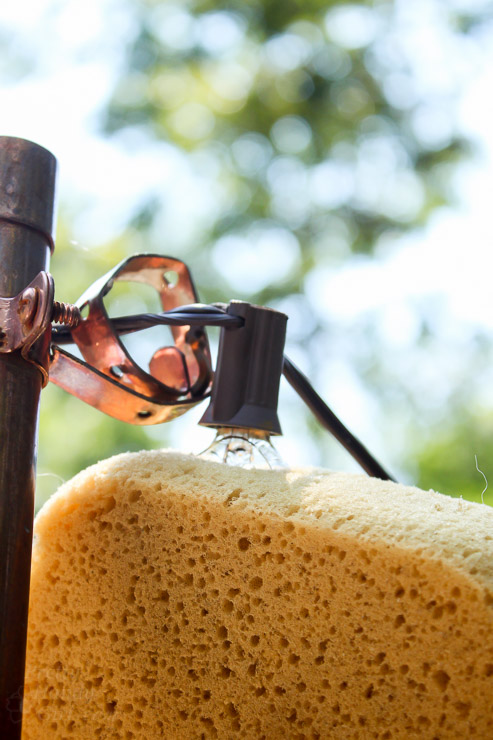
Similar to the potato method, if you have some shards showing, simply push the sponge onto the broken bulb and turn counter-clockwise. Depending on how tight the bulb is, the sponge may just tear.

The Newspaper Method:

4 Ways to Remove a Broken Light Bulb | Pretty Handy Girl

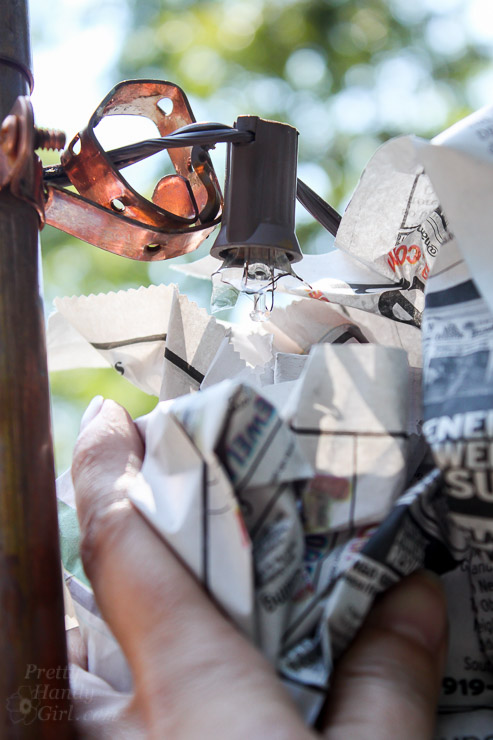
The newspaper trick works well for bulbs that have short or long shards. Ball up a wad of newspaper and grasp the bulb through the newspaper. Then turn counter-clockwise to unscrew the bulb. Then ball up the glass inside the newspaper and discard.

The Needle-nose Pliers Method:

4 Ways to Remove a Broken Light Bulb | Pretty Handy Girl

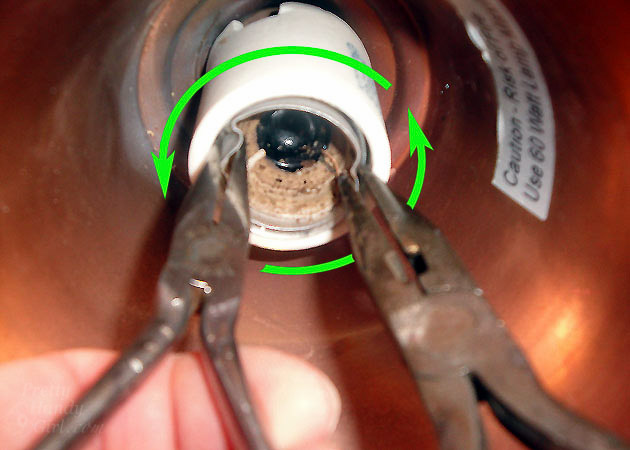
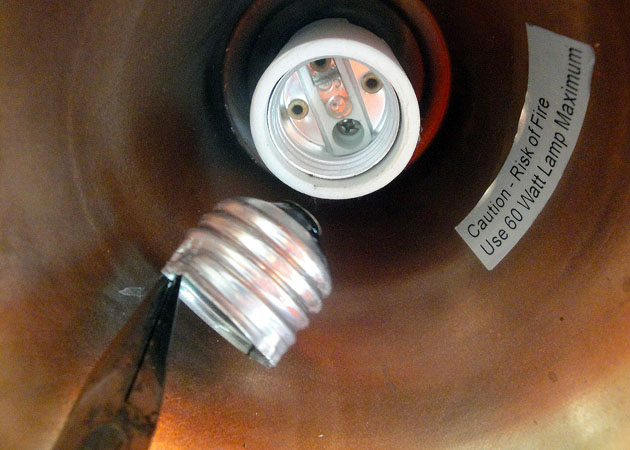
Finally, if all else fails (or you don’t have any shards), you can use the needle-nose pliers method. You must remove any glass carefully with the pliers. Then grasp opposite sides of the bulb base. Gently twist each base to bend the metal. Then turn both pliers to remove the broken bulb base.

Removed-bulb-end

Hope these tricks help! If you have any other tricks for removing a broken light bulb, I’d love to hear them.

PHGFancySign

Like this tip? You might find more useful tips in my 31 Days of Handy Home Fixes!