I have a new update for you on Millie’s Remodel. Join me as I uncover the damaged wood floors and ask the question: Can We Save these Wood Floors?

can these wood floors be saved?

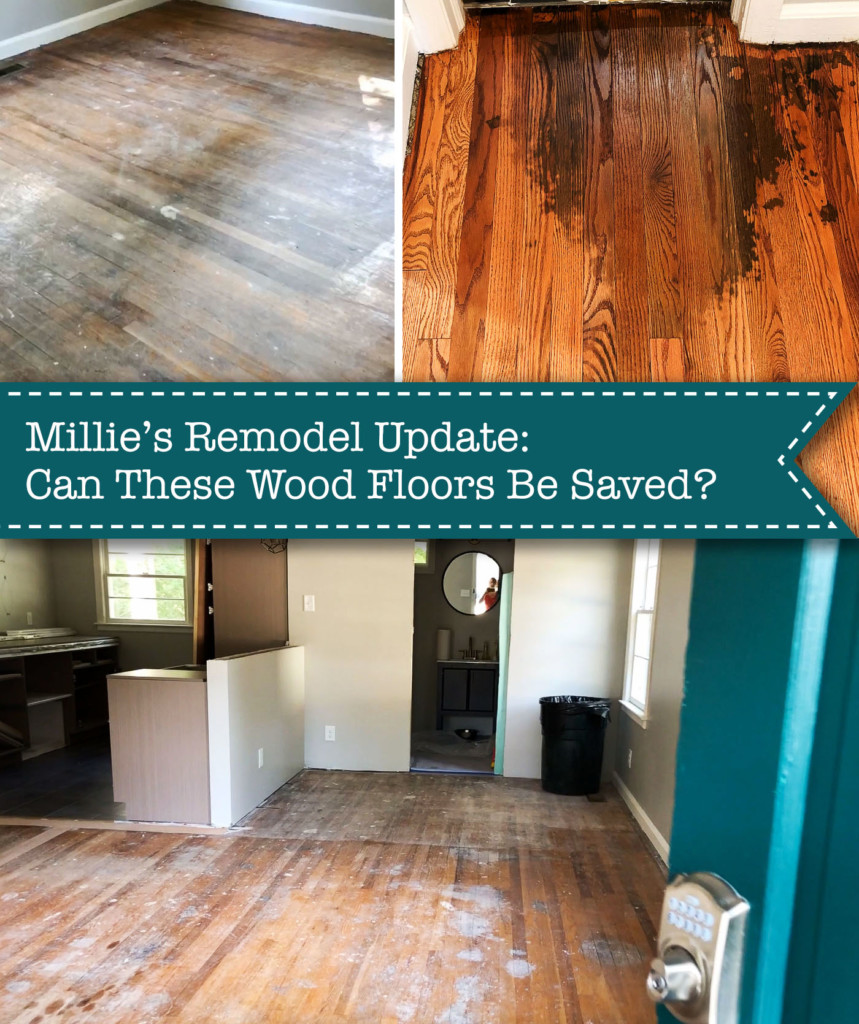
Millie’s Remodel: Can We Save These Wood Floors?

I know it’s been a minute since you got the last update, but unfortunately, my husband contracted COVID and it was the scariest two weeks of my life while I tried to prevent the boys and I from getting sick. While I cared for my husband and worried about his health, I documented his symptoms and what it was like caring for someone with COVID in my Instagram highlights. Unfortunately, I didn’t start saving the stories until a few days in. Regardless, it should give you a good idea what it was like caring for someone who has COVID and how his symptoms progressed.

Can We Save These Wood Floors:

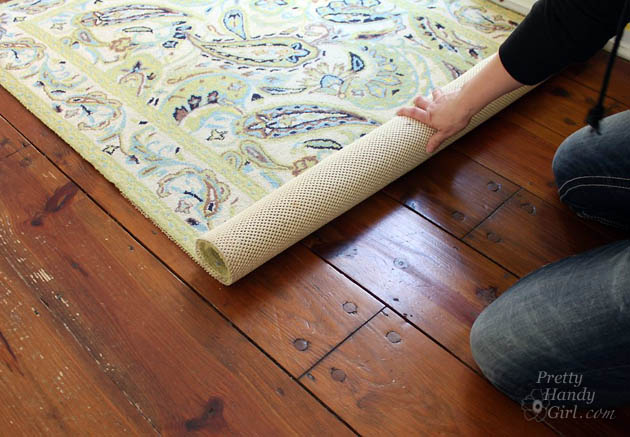
Now back to Millie’s Remodel, the real star of this show. When I purchased the house, it had brand new brown berber carpeting in every room except the kitchen.

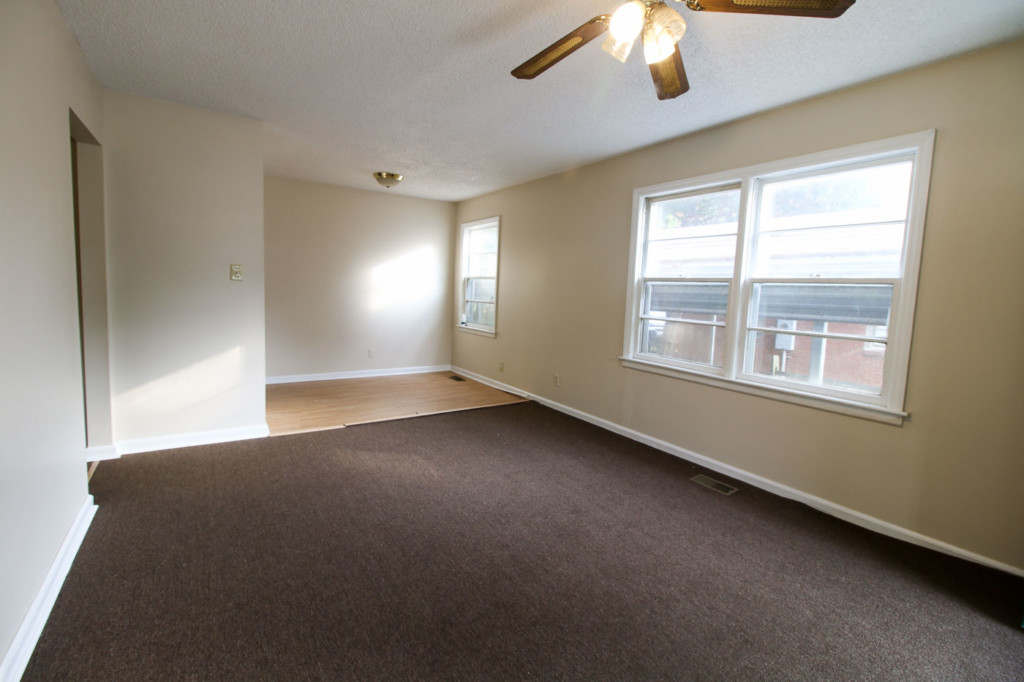
Crazy enough, the carpet wasn’t professionally installed, it was cut and the shoe molding was tacked on top of it. Which made it super easy to remove and allowed me to see that there were wood floors underneath before I bought the house.

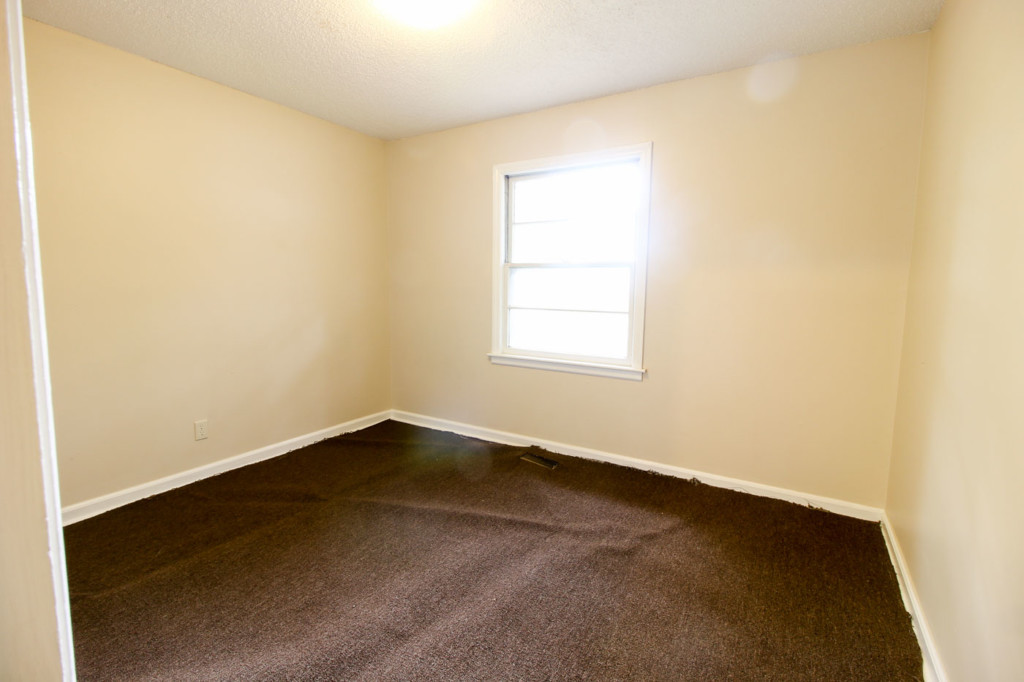
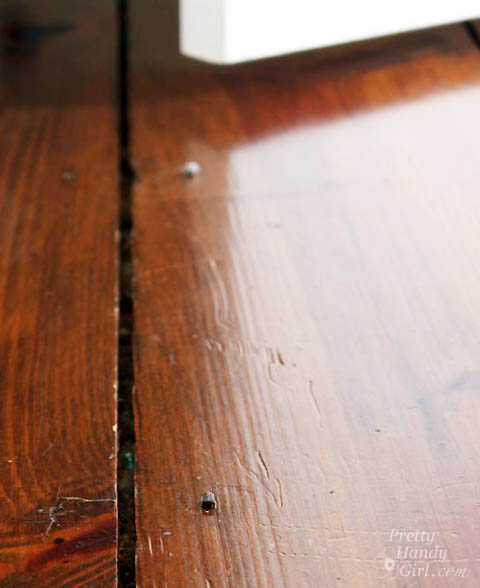
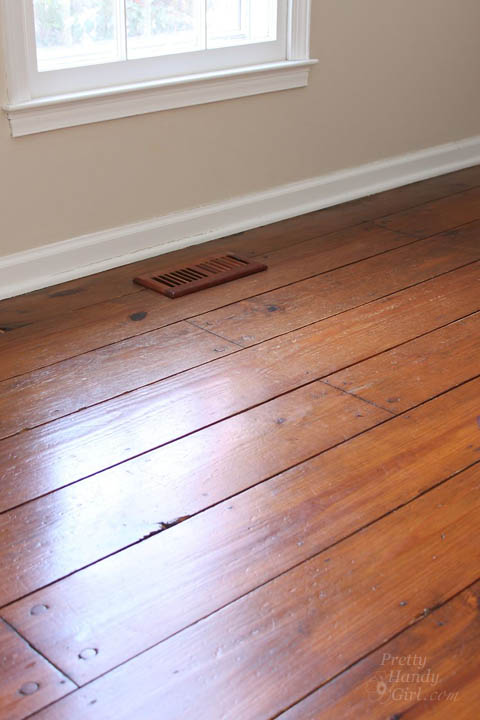
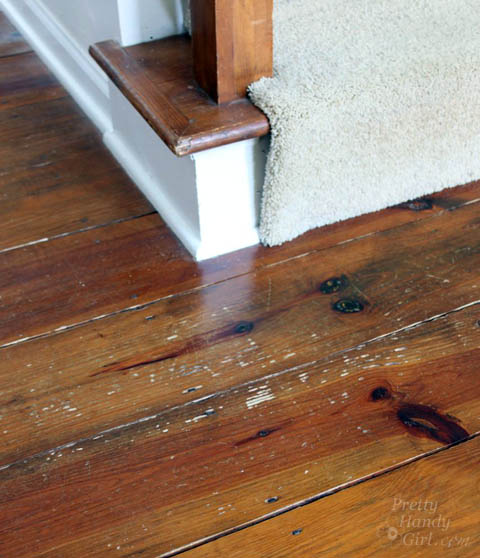
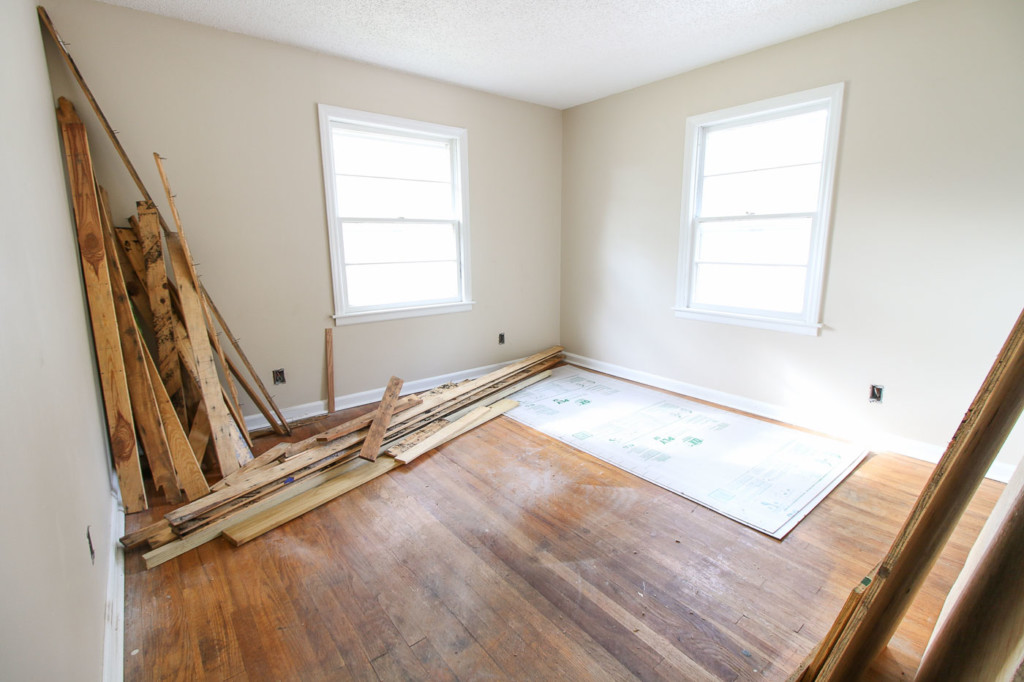
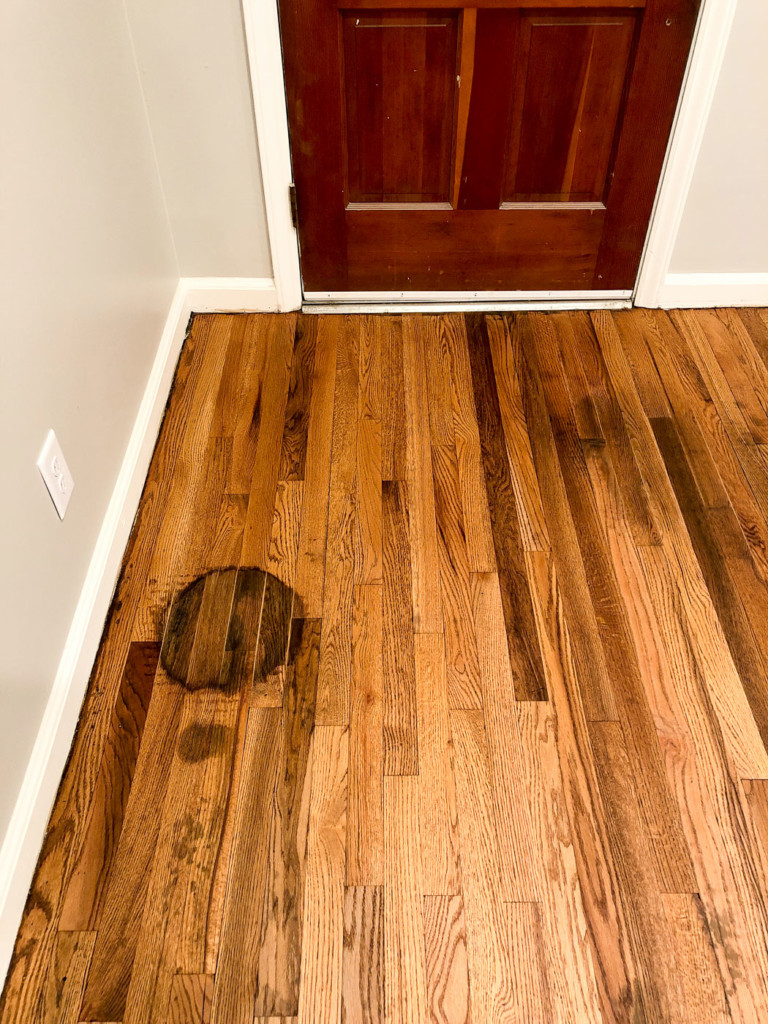
Although I saw some of the floor before closing, I had no idea what type of shape they were in. What lurked underneath the carpet were real wood floors in REAL BAD SHAPE.

Lots of stains and even a nail polish spill (not blood!)

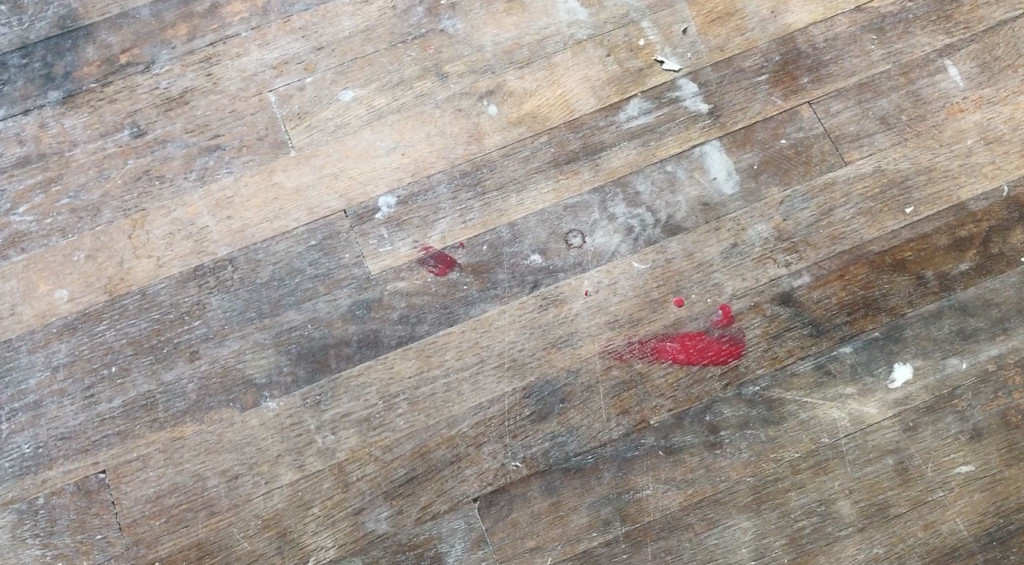
A spot in front of the bathroom had the worst damage, but my floor refinisher felt confident it would sand out.

This bedroom had the least damage, but this room had a horrible smoky/fishy odor. We think the previous tenant was a cigarillo smoker based on all the plastic tips I found in the backyard.

salvaged materials in back bedroom

Patching the Wood Flooring:

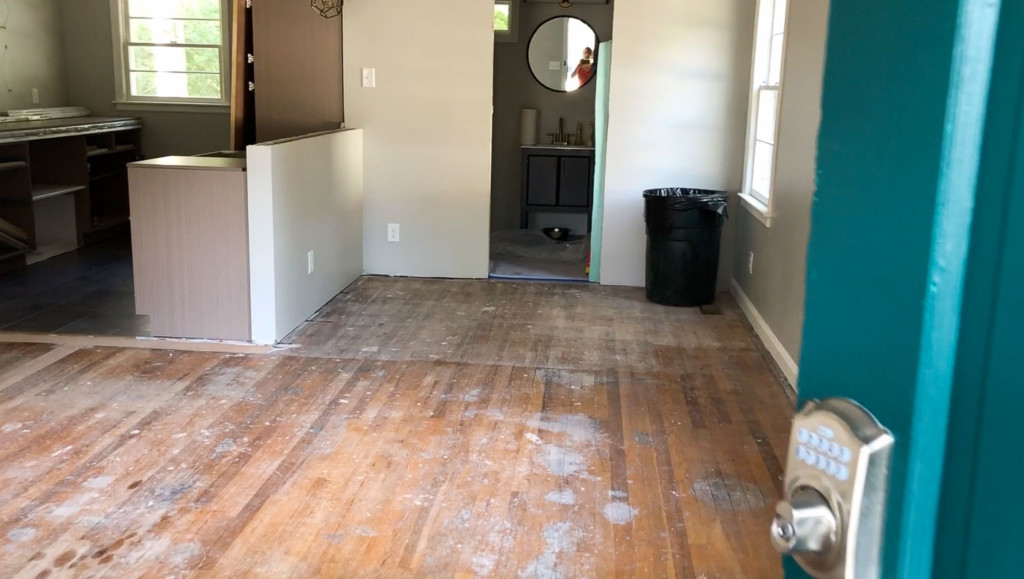
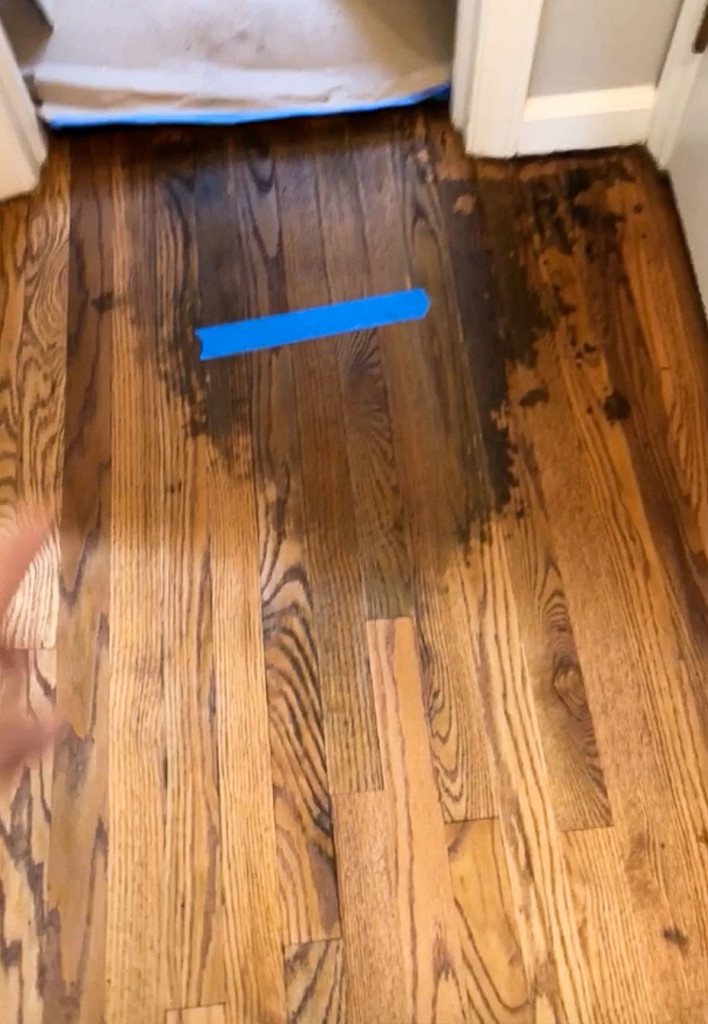
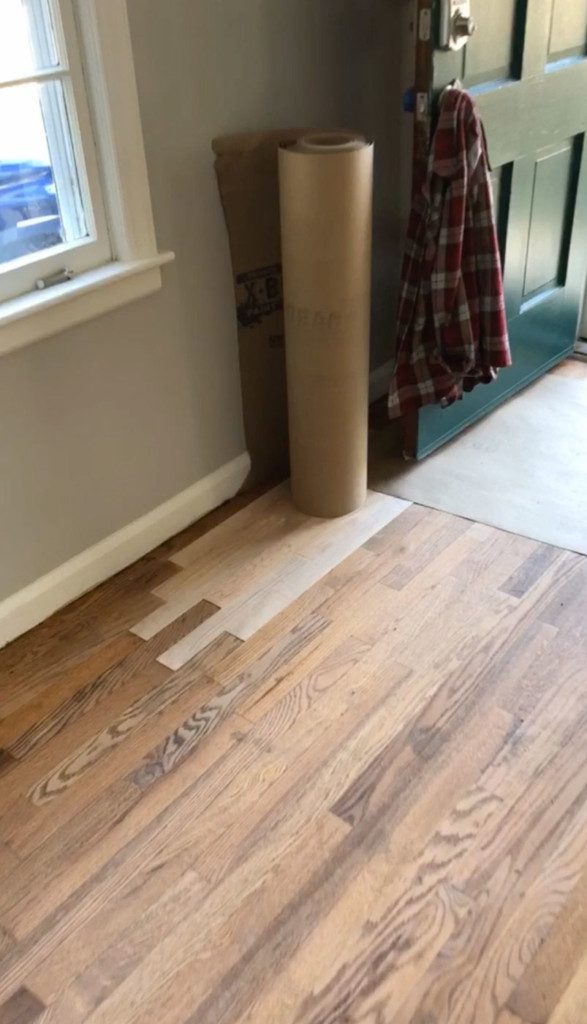
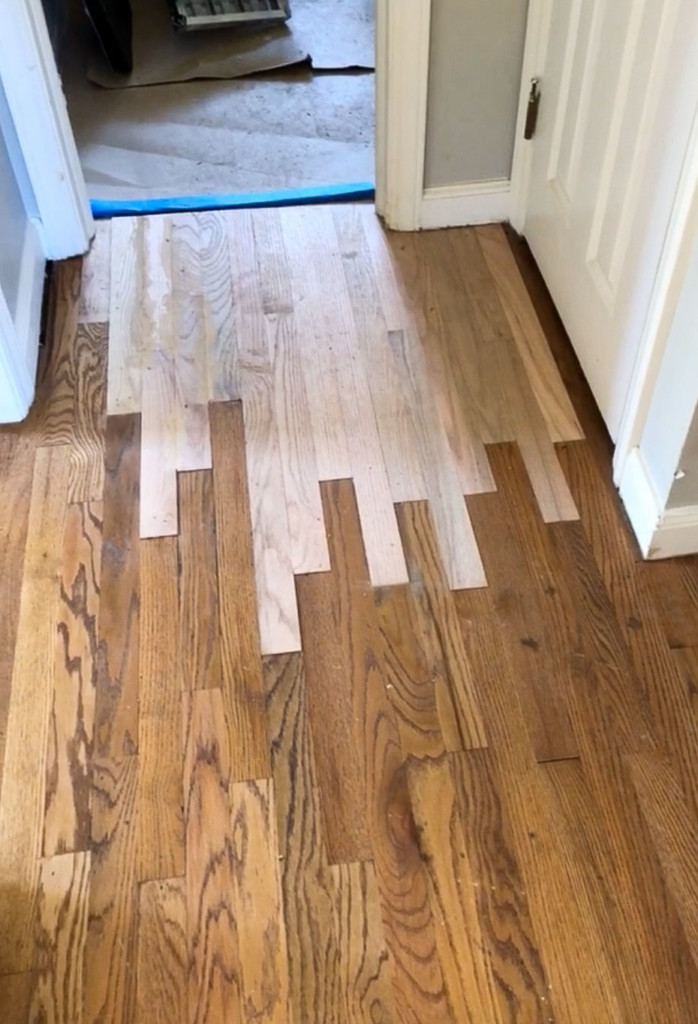
Before the floors were scheduled to be sanded, my wood floor contractor sent out his “guy” to patch the plywood in the hallway and the area where I removed a doorway to open up the living room more.

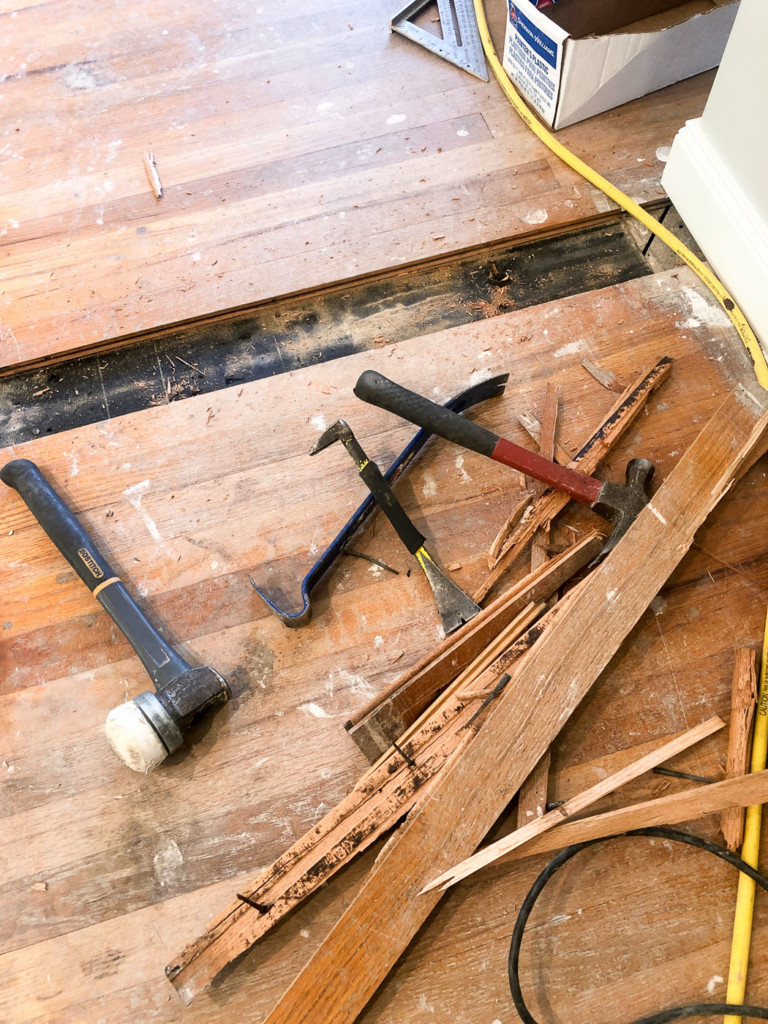
Here’s where that plywood was in the hallway.

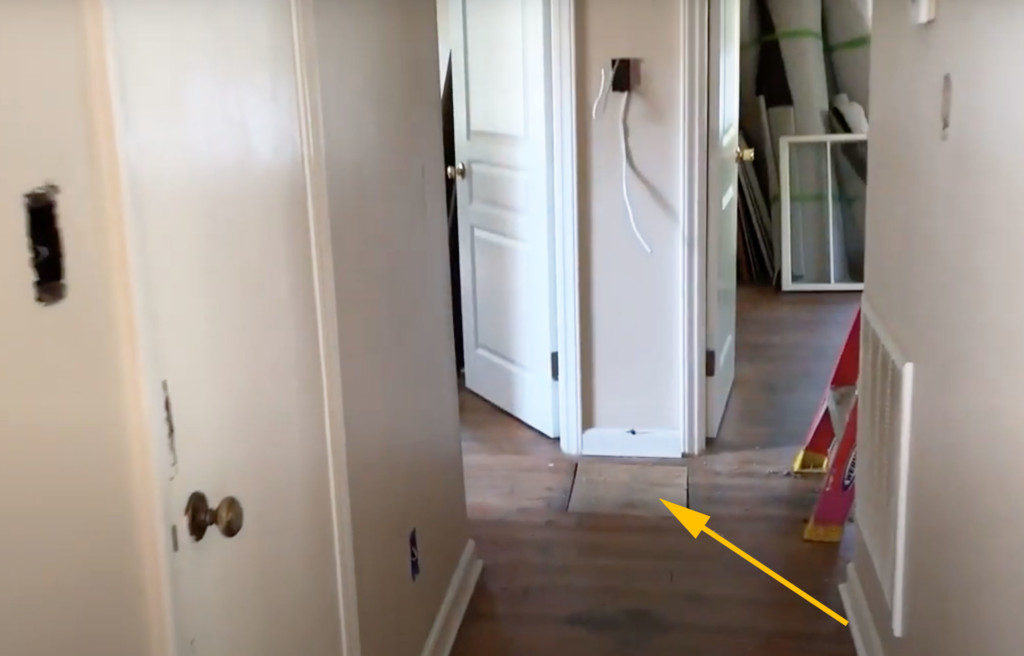
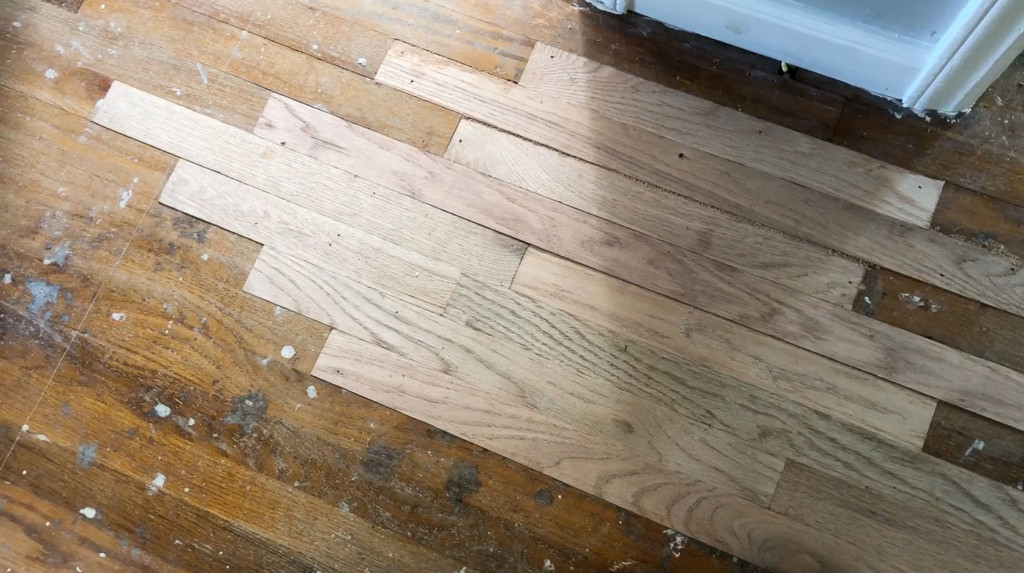
He was able to match the oak flooring and feather in some replacement boards.

And then the floor refinishing came to a screeching halt. This was one of the most frustrating contractors I’ve ever dealt with! (I won’t share the name of the refinisher I worked with. But, I will NEVER work with him again! If you live in the Raleigh/Durham area and want to know who I recommend and who to steer clear of, just shoot me an email.)

Rant Warning:

The flooring contractor promised that his guy would come to sand the floors in the evening after I left. This should have been the first red flag, as most reputable companies send their employees during the day. But, I was just happy to have my job scheduled for refinishing.

Every morning I’d show up at the house expecting to see progress made on the floors only to be let down when I realized nothing had changed. I’d text the refinisher and he’d ultimately get back to me after several hours or sometimes a day later (again, another red flag.)

This back and forth of texts and promises went on for two weeks! For 10 days I would show up and find nothing done. But, the biggest issue was all the time I spent stashing everything into the bathrooms and then emptying them in the morning so I could continue tiling in there.

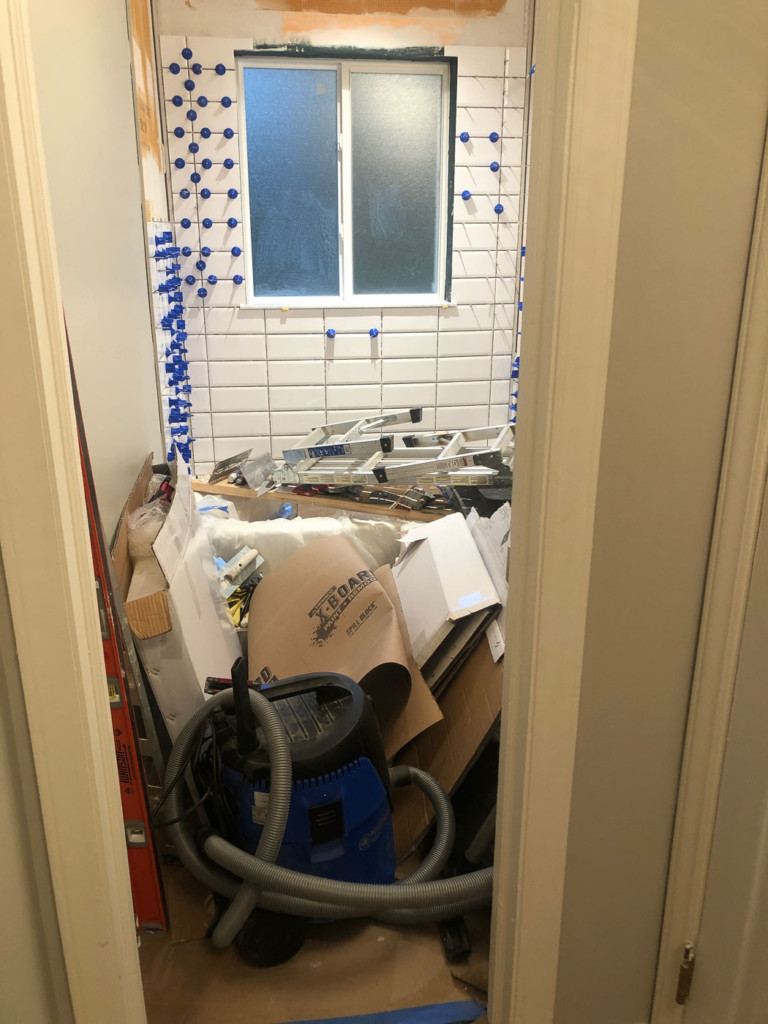
This might seem like a minor inconvenience, but I spent 20 minutes out of my day each day loading and unloading tools and tiles. Add that up over 10 days and that was over 3 hours of time I wasted loading and unloading all my equipment.

Finally, I told the flooring contractor I was headed out of town for a few days and I needed the floors to get done while I was gone. I was fed up.

Making the Stain Decision:

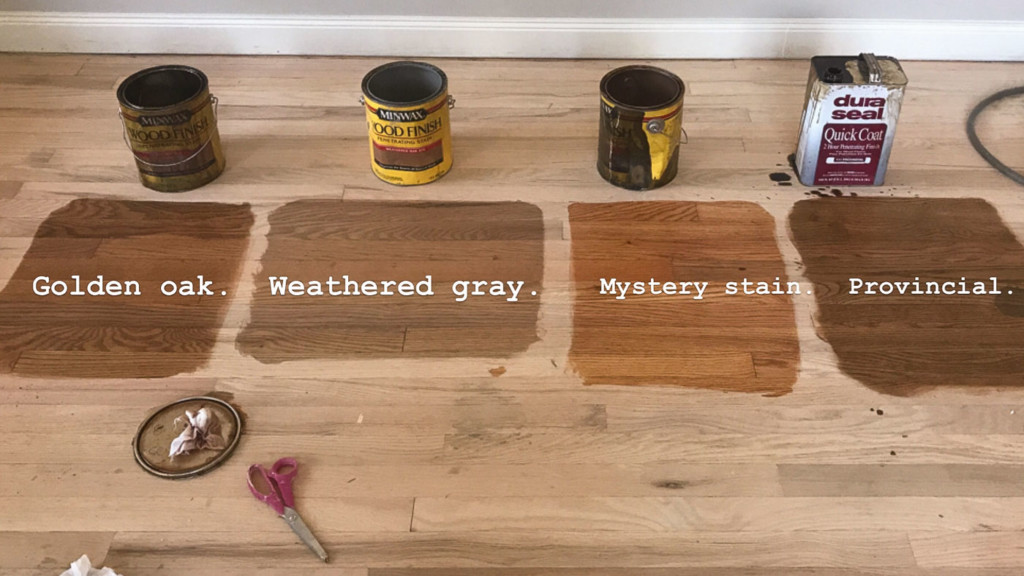
Finally, the floors were sanded while I was away. The floor refinisher sent me a picture of the floors after sanding and offered me a few stain colors to choose from. What a kind thing for him to do, right?

Umm, yes, except he didn’t tell me what the stain colors were! I can’t even properly express my frustration. He sent me the photo above with no stain color names. I was able to figure them out by zooming into the picture (except the “mystery stain” color.) He never got back to me with colors. For your convenience here is what I was able to decipher:

How I Choose Stain and Paint Colors:

I’m very methodical when I choose paint or stain colors. Usually, I look at the colors in the space for at least a week. But, in this case, I needed to make a decision quickly. Luckily I have a friend who had recently used Golden Oak and told me to search for pictures of it online. It seemed like the perfect mid-range stain that would go well with the mid-century vibe I was using in Millie’s Remodel. Although I liked the weathered gray, it was too gray for this house. And provincial was darker than I wanted the floors to be. Finally, I texted my flooring contractor and told him to go with golden oak. I said a little prayer that they would be finished when I got back to Raleigh.

Wood Floor Stains:

When I got back, the floors had finally been stained! Hooray, but also not good. Most of the house looked pretty good. There were some mild stains still showing, but I was okay with that. In my mind, it’s okay when a 63-year-old house has some signs of age.

I never expected perfection, but in several areas, there were very dark stains. I was starting to doubt that the wood floors could be saved.

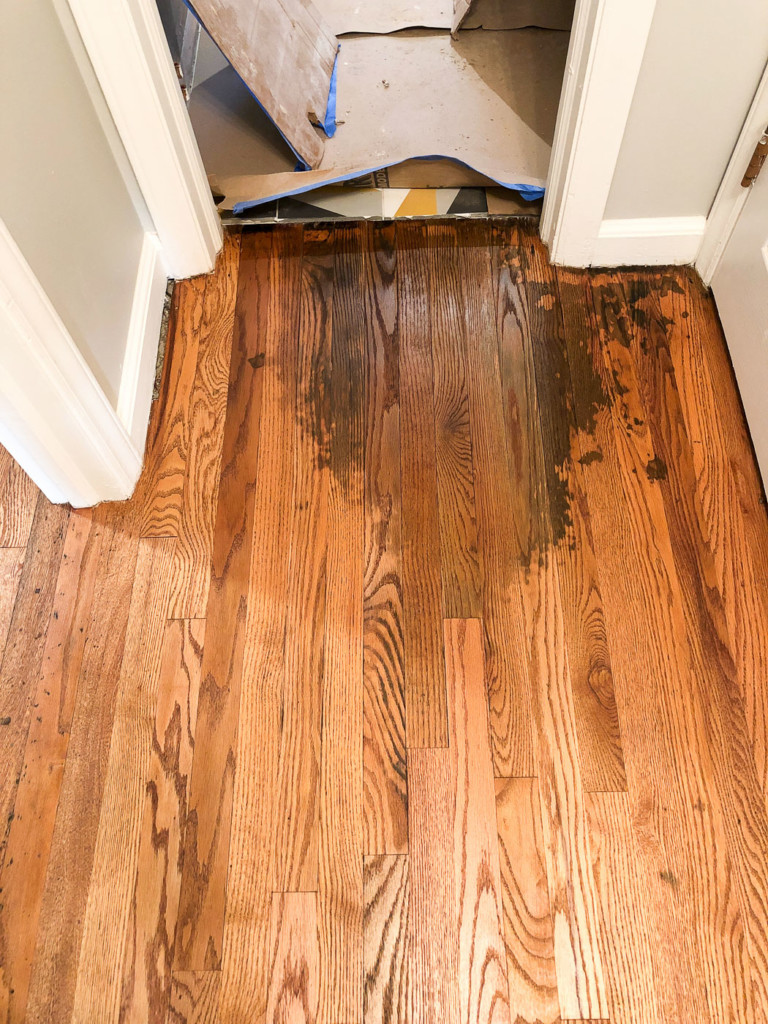
There was a huge water stain outside the bathroom. And another bad stain near the front door.

I was disappointed the floor refinisher didn’t call me to suggest we go with a darker stain. I tried to call him and ended up hearing back the next day. He said his guy would come to patch the really bad spots. This was a great solution and luckily he was able to come back within a few days to patch the floor where the bad stains were.

The spot near the bathroom needed the most patching.

Never Pay a Contractor Until the Job is Complete:

This is the point where suddenly my floor contractor was super communicative! I got multiple texts saying he wanted to come by and pick up a check to pay his guy. I told him not until the job was complete. He was so persistent, but luckily I didn’t give in.

For days he hounded me for payment. This is a huge red flag! A contractor who can’t pay their “guys” because they rely on the income from one job to the next is not managing their business well.

Luckily, my stubbornness paid off, and the floors were finished quickly so he could get paid.

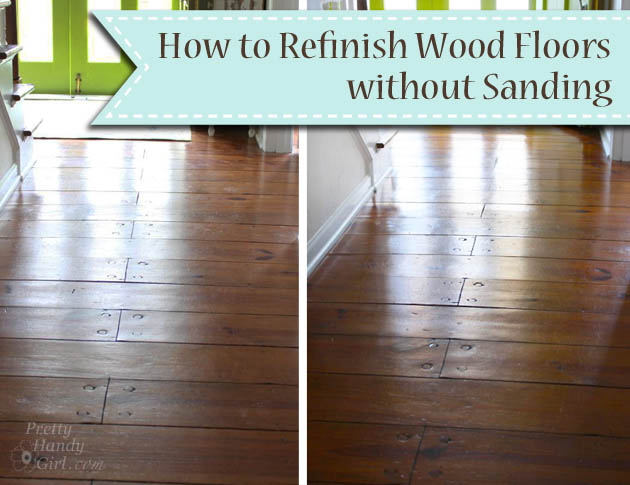
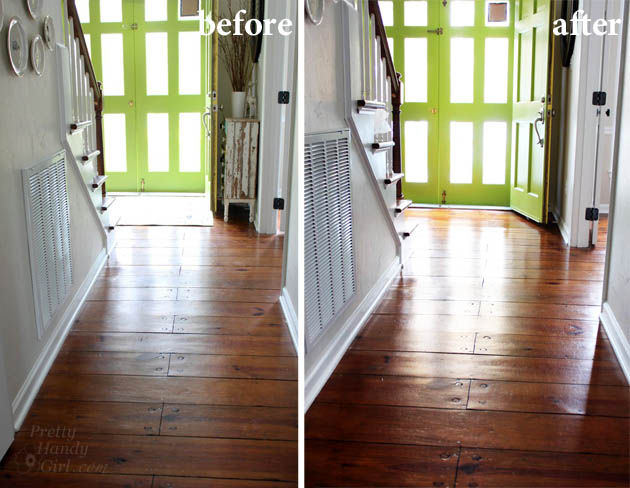
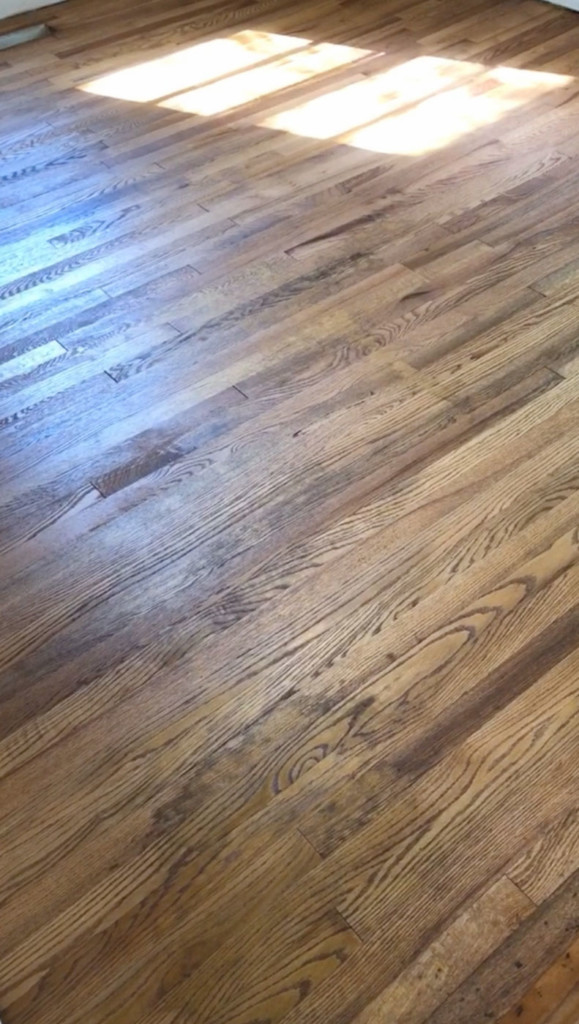
Could These Wood Floors Be Saved?

The answer is a resounding YES! Feast your eyes on these beautiful original 1957 wood floors refinished with Minwax Golden Oak.

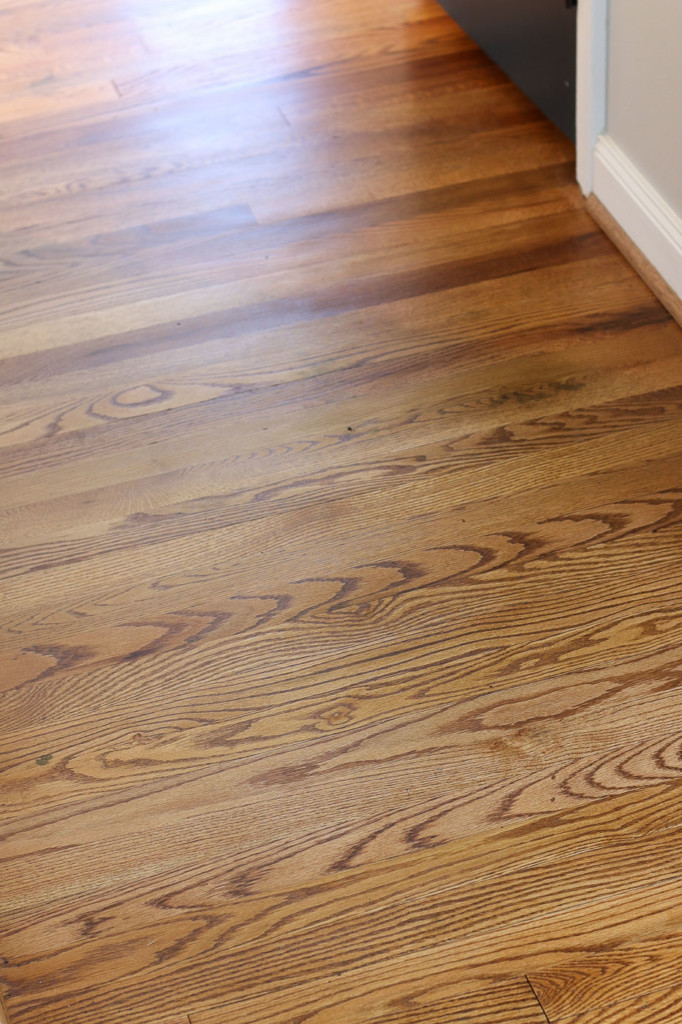
They certainly aren’t perfect, but that’s okay, this house deserves to show her age a little.

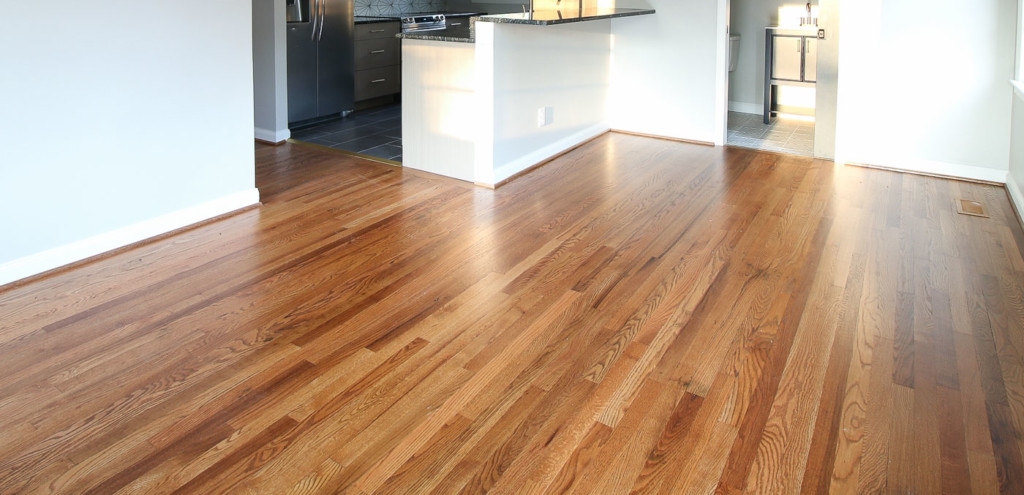
Remember the living room before? Can you even believe this is the same floor?

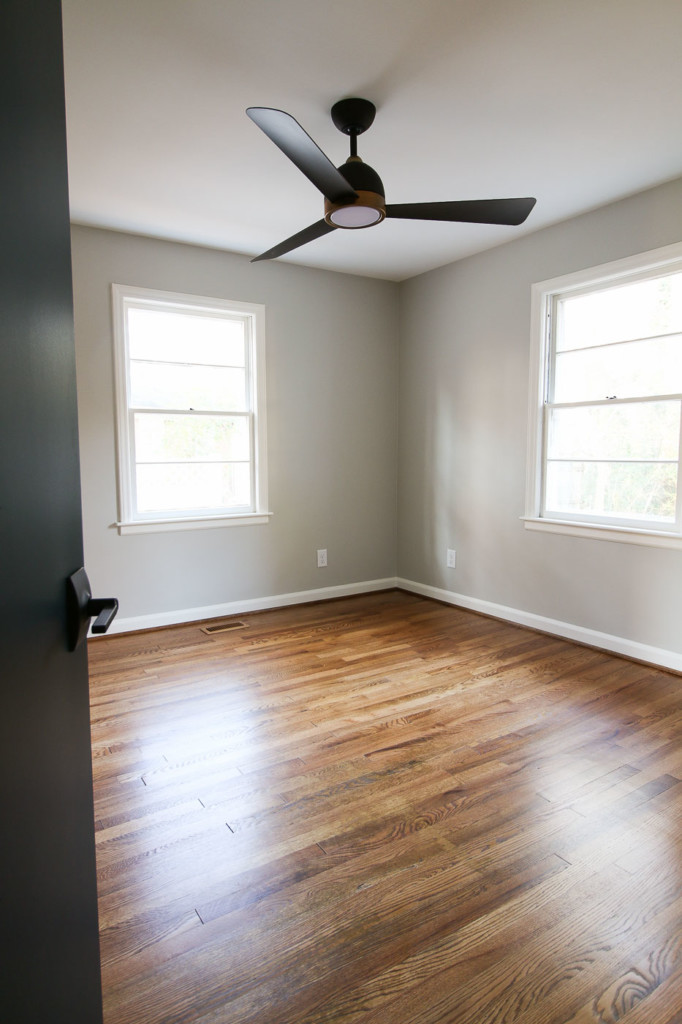
And remarkably the back bedroom never smelled so fresh!

Remember this was the before:

salvaged materials in back bedroom

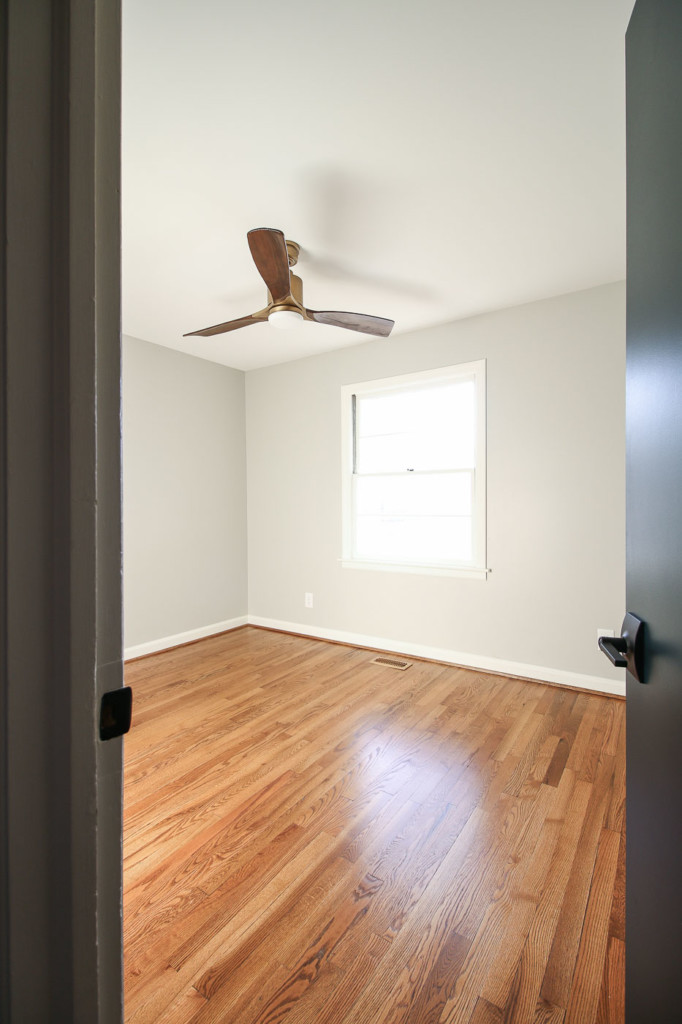
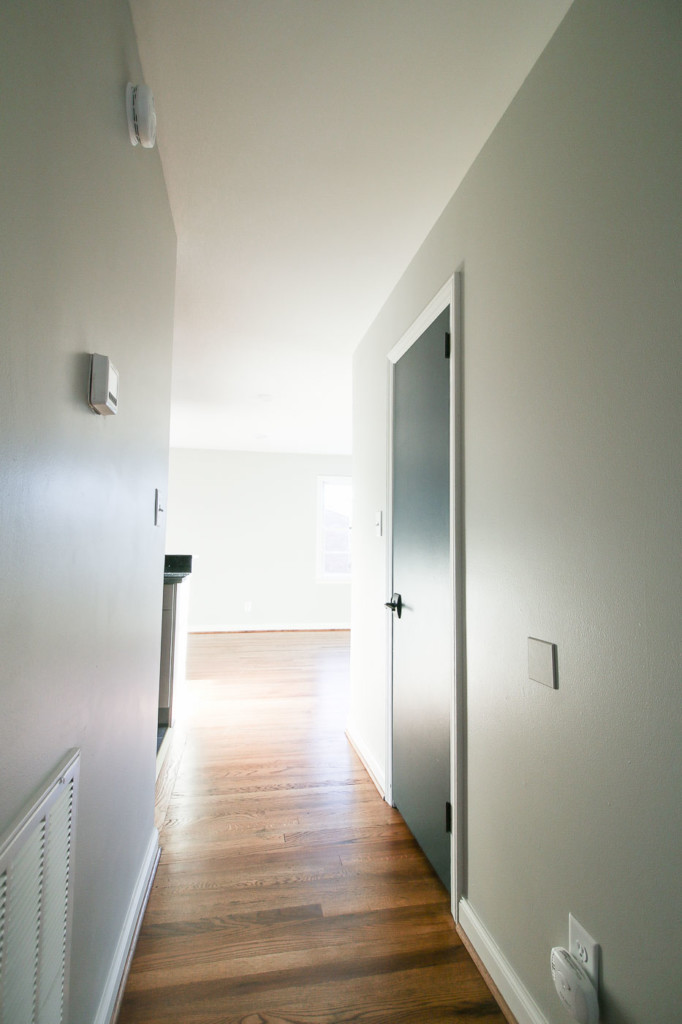
The other bedrooms came out phenomenal too. What do you think of the door colors I chose? It’s Dark Night by Sherwin Williams.

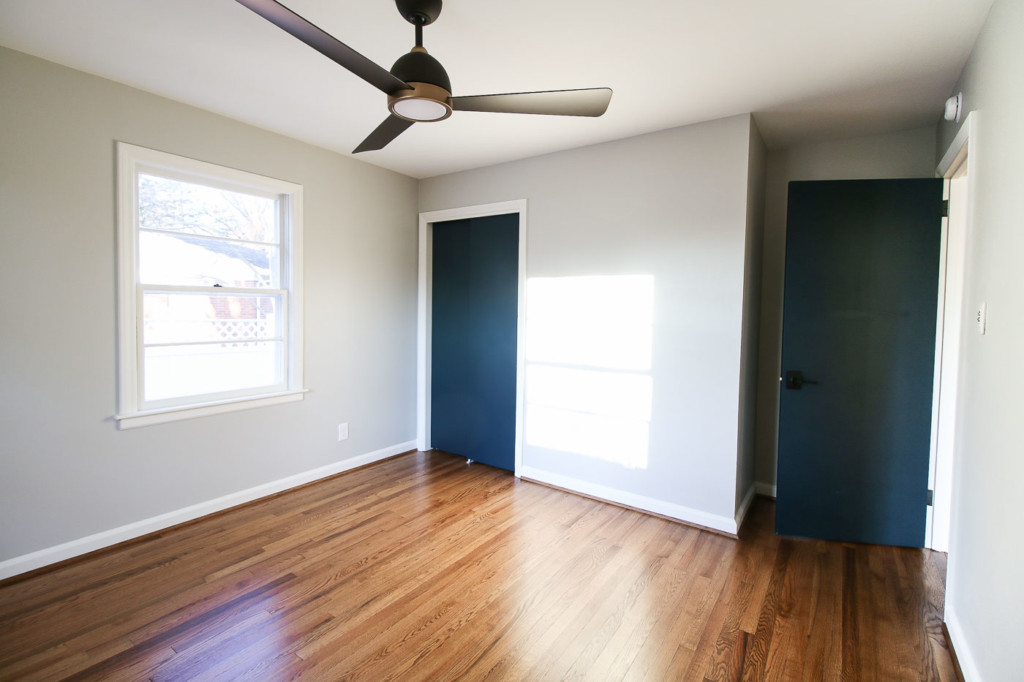
The walls are Repose Gray by Sherwin Williams and I love how simple and neutral the color is.

Unlike the Saving Etta house, all the rooms are painted the same color. This makes it easier for me to repaint when renters move out.

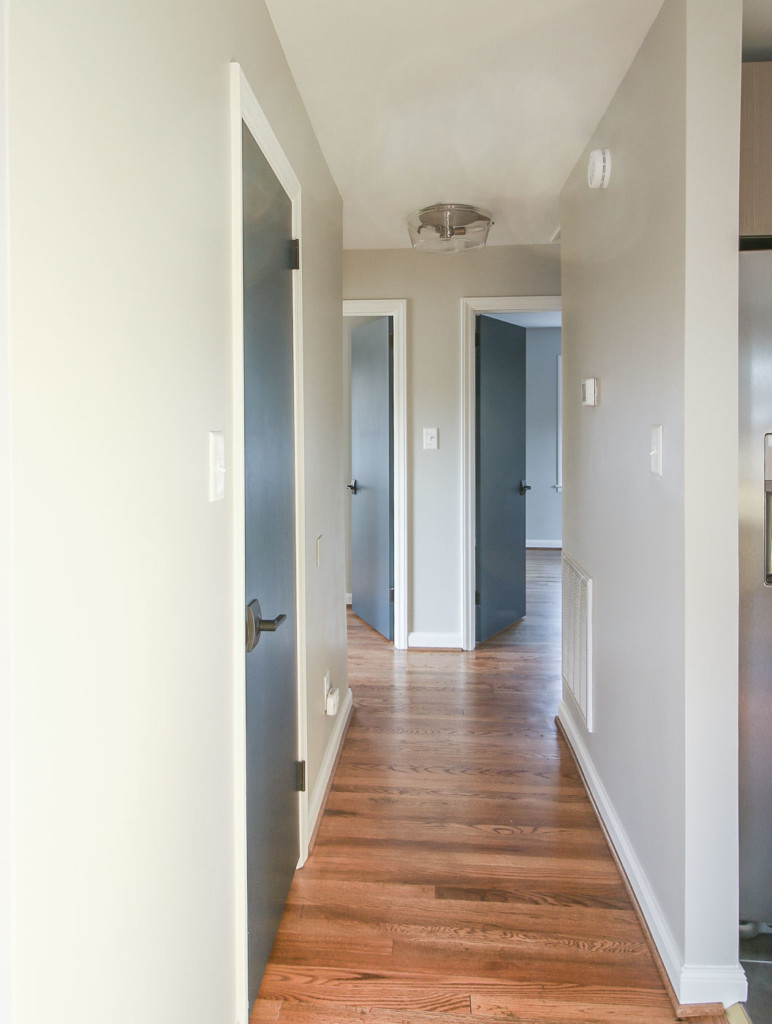
I’ll leave you with the transition from the hall to the kitchen tiles. I used a Schluter Reno-V profile to bridge the transition. You can read my entire article and see the video for 11 Tips to Get Professional Looking Tile Floors!

How to Hire Great Contractors:

I’ll be the first to admit, I could have followed my own advice when hiring this flooring contractor. I should have asked for references and followed up more. Instead, I rushed to hire him because his price was good (red flag number 4.) But, I did follow my own advice and didn’t pay him until the work was done. This one thing saved me the headache of trying to get him back to finish the job.

Read my article on how to hire great contractors and questions you should be asking?

How to Hire Great Contractors! Plus: Free Printable Questions You Need to Ask

Have you ever had bad experience with a contractor? Do tell! I’m also curious about what you think about the stain color I chose.

Upcycled Magnetic Chalkboard Frame | Pretty Handy Girl

I’m a serial upcycler. When I can find relatively free materials and turn them into something worth displaying, I’m thrilled! This Magnetic Chalkboard frame is one of those upcycled projects I am proud of.

Upcycled Magnetic Chalkboard Frame | Pretty Handy Girl

Upcycled Magnetic Chalkboard Frame

Earlier in the week, I showed you the changes I made in my oldest son’s bedroom. One of the switches I made was to replace his bedroom door because the old one had cracked after one too many slammings. Ugh, cheap hollow door.

In an effort to keep my son from taping all types of signs to his new door, I found an ugly old frame and married it with some scrap metal from a junky set of shelving a neighbor was throwing away.

bookcase in love with ugly frame

That’s not real wood, it’s metal…fake wood metal. Yuck. Wait until you see how they were transformed. You won’t believe your eyes, so watch closely how I made this Upcycled Magnetic Chalkboard Frame.

Before you leave this tutorial thinking you can’t possibly make this project because you’ll never be able to find cheap faux wood shelves, let me share with you some alternate materials you can use!

(I’ve included affiliate links for your convenience. I earn a small percentage from a purchase using these links. There is no additional cost to you. You can read more about affiliate links here.)

Magnetic Material:

Non-Magnetic Material for Chalkboard:

Now that you have some additional material options, let’s get busy making a Magnetic Framed Chalkboard (or just a framed chalkboard).

Materials:

Upcycled Magnetic Chalkboard Frame | Pretty Handy Girl

Optional: You may need some Goo Gone, a scraper, and rag to eliminate any glue on the back of the frame.

Instructions:

Begin by cutting your metal (or backing) to fit into the back of the frame.

Upcycled Magnetic Chalkboard Frame | Pretty Handy Girl

Paint one side of the metal with chalkboard paint. Let it dry. Apply a second coat of chalkboard paint. Let it dry.

Upcycled Magnetic Chalkboard Frame | Pretty Handy Girl

While the chalkboard paint is drying, time to work on the frame.

If your frame has paper on the back, peel it off and use Goo Gone, a scraper, and sander to remove any of the glue residue.

Upcycled Magnetic Chalkboard Frame | Pretty Handy Girl


When the chalkboard paint has dried, insert it into the frame, chalkboard side up from the backside of the frame (are you seeing where I’m going with this?)

Upcycled Magnetic Chalkboard Frame | Pretty Handy Girl

The back of the frame is much prettier than the front, but in order to hold the chalkboard in place, we need to cut some picture molding. Cut the end of your molding at a 45 degree angle. Fit it into the frame and mark where to make your second cut.

Upcycled Magnetic Chalkboard Frame | Pretty Handy Girl

Continue fitting and cutting molding around your frame.

Upcycled Magnetic Chalkboard Frame | Pretty Handy Girl

Once all four pieces of molding fit, you are ready to secure them.

Upcycled Magnetic Chalkboard Frame | Pretty Handy Girl

Apply a bead of wood glue along the inside edge of the back of the frame.

Upcycled Magnetic Chalkboard Frame | Pretty Handy Girl

Set the molding pieces in place and wipe up any glue that squeezes out.

Upcycled Magnetic Chalkboard Frame | Pretty Handy Girl

Clamp the molding pieces and the frame. Allow the glue to dry for at least an hour.

Upcycled Magnetic Chalkboard Frame | Pretty Handy Girl

When the glue has dried. Attach two D-rings to the back of the frame.

Upcycled Magnetic Chalkboard Frame | Pretty Handy Girl

Season the chalkboard with the side of a piece of chalk. Then use a dry rag to buff it off.

Time to hang it up! (In my case, I hung it on my son’s door.

Upcycled Magnetic Chalkboard Frame | Pretty Handy Girl

To keep the frame from bouncing any time the door is opened or closed, I put a 3M Command velcro strip between the bottom of the frame and the door.

Now my son can put up pictures, messages, and more without damaging the door.

Upcycled Magnetic Chalkboard Frame | Pretty Handy Girl

Pretty cool huh?! Would you ever guess the back of an ugly frame and metal shelves could look this beautiful?

Upcycled Magnetic Chalkboard Frame | Pretty Handy Girl

I especially like the little metal fasteners showing in the corners of the frame.

Tell me, do you have an ugly frame hanging around your house? Have you ever looked at the back and found it more beautiful than the front?

PHGFancySign


Pin for later!

How to Fill Holes and Knots in Wood | Pretty Handy Girl

How to Fill Holes and Knots in Wood | Pretty Handy Girl

Occasionally, you will get a piece of gorgeous wood that has voids or knots in it. You wouldn’t want to add wood putty, because it wouldn’t retain the look of the knots. But, you want a smooth surface. The solution is to fill the wood knots and voids with epoxy. The results will be beautiful and you’ll be hard pressed to find the patch afterwards.

Materials:

(contains affiliate links)

How to Fill Holes and Knots in Wood | Pretty Handy Girl

Instructions:

Begin by taping off the area around the holes, voids or knots. Press the edges of the painter’s tape down to seal it against the wood.

How to Fill Holes and Knots in Wood | Pretty Handy Girl

Remove the epoxy from the packaging. (I used Gorilla Glue Epoxy glue that sets up in 5 minutes.)

How to Fill Holes and Knots in Wood | Pretty Handy Girl

Snip or snap off the tip of the epoxy tubes.

How to Fill Holes and Knots in Wood | Pretty Handy Girl

Press the cap out of the plungers before trying to depress the plunger. Retain the cap to use if you have any leftover epoxy. Read more

How to Paint a Deck Mandala Tattoo | Pretty Handy Girl

How to Paint a Deck Mandala Tattoo | Pretty Handy Girl

As promised, I’m back today to show you how to paint a giant mandala tattoo on your deck. Painting a design on your deck can turn an ordinary deck into a beautiful retreat. Add a few colorful accessories and you’ll have a backyard Bali getaway! Creating the mandala is a lot easier than it looks. Ready to get started?

Materials:

Instructions:

Pre-stained your deck with one coat of Thompson’s Waterseal Semi-transparent stain. (I used Acorn Brown.) Allow the stain to dry.

How to Paint a Deck Mandala Tattoo | Pretty Handy Girl

Choose the location for the center of your design. Trace around a small circular object or use the tack and string to trace a small circle.

How to Paint a Deck Mandala Tattoo | Pretty Handy Girl

Place the thumbtack in the center of the small circle and draw circles radiating out from the center. Try to add more distance from the previous circle as you go outward. (i.e. 3″ from the center, 6″ from the inner circle, 10″ from the 2nd circle.)

How to Paint a Deck Mandala Tattoo | Pretty Handy Girl

Divide your inner circle into eight sections and make a chalk tick marks. Read more

How to Refinish Wood Floors without Sanding | Pretty Handy Girl

How to Refinish Wood Floors without Sanding | Pretty Handy Girl
How to Refinish Wood Floors without Sanding

I love our antique heart pine floors! They are beautifully distressed. The round pegs and square nails securing them in place add loads of character. However, the square nails sit flush with the surface preventing us from ever being able to refinish them with a sander. The nails would tear up the sandpaper in no time. But, that’s no problem because I know a way to Refinish Wood Floors without Sanding!


How to Refinish Wood Floors without Sanding | Pretty Handy Girl

From time to time, our floors start to look dull…

How to Refinish Wood Floors without Sanding | Pretty Handy Girl

…and the scratches are more noticeable. This is when I know it’s time to refinish them.

How to Refinish Wood Floors without Sanding | Pretty Handy Girl

The first time I refinished our floors, it was several years ago when we were painting the office and dining room. I decided to try to refinish the floors because the rooms were already devoid of furniture. Several neighbors had recommended Bona® Hardwood Floor Cleaner and Bona® Hardwood Floor Polish. I was skeptical, but the results were beautiful floors that had luster, but still showed their beautiful age.

Before and After Finishing Wood Floors without Sanding | Pretty Handy Girl

The Bona® Hardwood Floor Cleaner did a fabulous job of cleaning the floor without damaging them. And, the Bona® Hardwood Floor Polish provided a strong finish without any waxy build up. The high gloss protective layer adds some shine, but isn’t overly shiny. The polish also fills micro-scratches, evening out the appearance of the floor.

How to Refinish Wood Floors without Sanding | Pretty Handy Girl

Fast forward to this past week when Bona asked me to write a sponsored post for them, I jumped for joy because I already use and love the Bona® Hardwood Floor Products! (Here’s my full disclosure: Yes, this is a sponsored post. No, I was not told what to write. And yes, I probably would have blogged about my experiences using Bona® Hardwood Floor Products at some point anyway. Win-win.)

I highly recommend trying the combo of the Bona® Hardwood Floor Cleaner and the Bona® Hardwood Floor Polish before spending huge amounts of money to have your floors refinished. (Bona® Hardwood Floor Cleaner & Polish will not work on floors that have an oil or wax coating. Test in an inconspicuous area to be sure it will work for your floors.)

Here’s how to Refinish Your Wood Floors without Sanding:

Materials:

(I’ve included affiliate links for your convenience. I earn a small percentage from a purchase using these links. There is no additional cost to you. You can read more about affiliate links here.)

Instructions for Cleaning the Wood Floors:

Remove all rugs and furniture from the room. If you have heavy furniture pieces that are never moved, you can leave them in place.

How to Refinish Wood Floors without Sanding | Pretty Handy Girl

Vacuum or sweep the floors to remove all dirt and debris.

How to Refinish Wood Floors without Sanding | Pretty Handy Girl

Assemble your Bona® Hardwood Floor Spray Mop as shown here: Read more