collage with 4 images featuring colorful front doors

Discover 55+ colorful front doors with stunning color schemes to boost curb appeal and add personality to any home exterior.

4 image collage with colorful front doors

Colorful Front Doors

I am drawn to homes that have unique front door colors and crave something beyond the normal white, black or burgundy. Give me a unique color that tells me something about its occupants!

I love being able to say, we’re the only house on the street with the coral-pink doors. In my book, you need to Go Bold or Go Home!

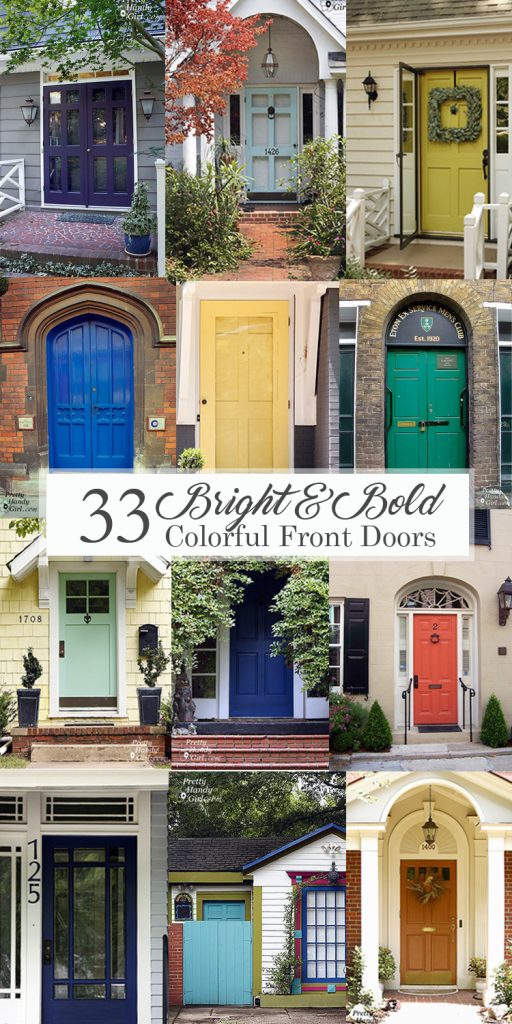
Get out that paintbrush and show your true colors with this gallery of Bright & Bold Colorful Front Doors.

Before we get started, a little disclaimer. I’m very good at eyeballing paint colors, but I am only human. There are so many factors that go into choosing a paint color. Time of day, time of year, weather, and your surroundings will all affect the perception of color. Throw in the mix that you’re viewing these images on your electronic device which can only make up colors using a combination of Red, Green, and Blue. For that reason, I highly recommend using one of these colors as your springboard. Get similar paint chips near the ones you like and hold them up to your front door during different times. 

I go into a lot more detail about how to choose paint colors in this comprehensive article

how-to-pick-paint-colors

Front Door Paint Colors Pictures

Over the years I’ve collected quite an assortment of photos of colorful front doors.

Some are from my travels to Iceland, Scotland, England, France, and other old towns in the US. Near me in Raleigh, Cameron Park is one of my favorite neighborhoods to find inspiration. It is tucked between Oberlin & Hillsborough Street. The houses are old and the trees are ancient. But, there seems to be an ongoing competition for the boldest and brightest front doors. I used Benjamin Moore, Sherwin Williams, and Valspar color deck to choose an approximate match for each door.

If you are considering a new paint color for your door using any of these colors, be sure to paint a large sample on poster board and hold it up to your door first. Keep in mind, some of the colors may need two coats before you see the true color.

Now let’s get to these gorgeous painted front doors. Whether you are looking to add personality to a neutral exterior, or you want to create a bold focal point to elevate your home’s design, we have a ton of color inspiration for you! The paint color is noted in the link below each picture to make it easier for you to identify the name and brand of the paint color.

You will see a variety of brands including Sherwin Williams, Benjamin Moore, Valspar, Magnolia Paint and more.
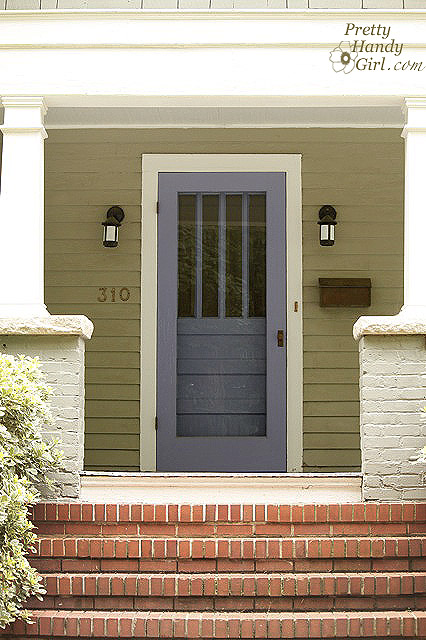
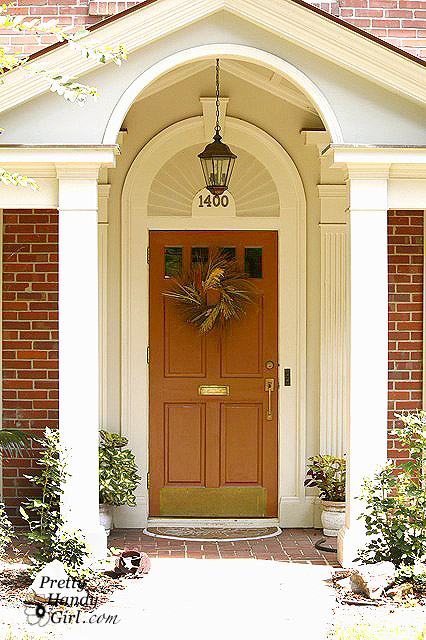
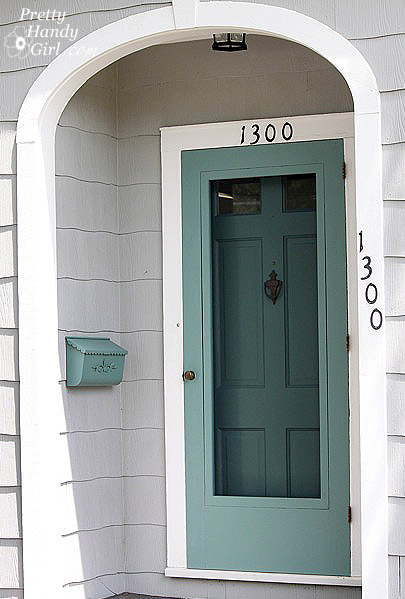
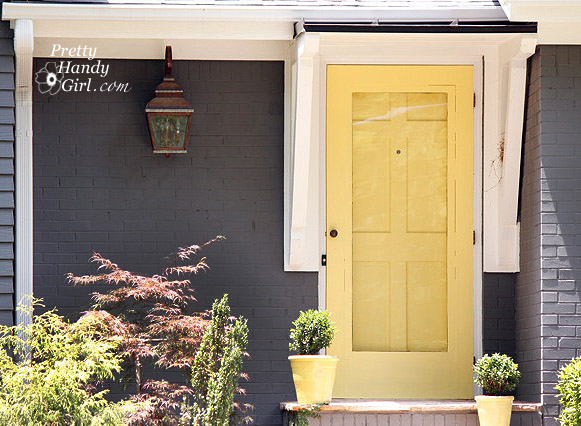
Front Door Colors

Undercool by Sherwin Williams - Cape Code style house with bright blue front door and cedar shake siding
Undercool by Sherwin Williams

Chartreuse by Sherwin Williams - Small cottage green-yellow-lime colonial door with square wreath
Chartreuse by Sherwin Williams

Magnolia Green by Magnolia Paint - with Locally Sown by Magnolia Paint Siding
Magnolia Green by Magnolia Paint –
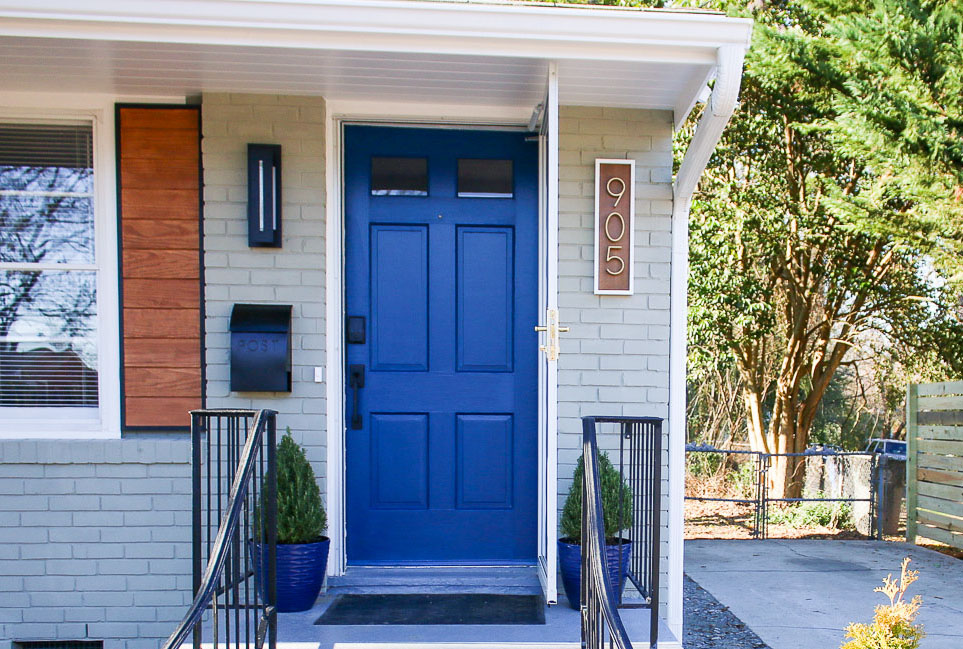
Siding color: Locally Sown by Magnolia Paint Siding

Blue Peacock by Sherwin Williams - Creamy Tan trim and dark siding on this early 1900's home
Blue Peacock by Sherwin Williams


Honorable Blue by Sherwin Williams - Dark Blue Door with climbing vines over the front door
Honorable Blue by Sherwin Williams

Colorful front doors
Slick Blue by Sherwin Williams

Classic Red by Valspar - 3 story Old house with navy siding, light blue shutters, and bright red door
Classic Red by Valspar

Colorful front doors
Open Seas by Sherwin Williams

Picante by Benjamin Moore - Coral Pink from door with dark teal blue green siding and white trim
Picante by Benjamin Moore

Colorful front doors
Crabby Apple by Sherwin Williams

Loyal Blue by Sherwin Williams - Modern Ranch house with sage siding and royal blue door
Loyal Blue by Sherwin Williams

Colorful front doors
Atmospheric by Sherwin Williams


Colorful front doors
Aqua Tint by Sherwin Williams

Abalone Shell by Sherwin Williams - cute muted pink condo door with patina shell knocker
Abalone Shell by Sherwin Williams

Colorful front doors
Indulgent by Sherwin Williams

Harbor Haze by Benjamin Moore - South Carolina coastal house with front porch, dormer windows, and light blue double glass door.
Harbor Haze by Benjamin Moore

Colorful front doors
Bee by Sherwin Williams

Colorful front doors
Swimming by Sherwin Williams

Colorful front doors
Fabulous Grape by Sherwin Williams

Colorful front doors
Cloudless by Sherwin Williams

Colorful front doors
Lobelia by Sherwin Williams


Colorful front doors
Honorable Blue by Sherwin Williams

Colorful front doors
Copper Pot by Sherwin Williams

Colorful front doors
Sapphire by Sherwin Williams

Colorful front doors
Wild Currant by Sherwin Williams

Colorful front doors
Ebbtide by Sherwin Williams

Colorful front doors
Lantern Yellow by Sherwin Williams

Colorful front doors
Nautilus by Sherwin Williams

Colorful front doors
Piñata by Benjamin Moore

Pictures of Front Door Paint Colors (International)

And just in case you have a lust for the international palette, these are a few doors I spotted overseas.

Iceland has loads of colorful doors because they typically use metal and stucco on their homes. The colorful doors add punch to an otherwise bland house color scheme.

Real Red by Sherwin Williams

Sunshine by Benjamin Moore - Bright Yellow Door on a house with gray siding in Iceland
Sunshine by Benjamin Moore

Million Dollar Red by Sherwin Williams - Iceland small town red arched half light door with gray metal siding
Million Dollar Red by Sherwin Williams

Once you travel to France, Spain, and England you find yourself surrounded by stone homes. They also love to paint doors in vibrant colors.

Frank Blue by Sherwin Williams - 24 panel navy blue door with antique look
Frank Blue by Sherwin Williams

Fort Pierce Green by Benjamin Moore Double wide arched door spotted in France with diamond pattern and sunburst arch
Fort Pierce Green by Benjamin Moore

Fine Wine by Sherwin Williams - Cranberry Red door with an angular porch cover spotted in Scotland.
Fine Wine by Sherwin Williams

Pulsating-blue-by-sherwin-williams - beautiful royal blue door in France
Pulsating Blue by Sherwin Williams

Cape Verde by Sherwin Williams - blue green door with climbing vines over front door shot in France
Cape Verde by Sherwin Williams

Colorful front doors
Blue Chip SW6959

Quite Red by Valspar. Tall double red doors with wrought iron detail on arched doorway opening
Quite Red by Valspar

Colorful front doors
Nifty Turquoise by Sherwin Williams

Colorful front doors
Blue Blood by Sherwin Williams

Jekyll Club Veranda Blue by Valspar - skinny 10 light door spotted in France
Jekyll Club Veranda Blue by Valspar

Colorful front doors
Heart Throb by Sherwin Williams

Blue Chip by Sherwin Williams - Cute royal blue door in France with diamond iron grill over window
Blue Chip by Sherwin Williams

Vegas Green by Valspar arched emerald or Kelly green door with ornate windows and green stucco siding, white trim
Vegas Green by Valspar

La Fonda Fireberry by Valspar - Bright Red historic stone house in France
La Fonda Fireberry by Valspar

Great Barrington Green by Benjamin Moore - Olive or Army Green Double Doors spotted in Barcelona Spain
Great Barrington Green by Benjamin Moore

Spearmint by Sherwin Williams - Skinny little blue green door with potted tree in front of it. Spotted in Barcelona, Spain
Spearmint by Sherwin Williams

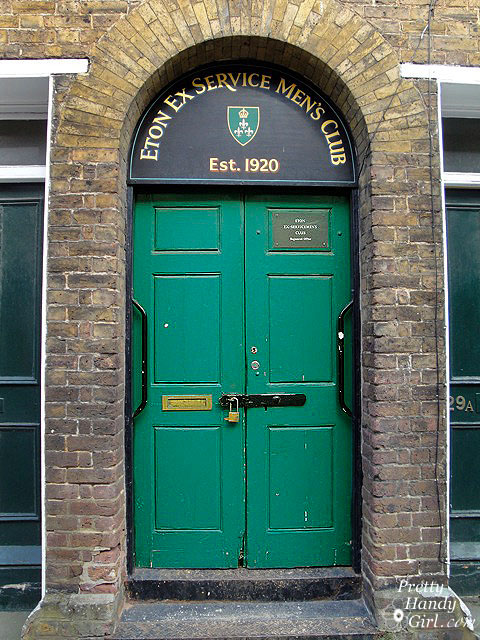
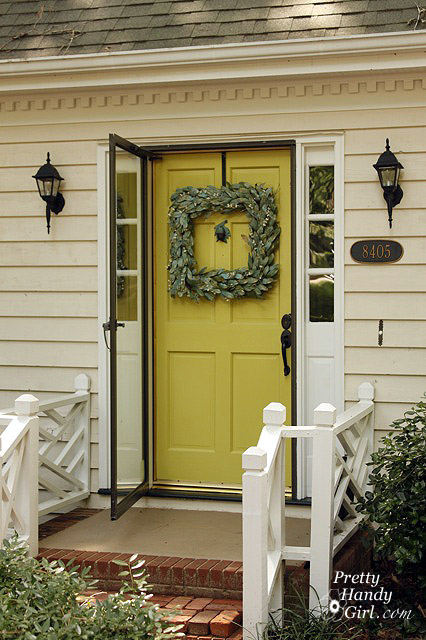
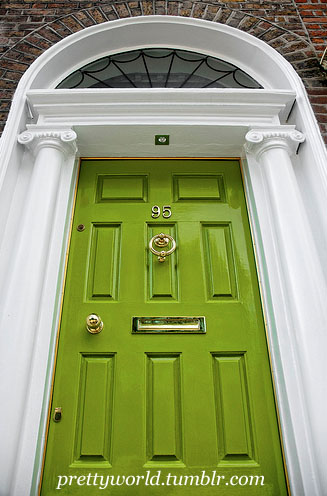
Talk about WOW factor! I found this green door online HERE.

Colorful front doors
Outrageous Green by Sherwin Williams

Bold Blue by Benjamin Moore - Dark blue violet double doors with centered door knobs shot in France
Bold Blue by Benjamin Moore

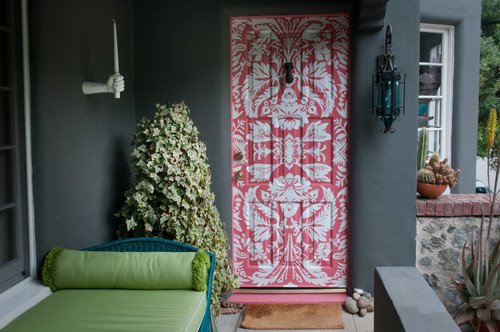
And if that isn’t enough to catch your attention, look what Allison Cosmos did to this door:

The Front Door eclectic entry

This design would work well on contemporary homes, as well as traditional for a pop of modern texture.

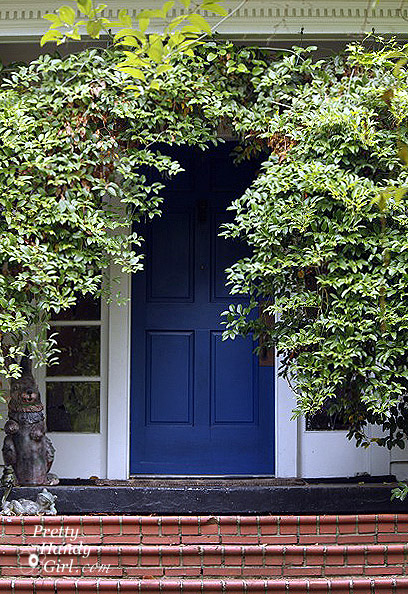
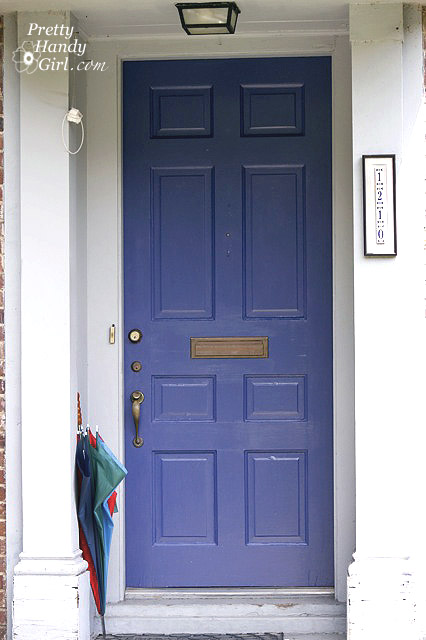
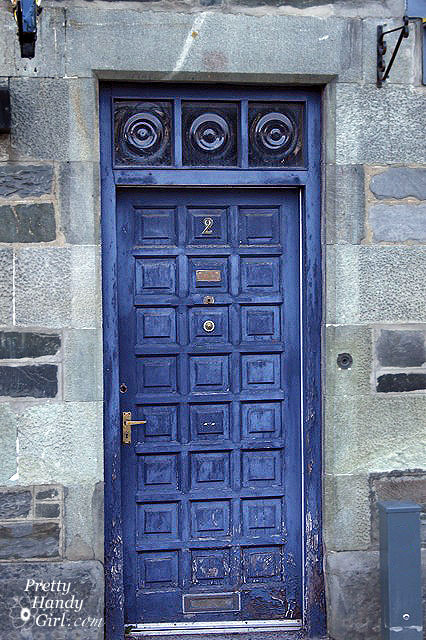
My all time favorite front door photo is this one from The Impatient Gardener. Could you tell that I’m drawn to blues?

Blue Chip by Sherwin Williams - White House with royal blue front door decorated for the holidays with snowfall
Blue Chip by Sherwin Williams


Back at the Pretty Handy Girl abode, my home’s doors were purple for over 7 years.

Purple_Honor_front_doors

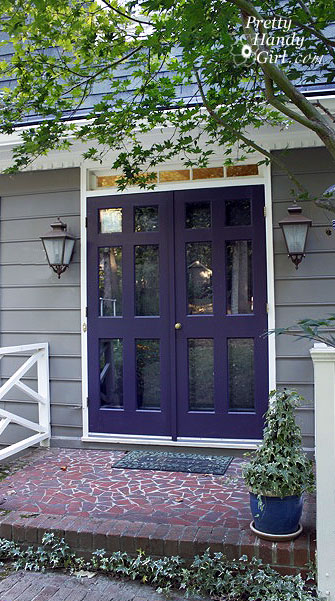
Purple Honor by Duron Paint (ask a Sherwin Williams store to mix this color)

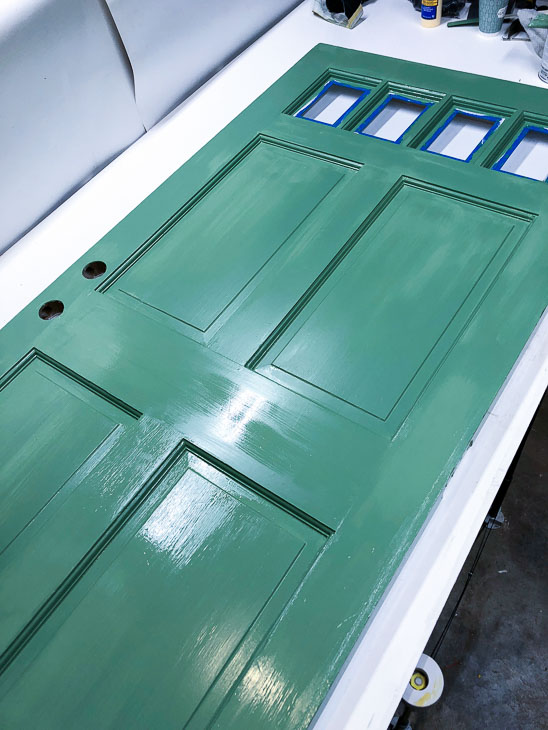
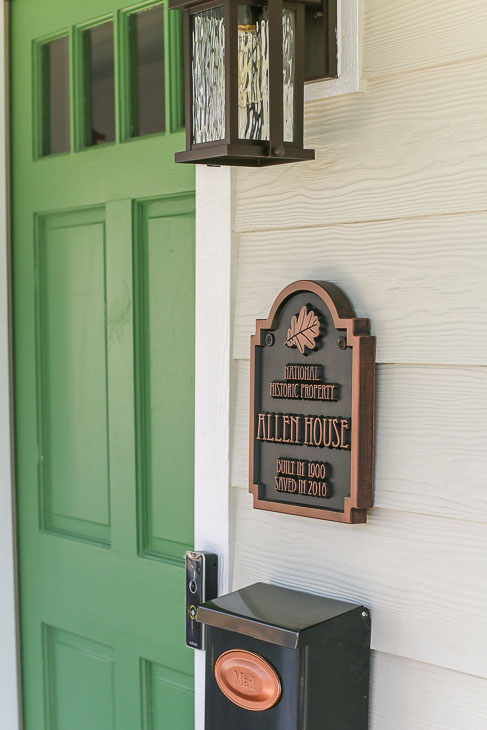
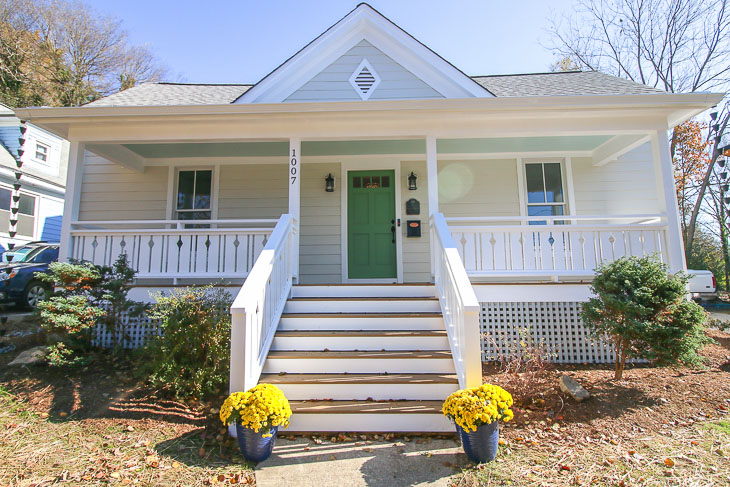
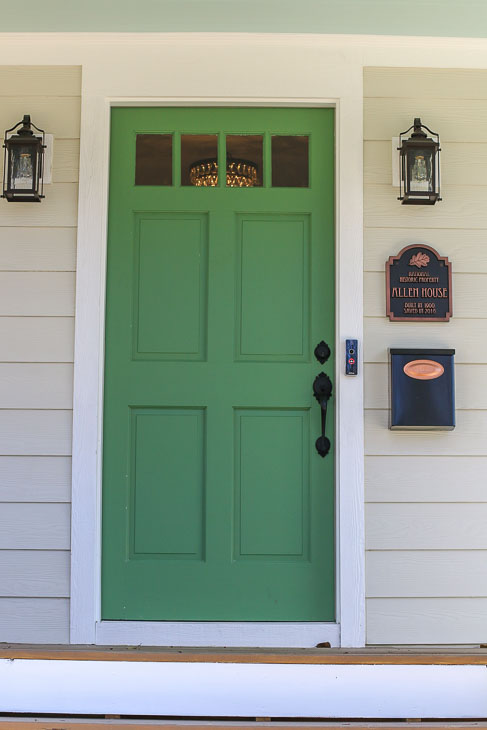
After that, I decided to add some vibrancy and paint the front doors an amazing green.

Perennial Green by Benjamin Moore

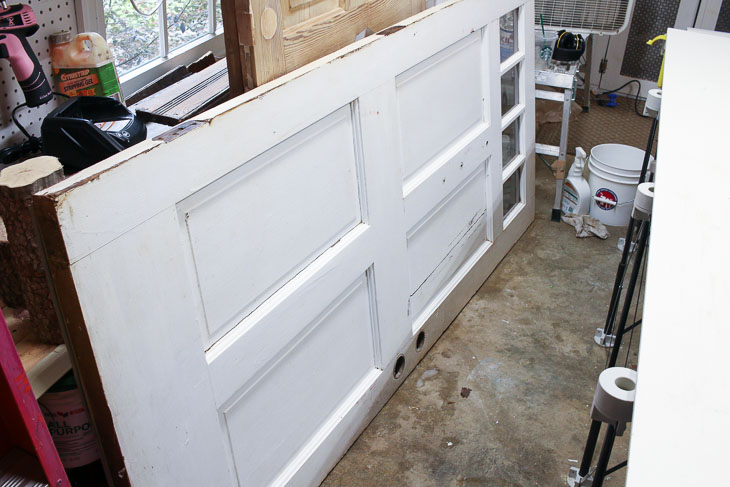
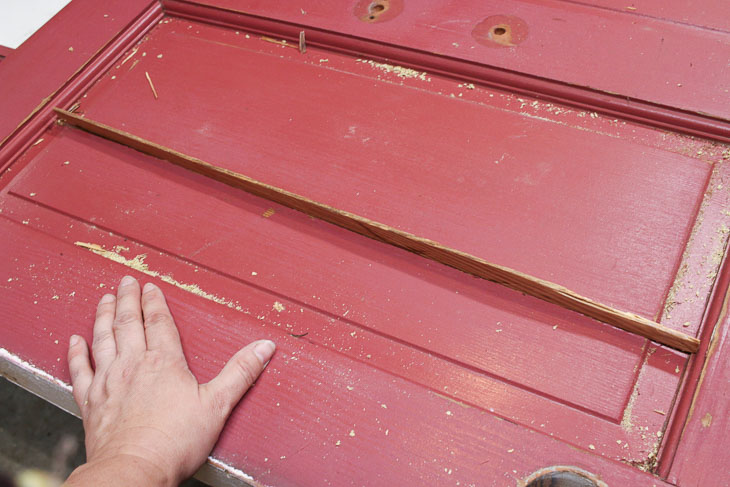
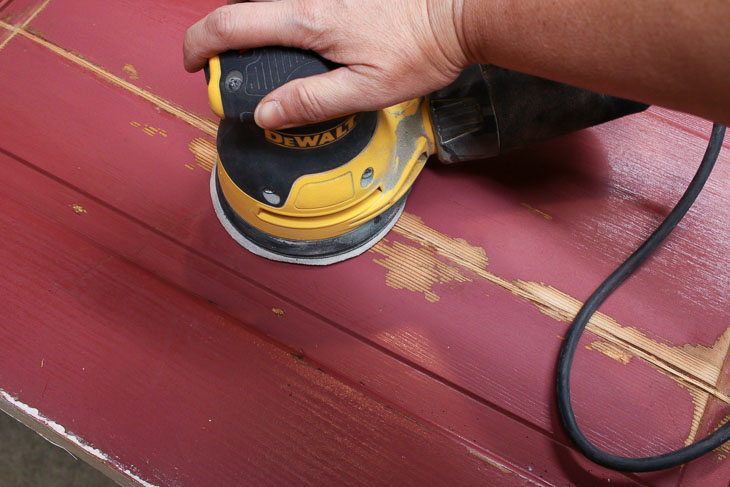
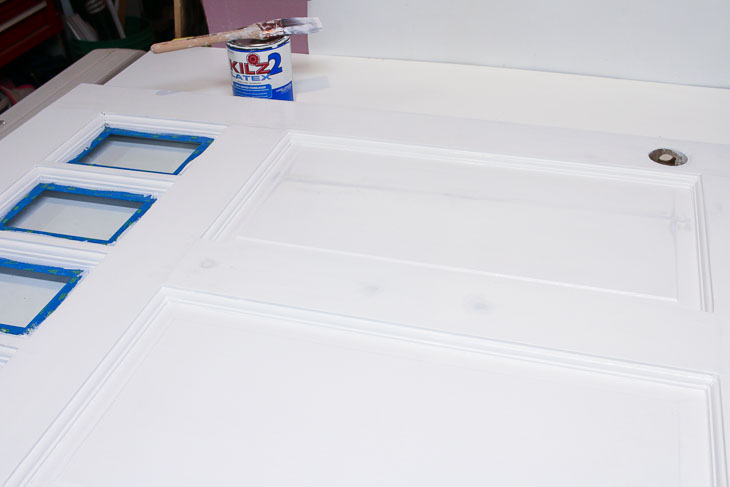
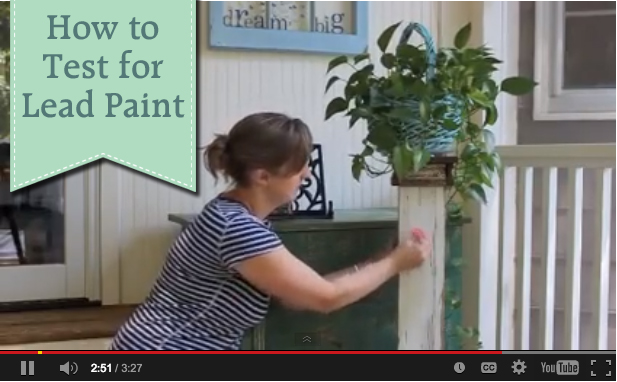
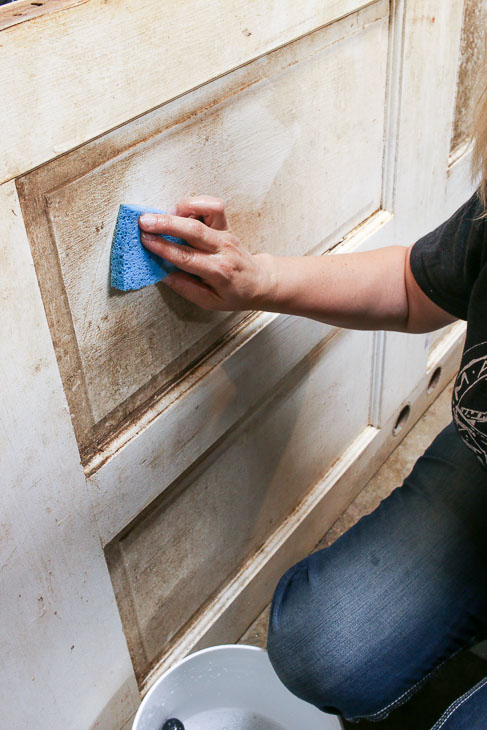
Before I painted them, I had to strip many layers of paint off them. If you ever need to strip paint off your front door, I have some tips and a tutorial for you.

But, I’m notorious for wanting to change things in and around my house. A few years ago, we needed to replace siding and I decided to paint the whole house a new color palette.

Lei Flower by Sherwin Williams with Inner Balance Siding Color.

Lei Flower by Sherwin Williams

Siding Color: Inner Balance by Benjamin Moore

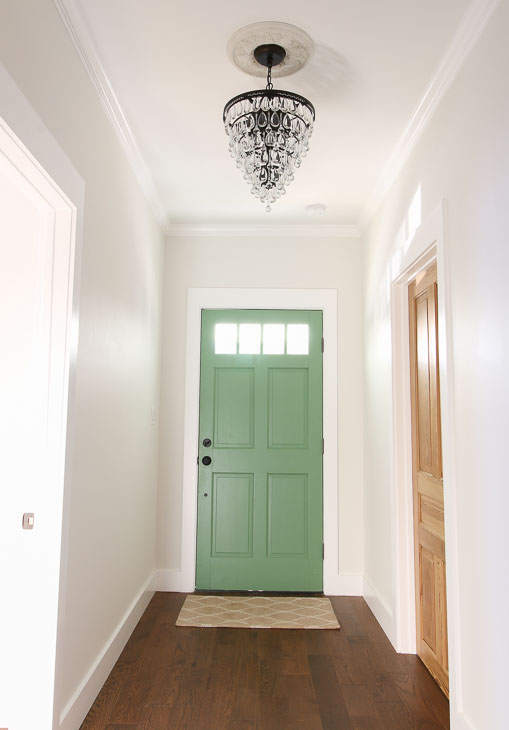
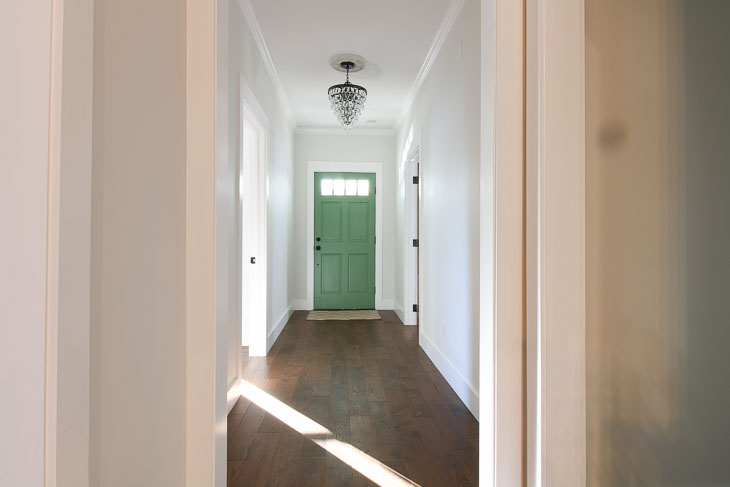
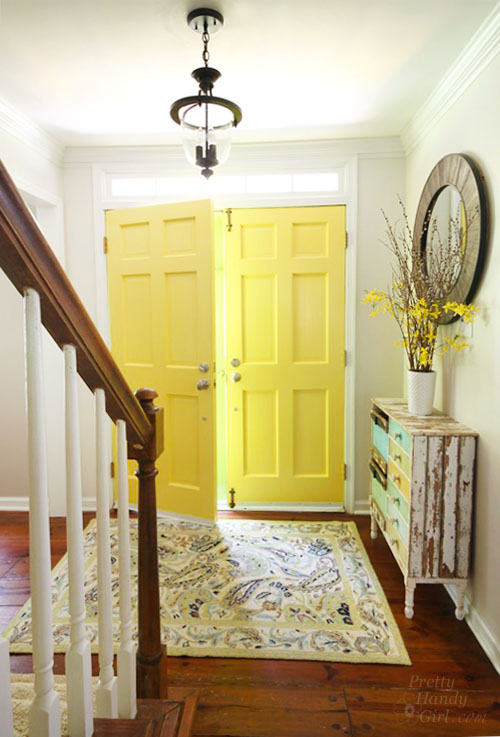
Because I love color, I also painted the inside of my front doors a cheery yellow!

Benjamin Moore Yellow Highlighter Painted Interior Doors | Pretty Handy Girl
Yellow Highlighter by Benjamin Moore

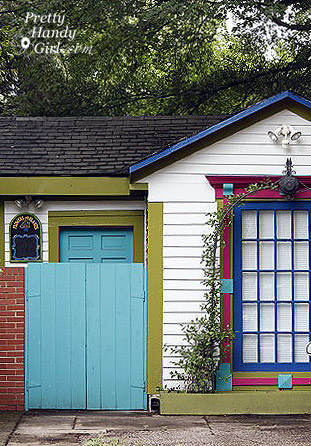
Don’t forget you can paint your out buildings and shed doors a fun color, too!

Spirit in the Sky by Sherwin Williams

How to Build this Cute Garden Shed
Calypso Blue by Benjamin Moore

Share this post because friends don’t let friends have boring front doors.

Pin this graphic to share these bright front door colors with your friends! I hope you found the perfect color choice for your front door!

vertical collage with colorful front door ideas and text overlay

I hope you have been inspired! Now Go Bold or Go Home!

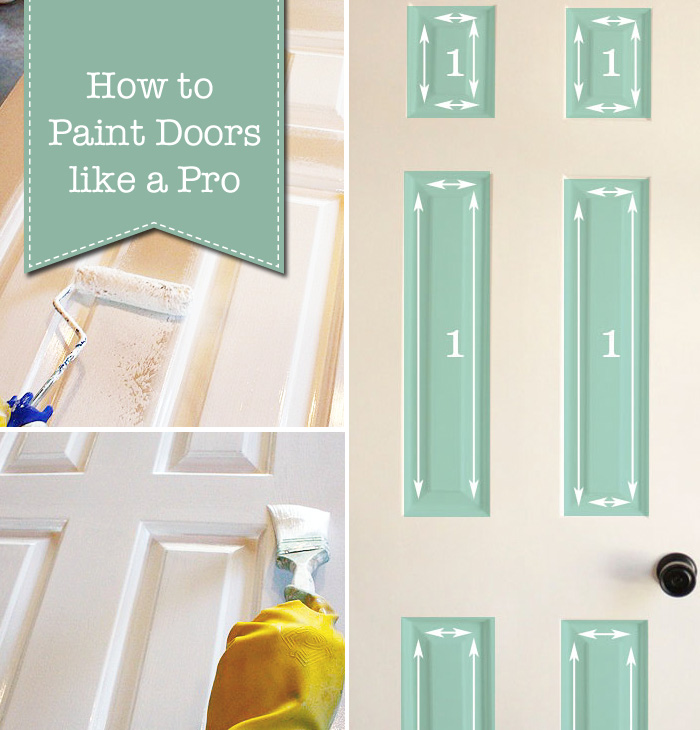
After you’ve learned how to choose the perfect color, you’ll want to learn how to paint your doors like a professional.

How to Paint Doors like a Professional | Pretty Handy Girl

Speaking of painting, I have painted almost every room in our home now. Make that almost every room in two homes!

You could say that over the years I’ve learned a few tricks of the trade.

If you’re planning to paint, I recommend these favorite painting tools that I pull out for every painting job.

Colorful front doors

If you like this post, you’ll want to find out the 15 Simple Ways to Improve Your Home’s Curb Appeal!

three houses with amazing curb appeal. White house with black shutters, 1 black and white modern house with wood accents, and one cream colored house with bright coral front door.

Fixing Common Door Problems

Do you have a door that sticks or doesn’t close properly? You are not alone. Many factors can contribute to this problem. Let’s learn how fixing common door problems can be easy.

Fixing common door problems pin this image

Fixing Common Door Problems

Do you have a door that sticks or doesn’t close properly? Or maybe your door rubs, squeaks, or is drafty. Regardless of the problem, I’m going to show you how to fix your most common door problems! But first, a big thank you to Schlage, the 100-year-old leading door hardware company, for sponsoring this article.

If you have common door problems, you are not alone. Many factors can contribute to them: house movement, humidity, dry air, improper installation, slamming doors, or kids swinging on them (true story). Without being able to control many of these factors, it’s important to know how to fix your door problems – as your door is often a main focal point of the room and/or entryway.

(I’ve included affiliate links for your convenience. I earn a small percentage from a purchase using these links. There is no additional cost to you. You can read more about affiliate links here.)

Door Not Latching:

A door that doesn’t latch properly is usually a simple fix. Lean down until you are at eye-level with your doorknob. Look at the gap between the door and the door frame. Is the latch centered on the strike plate?

latch too low on strike plate

If not, that’s why your door doesn’t latch. Here’s how to fix it. Determine the center of the latch. Remove the strike plate and move it to center on the latch.  Mark the new location of the strike plate. Chisel the door frame as needed.

chisel strike plate area out

Reattach the strike plate and test the door. You can see in the photo below the latch is now centered with the strike plate and the latch can now slide into the strike plate properly.

Latch and strike plate lined up

(Like the knob above? It’s a Schlage Plymouth in Bright Brass, but comes in a variety of finishes.)

Door Not Closing Tight Against Stop:

If your door rattles loose in the frame and doesn’t close properly against the stop, it can be as simple as moving the strike plate closer to the stop.

Important: If this problem happens on a door between the garage and the house, it could be a potential safety issue! The door between the garage and the house must protect the residents from carbon monoxide gases potentially leaking in from a car’s exhaust. With this in mind, it’s important to fix this problem immediately!

Luckily, fixing a door that doesn’t close tightly is a simple one to remedy. But, there are two solutions depending on your type of strike plate. (Is your strike plate adjustable or non-adjustable?)

door won't shut tight vs. door closes against stop

If You Have an Adjustable Strike Plate:

Look closely, does your door strike plate have a small screw holding a sliding tab to the strike plate? If this looks like your strike plate, the solution is simple.

common door problems strike plate

Loosen this screw and adjust the tab closer to the door stop.

door problems adjust latch

Tighten the screw and try closing your door again. Continue to adjust the tab until your door shuts properly and stays closed.

If You Have a Non-Adjustable Strike Plate:

Non-adjustable strike plates don’t have an adjustable tab, but your fix is still easy. Remove the strike plate and reposition it closer to the stop.

moved strike plate

Sticking Doors or Doors that Won’t Close

Look at the space around the door. Is there a gap at the top or bottom? Normally, the door will stick at the top corner opposite of the hinges because over time the weight of the door will pull away from top hinges.

To fix a door that sticks or rubs in the frame, you can try one of these fixes:

  • Tighten screws
  • Add longer screws
  • Add a shim behind a lower hinge

Let’s take a look at this french door. The door rubs at the top when trying to close it.

french doors rubbing at top

Open the door and look at the hinges. Do any of them need to be tightened? Well look at that! This door is missing a screw.

missing screw in hinge

Try to tighten the screws. If they just spin, the wood has been stripped. You can either add longer screws or fill in the holes with toothpicks.

Replace with Longer Screws

Remove the hinge screws and use longer screws that drive through the door jamb and into the framing.

long and short screw in hand

How to Fix Stripped Screw Holes:

Remove the screws from one hinge at a time. Squeeze some wood glue onto several toothpicks. Pack the hole with toothpicks.

insert toothpicks into stripped screw holes

Let the glue dry. Cut off the excess toothpick with a utility knife (or use a chisel if you don’t have your knife with you.)

chisel off extra toothpick

Drive screws back into the hinges.

drive longer screws into door hinge

Better yet, replace the screws with longer ones that will grip into the framing behind the door jamb.

Hopefully this will fix your door. You can see below the door shuts and the spacing is even between the french doors.

Is Your Door Out of Alignment?

Door still rubbing? Occasionally a door will get out of alignment. To fix this, first, look at the door and determine where the gaps are bigger.

For the door above, try simply loosening the screws from the top hinge 1/4 turn or more. If this doesn’t work, try tightening the screws into the hinges at the bottom. If it’s still not fixed, you’ll need to try shimming the door hinge.

Shimming Door Hinges:

Sometimes a door hinge needs to be shimmed to adjust the door in the frame. If the spacing is tight behind one hinge, you can adjust it slightly to correct uneven spacing around the door.

common door problem fixes

The door above still shows a tight spot near the top right hinge. To shim it slightly, add a piece of chipboard (cereal box cardboard) behind the hinge.

door problems shim hinges

If you need a thicker shim, you can use the end of a wood shim.

add shim behind hinge

Replace the screws in the hinge and test your door. Is it still rubbing?

replace door hinge screws

Recessing a Hinge:

Occasionally, you might need to set a hinge deeper into the door or the frame. You can use a chisel to remove a small amount of material from the jamb or the door. If you don’t have a chisel or are worried about taking out too much, use the small sanding bit on a Dremel.

dremel door hinges

Door Rubbing on Top:

Have a door that swells when the temperature or humidity changes? To fix a door that rubs along the top in different seasons, you’ll want to sand or plane the top. This doesn’t involve buying a ticket or boarding an airplane. Planing is removing material from the edge of wood. You can try using sandpaper with a coarse grit to sand it down, but if that doesn’t work, reach for a hand planer.

plane top of door

As you run the planer across the top of the door it literally shaves off some of the wood. Simple design, but very effective.

Door Scraping on the Floor:

door scraping floor

A door that rubs on the floor or carpet is not only annoying, but it can scratch your floors. Time to fix this problem!

Get a helper to assist with removing the door. Close the door completely.

Position a scraper or flat pry bar just under the hinge pin head. Gently tap the end of the pry bar with a hammer to raise the hinge pin. Remove the hinge pin from the top and bottom hinges first.

remove hinge pin

Remove the middle hinge pin last but have your assistant nearby to hold the door in the frame. As the assistant opens the door, be ready to lift it off the hinges.

Lay the door on sawhorses. Tape the button of the door with painter’s tape to protect from chipping.

cut off bottom of door

Use a circular saw, track saw, or power planer to remove a portion of the bottom of the door.

Plane doors from the edge to center

Replace the door and check to see if it still rubs.

Exterior Door is Hard to Open:

If your exterior door is hard to open, it might be from a loosened threshold piece. You can try to tighten the threshold screws or replace the threshold and sweep at the same time.

driving screws into door threshold

Also check to see if the door sweep has lowered. Unscrew the sweep and raise it on the door. Tighten the screws.

raise door sweep

Door Latch Sticks in the Door

If the latch is sticking in the door, you can try one of three fixes:

  • Loosen the screws on the doorknob. (Tightening the screws on your doorknob too much can cause the knobs to bind.)
  • Remove the knobs, spray a little lubricant onto the latch inside the door. Replace the knobs and turn them to distribute the lubricant.
  • Finally if all else fails, it might be time to replace the doorknobs. Believe it or not this is a quick fix and can be done in five minutes.

Save yourself the headache of doorknobs that stop working smoothly and purchase Schlage brand door hardware from the start. Schlage has been producing high-quality door hardware in a variety of types, looks, and finishes for more than a century and will continue to do so in the years to come. Whether traditional, modern, or technology, Schlage products offer a limited lifetime mechanical and finish warranty and a three-year limited electronics warranty.

How to Replace Door Knobs | Pretty Handy Girl

Squeaking Doors

Doors that squeak mean the hinges need lubrication. Simply spray a lubricant like WD-40 just under the top of the hinge pin. Be sure to have a rag handy to catch any drips.

Fixing Common Screen Door Problems | Pretty Handy Girl

Open and close the door several times to help the lubricant work its way down the hinge. Your door should be squeak free now.

Door Knob Hits the Wall

Door knobs that hit a wall can put dents or holes in the wall if left alone. The solution is quick. Either add a door stop behind the door at the baseboard…

door stop behind door at baseboard

…or add a hinge pin adjustable door stopper to the top door hinge.

hinge pin adjustable door stopper

Drafty Doors

Cold drafts wafting in around your door? The solution is as simple as installing (or adjusting) the weatherstripping. If you can see light coming in around your door, it’s guaranteed to let drafts in too!

Adding Foam Weatherstripping | Pretty Handy Girl

Simply adding adhesive-backed foam weatherstripping around the door will stop those drafts in their tracks.

Look Ma, no more light, no more drafts!

Adding Foam Weatherstripping | Pretty Handy Girl

Adding a door sweep to the bottom of the door will keep out drafts from the bottom of the door. In addition, a well-fitted sweep will also keep insects and spiders from making an entrance under your door.

white door sweep on yellow door

That pretty much sums up fixing common door problems. Next time you have an issue with your door, you can fix it yourself!

PHGFancySign

Disclosure: This article has been sponsored by Schlage. If you’ve been around here for a while, you know I’m very particular about the brands I work with. I only recommend products and brands that I use myself. I was compensated for my time, but I was not told what to write. All opinions are my own.

Pin for later!

How to Fix common Door Problems

Upcycled Magnetic Chalkboard Frame | Pretty Handy Girl

I’m a serial upcycler. When I can find relatively free materials and turn them into something worth displaying, I’m thrilled! This Magnetic Chalkboard frame is one of those upcycled projects I am proud of.

Upcycled Magnetic Chalkboard Frame | Pretty Handy Girl

Upcycled Magnetic Chalkboard Frame

Earlier in the week, I showed you the changes I made in my oldest son’s bedroom. One of the switches I made was to replace his bedroom door because the old one had cracked after one too many slammings. Ugh, cheap hollow door.

In an effort to keep my son from taping all types of signs to his new door, I found an ugly old frame and married it with some scrap metal from a junky set of shelving a neighbor was throwing away.

bookcase in love with ugly frame

That’s not real wood, it’s metal…fake wood metal. Yuck. Wait until you see how they were transformed. You won’t believe your eyes, so watch closely how I made this Upcycled Magnetic Chalkboard Frame.

Before you leave this tutorial thinking you can’t possibly make this project because you’ll never be able to find cheap faux wood shelves, let me share with you some alternate materials you can use!

(I’ve included affiliate links for your convenience. I earn a small percentage from a purchase using these links. There is no additional cost to you. You can read more about affiliate links here.)

Magnetic Material:

Non-Magnetic Material for Chalkboard:

Now that you have some additional material options, let’s get busy making a Magnetic Framed Chalkboard (or just a framed chalkboard).

Materials:

Upcycled Magnetic Chalkboard Frame | Pretty Handy Girl

Optional: You may need some Goo Gone, a scraper, and rag to eliminate any glue on the back of the frame.

Instructions:

Begin by cutting your metal (or backing) to fit into the back of the frame.

Upcycled Magnetic Chalkboard Frame | Pretty Handy Girl

Paint one side of the metal with chalkboard paint. Let it dry. Apply a second coat of chalkboard paint. Let it dry.

Upcycled Magnetic Chalkboard Frame | Pretty Handy Girl

While the chalkboard paint is drying, time to work on the frame.

If your frame has paper on the back, peel it off and use Goo Gone, a scraper, and sander to remove any of the glue residue.

Upcycled Magnetic Chalkboard Frame | Pretty Handy Girl


When the chalkboard paint has dried, insert it into the frame, chalkboard side up from the backside of the frame (are you seeing where I’m going with this?)

Upcycled Magnetic Chalkboard Frame | Pretty Handy Girl

The back of the frame is much prettier than the front, but in order to hold the chalkboard in place, we need to cut some picture molding. Cut the end of your molding at a 45 degree angle. Fit it into the frame and mark where to make your second cut.

Upcycled Magnetic Chalkboard Frame | Pretty Handy Girl

Continue fitting and cutting molding around your frame.

Upcycled Magnetic Chalkboard Frame | Pretty Handy Girl

Once all four pieces of molding fit, you are ready to secure them.

Upcycled Magnetic Chalkboard Frame | Pretty Handy Girl

Apply a bead of wood glue along the inside edge of the back of the frame.

Upcycled Magnetic Chalkboard Frame | Pretty Handy Girl

Set the molding pieces in place and wipe up any glue that squeezes out.

Upcycled Magnetic Chalkboard Frame | Pretty Handy Girl

Clamp the molding pieces and the frame. Allow the glue to dry for at least an hour.

Upcycled Magnetic Chalkboard Frame | Pretty Handy Girl

When the glue has dried. Attach two D-rings to the back of the frame.

Upcycled Magnetic Chalkboard Frame | Pretty Handy Girl

Season the chalkboard with the side of a piece of chalk. Then use a dry rag to buff it off.

Time to hang it up! (In my case, I hung it on my son’s door.

Upcycled Magnetic Chalkboard Frame | Pretty Handy Girl

To keep the frame from bouncing any time the door is opened or closed, I put a 3M Command velcro strip between the bottom of the frame and the door.

Now my son can put up pictures, messages, and more without damaging the door.

Upcycled Magnetic Chalkboard Frame | Pretty Handy Girl

Pretty cool huh?! Would you ever guess the back of an ugly frame and metal shelves could look this beautiful?

Upcycled Magnetic Chalkboard Frame | Pretty Handy Girl

I especially like the little metal fasteners showing in the corners of the frame.

Tell me, do you have an ugly frame hanging around your house? Have you ever looked at the back and found it more beautiful than the front?

PHGFancySign


Pin for later!

Many of us have been staring at the same walls and doors in our homes for many years (or maybe many decades.) If you’ve wanted to give your home an update, painting a door is a quick and easy way to do just that. Today I’ll to show you how to paint doors (the professional way) so they look amazing for years (or decades) to come.

How to Paint Doors like a Professional | Pretty Handy Girl

How to Paint Doors (The Professional Way)

So you want to paint like a pro? Well, sit back and let me give you some tips and a tutorial for painting a door. This tutorial pertains to any paneled door (interior or exterior).

How to Paint Doors like a Professional | Pretty Handy Girl

Our doors are all the six panel type. If you have flat (non-panel) versions, you can skip this post and come back later. For the rest of us, get out your paper and pencils and take some notes (does anyone do this anymore?)

Materials:

(I’ve included affiliate links for your convenience. I earn a small percentage from a purchase using these links. There is no additional cost to you. You can read more about affiliate links here.)

optional: Painting Pyramids

How to Test for Latex or Oil Paint?

To determine if you need to prime your door you need to assess if your door was painted with latex or oil paint first. To test the paint, rub a small spot with rubbing alcohol (or ammonia) and if the paint comes off it is latex. If not, it’s oil paint.

How Do I Know if My Door Has Lead Paint:

You can easily test your door (or any paint) for the presence of lead by using a lead test swab. I go into more detail about lead paint in this tutorial.

How to Easily Test for Lead Paint

But, the short of it is, if you have lead paint, you must be very careful when sanding it. Cover the area with disposable plastic. Use a wet sanding block (never use a power sander). Wear a respirator and be sure to clean everything with disposable wet wipes.)

When Do You Have to Prime?

As we determined above, if your door was painted with oil-based paint (and you want to use latex paint) you will need to prime. But, here are a few more reasons you need to prime your door first:

  • Bare wood or stained wood doors.
  • Dark painted doors you wish to paint lighter (or vice versa), you want to use a tinted-primer to cut down on coats.
  • If the door was painted with oil and you want to use latex paint. If you are painting over latex with latex (or oil over oil) and the previous paint job is in good shape you can skip the primer. (This was the case with my door, so I didn’t prime it.)
  • The paint is chipping. First, scrape or sand any flakes and then prime. (Important: Check for Lead Paint First.)
  • Lead paint (whether in good shape or not), you will need to prime.

Should I Remove or Paint a Hung Door?

The easiest way to paint a door is to remove the door, then remove the knobs and latch. Then you can lay it horizontally on sawhorses. Painting a door on sawhorses eliminates potential drips and is easier on your back. But, removing the door can also be a pain, especially if it’s a large solid wood door. I’ve painted plenty of doors without removing them, and they look great. It comes down to personal preference.

Preparation:

Whether you are removing the door or painting it in place, be sure to cover the area underneath with a drop cloth, newspapers, or flattened cardboard boxes (my favorite for hung doors because it gives some cushion when you are kneeling on the floor.

Lightly sand the entire door. No need to bust out the power sander, you can use a sanding block or sheet of sand paper. Be sure to sand down any bumps or blemishes. The main goal is to give your door a little “tooth” for the new paint or primer to adhere to. Wipe off the door with a damp rag to remove any sawdust.

Instructions for How to Paint Doors the Professional Way.

Step 1: Paint the interior panels first as shown in the graphic below.

How to Paint Doors like a Professional instructions

Using a small roller to paint doors can greatly speed the process. Begin by rolling paint on the flat panels. Work quickly by rolling on the paint, then use a brush to smooth out the paint and fill in the detailed areas around the flat panel.

This is one of the most important tips for getting a professional look:

Follow the grain direction when brushing on the paint

If you follow the grain and the direction of the arrows in the graphic above, you will maintain the look of the door construction. Original wood doors are made with several pieces and the wood grain changes direction. Even if you have cheap hollow core doors, you can fake the look of a quality door by following the grain pattern.

How to Paint Doors like a Professional Panels

In other words: NEVER run your brush strokes perpendicular to the wood grain. This does NOT look professional.

How to Paint Doors like a Professional | Pretty Handy Girl

Step 2: Next, roll the inside center vertical piece. Start by rolling the paint on in an up and down direction.

How to Paint Doors like a Professional | Pretty Handy Girl

Then drag your brush up and down vertically with the wood grain (see arrows in the above diagram.)

How to Paint Doors like a Professional | Pretty Handy Girl

Step 3: Next paint the horizontal cross pieces in the middle of the door.

How to Paint Doors like a Professional | Pretty Handy Girl

Keep your brush strokes horizontal (with the grain) and cross over the tall vertical center.

How to Paint Doors like a Professional | Pretty Handy Girl

Step 4: Paint the door border. Pay attention to the direction of the wood grain for this last step. The grain on the two sides should go vertically from top to bottom.

How to Paint Doors like a Professional | Pretty Handy Girl

There are header and footer panels sandwiched between the left and right sides. These “sandwiched” pieces should be painted by dragging your brush horizontally (see diagram above.)

How to Paint Doors like a Professional | Pretty Handy Girl

Step 5: The last step is to paint the edges of the door. (Do Not paint the hinges…that’s not very professional either!) If your hinges or doorknobs were painted previously you can follow this tutorial with four ways to remove paint from metal hinges.

4 Ways to Remove Paint from Metal Hinges (& more) | Pretty Handy Girl

Roll paint onto the edges then smooth them with the paintbrush. Be on the lookout for drips or puddles of paint. Go back and check the face of your door for drips now before the paint cures.

Let your door dry (30 minutes – 1 hour), then follow up with a second coat of paint. When you are done let the doors dry for 2+ hours before flipping to paint the other side. I have found that it helps to put pieces of cardboard or rags under the door so the paint doesn’t stick to the sawhorses. But you can also buy Painting Pyraminds which elevate the door and hold it on tiny points.

Ready to perfect more of your painting skills? Check out the Paint Week series with 5 Lessons to Perfect Your Painting Skills:

Paint Week - 5 Lessons to Perfect Your Painting Skills

And if you really want to paint your front door but can’t decide on a color, you’ll love this collection of Bold Colored Front Doors!

Bright and Bold Colorful Front Doors

signature

How to Fix Cracks in Door Panels - An Easy Repair
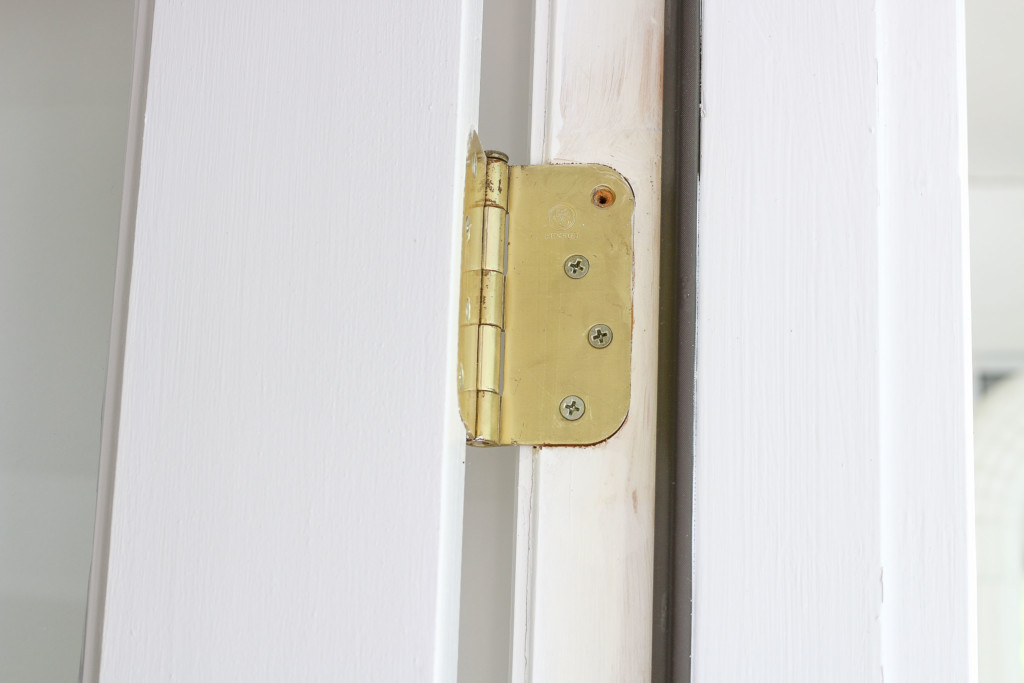
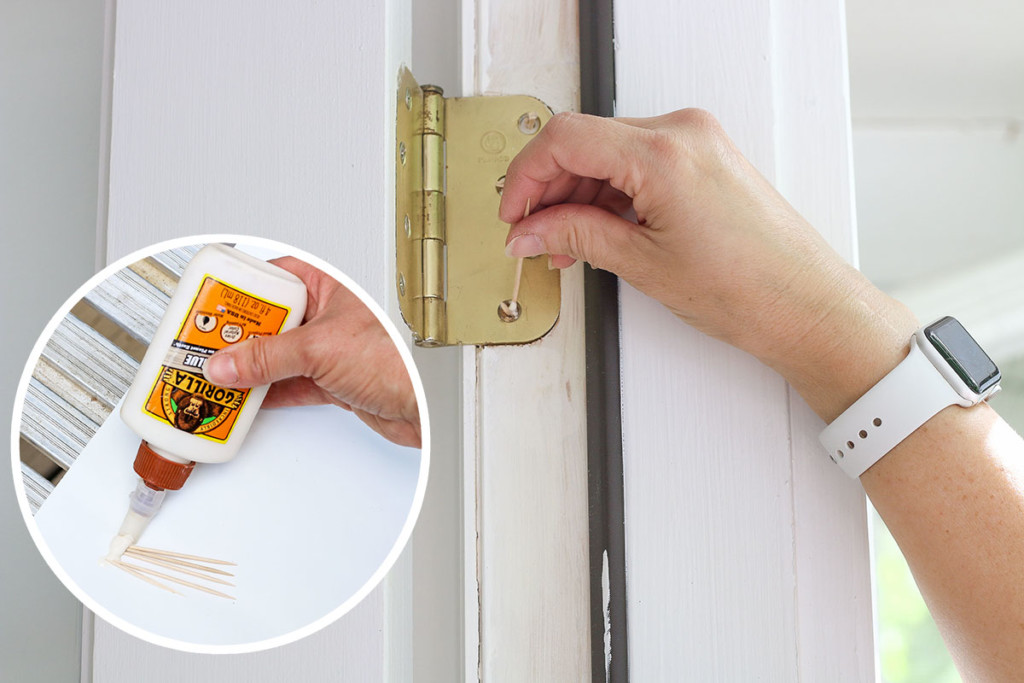
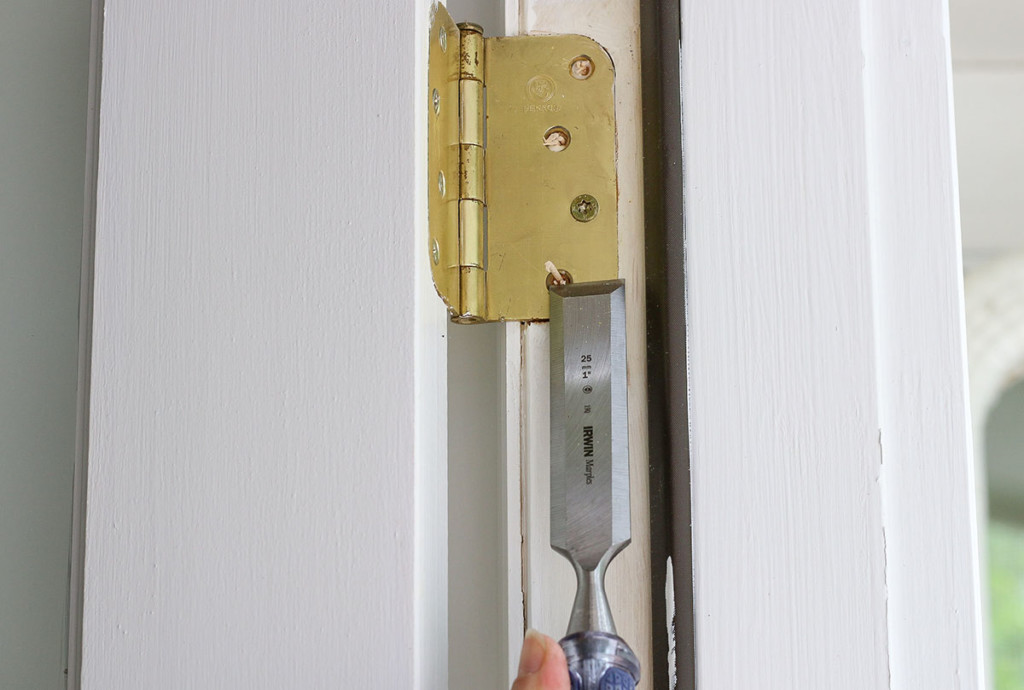
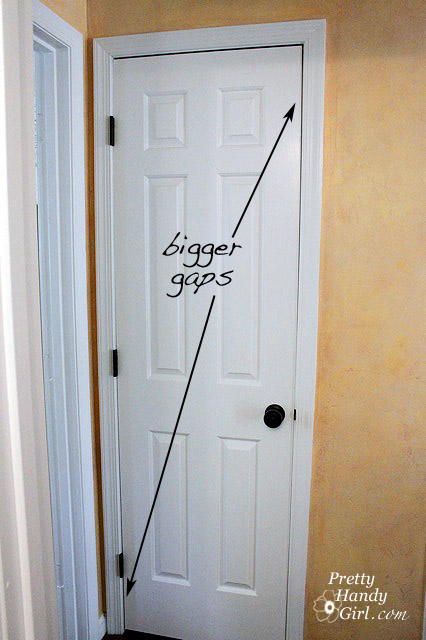
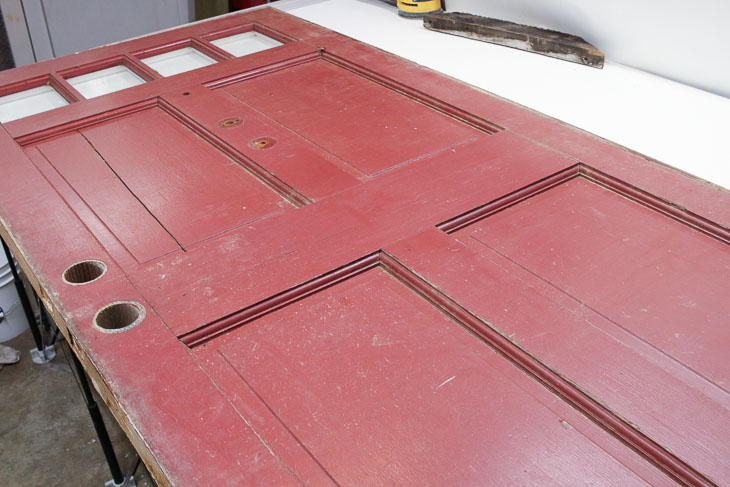
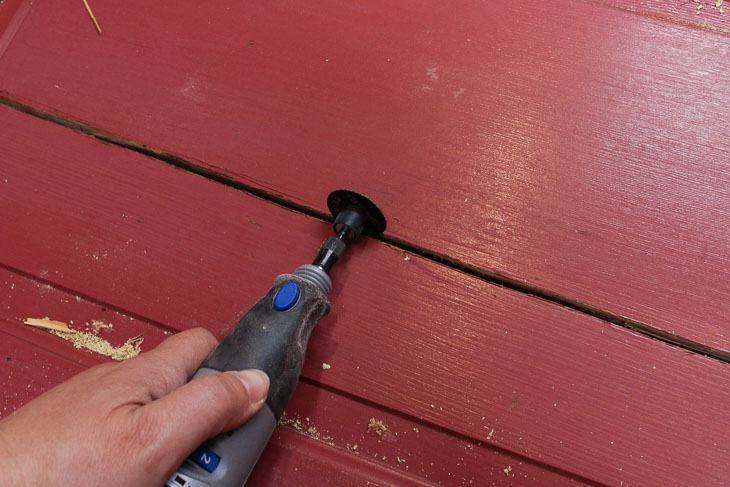
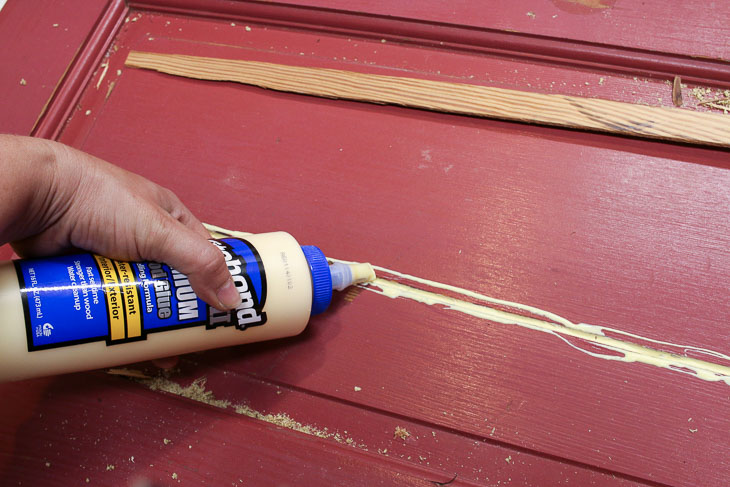
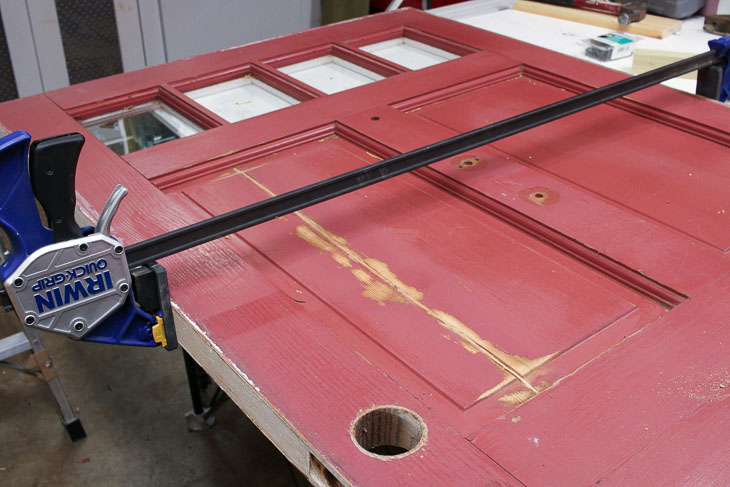
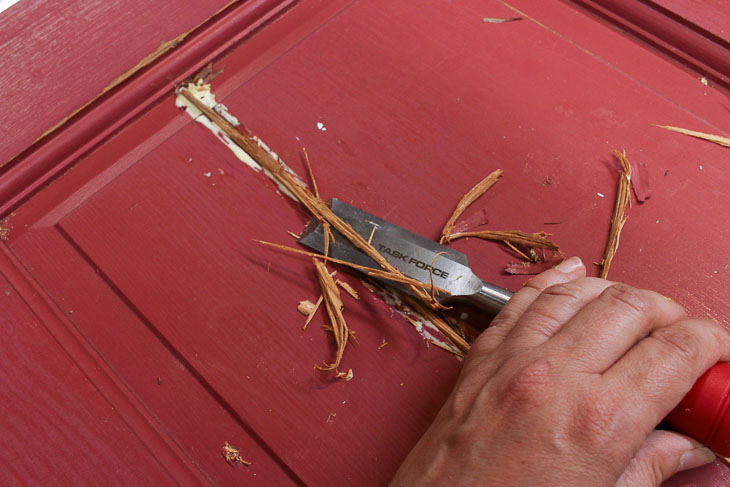
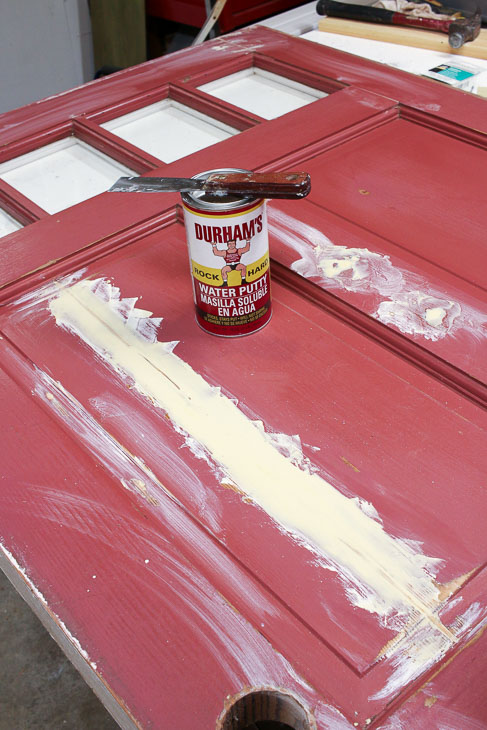
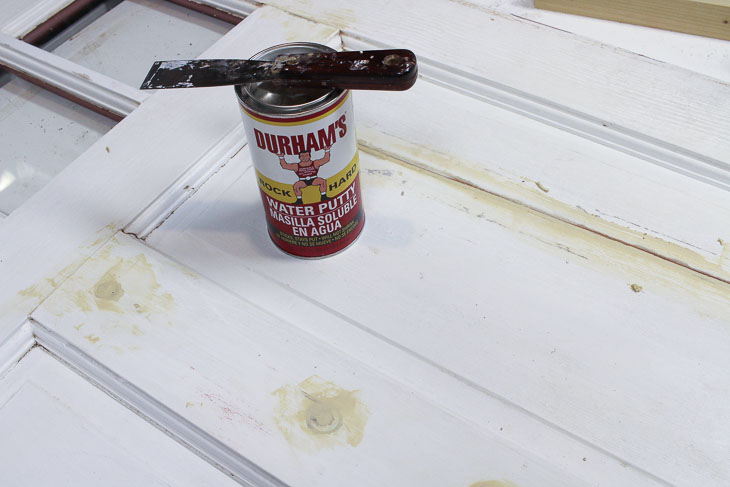
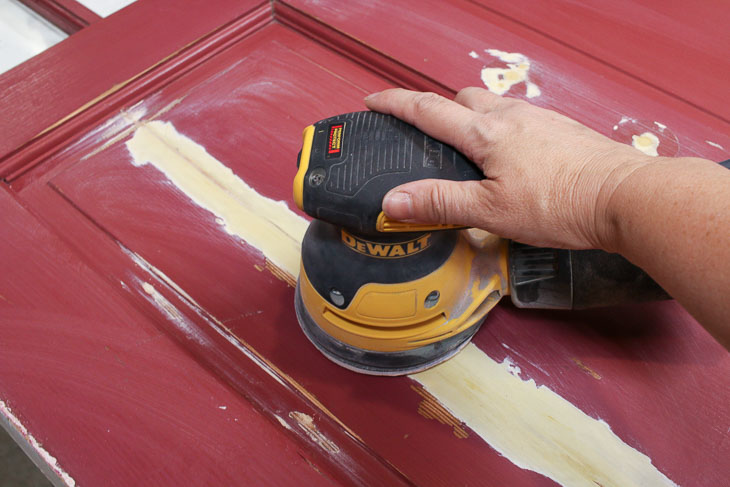
How to Fix Cracks in Door Panels without Taking the Door Apart

Wooden doors will develop cracks over time, especially if the panels aren’t free to expand and contract. Most of the time, years of paint or caulking the seams around the panels will cause the wood to stick and not allow the panel to expand and contract with the weather. The result is a big vertical crack along the wood grain. Today I’m going to show you how to repair the crack without taking the door apart!

You may remember right before I purchased the Saving Etta house, I discovered a discarded door by the dumpster behind our local grocery store. It had a big crack in the panel and was very dirty. But, otherwise, it appeared to be structurally sound. Pretty Handsome Guy and I salvaged the door on a late night rescue mission, and had a good laugh about it afterwards.

The door sat in the garage until the addition was framed and rough openings were created at the Saving Etta house. With the windows set to arrive, I knew I had to take a day out of my busy schedule to repair the cracked door and prepare it for installation.

Dirty Front Door found in the Trash

First the door got a good cleaning with soapy water.

Cleaning Front Door with sponge and soapy water 
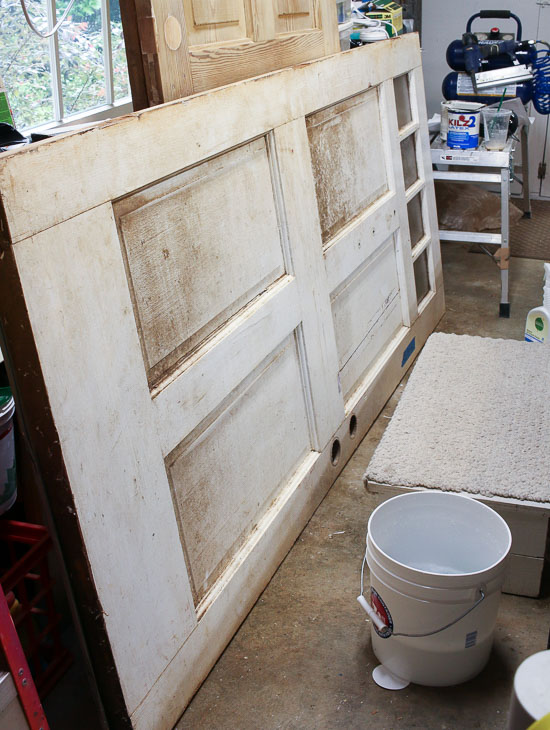
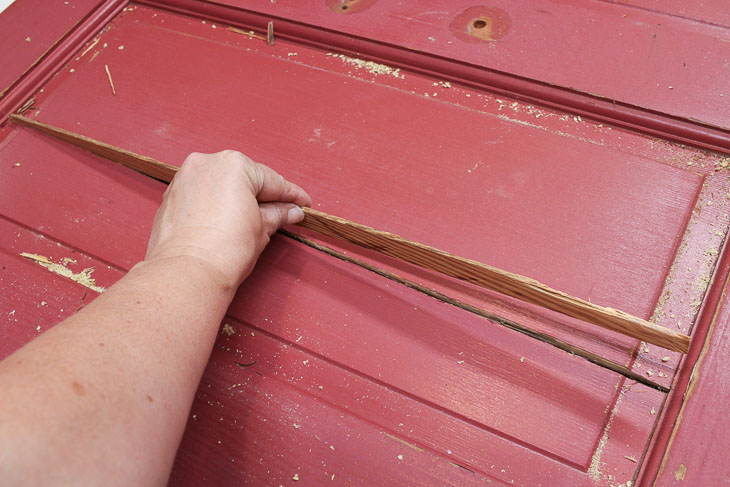
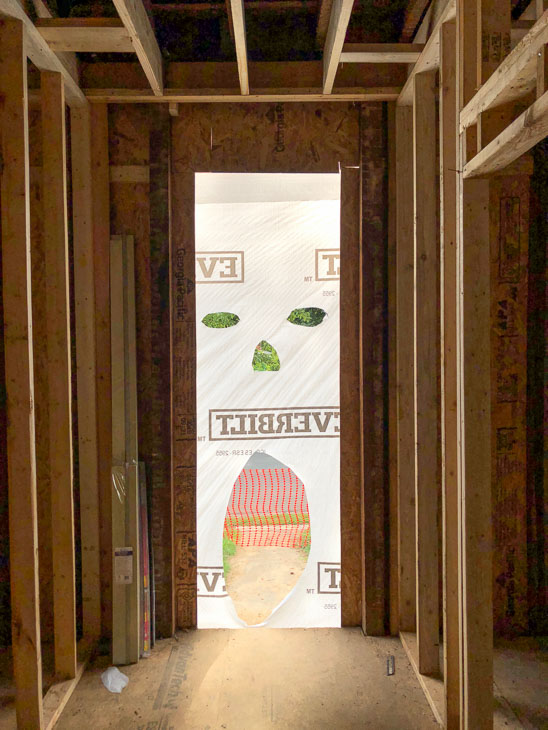
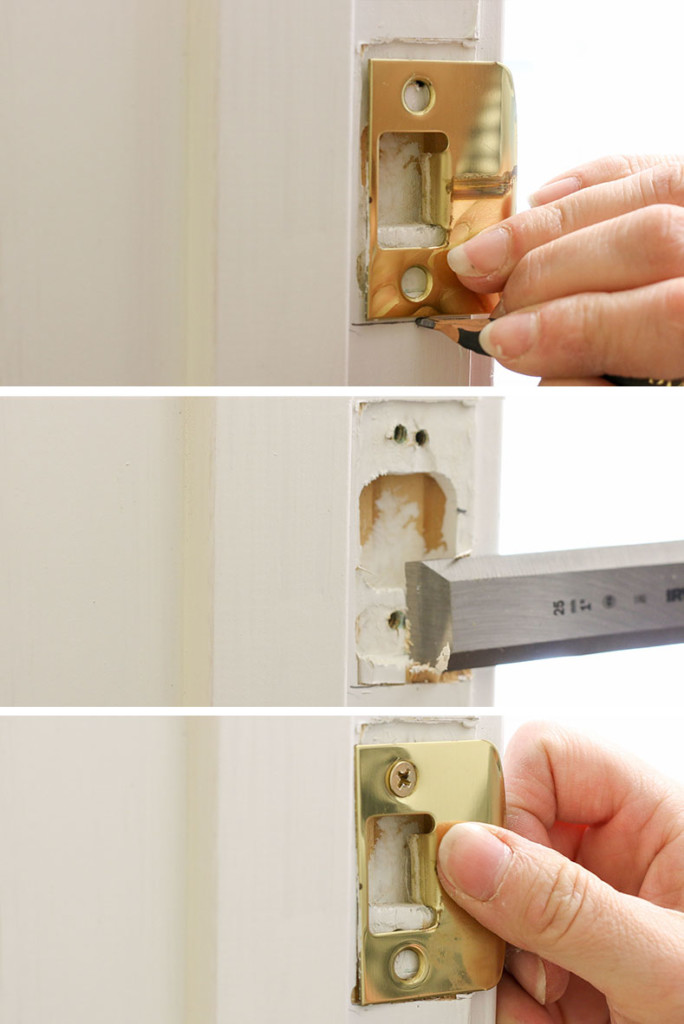
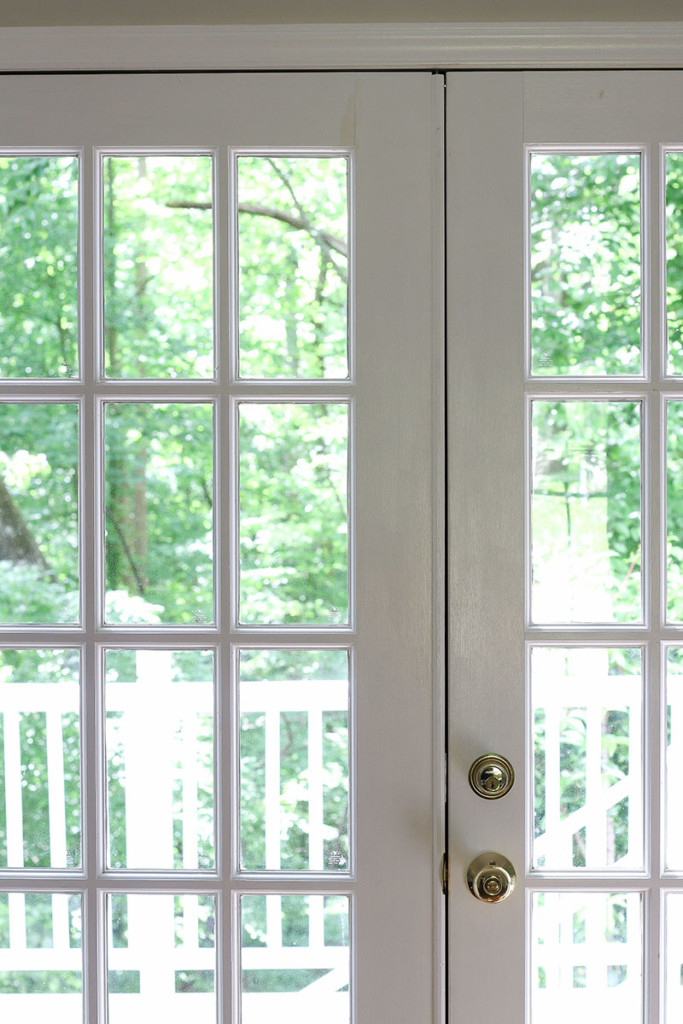
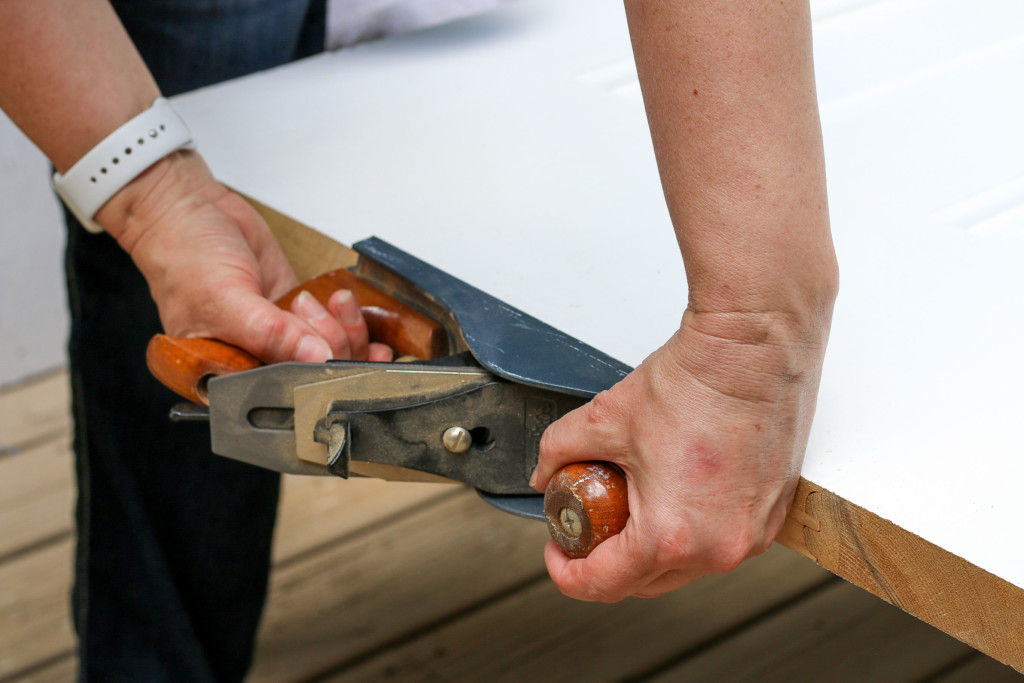
Looking better already!

Cleaned front doo

Now it was time to fix the door. Let’s learn how to repair a cracked door panel without taking the door apart.

Materials:

(I’ve included affiliate links for your convenience. I earn a small percentage from a purchase using these links. There is no additional cost to you. You can read more about affiliate links here.)

Instructions:

Lay the door on a flat surface like a workbench or saw horses.

burgundy side of dumpster found door

Using the Dremel with a cut off wheel, clean up the crack and open it to the width of your wood spline.

Open door panel crack with dremel cutting wheel

Sand smooth any jagged edges along the crack and any dings on the rest of the door.

Sanding door smooth

Test fit the spline into the crack. Make any adjustments to the crack as needed or cut a narrower spline on a table saw.

Insert wood spline into door crack

The spline should fit snuggly in the crack.

Test fit wood spline in door crack

Remove the spline and apply a liberal amount of wood glue into the crack.

Add lots of wood glue to door crack

Insert the spline and clamp the door until the glue hardens.

Clamp door repair overnight.

Chisel off the excess spline (you don’t need to get it perfect, but you’ll want to remove as much of the spline that protrudes beyond the door panel.)

Chisel off excess wood spline

Sand the repaired crack until the spline is even with the rest of the door panel.

Sand fixed door crack smooth

There will probably still be some minor cracks or voids, but these can be repaired with putty. Mix up a small amount of Durham’s Rock Hard Water Putty (just add water!) Apply along the repaired crack and fill in any small holes or dings on the door. Let the putty cure.

Use Durham wood hardener to smooth imperfections

Flip the door over and repeat the process of removing the excess spline material and adding the wood putty.

Add Durham Wood Hardener on back side of door repair

After the putty has dried, sand until smooth. Start with a 120 grit sandpaper and work your way up to 220 grit.

Sand cracked door panel repair smooth

Clean the door of any sanding dust. Tape off the window edges (if applicable). Prime the door on both sides (allowing one side to dry before priming the other side.)

Prime repaired door with KILZ 2 primer

Paint your door any color you like!

Paint repaired door with Magnolia Home Magnolia Green paint

Want to Stain Your Door Instead?

If you prefer the natural wood look on your door, be sure to choose a spline that matches your door’s wood species and skip the wood putty step.

Installing the Door:

Back at the house, my framers had some fun with the house wrap at the front door.

After I added an exterior door frame kit to my repaired door, the framers hung it in the rough opening.

Because I didn’t paint the exterior of the door yet, you can barely see the repair above. But, after a fresh coat of paint, I challenge you to spot the repaired crack!

Magnolia Green by Magnolia Paint - with Locally Sown by Magnolia Paint Siding

Do you like the color I painted the door? You might remember my decision making process when selecting the exterior color scheme. Ultimately I chose Magnolia Green and Locally Sown in the Magnolia Paint line.

Magnolia Green Door with Locally Sown Magnolia Home Paint on Siding

And just in case you thought I was only good at saving doors, apparently now I’m also a house saver! The Saving Etta house received her plaque denoting her name as it’s registered in the list of National Historic Properties.

Saving Etta: 1900 Home Saved from Demolition and restored into a beautiful Triple A construction modern farmhouse.

Hopefully she’ll last another one hundred plus years!

A funny story about the green door: Originally I was going to hang the door with the handle on the opposite side, but made a last minute change. The interior of the door was supposed to get painted gray to match the rest of the doors in the house (minus the salvaged 1900 doors shown above. They were left raw to show off the original wood grain and square peg construction.)

Many of you loved the green color and voted on Instagram to keep the front door green on both sides. Which is why Etta has a green front door inside and out!

Saving Etta: 1900 Home Saved from Demolition and restored into a beautiful Triple A construction modern farmhouse.

What do you think? Do you like the double-sided green door? Do you have a cracked door panel in need of repair? I know you can fix it.

signature