Stop overpaying at the auto shop! Try these DIY car maintenance hacks that show you how to handle common car problems quickly and affordably.
DIY Car Maintenance
Taking care of your vehicle doesn’t have to be complicated or expensive. With a little knowledge and the right tools, any car owner can handle basic routine maintenance that helps extend the life and value of their vehicle.
The good news is that many simple tasks like checking fluids, replacing wiper blades, or learning the best way to handle a flat tire can be done right in your own driveway.
Your owner’s manual is a great place to start since it outlines important service intervals and care tips specific to your vehicle.
When you do need supplies, a quick trip to your local auto parts store can provide everything you need to keep your car running smoothly.
With these great tips, you can save money, avoid unexpected breakdowns, and keep your vehicle in great shape for years to come.
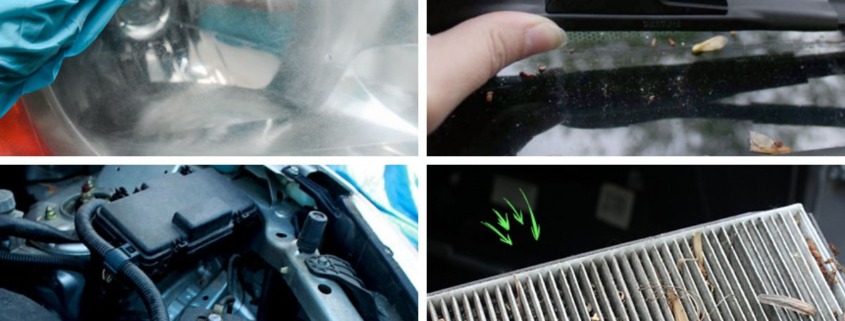
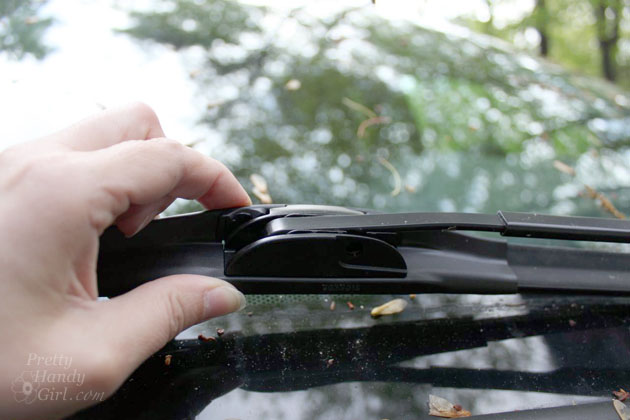
Newer vehicles have made changing your wiper blades incredibly simple. Learn how to change wiper blades on your own car with this easy tutorial. It only takes a little time and works for many different cars, saving you an unnecessary trip to the repair shop.
I learned how simple it is to replace vehicle cabin air filters. Just like the filters in your home, your car’s filters need to be changed regularly to keep everything running smoothly and in good shape! Let me show you this simple DIY tutorial that you can follow for your own vehicle.
Over the years, we’ve sold several cars and were able to get top dollar each time, even if it was an old car. A big part of that success came from staying on top of car repair and regular maintenance including an oil change, replacing the engine air filter, and checking tire pressure with a tire pressure gauge to help improve fuel efficiency. Today, I’m sharing 12 simple tips that will help you maintain the value of your car and maximize its resale price. Why not use these savings toward your new car?
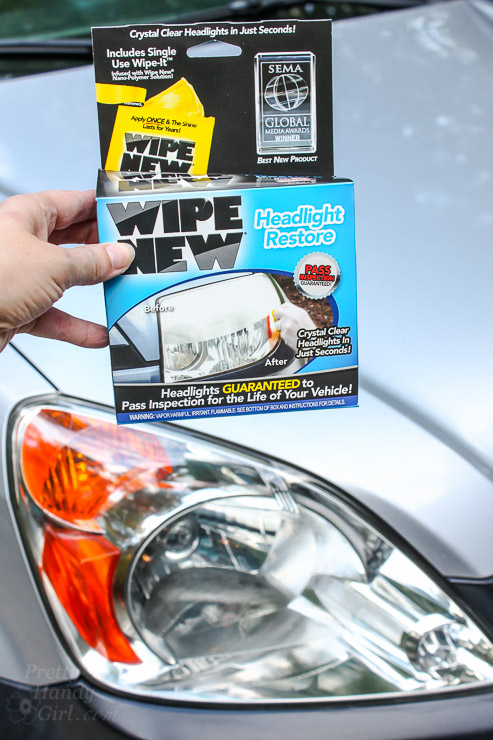
Are your car’s headlights starting to look dull and foggy? If you’re like me, you probably don’t have a lot of time to deal with small car maintenance tasks. I’m excited to share the easiest way to make your headlights look brand new again, so your car is ready for your next road trip. The added bonus is that this quick fix can also help improve nighttime visibility.
Replacing a car battery is easier than you might think and usually takes less than 30 minutes with a few basic tools. In this step-by-step tutorial, you’ll learn how to install a new battery, check it with battery testers, and follow your vehicle manufacturer’s recommendations to get the job done safely and quickly.
PIN FOR LATER
We hope you found these DIY car maintenance tutorials helpful and encouraging for taking better care of your vehicle. Whether you start with one small task or tackle several routine maintenance jobs, a little effort can go a long way in keeping your car running smoothly.
https://prettyhandygirl.com/wp-content/uploads/2026/03/DIY-Car-Maintenance.jpg12001200Brittany Baileyhttps://prettyhandygirl.com/wp-content/uploads/2021/07/PHG-logo-tagline-2020-1030x211-R.jpgBrittany Bailey2026-03-09 13:13:312026-03-09 13:13:33DIY Car Maintenance: How to Extend the Life and Value of Your Vehicle
The $20,000 Window Secret: What Those Window Suppliers Won’t Tell You
Hello, homeowners! Today, I’m putting on my general contractor hat to talk to you about a topic that often gets me into a “heated” discussion: replacement windows. By the end of this, I promise to shed some “light” on the situation—and I might just save you a fortune. Seriously, I recently saved my neighbor $20,000 by stopping her from making a major mistake. After all, replacing windows is a significant investment, depending on the number of windows needing replacement. Want to learn more? Great, keep reading.
The Four Questions You Must Ask First
I was chatting with that neighbor recently about her upcoming home projects. When she mentioned replacing all her original windows, I had to fight the urge to yell “Noooooo!” in slow motion. Instead, I asked her four simple questions:
Are your windows rotting beyond repair? (If yes, it’s truly time for a change.)
Can you actually open and close them? (If they’re just stuck, I can help you free them from years of old paint.)
Are they drafty? (If yes, high-quality storm windows might be the answer.)
Why, exactly, do you want to replace them? The answer to number four is usually the same: the promise of lower heating and cooling bills. But before you drop five figures on new glass, let’s learn about the “hidden” side of replacement windows.
The Myth of the “Energy Savings” Payback
The window industry has done an incredible job of making us believe old windows are “energy hogs.” While new windows will help improve your energy bills to some extent, windows are the least insulated parts of your home, and here is the secret: All windows are energy hogs!
Independent data from the Department of Energy and Consumer Reports tells a very different story than the sales brochures from window replacement companies:
The Lifespan Gap: Most modern windows last 20–30 years. This means they often fail and need replacing again before they’ve even “paid for themselves” in utility savings. This means the best windows may be the old single pane windows you already have.
The Payback Period: New windows can take 20 to 60+ years to pay for themselves through energy costs. A window replacement project may address some drafty windows, but it’s going to take a big hit on your finances.
Lifespan of a Modern Window:
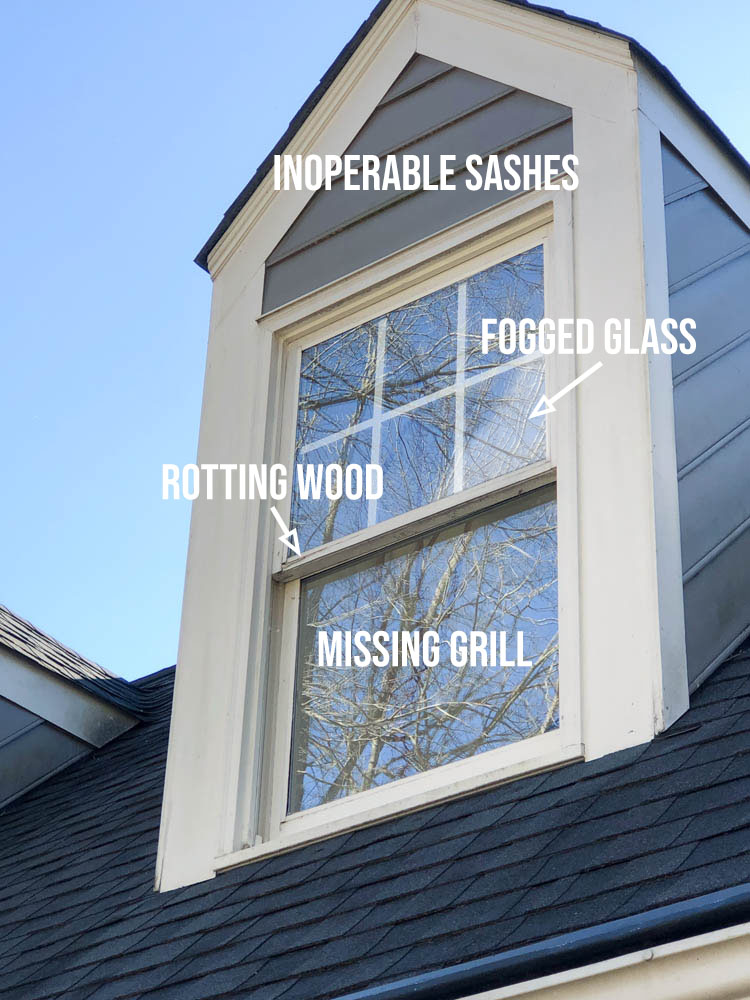
Typically at 20-30 years, double (or triple) pane windows will reach the end of their lifespan. Sadly, unlike single pane windows, they can’t be fixed. Regardless of the frame’s material, the window is often considered “at the end of its life” when these issues occur:
Seal Failure: This is the most common issue for double-pane windows. When the seal breaks, moisture gets between the glass (fogging), and the insulating argon gas escapes.
Warping: In cheap vinyl or poorly maintained wood, the frame can warp, making the window difficult to open, close, or lock securely.
Drafts: Improper installation and insulation can lead to cold drafts and heat loss. As a house settles or materials degrade, gaps can form between the insert and the original frame, leading to drafts.
If you’re concerned about energy savings and the environment impact, it’s important to recognize that replacement windows are not an eco-friendly choice. Your old windows will likely be added to the landfill. The manufacturing and installation processes of new windows contribute to carbon emissions and waste. Remember that the greenest option is to maintain and repair your existing windows.
What About Increasing the Value of Your Home?
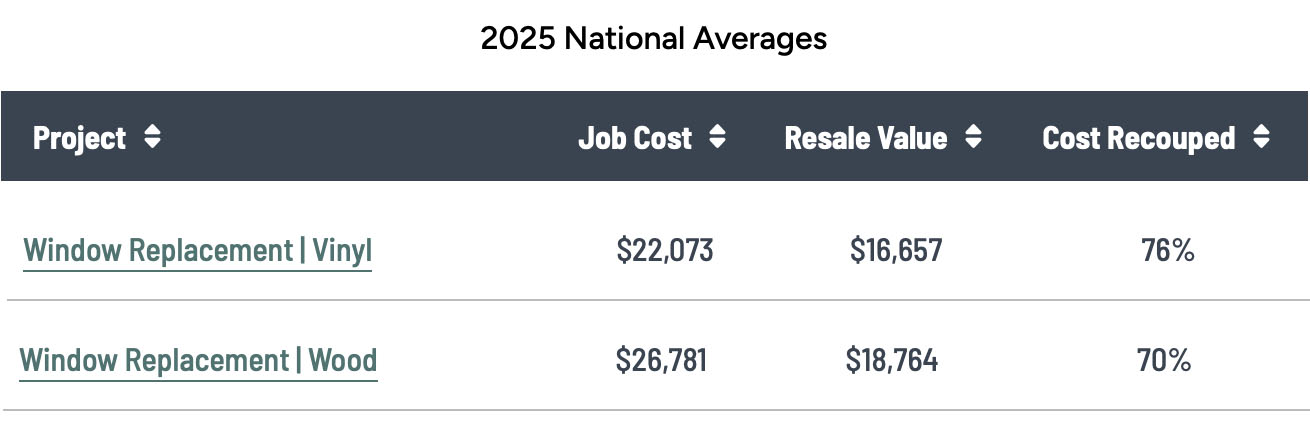
While new windows increase value, the Return on Investment (ROI) isn’t always the best. According to the Journal of Light Construction these are the returns on your investment you can expect from some common home improvement projects:
New Garage Door: 268% cost recouped.
Minor Kitchen Remodel: 113% cost recouped.
Window Replacement ROI: 70–76% cost recouped.
It’s always recommended to weigh the potential financial benefits against your specific circumstances and consult with a real estate professional to understand the market conditions in your area.
The Truth About Replacement Windows:
If you are still considering replacement windows, let’s chat about how they will impact your home’s appearance inside and out.
Change of Appearance to Your Home:
Every home has its unique character and architectural style. Unfortunately, replacement windows may not always blend with the original design and will negatively affect your home’s curb appeal.
Modern window styles and sizes might clash with the overall aesthetic of your home, potentially diminishing their charm and character. To maintain the architectural integrity of your home, you may need to consider new construction or sash replacement windows (keep reading to learn more). And of course you will need to check if you live in a historic preservation house requiring approval before investing in new windows.
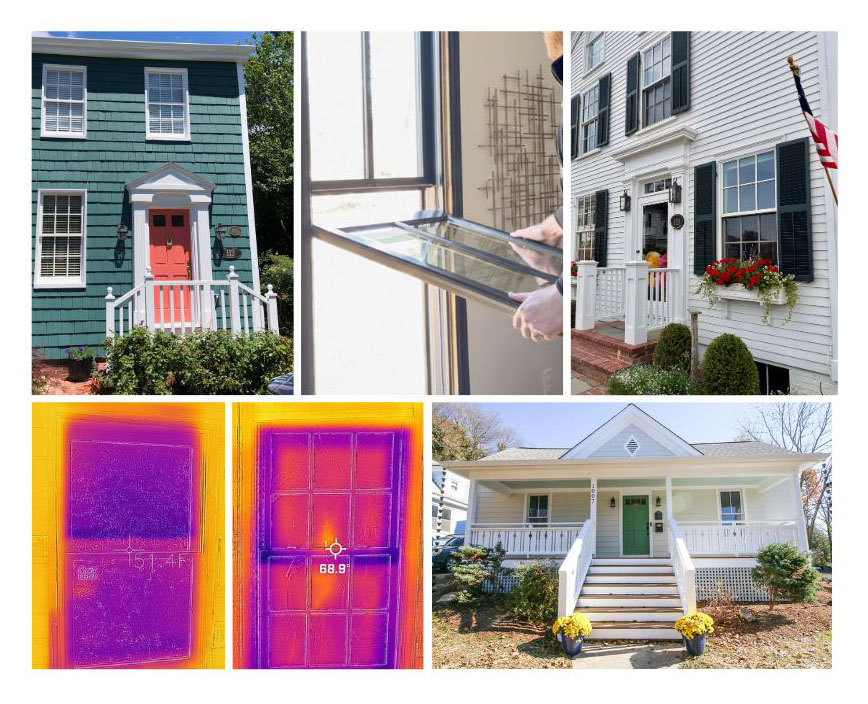
Can You Spot the Replacement Windows?
To get a good understanding of how replacement windows change the look on a house, take a peak at these three traditional houses. One has the original windows and two have replacement windows. See if you can tell the difference.
If you guessed that the first house has original windows, you are correct. Now that you’ve seen the visual difference, let’s chat about how those replacement windows might change the interior of your home.
Loss of Light
Did you know that replacement windows can reduce the amount of natural light that enters your home? Because replacement windows sit inside the original window frame and casing, the glazing area (or glass) area is less than your original windows. If you have a big window, it may not make a huge difference. But, if you have narrow windows or a dark house you might notice a big difference. (Scroll down to watch the video where I talk more about the difference between replacement, new construction, and original windows.)
The Low Maintenance Claim is Appealing
Usually, during that free consultation when the salesperson uses the term “maintenance free”, they are specifically talking about the frames. Here’s the difference between window frame material type:
Wood: If you replace your windows with new wood units, you are still signing up for a lifetime of staining or painting to prevent rot.
Vinyl, Fiberglass, and Aluminum: These materials won’t rot, peel, or require painting. This is the “maintenance-free” part.
But, you still need to clean the tracks, check and replace worn out caulk, lubricate metal parts, keep weep holes clear, and clean the glass panes.
IMPORTANT! Watch this Video to See the Visual Difference Between Types of Window
Here’s an important video I made showing the difference between all the different window types I discussed. By the end of the video you should be able to spot replacement windows from a mile away!
4 Ways to Upgrade Your Old Windows
When your old windows start to fail, most homeowners assume “replacement windows” are the only answer. However, depending on your budget, the style of your home, and how much light you want, you actually have four distinct options to take if you have older windows.
1. Repair or Add Storm Windows
Single pane windows were designed to last the lifetime of your home if they are maintained. Rather than replacing them entirely. Regular maintenance, such as weatherstripping and caulking, can significantly improve energy efficiency without the need for complete replacements. Plus, reglazing and painting can improve the look of your windows and prevent them from deteriorating.
To make them more energy efficient, add high-quality storm windows. This setup can be nearly as energy-efficient as modern construction at a fraction of the cost.
2. Replacement Windows (Insert Windows)
The most popular choice of window installers are replacement windows. And for good reason: they are quick to install and don’t require messing with your interior trim during the installation process. These units slide right into your existing frames (after careful measurements and ordering the window units)
The Catch: Because they sit inside your old frame, the window unit is “chunkier”, meaning you lose several inches of glass and natural light.
Lifespan: Not all replacement windows are the same quality. And depending on material (and window installation) replacement windows may fail within anywhere from 15-30 years (potentially less time if not installed correctly.)
Expected Lifespan of a Replacement Window
MaterialType
Average Lifespan
Variables Affecting Longevity
Vinyl Windows
20-40 years
High-quality vinyl resists warping, but extreme heat or UV exposure can cause low-grade vinyl to crack or discolor sooner (sometimes as early as 10-15 years).
Wood Windows
15 – 30 years
Extremely durable but high-maintenance. If regularly painted/sealed, they can last 50+ years; if neglected, they can rot in under 20 years.
Fiberglass Windows
30 – 50 years
The most durable option. It doesn’t expand or contract like vinyl, which helps the seals stay intact much longer.
Aluminum Windows
20 – 30 years
Very strong and resists rot, but prone to corrosion (especially in coastal areas) and seal failure over time.
3. New Construction Windows
Unlike inserts, these are installed directly into the house’s rough framing. While they require removing the trim and involve more labor, the benefits can be significant:
Better Insulation: You can properly flash and foam around the window frames to stop drafts during professional installation.
Maximum Light: They look more like original windows and don’t sacrifice light by having a bigger glass surface area.
This is a great middle-ground option where you only replace the moving parts (the sashes) of the window. It’s a less messy process that doesn’t damage walls or casing and maintains your original light levels. New sashes also address inoperable windows that were stuck or tough to open.
The downside is they won’t fix any energy loss around the window frame (if there is some.)
Conclusion
Upgrading your windows is a major home investment, but it isn’t a one-size-fits-all solution. While replacement windows are a popular fix for broken seals and drafts, they aren’t your only product options—and they aren’t always the best one. As we’ve seen, the high upfront costs and long “payback” periods mean that windows rarely pay for themselves through energy savings alone. Furthermore, the “chunky” frames of insert windows can cost you inches of precious natural light.
Before you commit, evaluate what matters most to you: Is it the quick convenience of an insert, the superior insulation and maximum light of a new construction window, or the historic charm and cost-savings of repairing your original windows? Remember, sometimes the best window is a well-maintained one. Whether you choose to DIY a sash replacement or go for a full frame-out install, make sure you’re choosing the path that preserves the character, comfort, and light of your home.
It’s also important to choose a contractor that will give you a proper installation to truly achieve energy-efficient windows. I have a very popular article on how to choose great contractors and prevent yourself from being a victim. It will take you through the important steps when hiring a contractor to work on your home.
I hope this guide helps you navigate the sales pitches and find the perfect window solution for your house!
As a licensed general contractor, I love to help people make smart decisions on their home improvement projects. Feel free to ask me any questions you have in the comments.
https://prettyhandygirl.com/wp-content/uploads/2026/02/DO-YOU-REALLY-NEED-TO-REPLACE-YOUR-WINDOWS-TOP-IMAGE.jpg.jpg704868Brittany Baileyhttps://prettyhandygirl.com/wp-content/uploads/2021/07/PHG-logo-tagline-2020-1030x211-R.jpgBrittany Bailey2026-02-17 17:58:392026-02-17 18:15:45STOP! Don’t Put Replacement Windows in Your Home before Reading This
Tackle these 27 DIY exterior home maintenance tasks to keep your house in great shape. Easy, budget-friendly tips you can handle yourself.
Home Maintenance Projects for the Exterior of Your Home
Taking care of the exterior of your home might not be the most exciting task, but it’s one of the best ways to keep everything running smoothly and looking great year after year.
From simple cleanups to small repairs, regular exterior home maintenance projects help prevent bigger, more expensive problems down the road while boosting curb appeal at the same time.
The good news is that many of these tasks are easy to tackle on your own and don’t require special skills or tools. A little effort now goes a long way toward protecting your home, keeping it safe, and helping it look its best in every season.
27 Exterior Home Maintenance Tasks
Stay ahead of wear and tear with these necessary exterior home maintenance tasks that help protect your home, boost curb appeal, and prevent costly repairs before they start.
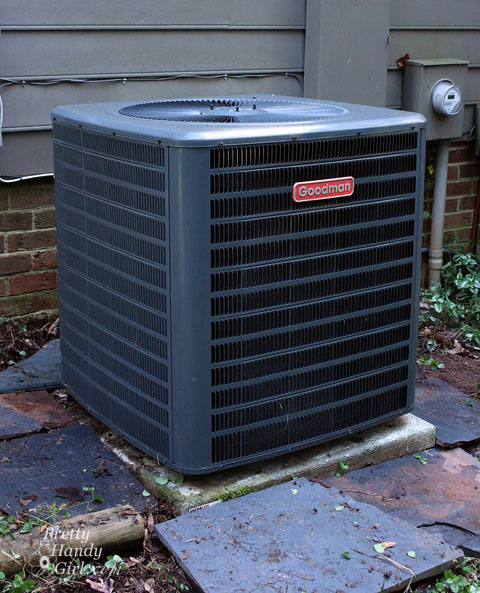
Learn simple ways to keep your HVAC system running smoothly with easy maintenance tips that improve efficiency, extend its lifespan, and help avoid costly repairs.
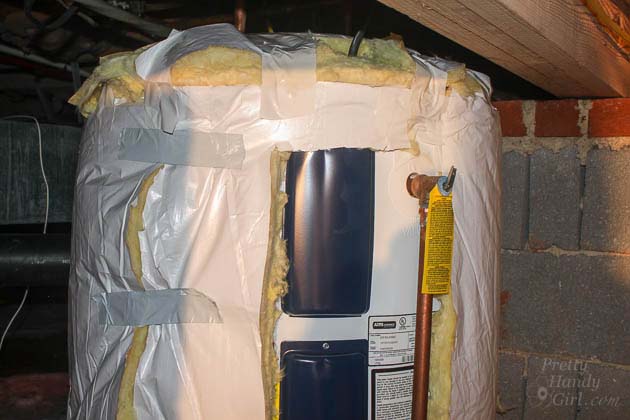
Learn how to make a tank style water heater more energy efficient to lower maintenance costs, keep it in good working order, and ensure reliable performance during the winter months.
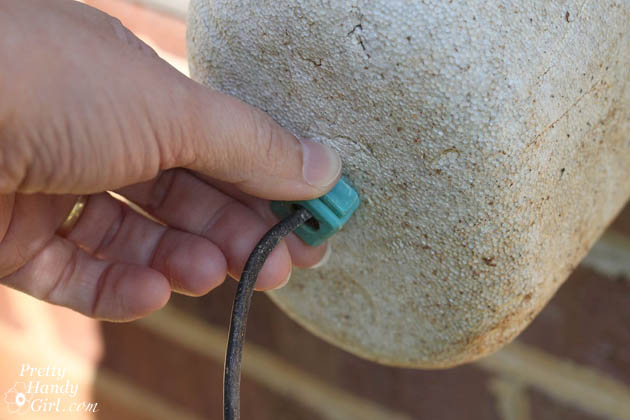
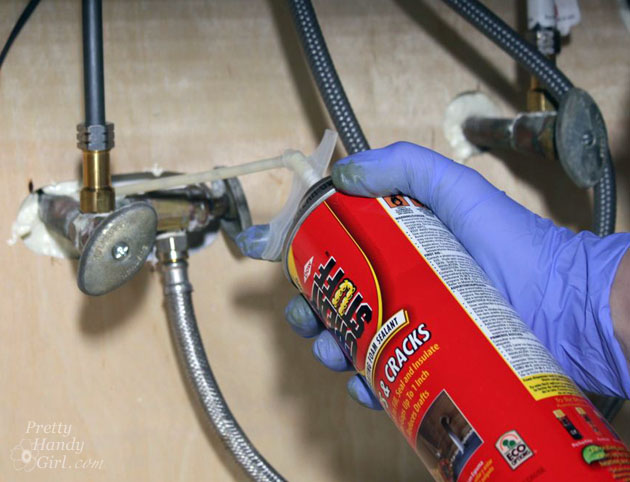
Protecting your spigots from freezing pipes is an easy preventative step that helps avoid leaks, water damage, and costly repairs during colder months.
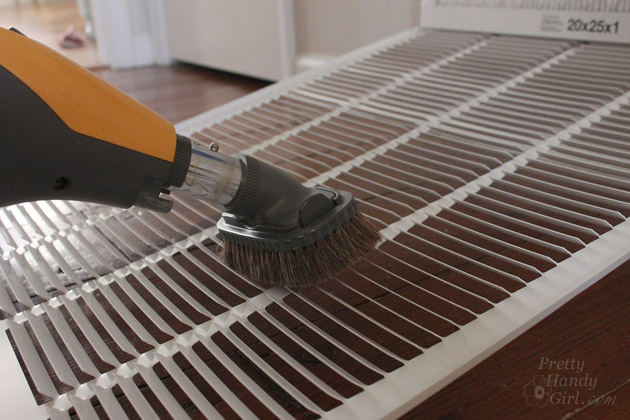
Learn the warning signs of restricted airflow, common causes like dirty filters or blocked vents, and simple fixes to keep your system running efficiently.
Water leaks, polybutylene pipes, and mold can quickly turn into serious home issues. Learn what to do, how to spot warning signs, and the steps to protect your home from costly damage.
Get your home ready for colder months with 21 easy tips that focus on regular checks to help prevent damage, improve efficiency, and keep your home comfortable all winter long.
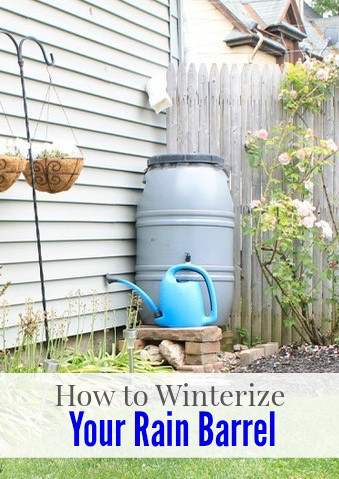
Learn how to winterize your rain barrel to prevent freezing, protect your system from damage, and ensure it’s ready to use again when warmer weather returns.
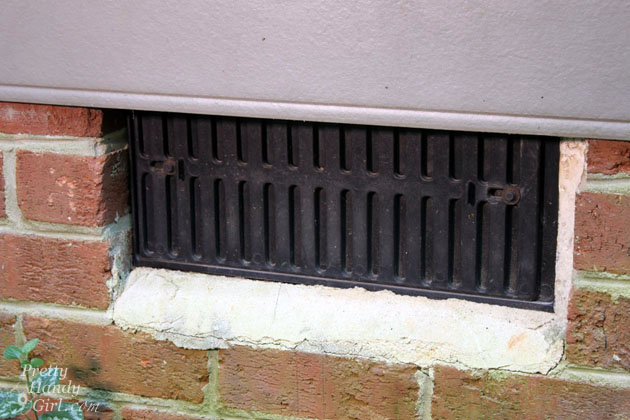
Do you open or close crawl space vents? Learn when to adjust them, how climate and seasons play a role, and what helps protect your home from moisture and damage year-round.
Learn how to install an exterior motion sensor light with easy step-by-step guidance to improve safety, boost security, and brighten outdoor spaces automatically.
Clean up your home’s exterior without a pressure washer or ladder. This easy method removes dirt and grime safely while keeping the job simple and DIY-friendly.
Give your outdoor seating a fresh new look by painting rusty or chipped metal patio chairs in 5 easy steps. This simple makeover refreshes worn furniture and delivers awesome results without a big budget.
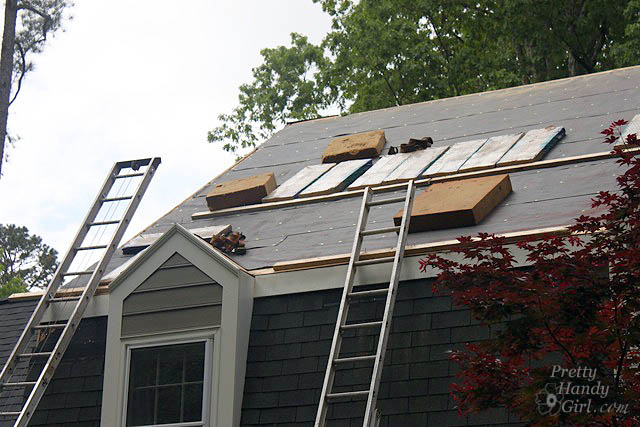
Here’s what you should know about replacing your roof and asphalt shingles, including roof damage signs, what to expect during the process, and tips to help protect your home and future roof damage.
Learn how to fix small areas of wood rot before they turn into major damage. This simple repair helps protect your home and extend the life of wood surfaces.
Learn how to seal and protect your deck with easy steps that guard against moisture, sun damage, and wear, helping your outdoor space last longer and look great.
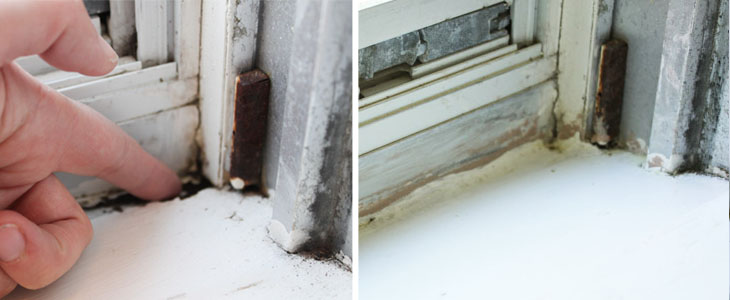
Learn how to fix cracks in door panels without taking the door apart using simple tools and easy repair techniques. This quick DIY helps restore the look of your door and prevents further damage without a full replacement.
Learn how to repaint a metal storm door with simple steps that refresh its look, protect it from the elements, and extend its lifespan without a full replacement.
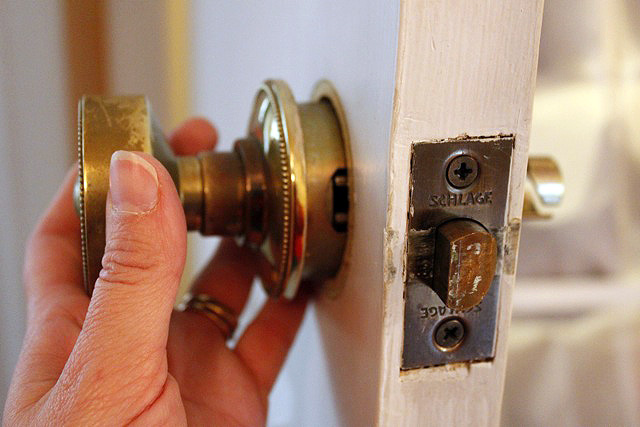
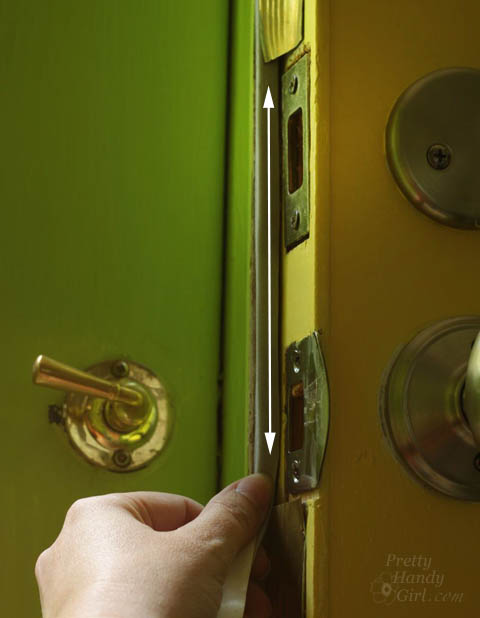
Learn how to replace door knobs and deadbolts with easy, step-by-step instructions to improve security, update your home’s style, and complete a simple DIY upgrade in no time.
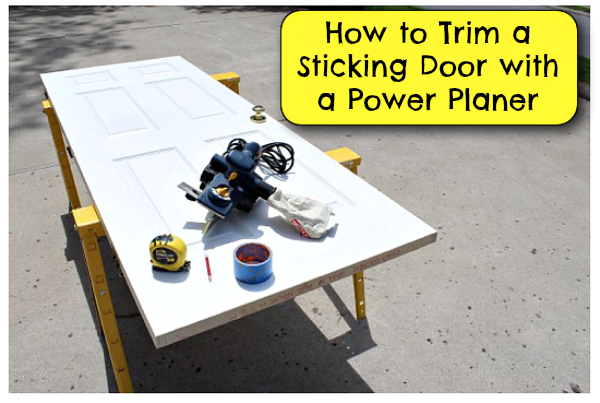
A sticking door or one that won’t close properly can be frustrating, but it’s a very common problem. Once you understand the causes, fixing everyday door issues can be quick and easy.
Learn how to trim a sticking door with a power planer using easy, step-by-step tips to improve the fit, stop rubbing, and get your door opening and closing smoothly again.
Save money and avoid costly repairs with these DIY home maintenance ideas. Step-by-step fixes and seasonal tips to keep your house running smoothly.
Home Maintenance Tasks
Keeping up with home maintenance can feel overwhelming, especially as the seasons change and your house ages. Whether you’re settling into a new home or you’ve lived in your space for years, regular maintenance is the key to avoiding costly major repairs down the road.
The good news? Most home upkeep tasks are simpler than you might think and totally doable with a little guidance. This list of 30 home maintenance tasks breaks everything down into manageable steps, helping you stay on top of your home and keep it running smoothly all year long.
Easy Home Maintenance Tasks
These regular home maintenance tasks are helpful and easy to tackle. Keeping up with them will help ensure your home stays in tip-top shape for years to come.
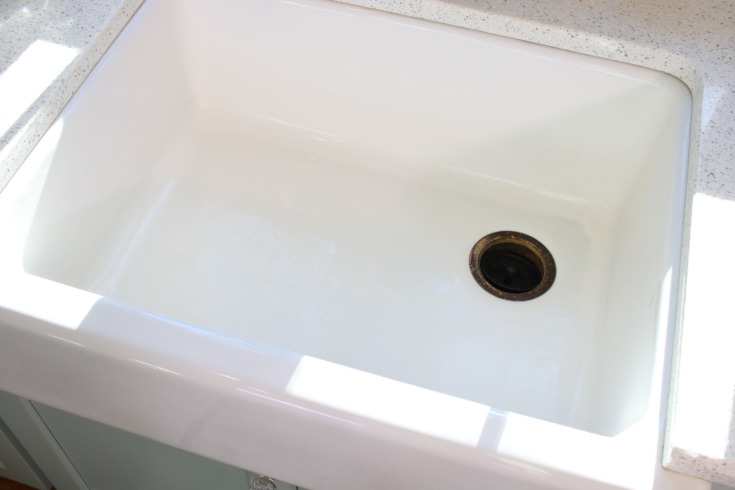
Learn how to remove scratches from a cast iron sink or tub to restore its finish and prevent stains from getting worse over time. This simple fix helps protect your bathroom or kitchen surfaces and keeps them looking their best.
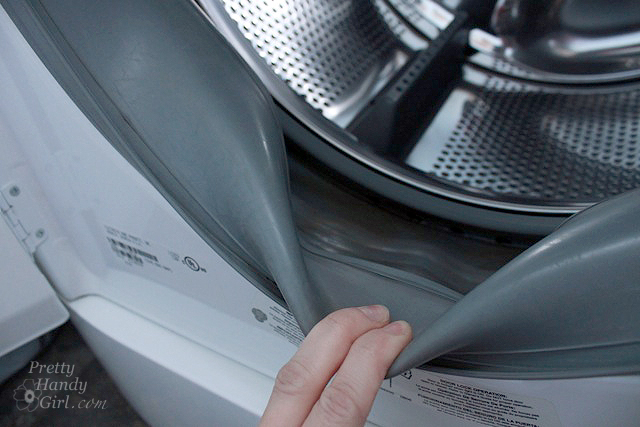
Here’s how I kept my high efficiency washer mold free with simple habits that support the care of your washer and encourage proper maintenance. These easy steps help prevent odors, buildup, and costly repairs over time.
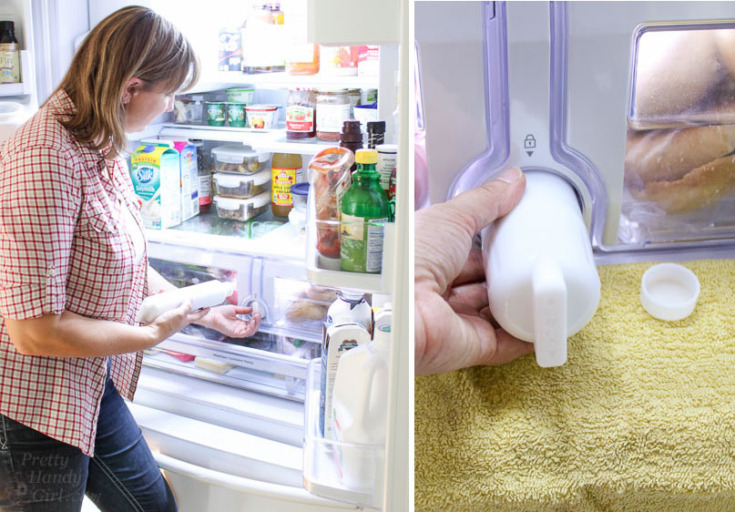
Learn how to replace refrigerator water filters on a regular basis and avoid a common home maintenance mistake that can affect water quality and appliance performance.
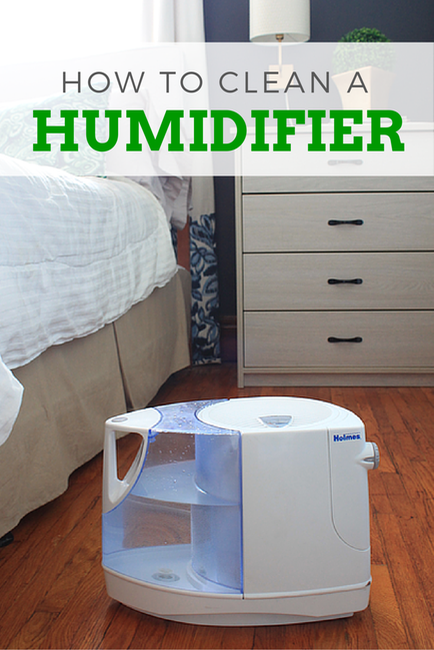
Learn how to clean a humidifier the right way to prevent mold and mineral buildup, improve air quality, and keep it working safely and efficiently in your home.
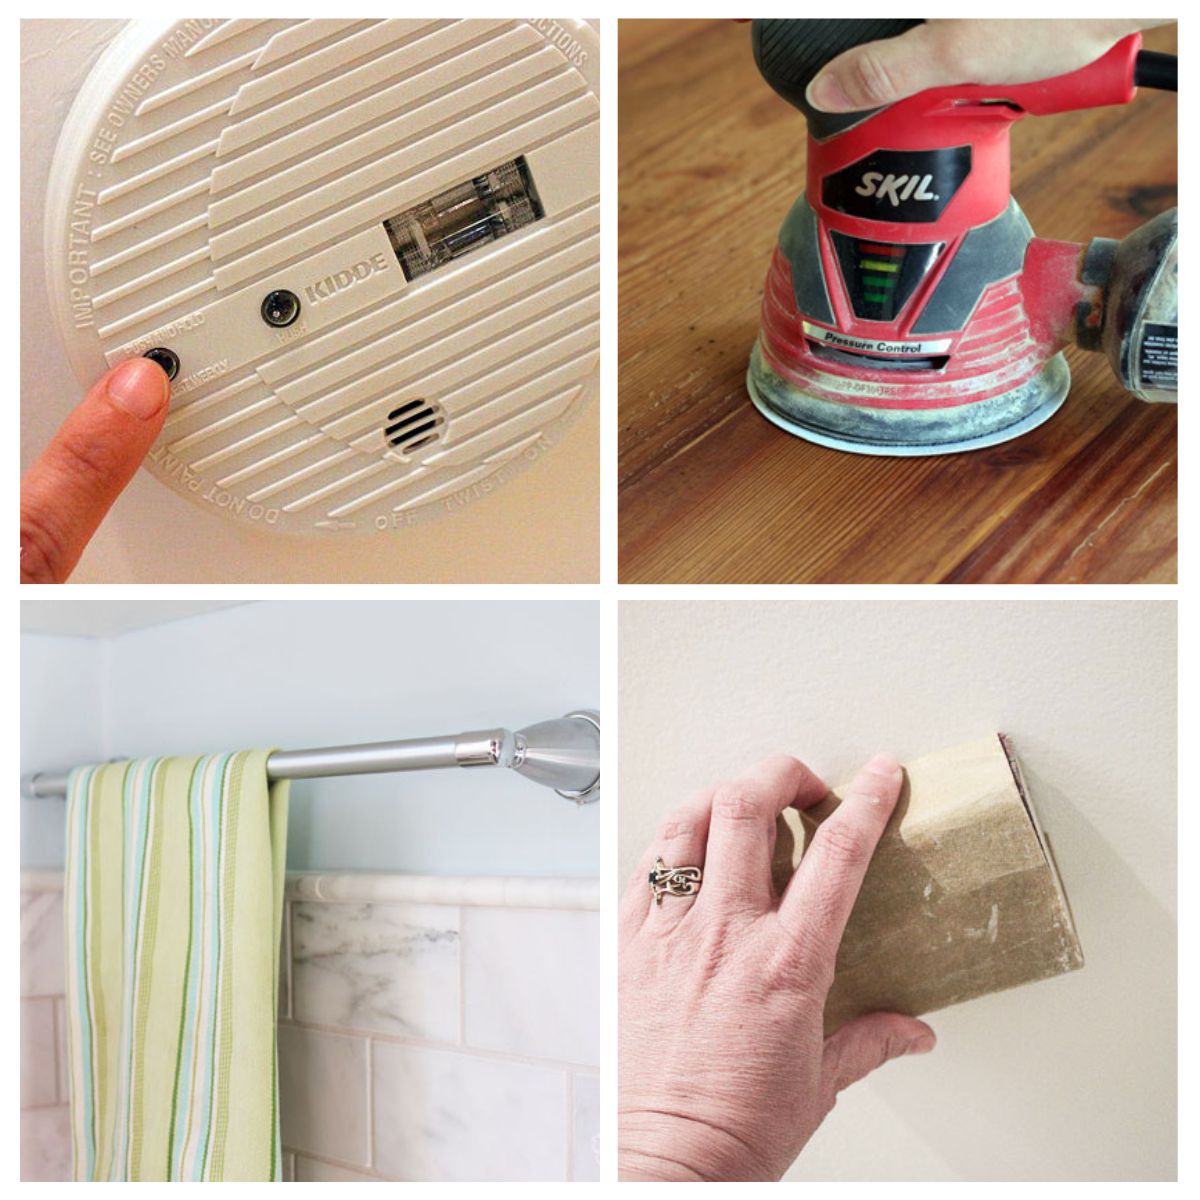
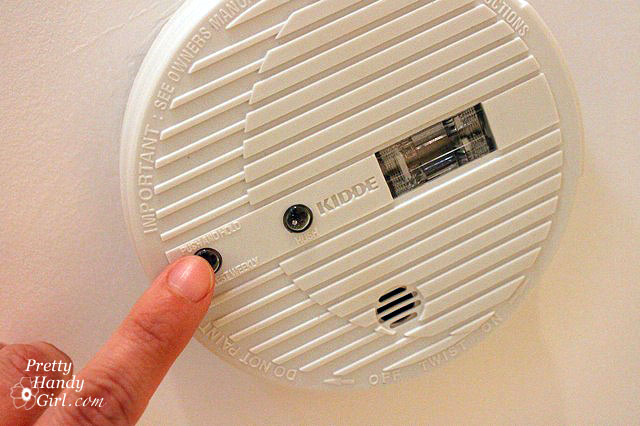
Smoke detectors are a critical safety feature, and staying on top of simple tips can help catch small problems before they become serious. Regular testing and maintenance keep your home protected and your alarms working properly.
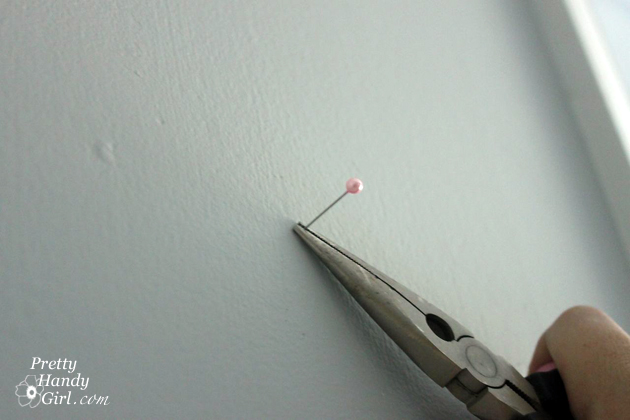
Learn how to patch holes in drywall to fix small damage before it turns into major problems. This easy DIY repair helps restore smooth walls and keeps your home looking its best.
Learn how to clean drips inside your oven door with simple, effective steps to remove built-up grease and grime, helping your oven look better and work more efficiently.
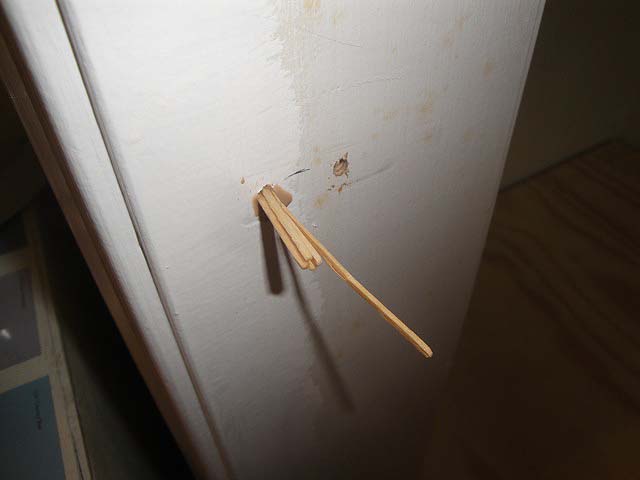
Learn how to fill voids and knot holes in wood using simple techniques that create a smooth finish and help strengthen wood surfaces for long-lasting results.
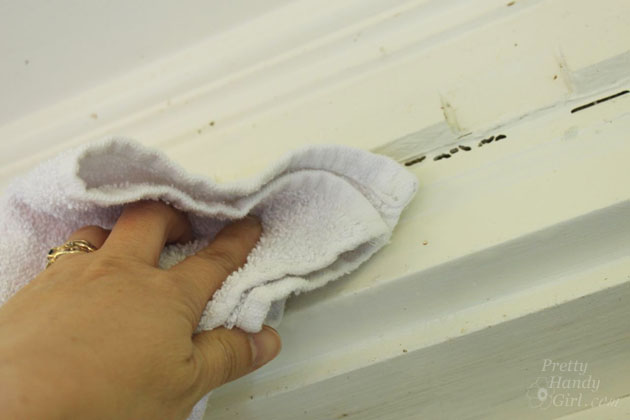
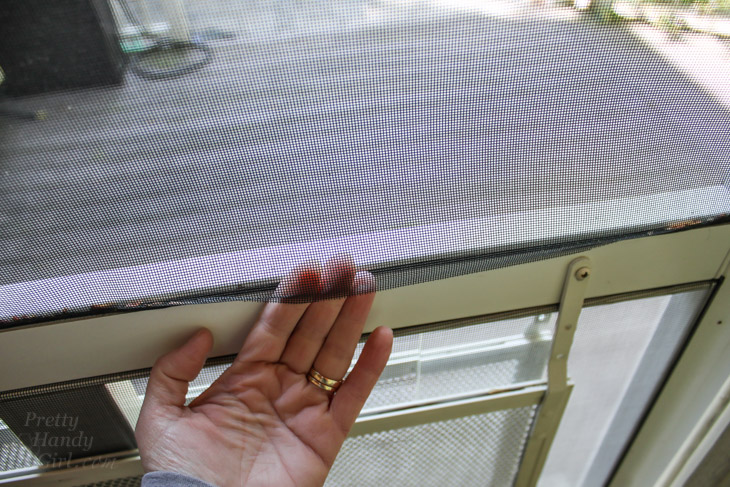
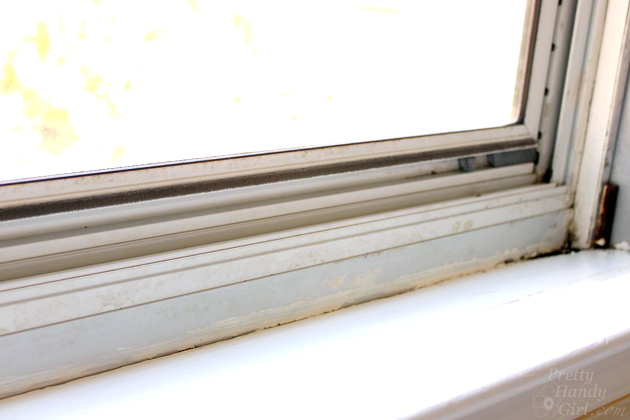
Learn how to easily clean mildew off storm windows with simple, effective methods that remove buildup, improve clarity, and help prevent mildew from coming back.
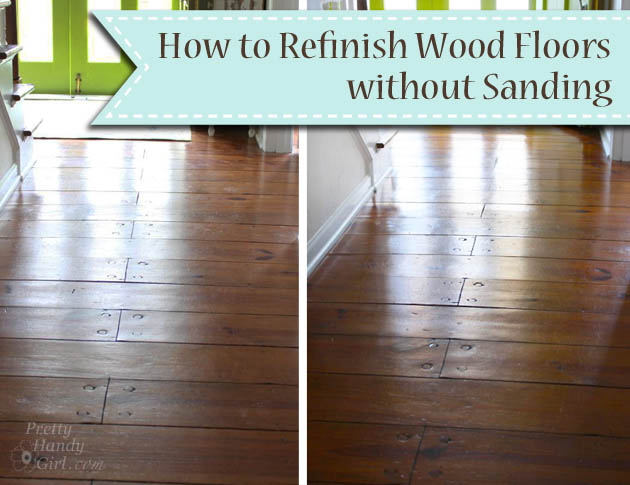
Learn how to refinish wood floors without sanding using easy, low-mess techniques that restore shine, refresh worn areas, and extend the life of your floors.
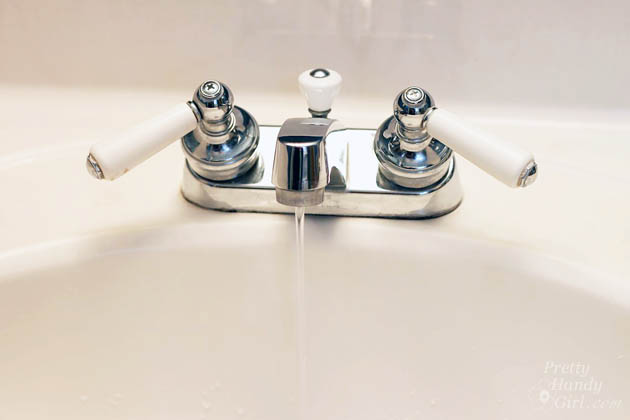
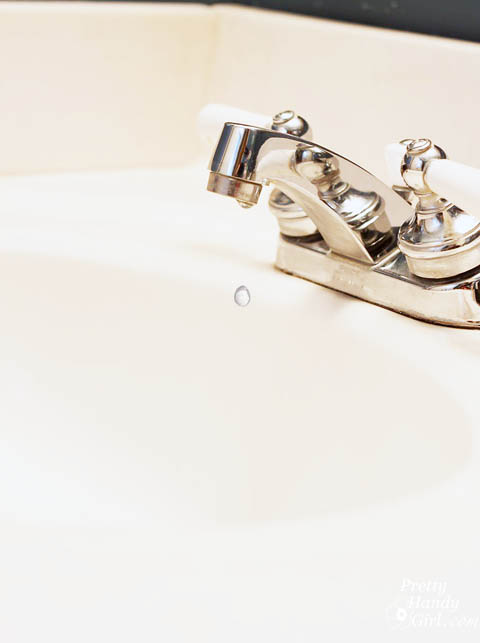
Learn how to fix a leaky faucet in 10 minutes with a quick, easy DIY repair that stops dripping, saves water, and prevents unnecessary wear on your fixtures.
Fix 1 didn't help? Learn another way to fix a leaky faucet. This quick DIY shows how to stop the drip fast, save water, and get your faucet working properly again.
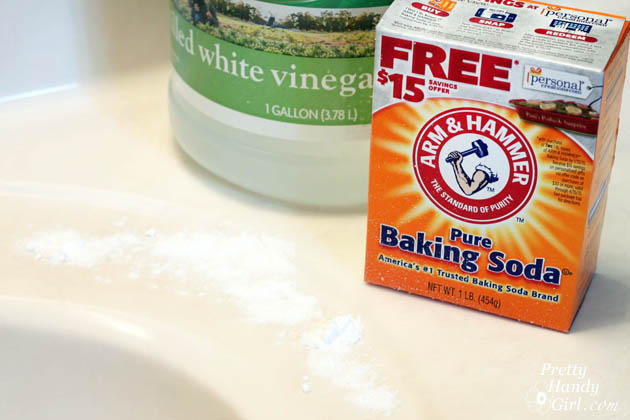
Try a non-toxic drain opener for a safe, effective way to clear slow drains without harsh chemicals, making it better for your home, pipes, and family.
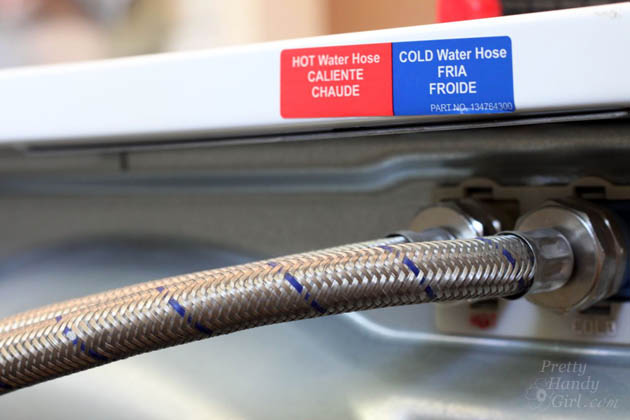
Replace water lines with braided metal hoses to reduce the risk of leaks, improve durability, and add a simple upgrade that helps protect your home from water damage.
Discover 10 places you probably forget to dust, with easy reminders that help reduce allergens, keep your home cleaner, and improve overall air quality.
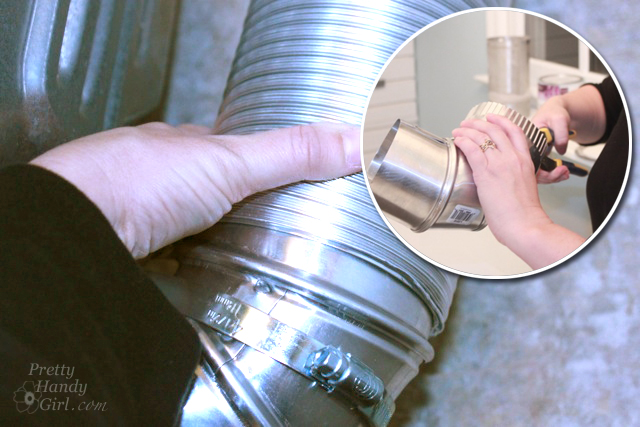
Installing a semi-rigid dryer hose helps prevent fire hazards by improving airflow, reducing lint buildup, and creating a safer, more efficient dryer vent system.
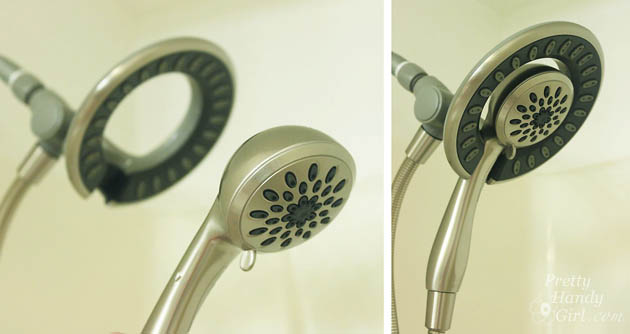
Learn how to repair a leaky shower or tub faucet with easy, step-by-step guidance to stop drips, save water, and prevent further damage to your fixtures.
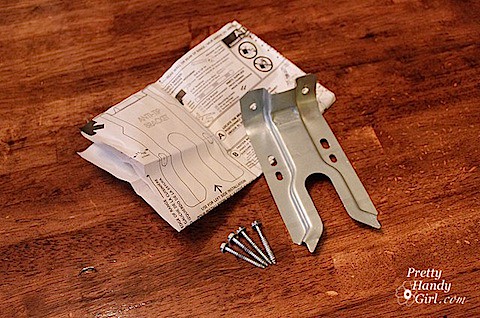
Installing an anti-tip bracket for your oven is a necessary safety upgrade that helps prevent tipping accidents and keeps your kitchen safer for kids, pets, and everyday use.
https://prettyhandygirl.com/wp-content/uploads/2026/01/31-Easy-Home-Maintenance-Tasks.jpg12001200Brittany Baileyhttps://prettyhandygirl.com/wp-content/uploads/2021/07/PHG-logo-tagline-2020-1030x211-R.jpgBrittany Bailey2026-02-02 19:00:002026-02-02 18:25:03Easy Home Maintenance Tasks You’re Probably Not Doing but Should (Interior)
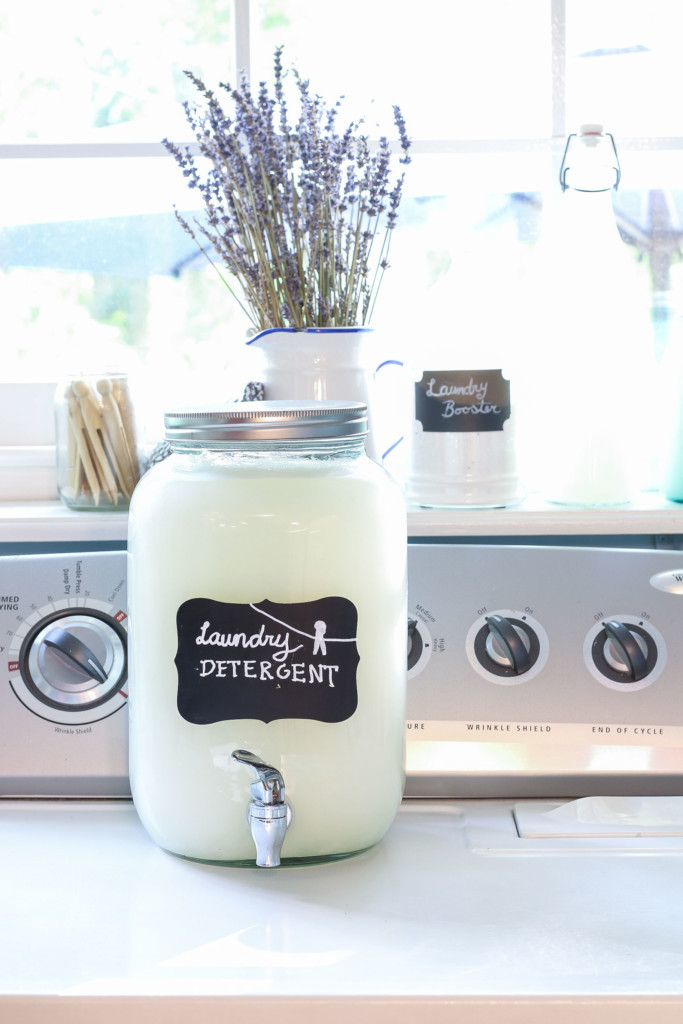
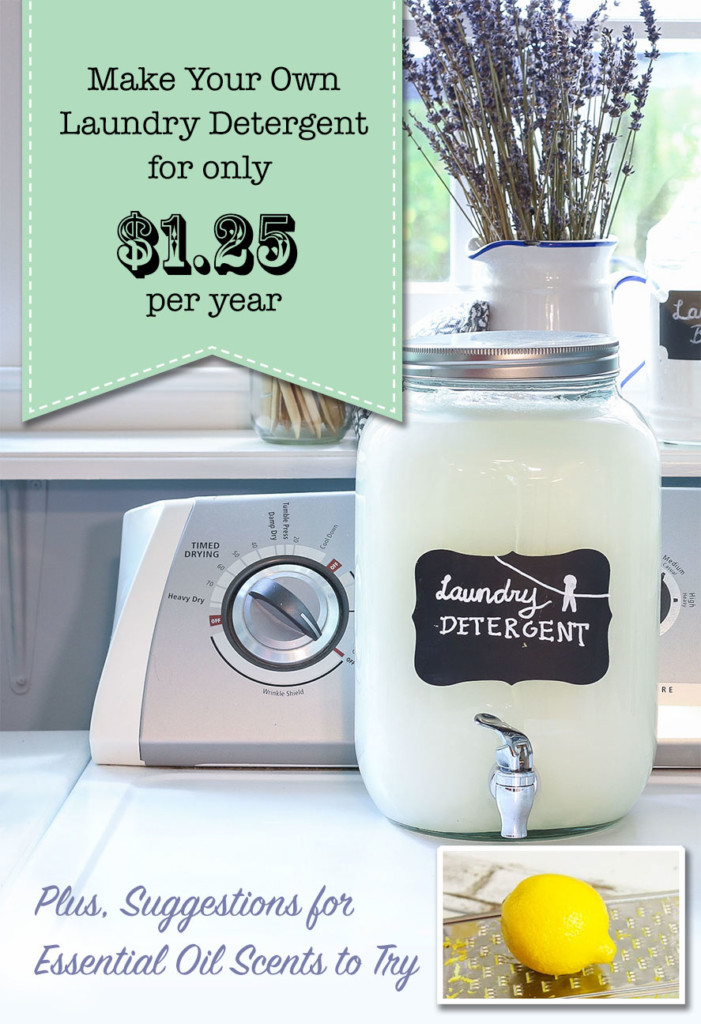
Today’s tip is a DIY laundry detergent recipe that is gentle on your washer (HE and regular), but most importantly it will save you money!
If you’ve ever looked at the cost of store-bought detergents, you may have choked at the cost. I have a wonderful detergent recipe to make your own own homemade laundry detergent for only $1.25 per year!
And the detergent is low suds and low residue which will keep your washer and clothes cleaner.
How to Make DIY Laundry Detergent
If you think this homemade liquid laundry detergent couldn’t possibly work on dirty clothes, think again. I can tell you that in addition to our regular clothing, I’ve been using this recipe for 9 years on my boys’ clothes, on my own work clothes, and my husband’s karate clothing. And it really works.
The great thing about this laundry detergent is the basic ingredients are simple, gentle on sensitive skin, and can be purchased at your grocery store. Just look on the high or low shelves in the laundry detergent aisle.
If you can’t find them in the laundry aisle, it’s always a good idea to look at your local hardware or home improvement store.
To make the homemade detergent, you only need about 15 minutes and then let the liquid detergent sit overnight. The next morning, you stir, add more cold water, and you are done!
Do you think that’s too much time to devote to making your own laundrysoap? What if I told you that this batch lasts our family of four (did I mention two of them are young boys) six months or more.
Several of you asked me to make a video showing how I make my own detergent. For your convenience you can watch the video, then scroll down to read the directions to make your own laundry soap.
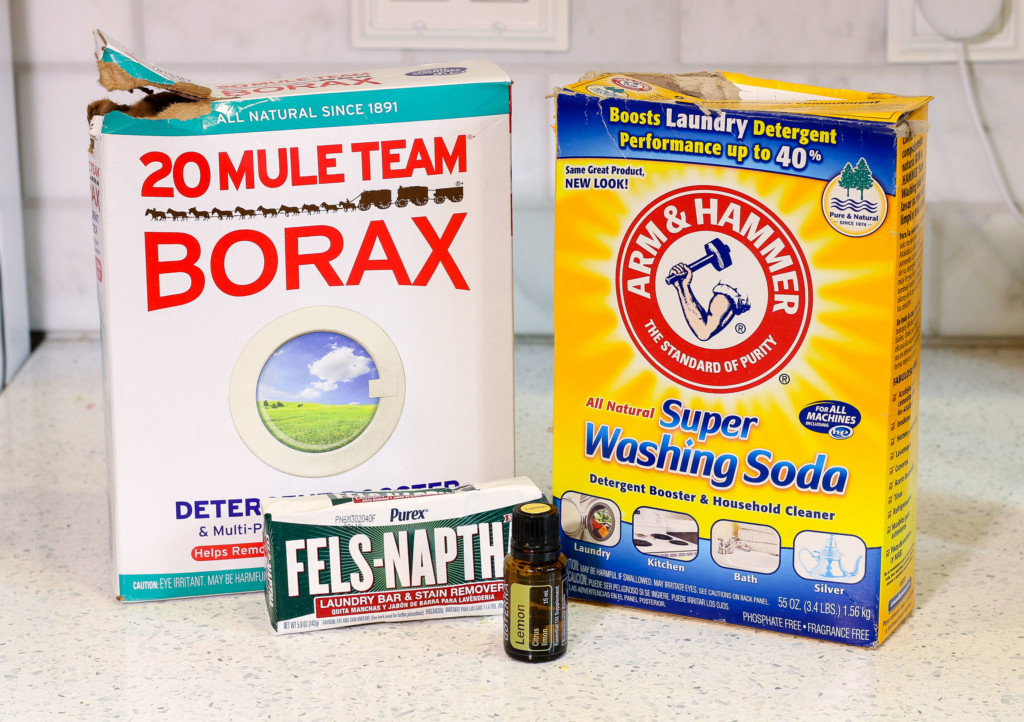
Ingredients:
(I’ve included affiliate links for your convenience. I earn a small percentage from a purchase using these links. There is no additional cost to you. You can read more about affiliate links here.)
Please note, you can purchase these items cheaper at your local grocery store or hardware store. The links are here to help you see what the box looks like or to order if you can’t get to the store.
Optional: Essential Oil for Scent (see below for scent ideas)
Instructions:
The first step is to cut your Fels Naptha Bar in quarters. Grate one quarter of the Fels Naptha Bar using a fine cheese grater.
Boil 1 cup of water. Pour grated Fel Naptha into pan of boiling water. Stir continuously until the soap has dissolved. Meanwhile, pour 2 1/2 quarts (10 cups) of water into a large container or bucket. Pour dissolved Fels Naptha into the bucket of water. Stir.
Add 1/4 cup Super Washing Soda and 2 TBSP Borax to the bucket.
Add 2 1/2 quarts more water and stir.
Cover the mixture and let is sit overnight out of reach of pets or children. Uncover the bucket and stir the gelatinous mix.
Add 5 Quarts (20 cups) of water to the bucket. Stir.
If your clothing gets stained, try soaking in this miracle stain remover a day or two before laundering. You’ll be amazed how the stain lifts out effortlessly. It’s a great way to get even the toughest stains out.
How did I figure out my cost per year?
I had to do a little guestimating to figure out my cost. In the nine years I’ve been making this recipe, I’m only on my second box of Borax and Arm & Hammer Washing Soda.
Each batch of this homemade laundry soap consists of at least 4o cups. If you use the required 1/4 cup per load (do not use more, as more detergent won’t get your clothing cleaner) you can easily get 160 loads of laundry from each batch.
All this to say, I came up with a very conservative estimate that I pay $1.25 for laundry detergent per year, much less than commercial detergents.
The next time you have a load of laundry to wash, give this diy laundry soap a try. You may never buy commercial laundry detergent again!
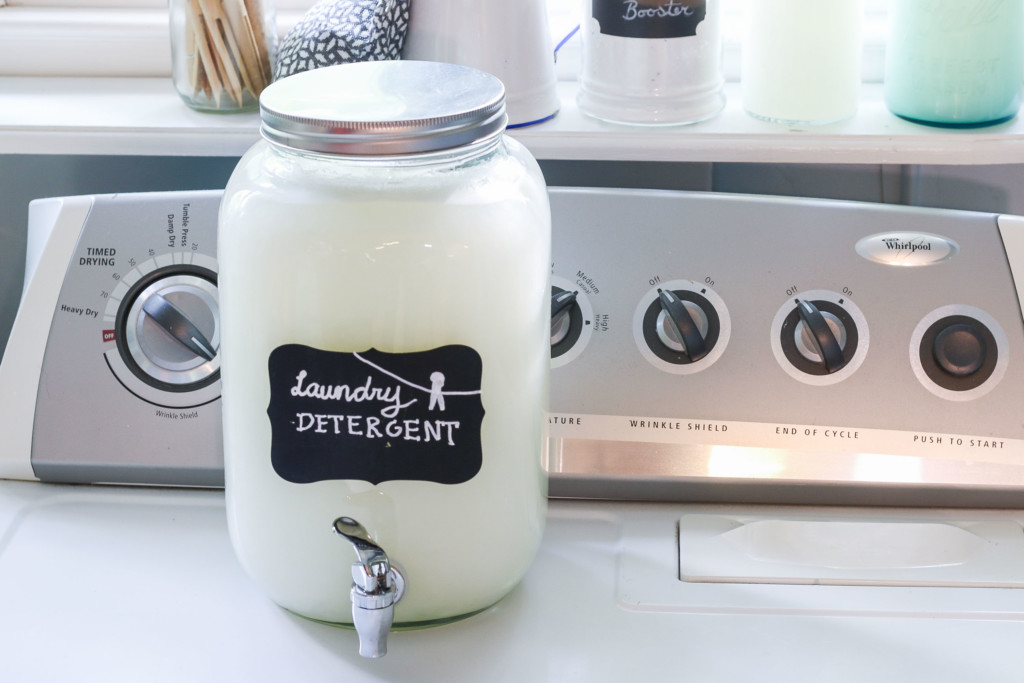
Storing Your Laundry Detergent:
The first time I started making this recipe, I used my empty laundry detergentplastic container. But, it was often too small for the batch size. Next, I used an empty 2.5 Gallon bucket water jug.
The large drink dispenser holds all the excess detergent. This is a prettier solution to storing all the detergent and looks better on your laundry room shelf.
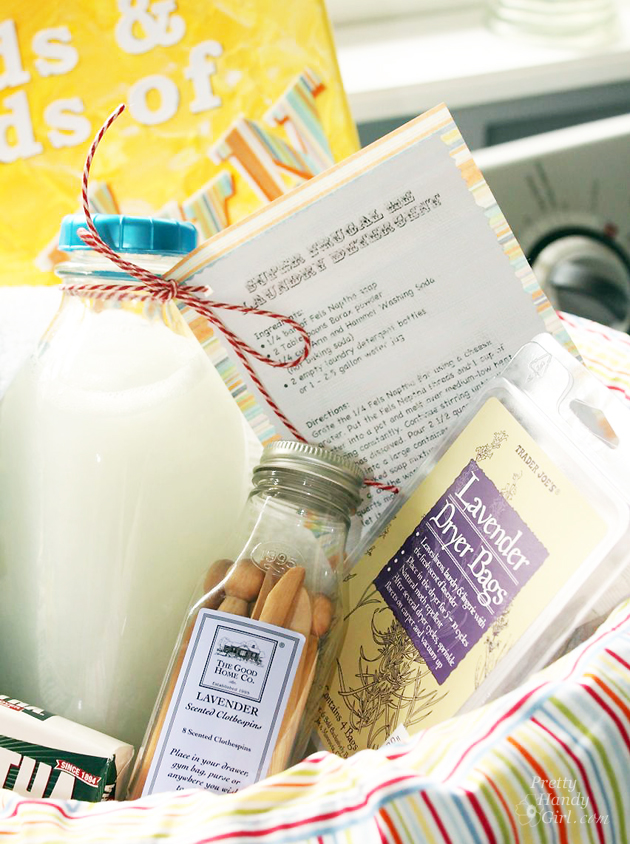
Gift Idea:
Once you try this DIY laundry detergent, I know you’ll love it. And then you’ll want to share this recipe with everyone you know!
It does not contain any harsh chemicals and takes just a little bit of time to make. I like to share the recipe with a small sample amount in a laundry themed basket.
https://prettyhandygirl.com/wp-content/uploads/2025/09/DIY-Laundry-Detergent.jpg12001200Brittany Baileyhttps://prettyhandygirl.com/wp-content/uploads/2021/07/PHG-logo-tagline-2020-1030x211-R.jpgBrittany Bailey2025-10-06 07:00:002025-10-05 22:18:11How to Make DIY Laundry Detergent for Only $1.25 per year


