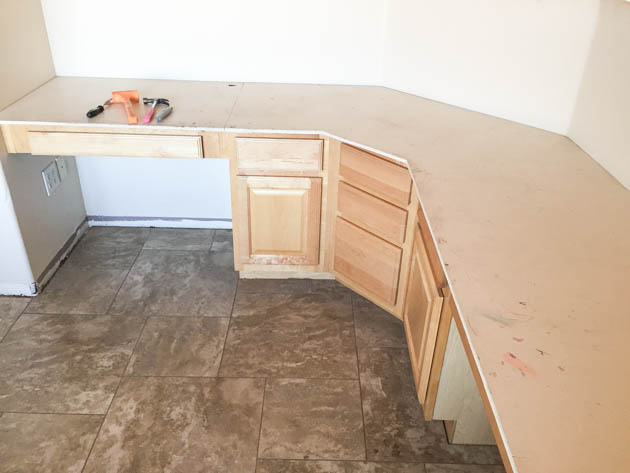
Hey there, everyone! I’m Katie from Addicted 2 DIY. I’m so, so excited to be here today sharing this simple — and most importantly — inexpensive way to update a desk! I’m in the middle of updating our den/kid’s office space and one of the biggest things that had to go was the awful eyesore my boys used as a desktop.
This was the glorious before photo of their desk area. The particle board top was from the previous homeowners. While we were remodeling the house, we slapped a coat of paint on it until we could decide what to do with it. Four years later, I decided enough was enough. I was tired of feeling embarrassed when anyone saw this room. I took the old top off, painted the cabinets, and built a new wood top for it. Here’s how you can Build a Wood Plank Desktop for About $40!
Build a Wood Plank Desktop Materials:
- 8 – 2″ x 6″x 8′ pine boards
- 2 – 2″x 2″ x 8′ pine boards (if you need the extra width)
- drill
- 2 1/2″ screws
- compound miter saw
- scrap pieces of 3/4″ wood
- wood shims
- belt sander and/or orbital sander
- sandpaper discs and sheets (80 grit and 220 grit)
- wood stain
- polyurethane
- paint brush
Build a Wood Plank Desktop Instructions:
If your desk area is straight or an L shape, you can ignore these four steps below and measure and cut your pieces to the length needed using your miter saw.
If your desk shape is similar to mine, follow these steps:
1. Cut your 2×6 pieces to slightly overlap the middle section on each side. Make sure the pieces are long enough to accommodate the angled cuts you’ll be making.
2. If you don’t have a tool to determine the cut angle, lay your middle pieces of wood on top of the side pieces you’ve already laid out and mark where the lines intersect.
3. Mark where the line intersects on the first and last pieces of wood with a pencil.
4. You can snap a chalk line to get your angle, or you can use a long ruler and draw the line with a pencil.
Determine the angle of your cuts based on where the miter saw blade lines up with the chalk line. In this case, it was 22.5 degrees. That being said, this desktop was built between two imperfect (and not completely square) walls and some of the cuts had to be tweaked slightly on the angle. Read more


