HomeRight PaintStick vs. EZ Twist Review | Pretty Handy Girl

HomeRight PaintStick vs. EZ Twist Review | Pretty Handy Girl

Remember when I declared that I only use a handful of painting products that I’ve used for 15 years? I usually detest “new and improved” painting gadgets. I’ve tried many and they are usually a flop or not as efficient as my current arsenal of painting tools. So, you’ll understand that when HomeRight first approached me about trying their PaintStick products, I declined. After saying no, I started seeing many rave reviews from other DIY bloggers. As I began anticipating the task of painting our master bedroom, I began to rethink trying the HomeRight PaintStick Paint Applicator. I was definitely tentative. Finally, I agreed to try out both the PaintStick original and the PaintStick EZ Twist. I warned HomeRight that I have high expectations and that if they weren’t met, I wouldn’t blog about their PaintSticks.

I guess you know where this is going because here I am to tell you that I really loved both PaintSticks! And I will be using one every time I paint a room from now on! Seriously, these products are a game changer.

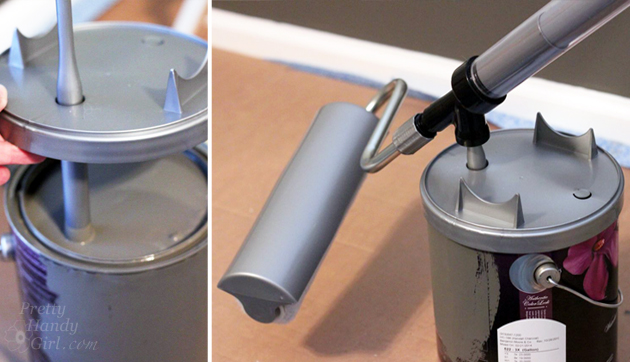
For one, you don’t have to worry about the messy task of pouring paint into a tray and moving the tray with you as you paint. Both HomeRight PaintSticks come with a paint can cover and fill tube that fits on your gallon paint container.
HomeRight PaintStick vs. EZ Twist Review | Pretty Handy Girl

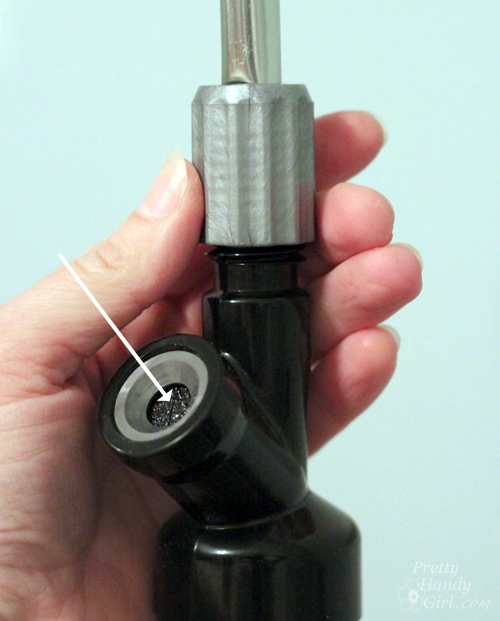
This keeps the paint from drying out and eliminates the need for a tray. The fill port on both PaintSticks is covered with a sponge type gasket that allows the fill tube to go through, but keeps the paint inside the PaintStick.
HomeRight PaintStick vs. EZ Twist Review | Pretty Handy Girl

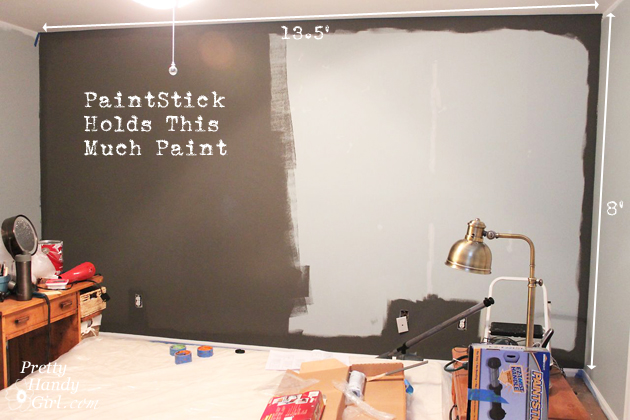
But, my FAVORITE aspect of the PaintSticks is that I can roll half a wall without stopping! No joke. With the traditional roller and tray I can usually paint a 4′ x 4′ square and then have to reload my roller. No more! The PaintStick literally allowed me to paint an 8′ x 7′ section (almost 4 times as much) without reloading.
HomeRight PaintStick vs. EZ Twist Review | Pretty Handy Girl

And refilling the tube is almost as fast as rolling. I cut my painting time down drastically. Here’s a video HomeRight made showing a side by side “Paint Off” race between the EZ Twist PaintStick and a roller and tray (and a paint sprayer). It’s pretty accurate in my experience.

The only negative, is that you will spend a little more time cleaning up. The PaintSticks have to be disassembled and cleaned out when you finish painting. But, this process doesn’t add enough time to come near exceeding the time it would take to paint conventionally with the roller and tray.

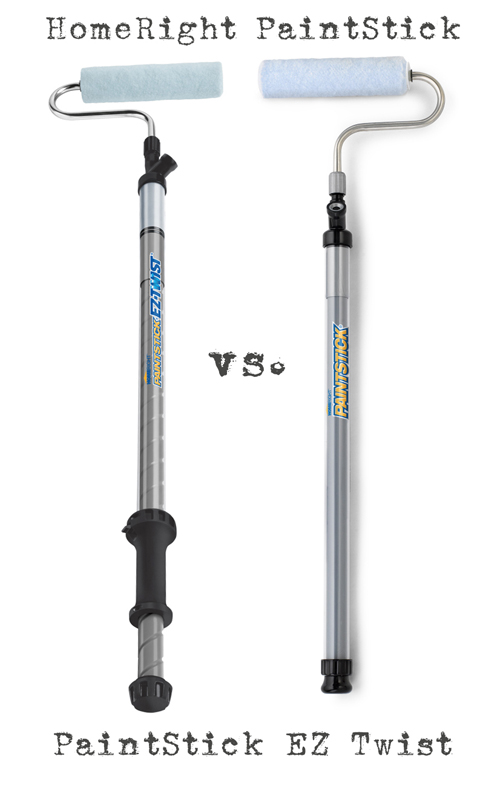
What’s the difference between the PaintStick and the EZTwist PaintStick? Read more

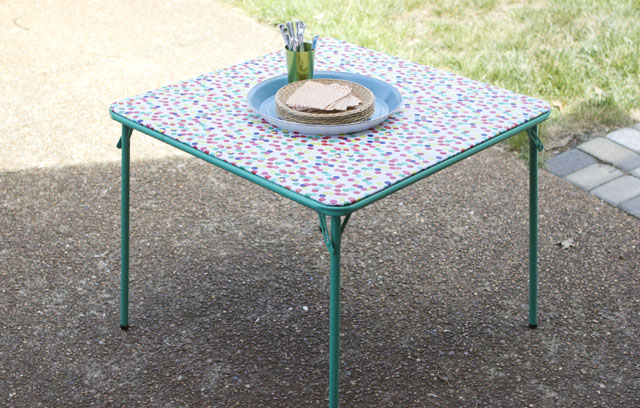
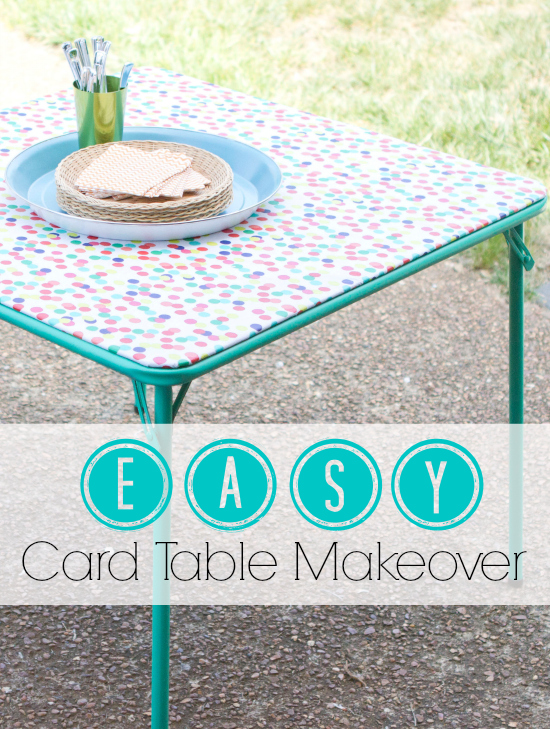
Super easy card table makeover
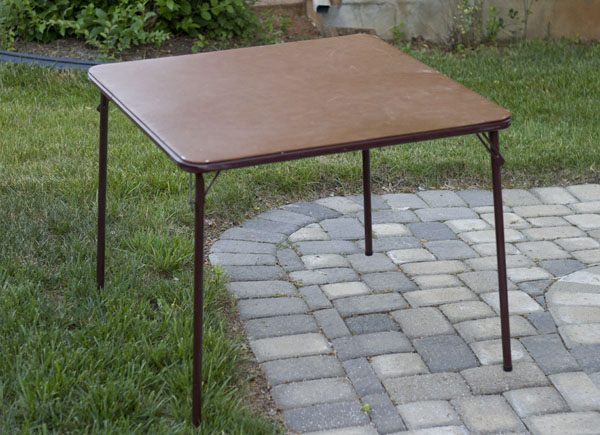
I can only imagine that Matt and I are not the only family in America with a less than stellar card table.  In fact both of ours were hand me downs from grandparents and though they may have been fabulous in the 80’s, now they are really lacking in the attractive decor department.  A few years go I picked up some vinyl table clothes with hopes of breathing new life into our sad card tables and once again life got in the way and I never recovered them.  I recently came across the table clothes and decided it was time to move on with my project but there was a small problem, I no longer liked the table clothes I had previously picked out.  Have no fear, after a quick trip to Target I was back in business and ready for my amazing, fabulous, incredible card table makeover!

Materials:

  • Card Table (old or new)
  • Damp rag for cleaning
  • Ratchet with socket
  • Vinyl Tablecloth
  • Drop Cloth
  • Spray Paint
  • Sand Paper – 180 grit
  • Drop Cloth
  • Hot Glue Gun
  • Hot Glue Sticks
  • Scissors

Instructions: 

Card Table

Give the table a good wipe down with a damp rag to remove any dust or possible cobwebs that may be lingering on the underside of the table.

Table

Remove the top of the table from the frame and legs. (Be sure to store your screws in a safe place because you will need them later.)  Most tables will be attached with a few hex screws that can easily be removed using a ratchet and socket or a socket wrench.

Read more
Seaside Theme Bathroom Refresh #LowesCreator | Pretty Handy Girl

Seaside Theme Bathroom Refresh #LowesCreator | Pretty Handy Girl

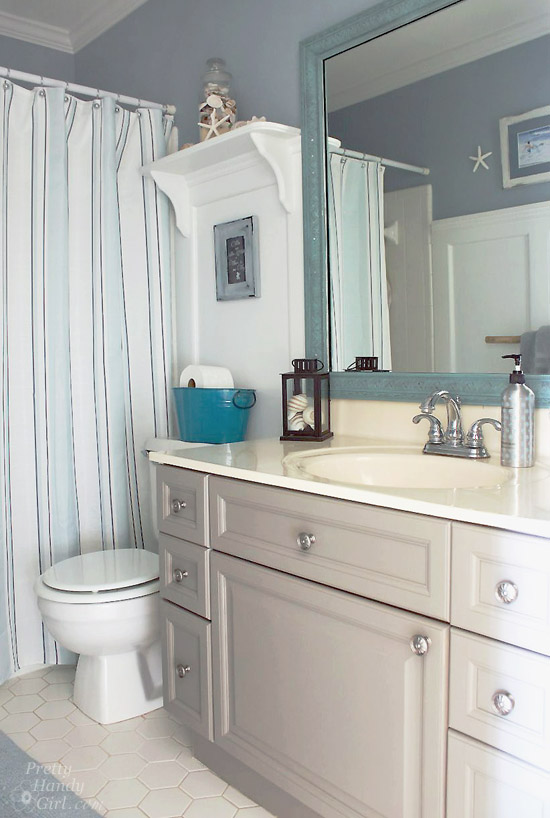
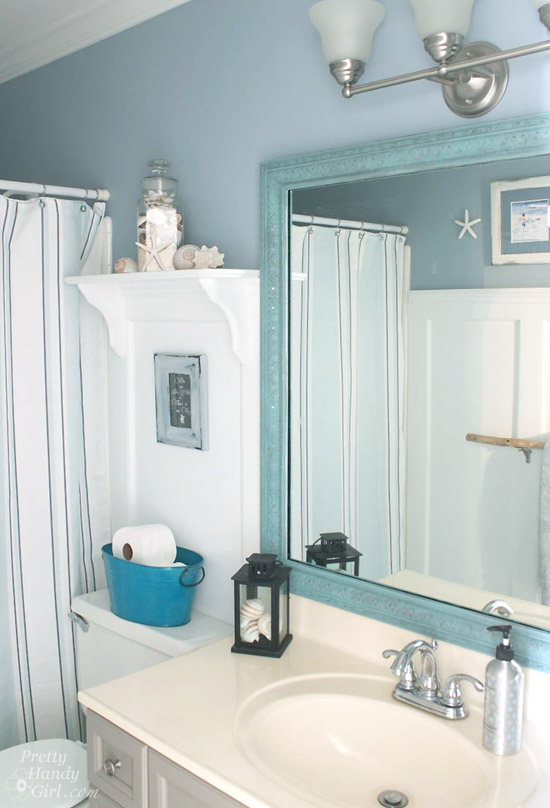
You know those projects that you complete 80% of the room and think to yourself, “This is good for now. I’ll do the rest in a day or two.” Yup, the boy’s bathroom was one such 80 percenter. I finally took the time to finish the last 20 percent of this bathroom makeover by giving it a refresh with some paint and new knobs.

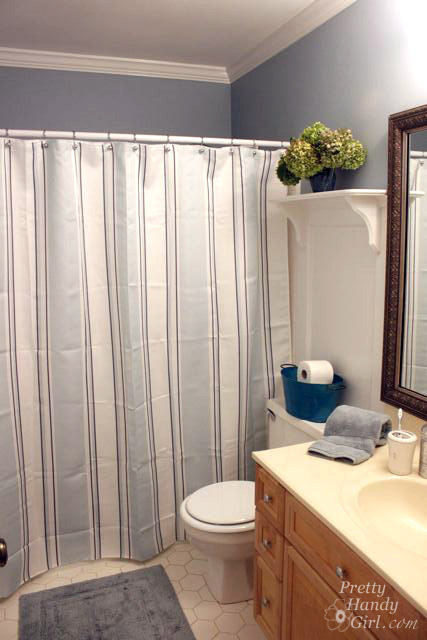
The bathroom used to look like this:

Seaside Theme Bathroom Refresh #LowesCreator | Pretty Handy Girl

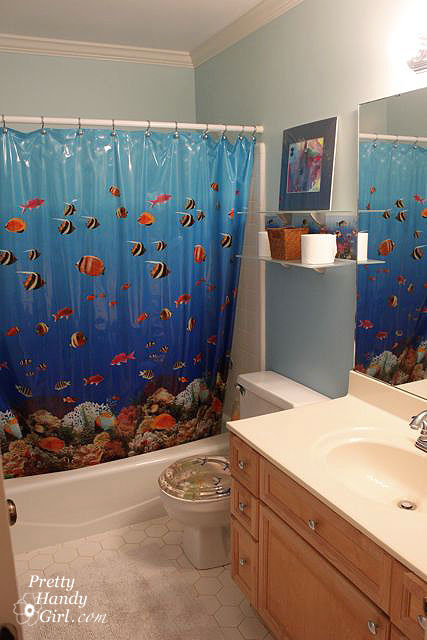
But, before that, it looked like this:

I find it comical that I took an underwater themed bathroom and gave it a seaside retreat feel. I guess you could say I pulled this big whopper from within the ocean and laid it out on the beach. LOL.

Let’s break it down now. Here’s how to paint a bathroom vanity so it will withstand the abuse of two young boys: Read more
Farmhouse Painted (chalk like paint) Jar Vases | Pretty Handy Girl

Farmhouse Painted (chalk like paint) Jar Vases | Pretty Handy Girl

Two weeks ago was Teacher Appreciation Week at my son’s school. Every year I have a bit of a knee jerk reaction to this week. Is it because I don’t appreciate my sons’ teachers and administrators? Definitely not true! I appreciate them more than I can ever show. It’s a joke in our house that if I homeschooled, we probably wouldn’t have children. We all need that time away. And, my kids are so headstrong, that they learn much better from talented educators that don’t tuck them in bed at night.

So, why you ask do I have a knee jerk reaction? Let me explain.

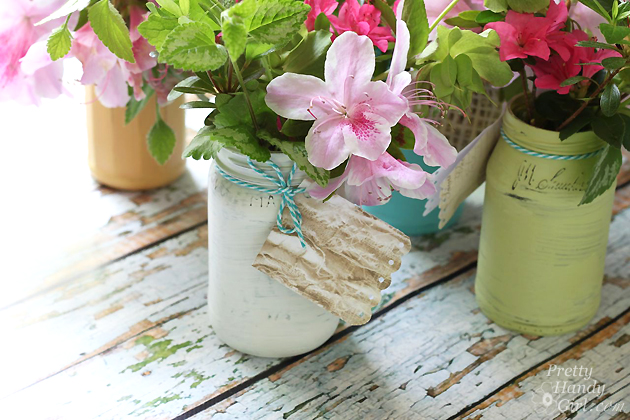
Two weeks ago I spent less than 20 minutes whipping up some really cute vases using recycled jars painted with Farmhouse Paint. Wait…What is this paint?

Farmhouse Painted (chalk like paint) Jar Vases | Pretty Handy Girl

Well, it’s “paint formerly know as chalk paint”  (don’t even get me on the soap box about everyone else not being able to call it chalk paint anymore because a particular company has trademarked the name. I mean, that’s like saying that no one can call it latex paint anymore because Brand X trademarked it. Sorry, I get riled up easily.)

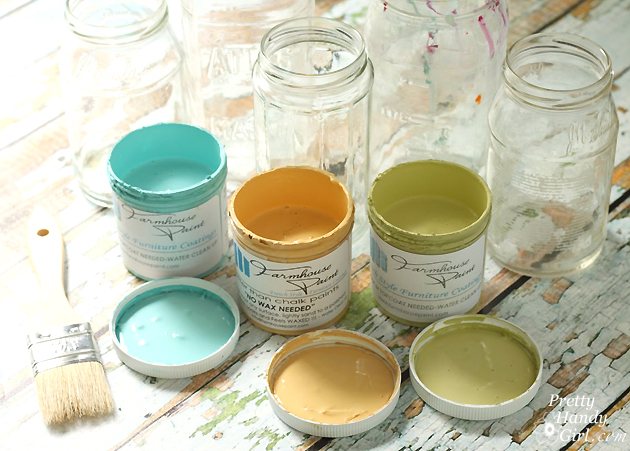
Anyway, back to my story, I made these adorable little vases by saving up a bunch of recycled jars.

Farmhouse Painted (chalk like paint) Jar Vases | Pretty Handy Girl

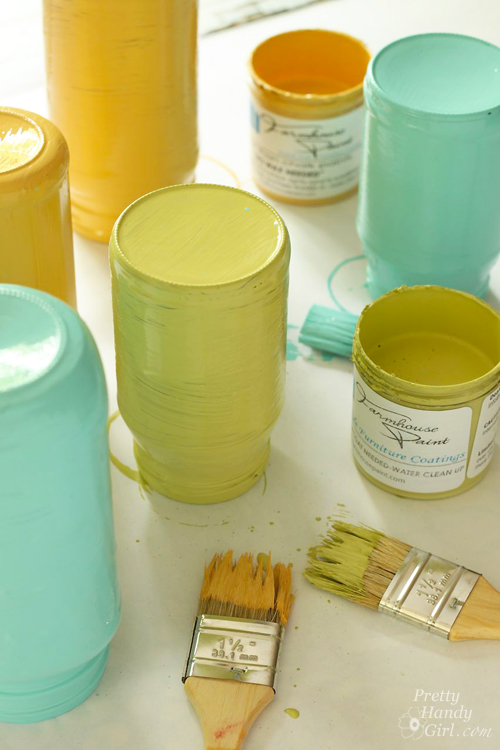
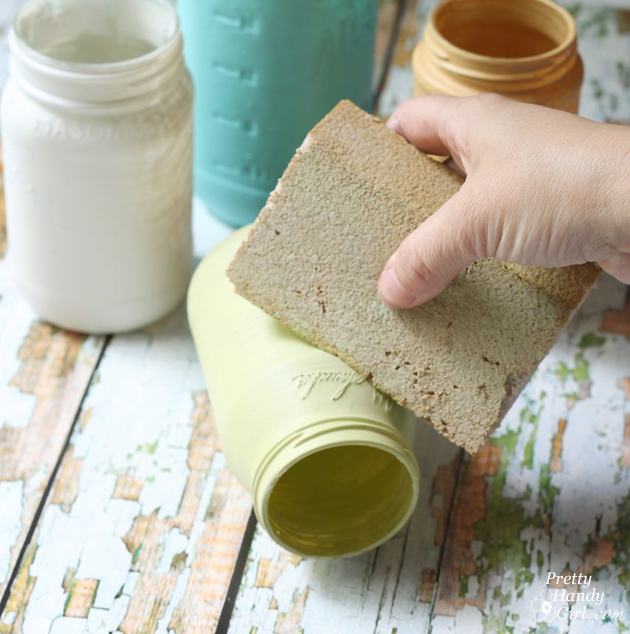
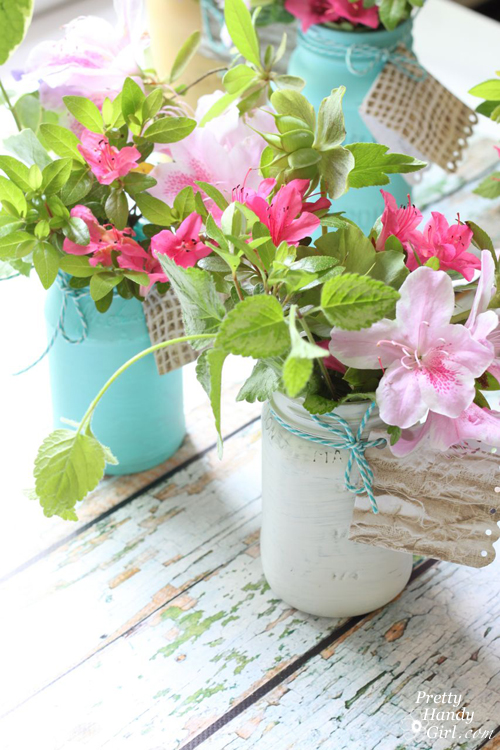
Then I painted them with two coats of Farmhouse Paint. I’m in love with this paint. The colors are vibrant and you don’t need to wax after painting. Just a light sanding with fine grit sandpaper and it give you the same soft sheen as waxing would.

Farmhouse Painted (chalk like paint) Jar Vases | Pretty Handy Girl

After the paint has dried I sand some areas (especially on any writing).

Farmhouse Painted (chalk like paint) Jar Vases | Pretty Handy Girl

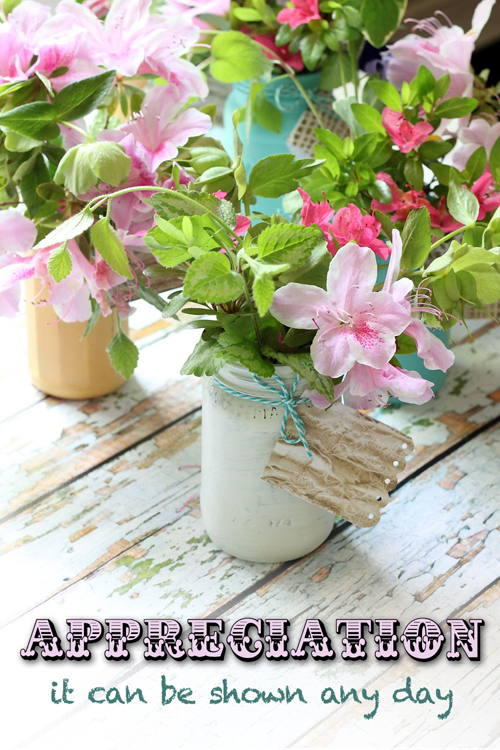
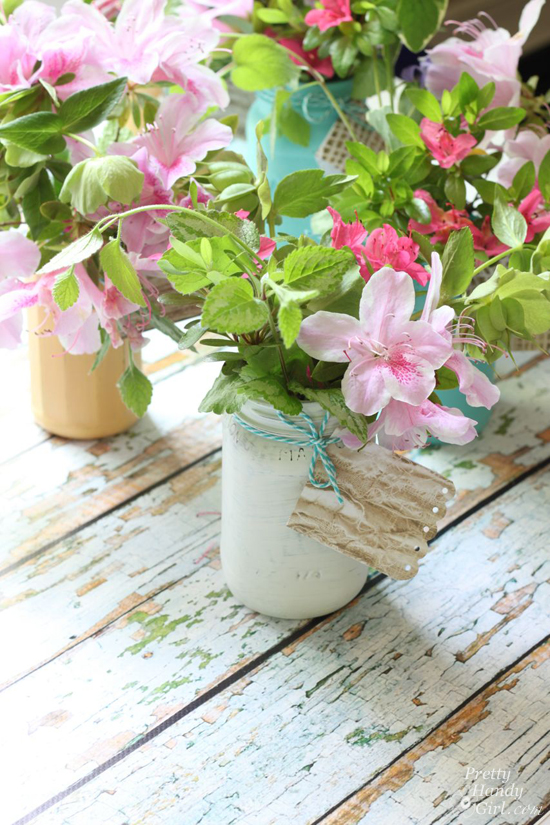
Finally, I added some fresh cut flowers from my yard and tied a string around the neck with a personal message.

Farmhouse Painted (chalk like paint) Jar Vases | Pretty Handy Girl

These little vases were adorable. They were cute and they seriously took me less than half an hour to put together (20 minutes to paint and a few more minutes cutting flowers in the yard.)

When I arrived at school, I began distributing the flowers. First the principal’s office — her desk was filled with more flowers vases than a florist’s counter. And the overflow was on her conference table.

     Farmhouse Painted (chalk like paint) Jar Vases | Pretty Handy Girl

The assistant principal’s desk had the same overcrowded vase problem.

I made my way around to my sons’ classrooms. Tins of cookies and more vases littered their desks. I was sad. Although I knew they appreciated the kind gifts, it must be overwhelming to get everything on one day or one week of the school year.
After the week is over and the cookies are gone, what is there? Nothing. Desks filled with papers to grade of course. But, no gifts; no notes of appreciation; no flowers…nothing.  That appreciation day is long forgotten.

That’s why I’m doing something different next year. Heck, I might even do some appreciating at the end of this school year!

Where are the gifts and flowers during the first week of school when the kids are scared, tired, disappointed, weepy for their Mom and Dad? Where are the gifts when the principal and other administrators have to deal with outraged parents because the school bus didn’t come on time to pick up their child? Or worse yet, what about the day after a weeknight Halloween? I know the children pour into their seats sleep-deprived and burned out after a high sugar evening. Heaven help me this year when Halloween falls on a Friday night. I might check into a hotel for two nights.

Anyway, I’m vowing to appreciate the staff and teachers at my sons’ school on any old ordinary day from now on. I’m sure that a small recycled jar turned into a sweet little vase of flowers will surely brighten the day of one tired educator. I may even slip a little gift card underneath. I know in our state, teachers are not paid nearly enough and we are facing a crisis as teachers leave schools searching for better paying jobs.

To all the teachers, school staff and administrators out there. I APPRECIATE you more than you will ever realize! Please forgive me if I don’t bring you a gift during Teacher Appreciation Week. I’ll surprise you some other time. 😉
Farmhouse Painted (chalk like paint) Jar Vases | Pretty Handy Girl

What do you say? Why not whip up a little painted vase to appreciate your child’s teacher on Monday. Or the last week of school? Or just on one ordinary not celebration day. Am I crazy? Doesn’t this make sense to you?

PHGFancySign

P.s. Did you like the chippy paint board backdrop I used? It’s not real wood, it is actually a vinyl backdrop made by my good friend Leen the Graphics Queen. It rolls up and stores neatly away. She should be selling them soon.


Pin for later!

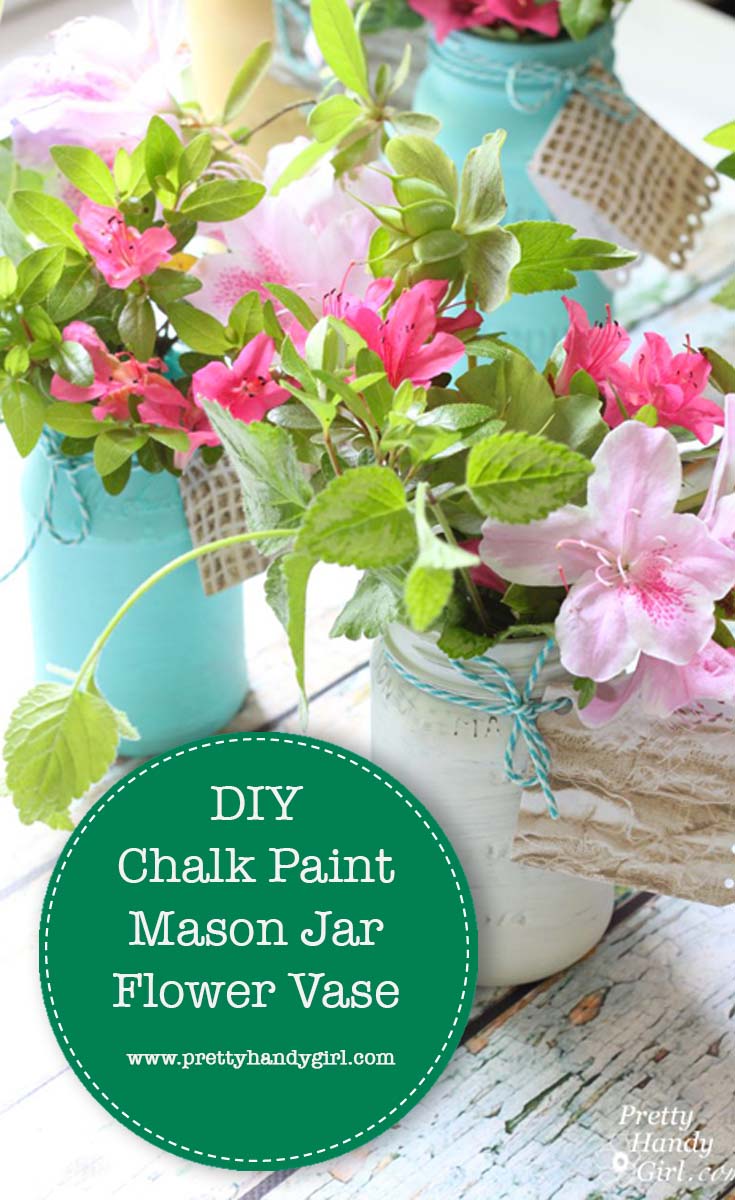
DIY Chalk Paint Mason Jar Flower Vase

Wall-Mounted Desk Tutorial | Pretty Handy Girl

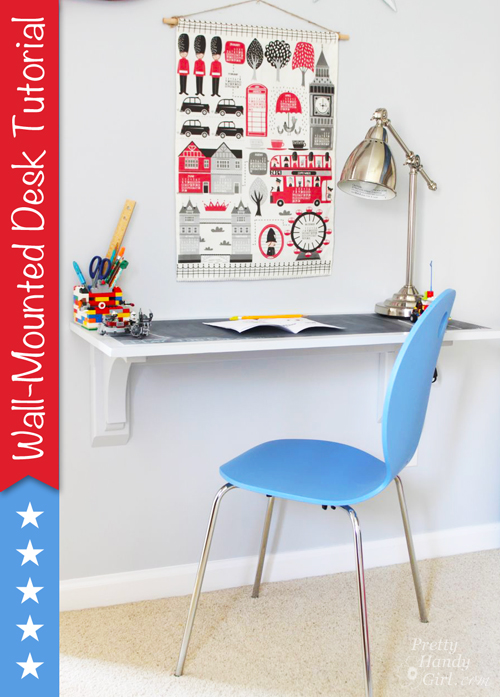
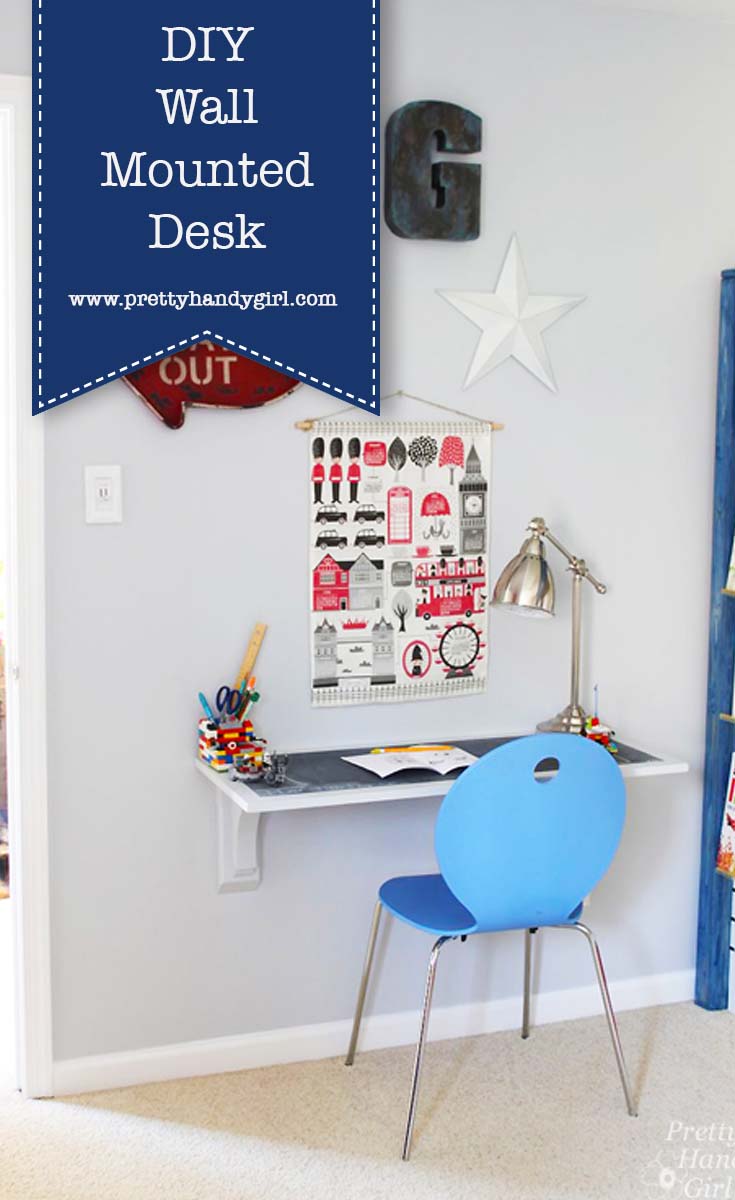
Need a desk but lack floor space or the funds to buy a desk? This Wall-Mounted Desk tutorial will meet your needs! Plus, you can customize the length to meet your needs.

Wall-Mounted Desk Tutorial | Pretty Handy Girl

Wall Mounted Desk Tutorial

Hey, I hope you had a fabulous weekend! Was it productive? Full of DIY activities? Well, I’m back with a tutorial for building a wall-mounted desk. The great thing about a desk that is wall-mounted is it can be small or large and it won’t take up any floor space! This gives a nice clean look and makes the room feel larger. Plus, the materials will almost certainly cost less than buying a desk.

My son is starting to have more homework in school. (I didn’t realize that first grade was the new 3rd grade!) I figured soon enough he’s going to need a spot to sit and work on homework. Plus, he’s an avid Lego builder and this makes a great surface for him to build on.
Materials:

  • Finish grade plywood (my desktop is 16″ x 40″)
  • Painter’s Tape
  • 1 – 2″ x 4″ x 93″
  • 2 – 9.5″ x 9.5″ bird’s mouth brackets
  • 4 – 3″ cabinet mounting screws
  • Paint
  • Paint brush
  • Drill
  • Drill bits
  • Level
  • Pencil

Instructions: 

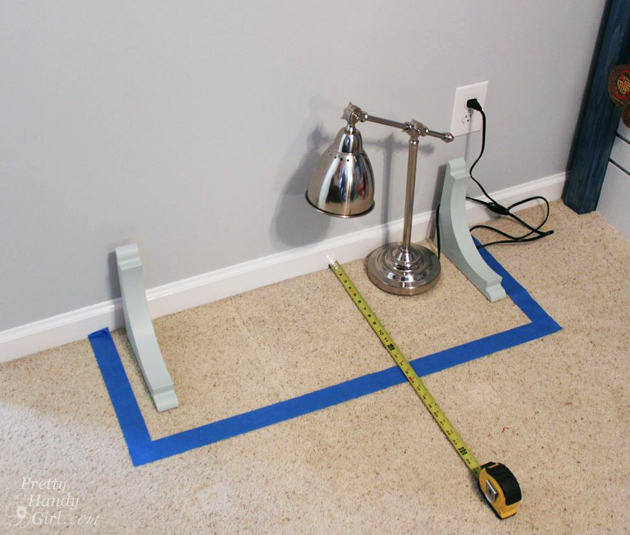
Begin by assessing where you want to mount your desk. For better perspective, you can outline the desk area with painter’s tape on the floor.

Wall-Mounted Desk Tutorial | Pretty Handy Girl

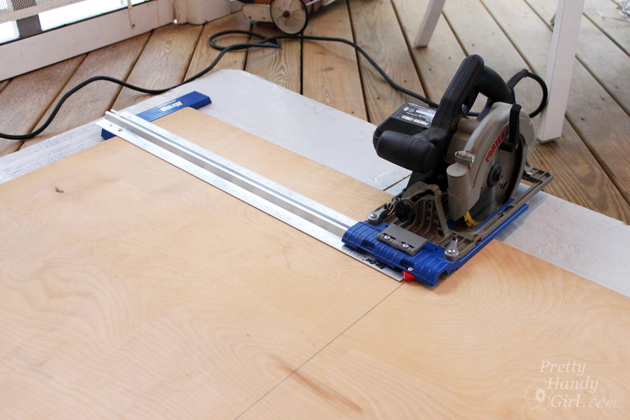
Cut your finish grade plywood to size. Using the Kreg Rip Saw with my miter saw is much easier than hauling out the table saw and getting as assistant to help lift the plywood. If you put a piece of rigid foam insulation underneath, you can cut almost anywhere! Just set your saw blade depth slightly below the plywood.

Wall-Mounted Desk Tutorial | Pretty Handy Girl

Cut your 2″x4″ stud 4″ narrower than the length of your desk top surface. (My desktop is 40″ long, therefore my mounting stud is 36″ long.)  Locate the studs in your wall. Mark their location.
Wall-Mounted Desk Tutorial | Pretty Handy Girl

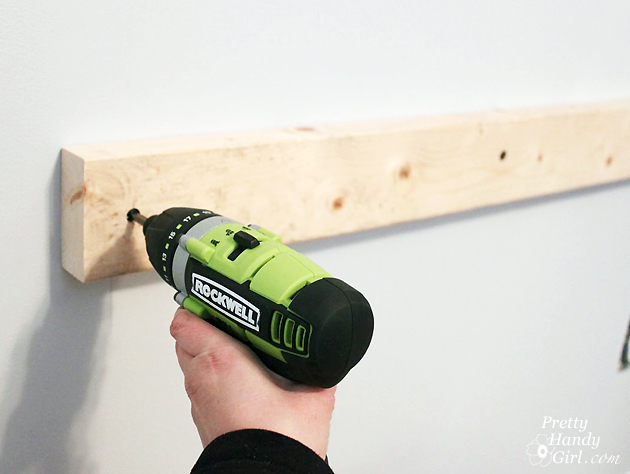
Pre-drill holes in the mounting board at the stud locations. Use a small bit slightly narrower than your screws. Then use a larger bit the width of your screw head to create a countersink hole. Drive the cabinet mounting screws into one end of the mounting board and into the stud. Use a level to make sure your mounting board is level, then drive the additional mounting screws into the other studs.
Wall-Mounted Desk Tutorial | Pretty Handy Girl

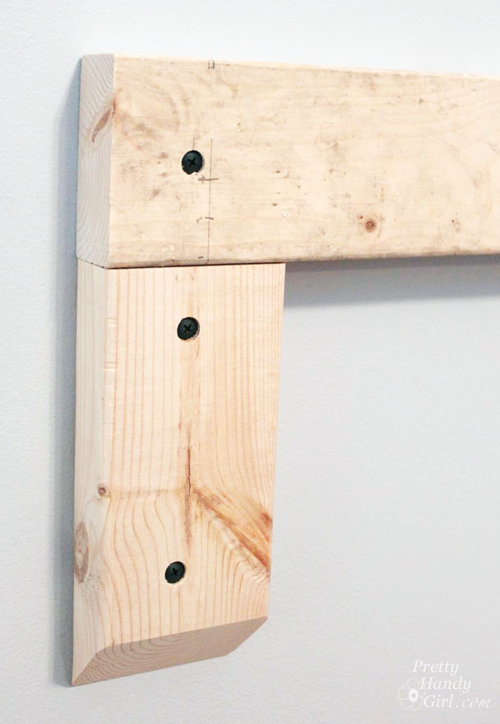
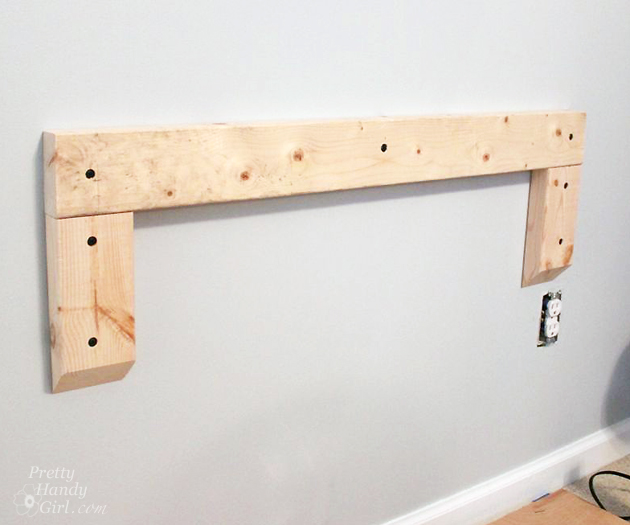
Cut two pieces of 2″x4″ at 8″ long. These will create the supports for the shelf brackets. For a clean look, bevel the end at a 45 degree angle when you cut them. Attach the 2″ x 4″ pieces below each end of the mounting board as shown below.

Wall-Mounted Desk Tutorial | Pretty Handy Girl

Your mounting boards should look like this:

Wall-Mounted Desk Tutorial | Pretty Handy Girl

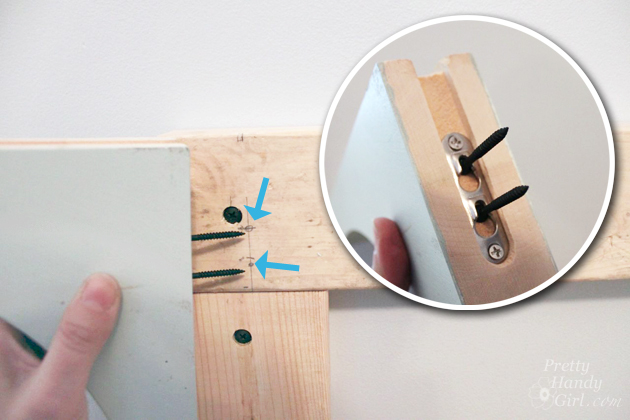
Set two small screws into the shelf bracket keyholes. Line the bracket up with the top of the mounting board and center it on the vertical supports already attached to the wall. Make a pencil mark where the screws need to be set.

Wall-Mounted Desk Tutorial | Pretty Handy Girl

Use the pencil to mark the depth of the keyholes on the screws so you know how deep to drive the screws into the bracket support.
Wall-Mounted Desk Tutorial | Pretty Handy Girl

Attach the small screws to the vertical support where the pencil marks were and drive them to the point where you marked on each screw.

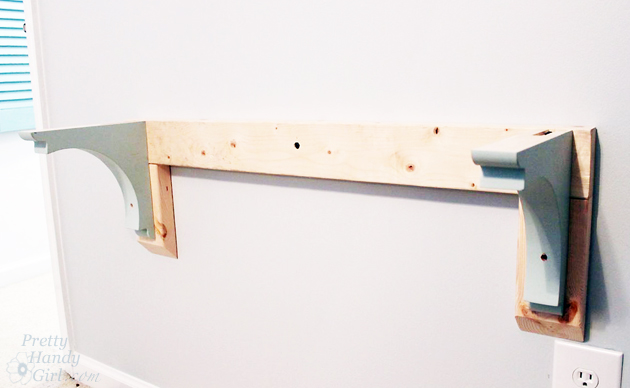
Slip the bracket onto the screws.

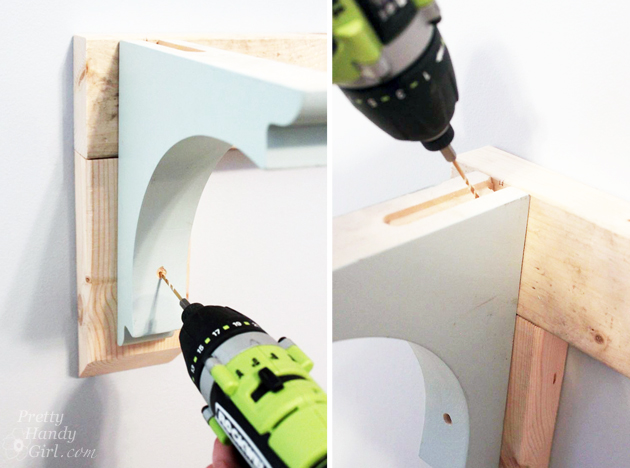
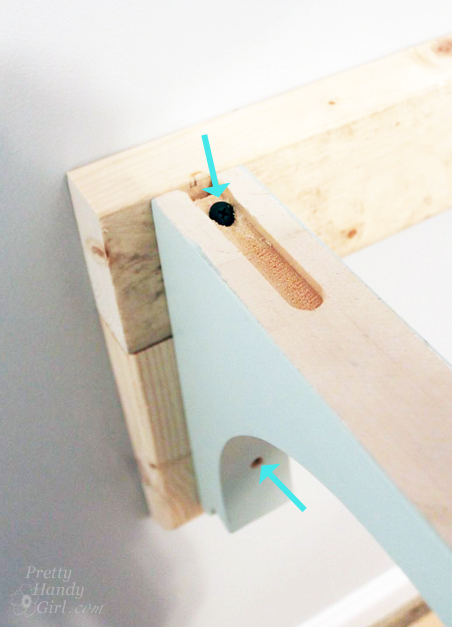
For added support, pre-drill one hole through the top of the bracket and into the mounting board. Pre-drill a second hole through the bird’s eye bracket at the narrowest point.

Wall-Mounted Desk Tutorial | Pretty Handy Girl

Drive screws into the two pre-drilled holes to further secure the shelf brackets to the mounting boards.

Wall-Mounted Desk Tutorial | Pretty Handy Girl

Repeat for the second bracket.

Wall-Mounted Desk Tutorial | Pretty Handy Girl

Lay your desktop surface on top of the brackets. You can either drive small screws through the top of the desk and into the mounting board. Or drive a small screw up through the underside of the bracket and into the desktop. I prefer the latter because you won’t have to wood putty the desk surface.

Wall-Mounted Desk Tutorial | Pretty Handy Girl

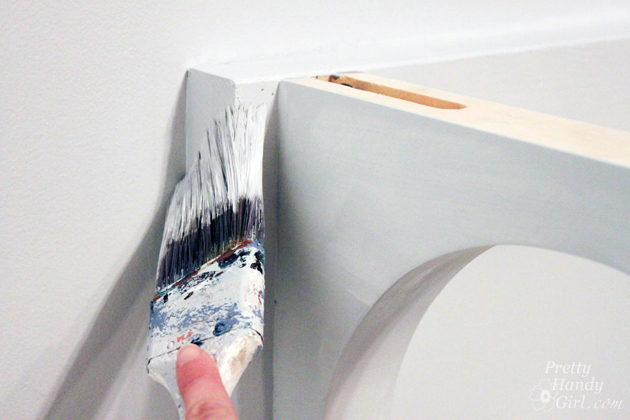
Wood putty all your holes. Allow the putty to dry and sand the putty smooth. Paint your brackets, mounting boards, and desktop. I chose to paint my desktop beforehand with a chalkboard surface.

Wall-Mounted Desk Tutorial | Pretty Handy Girl

Let the paint dry. If you want to protect the desk surface, you may choose to paint a few coats of polycrylic on top.

Wall-Mounted Desk Tutorial | Pretty Handy Girl

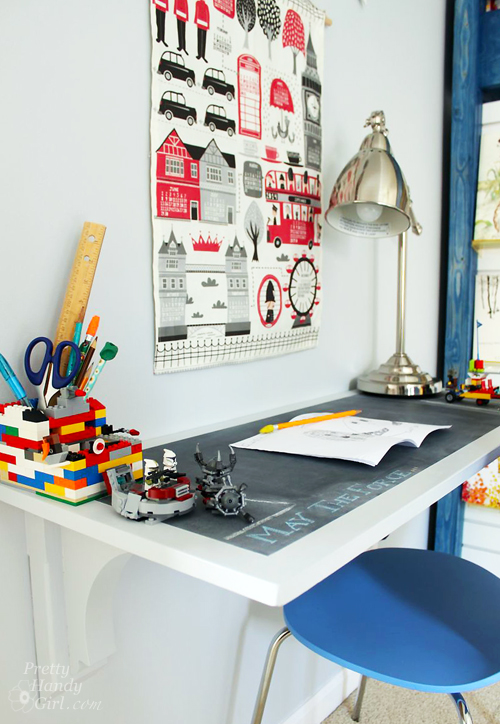
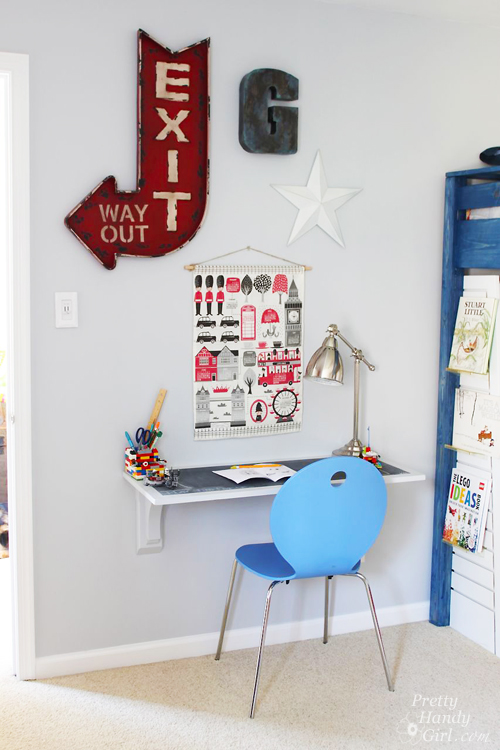
And my son has a spot to do homework, legos, or create a little book.

Wall-Mounted Desk Tutorial | Pretty Handy Girl

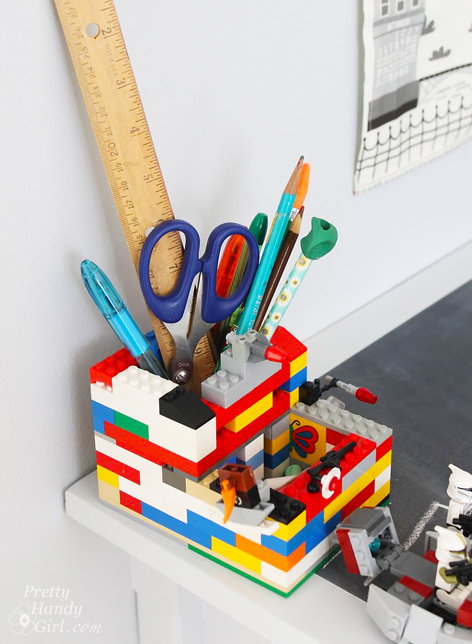
Don’t you just love his lego pencil holder he created?! I think he needs to start an Etsy store ;-).

Lego Pencil Holder | Pretty Handy Girl

I had fun decorating the wall with some vintage signs and an adorable London themed tea towel calendar from Spoonflower. Making tea towel calendars every year in November/December has been a tradition I started over a year ago. We anxiously await the release of the newest calendar designs on Spoonflower.

Wall-Mounted Desk Tutorial | Pretty Handy Girl

Source List:

I hope you found this tutorial helpful. It was an easy solution for my son’s room. Best of all, you can expand the width, but if you do add more brackets.

PHGFancySignPin for later!

DIY Wall Mounted Desk

If you liked this tutorial, you might also like this inexpensive desktop for $40!