Don’t toss that wood! Looking for thoughtful handmade gift ideas? This roundup features 40+ creative DIY gifts you can make from scrap wood, perfect for holidays, birthdays, and special occasions.

Scrap Wood Gift Ideas
If you’ve ever stared at your scrap wood pile wondering what on earth to do with it, you’re not alone. This collection of DIY gift ideas is here to fix that!
Each project includes a full tutorial and can be made with simple basic tools. We’ll show you how to take pieces from that pile and turn them into a unique piece that’s not only functional but also full of personality.
Whether you’re making something for a friend, a family member, or even yourself, these projects are all about letting your creativity shine.
What’s great about this collection is how versatile it is. From rustic home decor to clever organizers, every idea lets you put your own spin on it and really show off your creative expression.
Plus, there’s something so satisfying about taking something that might’ve been tossed aside and turning it into the perfect gift.
If you love hands-on projects and want to impress your loved ones with something truly one-of-a-kind, these simple scrap wood projects are just the ticket!
Scrap Wood Gift Ideas
45 creative DIY gift ideas transform scrap wood into charming, personalized treasures. From rustic home decor to practical organizers, these woodworking projects make thoughtful, budget-friendly gifts.

Rustic Wood Bathtub Tray
Here’s how to make a rustic wood bathtub tray, a the perfect DIY for holding your book, candle, or glass of wine while you lock the door and enjoy a long, relaxing soak.

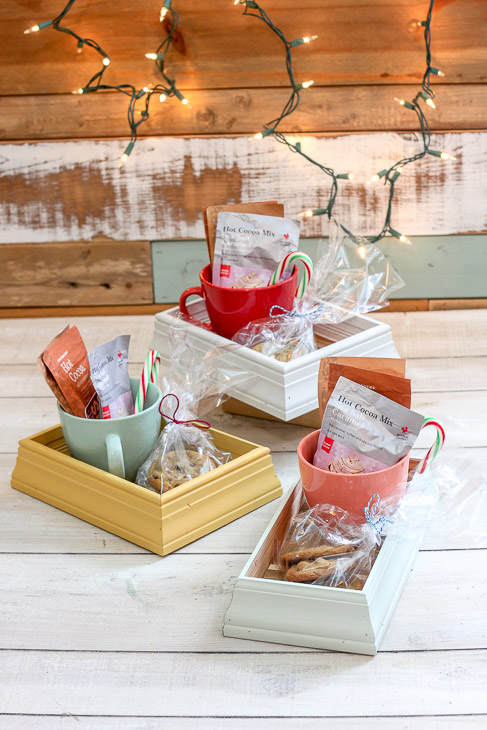
DIY Gift Caddies using Scrap Molding
These DIY gift caddies made from scrap trim are a fun, budget-friendly way to make a unique gift basket while using up leftover wood from your scrap pile.

How to Build a Quick DIY Tray & Gift Box
Looking for a simple project? These quick DIY trays and gift boxes are perfect for organizing, decorating, or gifting. Easy to make and great for any occasion!
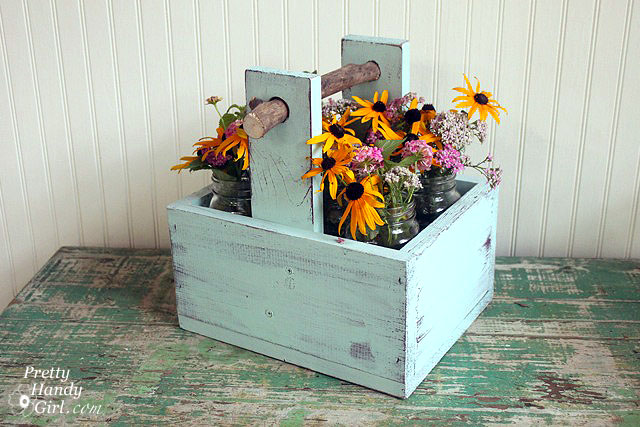
Rustic Wooden Caddy with Branch Handle
Give an old wooden box new life! Add a touch of charm and personality by transforming it with a unique branch handle for a fun, nature-inspired upgrade.

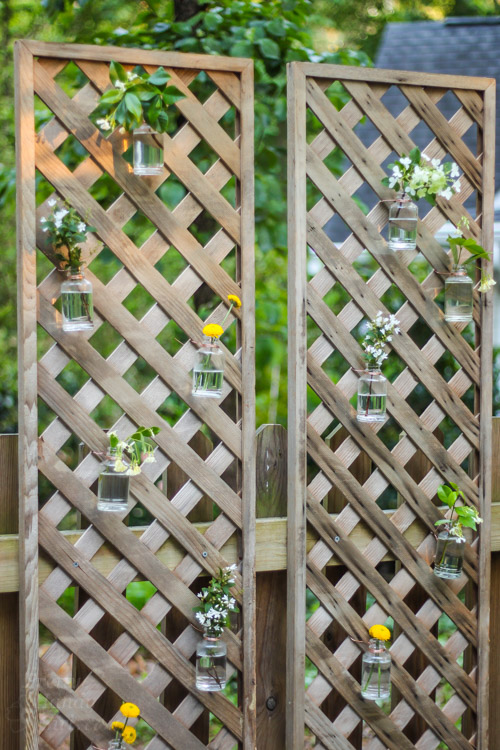
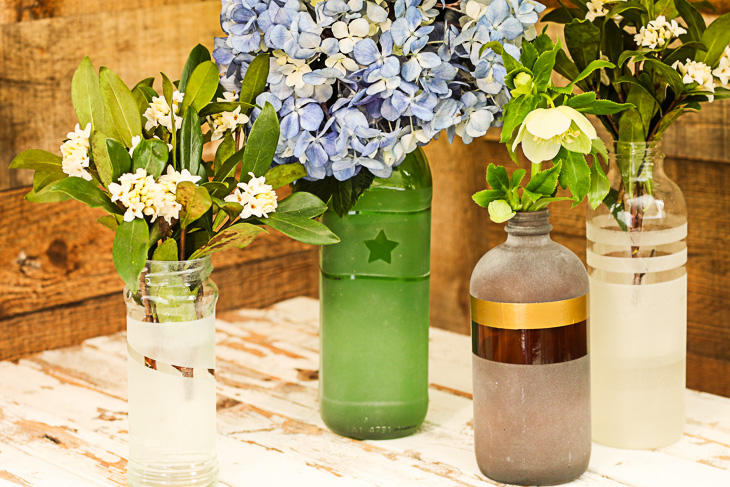
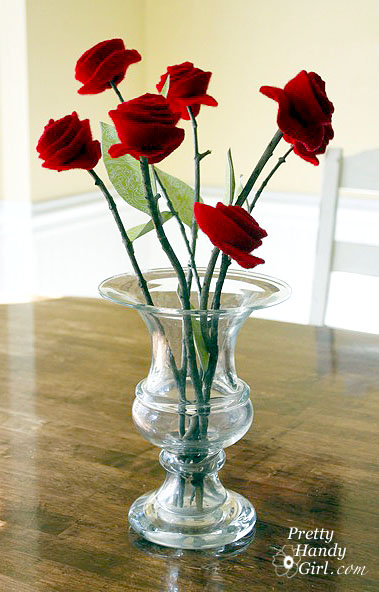
Reclaimed Wood Wall Hook & Vase DIY
Create a beautiful reclaimed wood wall hook and vase perfect for adding rustic charm and a touch of nature to your home décor. Easy and budget-friendly DIY!
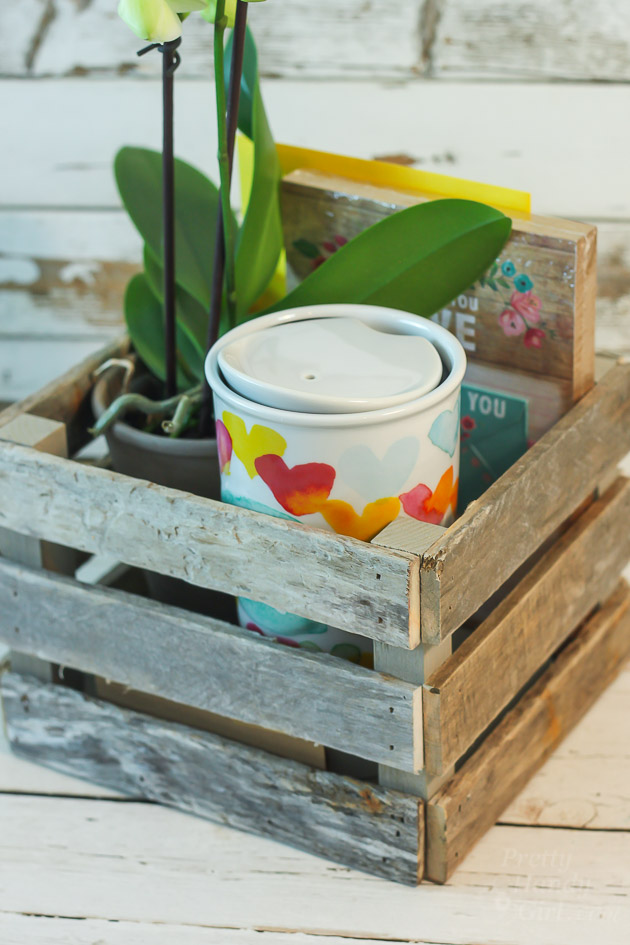
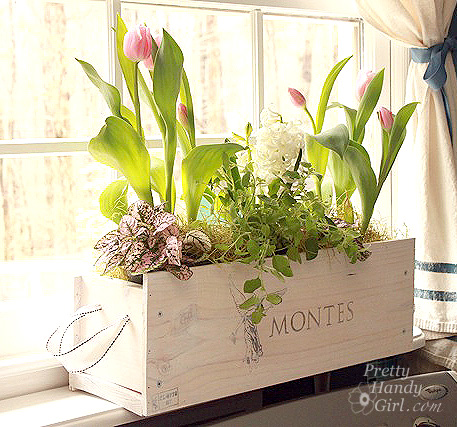
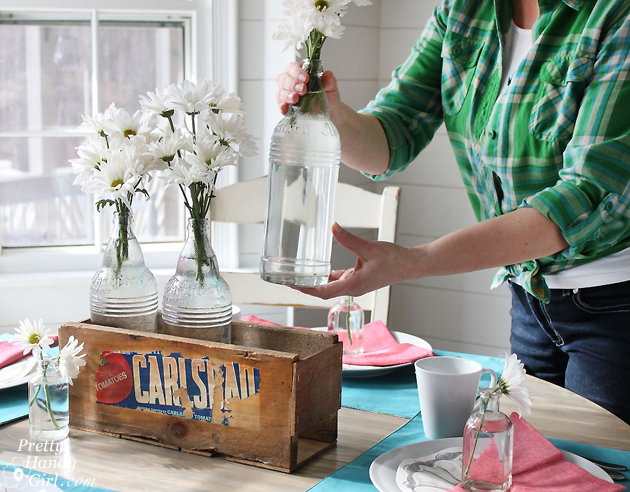
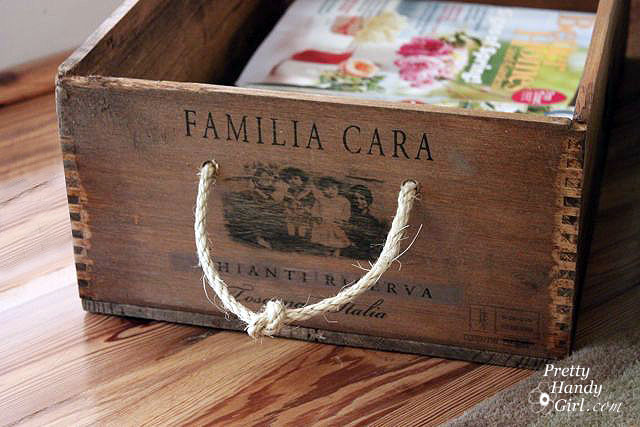
Make a Driftwood Gift Crate
Turn small crates and boxes into gift baskets for friends. It’s a fun way to use leftover scrap wood and create a gift that doubles as a stylish organizer for a desk or shelf. I’ll show you how to make one with driftwood!
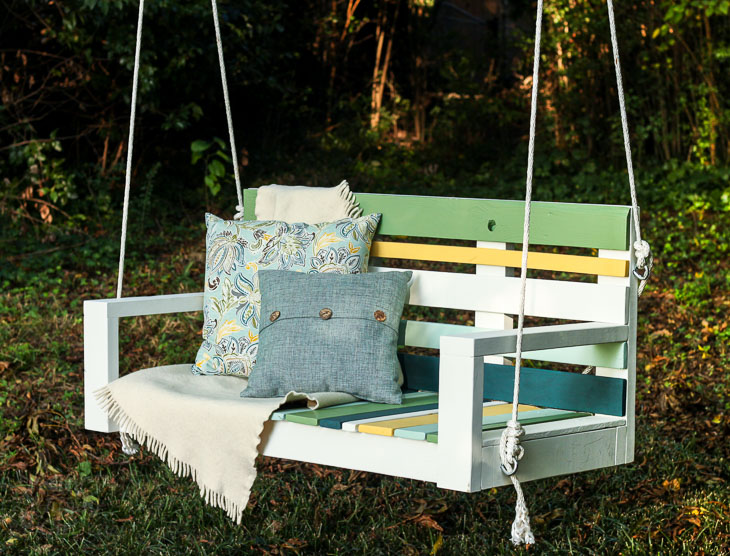
Building a Striped Porch Swing using Pallet Wood
Learn how to build a charming striped porch swing using free scrap wood and a little Krazy Glue to hold the slats in place! This easy, budget-friendly project is perfect for adding a cozy spot to relax on your porch.
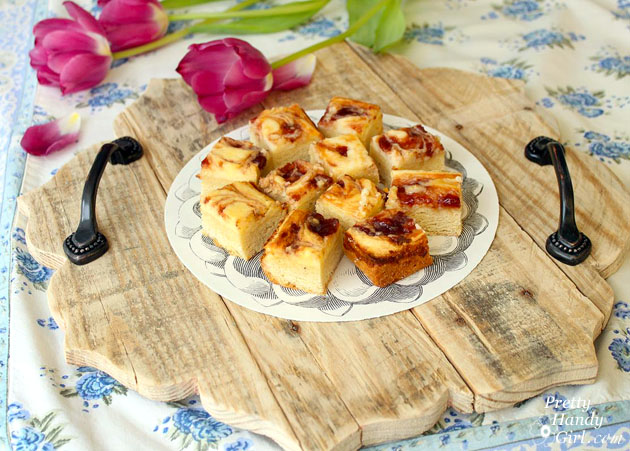
Rustic Pallet Serving Tray
It’s surprising how a rustic tray can turn an everyday meal or dessert into something special. This easy decorative pallet serving tray is a simple DIY project anyone can tackle! There is nothing better than giving, or receiving handmade gifts!

DIY Yard Dice
I spotted a set of yard dice and immediately added them to my “things to make” list. They ended up being surprisingly easy to create and so much fun to play with! Here’s how you can make your own.
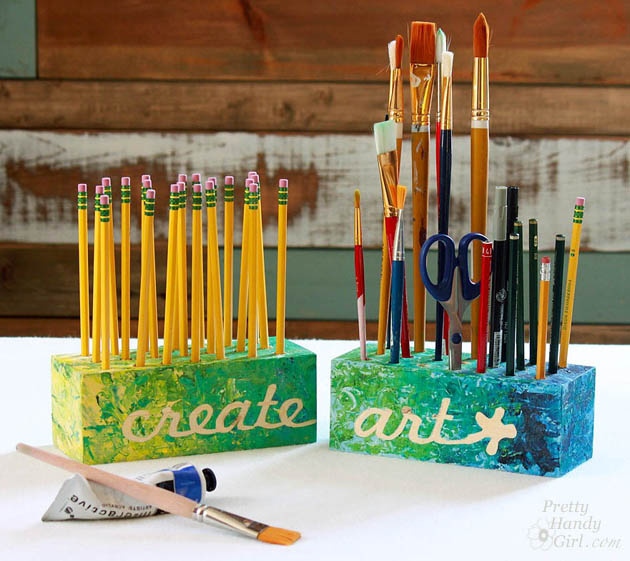
Creative Block Desk & Art Utensil Holder
Looking for great gifts for the creatives on your list? This block desk & art utensil holder is a fun, easy project that you can customize however you like. Bonus: kids can join in on the painting step!

DIY State Capital Rustic Tray
Whether you’re hunting for a quick gift or want one for yourself, this DIY State Capital Rustic Tray is both fun to make and simple to put together!
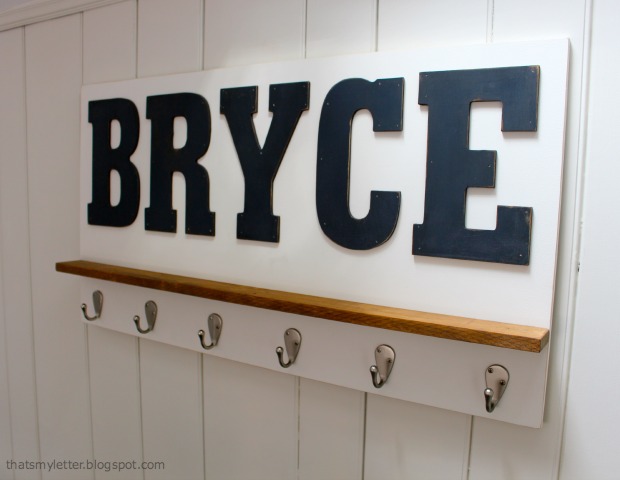
DIY Personalized Wall Shelf
Create your own DIY personalized wall shelf! I’ll walk you step-by-step so you can make a stylish and functional piece for your space.
Plenty O' Storage from One Board
With just one 1″ x 8″ x 8′ board, I made a faux cubby box with plenty of storage perfect for any room in your home! You can easily make your own.

DIY Drawer Dividers
DIY drawer dividers make organizing your drawers a breeze, and I’ll show you how to build them perfectly to fit your needs!
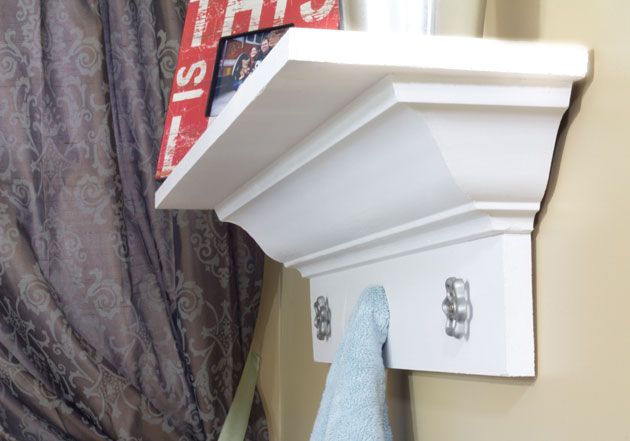
Build a Decorative Shelf With Crown Molding
Learn how to make a decorative shelf using crown molding! It’s a simple project that adds style and charm to any room.
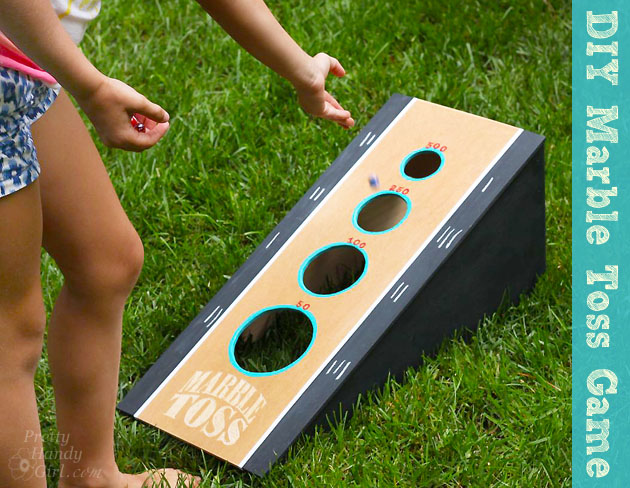
DIY Marble Toss Game with Dremel Fortiflex
Here is a fun marble toss game that keeps everyone entertained. It was easy to make with leftover scrap wood I had lying around my workshop.
DIY Kids Scooter
Looking for a simple DIY toy to make at home? Let’s build some fun kids’ scooters!
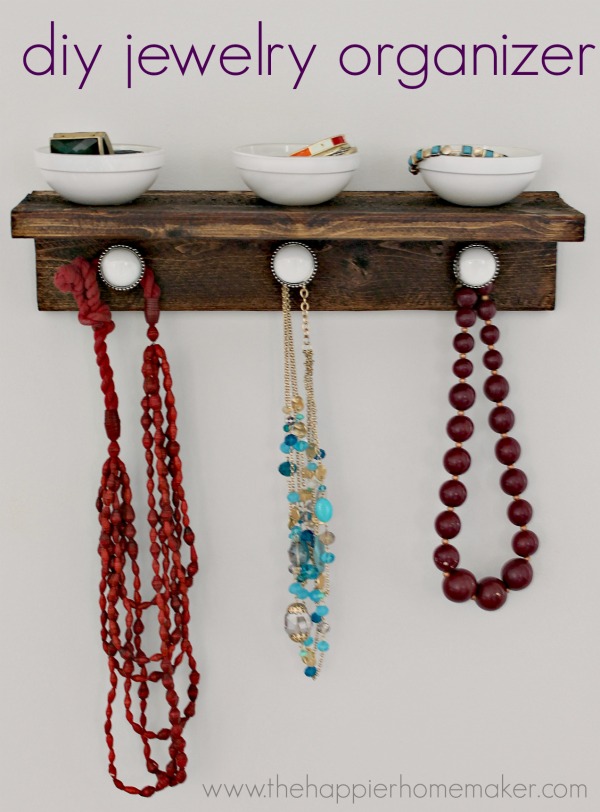
DIY Jewelry Organizer
Learn how to make this super easy rustic wood organizer—perfect for adding style and storage to any space!
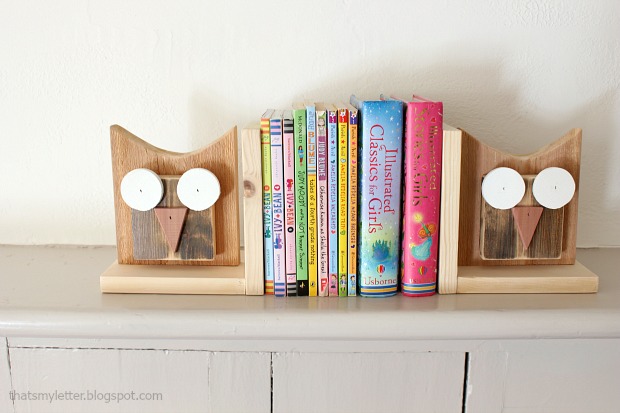
DIY Owl Bookends
While you’re sorting through your scrap wood bin, set aside a few pieces to make these charming owl bookends. They’re not only adorable but also perfect for tidying up your bookshelf!
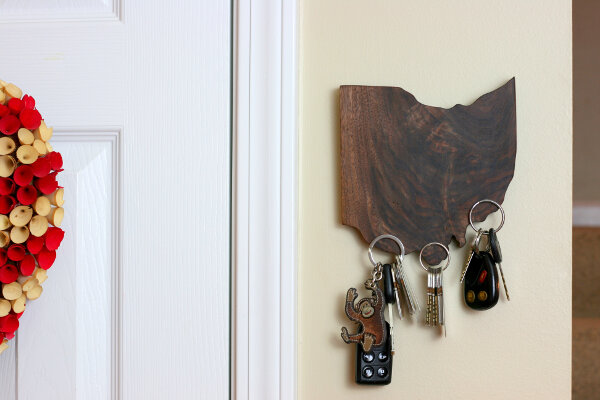
State Pride Magnetic Key Holder
Check out this State Pride Magnetic Key Holder you can build yourself. Take a closer look—it’s like magic, with no hooks in sight!
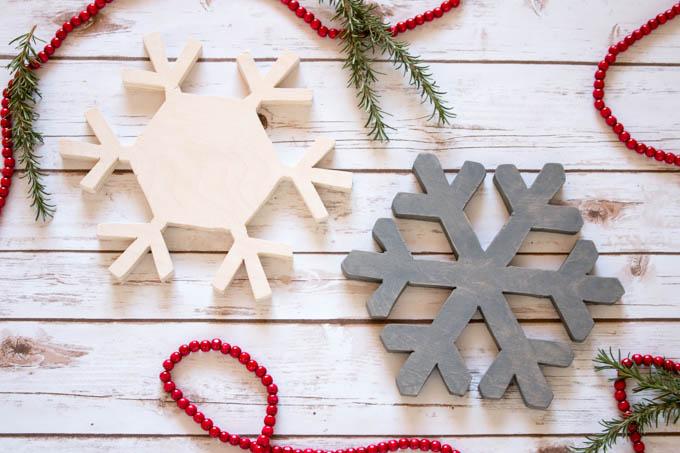
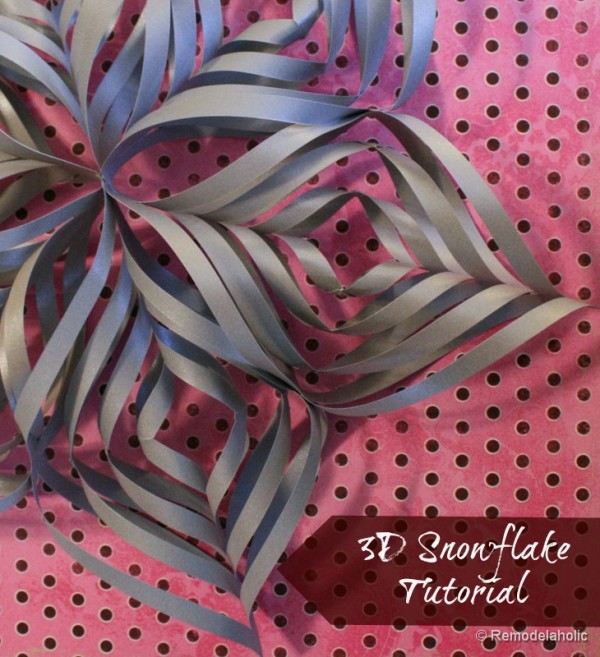
DIY Snowflake Christmas Trivets
This DIY Snowflake Christmas Trivet tutorial shows you how to make a festive project that doubles as both charming holiday decor and a handy accessory for your big family gatherings.
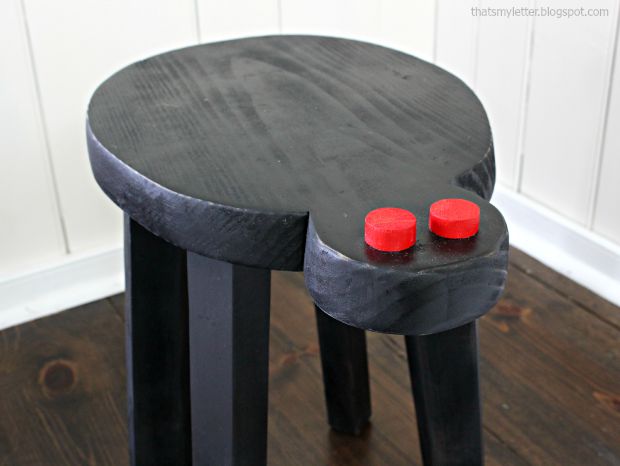
DIY Spider Stool
Here’s a fun Halloween project that’s perfect for using up leftover scrap wood. Let’s make a DIY Spider Stool!
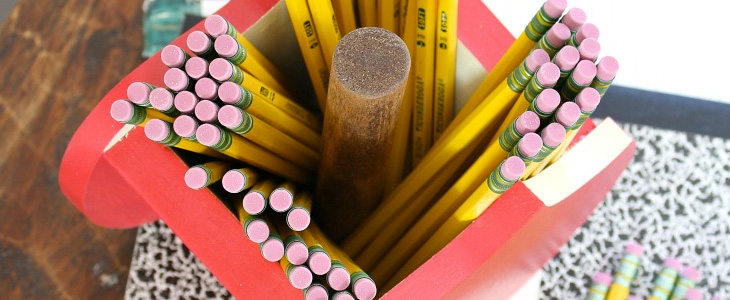
DIY Apple Pencil Holder
Looking for a sweet gift for the teachers in your life? Try this DIY apple pencil holder—a teacher appreciation gift you can make from scrap wood!
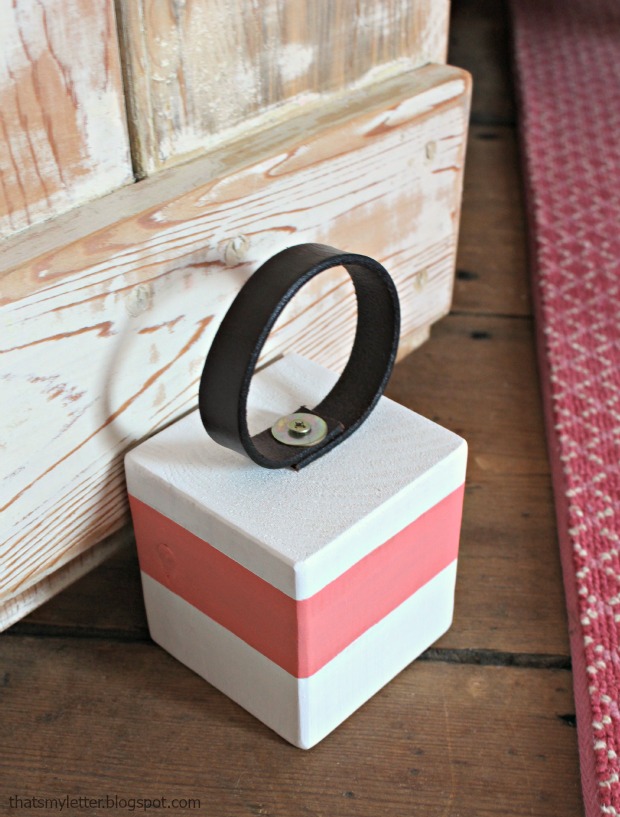
DIY Door Stop with Handle
Here’s a quick and easy scrap wood project! Today, I’ll walk you step-by-step through making a DIY Door Stop with a leather handle.
I can also make a few more casual, friendly variations if you want.

Rustic Home Sign
Learn how to create your own rustic home sign using a scrap piece of wood you probably have on hand. If your wood isn’t wide enough, simply glue two pieces together.
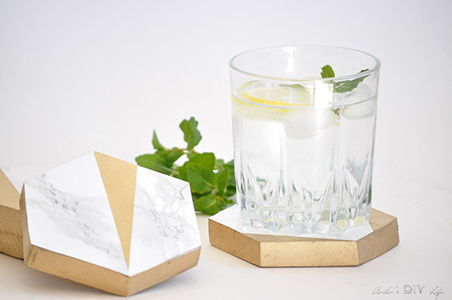
Easy Gold and Marble Coasters
Today’s project combines sparkle and savings with these simple gold and marble coasters.


DIY Rolling Plant Caddy Tutorial
A rolling plant caddy is super handy and thankfully, it’s easy to make! I built mine using scrap wood leftover from other projects.

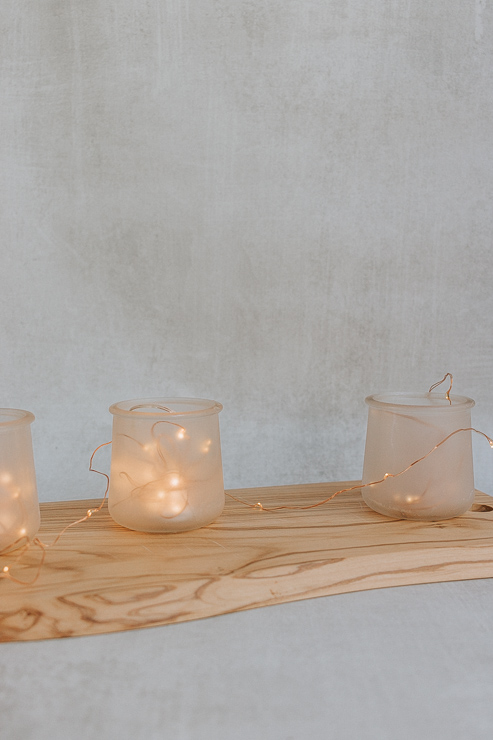
DIY Candle Lantern from Leftover Trim
A few scraps of trim left over from a fireplace remodel were turned into a candle lantern with a lovely streamlined look. Add a pair of them to your dining room table for a great centerpiece idea.

How to Make a Folding Guitar Stand
Designing this stand was a fun challenge as I figured out the curves and how to make a folding guitar stand that collapses flat for easy storage. I'm so happy with how it turned out!

Toddler Animal Stools
What toddler wouldn’t adore these super cute DIY animal toddler stools? Ready to tackle this adorable project today? I hope so! And the best part, they’re made from real scrap wood!

Giant Citrus Fruit Decor
Add the flavors of summer to your home decor with these giant citrus slices! This project is a simple way to use up oddly-shaped wood scraps while adding a bright pop of color to your mantel or drink stand.
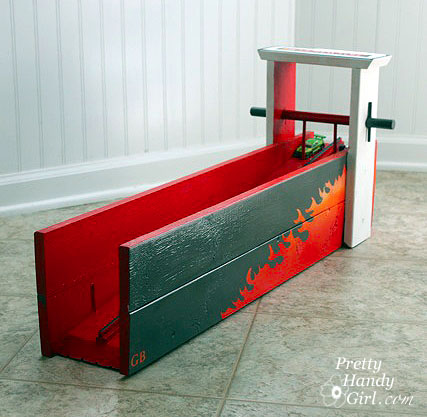
DIY Wooden Hot Wheels Car Racing Ramp
Spend some quality time making a wooden racing track with your kids! If you have boys, chances are you’ve got Hot Wheels cars at home. This race car ramp makes the best gift.
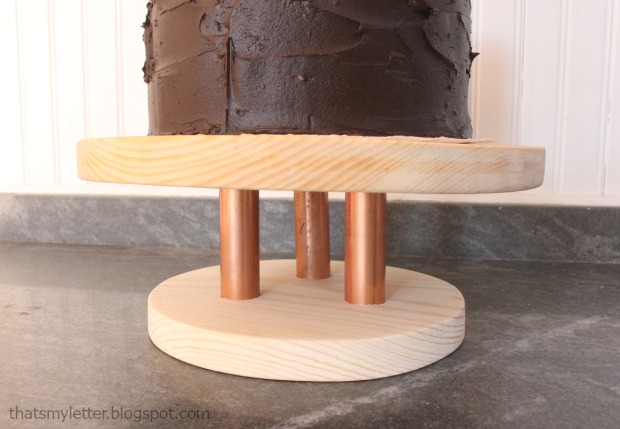
Wood and Copper Cake Stand
Make this stylish wood and copper cake stand in just a few steps! Cut a round wooden board for the top, attach a copper pipe or fitting as the base, and secure it with strong adhesive or screws. Finish with food-safe sealant for a modern, elegant dessert display.
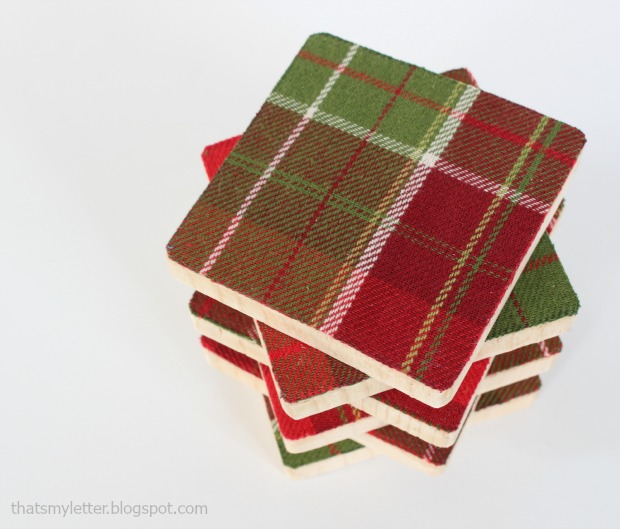
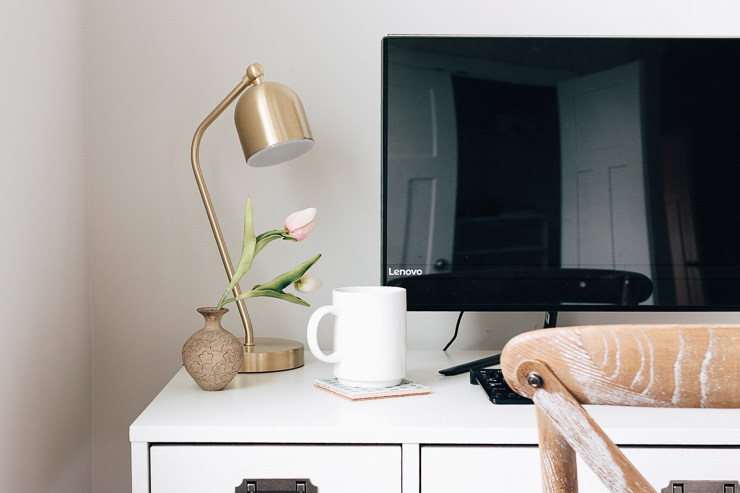
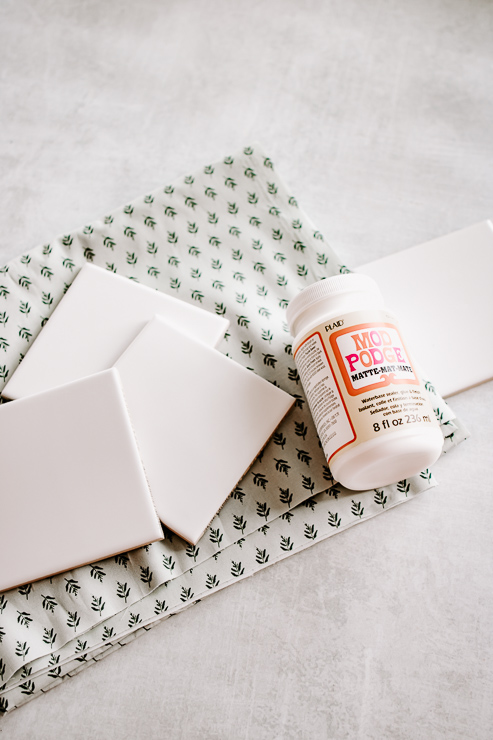
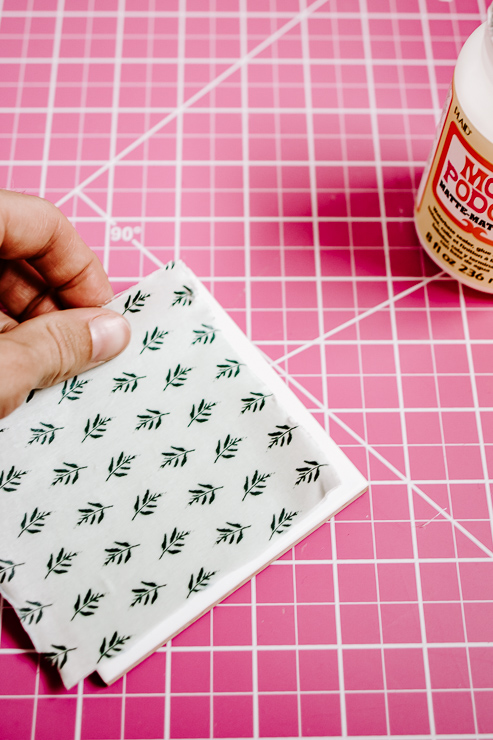
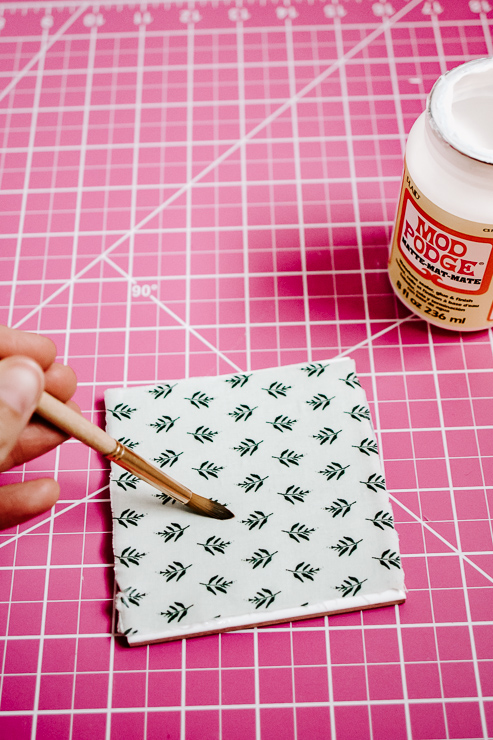
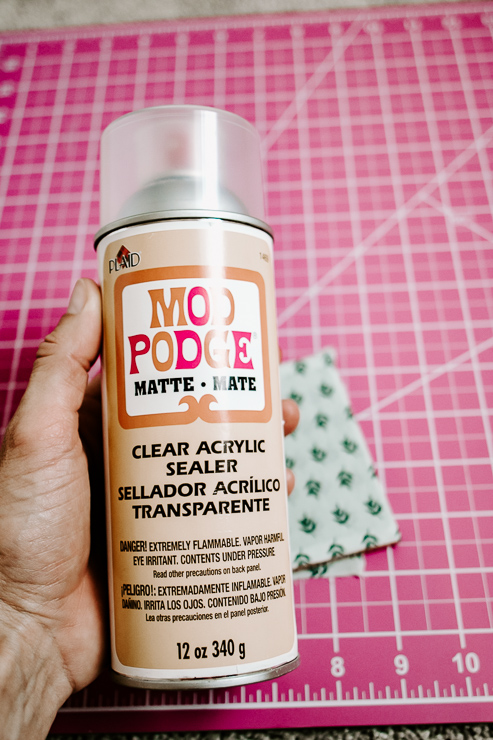
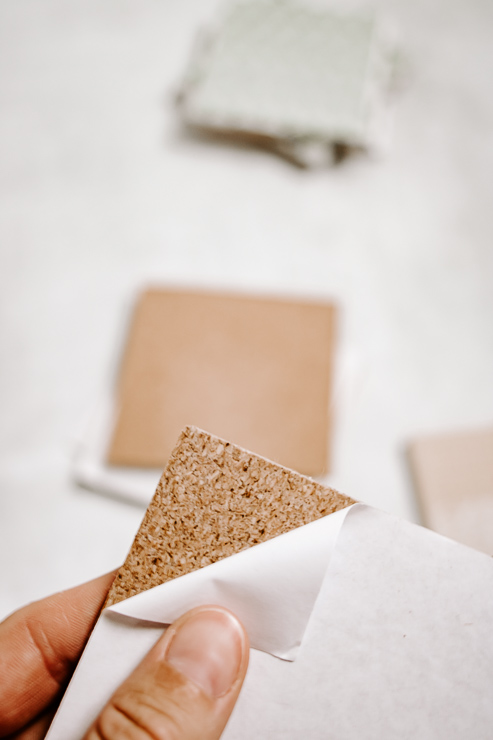
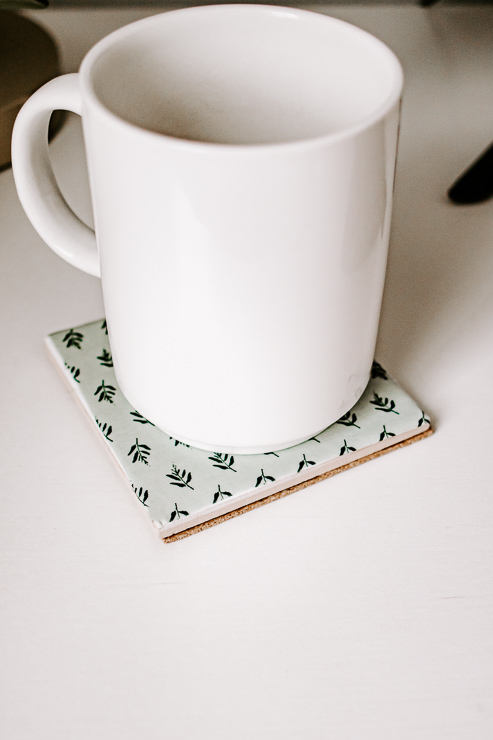
Fabric and Wood Coasters
These fabric and wood coasters bring a cozy touch of holiday cheer to your coffee table, and the best part? You probably already have everything you need to make them!
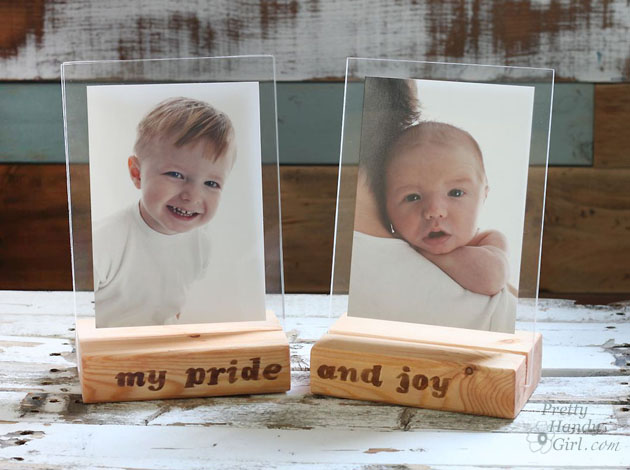
Floating Wood Block Picture Frames
Have someone on your gift list who’s hard to shop for? Here’s the perfect idea—make them a wood block floating picture frame using scrap 2×4 lumber and a piece of plexiglass!
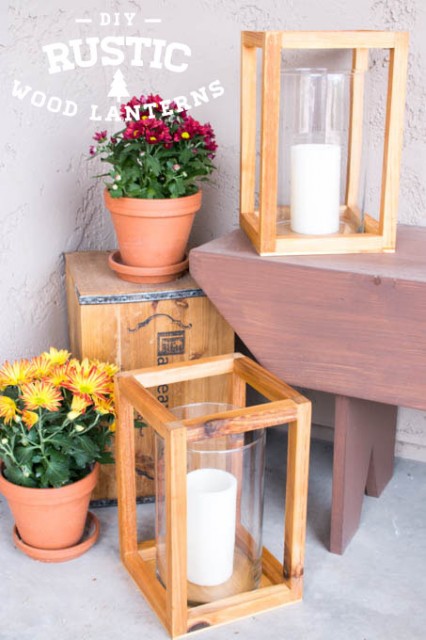
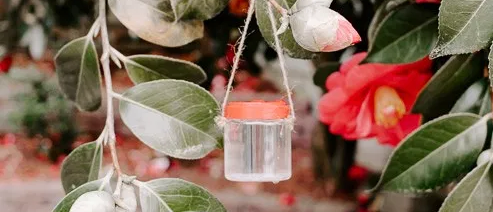
DIY Rustic Wood Lanterns
Lanterns are a wonderful way to bring warmth and charm to your decor. Follow this tutorial to make these gorgeous DIY Rustic Wood Lanterns!
DIY Scrap Moulding Trays
Got some scrap wood lying around? Perfect! Today I’m sharing a quick and easy tutorial for making your own DIY Scrap Molding Trays.

DIY Plywood Frame with Glass
I used some scrap plywood to create custom frames for my kids’ silhouettes. Since custom framing can be pricey, and not every piece fits a standard store-bought frame, this DIY plywood frame is the perfect budget-friendly solution!
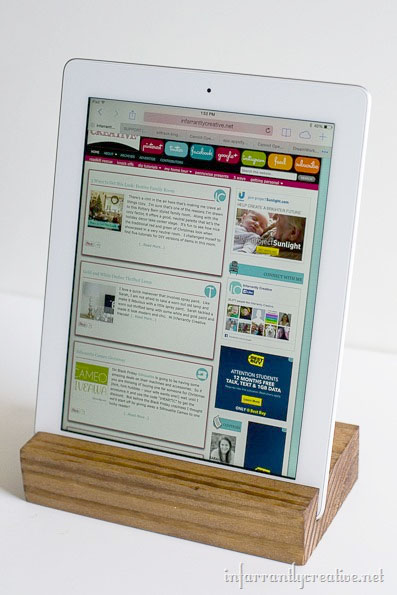
Scrap Wood iPad Tray
Looking for a budget-friendly gift idea? Build an iPad tray stand! Using a few pieces of scrap wood, you can create a simple and stylish stand that holds a tablet perfectly for reading, cooking, or watching shows hands-free.
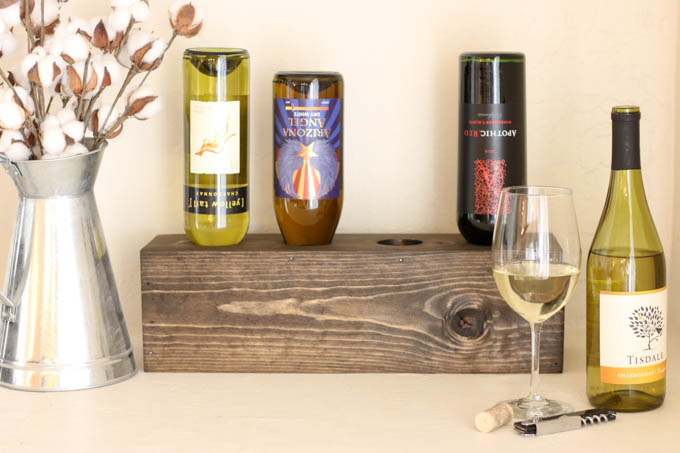
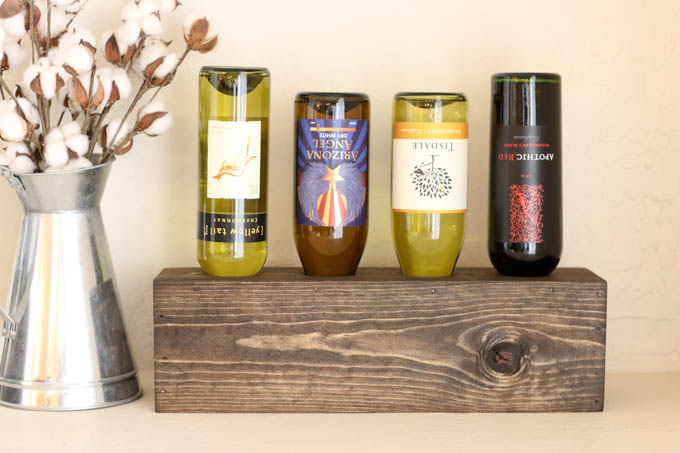
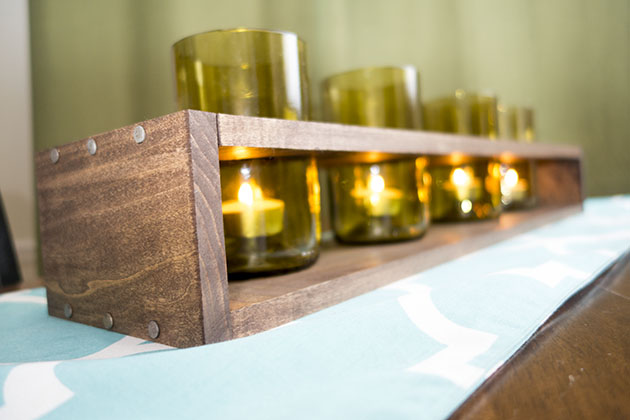
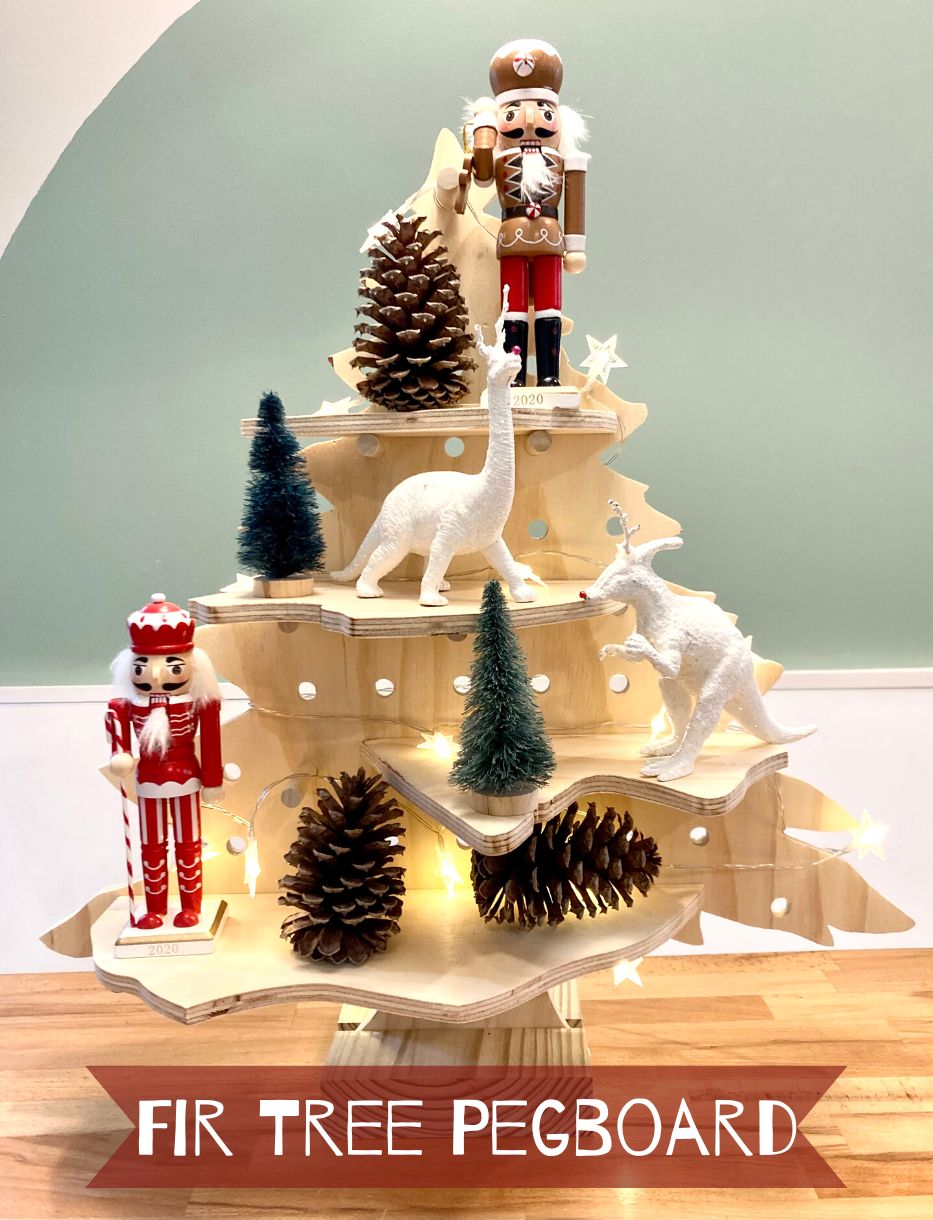
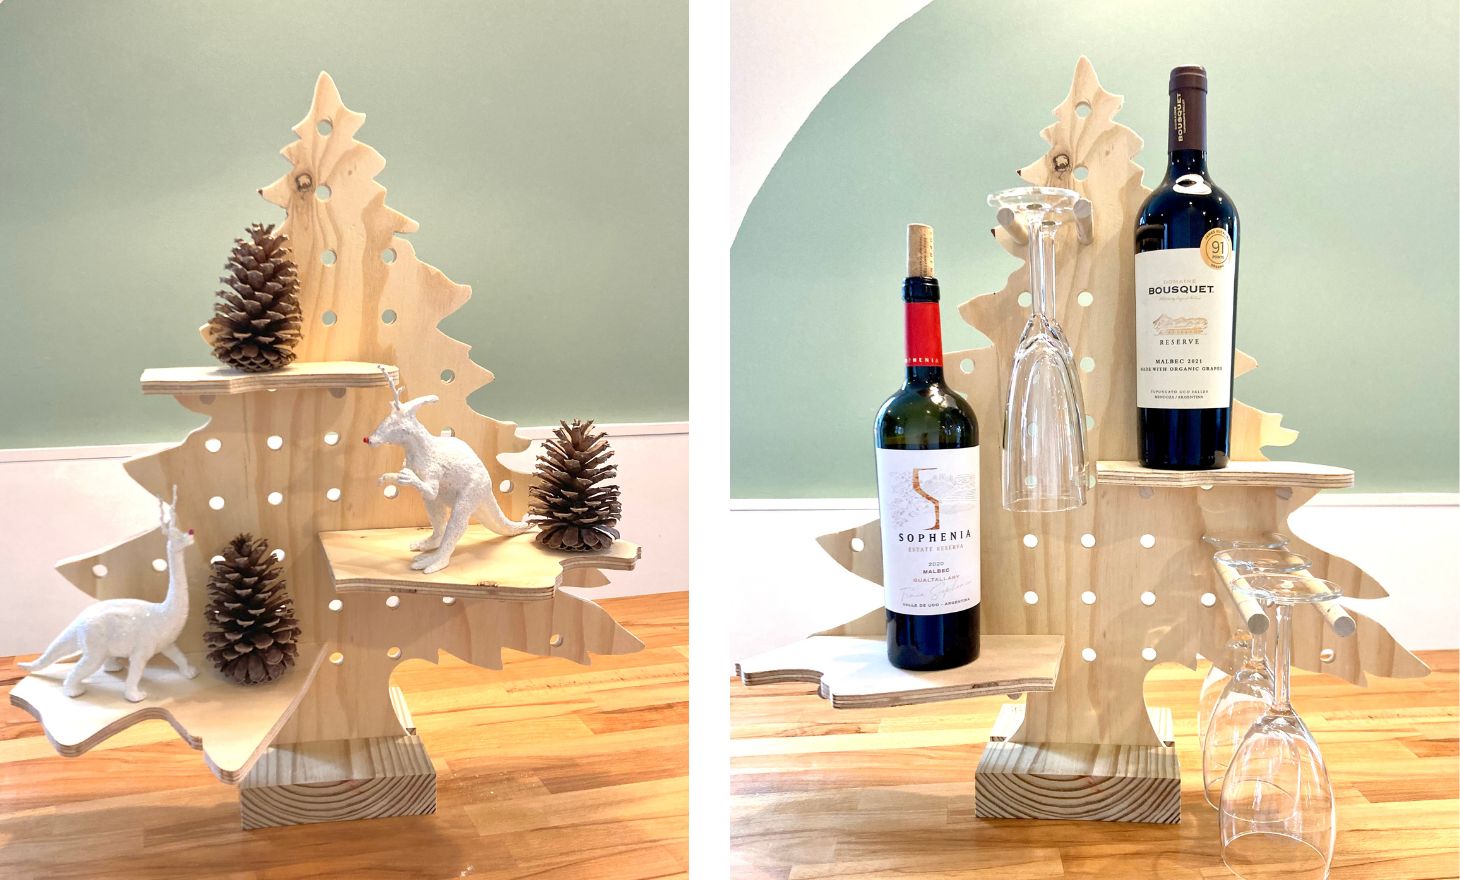
Scrap Wood Wine Holder
I recently raided my scrap pile and whipped up this easy DIY wine holder. It’s simple, rustic, and easy to customize to hold as many bottles as you need!

DIY Scrap Wood Caddy
This simple and versatile scrap wood caddy is a fun project you can make in no time! Perfect for organizing craft supplies, tools, or even using as a rustic gift basket, it’s a great way to turn leftover wood into something both useful and charming.
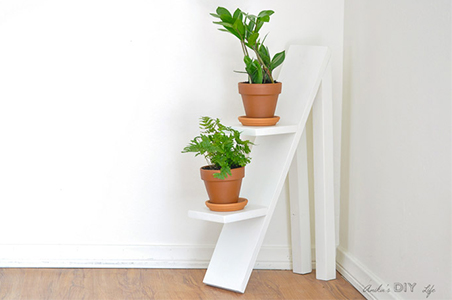
How to Make a Two-Tiered Plant Stand using Scrap Wood
I put some of my leftover wood scraps to good use by building a two-tiered plant stand! It’s a simple and stylish project that adds height and dimension to any plant display—perfect for both indoor and outdoor spaces.
Scrap Wood Shadow Box Frame
Turn those leftover scraps into something beautiful with a DIY Scrap Wood Shadow Box Frame! This project is a perfect way to repurpose small wood pieces while creating a unique, rustic frame to display photos, keepsakes, or small treasures.
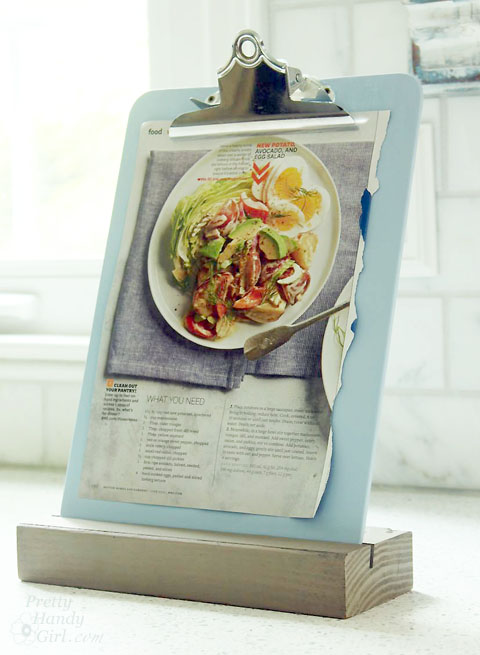
Easy Clipboard Stand
This easy clipboard stand is a clever way to give new life to an old clipboard and a scrap 2×4. Functional and versatile, this simple project is perfect for organizing your desk or displaying notes in style.
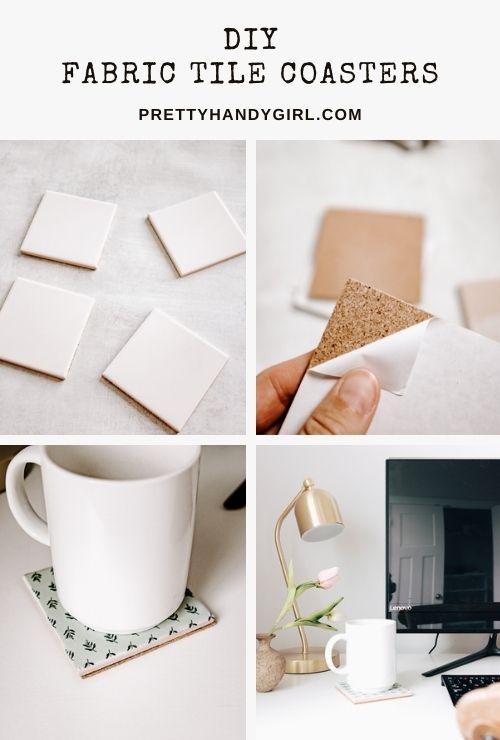
PIN FOR LATER