Little Playhouse | Pretty Handy Girl

Little Playhouse | Pretty Handy Girl

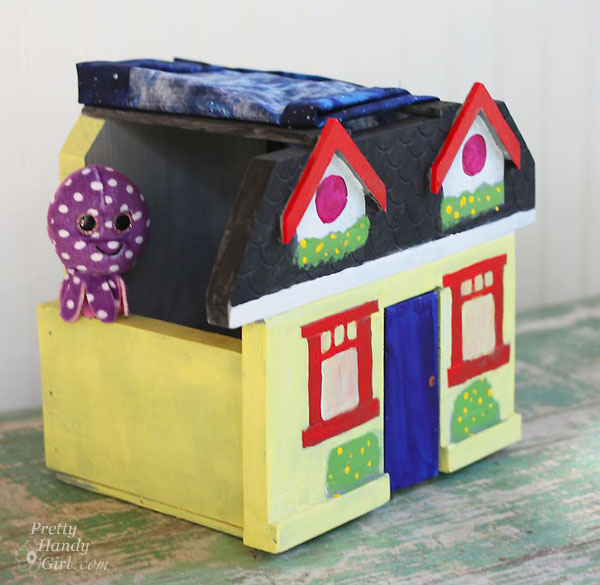
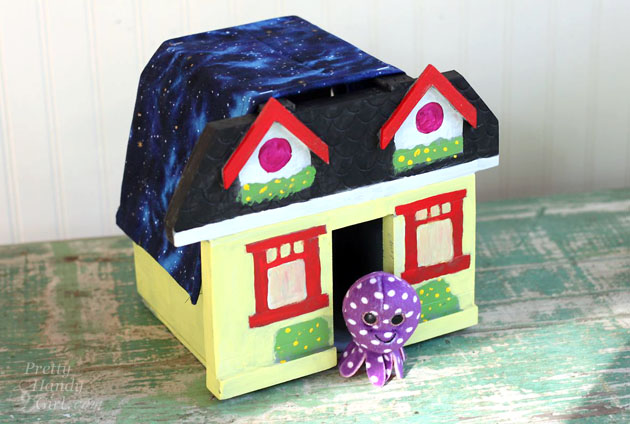
I love giving my boys creative freedom on projects. Frequently I let them have access to my scrap pile. Inevitably they build little houses for their stuffed animals. This little house was designed and painted by my 8 year old for Ollie (his little stuffed octopus.) I helped him build it. If you want to build a little playhouse for your child to paint, follow along.

Before we begin, I need to back up and tell you that this project is part of The Mystery Thrift Off.

#TheMysteryThriftOff is the brainchild of Lindsey from Better After. She chose a handful of people to take part in this challenge. After scouring her local thrift shops for ugly and hopeless items, she shipped off the chosen items to those of us in the challenge. I signed up—because frankly—I love a challenge. And, I love saving ugly items from the landfill. Be sure to see some of the other Mystery Thrift Off transformations at Better After and vote for your favorite.

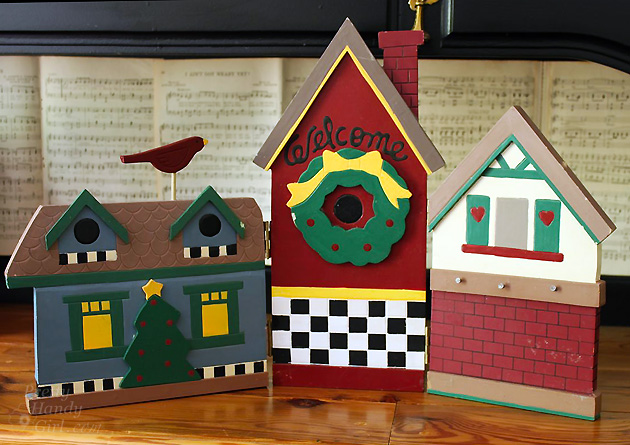
But, when the box arrived from Lindsey, I was terrified to open it up! I mean what if she had sent me a ceramic scabies bear!  Yikes. You can imagine my relief when I opened the box to reveal this dated Christmas village.
Chalkboard Arrow Sign (Mystery Thrift Off) | Pretty Handy Girl

Not too bad looking is it.? Truth be told, it was falling apart and the colors were hunter green, colonial blue, mauve and fleshy tan.
Chalkboard Arrow Sign (Mystery Thrift Off) | Pretty Handy Girl

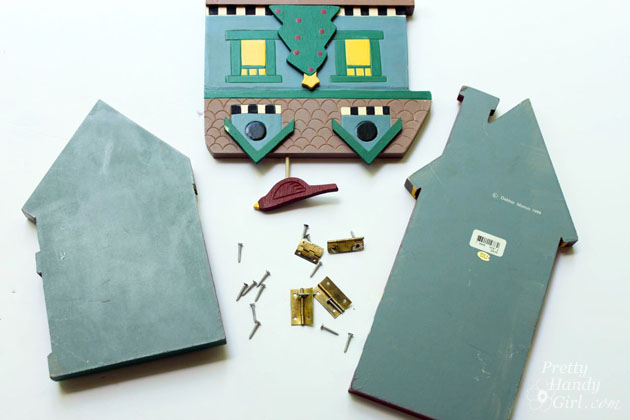
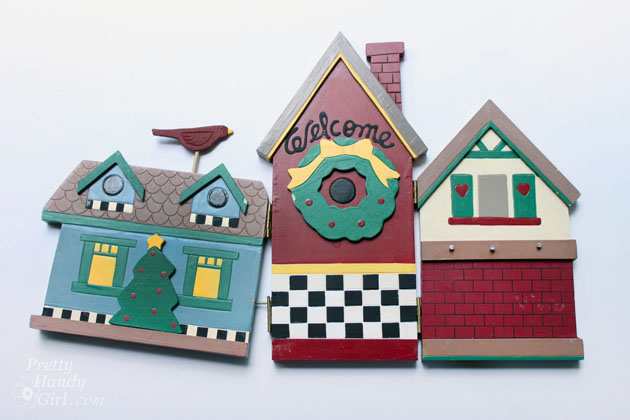
I quickly pulled the three houses apart and began to transform them into A Chalkboard Arrow Sign, a Housewarming Gift Caddy and the Little Playhouse I’m going to show you today.

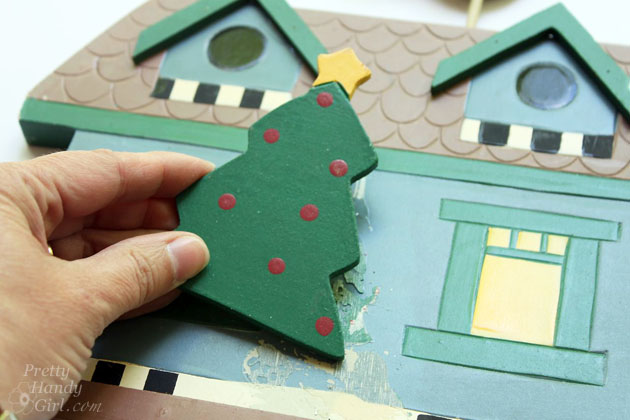
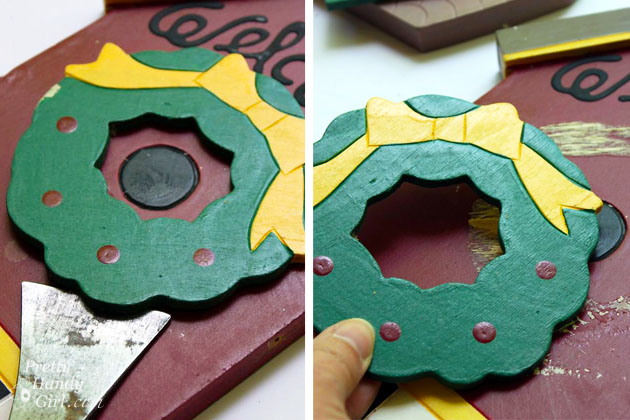
I began by removing some of the embellishments.

Little Playhouse | Pretty Handy Girl

I saved them for a future project.

Chalkboard Arrow Sign (Mystery Thrift Off) | Pretty Handy Girl

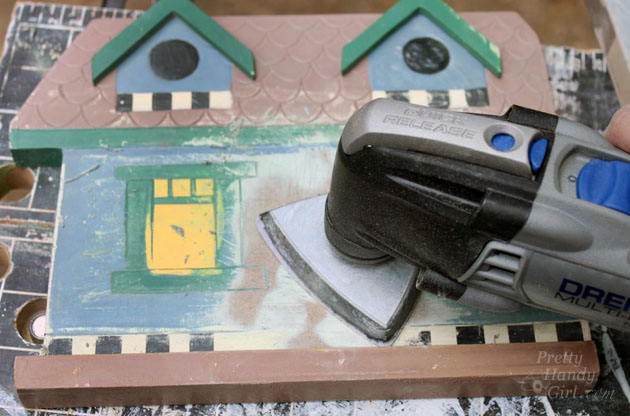
Next I sanded off the glue.

Little Playhouse | Pretty Handy Girl

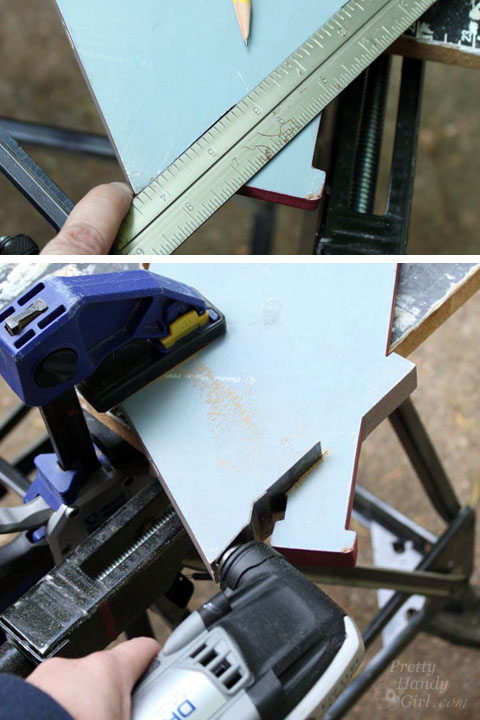
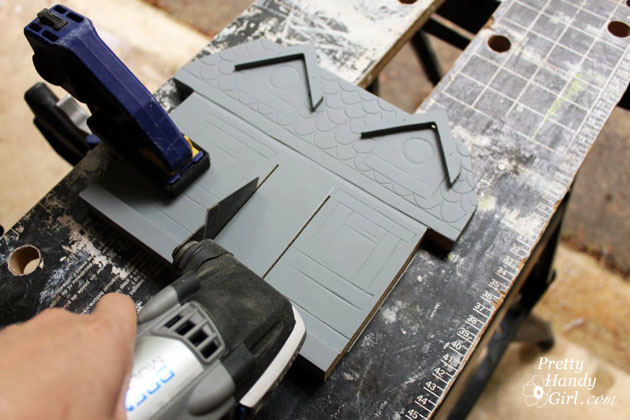
Here’s where you can pick up the tutorial. Start by cutting a house shape into a piece of plywood or scrap wood. Cut out a doorway (the Dremel Multi-Max worked perfect for this task.)
Little Playhouse | Pretty Handy Girl

Flip the house shape over and attach hinges to one side of the door and the house.
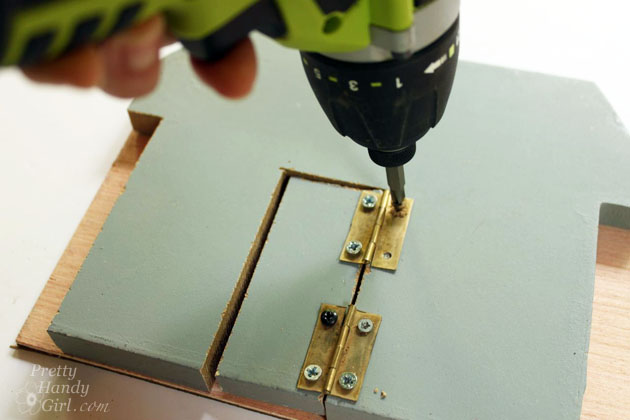
Little Playhouse | Pretty Handy Girl

Cut two pieces for the sides of the house (1″ x 4″ lumber) and a back piece the same height as the house front.
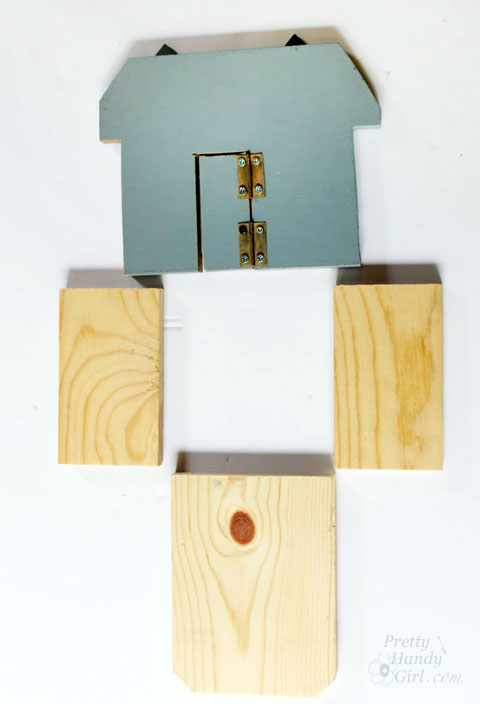
Little Playhouse | Pretty Handy Girl

Clamp the back of the house to a solid surface and attach the sides of the house with glue and finish nails. Read more

Housewarming Gift Crate | Pretty Handy Girl

Housewarming Gift Crate | Pretty Handy Girl

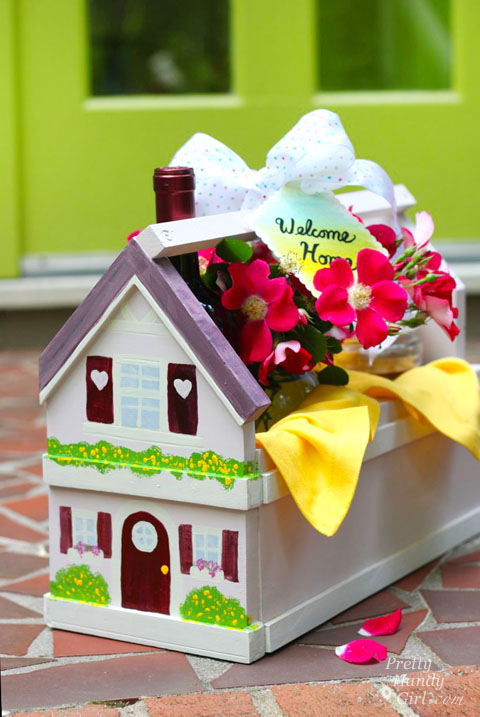
Do you have a new neighbor or know someone who just moved? It’s time to celebrate with them by giving them a housewarming gift caddy! This is an easy gift tote that you can customize to any size you like. Plus, the recipient can use the caddy for storage or display after the gift has been enjoyed.

Before we begin, I need to back up and tell you that this project is part of The Mystery Thrift Off.

#TheMysteryThriftOff is the brainchild of Lindsey from Better After. She chose a handful of people to take part in this challenge. After scouring her local thrift shops for ugly and hopeless items, she shipped off the chosen items to those of us in the challenge. I signed up—because frankly—I love a challenge. And, I love saving ugly items from the landfill. Be sure to see some of the other Mystery Thrift Off transformations at Better After and vote for your favorite.

But, when the box arrived from Lindsey, I was terrified to open it up! I mean what if she had sent me a ceramic scabies bear!  Yikes. You can imagine my relief when I opened the box to reveal this dated Christmas village.

Chalkboard Arrow Sign (Mystery Thrift Off) | Pretty Handy Girl

Not too bad looking is it.? Truth be told, it was falling apart and the colors were hunter green, colonial blue, mauve and fleshy tan.

Chalkboard Arrow Sign (Mystery Thrift Off) | Pretty Handy Girl

I quickly pulled the three houses apart and began to transform them into A Chalkboard Arrow Sign, a Little Playhouse and the Housewarming Gift Caddy I’m going to show you today.

Before I got started, I removed some nails from the house on the right. And then I was ready to get building.

Housewarming Gift Crate | Pretty Handy Girl

Ready to create your own caddy? Let’s get to it.

Materials:

  • 1″ x 6″ board
  • Wood glue
  • Finish nails
  • 1″ x 1″ square dowel
  • 1/2″ lattice trim (or other decorative trim)
  • 2″ screws
  • Spray primer
  • Paint (used Botanical Home Decor Paint)
  • Craft paint
  • Paintbrushes
  • Patch-plus-primer
  • Putty knife
  • Sandpaper

Instructions:

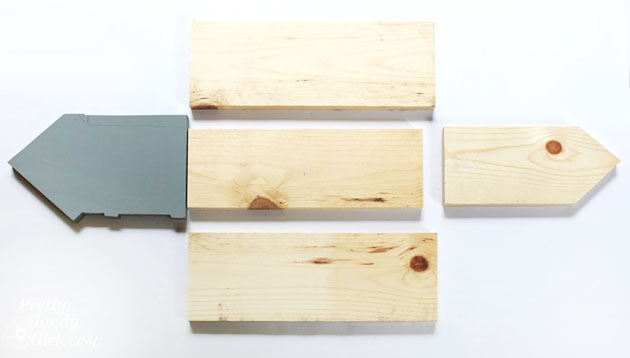
Cut the 1″ x 6″ into 5 pieces:

Housewarming Gift Crate | Pretty Handy Girl

  • 2 – 6″ x 15″sides
  • 1 – 6″ x 15″ base
  • 2 – 6″ x 11″ front & back pieces with a 45 degree corners cut into the tops

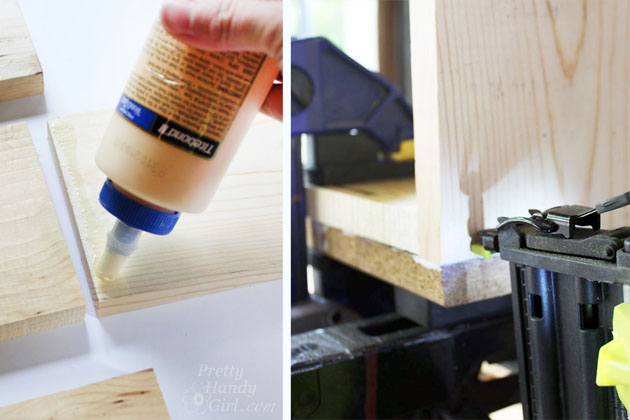
Add a line of glue along the bottom of the front and back of the caddy.  Attach them to the base with finish nails.

Housewarming Gift Crate | Pretty Handy Girl

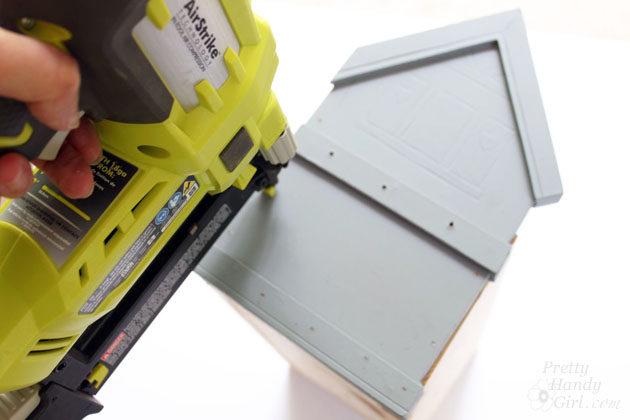
Add a line of glue to cut ends of the sides and add a line of glue to the bottom of the sides.  Attach the front to the sides with finish nails. Repeat for the back piece.

Housewarming Gift Crate | Pretty Handy Girl

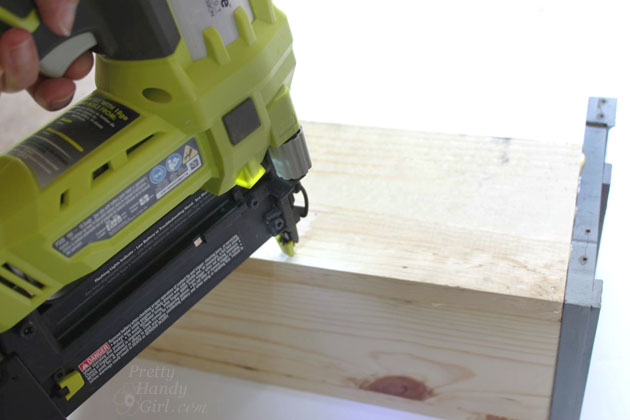
Attach the sides by nailing through the bottom and into the sides.

Housewarming Gift Crate | Pretty Handy Girl

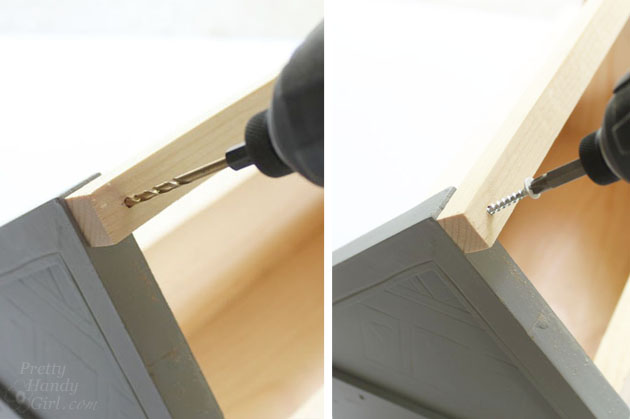
Pre-drill a hole into each end of the 1″ x 1″ square dowel. Attach the square dowel to the top of the front and back pieces with the 2″ screws.

Housewarming Gift Crate | Pretty Handy Girl

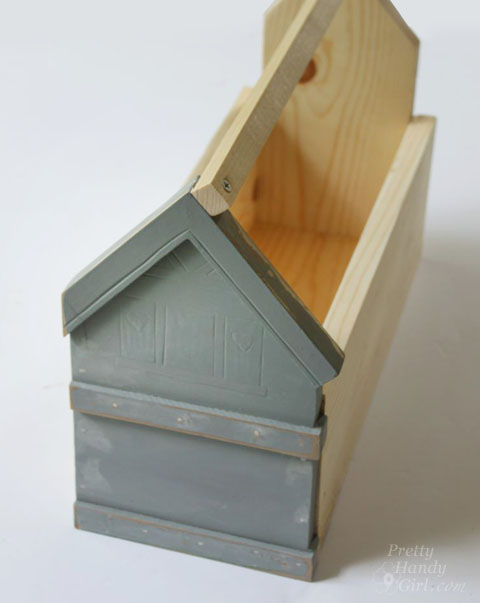
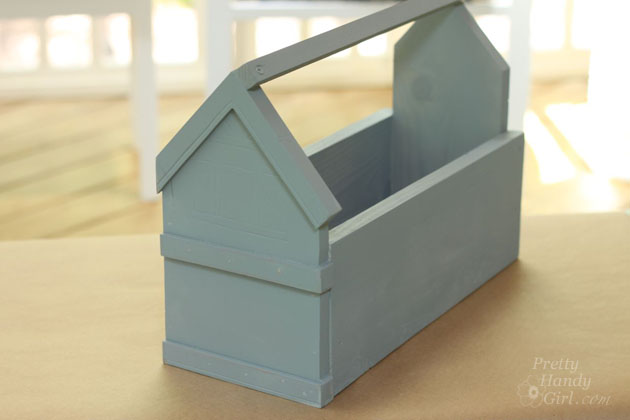
The completely assembled crate should look like this:

Housewarming Gift Crate | Pretty Handy Girl

Spray the caddy with spray primer inside and out.

Housewarming Gift Crate | Pretty Handy Girl

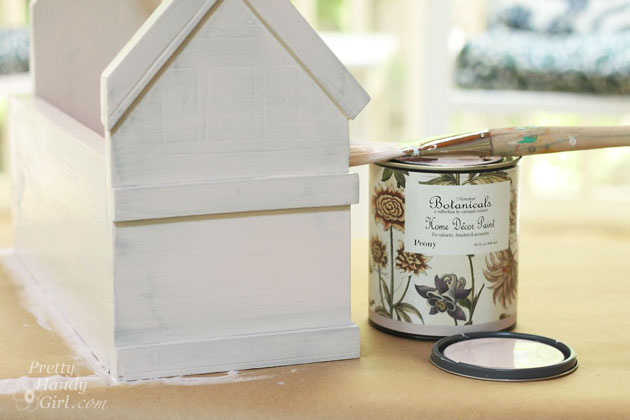
Paint caddy with a solid color first. (I used a new paint and love the texture and coverage. Botanicals Home Decor Paint in Peony went on smoothly like chalky paints.)

Housewarming Gift Crate | Pretty Handy Girl

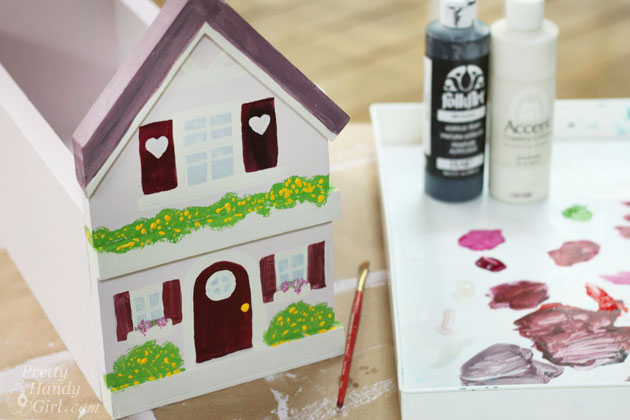
Use the craft paints to paint details like windows, shutters and a door onto the front of the caddy. If you’re feeling truly artistic, you can paint the back too.

Housewarming Gift Crate | Pretty Handy Girl

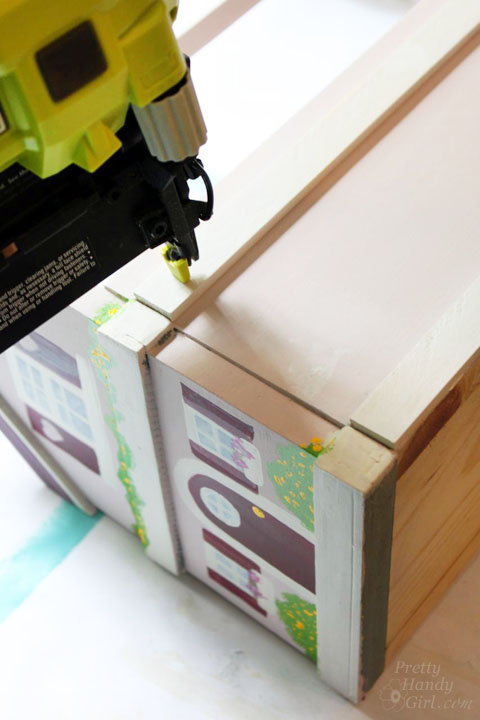
Nail the lattice trim pieces to the sides of the caddy for a little decoration.

Housewarming Gift Crate | Pretty Handy Girl

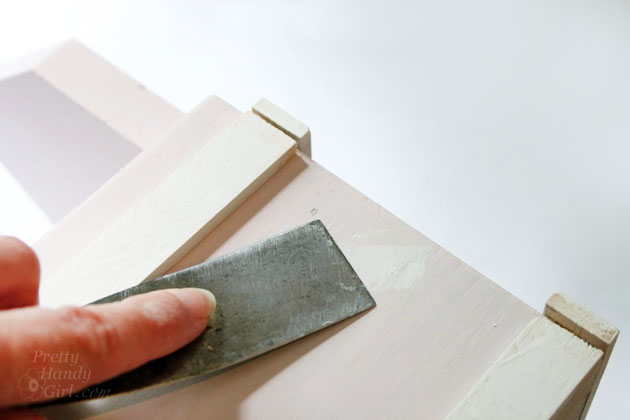
Putty all nail holes.

Housewarming Gift Crate | Pretty Handy Girl

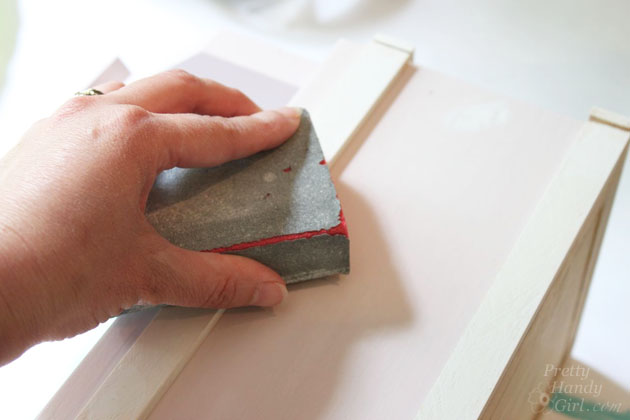
Sand the putty smooth after it has dried. Touch up paint the putty holes.

Housewarming Gift Crate | Pretty Handy Girl

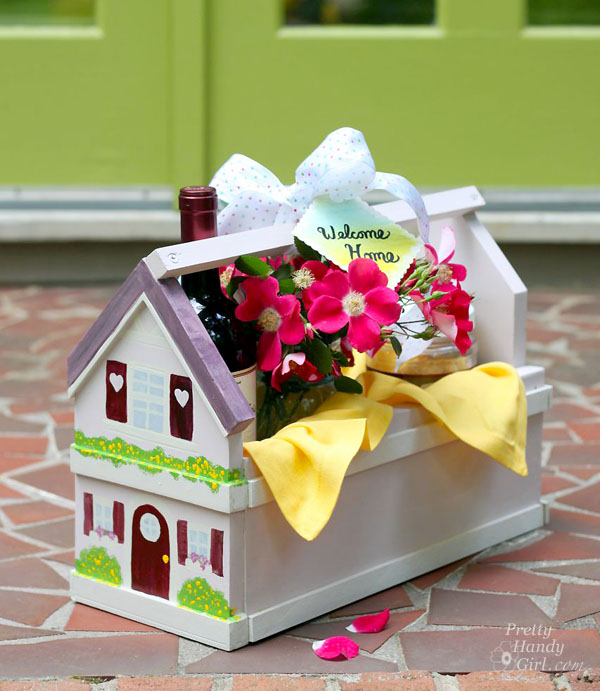
Fill your caddy with wine, flowers, food or other goodies to celebrate the new homeowners.

Housewarming Gift Crate | Pretty Handy Girl

The recipient will be tickled pink. Haha, get it, a little pink house?

PHGFancySign


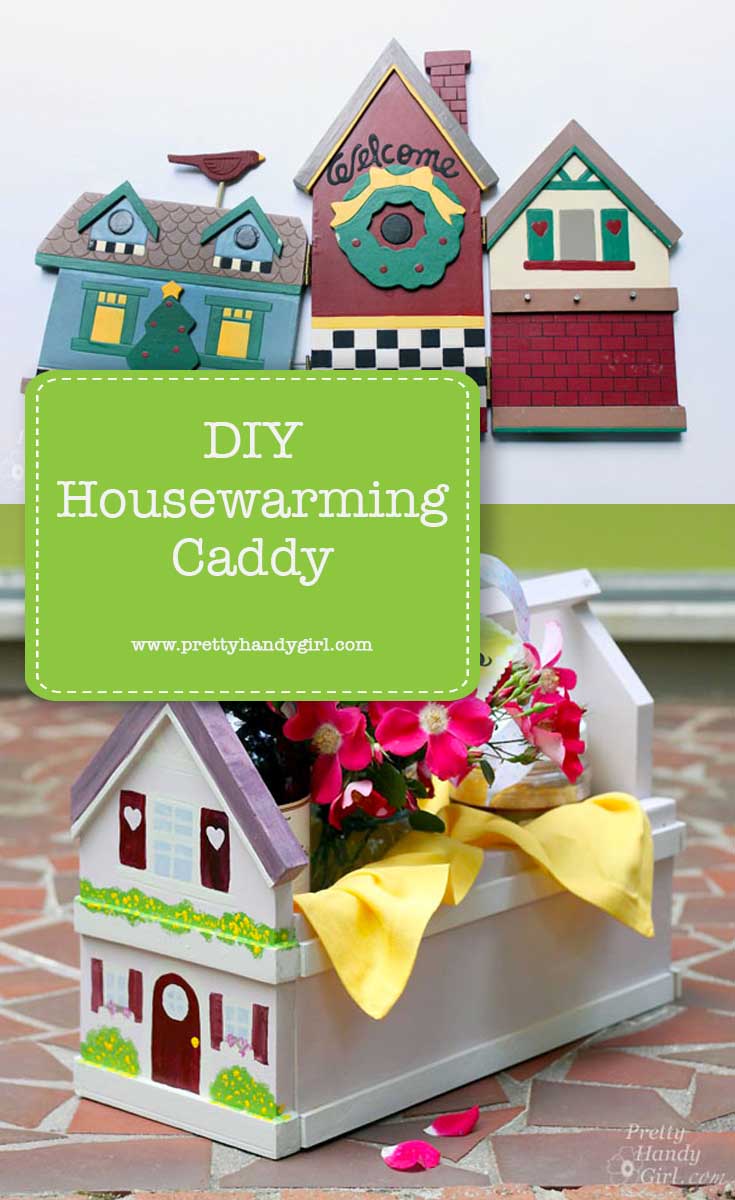
Pin for later!

Chalkboard Arrow Sign (Mystery Thrift Off) | Pretty Handy Girl

Chalkboard Arrow Sign (Mystery Thrift Off) | Pretty Handy Girl

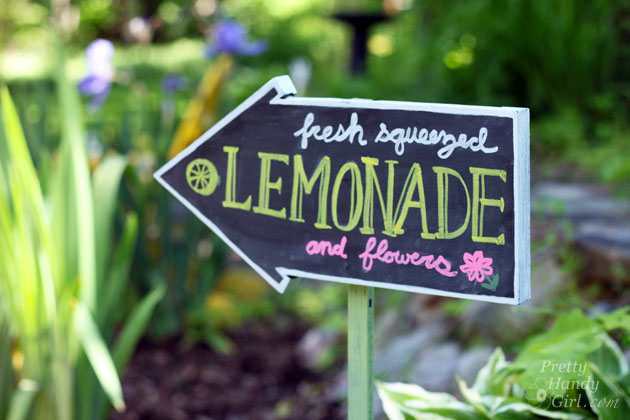
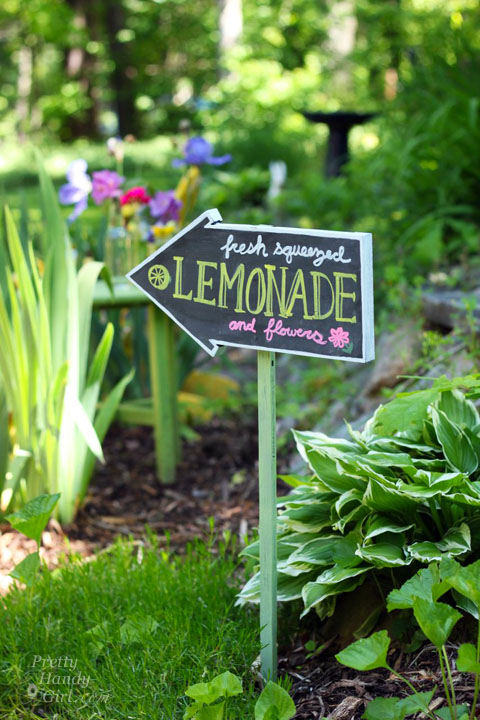
Are you having a yard sale, a lemonade stand or an open house? This Chalkboard Arrow Sign is an easy DIY project that will bring more attention to your event.

But, let me back up to explain exactly how this Chalkboard Arrow Sign came to be. Have you been following #TheMysteryThriftOff challenge? This is the brainchild of Lindsey from Better After. She chose a handful of people to take part in this challenge. After scouring her local thrift shops for ugly and hopeless items, she shipped off the chosen items to those of us in the challenge. I signed up—because frankly—I love a challenge. And, I love saving ugly items from the landfill. This week she’ll be revealing all the Mystery Thrift Off participants transformations and you can vote on your favorite!

But, when the box arrived from Lindsey, I was terrified to open it up! I mean what if she had sent me a ceramic scabies bear!  Yikes. You can imagine my relief when I opened the box to reveal this dated Christmas village.

Chalkboard Arrow Sign (Mystery Thrift Off) | Pretty Handy Girl

Not too bad looking is it.? Truth be told, it was falling apart and the colors were hunter green, colonial blue, mauve and fleshy tan.

Chalkboard Arrow Sign (Mystery Thrift Off) | Pretty Handy Girl

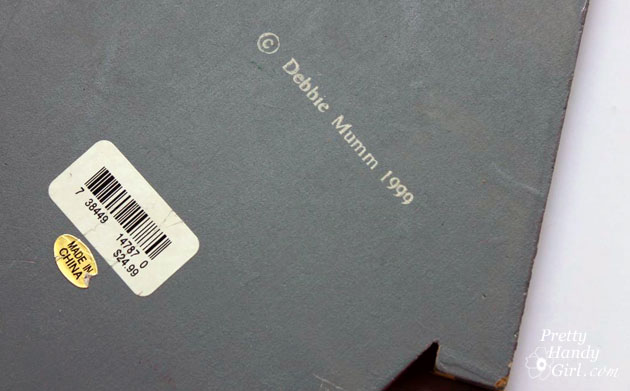
I flipped it over to reveal that this was the fine art of Ms. Debbie Mumm in 1999. And someone paid $24.99 for it! I certainly hope Lindsey didn’t spend that much. I think 1999 is calling and they want their village back.

Chalkboard Arrow Sign (Mystery Thrift Off) | Pretty Handy Girl

I’ll quickly show you how I transformed this village and then we’ll get to the tutorial for how you can make your own Chalkboard Arrow Sign.

The hinges were easy removed from between the houses. I kept them for another project.

Chalkboard Arrow Sign (Mystery Thrift Off) | Pretty Handy Girl

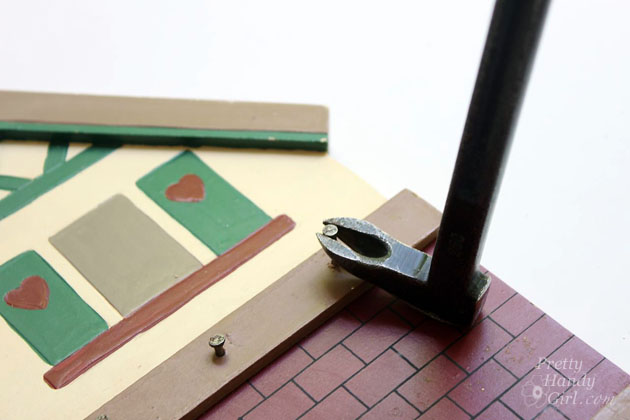
The wooden embellishments were popped off with a pry bar.

Chalkboard Arrow Sign (Mystery Thrift Off) | Pretty Handy Girl

I also saved these embellishments for a future project.

Chalkboard Arrow Sign (Mystery Thrift Off) | Pretty Handy Girl

To create the arrow shape, I chose the middle tall building and cut off the chimney with my Dremel Multi-max.

Chalkboard Arrow Sign (Mystery Thrift Off) | Pretty Handy Girl

Here’s where you can pick up the tutorial. 🙂

Materials:

  • 9″ x 14″ piece of smooth plywood, masonite or wood board
  • Jigsaw
  • Sander
  • Valspar Gray Spray Primer
  • Chalkboard paint
  • Foam roller
  • Chalk Ink
  • 1″ x 1″ square garden stake (look in the garden section of Lowe’s)
  • Finish Nails
  • Wood glue

Instructions:

Print out the Chalkboard Arrow Template. It should fit on a legal sheet of paper. Cut out the template and transfer the shape to your wood.

Use a jigsaw to cut out the shape. Sand any rough edges from your plywood. Read more

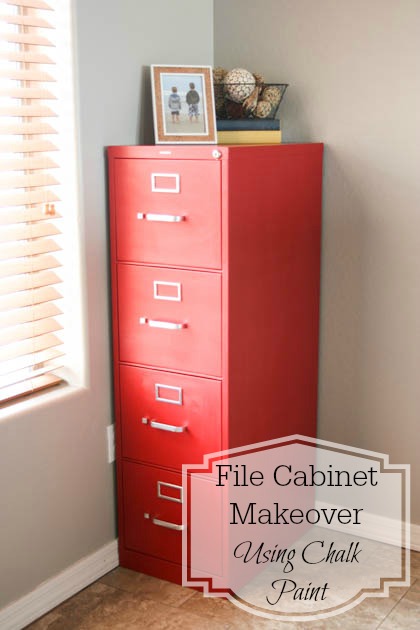
File Cabinet Makeover Using Chalk Paint

Hey there everyone!  I’m working in my craft room to give it a major overhaul and make it a much more functional and creative space.  It also doubles as an office that I share with my husband.  It’s not always the easiest thing to do, partly because of a lack of organization. One of the biggest projects we’re taking on is completely making over the closet.  I’ve already replaced the closet doors with curtains and I love how much easier it has made it to get to things in the closet.

File Cabinet Makeover Using Chalk Paint

edited-8164

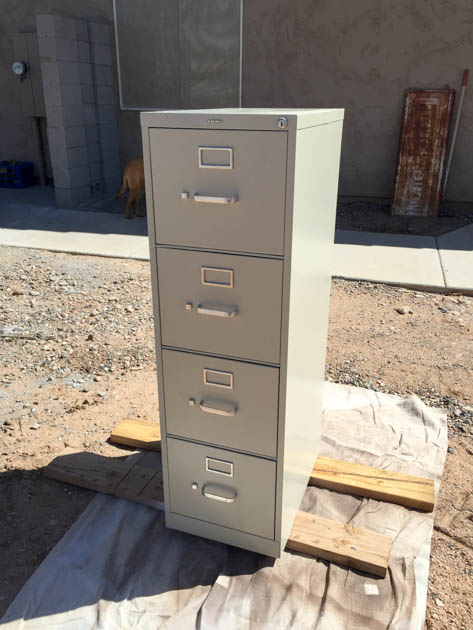
This file cabinet is one of the things that goes in that closet.  When we finish making over the closet, it will be moved to a more prominent location that will be more visible, especially if the curtains are left open.  Because of that, I decided that the boring beige color had to go and I gave it a quick and SUPER cheap makeover!

Here’s what you’ll need to do this project yourself!

File Cabinet Makeover Using Chalk Paint Materials:

File Cabinet Makeover Using Chalk Paint Instructions:

Unless you plan on painting it, you want to remove all of the hardware off of your file cabinet.  I wasn’t quite sure how this would go, but it was extremely easy to remove everything.  Just a couple of bolts and I was pretty much done!

edited-8166

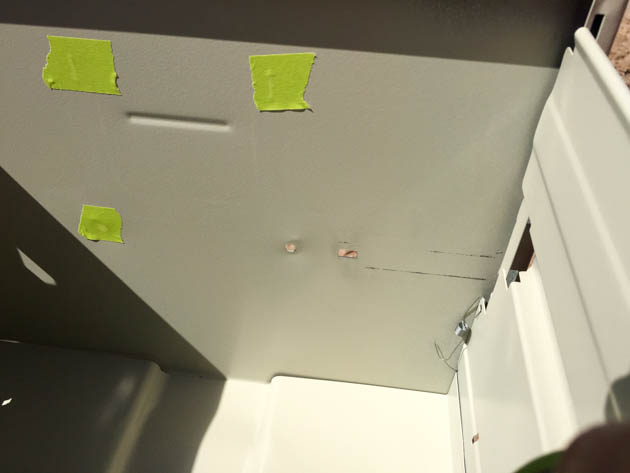
To protect the inside of the cabinet from overspray or paint dripping through, cover all of the holes from the inside using masking or painter’s tape.

edited-8168

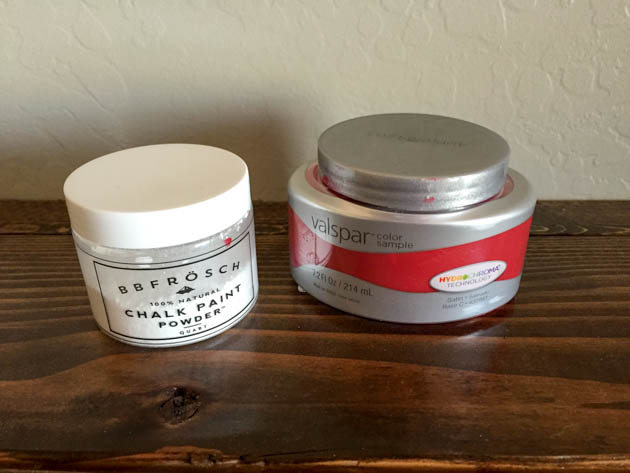
Time to mix your chalk paint.  What I love so much about BB Frösch Chalk Paint Powder is that there’s virtually no waste.  You mix as you go.  I like using the sample-sized paint containers because they’re cheap and if it’s a project where I’m not sure how much paint I’ll need, at least I know I won’t go way over by buying a quart.  The other amazing thing is that there’s virtually no prep work.

Wipe down the file cabinet with a wet cloth and that is it!

edited-8170

If you choose to paint your cabinet using a roller or paint brush, you can get started from this point.  If you plan to use a paint sprayer, you’ll need to prep the paint.  First and foremost, strain your paint!  Lowe’s sells little cone paint strainers (they look like coffee filters) for $.98 a four pack.  Once your paint is strained, you need to thin it with water.  The HomeRight paint sprayer that I use comes with everything you need to do this, plus great instructions. Read more
Build a Temporary Pergola with Trellises | Pretty Handy Girl

Build a Temporary Pergola with Trellises | Pretty Handy Girl

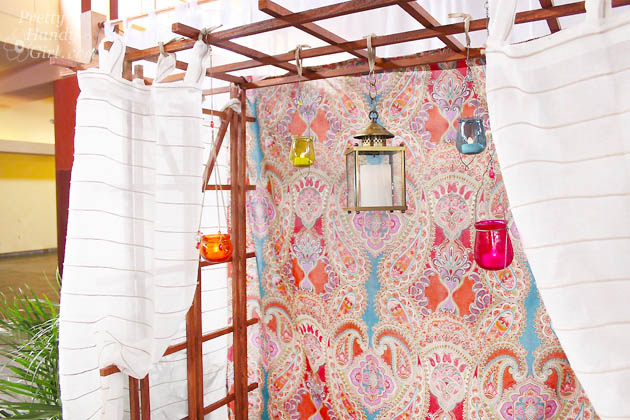
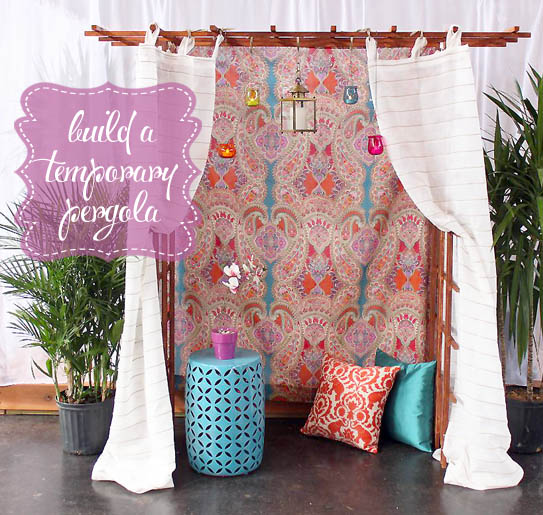
This tutorial to build a temporary pergola is perfect for a wedding, photo shoot, for some shade, or for your garden if you are okay with it not lasting forever.
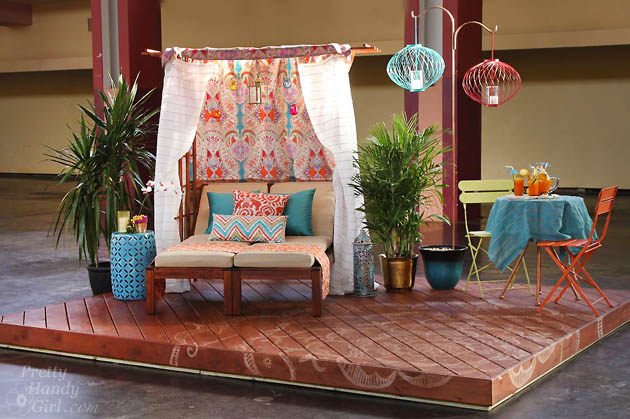
My sister and I constructed it for our Thompson’s WaterSeal Bali Dream Deck to provide some romance and shade from the hot Bali sun.

Bali Dream Deck for Thompsons Water Seal | Pretty Handy Girl

Materials:

Build a Temporary Pergola with Trellises | Pretty Handy Girl

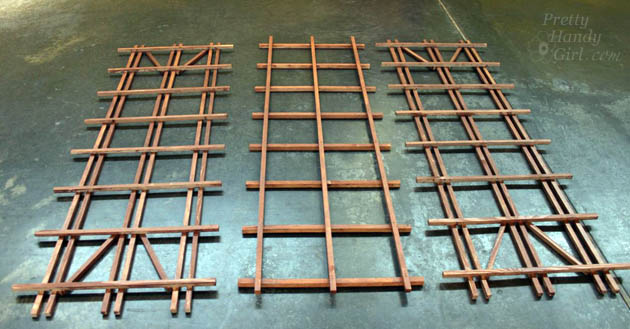
  • 2 Trellises (with double vertical construction)
  • 1 Trellis
  • 4 – 2 1/2″ wood screws
  • Drill bit
  • Drill
  • Clamps

Optional:

Instructions: 

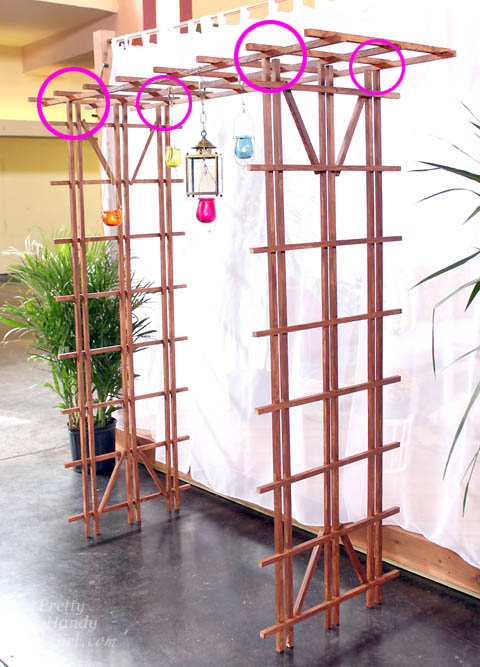
Dry fit your trellis pieces together to create the pergola shape. Make note of where the top trellis intersects with the two side pieces.

Build a Temporary Pergola with Trellises | Pretty Handy Girl

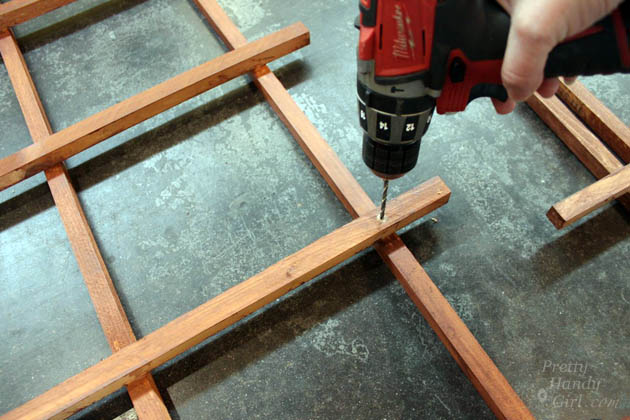
Pre-drill holes through the top trellis piece at the four intersecting points.

Build a Temporary Pergola with Trellises | Pretty Handy Girl

Pre-drill holes into the top outer pieces of the vertical side trellises (where they meet the top trellis.) Read more