Rustic Pallet Serving Tray | Pretty Handy Girl

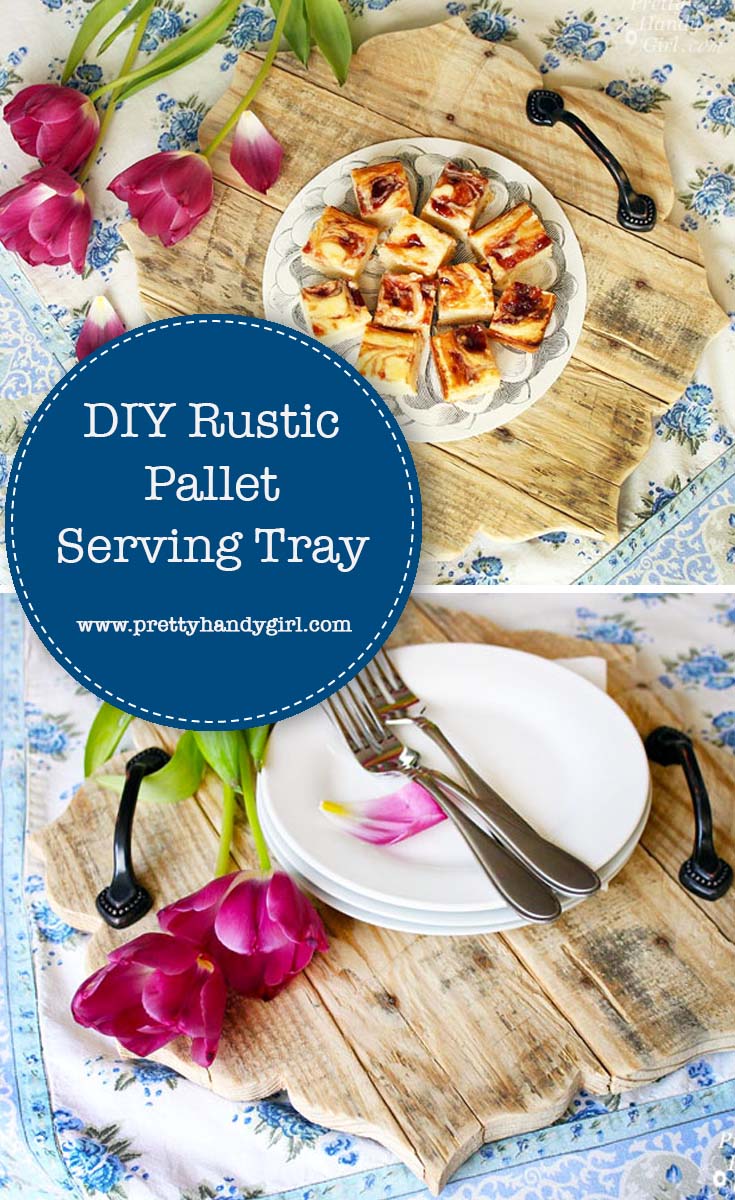
It’s amazing how serving food on a rustic tray can elevate your standard meal or dessert into an elegant occasion. This simple decorative rustic pallet serving tray is a simple project anyone can do!
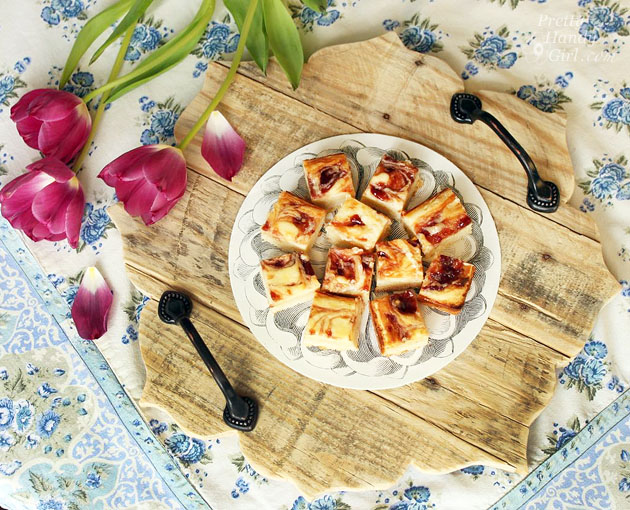
Rustic Pallet Serving Tray | Pretty Handy Girl

Rustic Pallet Serving Tray

When I worked on a deck makeover with my sister, Caitlin (of Symmetry Designs), we shopped for a lot of the accessories ahead of time. She wanted me to find the perfect Bali-esque tray. Unfortunately I was coming up empty-handed. But, sometimes, you just have to DIY it! This Rustic Pallet Serving Tray was the brainchild of my sister, but I took her idea and ran with it.

Here’s how to make one for yourself.

Materials:

(I’ve included affiliate links for your convenience. I earn a small percentage from a purchase using these links. There is no additional cost to you. You can read more about affiliate links here.)

Instructions:

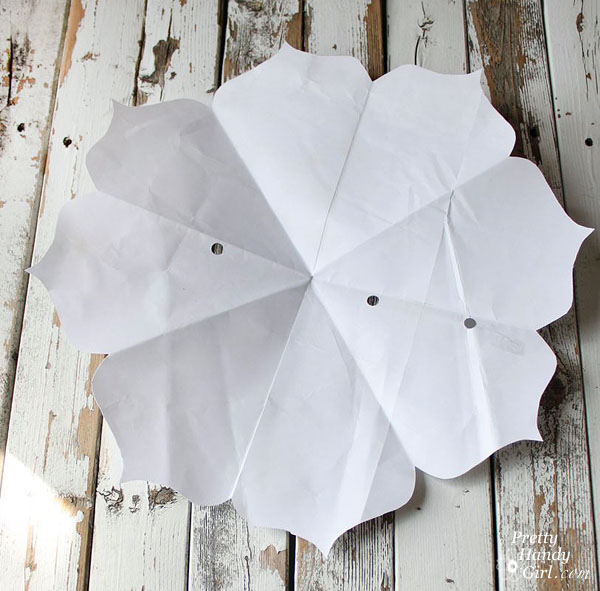
Fold a piece of paper into eights. Cut a design along the edge. (I used a simple scallop shape like this “}”.)

Rustic Pallet Serving Tray | Pretty Handy Girl

When you unfold the paper, you should have a paper template to use for tracing.
Rustic Pallet Serving Tray | Pretty Handy Girl

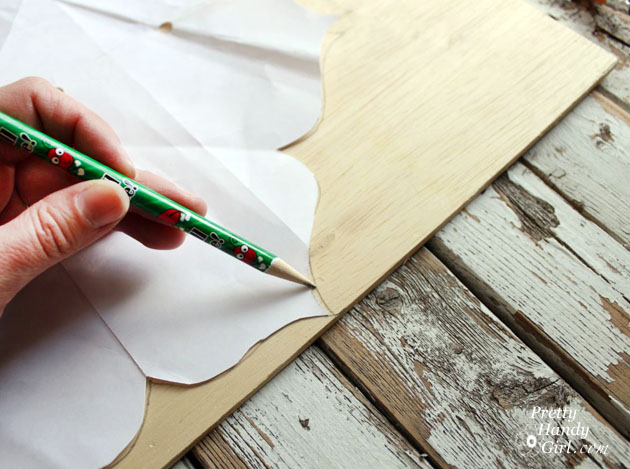
Trace the template onto a piece of thin plywood.
Rustic Pallet Serving Tray | Pretty Handy Girl

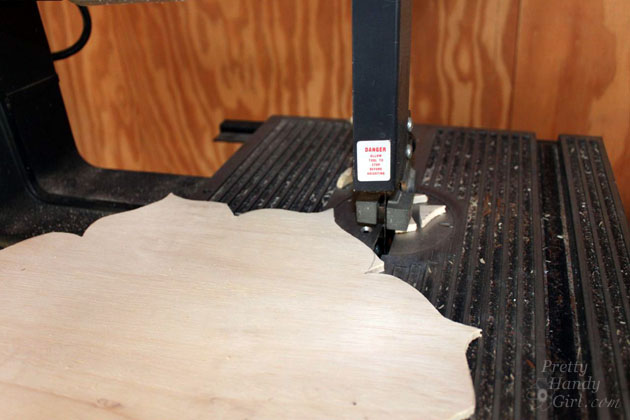
Use a jigsaw or band saw to cut out the shape. You might find this tutorial helpful for cutting out intricate shapes.
Rustic Pallet Serving Tray | Pretty Handy Girl

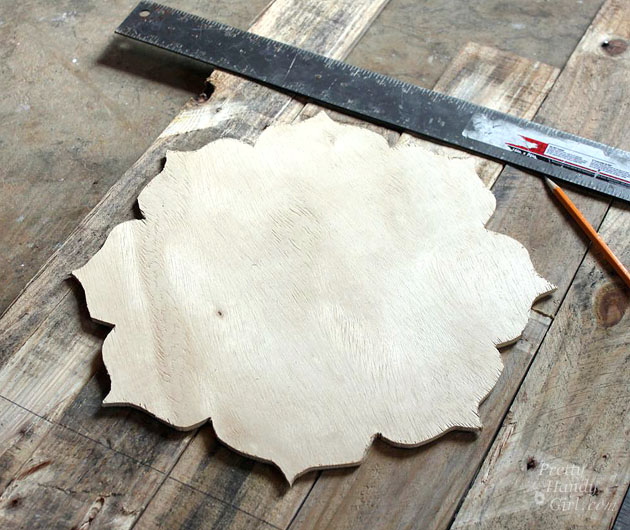
Lay your plywood shape on top of the rustic boards. Move the boards around until you like the sections that will make up the tray. Mark a square around the shape with a ruler.
Rustic Pallet Serving Tray | Pretty Handy Girl

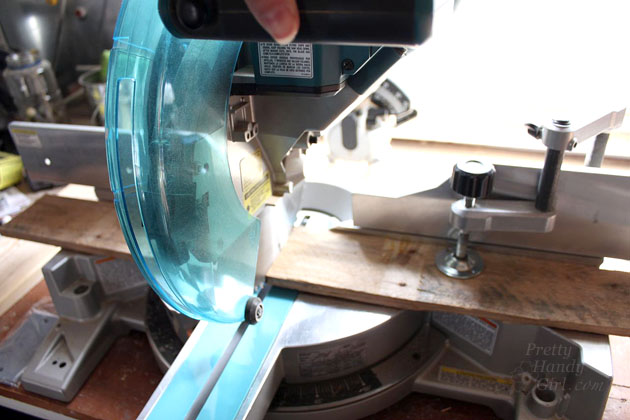
Cut the boards down to size using the pencil mark as a guide.
Rustic Pallet Serving Tray | Pretty Handy Girl

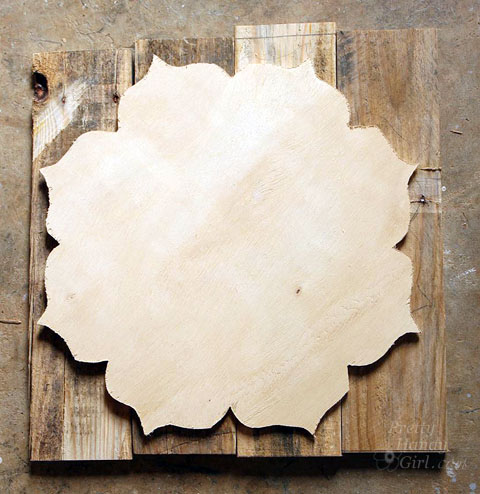
Dry fit the boards together on the plywood shape.
Rustic Pallet Serving Tray | Pretty Handy Girl

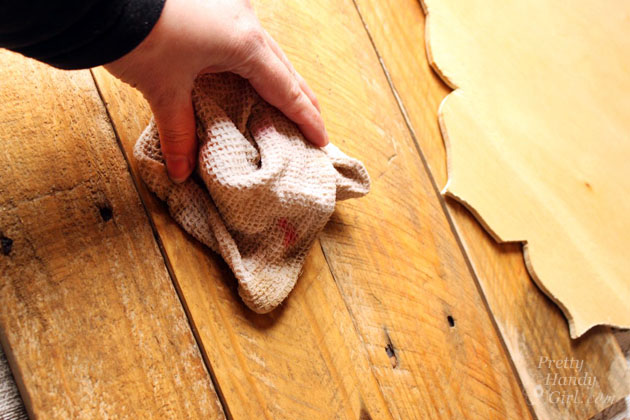
Wet both the plywood shape and the boards with a damp rag.
Rustic Pallet Serving Tray | Pretty Handy Girl

Apply Gorilla Glue to the plywood shape.

Rustic Pallet Serving Tray | Pretty Handy Girl

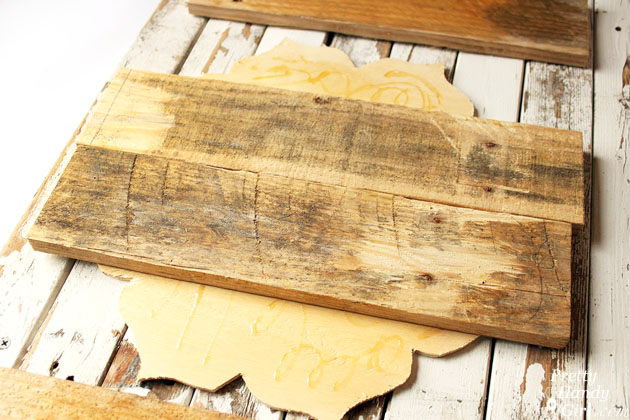
Set the rustic boards into the glue on the plywood shape.
Rustic Pallet Serving Tray | Pretty Handy Girl

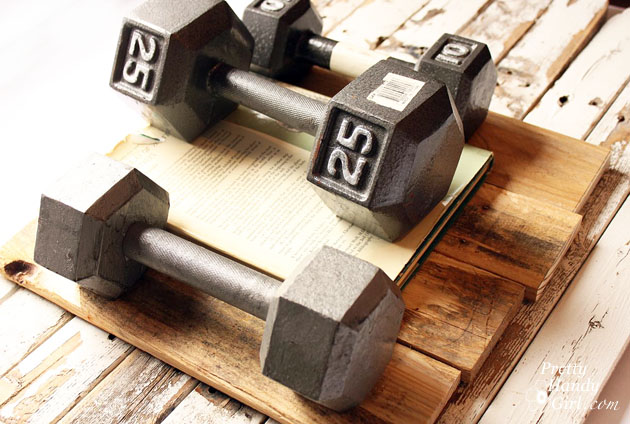
Weigh the boards down with weights or heavy books.
Rustic Pallet Serving Tray | Pretty Handy Girl

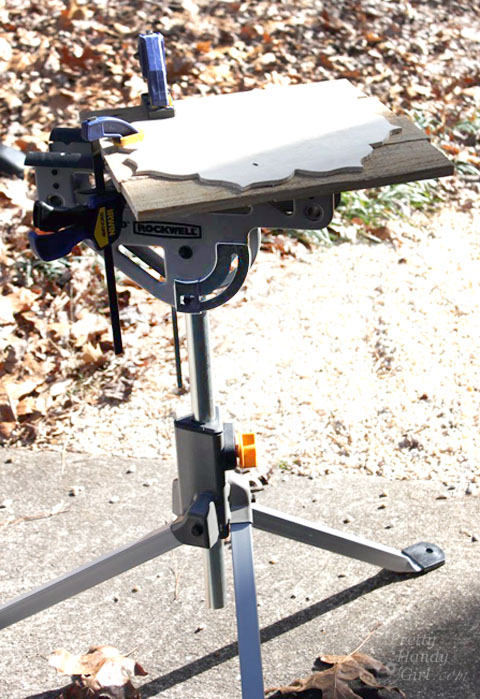
Allow to dry for at least an hour. Remove the weights and clamp the boards onto a work surface (with the area needing to be cut hanging over the edge. Make sure there is clearance for the jig saw blade. You’ll need to cut half the boards and then turn and re-clamp to cut the entire circumference. The Rockwell JawStand works beautifully for this task.
Rustic Pallet Serving Tray | Pretty Handy Girl

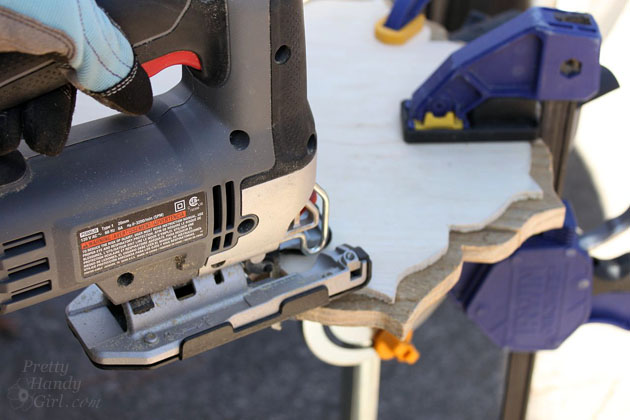
Draw a pencil line 1 inch out from the plywood shape. Cut around the pencil line with a jig saw.
Rustic Pallet Serving Tray | Pretty Handy Girl

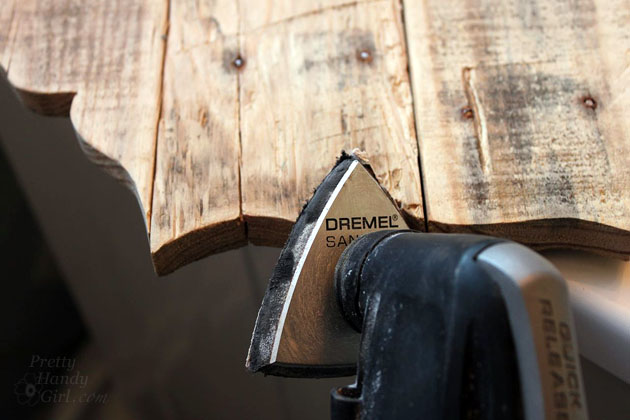
Sand edges and grooves with sandpaper or Dremel Multi-Max.
Rustic Pallet Serving Tray | Pretty Handy Girl

Measure and mark the location of the handles on the tray.
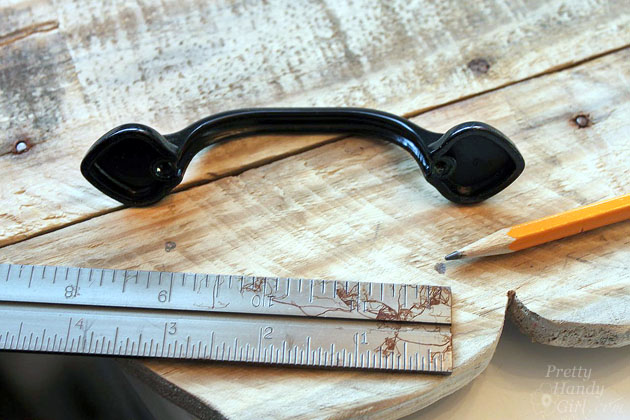
Rustic Pallet Serving Tray | Pretty Handy Girl

Pre-drill holes using a bit that is the same size as the handle screws.
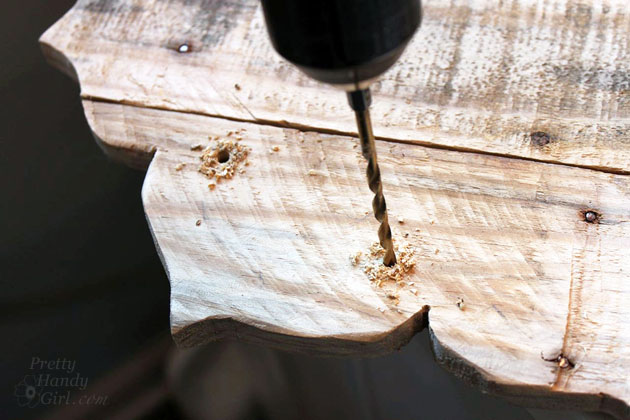
Rustic Pallet Serving Tray | Pretty Handy Girl

Flip the tray over and drill countersink holes with a larger drill bit.
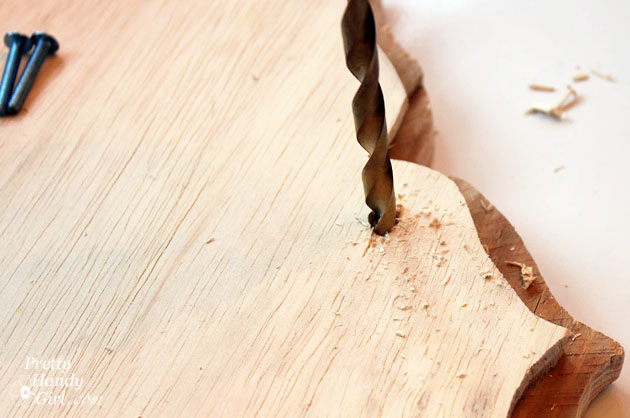
Rustic Pallet Serving Tray | Pretty Handy Girl

Attach the handles with the screws. The screw heads should sink into the plywood.
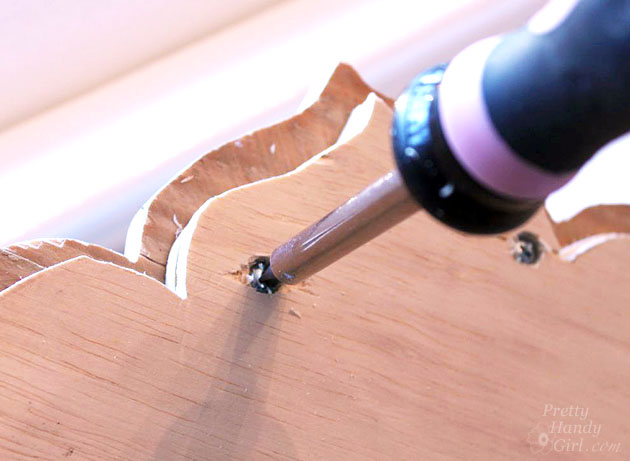
Rustic Pallet Serving Tray | Pretty Handy Girl

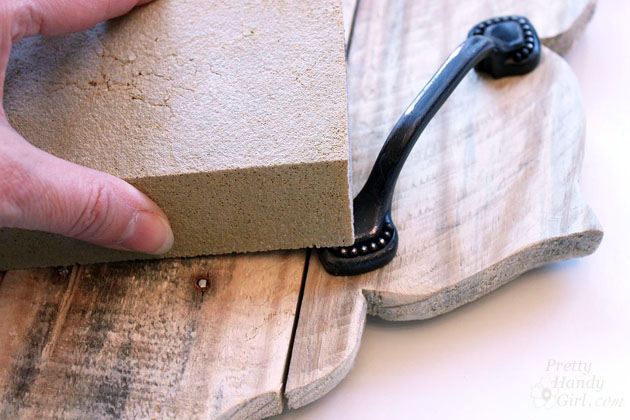
If you want a truly rustic look, lightly sand your handles.
Rustic Pallet Serving Tray | Pretty Handy Girl

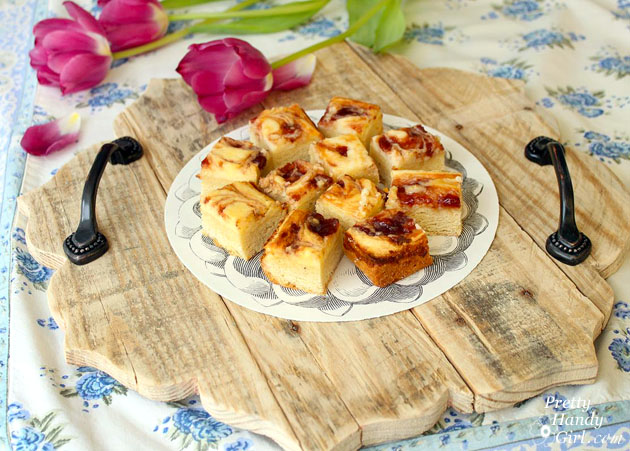
If you are going to use your tray for food, use a plate or doily under the food.
Rustic Pallet Serving Tray | Pretty Handy Girl

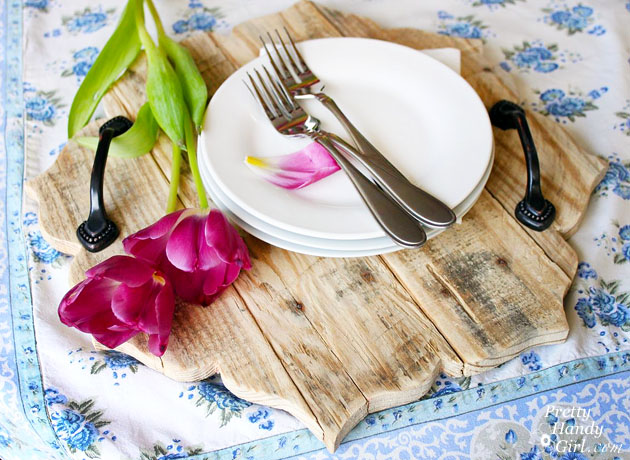
What do you think? Do you like this beautiful rustic tray? Think you could make one? I bet you could!
Rustic Pallet Serving Tray | Pretty Handy Girl

You can see this tray and our Bali-inspired deck makeover here.

PHGFancySign

Pin for later!
This DIY Rustic Pallet Serving Tray is easy to create with a cutout pattern | Plank serving tray | Pretty Handy Girl #DIY #woodworking #DIYtray #servingtray #rustichomedecor

How to Make Pinch Pots from Air Dry Clay

Looking for a simple craft to make and help you decompress? Make these cute clay pinch pots and use them around your house.

How to Make Clay Pinch Pots

How to Make Pinch Pots from Clay

I hope you are ready to get your hands a little messy!  Today’s tutorial is all about making some easy pinch pots out of inexpensive clay.  Right now, it feels like the days are long, and life is still so uncertain. I find that immersing myself in an enjoyable activity really helps to pass the time.  Working with the hands can be good for the soul!

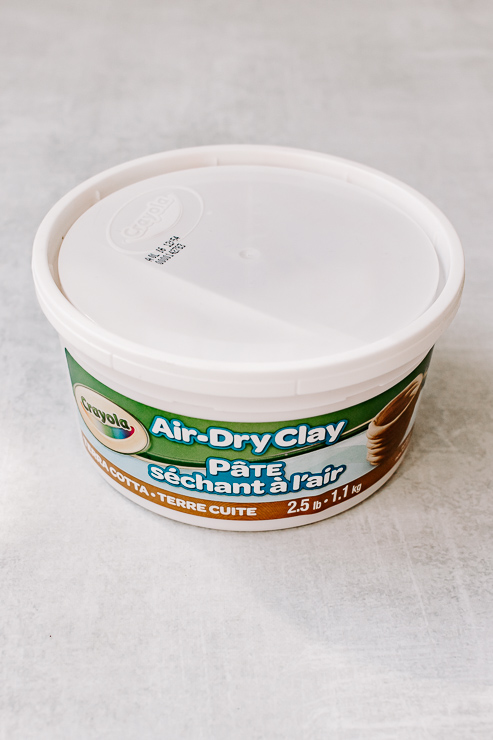
The good news is, you don’t really need anything special other than air dry clay and your hands.  Plus, you don’t have to leave your house to create this project.  The terracotta clay I purchased is from Amazon and was shipped right to my door.

Crayola Air Dry Clay

This is a great craft for the kiddos too, so be sure to involve them with learning how to make pinch pots if they are looking for something to do.

Let’s dive right in!

Materials:

(I’ve included affiliate links for your convenience. I earn a small percentage from a purchase using these links. There is no additional cost to you. You can read more about affiliate links here.)

Instructions:

This project is easy, inexpensive, and very therapeutic! Let your mind focus on shaping the clay and put your worries aside for a little bit.

Step 1: Shape your clay into round balls

Shape Clay into a Round Ball

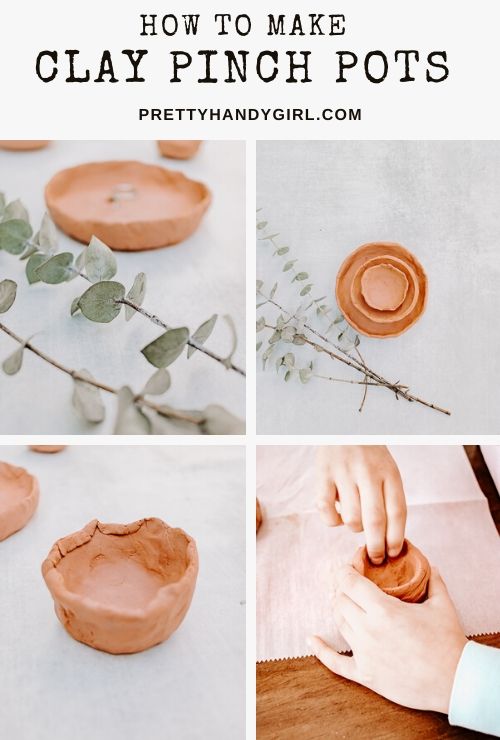
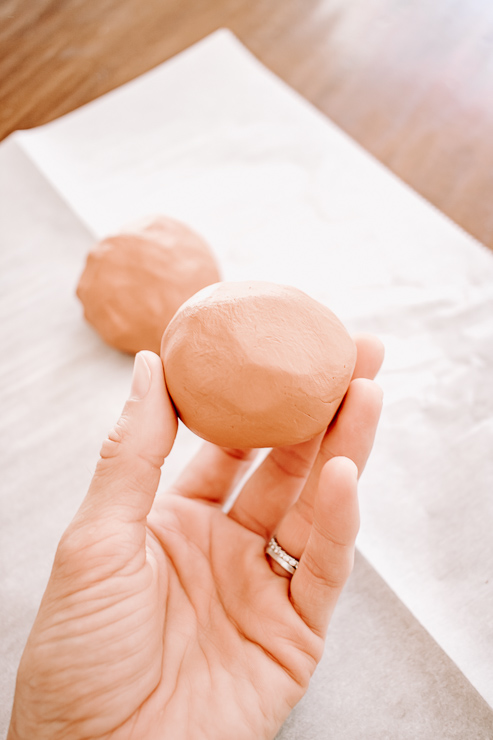
Layout a piece of parchment paper.  Grab a hunk of clay and shape/roll it into a nice ball. My clay balls are about the size of the palm of my hand. You can go bigger or smaller, it’s up to you!

Step 2: Form your Pots

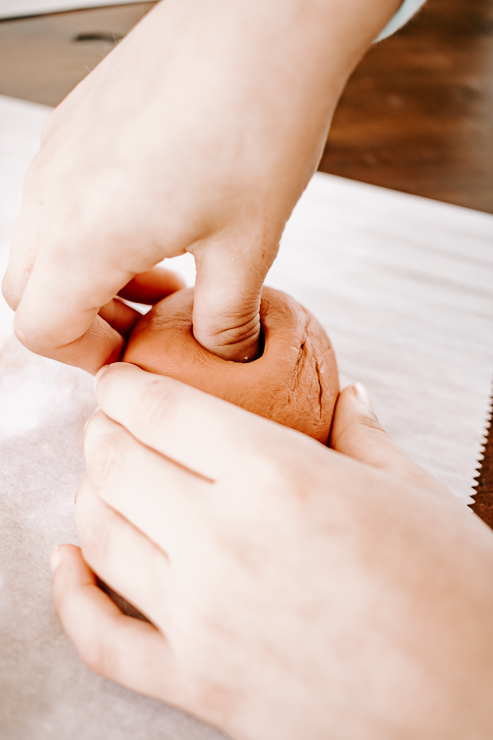
Push thumb into center of clay

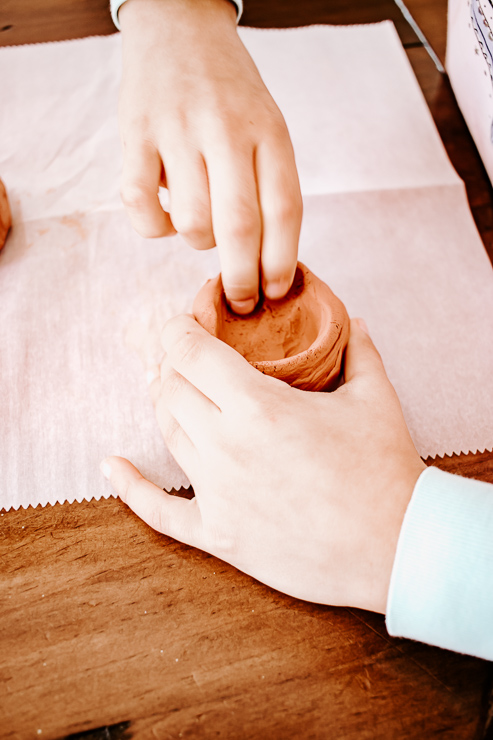
Now that you have your clay ball formed, take your thumb or finger and stick it into the center of the ball. Use your fingers to “pinch” the clay outward, slowly creating a bigger hole in the center. Keep going around and around until you are satisfied with the shape and size of your pinch pot.

Use fingers to pinch out sides of pot

Clay is forgiving, you add more if you pinched it too thin. Add a little water to your clay to avoid cracking. The thicker the sides (or bottom), the longer it will take to dry. Keep that in mind when shaping your pinch pot.

Step 3: Dry your Pinch Pots for Several Days

Let pots dry for several days

We left our clay pinch pots to dry on the parchment paper for several days. When they are fully dry, the pots will turn a lighter color and be hard to the touch.  Once dry, you can paint them with acrylic paint or just leave them plain.  Being the simplistic girl that I am, I just left mine plain.  But kids might enjoy a painting project.

That’s it!  As I said, this is a simple, inexpensive project.  Luckily, you should have plenty of clay leftover for next time.

Crayola Pinch Pots How to Tutorial

You might be wondering what in the heck to do with pinch pots?

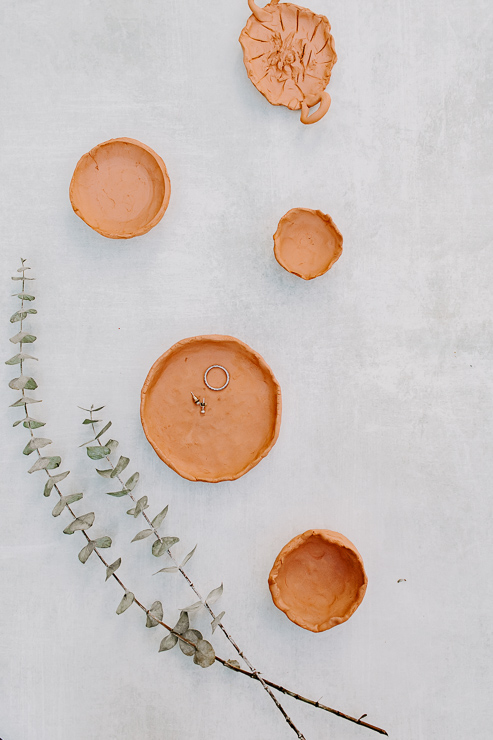
Aside from the fact that it’s just a fun craft, there are tons of ways to use your new pots! A quick google search will bring up some ideas for you. But I’ll give you a few here to get you started.

  • Plant faux succulents
  • Use as a ring tray on your nightstand
  • A decor dish to decorate with

Since you can’t get the clay wet, planting a real plant in them is not going to work. But that’s ok because those faux succulents have to go somewhere and they look great in these little pinch pots.

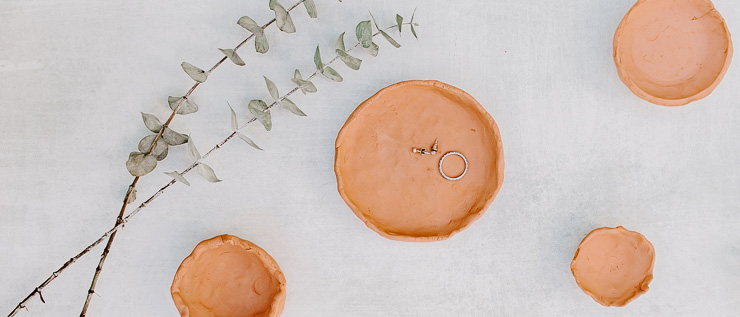
You could also use them as a small catch-all dish on your nightstand or console table. In fact, that’s how I’m using my pinch pots! I have one sitting on my nightstand because I somehow always forget to take off my earrings at night – so this has become the perfect little spot to put them before I go to sleep.

Pinch pots from clay - use as a jewelry dish!

Finally, you can just use them as decor pieces to decorate shelves and bookcases or tables. They look very earthy, so depending on your decor style, they add a nice collected feel to your rooms. Plus – you made them! Take a little pride in your handiwork.

If you like this clay project, be sure to check out my tutorial for a heart-shaped jewelry dish.

Stay safe, stay healthy!

karen signature

~ See More of Karen’s Tutorials ~


karen from decor hintHello!  I’m Karen, the creator of the Home Decor and DIY Blog: Decor Hint. I’m a Native of the East Coast, but I currently live in beautiful Seattle with my hubby, our two wonderful children, and our spunky wheaten terrier.

You can usually find me with some sort of craft in one hand and a coffee in the other. And I’m always rearranging furniture or moving lamps from room to room. I have a passion (read: obsession) for decorating, DIY, and gardening. In short, I love making my house into a home.

Like many, I’m inspired by what I see in home decor magazines, but I’m not so inspired by the price tags.  Consequently, I love finding and creating beautiful budget-friendly home decor items. In a head to head competition, I bet you’d never know the difference between the designer items and my DIY creations!  Many of my DIY projects focus on sewing, crafting, upcycling and organizing. Some of my favorite projects have been making pretty wreaths, sewing my own tassel hand towels, and crafting these trendy wood bead garlands. I can’t wait to inspire you and spark your creativity through my DIY projects.

You can always connect with me on Pinterest, Twitter or Instagram.

Upcycled Magnetic Chalkboard Frame | Pretty Handy Girl

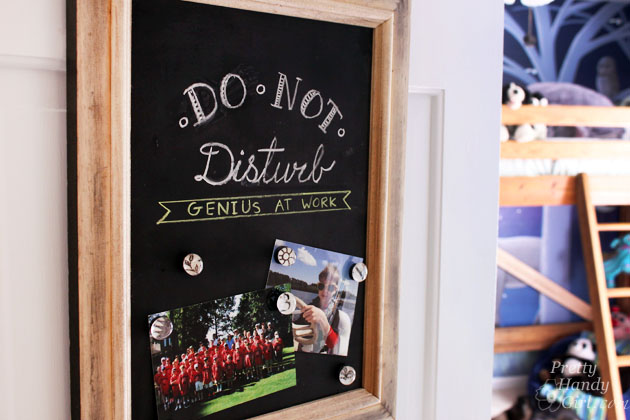
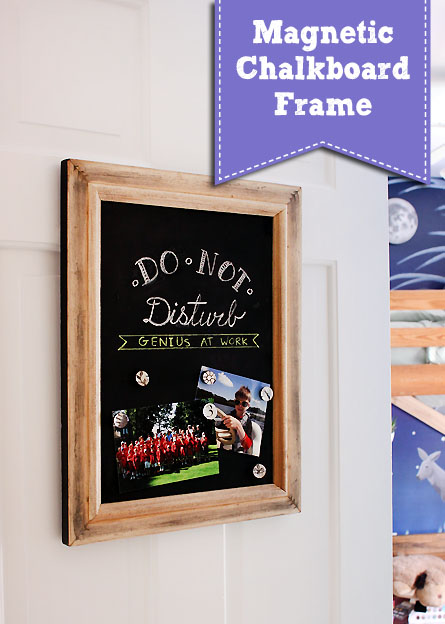
I’m a serial upcycler. When I can find relatively free materials and turn them into something worth displaying, I’m thrilled! This Magnetic Chalkboard frame is one of those upcycled projects I am proud of.

Upcycled Magnetic Chalkboard Frame | Pretty Handy Girl

Upcycled Magnetic Chalkboard Frame

Earlier in the week, I showed you the changes I made in my oldest son’s bedroom. One of the switches I made was to replace his bedroom door because the old one had cracked after one too many slammings. Ugh, cheap hollow door.

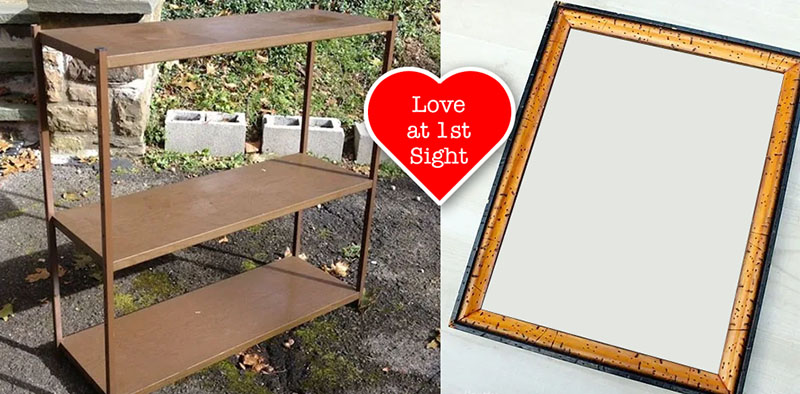
In an effort to keep my son from taping all types of signs to his new door, I found an ugly old frame and married it with some scrap metal from a junky set of shelving a neighbor was throwing away.

bookcase in love with ugly frame

That’s not real wood, it’s metal…fake wood metal. Yuck. Wait until you see how they were transformed. You won’t believe your eyes, so watch closely how I made this Upcycled Magnetic Chalkboard Frame.

Before you leave this tutorial thinking you can’t possibly make this project because you’ll never be able to find cheap faux wood shelves, let me share with you some alternate materials you can use!

(I’ve included affiliate links for your convenience. I earn a small percentage from a purchase using these links. There is no additional cost to you. You can read more about affiliate links here.)

Magnetic Material:

Non-Magnetic Material for Chalkboard:

Now that you have some additional material options, let’s get busy making a Magnetic Framed Chalkboard (or just a framed chalkboard).

Materials:

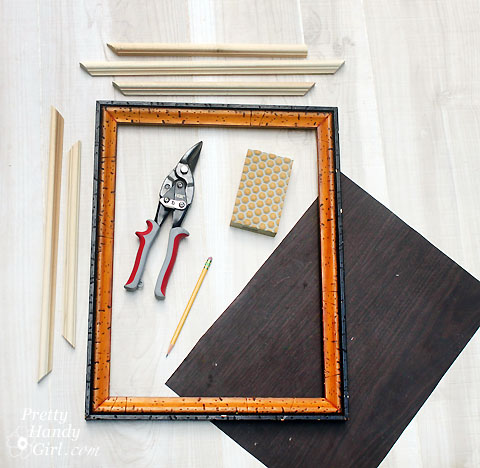
Upcycled Magnetic Chalkboard Frame | Pretty Handy Girl

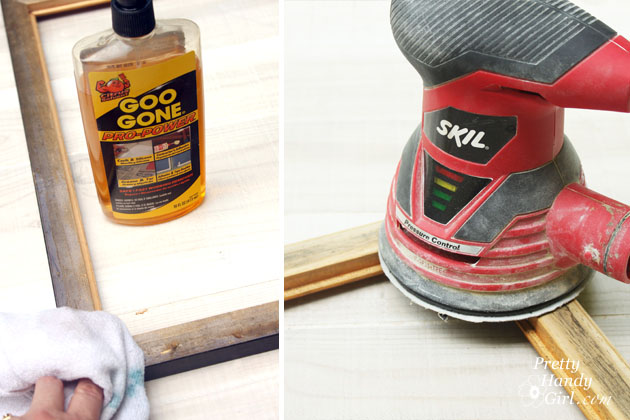
Optional: You may need some Goo Gone, a scraper, and rag to eliminate any glue on the back of the frame.

Instructions:

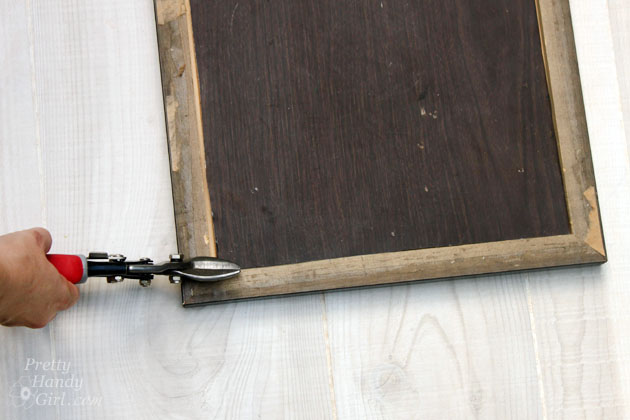
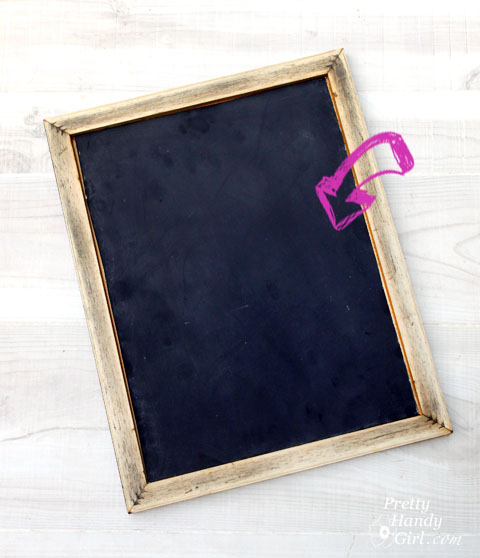
Begin by cutting your metal (or backing) to fit into the back of the frame.

Upcycled Magnetic Chalkboard Frame | Pretty Handy Girl

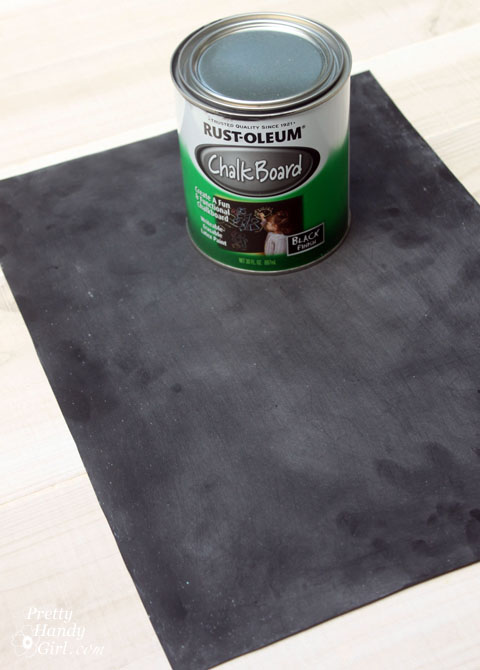
Paint one side of the metal with chalkboard paint. Let it dry. Apply a second coat of chalkboard paint. Let it dry.

Upcycled Magnetic Chalkboard Frame | Pretty Handy Girl

While the chalkboard paint is drying, time to work on the frame.

If your frame has paper on the back, peel it off and use Goo Gone, a scraper, and sander to remove any of the glue residue.

Upcycled Magnetic Chalkboard Frame | Pretty Handy Girl


When the chalkboard paint has dried, insert it into the frame, chalkboard side up from the backside of the frame (are you seeing where I’m going with this?)

Upcycled Magnetic Chalkboard Frame | Pretty Handy Girl

The back of the frame is much prettier than the front, but in order to hold the chalkboard in place, we need to cut some picture molding. Cut the end of your molding at a 45 degree angle. Fit it into the frame and mark where to make your second cut.

Upcycled Magnetic Chalkboard Frame | Pretty Handy Girl

Continue fitting and cutting molding around your frame.

Upcycled Magnetic Chalkboard Frame | Pretty Handy Girl

Once all four pieces of molding fit, you are ready to secure them.

Upcycled Magnetic Chalkboard Frame | Pretty Handy Girl

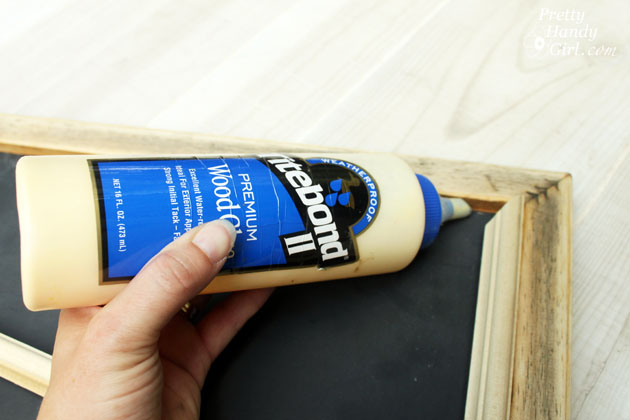
Apply a bead of wood glue along the inside edge of the back of the frame.

Upcycled Magnetic Chalkboard Frame | Pretty Handy Girl

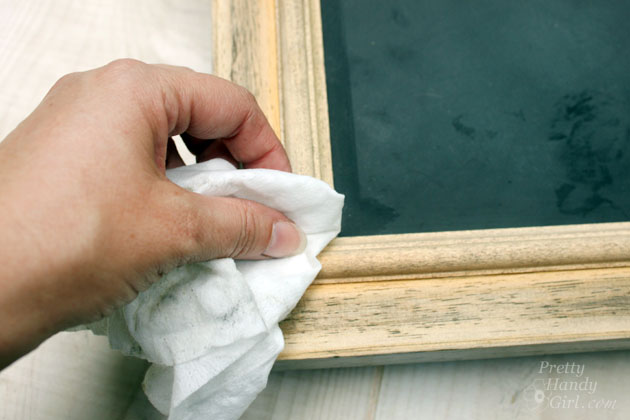
Set the molding pieces in place and wipe up any glue that squeezes out.

Upcycled Magnetic Chalkboard Frame | Pretty Handy Girl

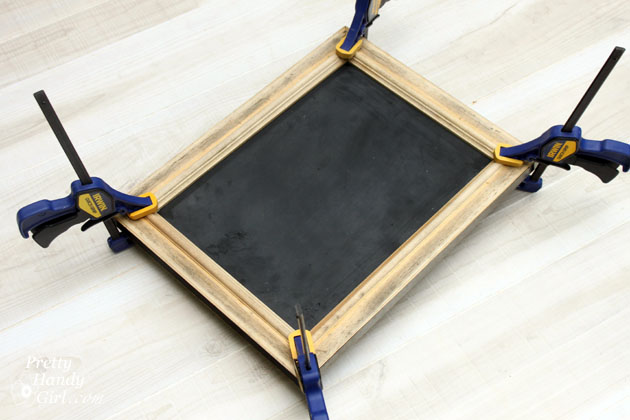
Clamp the molding pieces and the frame. Allow the glue to dry for at least an hour.

Upcycled Magnetic Chalkboard Frame | Pretty Handy Girl

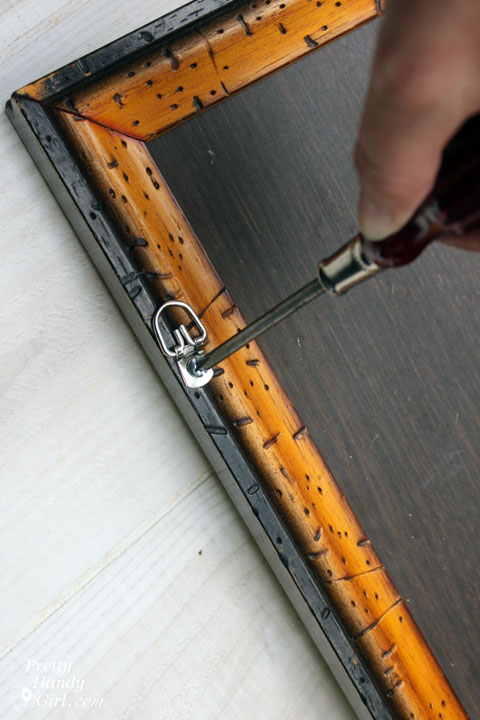
When the glue has dried. Attach two D-rings to the back of the frame.

Upcycled Magnetic Chalkboard Frame | Pretty Handy Girl

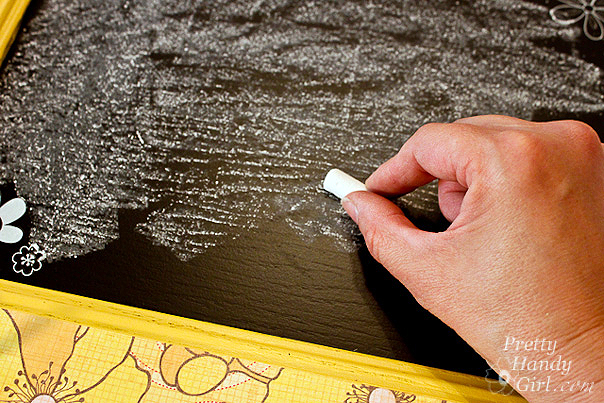
Season the chalkboard with the side of a piece of chalk. Then use a dry rag to buff it off.

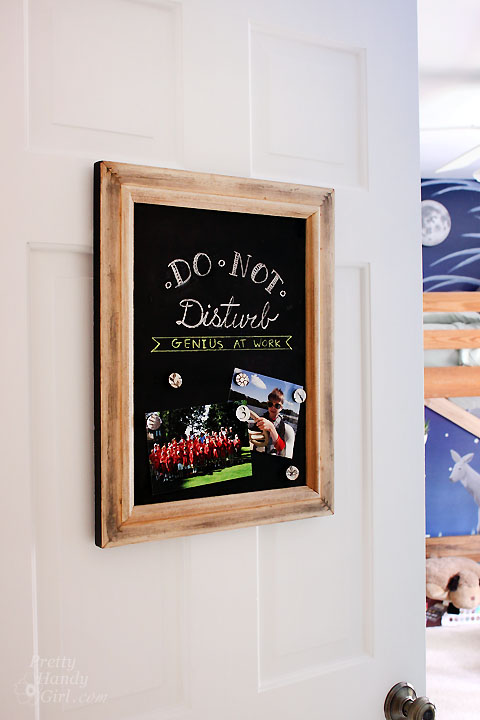
Time to hang it up! (In my case, I hung it on my son’s door.

Upcycled Magnetic Chalkboard Frame | Pretty Handy Girl

To keep the frame from bouncing any time the door is opened or closed, I put a 3M Command velcro strip between the bottom of the frame and the door.

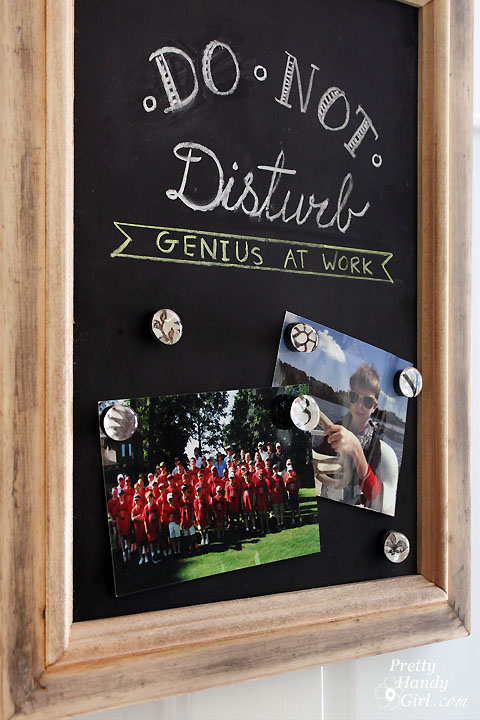
Now my son can put up pictures, messages, and more without damaging the door.

Upcycled Magnetic Chalkboard Frame | Pretty Handy Girl

Pretty cool huh?! Would you ever guess the back of an ugly frame and metal shelves could look this beautiful?

Upcycled Magnetic Chalkboard Frame | Pretty Handy Girl

I especially like the little metal fasteners showing in the corners of the frame.

Tell me, do you have an ugly frame hanging around your house? Have you ever looked at the back and found it more beautiful than the front?

PHGFancySign


Pin for later!
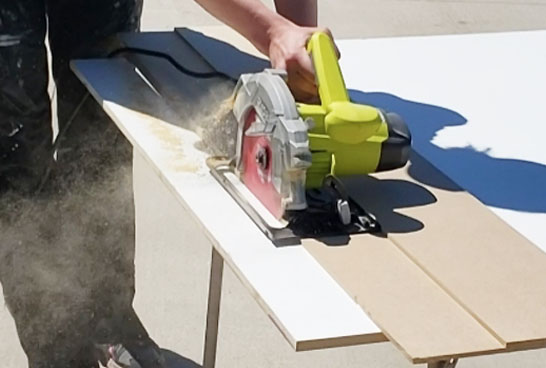
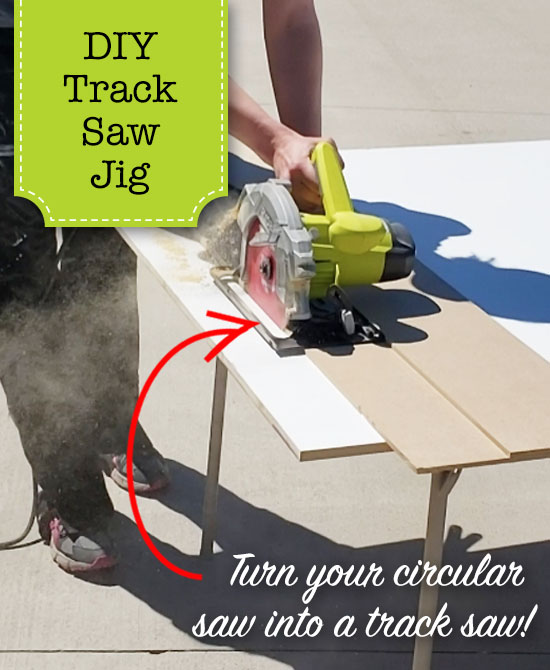
diy track saw jig for circular jig

Making large and small rip cuts doesn’t have to be a difficult or calculated process.  With this inexpensive and easy to make DIY track saw jig, you will be making rip cuts quickly and easily with your circular saw!

diy track saw jigDIY Track Saw Jig for your Circular Saw
Hi! It’s Kristen, from In Her Garage, and today I am going teach you how to make a DIY Track Saw Jig for your circular saw. It’s basically a super simple circular saw cutting guide to make rip cuts much easier for you.  No more accounting for the saw’s base plate width or spending a ton of money on fancy, brand name guides. This will be an easy drop and clamp design that is foolproof! Let’s make it!

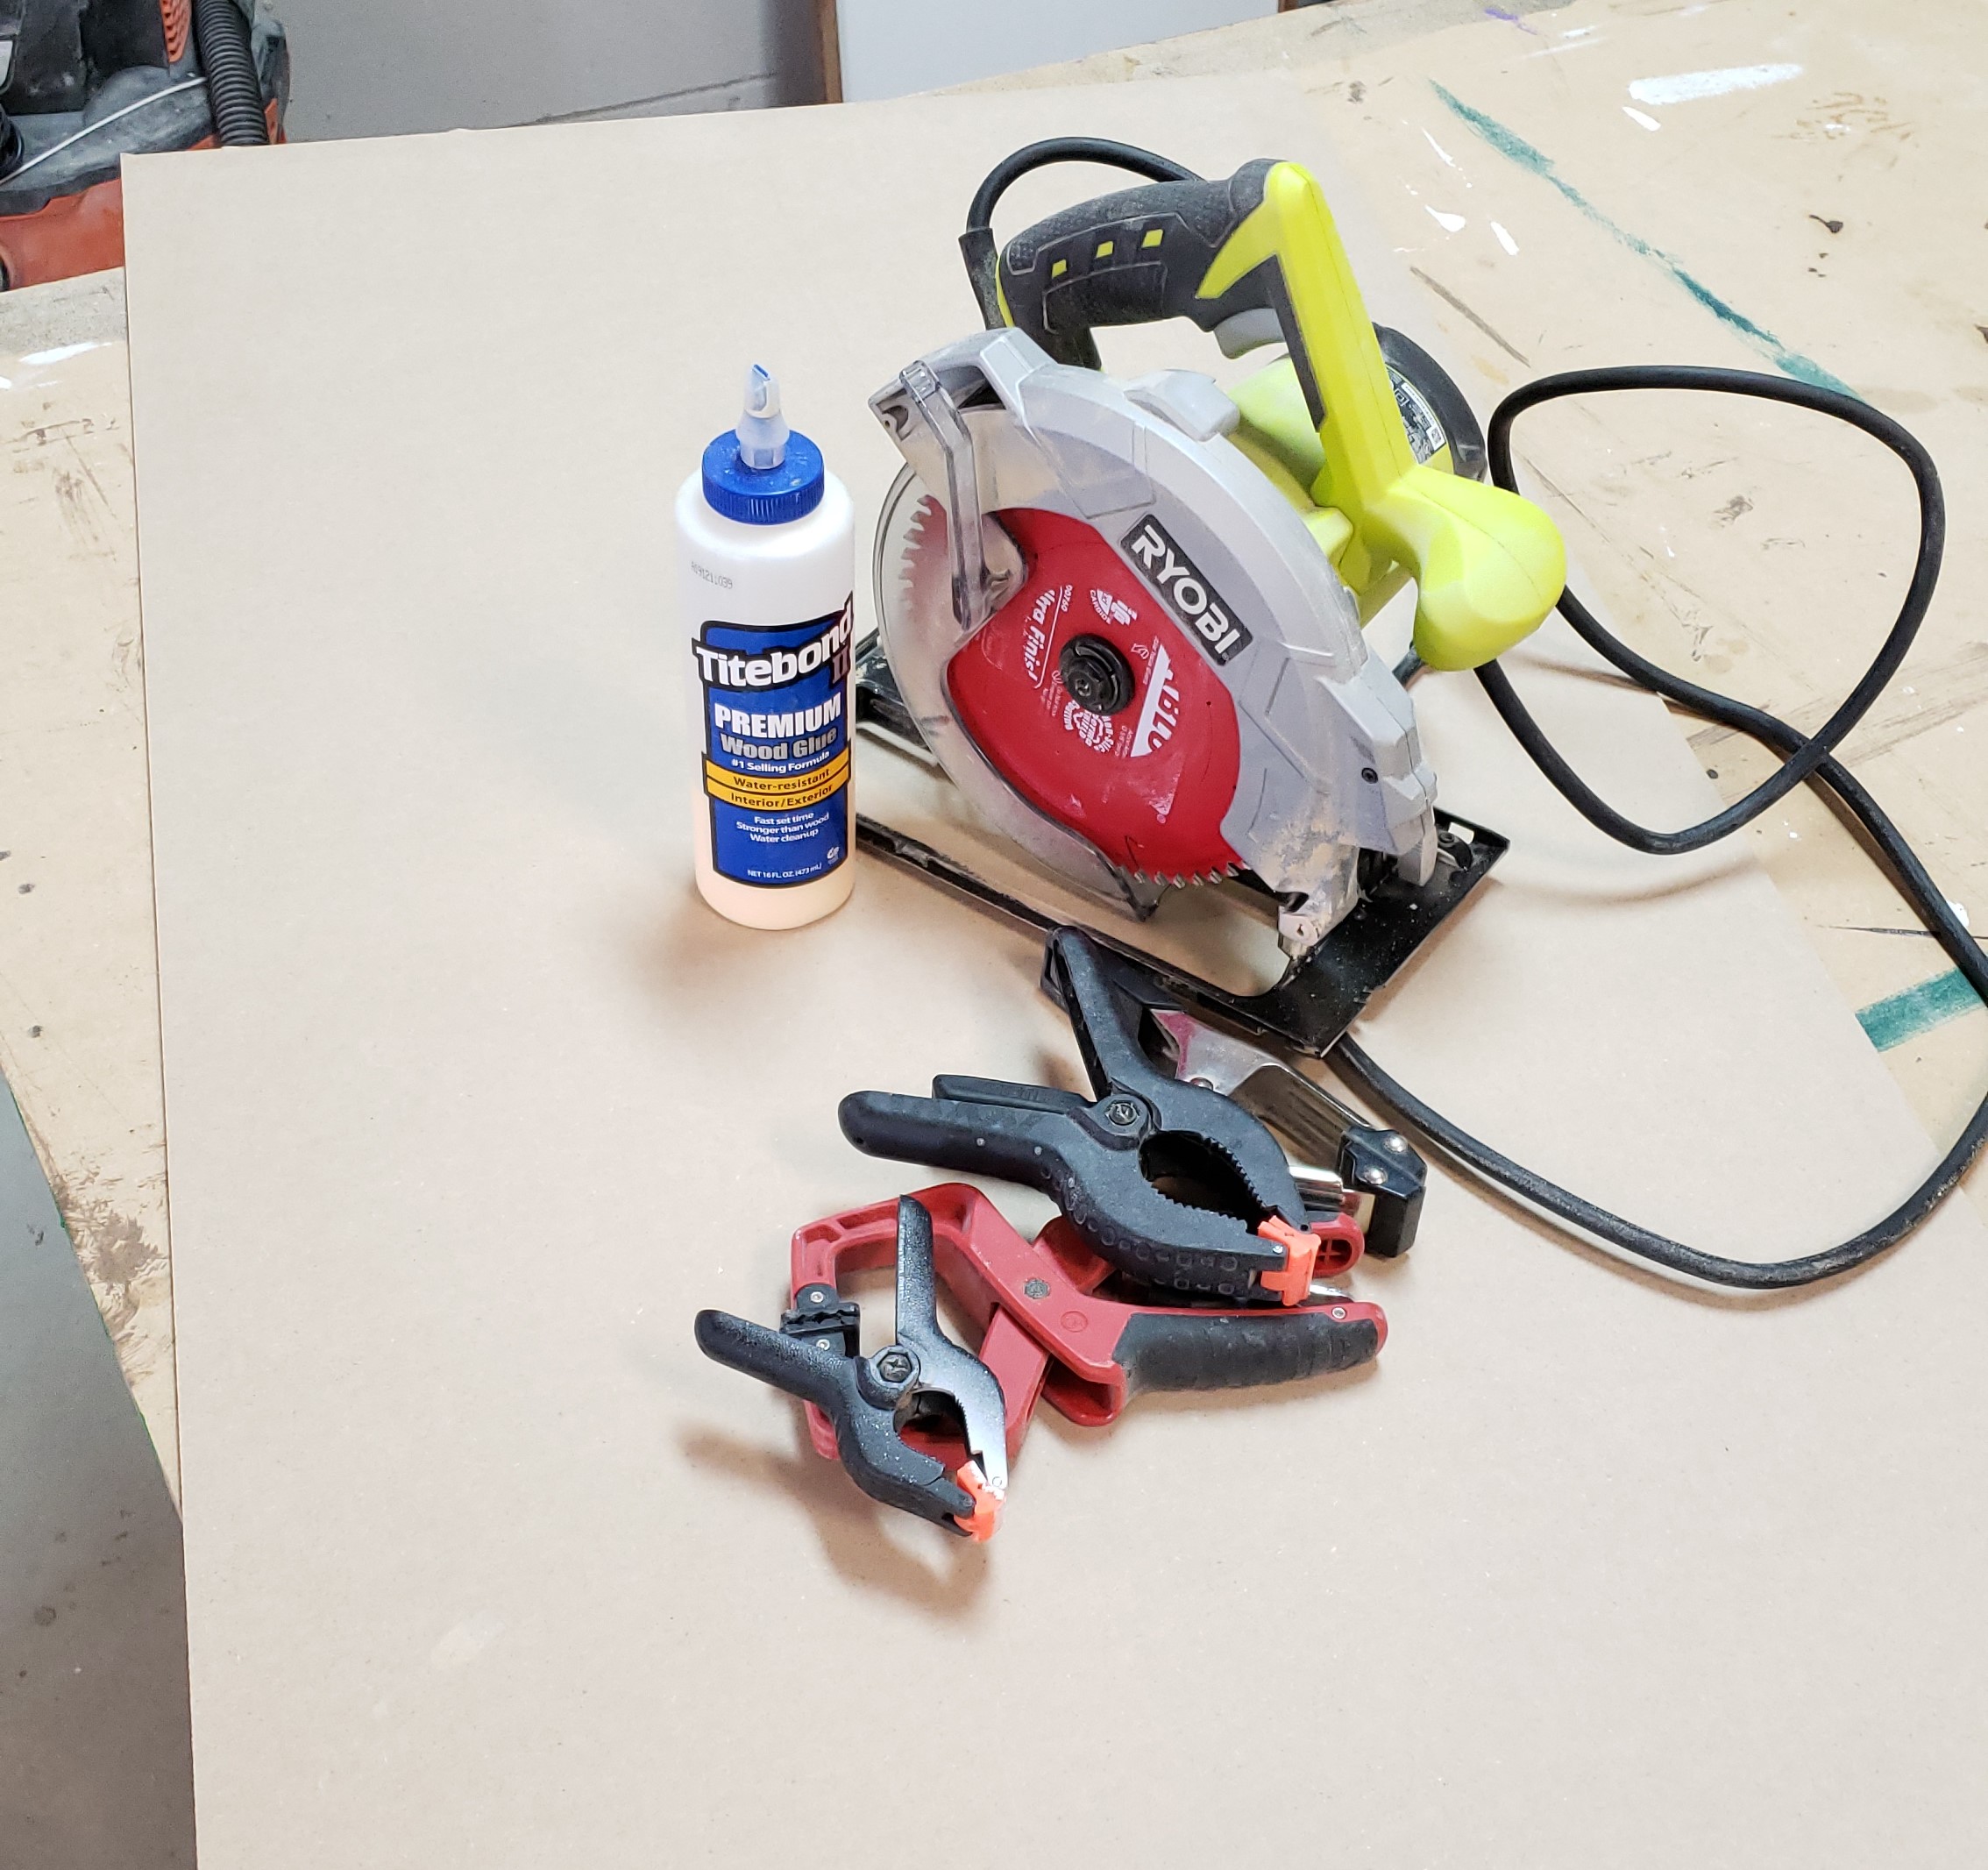
Materials:

(I’ve included affiliate links for your convenience. I earn a small percentage from a purchase using these links. There is no additional cost to you. You can read more about affiliate links here.)

Instructions:

1. Measurements for the track saw base panel

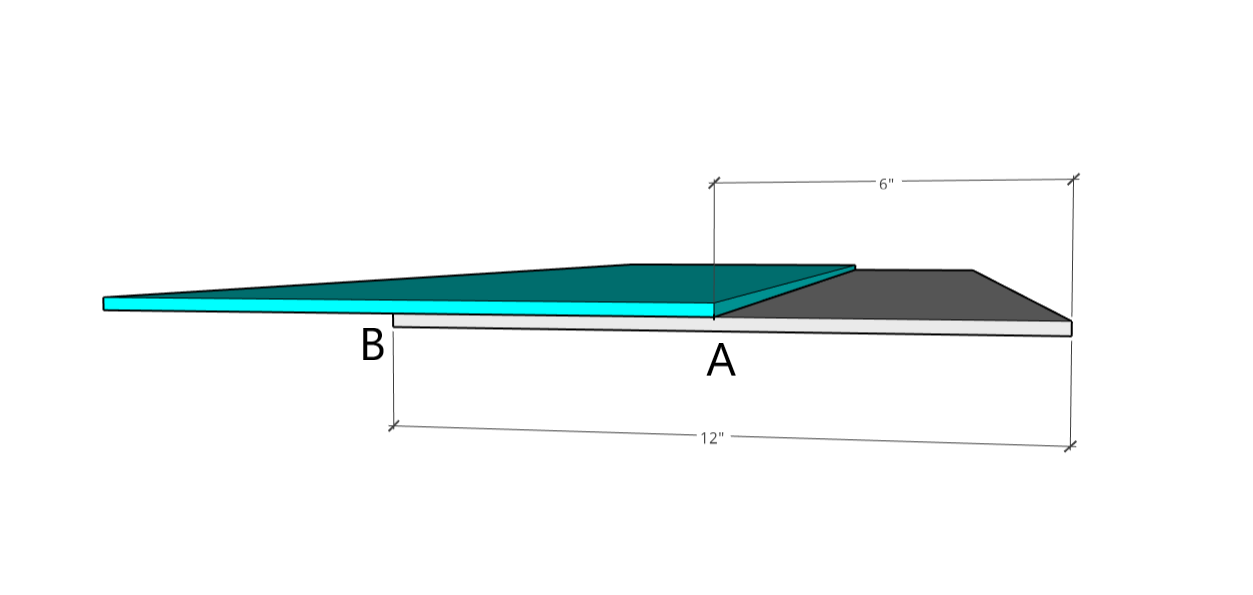
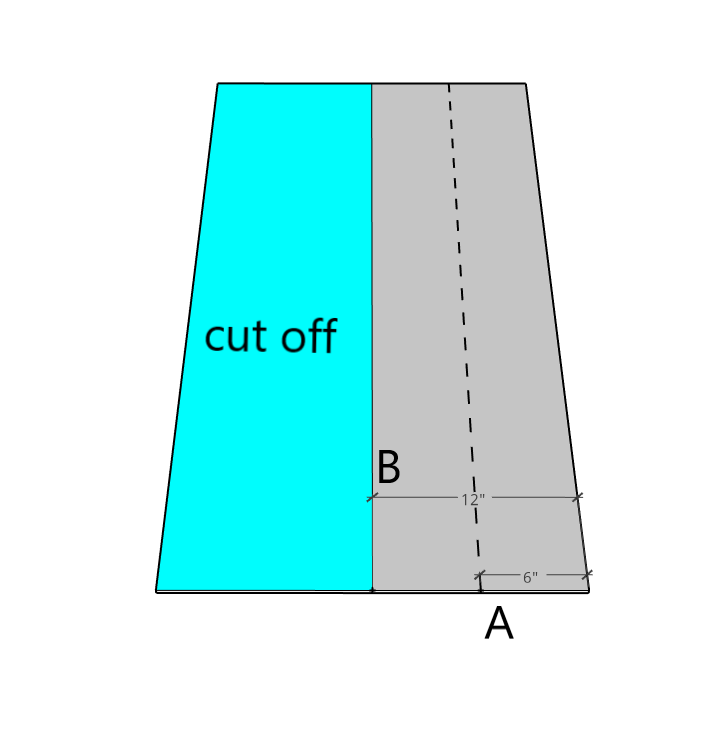
Create 2 lines running the length of the hardboard panel and label them “A” and “B” as indicated in the diagram below.

  • “A” measures 6″ from the edge – this measurement is approximately the width of most circular saw baseplates
  • “B” measures 12″ from the edge – this measurement is approximately the width of the entire circular saw and will be the end width of the track saw jig.

2. Cut the excess off of the base panel

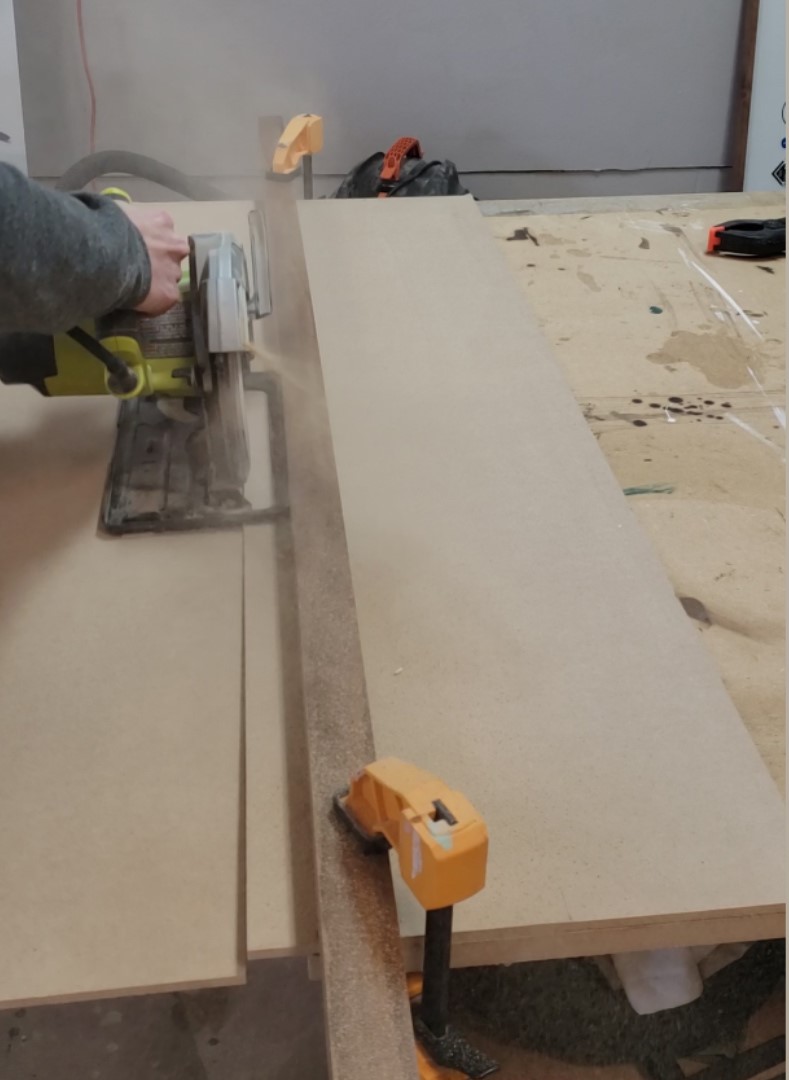
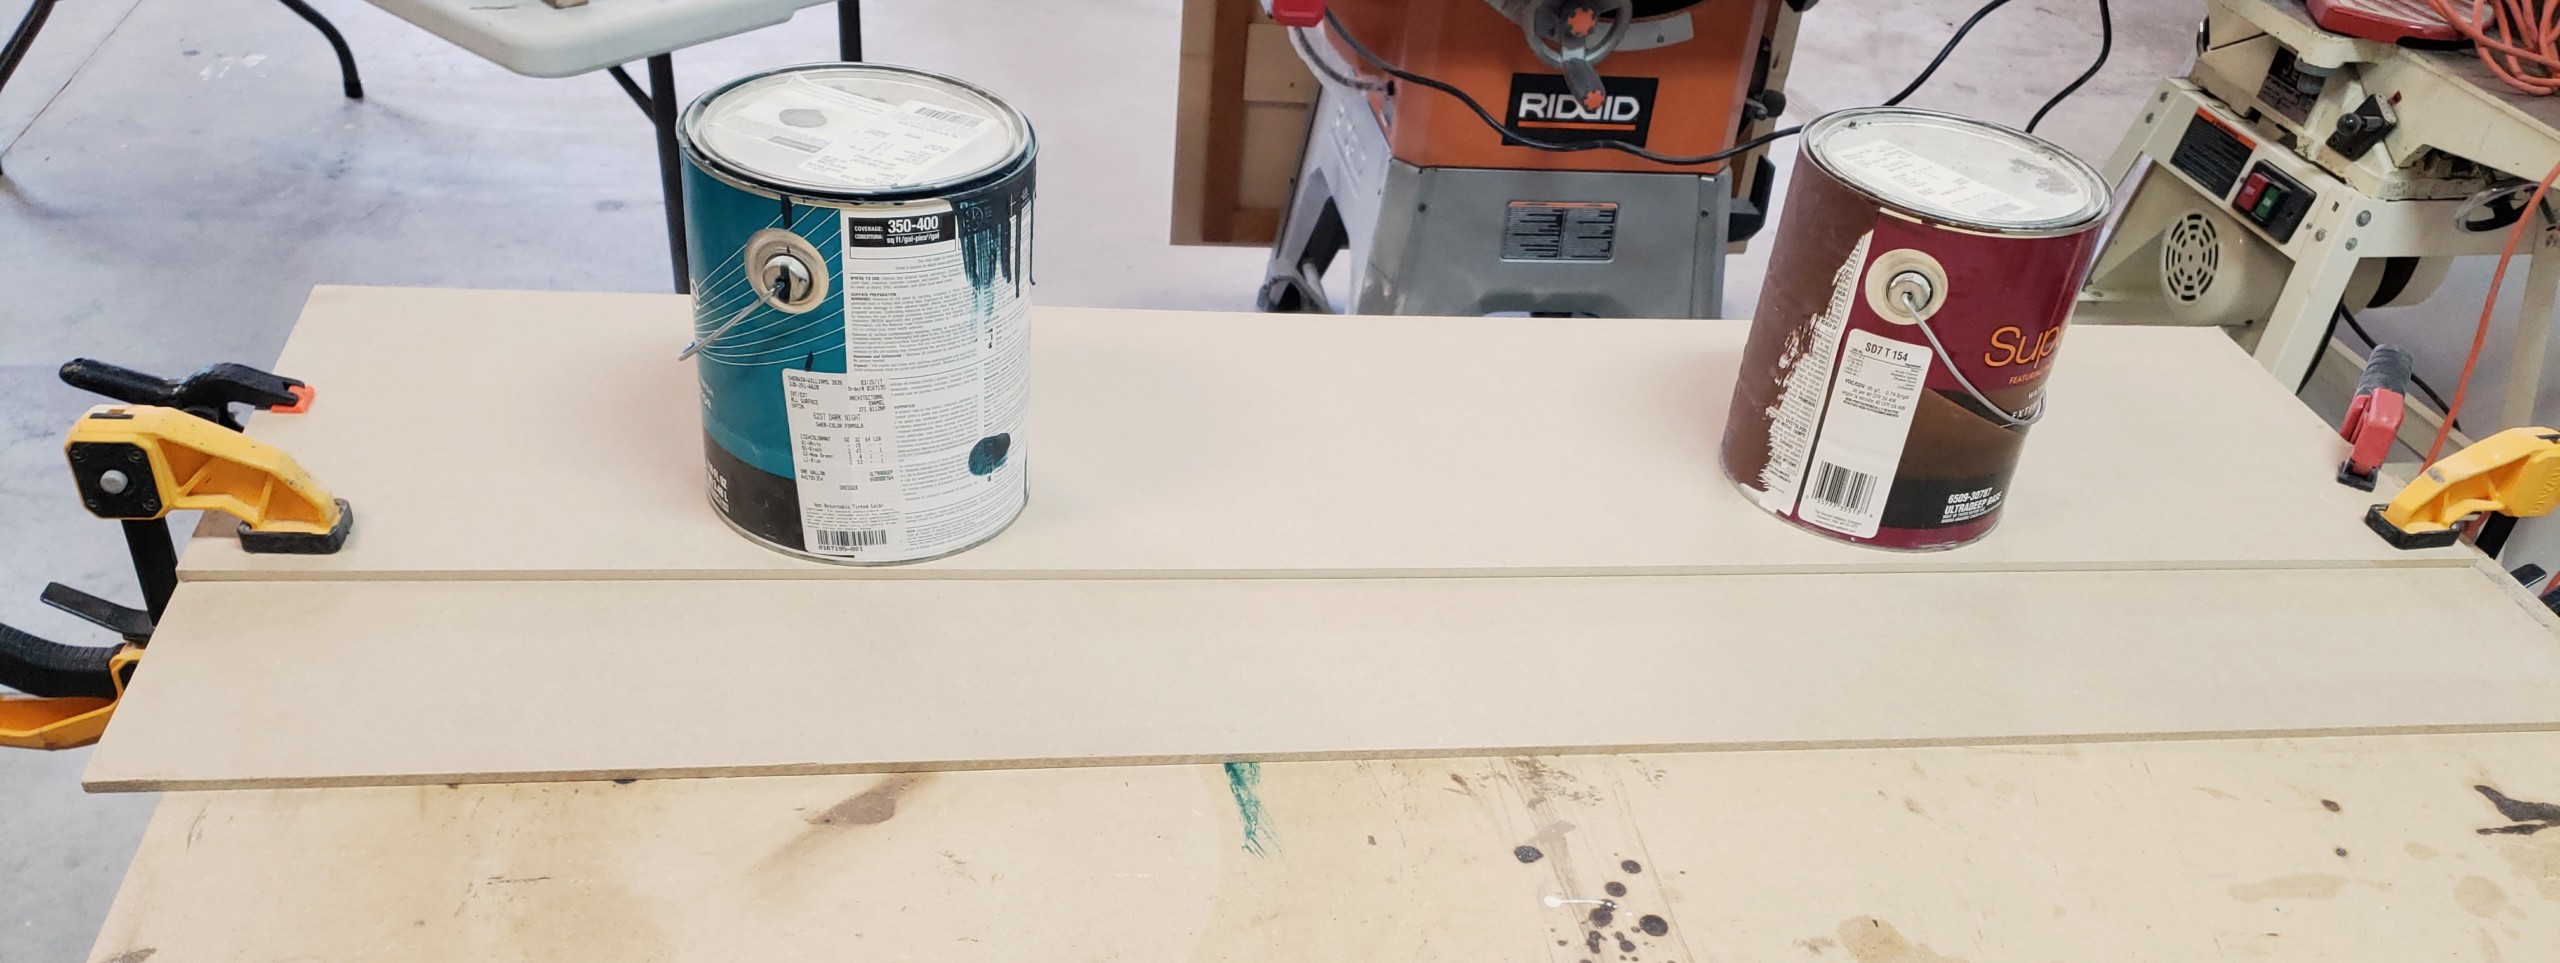
Clamp a straight edge (or any straight piece of scrap board) lined up against line “B”. Set your circular saw base plate against the straight board and cut along the length of the hardboard to cut this excess off. You will use the freshly cut edge of the excess in the next step.

3. Creat the track saw cutting guide

Apply wood glue between lines A & B of the track saw base panel (as shown above.) Do not apply the glue too close to line “A” or the glue will squeeze-out in the next step. Collect the excess piece of hardboard you just cut off and align the freshly cut edge up to line “A” of the base panel.

Clamp and apply weight over the top of the two panels. Wait approximately 15 minutes for the glue to cure and adhere the two pieces together.

4. Cut the straight edge guide

Position your panel so the 6 inch “A”  section overhangs off the edge of your work surface (this is the edge you used to measure lines “A” and “B” from.)

Rest your circular saw’s base plate against the top glued piece using it as a straight guide.  Make sure your saw blade will avoid your work surface when cutting. Now cut along the length of your panel.

This will create an edge that is exactly the width of the inside base plate to the inside of the saw blade.

5. Cut off the excess from the back of the jig

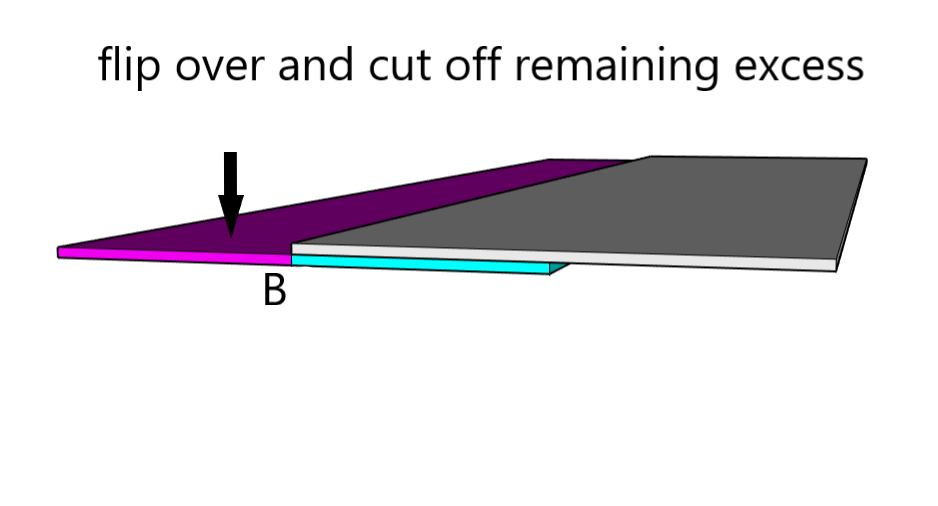
Flip the jig over and cut off the excess material that extends beyond line “B” shown below.

Do not cut any further into the jig than line “B” because your DIY Track Saw Jig well be too narrow. You will need this extra width to clamp the jig to any material you plan to cut. If your jig is too narrow, the saw’s motor will catch on the clamps.

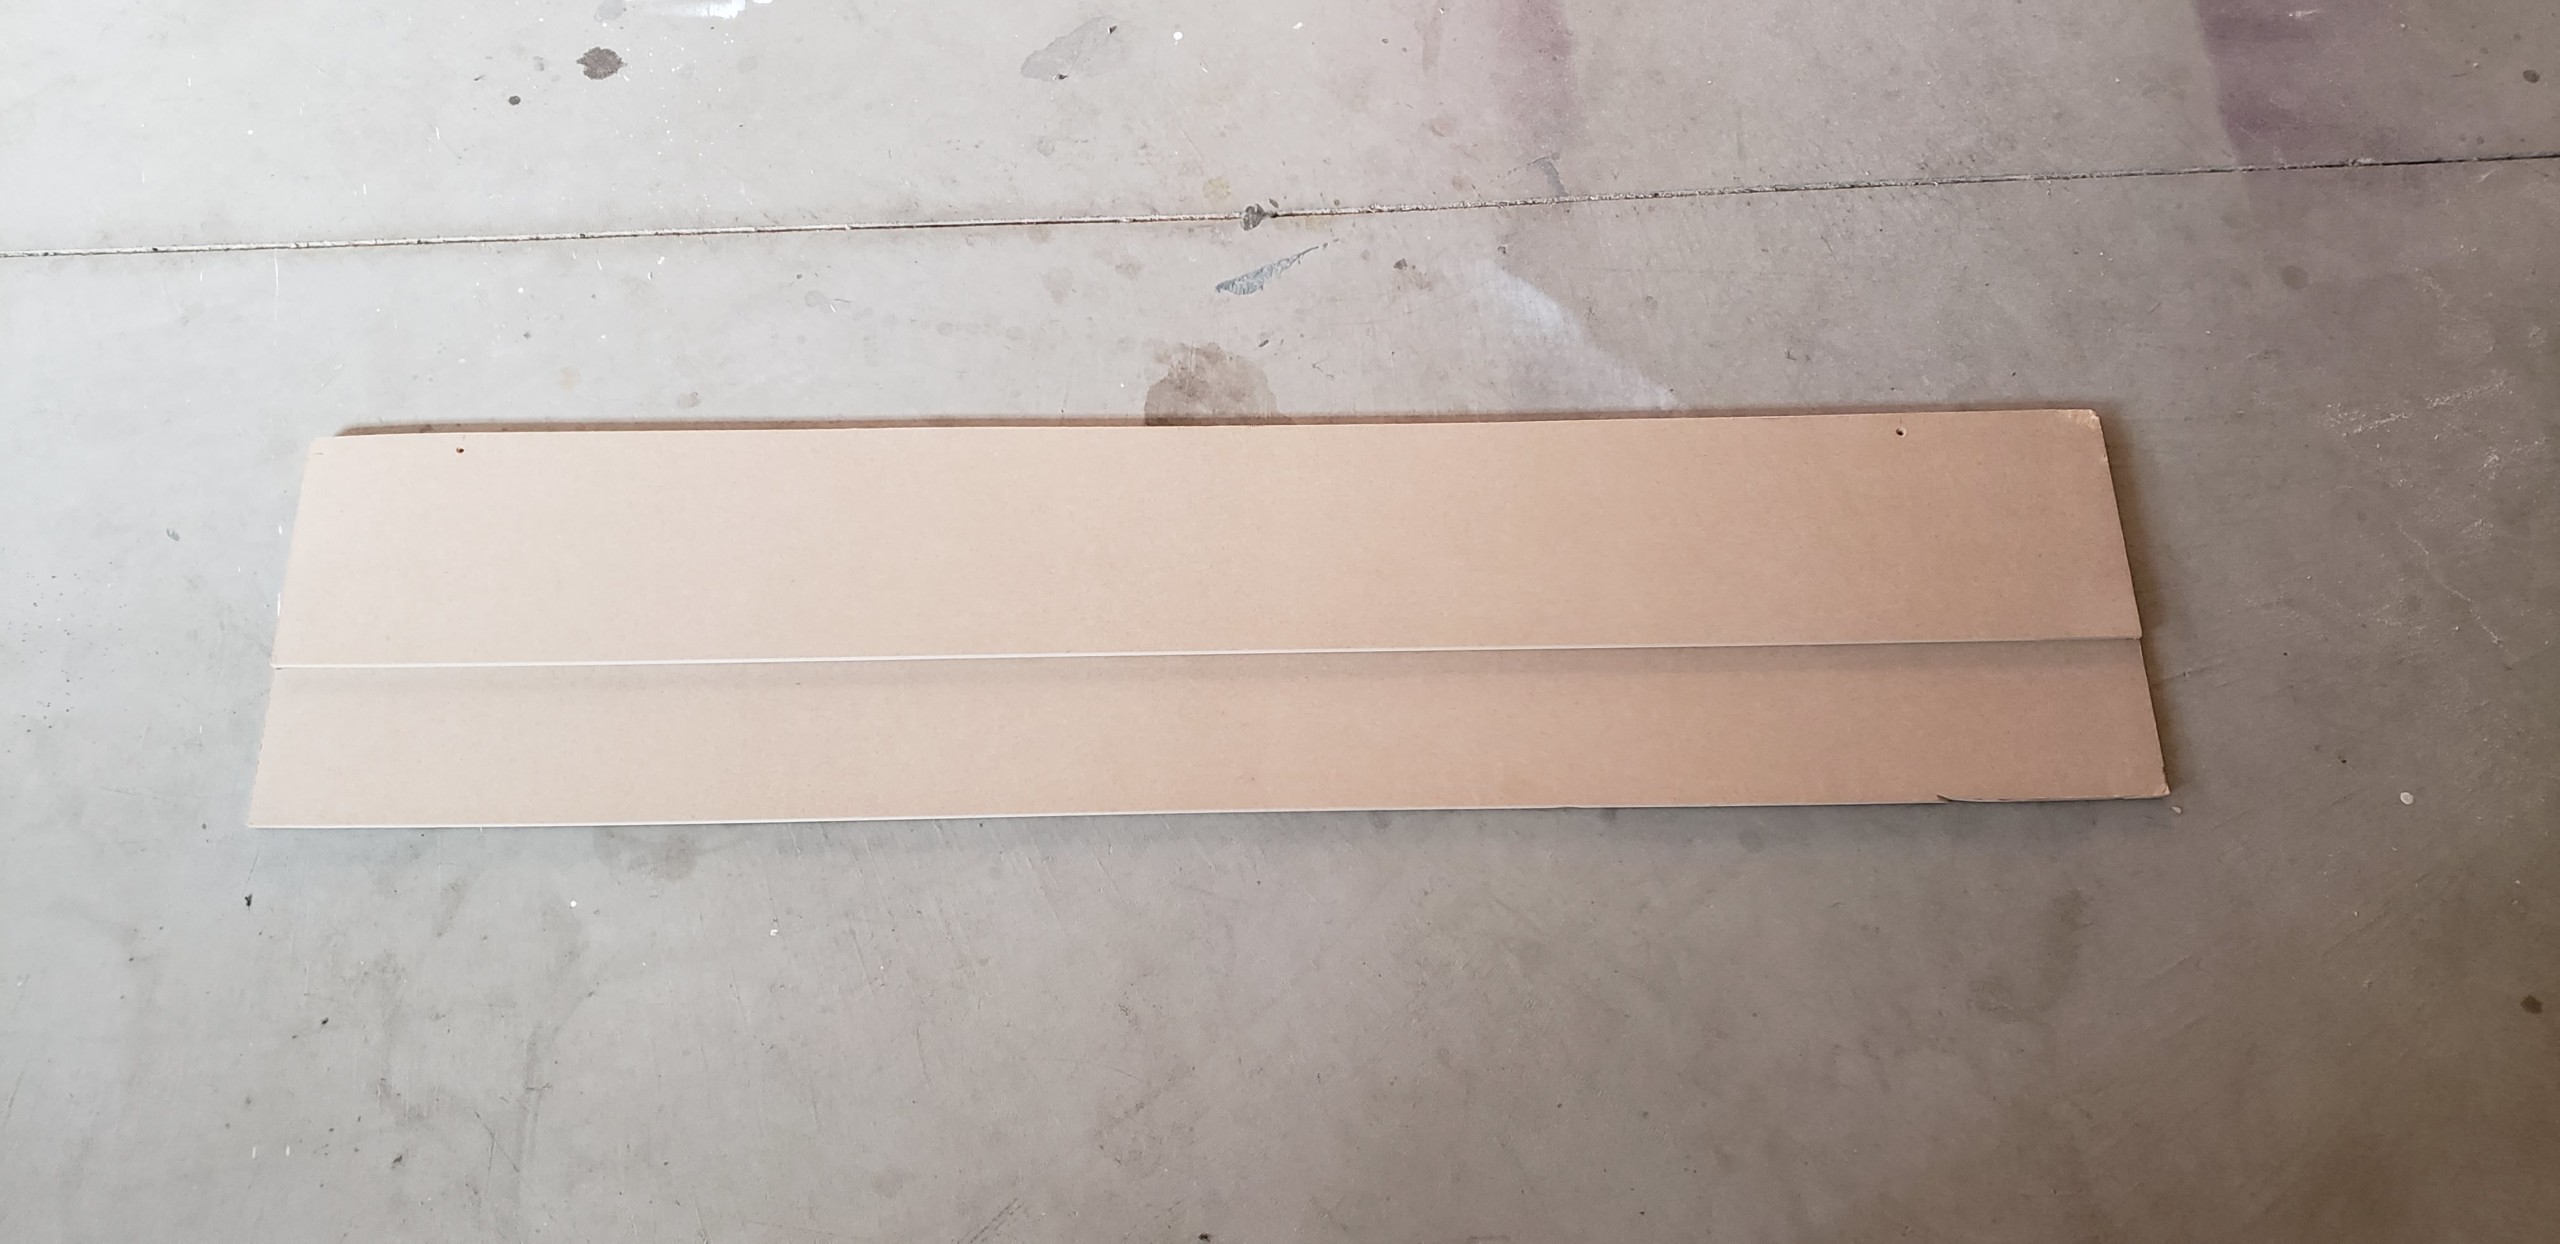
Now you have your own DIY Track Saw Jig for your circular saw! How easy was that?

Using the jig is even easier. All you need to do is measure and mark the surface you plan to cut. Then align the edge of the track saw jig with these marks and clamp down.  You’ll have a perfectly straight guide for the circular saw to travel along.  Just be sure to take into account which side of your measurement you want the saw blade to cut on and position the jig accordingly.

Great Job!!! Now just store this jig in a place that is easily accessible because you will use it A LOT!!

Helpful tip from the Pretty Handy Girl: Buy a panel of foam insulation from a big box store and cut your plywood on top of it.  The foam panel provides a firm surface for the entire piece of plywood and eliminates any falls, pinches, or board balancing you may need to do.

If you enjoyed this tutorial check out my DIY Toy Chest and 1 Drawer side table.  The DIY Track Saw Jig will come in really handy for making these gorgeous pieces.

About Kristen:

Hi! I’m Kristen, from In Her Garage, and I am a self-taught woodworker and DIY fanatic from Minnesota where I live with my husband and our two daughters. Between being a wife, mom and, registered nurse, I try to make as much time for DIY as possible. My love for building came after our family built our current home in 2015. After we moved in, we needed furniture and instead of spending massive amounts of money to order the pieces we wanted I decided that I would build them myself. I started with a buffet table plan from the fabulous Ana-white and quickly set out to remodel my entire home office.

Since then I have started a side business building furniture for the people in my community. I love hearing my clients talk about the pieces they wish they had whether it be a rustic buffet table, a one drawer side table, or a toy box and then making it a reality for them. While starting my small business it made perfect sense that I would document my building journey so I simultaneously launched the In Her Garage blog and I love sharing my plans, tips and tricks.

Making something beautiful with your own two hands through a little preparation and determination is an amazing feeling and I hope to bring inspiration and know-how to those looking to tackle a big or small project.
I am so glad that you found me here and please feel free to connect with me on PinterestInstagram, Facebook, and Youtube to see what I am working on right now.

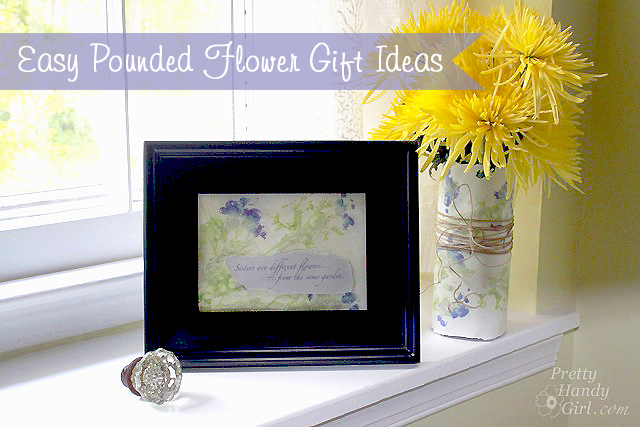
Spring is here and there are countless flowers awakening from the cold winter slumber. When it happens you can pick some blooms and turn them into easy gift ideas. Today I’ll show you how to make easy pounded flower art.

easy_pounded_Flower_Gift_ideasjpg

Easy Pounded Flower Gift Ideas

The results can be used for a framed quote, a paper-wrapped vase, notecards, and much more! I’d go so far to say, the results are close to high end (and expensive) handmade pressed flower paper.

Ready to make some beautiful pounded flower paper? I am (because I could also use an activity to get a little frustration out 😉.)

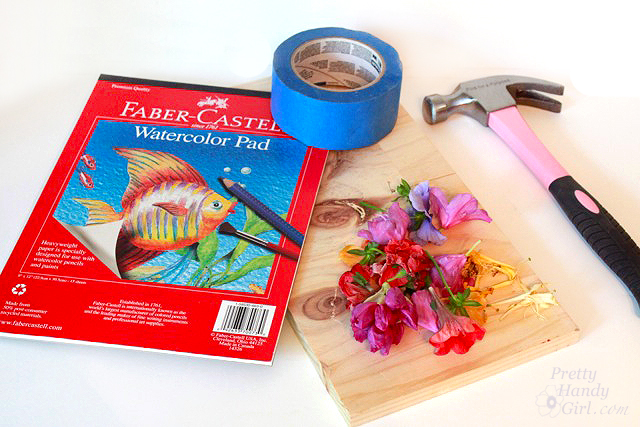
Materials:

(I’ve included affiliate links for your convenience. I earn a small percentage from a purchase using these links. There is no additional cost to you. You can read more about affiliate links here.)

materials

Instructions:

First, you’ll want to collect some flowers. Smaller colorful flowers work best. But, you can collect larger ones and experiment.

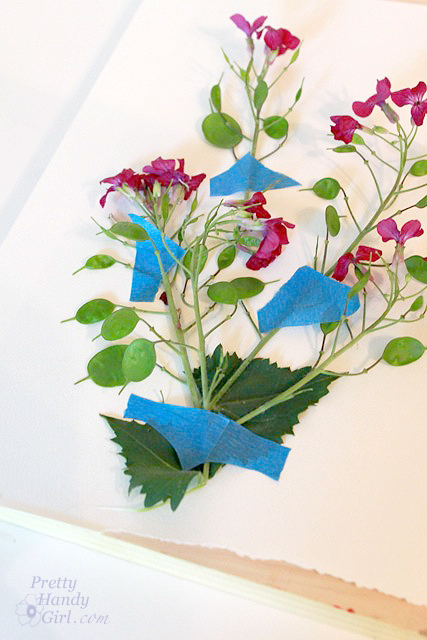
Lay one sheet of paper on top of the block of wood. Arrange your flowers on top of the paper and tape down any strands that don’t cooperate. (The flowers I picked are from a money plant that grows in our woods.)

tape_flower_into_shape

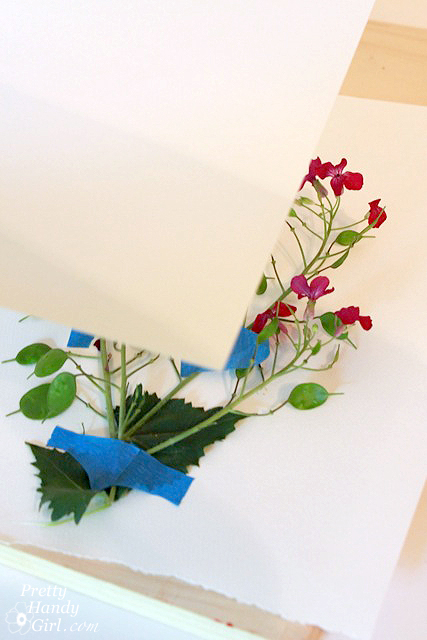
Lay a second sheet of paper on top of the flowers.

cover_flower_with_2nd_paper

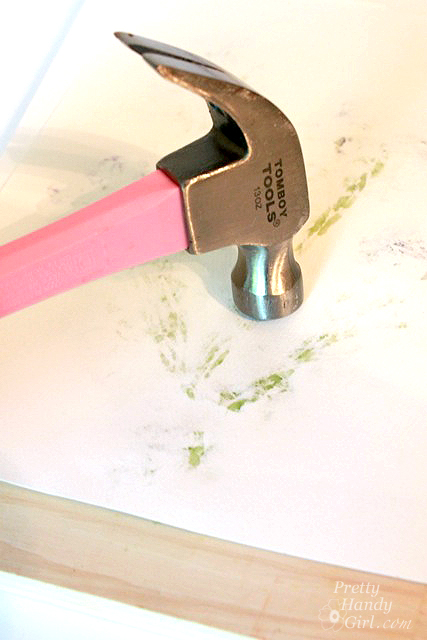
Pound the hammer around the paper until you have squished all of the flowers beneath. (This doubles as a stress relief exercise, trust me!)
hammer_paper_and_flowers

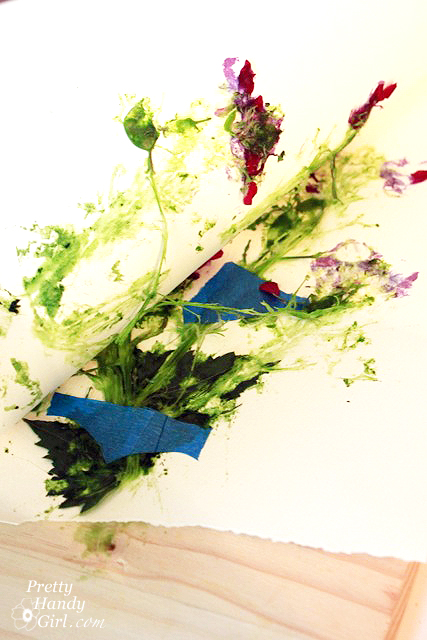
Peel apart the papers and you’ll have a pulpy mess.

pull_apart_papers

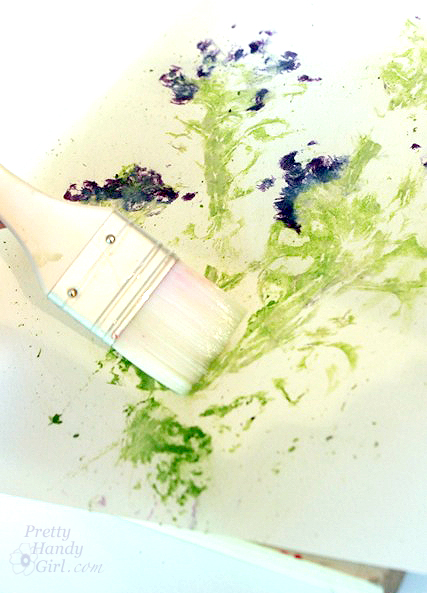
Remove the flowers and wipe off the excess bits and pieces with a clean chip brush.

wipe_off_flower_guts

Look at that! You got two prints that are a mirror image.

duplicate_pounded_flower_prints

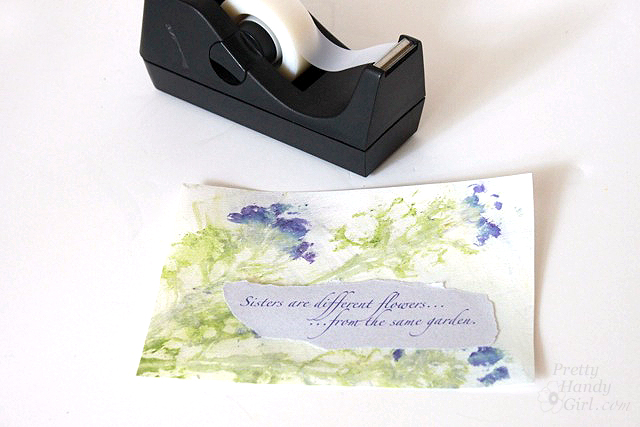
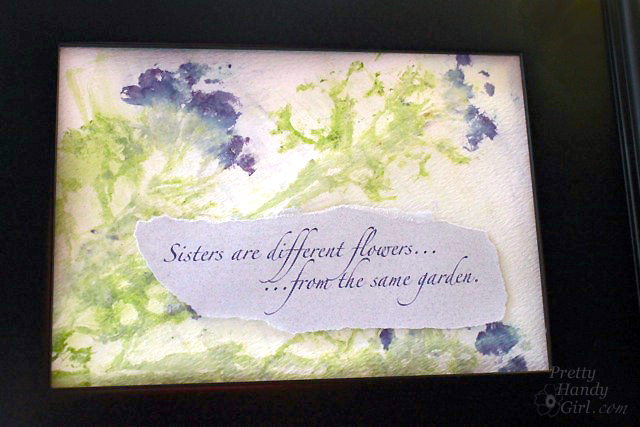
Print out a quote or type a message on coordinating paper and tear around it. Tape it onto flower paper.

tape_phrase_onto_paper

Put your verse artwork into a frame for a sweet gift to your sister, your mother, or a friend.

close_up_phrase_flower_art

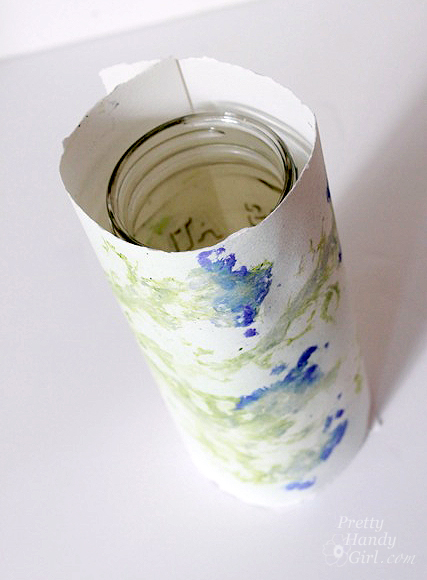
Take the other sheet and wrap it around a can, mason jar, or vase.

roll_paper_around_mason_jar

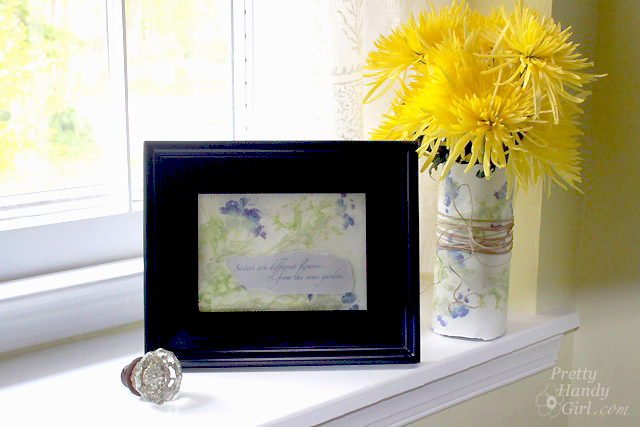
Wrap some twine around the paper to hold it in place. Add water to the vase and pop some fresh flowers in it.

close_up_pounded_flower_vase

Quick and easy gift idea, right?! Give a vase to brighten someone’s day. The best part of this gift is it only cost a pound! (Get it? Like a British £? I know, I have a corny sense of humor. You can blame it on my Dad, it runs on his side of the family.)

Maybe I’ve also been hammering a little too much lately. Leave me a comment if you have any corny jokes to share!

pounded_Flower_art

Do you have any creative ideas for using this pretty flower paper? I set some up for the kids and they had a blast pounding flowers.

PHGFancySign