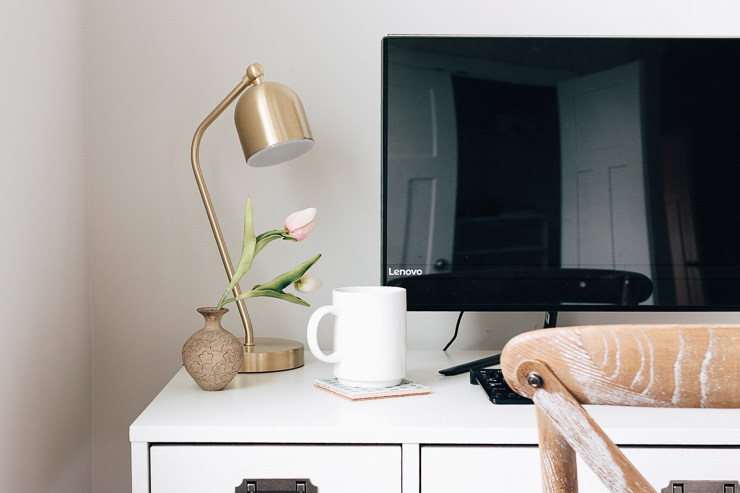
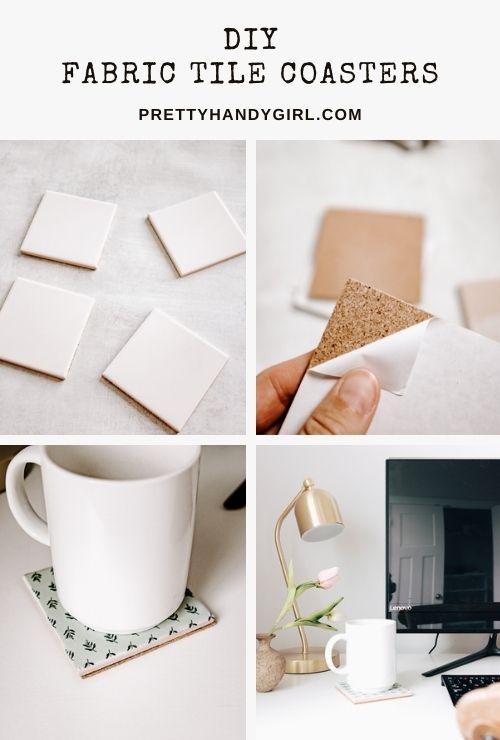
DIY fabric tile coasters

DIY Fabric Tile Coasters

Hello! How are we all doing?

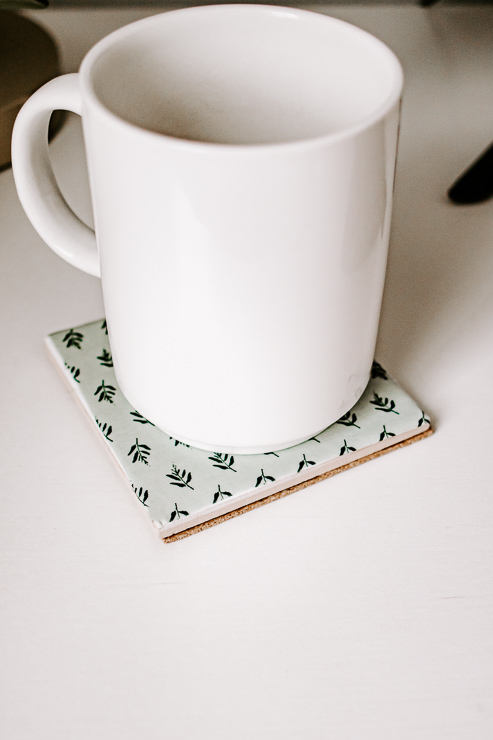
The holidays may look a lot different this year, but the same sentiments and traditions are still here. If you have a tradition of making handmade holiday gifts, I have the perfect craft for you today! These DIY fabric tile coasters are a cinch to put together and you can customize them with any fabric you like.
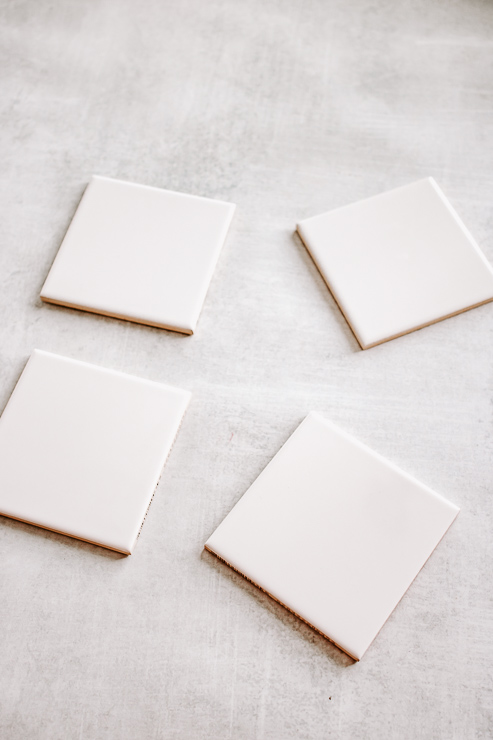
This project is not only easy, it’s inexpensive too. Pick up square tiles from a home improvement store for as little as 15 cents. Then grab some fabric scraps to make these coasters come together.

I’m sharing the full tutorial plus some tips on making your coasters waterproof! So, let’s get started.

How to Make DIY Fabric Tile Coasters

Materials:

(I’ve included affiliate links for your convenience. I earn a small percentage from a purchase using these links. There is no additional cost to you. You can read more about affiliate links here.)
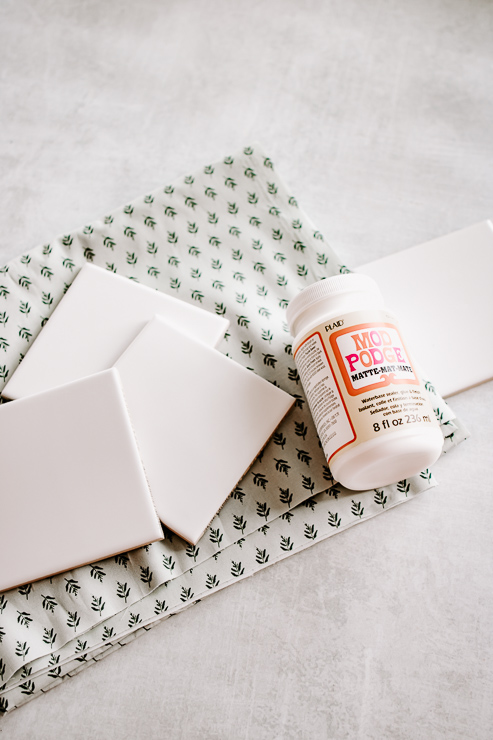
Instructions:

Step 1: Cut Fabric to Size

The first thing you need to do is cut your fabric to size. I tried this many different ways and by far the best looking option is to cut them slightly smaller than the tile. This will leave a small white border around the top of the coaster but it will look neater. Plus, it is much easier to apply this way.

Use a rotary cutter to get the neatest cuts, but if you don’t have one, use a pair of very sharp scissors or fabric scissors.

Step 2: Apply Fabric to Tile
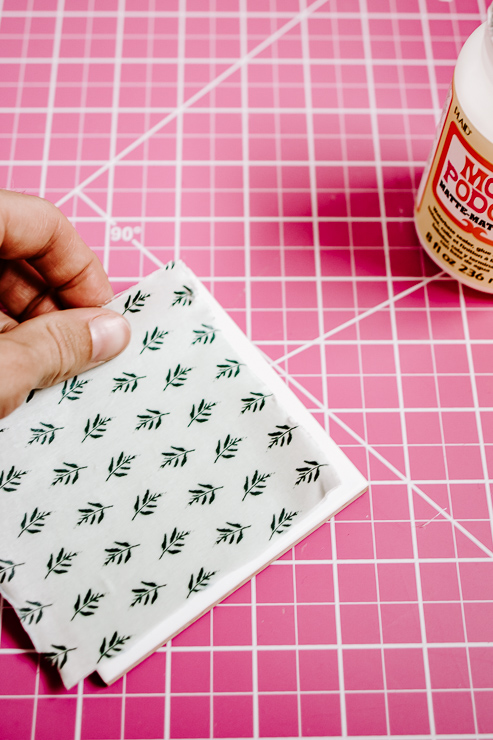
Take your foam brush and paint a layer of Mod Podge onto the top of your tile. Then, apply your fabric square to the tile, Smooth out bubbles as you apply.

Once your fabric is aligned properly and smooth, apply another layer of Mod Podge on top of the fabric.
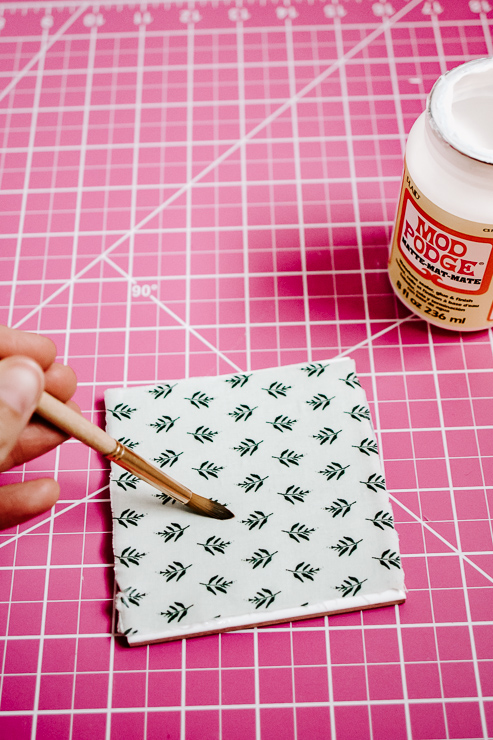
Set aside your tile coasters to dry.

Step 3: Waterproof and Seal your Coaster

Once your Fabric and Mod Podge fully dries, you will notice it feels a little stiff and tacky. Eventually, this will go away but if you don’t have time on your hands and you really want to waterproof them, you’ll need to seal them.
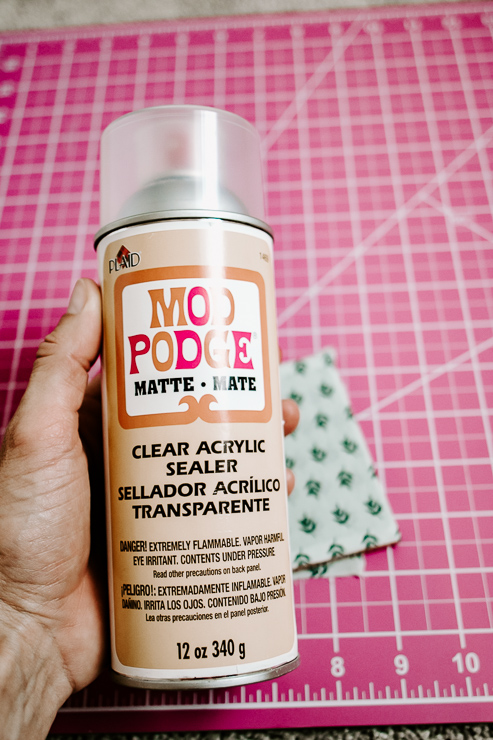
With any of these sealers, you want to spray outdoors or in an area with really good ventilation – as the fumes are pretty strong.

One way to seal them is to use an acrylic sealer spray from Mod Podge. You can buy this in gloss or matte. I only had matte on hand but I do think gloss is the way to go here.

Another sealer (which I haven’t personally tried yet) is called Engine Enamel. This is made by Rustoleum and is actually for cars! But I’ve heard it works here too. It will give a glossy finish to your coasters and protect them from water and heat.

Finally, a third option is to use resin. Resins can be more expensive than the first two options, so keep this in mind. EnviroTex Lite is a resin sold at Michael’s and other craft stores and gives your finished coaster a very high gloss, polished look. It’s really beautiful so if you are serious about your coaster making, this is definitely the winner here.

Step 4: Apply Cork to Bottom of Tile

After your coasters are dried and sealed, let’s finish the bottom. Tile squares can be a bit rough on the bottom, so we need to cover them.

I found these cork squares on Amazon and they fit perfectly! They are also sticky on one side, so you just need to peel off the back and apply.
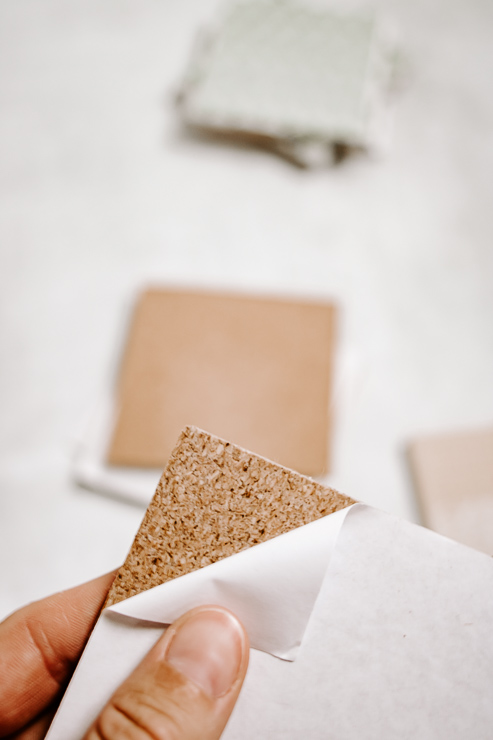
Another option is to use felt squares and hot glue them to the bottom.

These coasters are easy to create and make wonderful handmade gifts – even for a hostess!
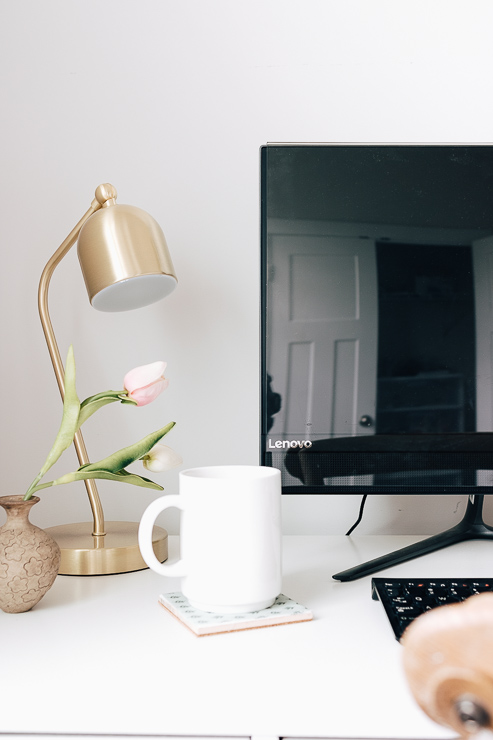
I hope you enjoyed this tutorial! Enjoy this holiday season, even if it does look a bit different. 🙂

karen signature

~ See More of Karen’s Tutorials ~


karen from decor hintHello!  I’m Karen, the creator of the Home Decor and DIY Blog: Decor Hint. I’m a Native of the East Coast, but I currently live in beautiful Seattle with my hubby, our two wonderful children, and our spunky wheaten terrier.

You can usually find me with some sort of craft in one hand and a coffee in the other. And I’m always rearranging furniture or moving lamps from room to room. I have a passion (read: obsession) for decorating, DIY, and gardening. In short, I love making my house into a home.

Like many, I’m inspired by what I see in home decor magazines, but I’m not so inspired by the price tags.  Consequently, I love finding and creating beautiful budget-friendly home decor items. In a head to head competition, I bet you’d never know the difference between the designer items and my DIY creations!  Many of my DIY projects focus on sewing, crafting, upcycling, and organizing. Some of my favorite projects have been making pretty wreaths, sewing my own tassel hand towels, and crafting these trendy wood bead garlands. I can’t wait to inspire you and spark your creativity through my DIY projects.

You can always connect with me on Pinterest, Twitter or Instagram.
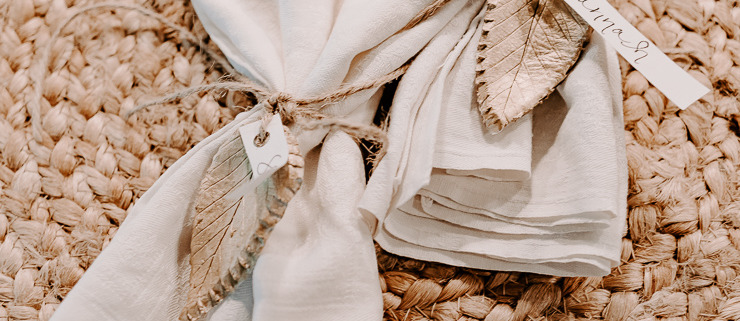
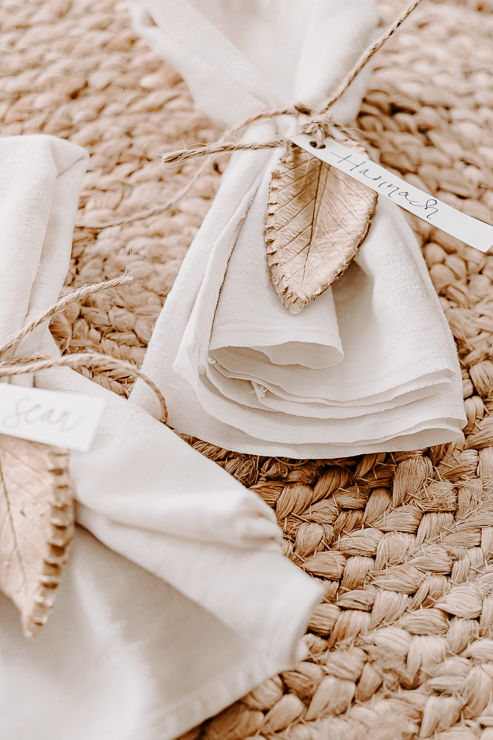
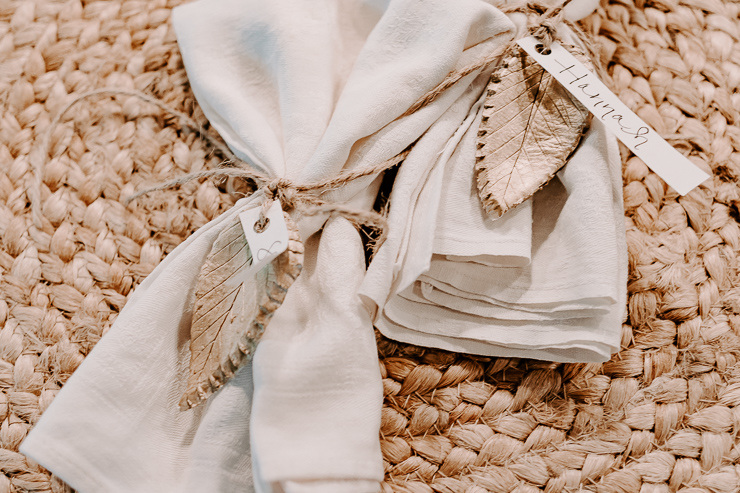
view of napkins tied with jute twine and a clay leaf place card

diy clay leaf place cards

DIY Leaf Place Cards for the Holidays

I hope your fall has been lovely so far.  The weather is just starting to turn here in NC.  I have to say, I love the weather here compared to Seattle.  We never experienced so much sun day after day!  Today, with Fall weather on my mind, I’m making you these DIY leaf place cards for the upcoming holidays.  These place cards are little clay leaves inspired by nature (hello, fall!) and painted in a beautiful gold color to elevate them for elegant dinners and parties.  

view of napkins tied with jute twine and a clay leaf place card

You’ll love my secret for getting those fancy leaf edges from your clay too – read on to find out how I do it.

These place cards can be used time and time again, just change out the name tag for each new guest.  

I hope you enjoy this craft!  

Materials:

  • Gold Paint
  • PaintBrush
  • Air Dry Clay
  • Flat Screwdriver
  • Rolling Pin
  • Toothpick
  • Leaves from Outside
  • Jute Twine
  • Wax Paper
  • Cardstock
  • Pen for Writing 

Instructions:

Step 1:  Roll our your Air Dry Clay

rolling out air dry clay

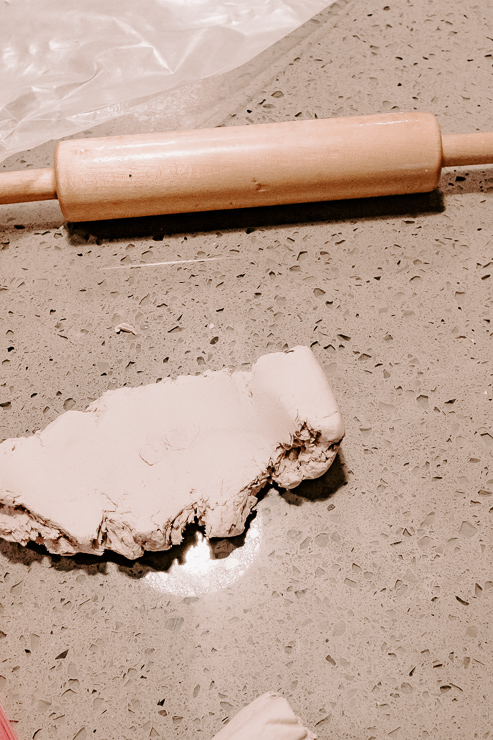
Grab a ball of air-dry clay and with slightly wet hands, roll it out using your rolling pin.  You want it to be about ¼ inch thick.  If you make it too thin, it will be too fragile and crack.  

Step 2:  Make a Leaf Imprint

leaves imprinted in clay

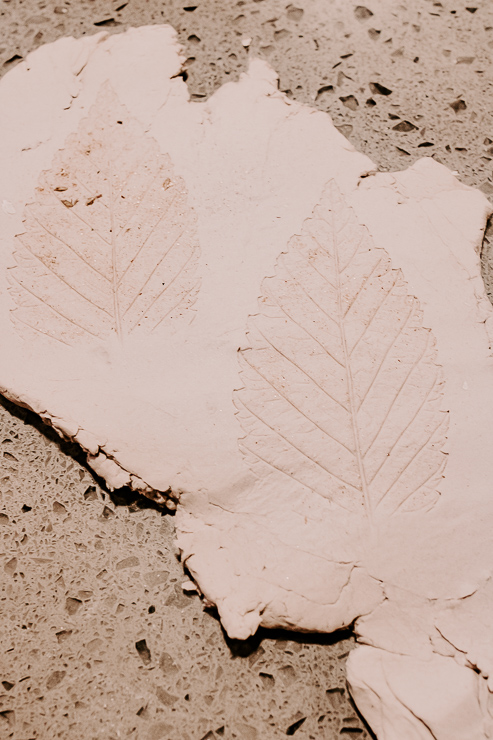
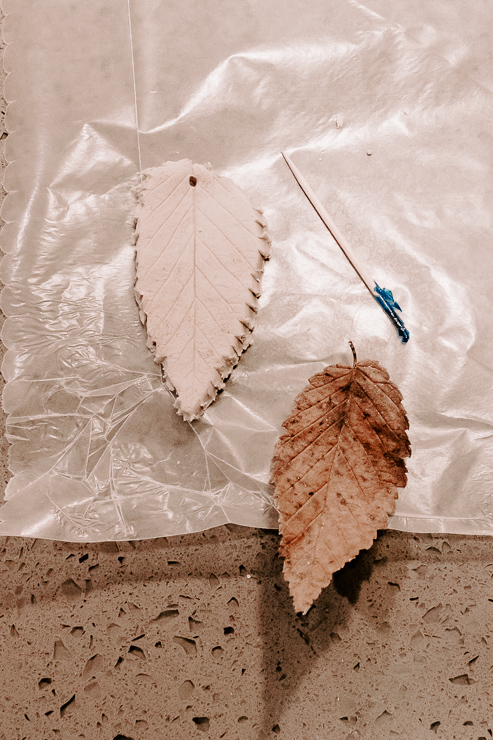
Take your leaf, and lay it on top of your clay.  Using your rolling pin, roll carefully over the leaf several times, creating an imprint of the leaf onto the leaf.  

Step 3:  Cut your Leaf Out

cutting out leaves from clay

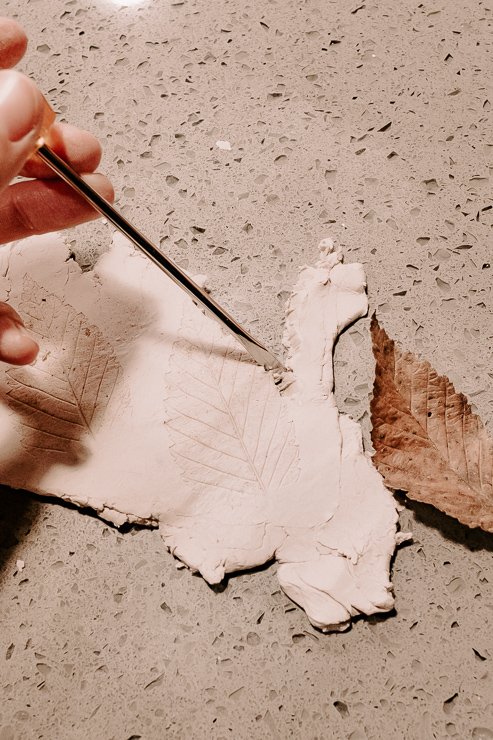
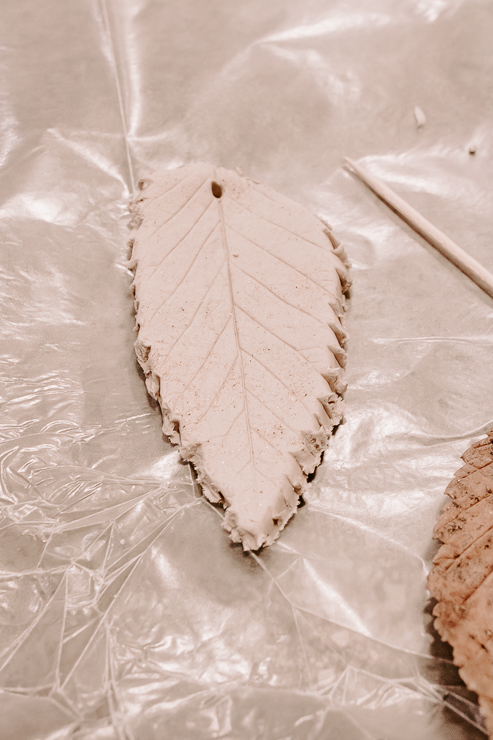
Here’s where the magic happens!  You should see a beautiful leaf imprint in your clay.  Take a flat screwdriver and make little divots on the side of your clay leaf, where the leaf would naturally have edges.  

a leaf cut out of clay with a hole for hanging

Do this all the way around, and then carefully remove your leaf.  Using a toothpick, make a hole in the top of your leaf.  This will be for tying your jute twine later.  

close up view of clay leaf

I take the leaf in my hands and slightly bend it to give it a more natural leaf shape, but you are welcome to keep it flat too.  Place your leaf on wax paper and allow it to air dry naturally for a couple of days.  

Step 4:  Paint your Clay Leaves

painting clay leaves gold

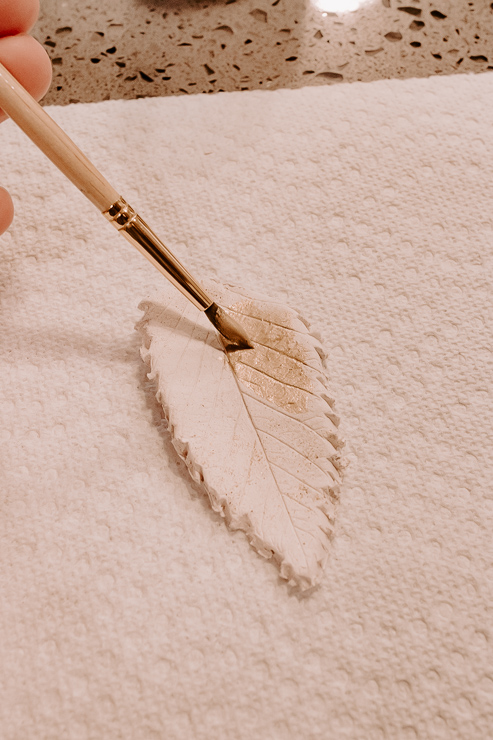
After your leaves dry, take a paintbrush and gold paint and lightly brush a few coats on the top and sides of your clay leaf.  Set them aside to dry.  

Step 5:  Tie on a Nametag

view of gold painted clay leaves

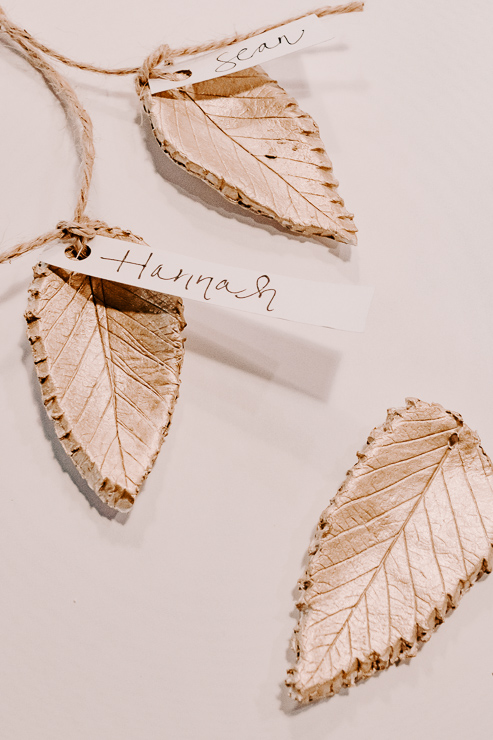
Our leaves are looking beautiful!  Now, all we need to do is cut a small tag of cardstock and write the guest’s name on it.  Use a hole punch to cut a hole in the cardstock.  Tie this to your leaf by threading your jute twine through the hole we created in the leaf in Step 3.  

napkins tied with jute twine and clay leaves with names

Simply beautiful!  

I like to tie my cloth napkins with jute twine, and then tie the clay leaf name tag to it.  

napkins tied with gold clay leaves and name tags

How pretty and unique are these!?  I’m sure you will get some comments from your guests.  And they will feel so special sitting at this elegant dinner with you.  

As I said earlier, you can reuse these DIY leaf place cards.  Once you get the hang of making one leaf, the rest don’t take long.  You can also try this project with different shaped leaves, such as maple leaves.  

napkins tied with jute twine and clay leaves with names

My daughter and I foraged for some leaves together.  She happened to find the pretty ones I ended up using.  Thanks, Hannah! 

Grab the kids and make this a family project.  It’s a great craft to do around the holidays.  

karen signature

~ See More of Karen’s Tutorials ~


karen from decor hintHello!  I’m Karen, the creator of the Home Decor and DIY Blog: Decor Hint. I’m a Native of the East Coast, but I currently live in beautiful Seattle with my hubby, our two wonderful children, and our spunky wheaten terrier.

You can usually find me with some sort of craft in one hand and a coffee in the other. And I’m always rearranging furniture or moving lamps from room to room. I have a passion (read: obsession) for decorating, DIY, and gardening. In short, I love making my house into a home.

Like many, I’m inspired by what I see in home decor magazines, but I’m not so inspired by the price tags.  Consequently, I love finding and creating beautiful budget-friendly home decor items. In a head to head competition, I bet you’d never know the difference between the designer items and my DIY creations!  Many of my DIY projects focus on sewing, crafting, upcycling and organizing. Some of my favorite projects have been making pretty wreaths, sewing my own tassel hand towels, and crafting these trendy wood bead garlands. I can’t wait to inspire you and spark your creativity through my DIY projects.

You can always connect with me on Pinterest, Twitter or Instagram.
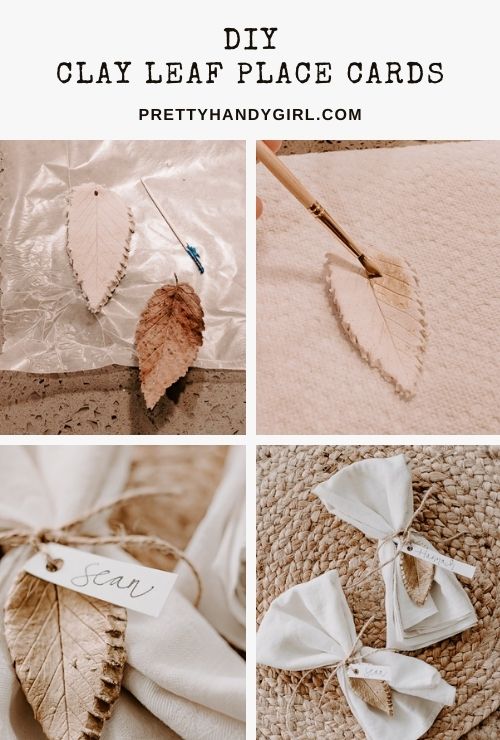
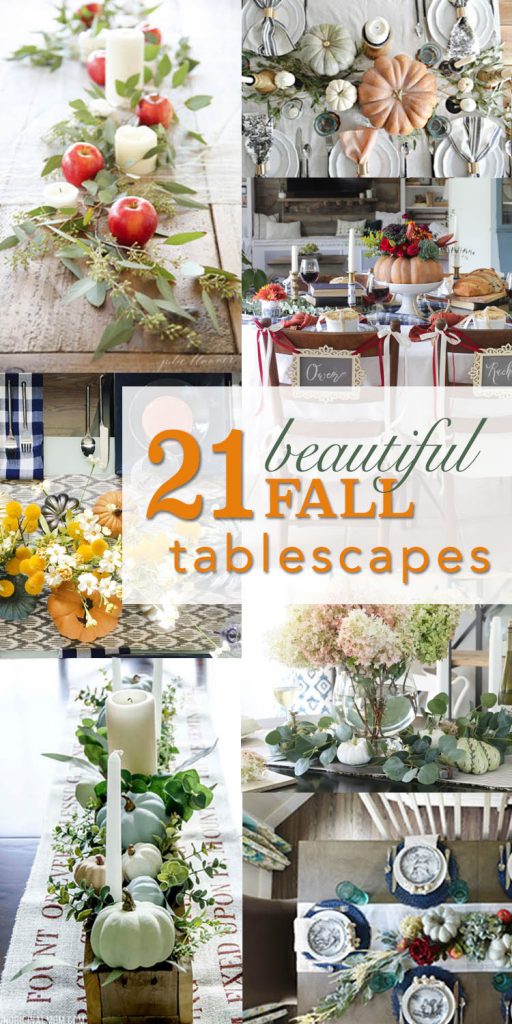
If you liked this tutorial, you’ll love these fall tablescape ideas:

21 Beautiful Fall Tablescapes - Decorating Your Table for Fall

modern boho side table

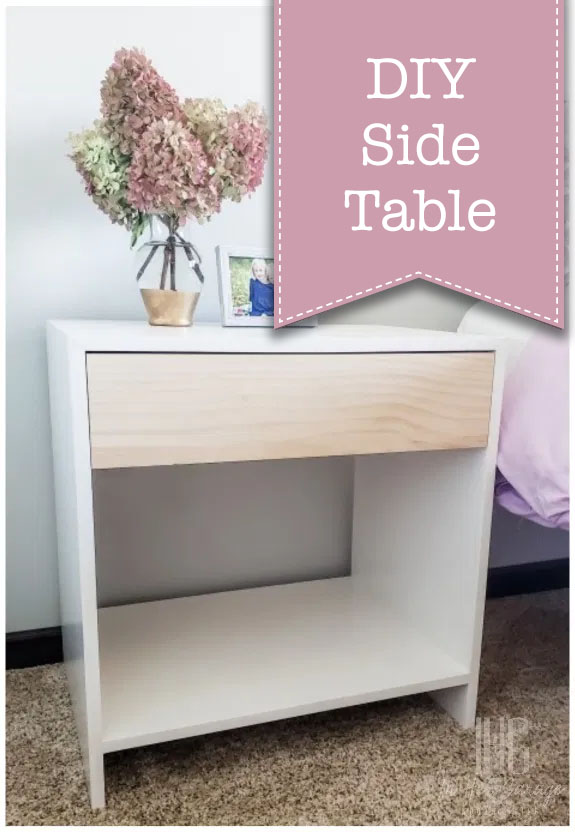
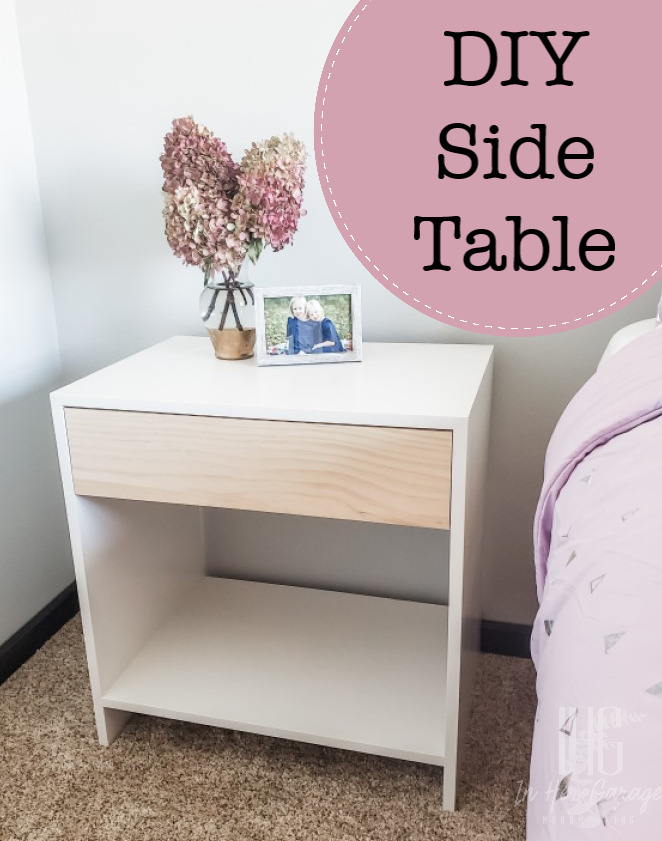
I built this side table as part of the bedroom furniture set for my daughter’s new room. It may look a little complicated, but can be built with a circular saw or a table saw.  Let’s make this DIY Modern Boho Side Table!

diy side table

DIY Modern Boho Side Table

Hello again! This is Kristen from In Her Garage and I am going to show you how I built this simple DIY side table (or nightstand). I built this as part of the bedroom furniture set for my daughter’s new room. We decided that we liked the Boho furniture trend and think it complements the bedding she picked out.

This side table is small but can be customized to your desires. It measures 24″w x 24″h x 17″d and is made from birch plywood. The side table incorporates beveled edges (which I think gives it a crisp and clean look).  It may look a little complicated, but these corners can be achieved using a circular saw or a table saw.  Let’s get making!

How to Build a Side Table

Materials:

(I’ve included affiliate links for your convenience. I earn a small percentage from a purchase using these links. There is no additional cost to you. You can read more about affiliate links here.)

Tools:

Cut list:

  • 2- 3/4″ x 24″ x 17″ – with a 45° bevel along one short edge (sides)
  • 1- 3/4″ x 24″ x 17″ – with two 45° bevels along both short edges (top)
  • 1- 3/4″ x 22 ½” x 17″ (bottom shelf)
  • 1- 3/4″ x 22 ¼ ” x 5″ (drawer face)

Instructions:

Step 1: Cut the bevel into the top and side panels of the side table.

  • Using either your table saw or your circular saw, adjust the blade to cut at a 45° bevel.  To get this measurement exact I use a Wixey Digital Angle Finder which is helpful but if you don’t have this tool then feel free to use a speed square or protractor.
  • Each side panel should have one bevel cut along the top edge
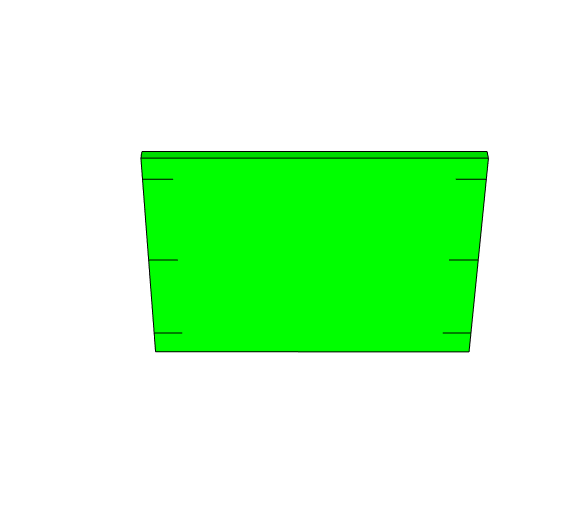
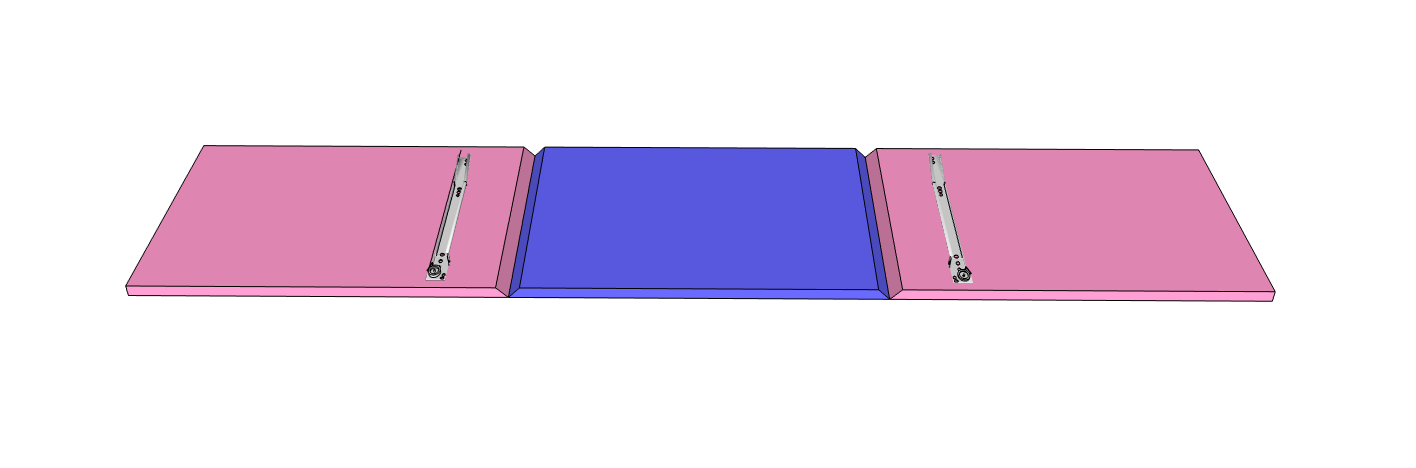
  • The top panel should have a bevel cut along each side as pictured below

Step 2: Add pocket holes to the shelf panel

  • Using your Kreg Jig, set to 3/4″ depth, drill three pocket holes into each side on the bottom of the shelf panel.  This is how your shelf will attach to the sides of the side table.

Step 3: Edge banding

I won’t go over all of the steps for applying iron-on edge banding in this tutorial because the Pretty Handy Girl has already done this for me! If you are new to edge banding check out Brittany’s Edge Banding Tutorial.

  • You will need to edge band the front edge of each panel (side panels, top panel, and shelf panel). This will finish the visible sides.
  • You can also edge band all edges of the drawer face if you wish.  This piece will be inset into the side table, so the edges won’t be visible when the drawer is closed but you’ll see them when open.
  • Another option would be to use a solid piece of 1×6 for the drawer face to avoid needing to band the edges all together. (I used a scrap piece of 1×6 so it didn’t need edge banding.)

Step 4: Install drawer slides to table carcass

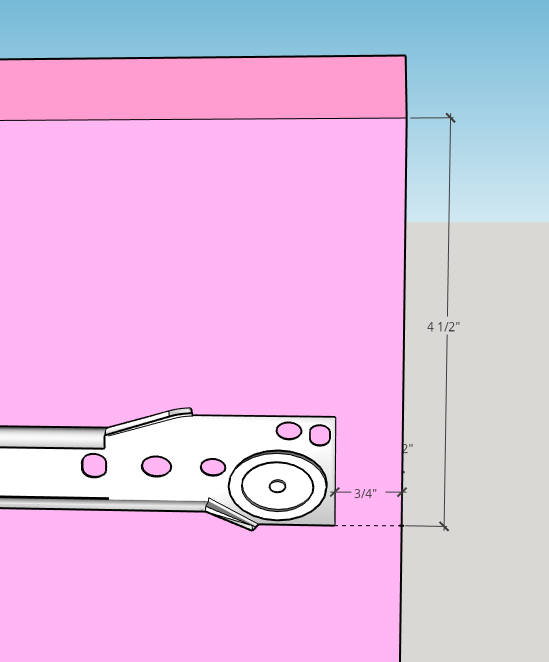
  • Install the drawer slides (meant to attach to the cabinet) on the inside of each side panel measuring down 4 ½” from the top of the bevel and 3/4″ in from the front edge as shown.  This is the step where the self-centering drill bit is really helpful to have!


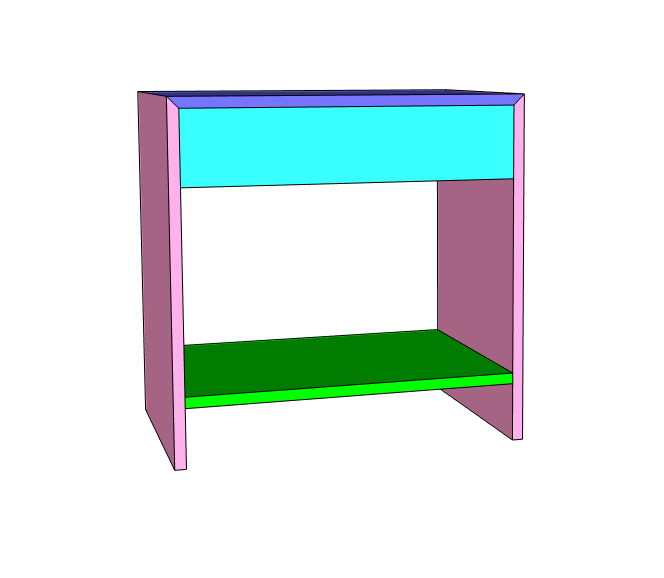
Step 5: Assemble the sides and top panels. The table will be upside down during assembly

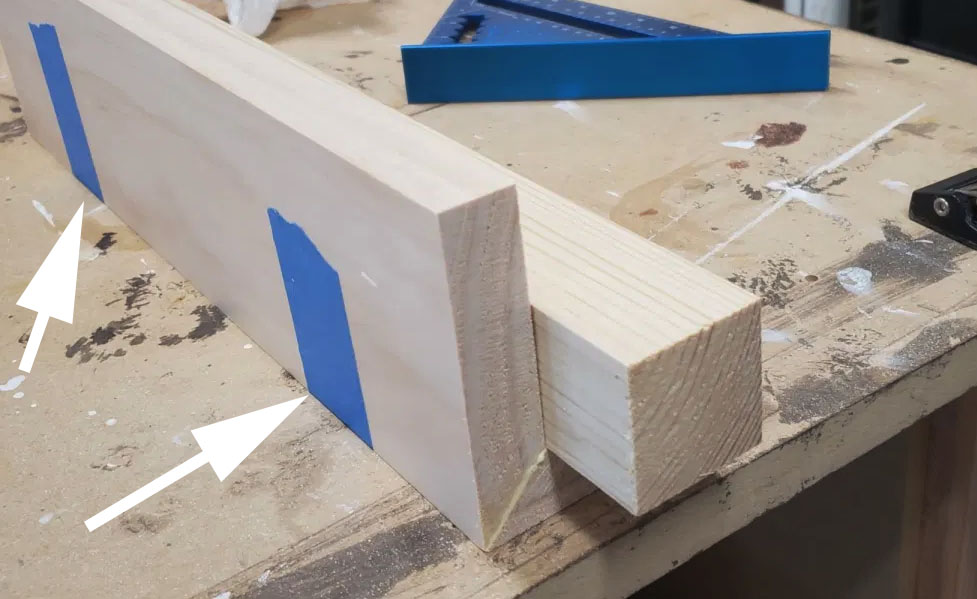
  • Add two pieces of painter’s tape to each of the two outside edges of the top panel, perpendicular to both beveled edges.
  • Set the top panel down on your work surface upside down, sticky side of the tape facing up, and place the two side panels with the beveled edges touching the top panel’s beveled edge, also being sure to align the front and back of the panels. Press down firmly so the tape sticks to all three panels.

  • Add an even bead of glue to both beveled surfaces and then lift one side panel as if closing a book. The two beveled edges will meet, and the tape will hold it in place (see photos below). Repeat this step for the other side panel.

The photo below is from another project, but shows how to use painter’s tape for holding the bevel joint in place.

tape back for bevel joints

  • You can add a few 1 ¼” brad nails to the joint to help hold it in place. Use wood putty to fill in the brad holes and sand smooth.

Step 6: Install shelf panel

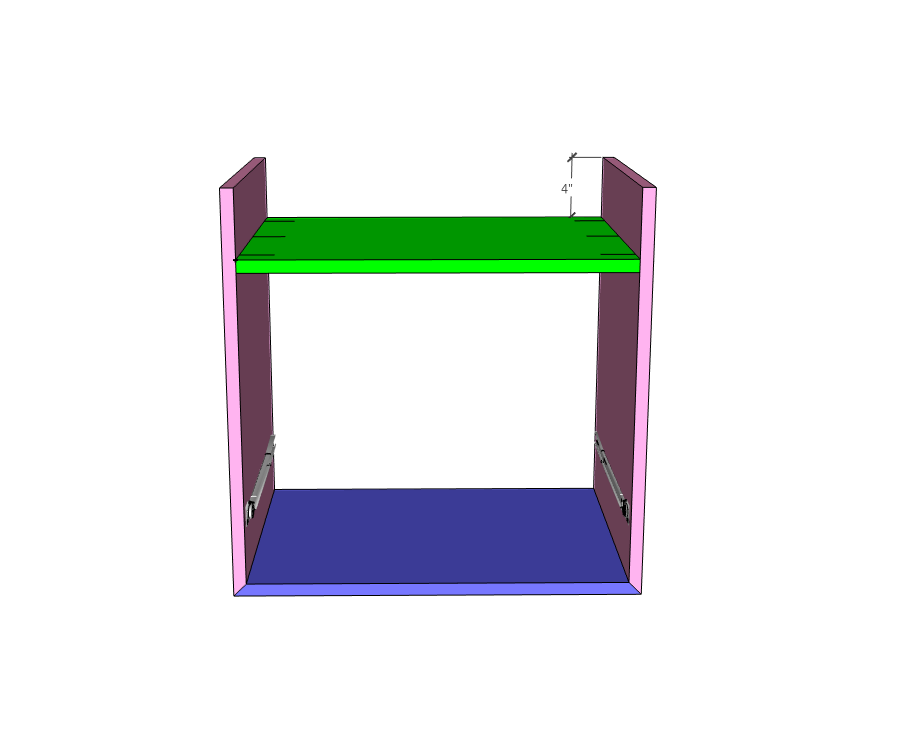
  • Install the shelf 4″ from the bottom of each side panel using wood glue and 1 ¼” pocket holes.
  • This step is easier to accomplish with wood clamps or by carefully laying the table on one side.

Step 7: Build the drawer

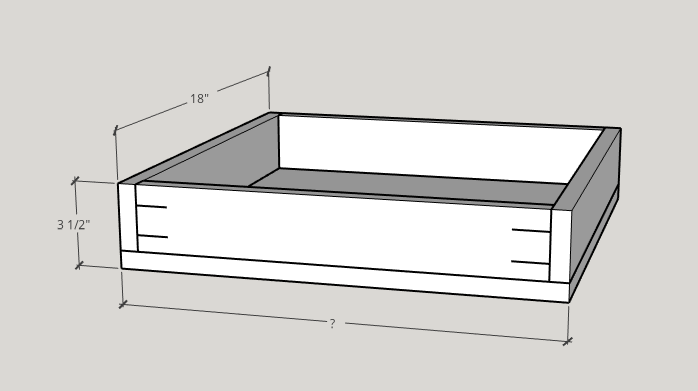
  • There are several different ways to build drawer boxes. The dimensions for this drawer are 3 ½” tall and 18″ deep. The width of your drawer depends on the specific drawer slides that you’ve chosen to use. I have provided a diagram for a simple method of building drawer boxes. (Or you can follow this tutorial for building drawers.)


Step 8: Paint or Stain and Finish

  • Once the side table carcass is assembled and the drawer face has been edge-banded (if that is what you chose to do) then you can paint or stain your DIY side table.  I chose to paint the carcass and apply a gloss top coat to give it a pretty shine. I left the drawer face a natural wood color because this is what looked best in my daughter’s room.

Step 9: Install the drawer face

  • Once the carcass and drawer face are finished to your liking then you can slide the drawer box into place.
  • Attach the drawer face using super glue and simply eye-balling the top and side gaps. Hold the drawer face firmly against the drawer box until they adhere together.  Then gently pull the drawer out and drive two 1 ¼” wood screws from inside the drawer into the back of the drawer face.

  • Feel free to add a pretty drawer pull or knob if you want. My daughter liked it without, so we decided to leave it as is.

Check out the entire furniture collection that I created for my youngest daughter’s bedroom.

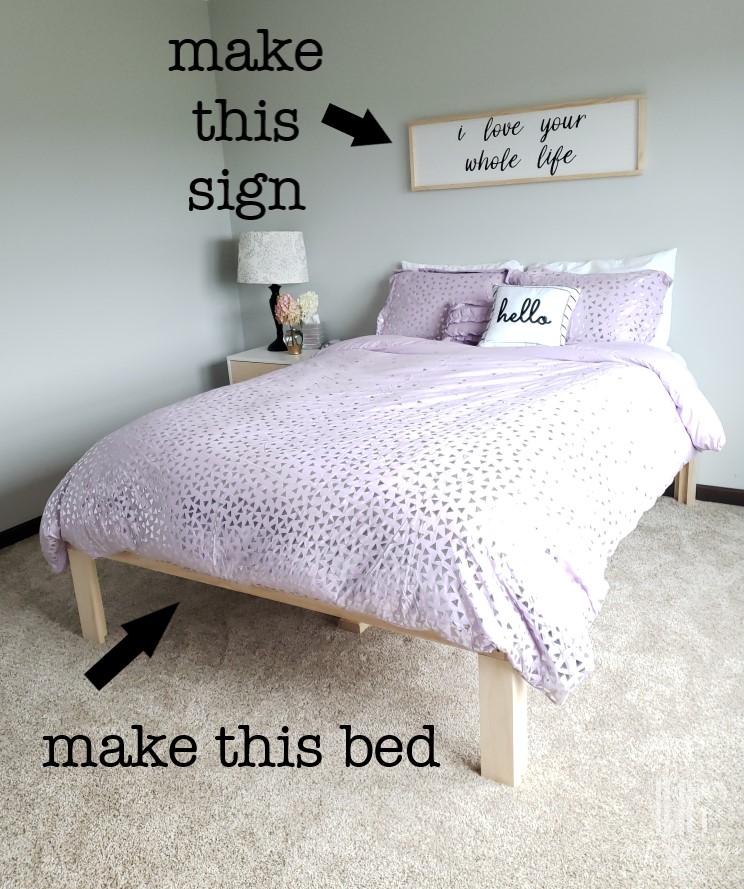
DIY Platform Bed and DIY Quote Sign

Stay tuned for the DIY Hanging Bookshelf that I will be teaching you how to make next month!

Hi! I’m Kristen, from In Her Garage, and I am a self-taught woodworker and DIY fanatic from Minnesota where I live with my husband and our two daughters. Between being a wife, mom and, registered nurse, I try to make as much time for DIY as possible. My love for building came after our family built our current home in 2015. After we moved in, we needed furniture and instead of spending massive amounts of money to order the pieces we wanted I decided that I would build them myself. I started with a buffet table plan from the fabulous Ana-white and quickly set out to remodel my entire home office.

Since then I have started a side business building furniture for the people in my community. I love hearing my clients talk about the pieces they wish they had whether it be a rustic buffet table, a one drawer side table, or a toy box and then making it a reality for them. While starting my small business it made perfect sense that I would document my building journey so I simultaneously launched the In Her Garage blog and I love sharing my plans, tips and tricks.

Making something beautiful with your own two hands through a little preparation and determination is an amazing feeling and I hope to bring inspiration and know-how to those looking to tackle a big or small project.
I am so glad that you found me here and please feel free to connect with me on PinterestInstagram, Facebook, and Youtube to see what I am working on right now.


how to paint watercolor daisies

Learn how to paint these watercolor daisies with this easy tutorial!

tutorial for painting watercolor daisy flowers

Easy to Paint Watercolor Daisies

Hello, Pretty Handy Girl Readers! Guess what? I found my box of watercolors. If you remember, last month I moved from Seattle to NC and things were a bit crazy there (still are, actually.) I’m back with another watercolor tutorial and this one is easy. Well, actually, they’ve all been pretty easy so far, right?

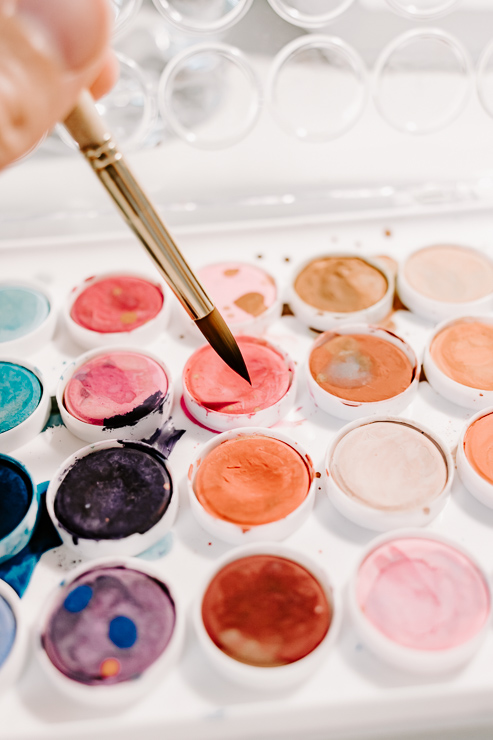
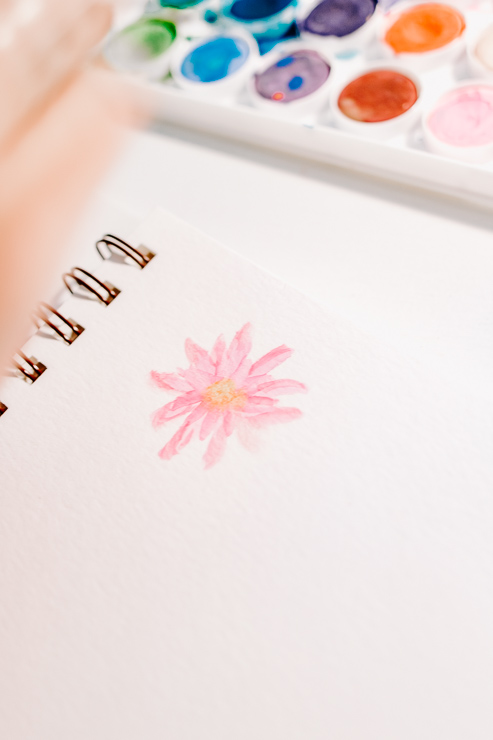
watercolors with a paintbrush

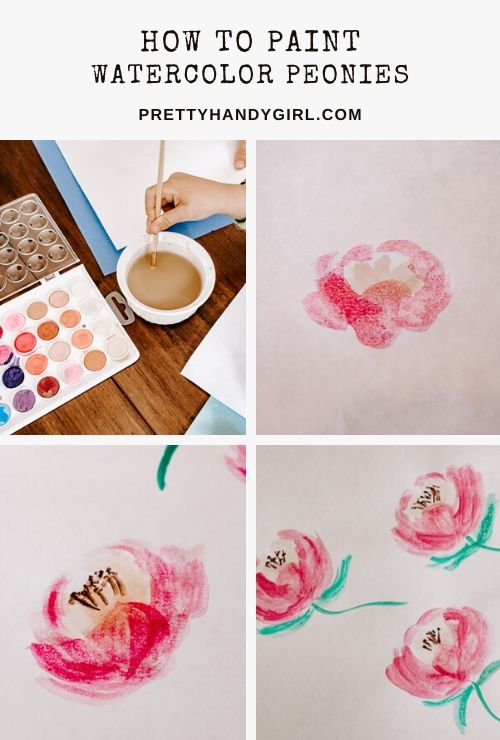
As a reminder, we’ve learned how to paint pink peonies:

How to Paint Watercolor Peony Flowers

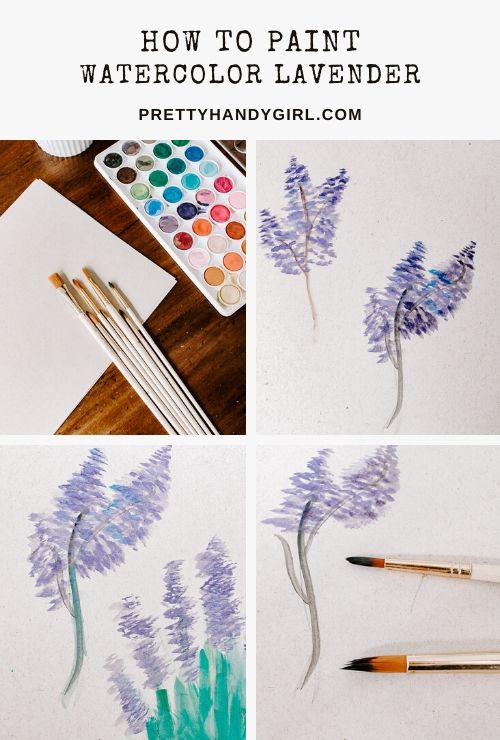
Then I taught you how to paint lavender in watercolor:

How to Paint Watercolor Lavender

Now let’s learn how to paint these daisies. Call them coreopsis. They are the cutest little flowers and so easy to create.

Let’s get started!

How to Paint Watercolor Daisies

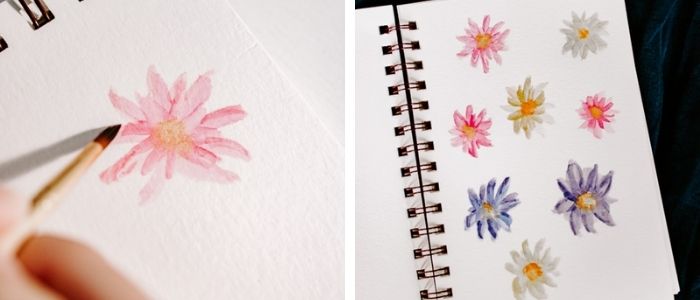
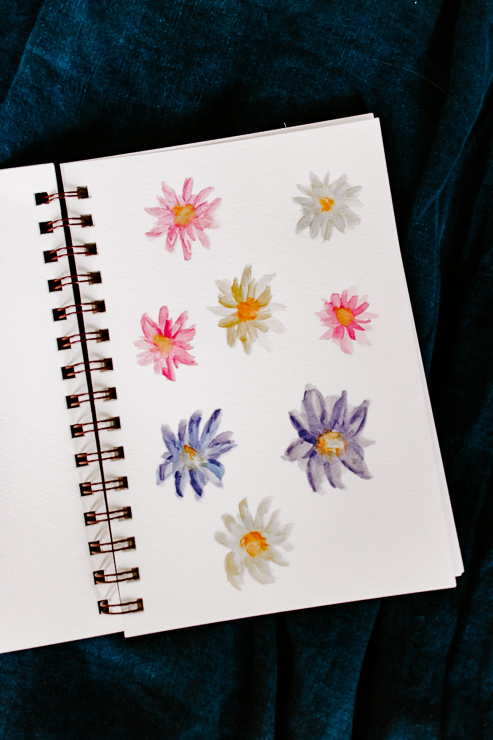
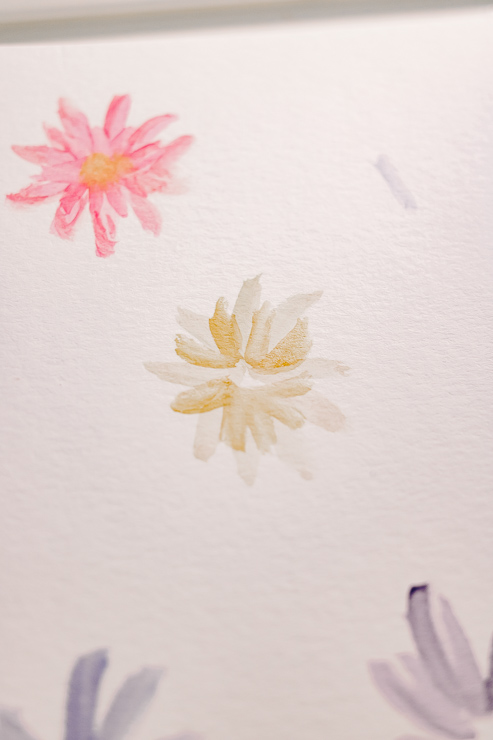
a page of yellow, purple and pink watercolor flowers

Materials:

(I’ve included affiliate links for your convenience. I earn a small percentage from a purchase using these links. There is no additional cost to you. You can read more about affiliate links here.)

Instructions:

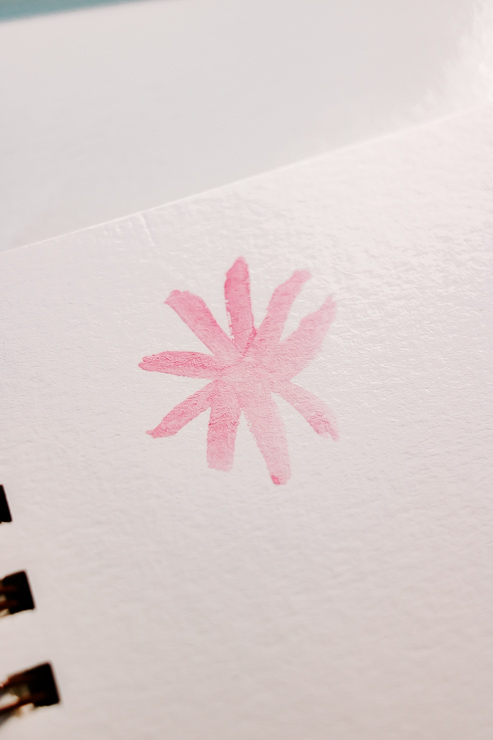
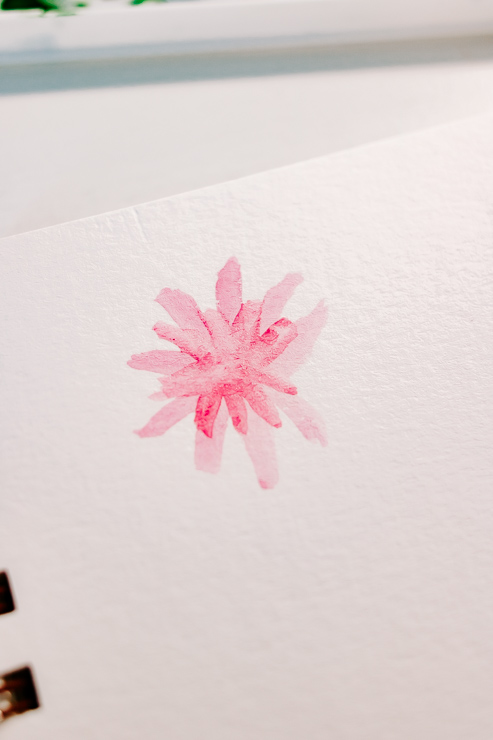
Step 1: Create a basic star flower shape

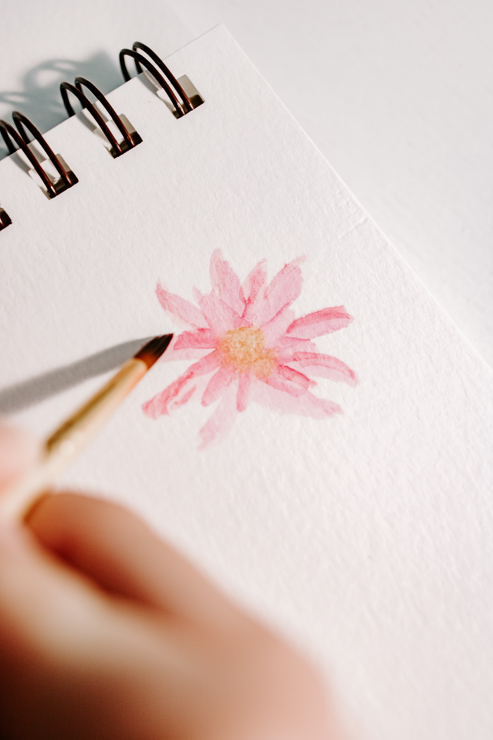
a pink watercolor flower being painted

Using a medium-sized brush, dip your brush in the water and then the color, and paint a few runny lines in a star shape. This is going to serve as the base for our flower. Don’t worry if the petals don’t look perfect right now. We are going to define them a little more at the end. Remember, watercolor is supposed to be kind of runny and imperfect.

Step 2: Create more petals deeper in color

a pink flower being painted with watercolors

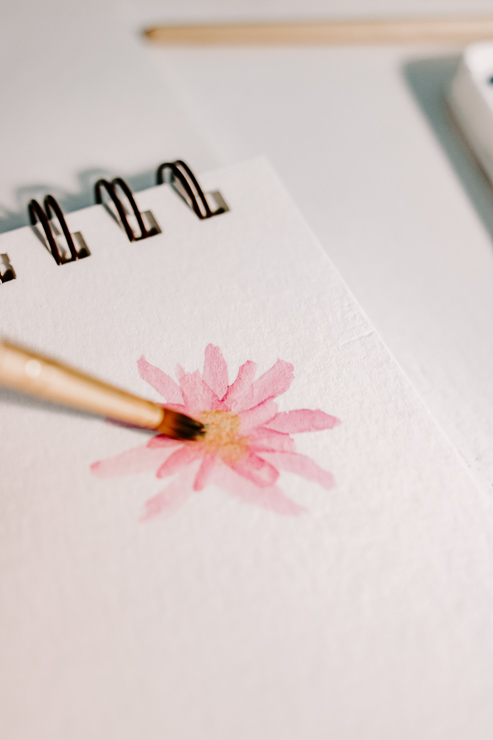
Working with the same brush we used in Step 1, grab some of the same watercolor paint. We want a richer, deeper color here so don’t use as much water. Paint a smaller star shape on top of the star shape you painted in Step 1. Try to go in between the petals previous petals. We are creating dimension and depth of the flower.

Step 3: Create the center of the flower

painting a pink watercolor daisy

Now we need to define that center part of the flower. Take a smaller brush and add a bit of yellow/orange color to it. Dot it in the center of your flower, using kind of a stippling motion. You can do this several times to create a deeper, darker center. Don’t fret, it should look somewhat messy and imperfect.

Step 4: Define your petals

painting a watercolor petal on a daisy flower

Finally, let’s take some of the petal color and define our petals a little more. You will want to use a smaller round brush for this. Dip a bit of water on the end of your brush, then dip it in the petal color. Define the ends of a few petals by outlining them. I don’t think you need to outline all of them. Use your artist’s eye here and determine what looks good.

pink watercolor daisy with yellow center

That’s it!

Put on some music and just let your brushes carry you away for a little bit. Forget about the world for a moment. We could all use a little escape.

yellow and pink watercolor daisy flowers

Thoughts on Paper:

Watercolor paper really does make a difference in how your final art looks, but you can still just use regular paper until you find the time and budget to buy some. In other words, don’t let not having the right materials hold you back. Watercolor painting is very relaxing and therapeutic.

If you make a page of these little flowers, you have yourself a little piece of frameable art for your walls. I hope you are enjoying these tutorials. Let me know if you are enjoying these watercolor tutorials in the comments below.

Stay safe out there, my friends! I’ll see you next month!

karen signature

See More of Karen’s Tutorials ~


karen from decor hintHello!  I’m Karen, the creator of the Home Decor and DIY Blog: Decor Hint. I’m a Native of the East Coast, but I currently live in beautiful Seattle with my hubby, our two wonderful children, and our spunky wheaten terrier.

You can usually find me with some sort of craft in one hand and a coffee in the other. And I’m always rearranging furniture or moving lamps from room to room. I have a passion (read: obsession) for decorating, DIY, and gardening. In short, I love making my house into a home.

Like many, I’m inspired by what I see in home decor magazines, but I’m not so inspired by the price tags.  Consequently, I love finding and creating beautiful budget-friendly home decor items. In a head to head competition, I bet you’d never know the difference between the designer items and my DIY creations!  Many of my DIY projects focus on sewing, crafting, upcycling and organizing. Some of my favorite projects have been making pretty wreaths, sewing my own tassel hand towels, and crafting these trendy wood bead garlands. I can’t wait to inspire you and spark your creativity through my DIY projects.

You can always connect with me on Pinterest, Twitter or Instagram.
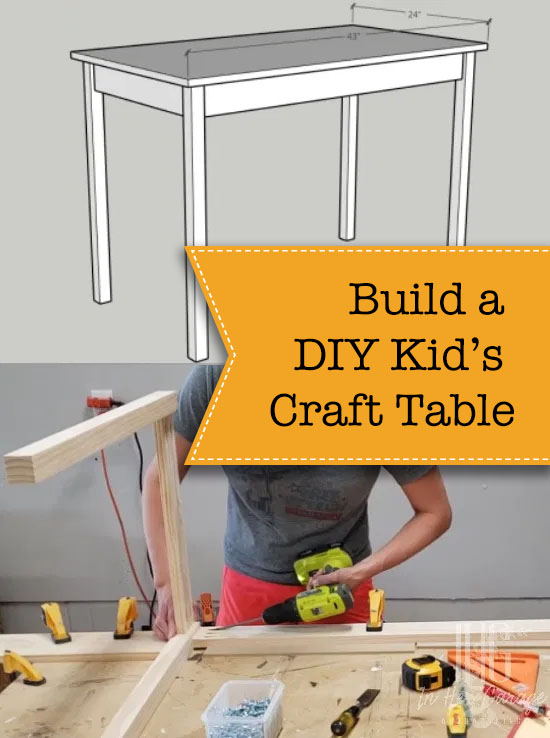
Have the kids taken over your kitchen table or island? Need somewhere to let the kids get creative? Today I am going to show you how to make a simple DIY kid’s craft table (or desk). Let’s get building.

Build a DIY Kid's Craft Table

DIY Kid’s Desk and Craft Table

If your children are going to be home this fall for distance learning or you just want a spot they can call their own, then it is time to get a space ready for them!! This DIY Kid’s Craft Table is the perfect size for whatever your child will need and it is small enough to fit in a spare corner in your home. Let’s make it!

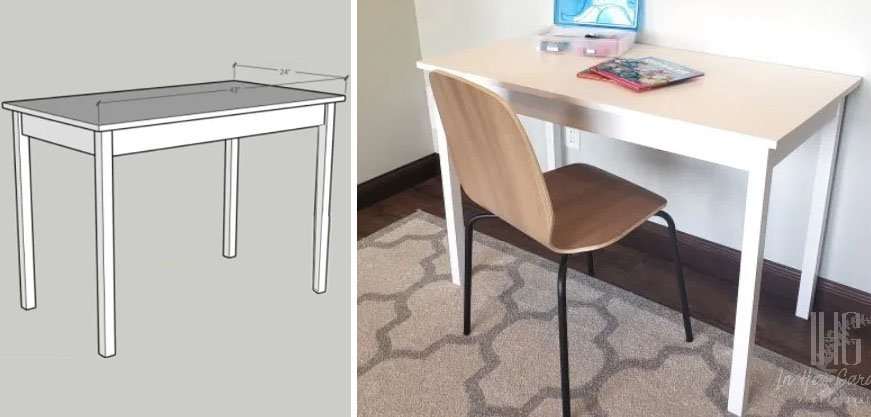
I made this particular table for a client and it measures 30”h x 43”w x 23”d but you can modify these measurements to fit your needs. Of course, the quality of lumber you use is your choice but I used clear pine from my local big box store because it paints better than using common pine boards. It may be more expensive but the boards tend to be straighter, it saves time on sanding, and I feel it yields a better-finished product. It doesn’t matter what wood you use as long as you love it.

Materials:

(I’ve included affiliate links for your convenience. I earn a small percentage from a purchase using these links. There is no additional cost to you. You can read more about affiliate links here.)

Tools:

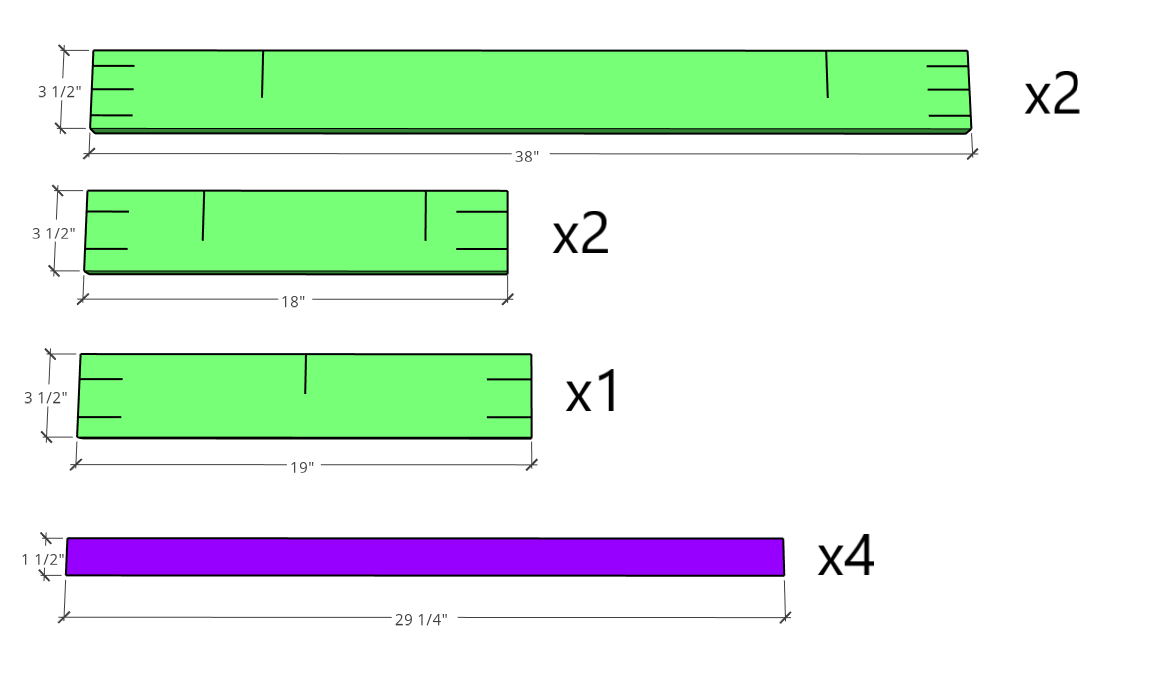
Cut list and pocket-hole placement:

  • 4- 2×2 @ 29 ¼”
  • 2- 1×4 @ 38” (3 pocket-holes in each end)
  • 2- 1×4 @ 18” (2 pocket-holes in each end)
  • 1- 1×4 @ 19” (2 pocket-holes in each end)
  • 3/4”x 43”x 23” birch plywood

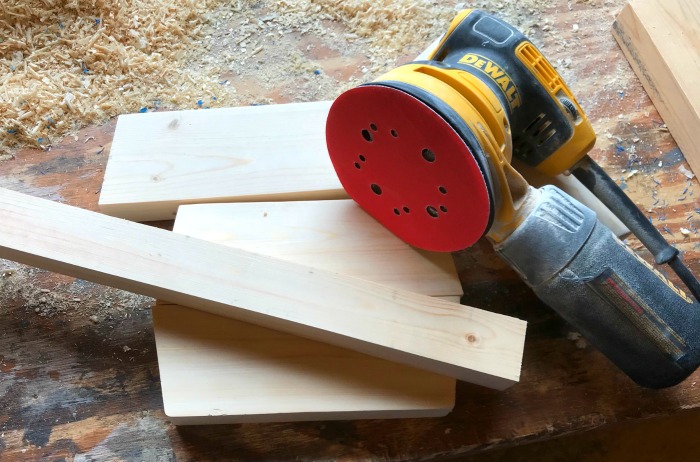
Step 1: Sand table components

  • I know it seems odd to start with this step but trust me when I tell you it is much easier to sand these boards before they are in place. Depending on how rough your lumber is, begin using 60-80 grit sandpaper and incrementally work your way up to 220 grit sandpaper.  I chose to use clear pine found at my local big box store so I was able to start with 120 grit sandpaper, which cut down my sanding time. This makes the extra money spent, well worth it!

Step 2: Assemble both table sides

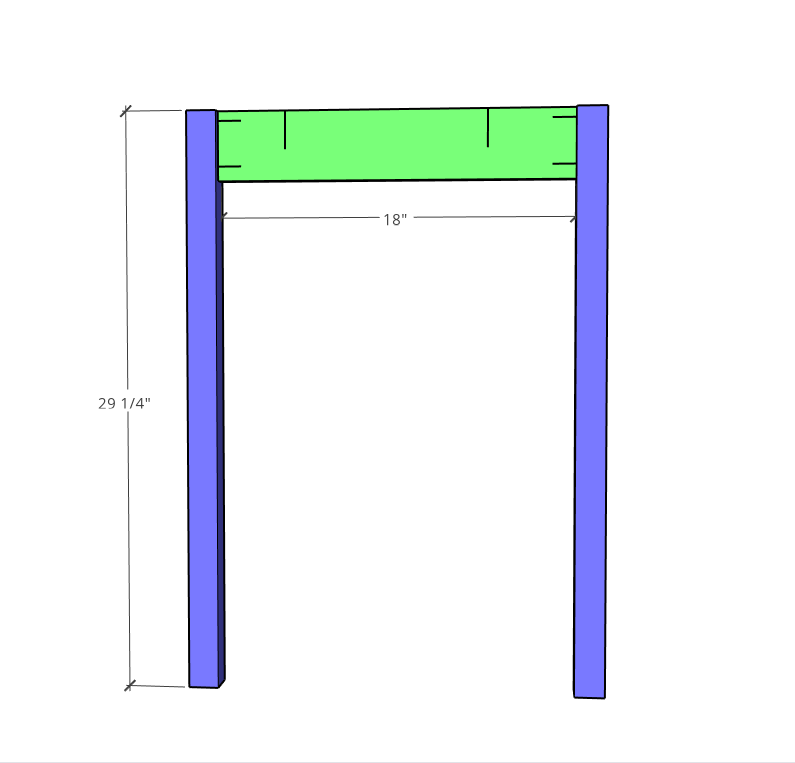
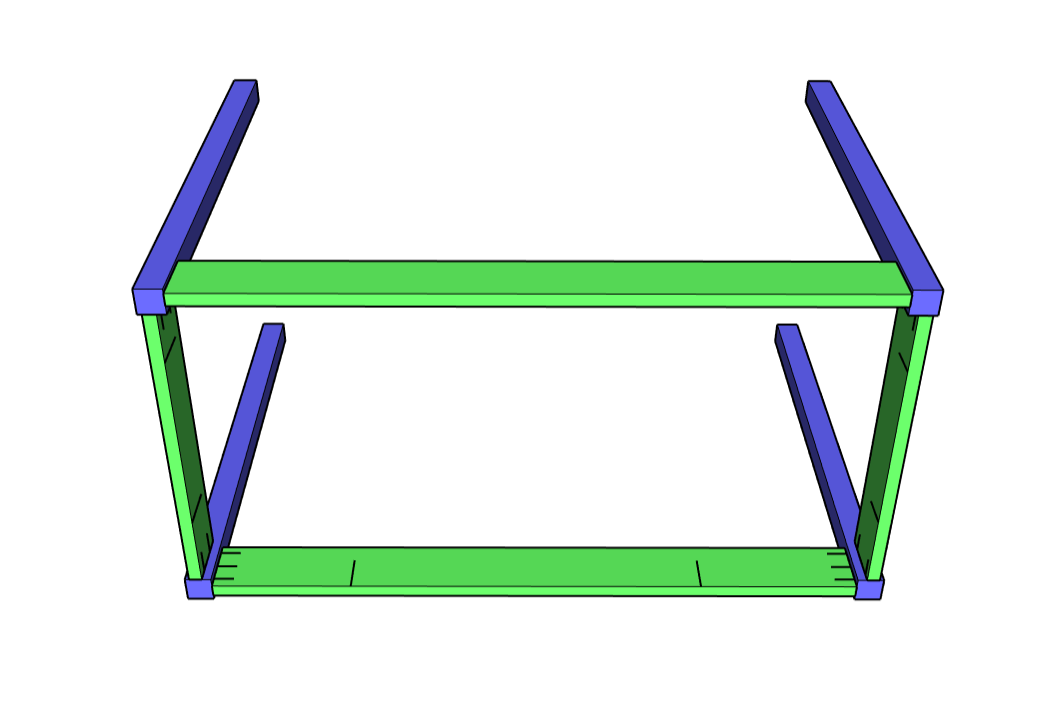
  • Sandwich one 1 x 4 x 18” (apron) board between two 2 x 2 x 29 ¼” (leg) boards. Pocket-holes should be facing up.
  • To add a little detail, place a ¼” piece of scrap beneath the 1×4 board to inset it slightly. This will create a shallow reveal looks nice and also gives you a little grace because now the three boards don’t have to be flush to the same surface perfectly.
  • Clamp the legs and apron boards together and join them using wood glue and 1 ¼” pocket screws.
  • Repeat these steps for the other side of the table.

Step 3: Attach the front and back table aprons

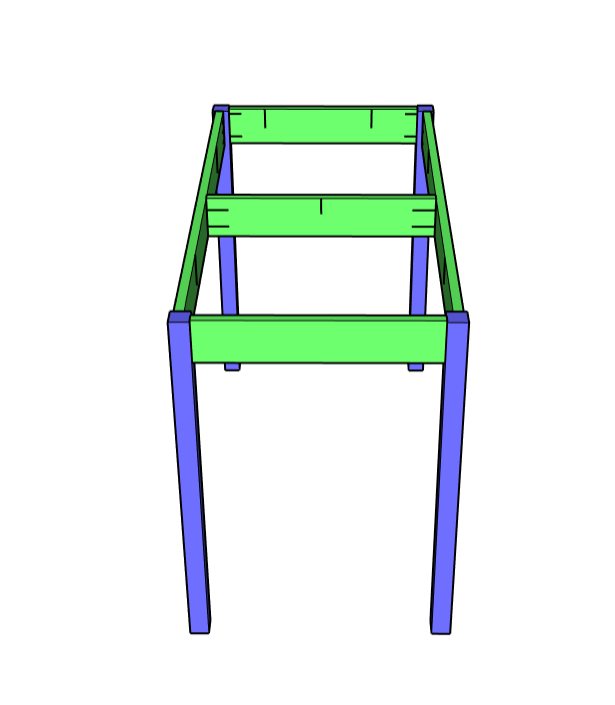
  • With both side components standing on their sides sandwich a 1 x 4 x 38” (apron) board between them, again placing a ¼” board beneath the apron to inset it slightly.
  • Align the top of the 1×4 with the top of the side components.
  • Clamp and attach using wood glue and 1 ¼” pocket screws.
  • Carefully flip the piece over and repeat the above steps to attach the second 1 x 4 x 38” apron board.

Step 4: Attach center support

  • Attach the center support using wood glue and pocket screws between the two 1 x 4 x 38” boards centered in the middle.

Step 5: Clean up

  • With a putty knife or chisel gently remove any glue squeeze out and sand smooth.

Step 6: Edge banding

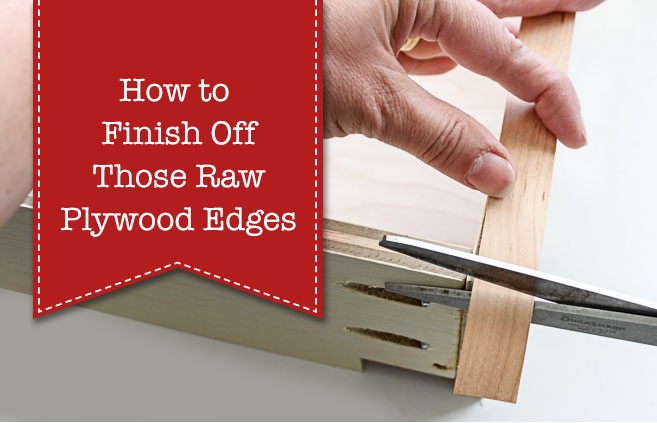
  • Once the plywood top is cut to size you will need to edge band to cover up the unsightly edges. I won’t go over all of the steps here but if you are new to edge banding please check out this tutorial on How to Finish Raw Plywood Edges.


Step 7: Finish

  • Time to paint or stain and topcoat!! My client wanted this piece painted white, so I chose a premium latex paint and used a water-based topcoat to protect the paint and prevent yellowing of the finish in the future.

Step 8: Attach the top

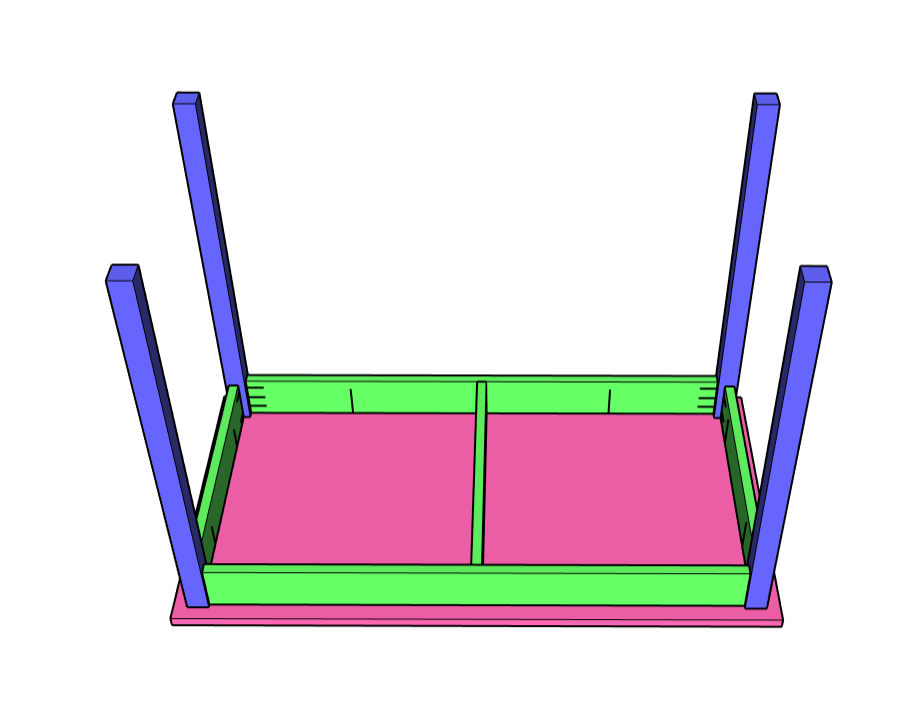
  • Place the tabletop on a flat surface (bottom side up) and center the base over the top upside down.
  • This plan allows for a 1” overhang of the top on all sides of the table base.
  • Using the pocket-holes that are shown in the diagrams below, attach the top with 1 ¼” pocket screws.

    • Note: Normally I would not recommend attaching a tabletop using pocket screws IF that top were made of solid wood because of wood’s tendency to expand and contract. However, this top is made of plywood and the amount of expansion and contraction that will happen over time is negligible and should not affect the structure of the table base.  If you are uncomfortable using pocket-holes to attach the top then feel free to attach it in some other way, such as with figure-8 fasteners or Z-clips.

Flip it over and admire your handy work!! Isn’t this DIY Kid’s Craft Table adorable?!

Check out my latest blog post about building a DIY Folding Craft/Sewing Table! This table is large enough for any craft project but folds down when you don’t need it. Perfect for anyone with a small space but large crafting ambitions!

Hi! I’m Kristen, from In Her Garage, and I am a self-taught woodworker and DIY fanatic from Minnesota where I live with my husband and our two daughters. Between being a wife, mom, and registered nurse, I try to make as much time for DIY as possible. My love for building came after our family built our current home in 2015. After we moved in, we needed furniture, and instead of spending massive amounts of money to order the items we wanted I decided that I would build them myself. I started with a buffet table plan from the fabulous Ana-white and quickly set out to remodel my entire home office.

Since then I have started a side business building furniture for the people in my community. I love hearing my clients talk about the pieces they wish they had whether it be a rustic buffet table, a one drawer side table, or a toy box and then making it a reality for them. While starting my small business it made perfect sense that I would document my building journey so I simultaneously launched the In Her Garage blog and I love sharing my plans, tips, and tricks.
 

I am so glad that you found me here and please feel free to connect with me on PinterestInstagram, and Facebook to see what I am working on right now.


If you enjoyed this tutorial and are looking for other cute ideas for kid’s desk or craft table check out these two fun projects. Both of these could be great projects you could do with the kids to keep the fun going.

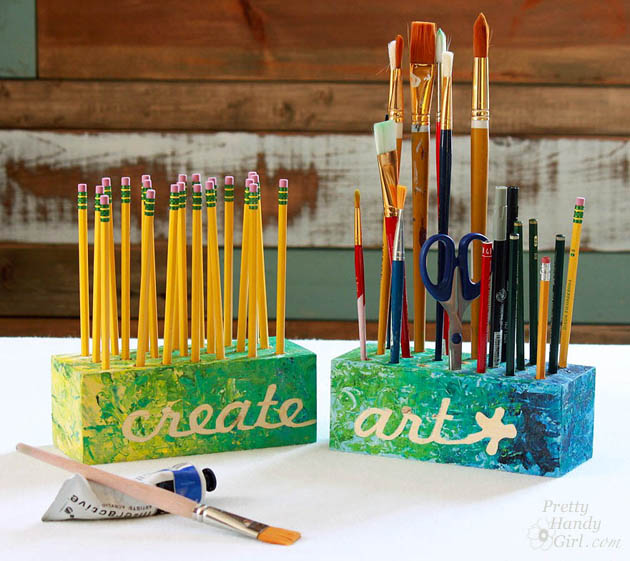
Creative Block Desk & Art Utensil Holder

create_art_block_holders_sm

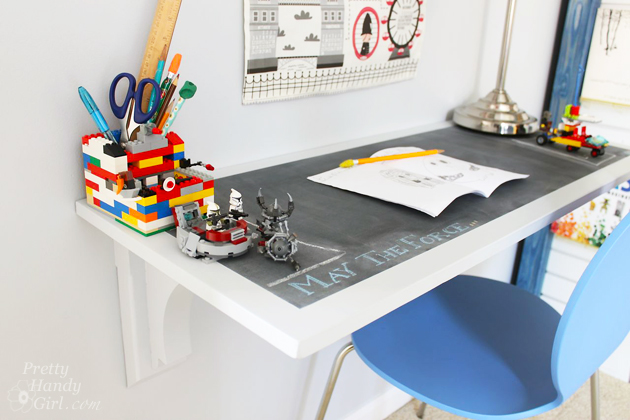
Creating a Chalkboard Desktop.

How to Make a Chalkboard Surface Desk | Pretty Handy Girl