Many of us have been staring at the same walls and doors in our homes for many years (or maybe many decades.) If you’ve wanted to give your home an update, painting a door is a quick and easy way to do just that. Today I’ll to show you how to paint doors (the professional way) so they look amazing for years (or decades) to come.
How to Paint Doors like a Professional | Pretty Handy Girl

How to Paint Doors (The Professional Way)

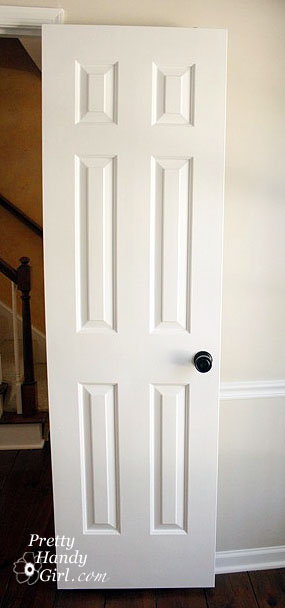
So you want to paint like a pro? Well, sit back and let me give you some tips and a tutorial for painting a door. This tutorial pertains to any paneled door (interior or exterior).
How to Paint Doors like a Professional | Pretty Handy Girl

Our doors are all the six panel type. If you have flat (non-panel) versions, you can skip this post and come back later. For the rest of us, get out your paper and pencils and take some notes (does anyone do this anymore?)

Materials:

(I’ve included affiliate links for your convenience. I earn a small percentage from a purchase using these links. There is no additional cost to you. You can read more about affiliate links here.)

optional: Painting Pyramids

How to Test for Latex or Oil Paint?

To determine if you need to prime your door you need to assess if your door was painted with latex or oil paint first. To test the paint, rub a small spot with rubbing alcohol (or ammonia) and if the paint comes off it is latex. If not, it’s oil paint.

How Do I Know if My Door Has Lead Paint:

You can easily test your door (or any paint) for the presence of lead by using a lead test swab. I go into more detail about lead paint in this tutorial.
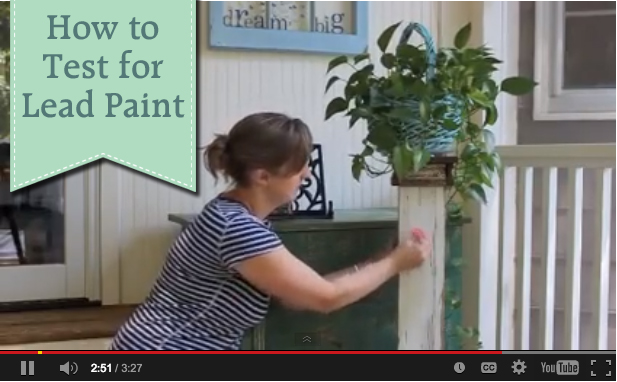
How to Easily Test for Lead Paint

But, the short of it is, if you have lead paint, you must be very careful when sanding it. Cover the area with disposable plastic. Use a wet sanding block (never use a power sander). Wear a respirator and be sure to clean everything with disposable wet wipes.)

When Do You Have to Prime?

As we determined above, if your door was painted with oil-based paint (and you want to use latex paint) you will need to prime. But, here are a few more reasons you need to prime your door first:

  • Bare wood or stained wood doors.
  • Dark painted doors you wish to paint lighter (or vice versa), you want to use a tinted-primer to cut down on coats.
  • If the door was painted with oil and you want to use latex paint. If you are painting over latex with latex (or oil over oil) and the previous paint job is in good shape you can skip the primer. (This was the case with my door, so I didn’t prime it.)
  • The paint is chipping. First, scrape or sand any flakes and then prime. (Important: Check for Lead Paint First.)
  • Lead paint (whether in good shape or not), you will need to prime.

Should I Remove or Paint a Hung Door?

The easiest way to paint a door is to remove the door, then remove the knobs and latch. Then you can lay it horizontally on sawhorses. Painting a door on sawhorses eliminates potential drips and is easier on your back. But, removing the door can also be a pain, especially if it’s a large solid wood door. I’ve painted plenty of doors without removing them, and they look great. It comes down to personal preference.

Preparation:

Whether you are removing the door or painting it in place, be sure to cover the area underneath with a drop cloth, newspapers, or flattened cardboard boxes (my favorite for hung doors because it gives some cushion when you are kneeling on the floor.

Lightly sand the entire door. No need to bust out the power sander, you can use a sanding block or sheet of sand paper. Be sure to sand down any bumps or blemishes. The main goal is to give your door a little “tooth” for the new paint or primer to adhere to. Wipe off the door with a damp rag to remove any sawdust.

Instructions for How to Paint Doors the Professional Way.

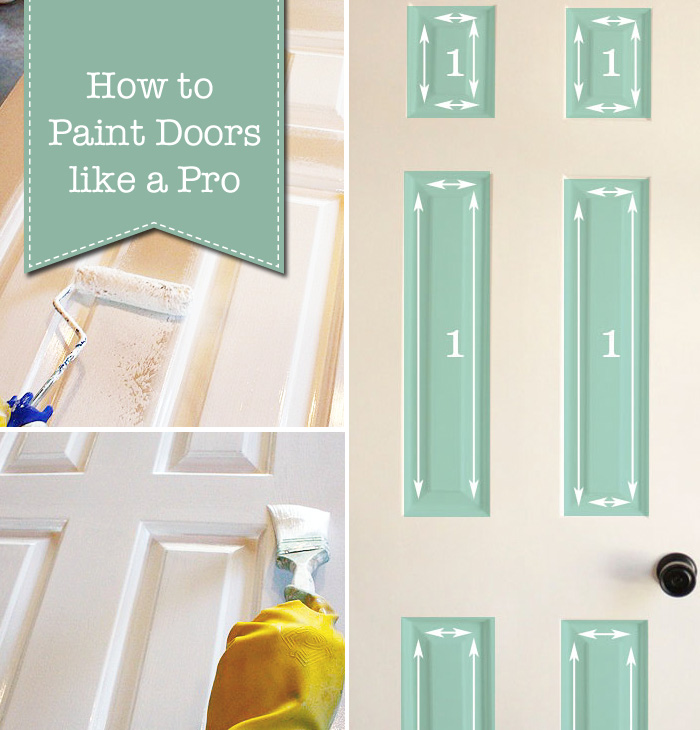
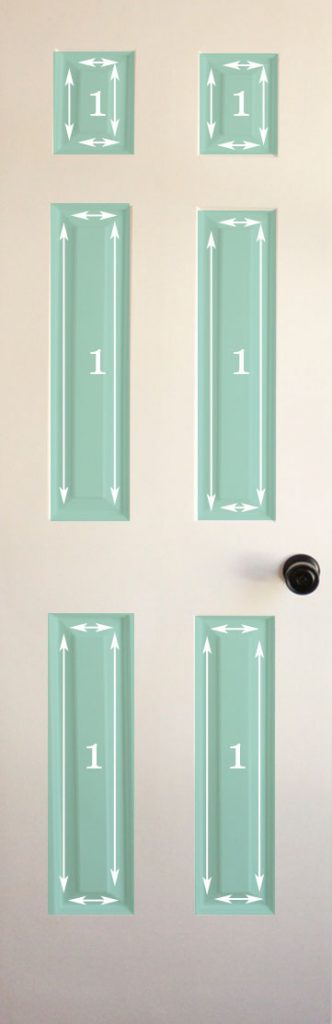
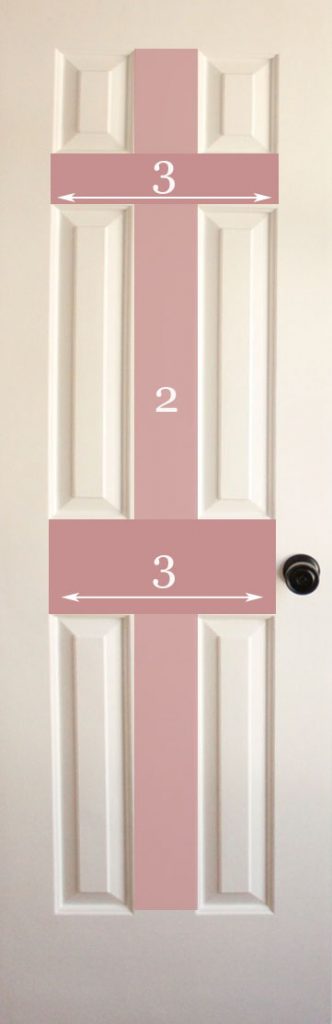
Step 1: Paint the interior panels first as shown in the graphic below.
How to Paint Doors like a Professional instructions

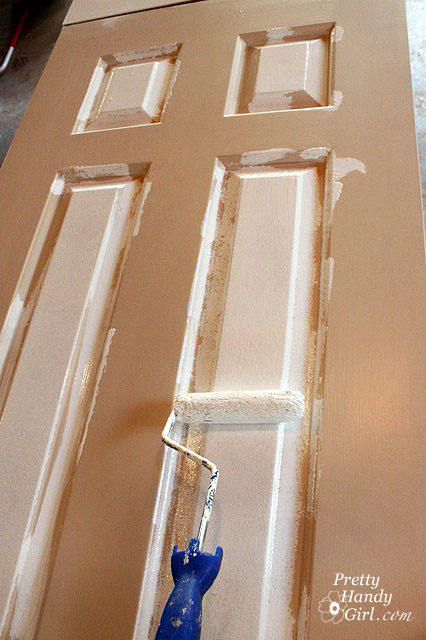
Using a small roller to paint doors can greatly speed the process. Begin by rolling paint on the flat panels. Work quickly by rolling on the paint, then use a brush to smooth out the paint and fill in the detailed areas around the flat panel.

This is one of the most important tips for getting a professional look:

Follow the grain direction when brushing on the paint

If you follow the grain and the direction of the arrows in the graphic above, you will maintain the look of the door construction. Original wood doors are made with several pieces and the wood grain changes direction. Even if you have cheap hollow core doors, you can fake the look of a quality door by following the grain pattern.
How to Paint Doors like a Professional Panels

In other words: NEVER run your brush strokes perpendicular to the wood grain. This does NOT look professional.
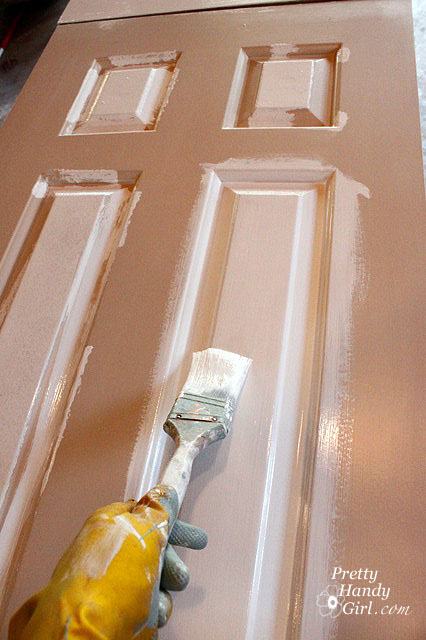
How to Paint Doors like a Professional | Pretty Handy Girl

Step 2: Next, roll the inside center vertical piece. Start by rolling the paint on in an up and down direction.

How to Paint Doors like a Professional | Pretty Handy Girl

Then drag your brush up and down vertically with the wood grain (see arrows in the above diagram.)
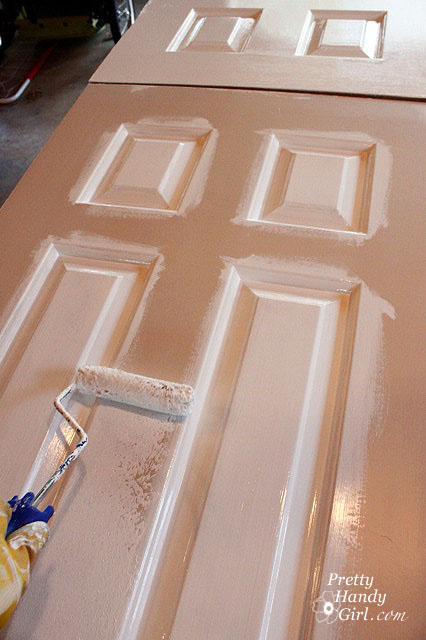
How to Paint Doors like a Professional | Pretty Handy Girl

Step 3: Next paint the horizontal cross pieces in the middle of the door.
How to Paint Doors like a Professional | Pretty Handy Girl

Keep your brush strokes horizontal (with the grain) and cross over the tall vertical center.
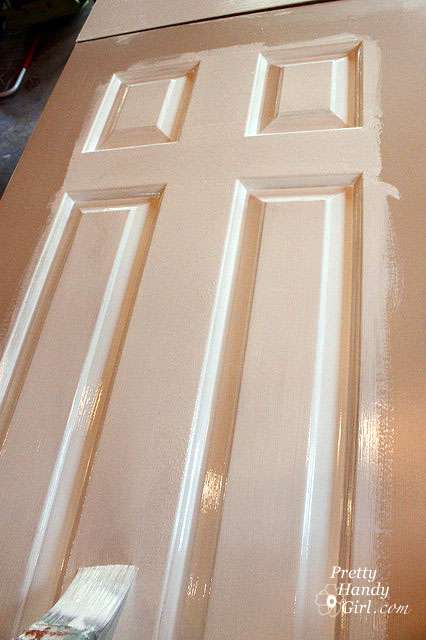
How to Paint Doors like a Professional | Pretty Handy Girl

Step 4: Paint the door border. Pay attention to the direction of the wood grain for this last step. The grain on the two sides should go vertically from top to bottom.
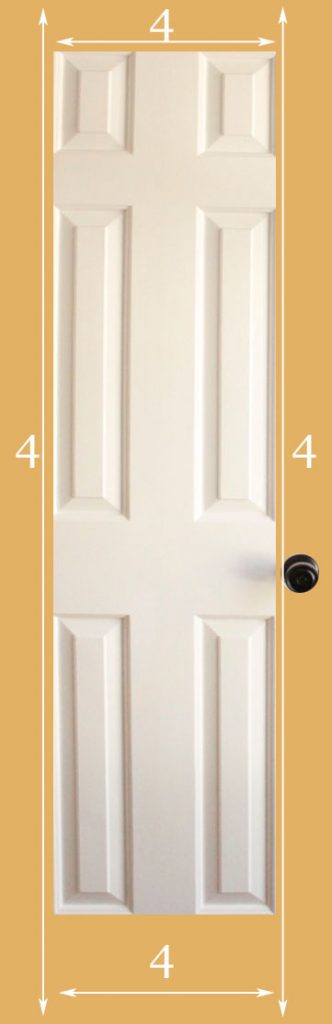
How to Paint Doors like a Professional | Pretty Handy Girl

There are header and footer panels sandwiched between the left and right sides. These “sandwiched” pieces should be painted by dragging your brush horizontally (see diagram above.)
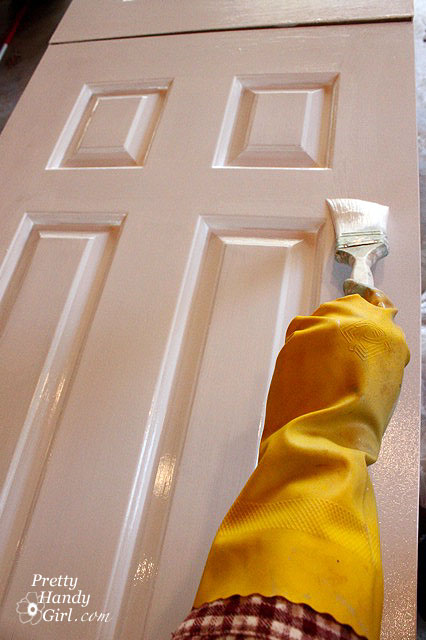
How to Paint Doors like a Professional | Pretty Handy Girl

Step 5: The last step is to paint the edges of the door. (Do Not paint the hinges…that’s not very professional either!) If your hinges or doorknobs were painted previously you can follow this tutorial with four ways to remove paint from metal hinges.
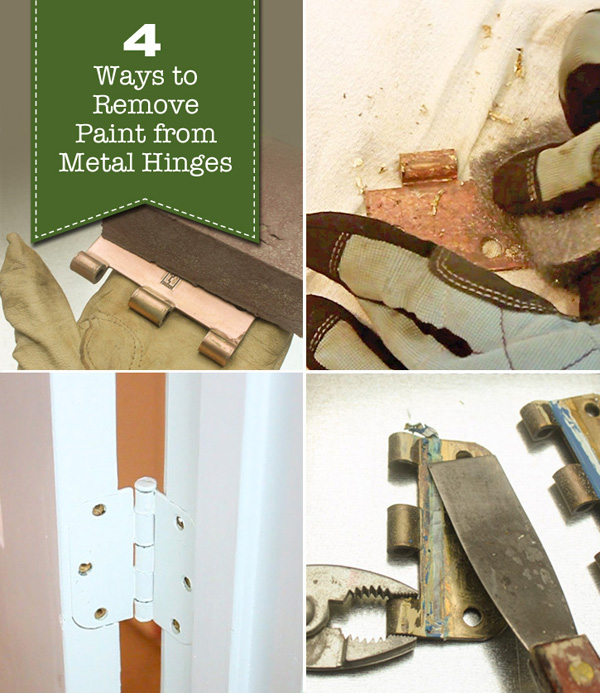
4 Ways to Remove Paint from Metal Hinges (& more) | Pretty Handy Girl

Roll paint onto the edges then smooth them with the paintbrush. Be on the lookout for drips or puddles of paint. Go back and check the face of your door for drips now before the paint cures.

Let your door dry (30 minutes – 1 hour), then follow up with a second coat of paint. When you are done let the doors dry for 2+ hours before flipping to paint the other side. I have found that it helps to put pieces of cardboard or rags under the door so the paint doesn’t stick to the sawhorses. But you can also buy Painting Pyraminds which elevate the door and hold it on tiny points.

Ready to perfect more of your painting skills? Check out the Paint Week series with 5 Lessons to Perfect Your Painting Skills:

Paint Week - 5 Lessons to Perfect Your Painting Skills

And if you really want to paint your front door but can’t decide on a color, you’ll love this collection of Bold Colored Front Doors!


Bright and Bold Colorful Front Doors

signature

Need a quick gift using scrap wood? A Creative Block Desk & Art Utensil Holder is an easy and fun gift to make and certainly a project that you can customize to meet your needs. Best of all, the kids can help with the painting step!

create_art_block_holders_sm

Creative Block Desk & Art Utensil Holder

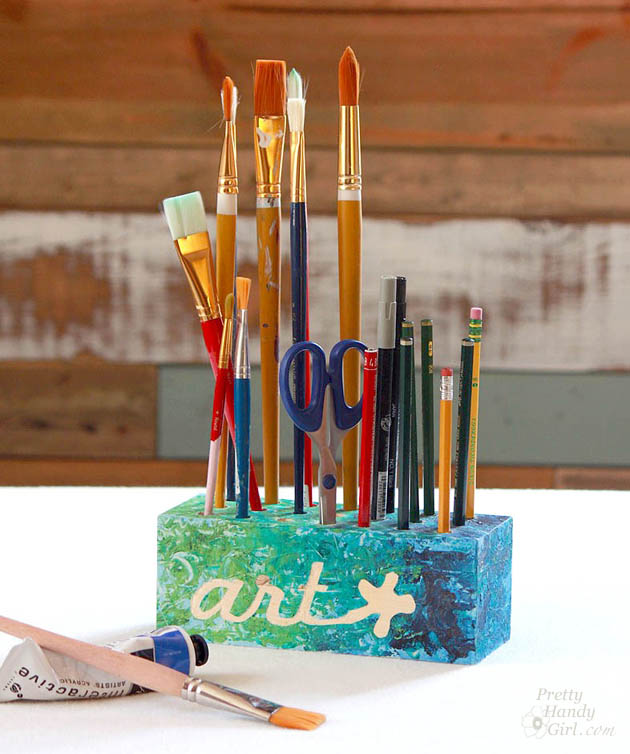
Mother’s Day is this coming weekend! Have you decided how to show her your appreciation and love?! I did! My mother is a professional artist. She creates amazing paintings that inspire others and brightens their homes. For Mother’s Day I wanted to brighten her studio with these art utensil holders. I call them “Creative Blocks.”

Go ahead and raid your scrap pile and join us as we make these colorful and fun Creative Block Desk & Art Utensil Holders.

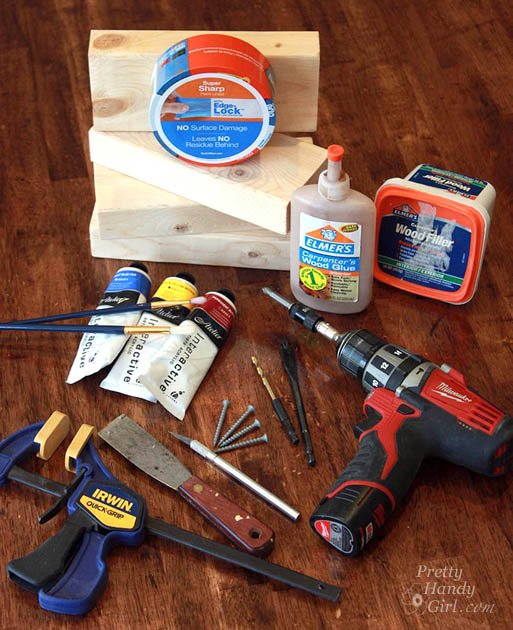
Materials:

(I’ve included affiliate links for your convenience. I earn a small percentage from a purchase using these links. There is no additional cost to you. You can read more about affiliate links here.)

materials_wood_blocks_sm

Instructions:

1. Block assembly: Select two 2×4″ scraps cut to the same length. Spread glue on one board and sandwich them together.

glue_blocks_together_sm

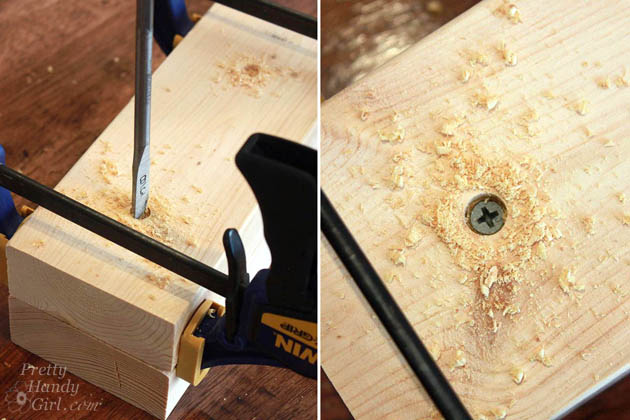
Clamp the wood together and drill two small holes to countersink the heads of the screws. Drive two screws into the bottom of the wood to hold the pieces together.

drill_blocks_together_sm

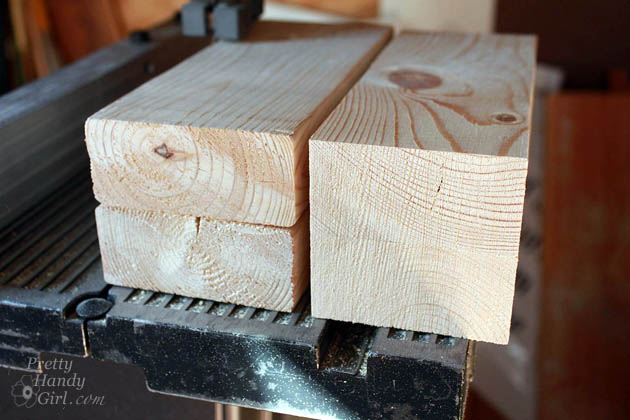
Use a band saw, jigsaw, or table saw to trim off the rounded edges of the wood so you have a square block of wood with straight corners.

square_off_2x4s_bandsaw_sm

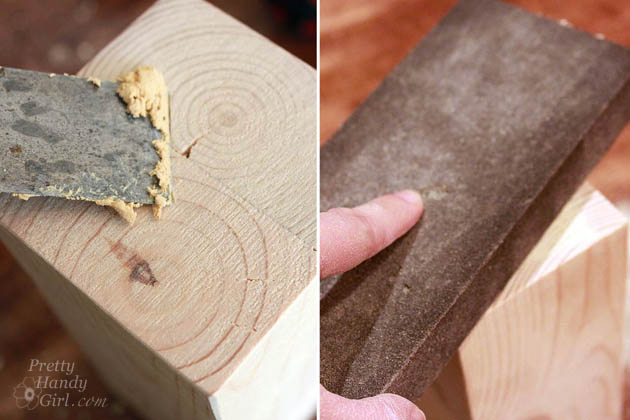
Putty any cracks or holes. Sand until smooth.

putty_and_sand_blocks_sm

2. Creating the mask:

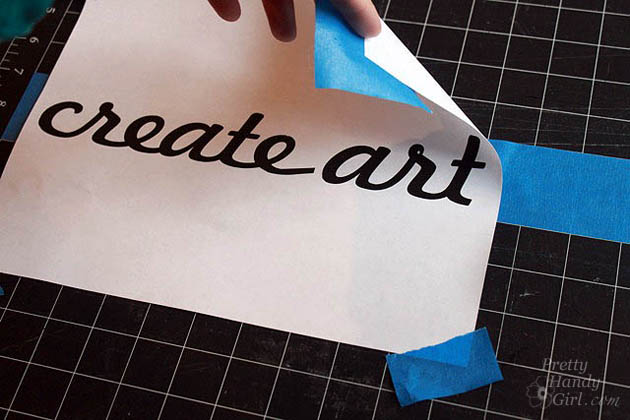
If you have a craft cutter (Silhouette or Cricut) you can create a mask in vinyl easily. But, if you don’t you can use the computer to print out your words. Lay the print out on top of a strip of Painter’s Tape. Use a few pieces of tape to secure the corners.

create_art_printout

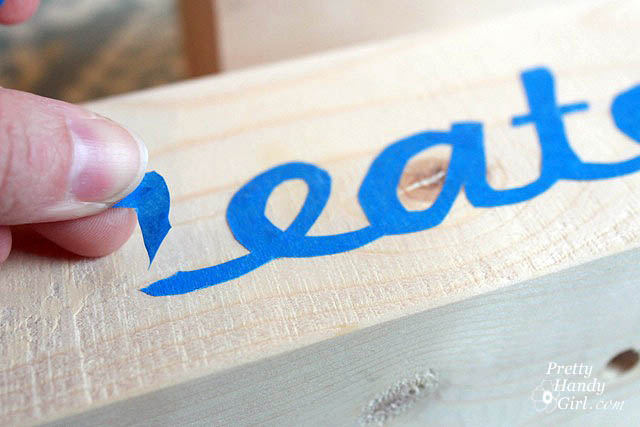
Trace around the words with the X-acto knife (be sure to have a few fresh blades on hand.) Transfer the resulting cut-out tape onto the block of wood. Press the edges of the tape mask to secure the tape.

add_scotch_blue_tape_letters

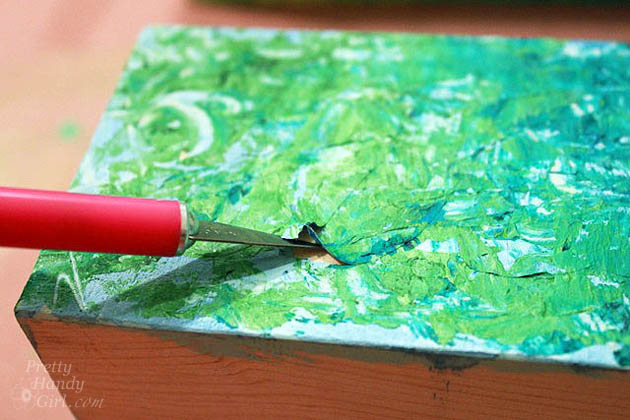
3. Painting the block: Paint a base color onto the block. Then use a brush and/or palette knife to dab thick paint over the block (minus the base.) Use the X-acto knife to gently peel off the tape mask. Let the paint dry thoroughly overnight.

lift_tape_up

4. Drilling Holes:  After the paint has dried completely, mark the location of the utensil holes with a pencil. Put a piece of painter’s tape on the drill bit to mark the depth of your holes. Clamp the block and drill holes at each pencil mark.

drill_holes

Dump sawdust out of the holes.

Wrap up the blocks in gift wrap and enjoy the look of joy as your Mom opens her Creative Block Mother’s Day gift!

create_pencil_holder_sm

art_brush_holder

You know, as an artist myself, I almost loved these too much to give them away. But, my Mom is worth it. (And I can make another set if I want ;-).)

create_art_block_holders_sm

For more last-minute Mother’s Day gift ideas and many other creative projects, check out the Gift Ideas section here on the blog.

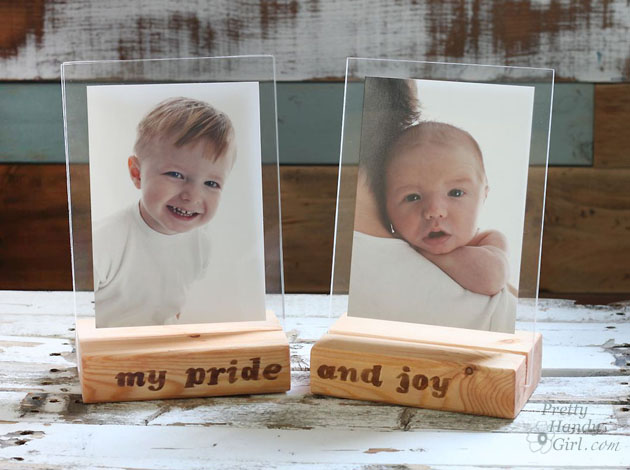
PHGFancySignIf you liked this project, you’ll love these floating picture frames using more 2×4 scrap wood.

wood-block-picture-frames

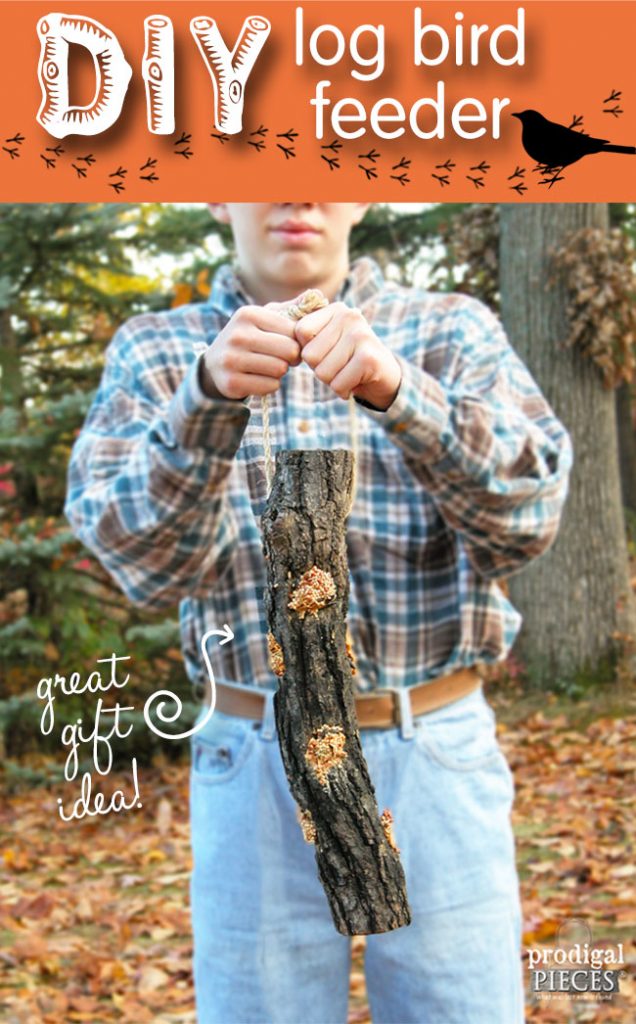
Give your feathered friends a treat from spingtime through winter. Make this easy-peasy DIY log bird feeder with one tool and a few basic materials by Prodigal Pieces for Pretty Handy Girl www.prodigalpieces.com #prodigalpieces

Hello readers, I’m Larissa coming to share with you a nature-inspired DIY project. Today, we’ll learn how to create a special DIY Log Bird Feeder treat for our feathered friends. The best part is that this can be a family fun activity to do AND to give as a gift for anyone who loves bird watching.

Give your feathered friends a treat from spingtime through winter. Make this easy-peasy DIY log bird feeder with one tool and a few basic materials by Prodigal Pieces for Pretty Handy Girl www.prodigalpieces.com #prodigalpieces

DIY Log Bird Feeder

We are avid bird lovers in our home and were delighted when a friend of mine gave us this bird feeder made from a piece of firewood and rope. How easy is that?

Give your feathered friends a treat from spingtime through winter. Make this easy-peasy DIY log bird feeder with one tool and a few basic materials by Prodigal Pieces for Pretty Handy Girl www.prodigalpieces.com #prodigalpieces

What a delight it is to see our tree clinging birds (nuthatches, tufted titmice, and woodpeckers) come for a visit and see their excitement at the treat they’ve found, especially the birds that overwinter. Did you know that migratory birds will remember your home the next time they’re passing through and will come back again year after year if you continue to provide nourishment for them? It’s like a reunion each spring and winter. Fun!

So, let’s grab some materials and get ready to create a DIY log bird feeder!

Give your feathered friends a treat from spingtime through winter. Make this easy-peasy DIY log bird feeder with one tool and a few basic materials by Prodigal Pieces for Pretty Handy Girl www.prodigalpieces.com #prodigalpieces

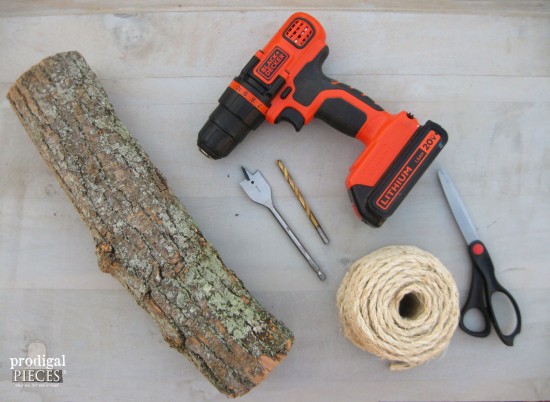
Materials:

(I’ve included affiliate links for your convenience. I earn a small percentage from a purchase using these links. There is no additional cost to you. You can read more about affiliate links here.)

Picking Your Log:

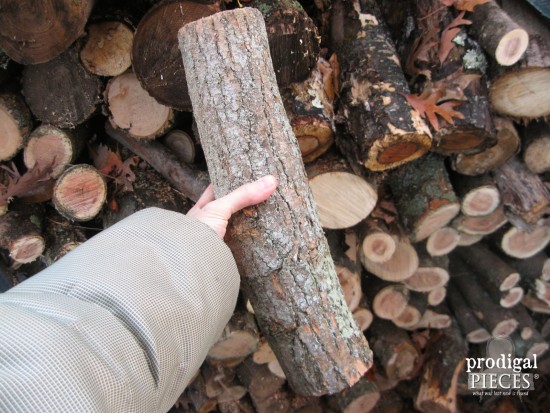
We are blessed to have a fireplace, so we always have a stash of firewood on hand. For your log, you can use a downed branch or head to your own stash to grab a piece of wood.

Give your feathered friends a treat from spingtime through winter. Make this easy-peasy DIY log bird feeder with one tool and a few basic materials by Prodigal Pieces for Pretty Handy Girl www.prodigalpieces.com #prodigalpieces

The tree-clingers prefer a chunky bark, but any tree variety will do.

Give your feathered friends a treat from spingtime through winter. Make this easy-peasy DIY log bird feeder with one tool and a few basic materials by Prodigal Pieces for Pretty Handy Girl www.prodigalpieces.com #prodigalpieces

Instructions:

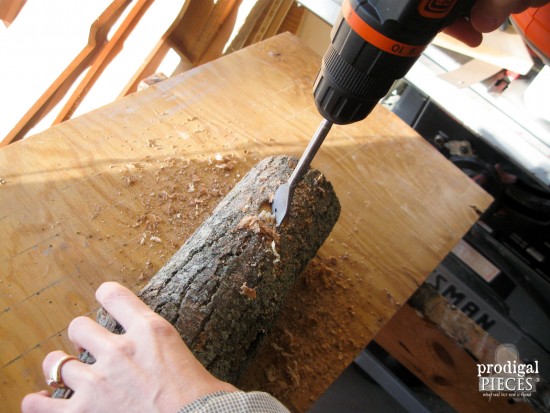
Clamp your log and keep your hand clear from the drill bit. Wear appropriate eye protection.

Give your feathered friends a treat from spingtime through winter. Make this easy-peasy DIY log bird feeder with one tool and a few basic materials by Prodigal Pieces for Pretty Handy Girl www.prodigalpieces.com #prodigalpieces

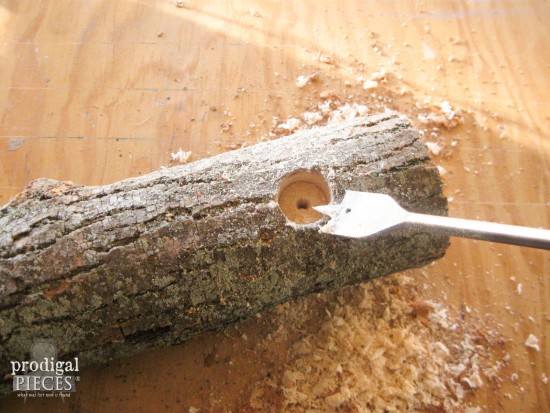
To start, use a 1″ spade bit to drill a hole approximately 1/2″ deep, 2 inches down from the top.

Give your feathered friends a treat from spingtime through winter. Make this easy-to-build DIY log bird feeder with one tool and a few basic materials.

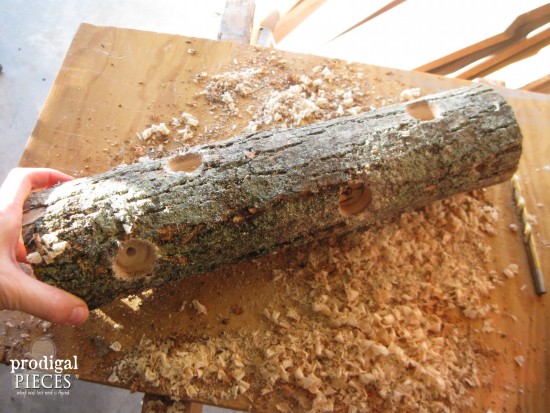
Drill a second hole on the same face about 6″ below the first.

Roll the log a quarter turn and drill in the next face starting with the first hole about 5″ from the top and then a second hole 6″ below that one. (This does not have to be exact and gives a more rustic feel when randomly chosen.)

Give your feathered friends a treat from spingtime through winter. Make this easy-peasy DIY log bird feeder with one tool and a few basic materials by Prodigal Pieces for Pretty Handy Girl www.prodigalpieces.com #prodigalpieces

Repeat those steps until you have two sets of matching faces on opposing sides.

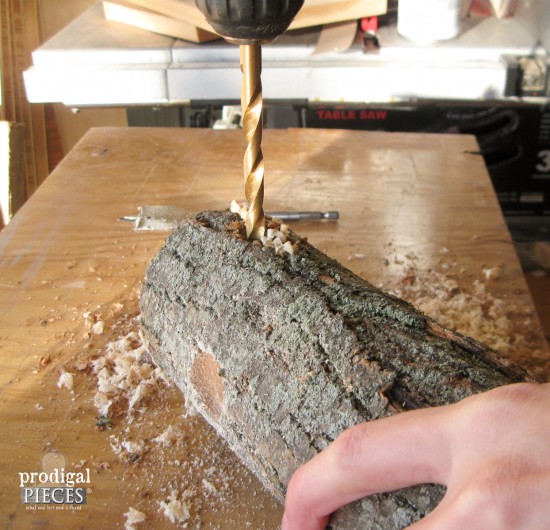
Drill your rope hole using a 5/16″ bit. Starting on the face that has the first hole 5″ down, drill your rope hole 2″ from the top, making sure to go completely through the log.

Give your feathered friends a treat from spingtime through winter. Make this easy-peasy DIY log bird feeder with one tool and a few basic materials by Prodigal Pieces for Pretty Handy Girl www.prodigalpieces.com #prodigalpieces

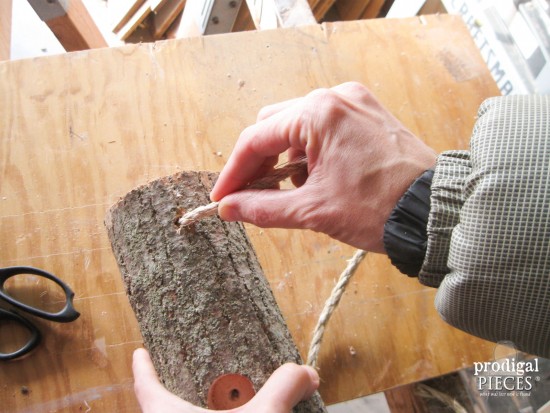
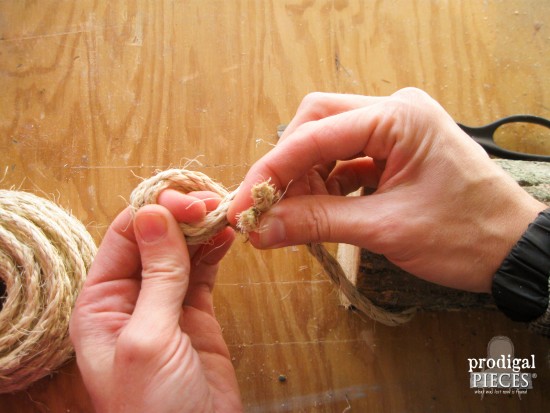
Cut a 2′ or longer piece of rope and thread it into the hole. If you turn the rope in the direction of the braid (counter-clockwise) while inserting it, that will help the rope go through smoothly.

Give your feathered friends a treat from spingtime through winter. Make this easy-peasy DIY log bird feeder with one tool and a few basic materials by Prodigal Pieces for Pretty Handy Girl www.prodigalpieces.com #prodigalpieces

Once through, tie the rope ends together using a basic knot.

Give your feathered friends a treat from spingtime through winter. Make this easy-peasy DIY log bird feeder with one tool and a few basic materials by Prodigal Pieces for Pretty Handy Girl www.prodigalpieces.com #prodigalpieces

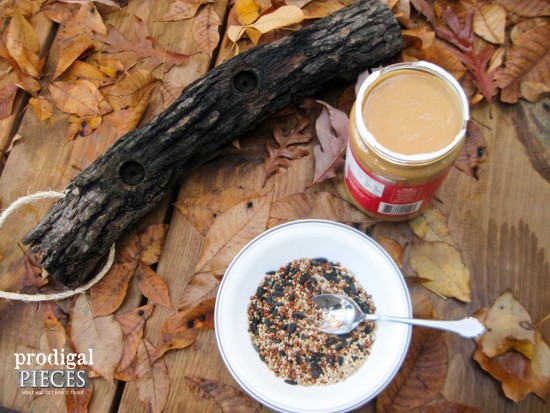
On to the fun part! Birds burn a ton of protein flitting about, so they need to store up as much as they can. We prefer to use chunky peanut butter and then roll it in seeds like this.

Give your feathered friends a treat from spingtime through winter. Make this easy-peasy DIY log bird feeder with one tool and a few basic materials by Prodigal Pieces for Pretty Handy Girl www.prodigalpieces.com #prodigalpieces

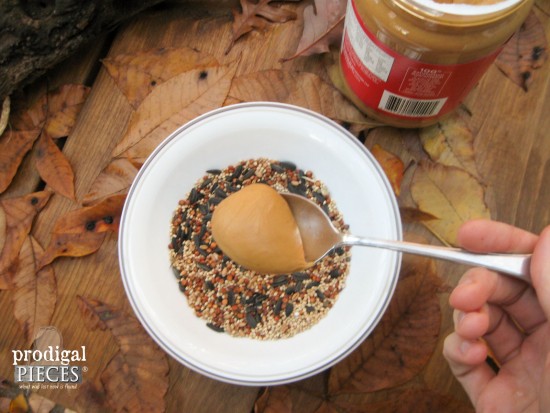
Grab a tablespoon of peanut butter and place it in a bowl of birdseed.

Give your feathered friends a treat from spingtime through winter. Make this easy-peasy DIY log bird feeder with one tool and a few basic materials by Prodigal Pieces for Pretty Handy Girl www.prodigalpieces.com #prodigalpieces

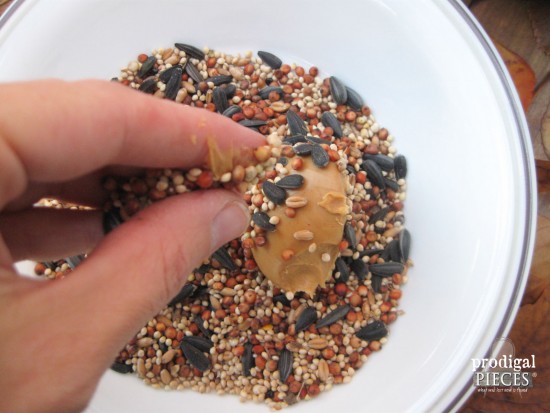
Then sprinkle the peanut butter with seed.

Give your feathered friends a treat from spingtime through winter. Make this easy-peasy DIY log bird feeder with one tool and a few basic materials by Prodigal Pieces for Pretty Handy Girl www.prodigalpieces.com #prodigalpieces

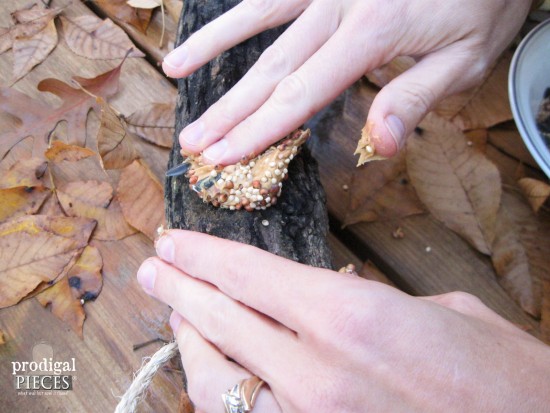
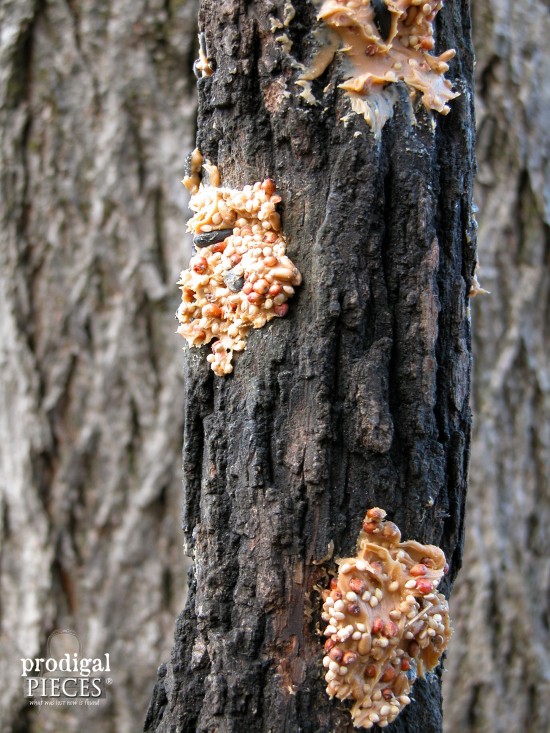
After coating with the seed, press the mixture into the holes using the back of a spoon, or if you’re nutty like me (catch the pun?) it’s more fun to use your fingers.

Give your feathered friends a treat from spingtime through winter. Make this easy-peasy DIY log bird feeder with one tool and a few basic materials by Prodigal Pieces for Pretty Handy Girl www.prodigalpieces.com #prodigalpieces

The kids love this part!

Give your feathered friends a treat from spingtime through winter. Make this easy-peasy DIY log bird feeder with one tool and a few basic materials by Prodigal Pieces for Pretty Handy Girl www.prodigalpieces.com #prodigalpieces

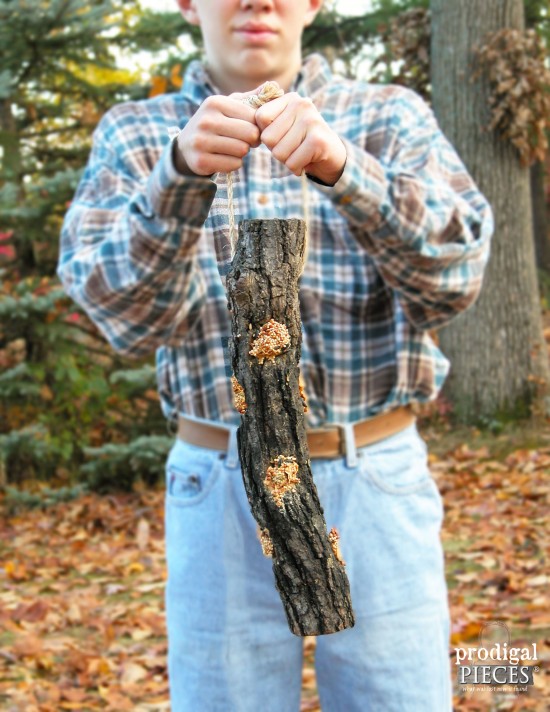
You’re done and it’s ready to hang. Yay!

Give your feathered friends a treat from spingtime through winter. Make this easy-peasy DIY log bird feeder with one tool and a few basic materials by Prodigal Pieces for Pretty Handy Girl www.prodigalpieces.com #prodigalpieces

For a fun twist, and if you’re feeling handy, you could also add dowels for other species to be able to roost at each hole, but for this project I kept it simple.

Got questions? Please feel free to ask.

If you enjoyed this project, do pin and share!

blog signature copy

Pin this project for later!

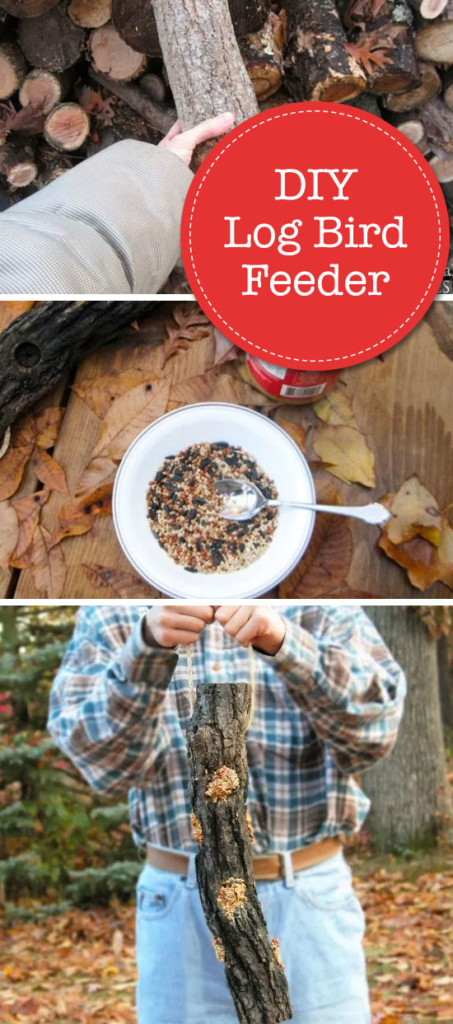
DIY Log Bird Feeder Pin Image


Liked this project? Then you’ll love these birdhouses:

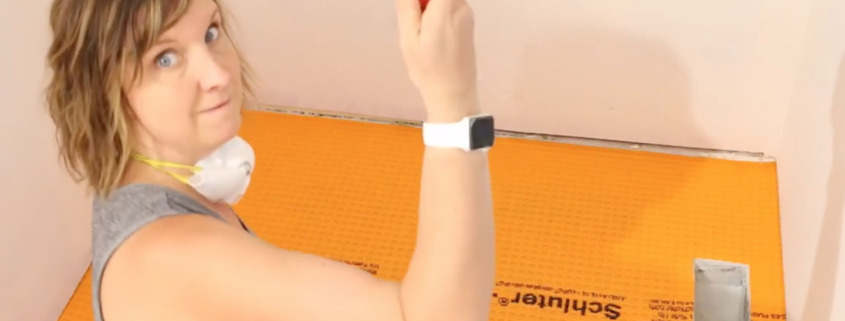
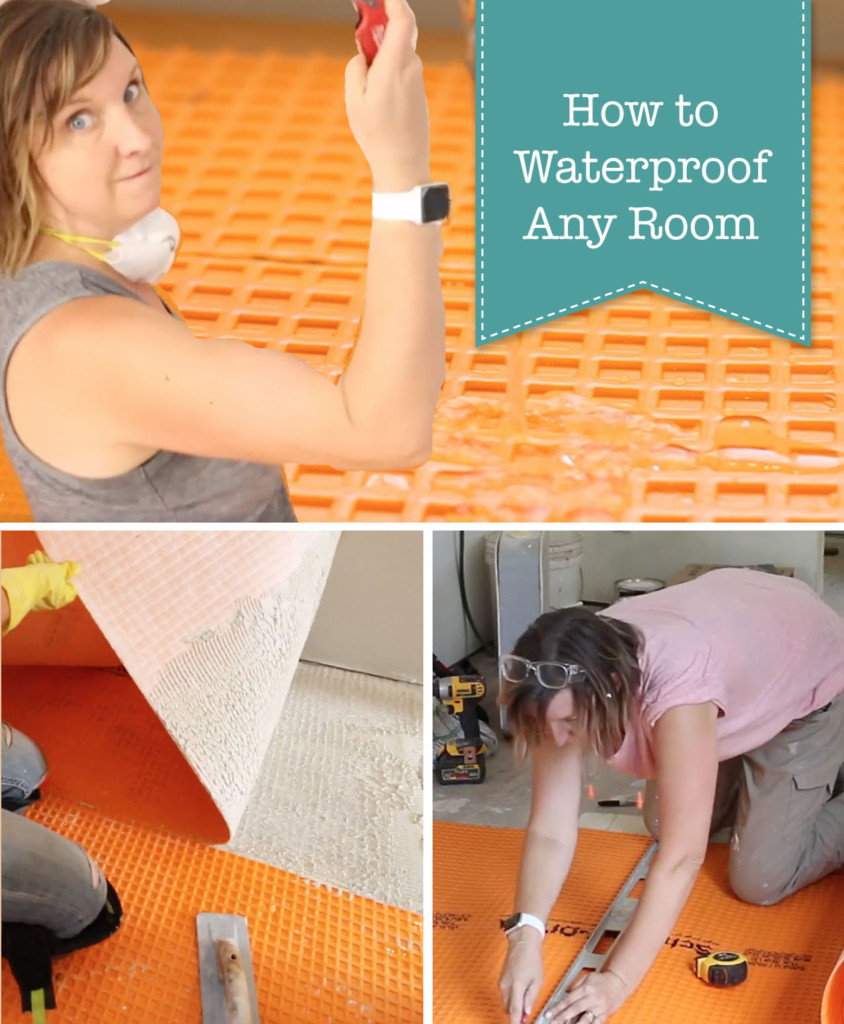
Today we’re prepping to tile in the kitchen and bathrooms. Having seen firsthand how much damage water can cause to a home, I want to show you this tutorial for How to Waterproof Floors!

Waterproofing Floors in Any Room

Renovations are finally moving forward at Millie’s Remodel. This is the point where I feel like we already hit rock bottom and now we’re finally on the rebound. You might remember we used a self-leveling concrete in the kitchen last week. Now it’s time to waterproof the floors to prevent damage from ever happening again!

Last year I took two Schluter classes and learned about waterproofing, uncoupling membranes, and tips and tricks to keep your tile job looking flawless for a lifetime. What I learned over the four days blew my mind. I learned why and how shower systems fail. But, most importantly, I learned how to properly prepare surfaces for tile using waterproofing membranes. Today we’ll just be talking about waterproofing a floor, but I’ll have another tutorial for you soon so you can learn how to waterproof walls too.

Materials:

(I’ve included affiliate links for your convenience. I earn a small percentage from a purchase using these links. There is no additional cost to you. You can read more about affiliate links here.)

Why should you waterproof a floor?

Before we get started, I want you to fully understand how waterproofing a room can actually save you money and save you from the headache of having a leak in your home.

If you have a kitchen or a bathroom, chances are you’re going to have a leak in your lifetime (or your home’s lifetime) if it hasn’t already happened. One of the best things you can do is to install waterproofing materials so water can never damage your floors or floor framing again. I believe so strongly in the Schluter products, that all the properties I’m working on (including my own) will have Ditra installed on the floor before tiling.

By using the Schluter Ditra uncoupling and waterproof membrane in conjunction with Kerdi band around the perimeter of the room, I can waterproof the entire floor. Which means I don’t have to worry about rot or mold happening. Any little leaks will sit on top of this membrane until I see it because the water will rise instead of seeping into your floor or walls.

Ready to get started? Let me show you how to waterproof any room in your house!

For your convenience, I made a video to help show how to install Schluter waterproofing products and how to fully waterproof a room!

Instructions:

  1. Cut open your roll of Ditra and roll it out onto a scrap piece of wood or something you can cut on.
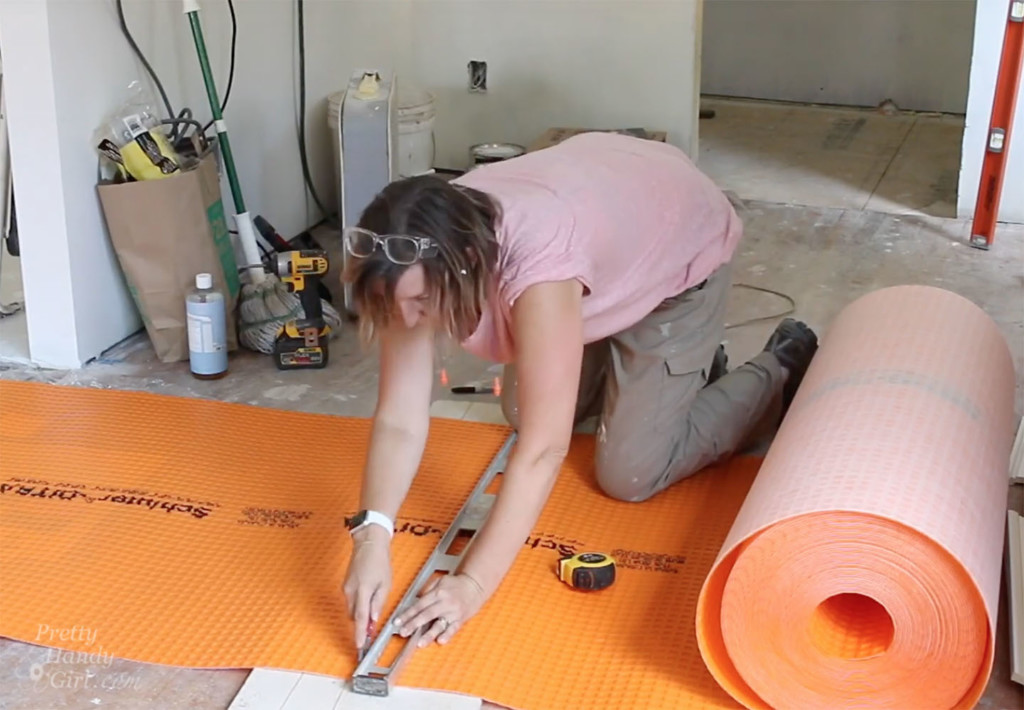
  2. Measure the room you want to waterproof and transfer the dimensions onto your Ditra membrane. Use a straight edge and a sharp utility knife to cut the Ditra. You might need to make a few passes with the knife to cut completely through the Ditra membrane.
  3. Test fit the Ditra in your room. Cut out a hole for your floor vents by pressing your knife through the membrane where the vent is and remove the material up to the edges of the duct. Cut the rest of the pieces to fill the room. Do not overlap the Ditra material.
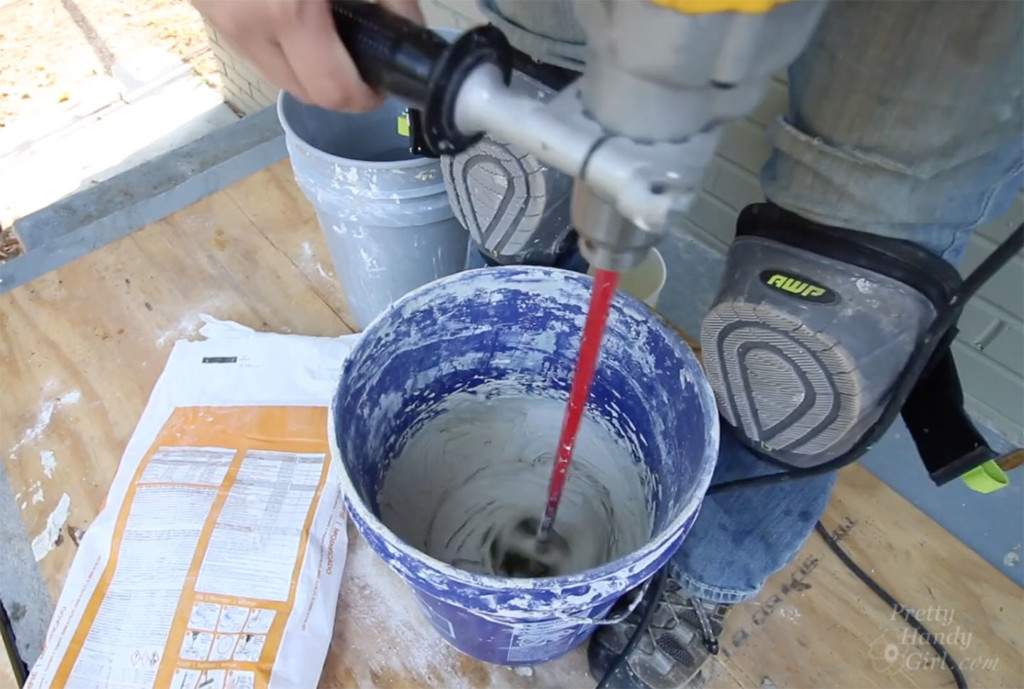
  4. Now it’s time to mix the thinset. When using Schluter Ditra it’s highly recommended to use the Schluter All Set. This mortar is specifically manufactured to cure against the waterproof membrane. Read the instructions on the packaging and mix your thinset as directed.
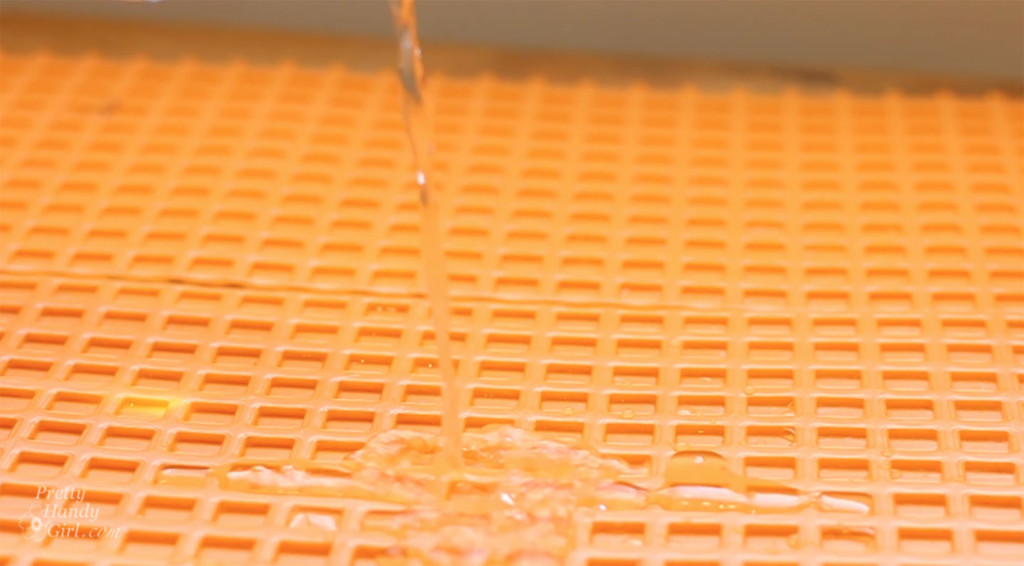
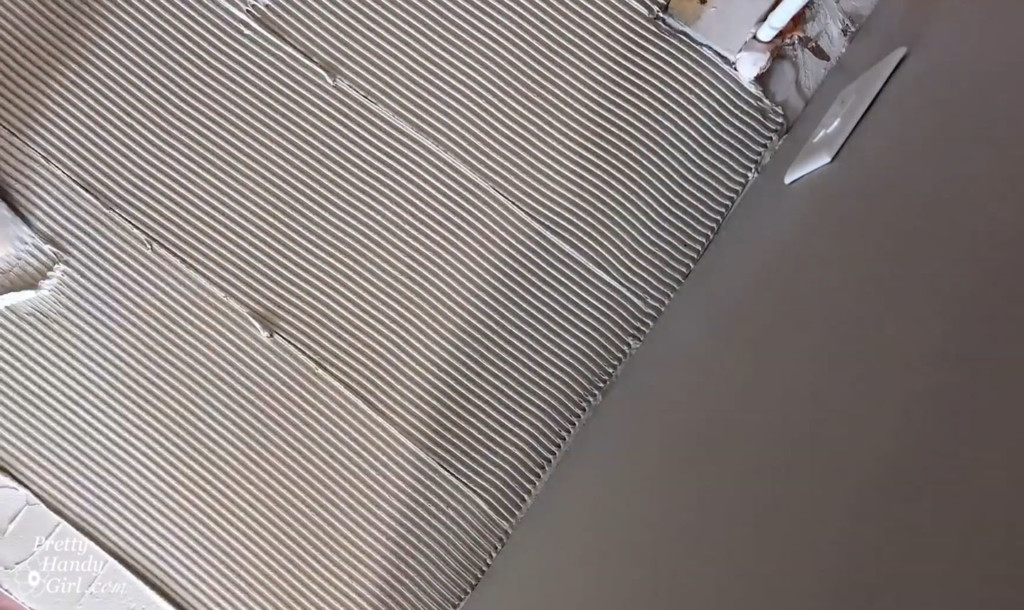
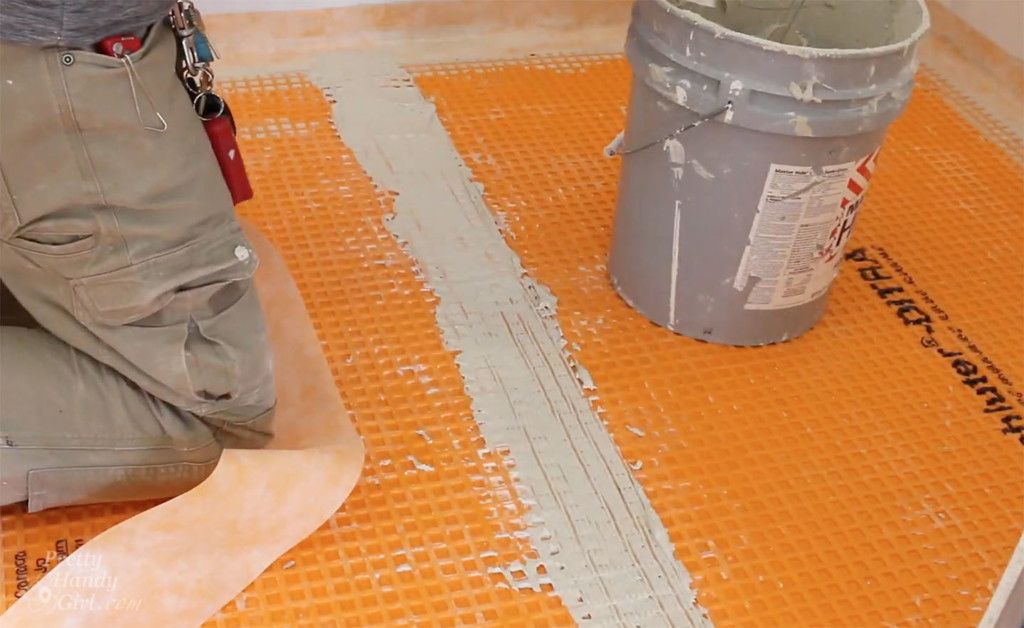
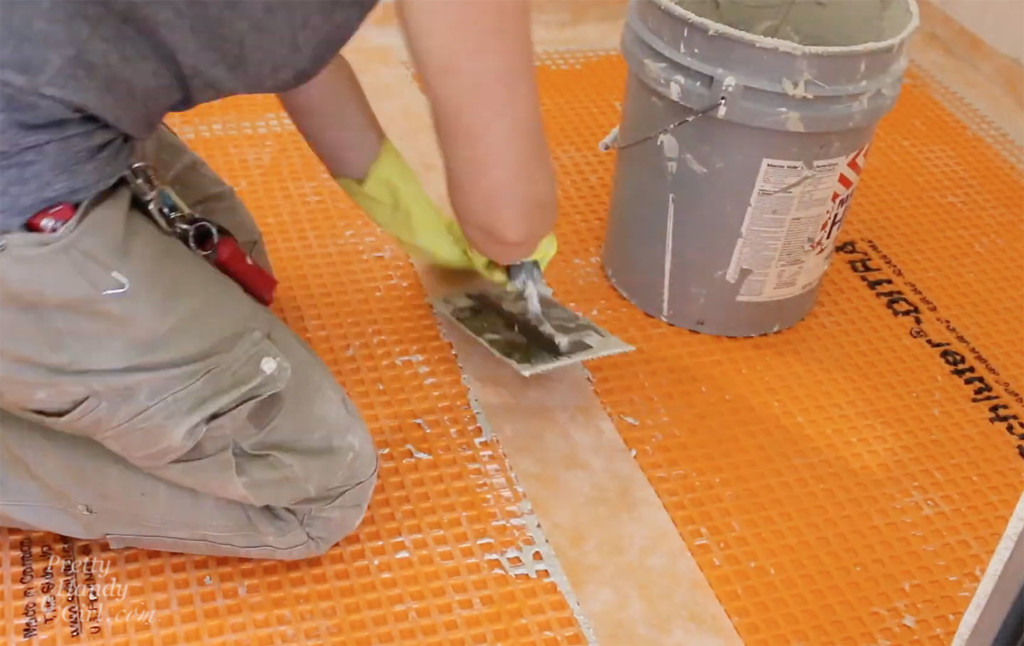
  5. Use a wet sponge and clean water to clean and wet the subfloor. Spread the thinset onto the floor using the Schluter Ditra trowel. Make sure you have good coverage on the floor.
    Then use the notched trowel to comb through the thinset at a 45° angle.
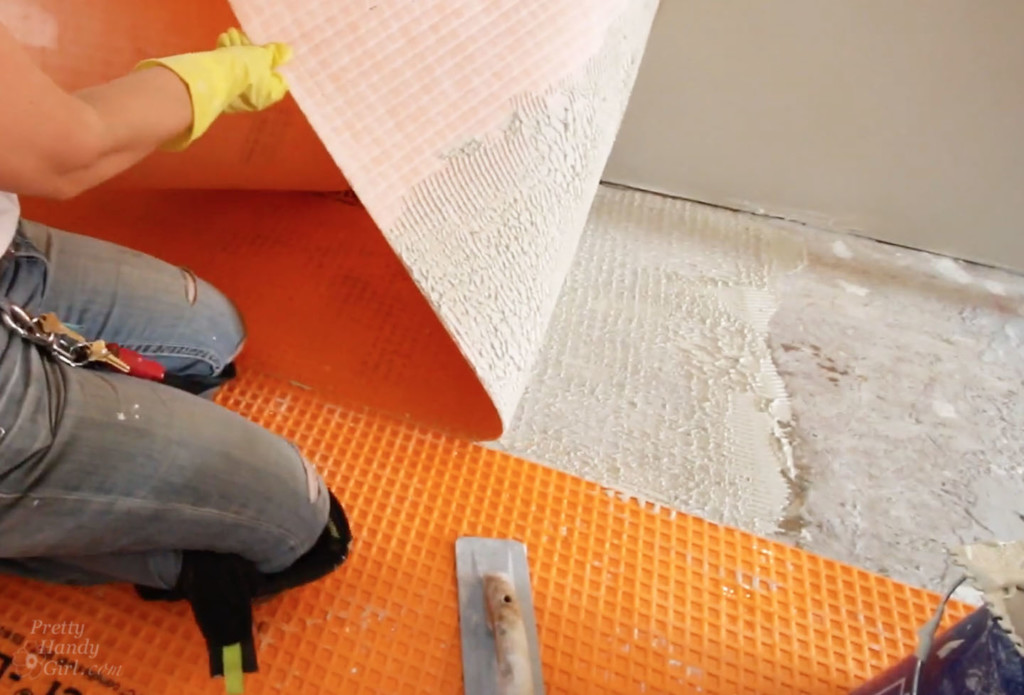
  6. Lay the Ditra membrane on top of the thinset and use a smooth float to press the membrane into the thinset. In the beginning, you should roll back a corner of the Ditra to make sure you have full coverage onto the backing of the membrane. Place the Ditra back down and use the float again to make sure the membrane is pressed into the thinset.
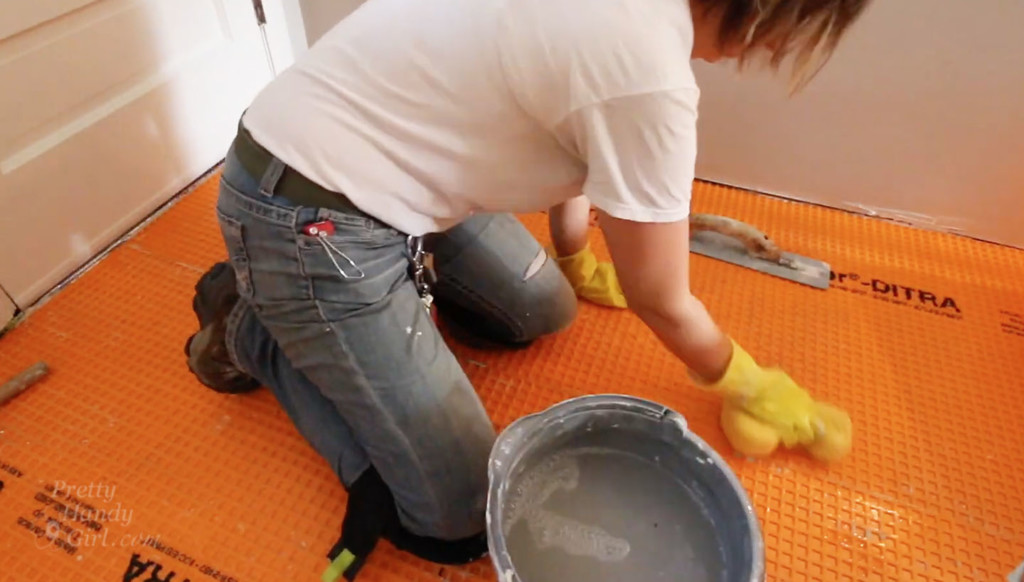
  7. Use a wet sponge to clean out any mortar that has squeezed out the seams or edges.
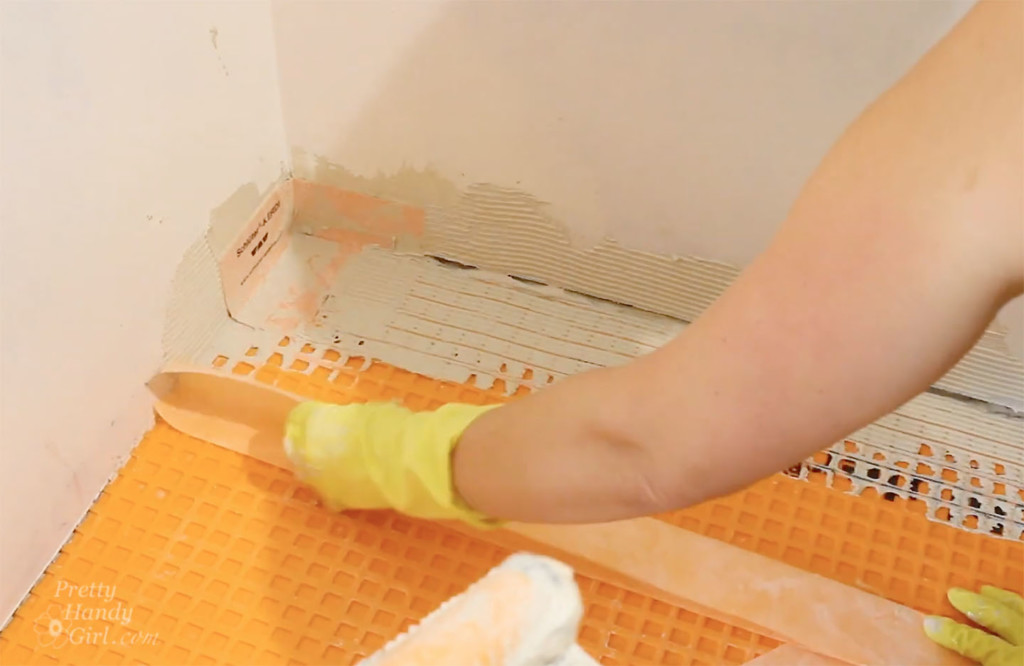
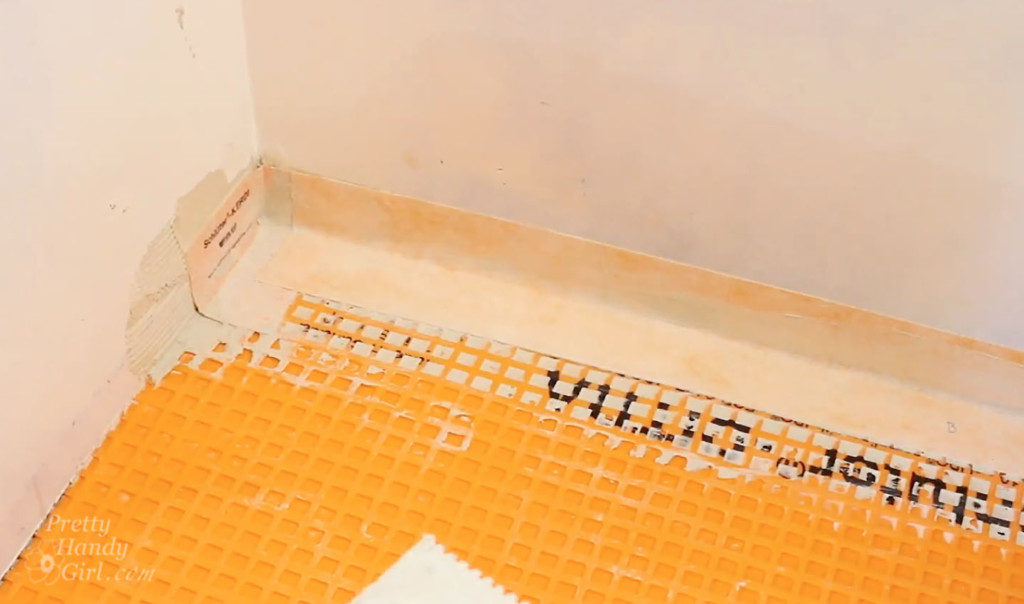
  8. Once all the Ditra has been installed into the subfloor, you’re ready to seal the perimeter and seams. Grab a Kerdi corner piece for each corner of the room. Using the Kerdi trowel, apply thinset mortar to the inside corner of the room. Use the notched side to comb through the thinset. Place the Kerdi corner into the thinset and use the flat side of the trowel to embed and scrape along the Kerdi.
  9. Now you’re ready to install the Kerdi Band on the straight sections of wall. Be sure to cut your Kerdi band so it overlaps the corner pieces by at least 2 inches. I like to pre-fold my Kerdi Band by creasing it in the middle so it’s easier to install in the corners. Apply the Kerdi Band to the wall and floor using the same technique as the corner.
  10. Clean up any excess mortar leaving a smooth surface for tile installation.
  11. Now it’s time to complete the waterproofing of the room by sealing the seams between the Ditra sheets. Cut your Kerdi Band so it overlaps any perimeter band by at least two inches. Apply the thinset over the seam, use the notched trowel to create ridges in the thinset.
    Then embed the Kerdi band into the mortar and run the flat side of the trowel over the band to smooth the thinset and embed the band.
  12. Clean up any excess and allow the thinset to cure before tiling.

Once the thinset has cured you can tile your room and rest easy knowing this room is waterproofed and there’s no way the subfloor will rot from a sneaky little leak. Or a big leak if you have kids that like to splash out of the bathtub. I know this risk all too well from my own boys.

I hope you found this tutorial helpful and you’ll consider using Schluter waterproofing materials before you renovate your next “water” room.

Disclosure: I was provided with some Schluter materials for this project. I was not told what to write. All opinions are my own. I am particular about the brands I represent and will always let you know when you are reading a post with complementary products or a sponsored post.

Hand Warmers with Rice DIY

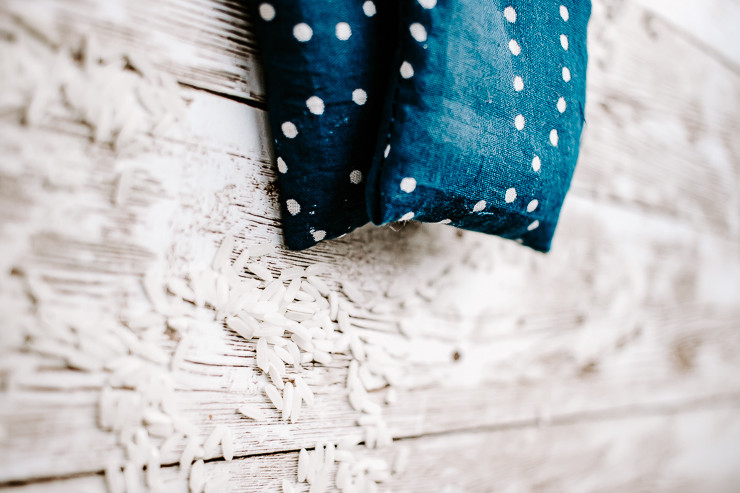
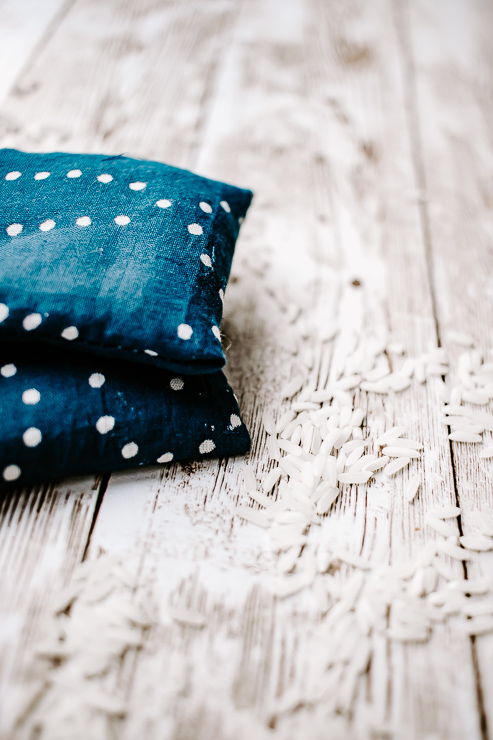
Since most of us are in the full swing of winter, I thought hand warmers would be the perfect DIY project for your weekend. Learn how to make these Easy DIY Hand Warmers You’ll Want to Take Everywhere!

How to Make Easy DIY Hand Warmers
Easy DIY Hand Warmers You’ll Want to Take Everywhere

Friends! I’m so excited to be back today with a new project for you – these cozy little DIY hand warmers. This is a great way to use any leftover fabric scraps you may have laying around. Sometimes a fabric is just too beautiful to throw away.

Hand Warmers with Rice DIY

I have tons of leftover fabric pieces that I’m always repurposing into something new. These DIY hand warmers are perfect because you don’t need a lot of fabric to make them. And they take no time at all to complete.

Read on for the full tutorial.

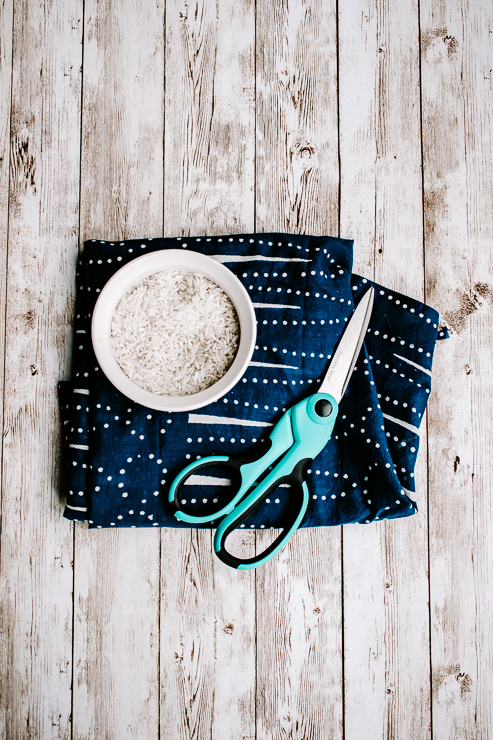
Materials:

(I’ve included affiliate links for your convenience. I earn a small percentage from a purchase using these links. There is no additional cost to you. You can read more about affiliate links here.)

Materials needed for hand warmers

Instructions:

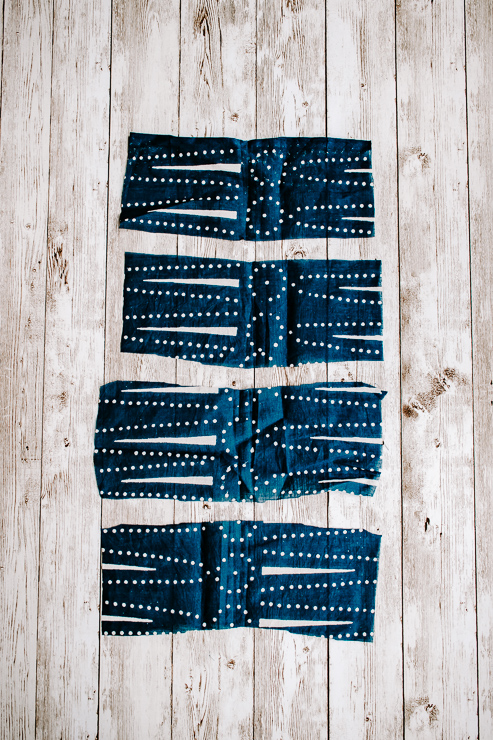
Cut rectangles out of fabric

Step One: Cut Your Fabric

Take your fabric and cut out a rectangle roughly about 3.5 inches tall by 8.5 inches wide. Don’t worry about the measurements being exact, we can even it up later. Just make sure you have a rectangle like shown above. This is the basic shape and you’ll see why in a minute.

Step Two: Fold your Fabric in Half and Sew Two Edges Closed

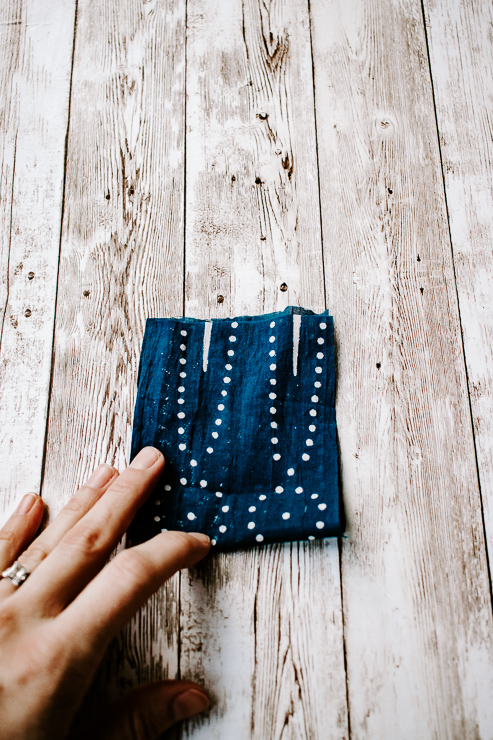
Fold fabric in half to make a square

Now that we have our rectangles cut, take each one and fold it in half. This will make a little square. Note: Make sure the print sides of the fabric are facing each other. (If your fabric is only one-sided, you want to make sure the non-print side is facing out, and the pattern is on the inside.

Pssst: that’s why we cut the rectangle shapes in the first step – it’s just one less side to have to sew!
Fold fabric in half

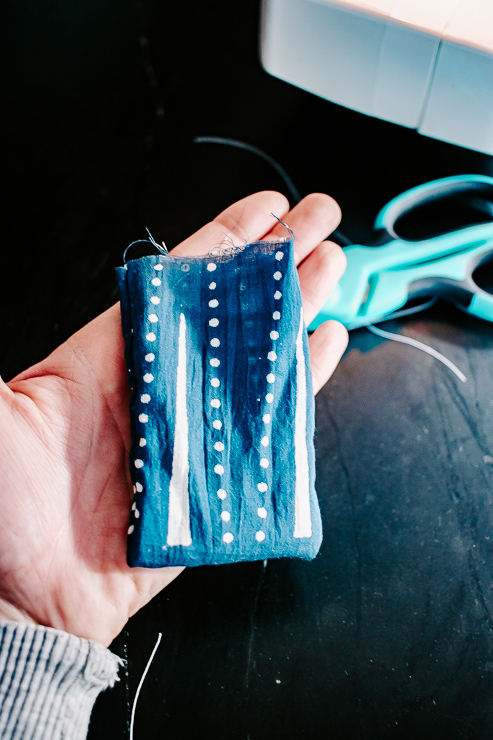
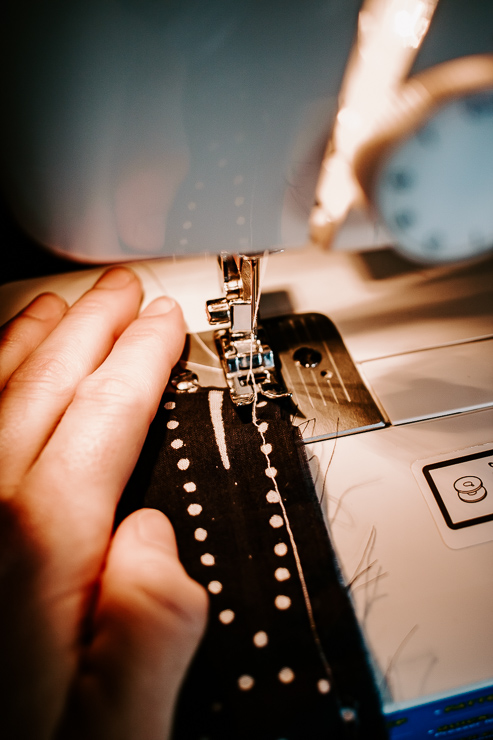
You will find that you have three open edges on your fabric square. Sew the two parallel edges closed. For added strength, sew each edge several times to ensure it is closed tightly.

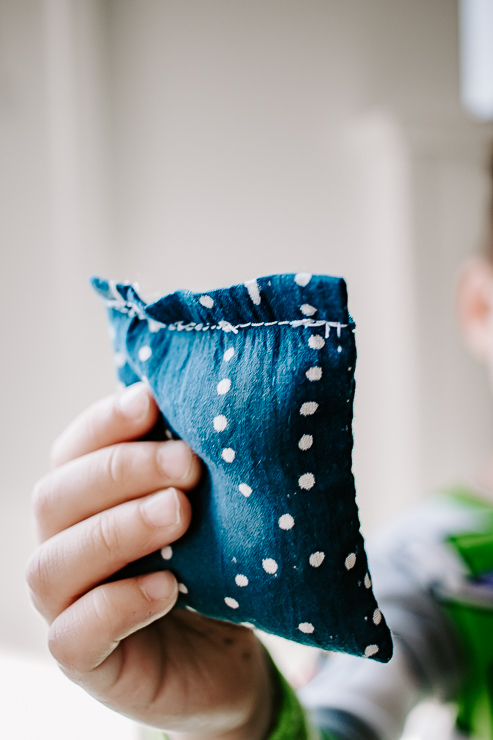
Now flip your little square right sides out. The stitches will be on the inside. And now you have a cute little pocket!

Showing a Fabric Pocket for making Hand Warmers

Step Three: Fill your Fabric Pocket with Rice

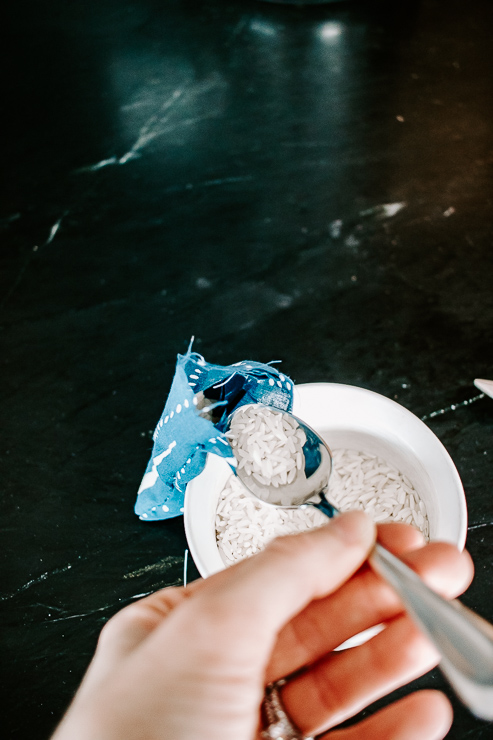
Spoon some rice into the open edge of each little fabric pocket. You really don’t need too much here. Make sure to leave enough space at the top to comfortably sew the open edge closed after filling. Do not overfill your pocket.

Fill Fabric Pockets with Rice

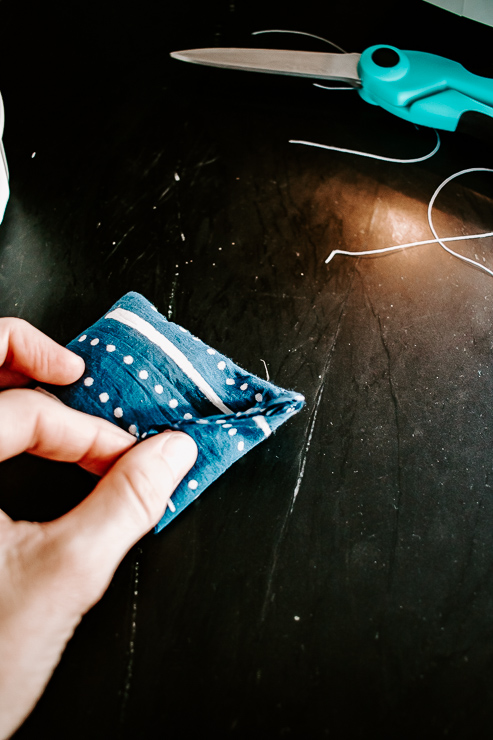
Because I wasn’t too concerned about it looking perfect, I folded the open edge down to close it while sewing. And that leads us to Step 4!

Step Four: Sew pouch closed

Sew Fabric Edges Shut

We are almost done! All we need to do is close up that last open edge. You can sew it up by tucking in the raw edges and stitching over top. Or create a neat little fold and stitch on top, as I did. Just make sure it’s sewn tight so no rice falls out.

Sew Fabric Edges Shut

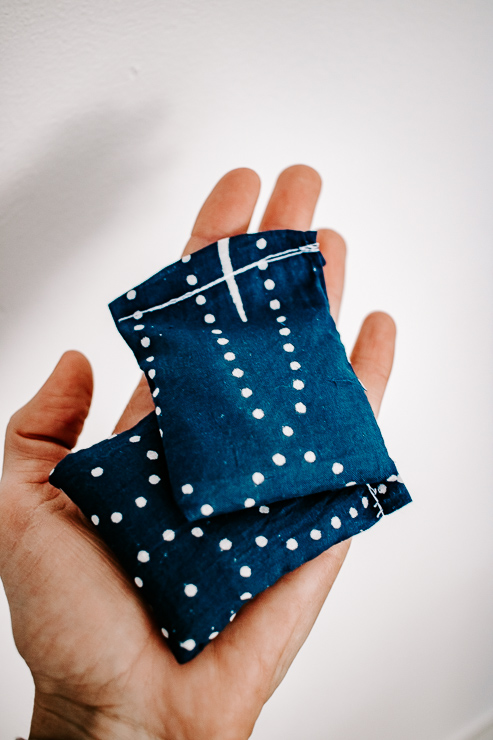
And that’s it! These little DIY rice warmers take all of five minutes to make and they are so handy during the chilly winter months!

How to Use DIY Hand Warmers

Now that we have our cozy little warmers, we need to “warm” them up in the microwave.

I heat my warmers anywhere from 10-30 seconds in the microwave. I would start with the lowest amount of time and increase the time slowly. These rice warmers can get very hot, so be careful! And please keep a close eye on them as they are heating at all times.  It takes some experimentation to find out what the perfect temperature is for you.

Easy DIY Hand Warmers

These hand warmers can last a fairly long time. I had one still giving off some heat after 30 minutes! They will naturally cool down after a while. Just reheat them as needed.

These hand warmers are perfect to take on walks. Before you leave the house, heat them up and tuck a few in your coat pockets to keep your hands nice and toasty. Or, grab a few to take to the neighborhood park with the kids. I’m always cold sitting on the park bench watching my kids play!

Hand Warmers with RIce DIY

You can also use these at home. Tuck them under your feet or under a cozy blanket for a real cozy treat! I’ve actually made larger versions of these as heating pads in our home. My kids love them. It’s the perfect soother for a bellyache or leg ache. And bonus, the larger ones hold heat much, much longer.

Easy DIY Hand Warmers

If you like this tutorial, check out my post on making scented rice sachets.

Stay warm folks and I’ll meet you right back here next month!

karen signature

~ See More of Karen’s Tutorials ~


karen from decor hintHello!  I’m Karen, the creator of the Home Decor and DIY Blog: Decor Hint. I’m a Native of the East Coast, but I currently live in beautiful Seattle with my hubby, our two wonderful children, and our spunky wheaten terrier.

You can usually find me with some sort of craft in one hand and a coffee in the other. And I’m always rearranging furniture or moving lamps from room to room. I have a passion (read: obsession) for decorating, DIY, and gardening. In short, I love making my house into a home.

Like many, I’m inspired by what I see in home decor magazines, but I’m not so inspired by the price tags.  Consequently, I love finding and creating beautiful budget-friendly home decor items. In a head to head competition, I bet you’d never know the difference between the designer items and my DIY creations!  Many of my DIY projects focus on sewing, crafting, upcycling and organizing. Some of my favorite projects have been making pretty wreaths, sewing my own tassel hand towels, and crafting these trendy wood bead garlands. I can’t wait to inspire you and spark your creativity through my DIY projects.

You can always connect with me on Pinterest, Twitter or Instagram.


Still have some scraps of fabric? You could make these adorable gift bags.

Sew Easy Anthropologie Cloth Napkin Gift Bags | Pretty Handy Girl