DIY Quote Sign with Faux Shiplap Detail
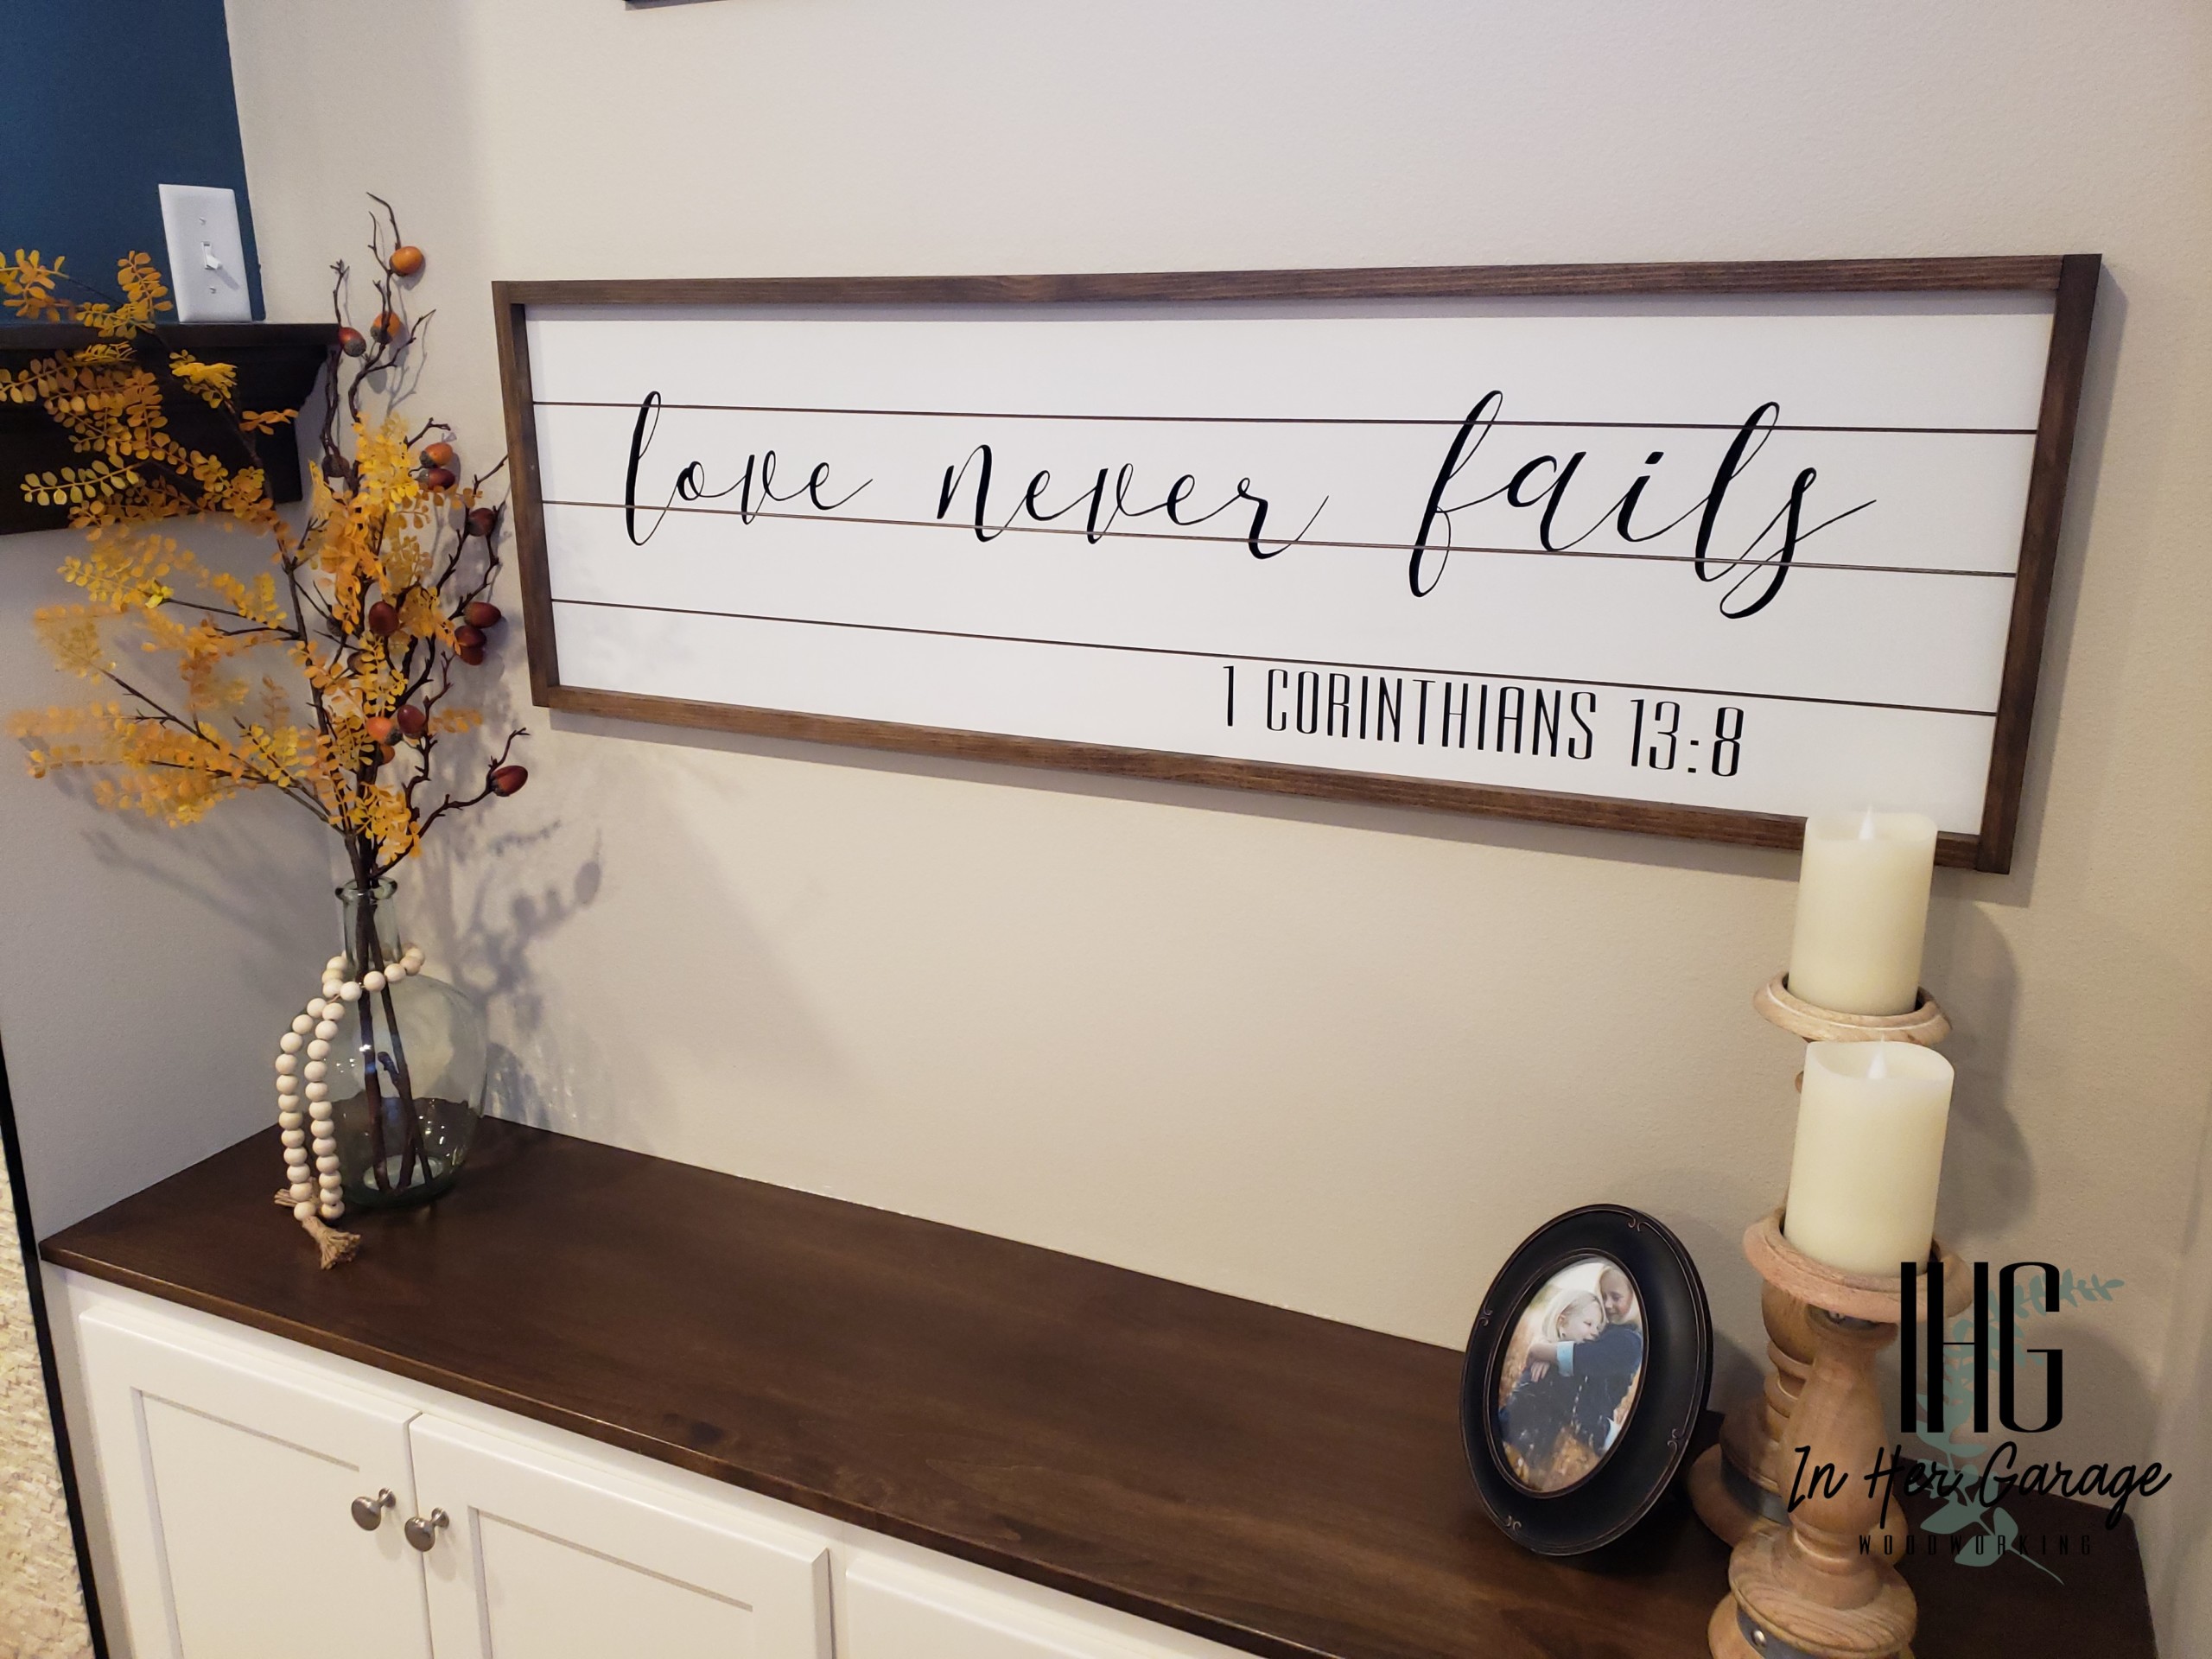
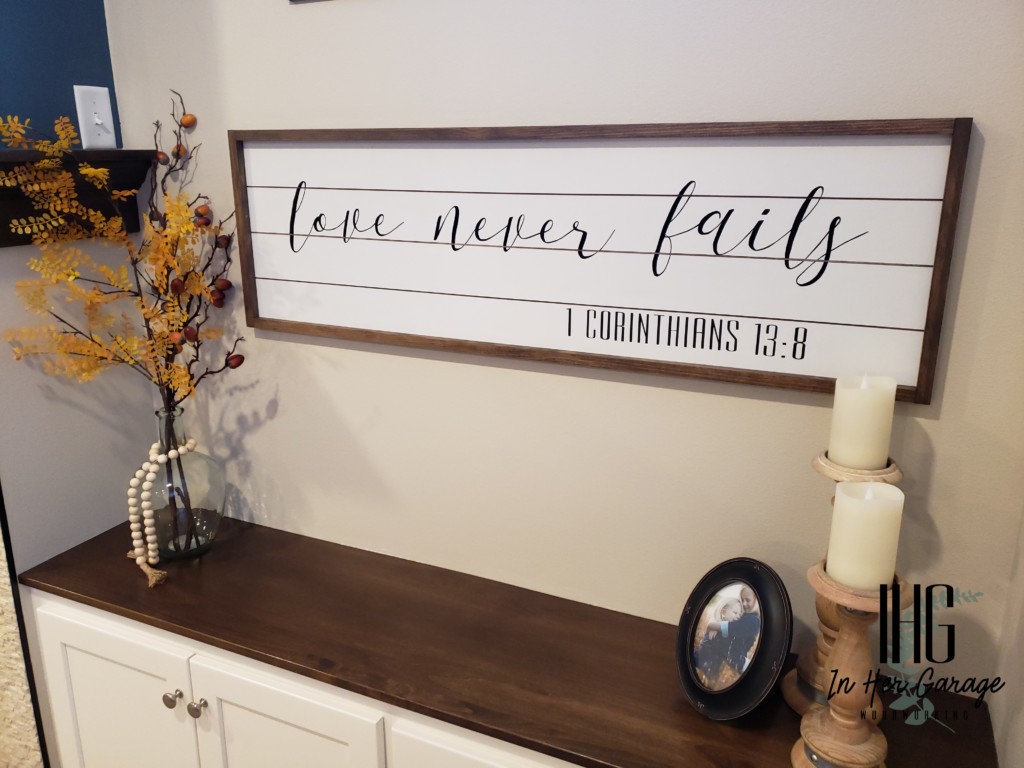
This month I will teach you how to make this DIY quote sign with a faux shiplap detail. It’s a home décor sign with a quote that you can choose! Quote signs are so popular right now and for good reason. They are a great way to express your specific style using a unique sentiment that appeals to you.
DIY Home Décor Sign with Faux Shiplap Detail
Hey all! This is Kristen from In Her Garage with another tutorial for you. I have made several signs and I believe this is the easiest way to make a sign that is inexpensive while looking clean and finished. The best part about this home decor sign is it looks like you made it with shiplap, but you really didn’t!
The sign in this tutorial measures 48” wide x 16” tall x 1 ½” deep. If you feel comfortable modifying the dimensions for the size sign you need please feel free.
Note: Please read through all the instructions before beginning the project.
Materials:
(I’ve included affiliate links for your convenience. I earn a small percentage from a purchase using these links. There is no additional cost to you. You can read more about affiliate links here.)
- 1/8” x 24” x 48” tempered hardboard or backer board
- 2- 1 x 2 x 8 common pine boards
- Paint for the sign background
- Stain for the frame
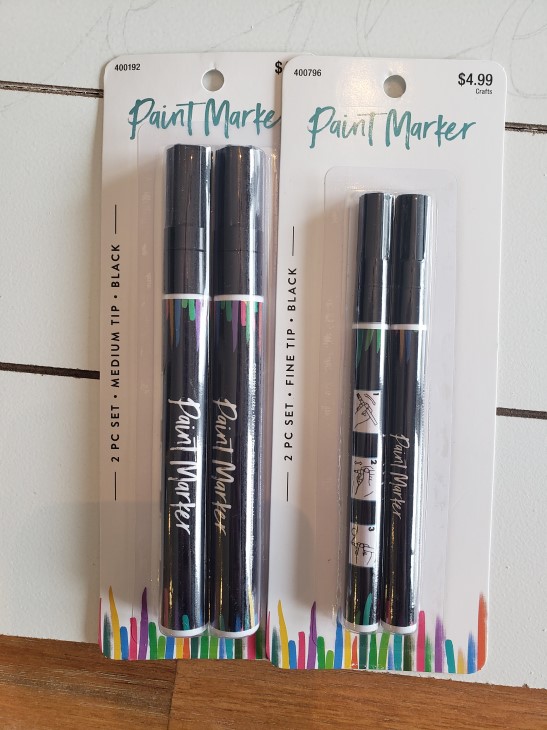
- Paint markers, fine and medium tip
- Lead pencils
- Saw-tooth picture hangers
Tools:
Prep:
- Paint the backer board the color of your choosing. You need to this first for adding the faux ship-lap detail later.
Instructions:
Cut the frame pieces for the sign.
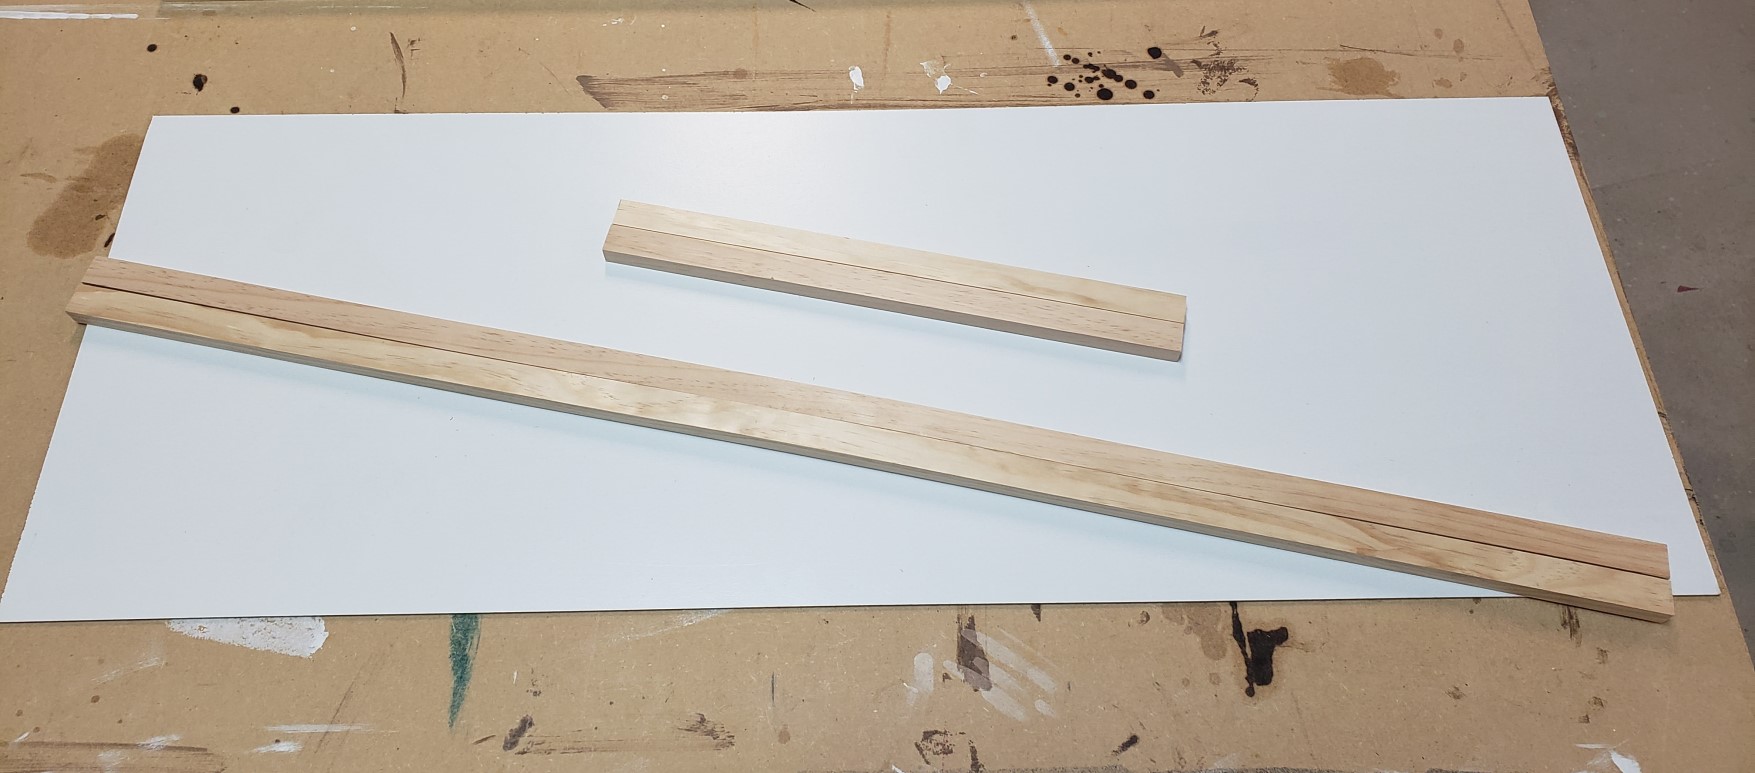
Using your miter saw or circular saw cut the frame pieces from the 1x2x8’s.
You will need:
- Two 16” boards
- Two 46 ½” boards
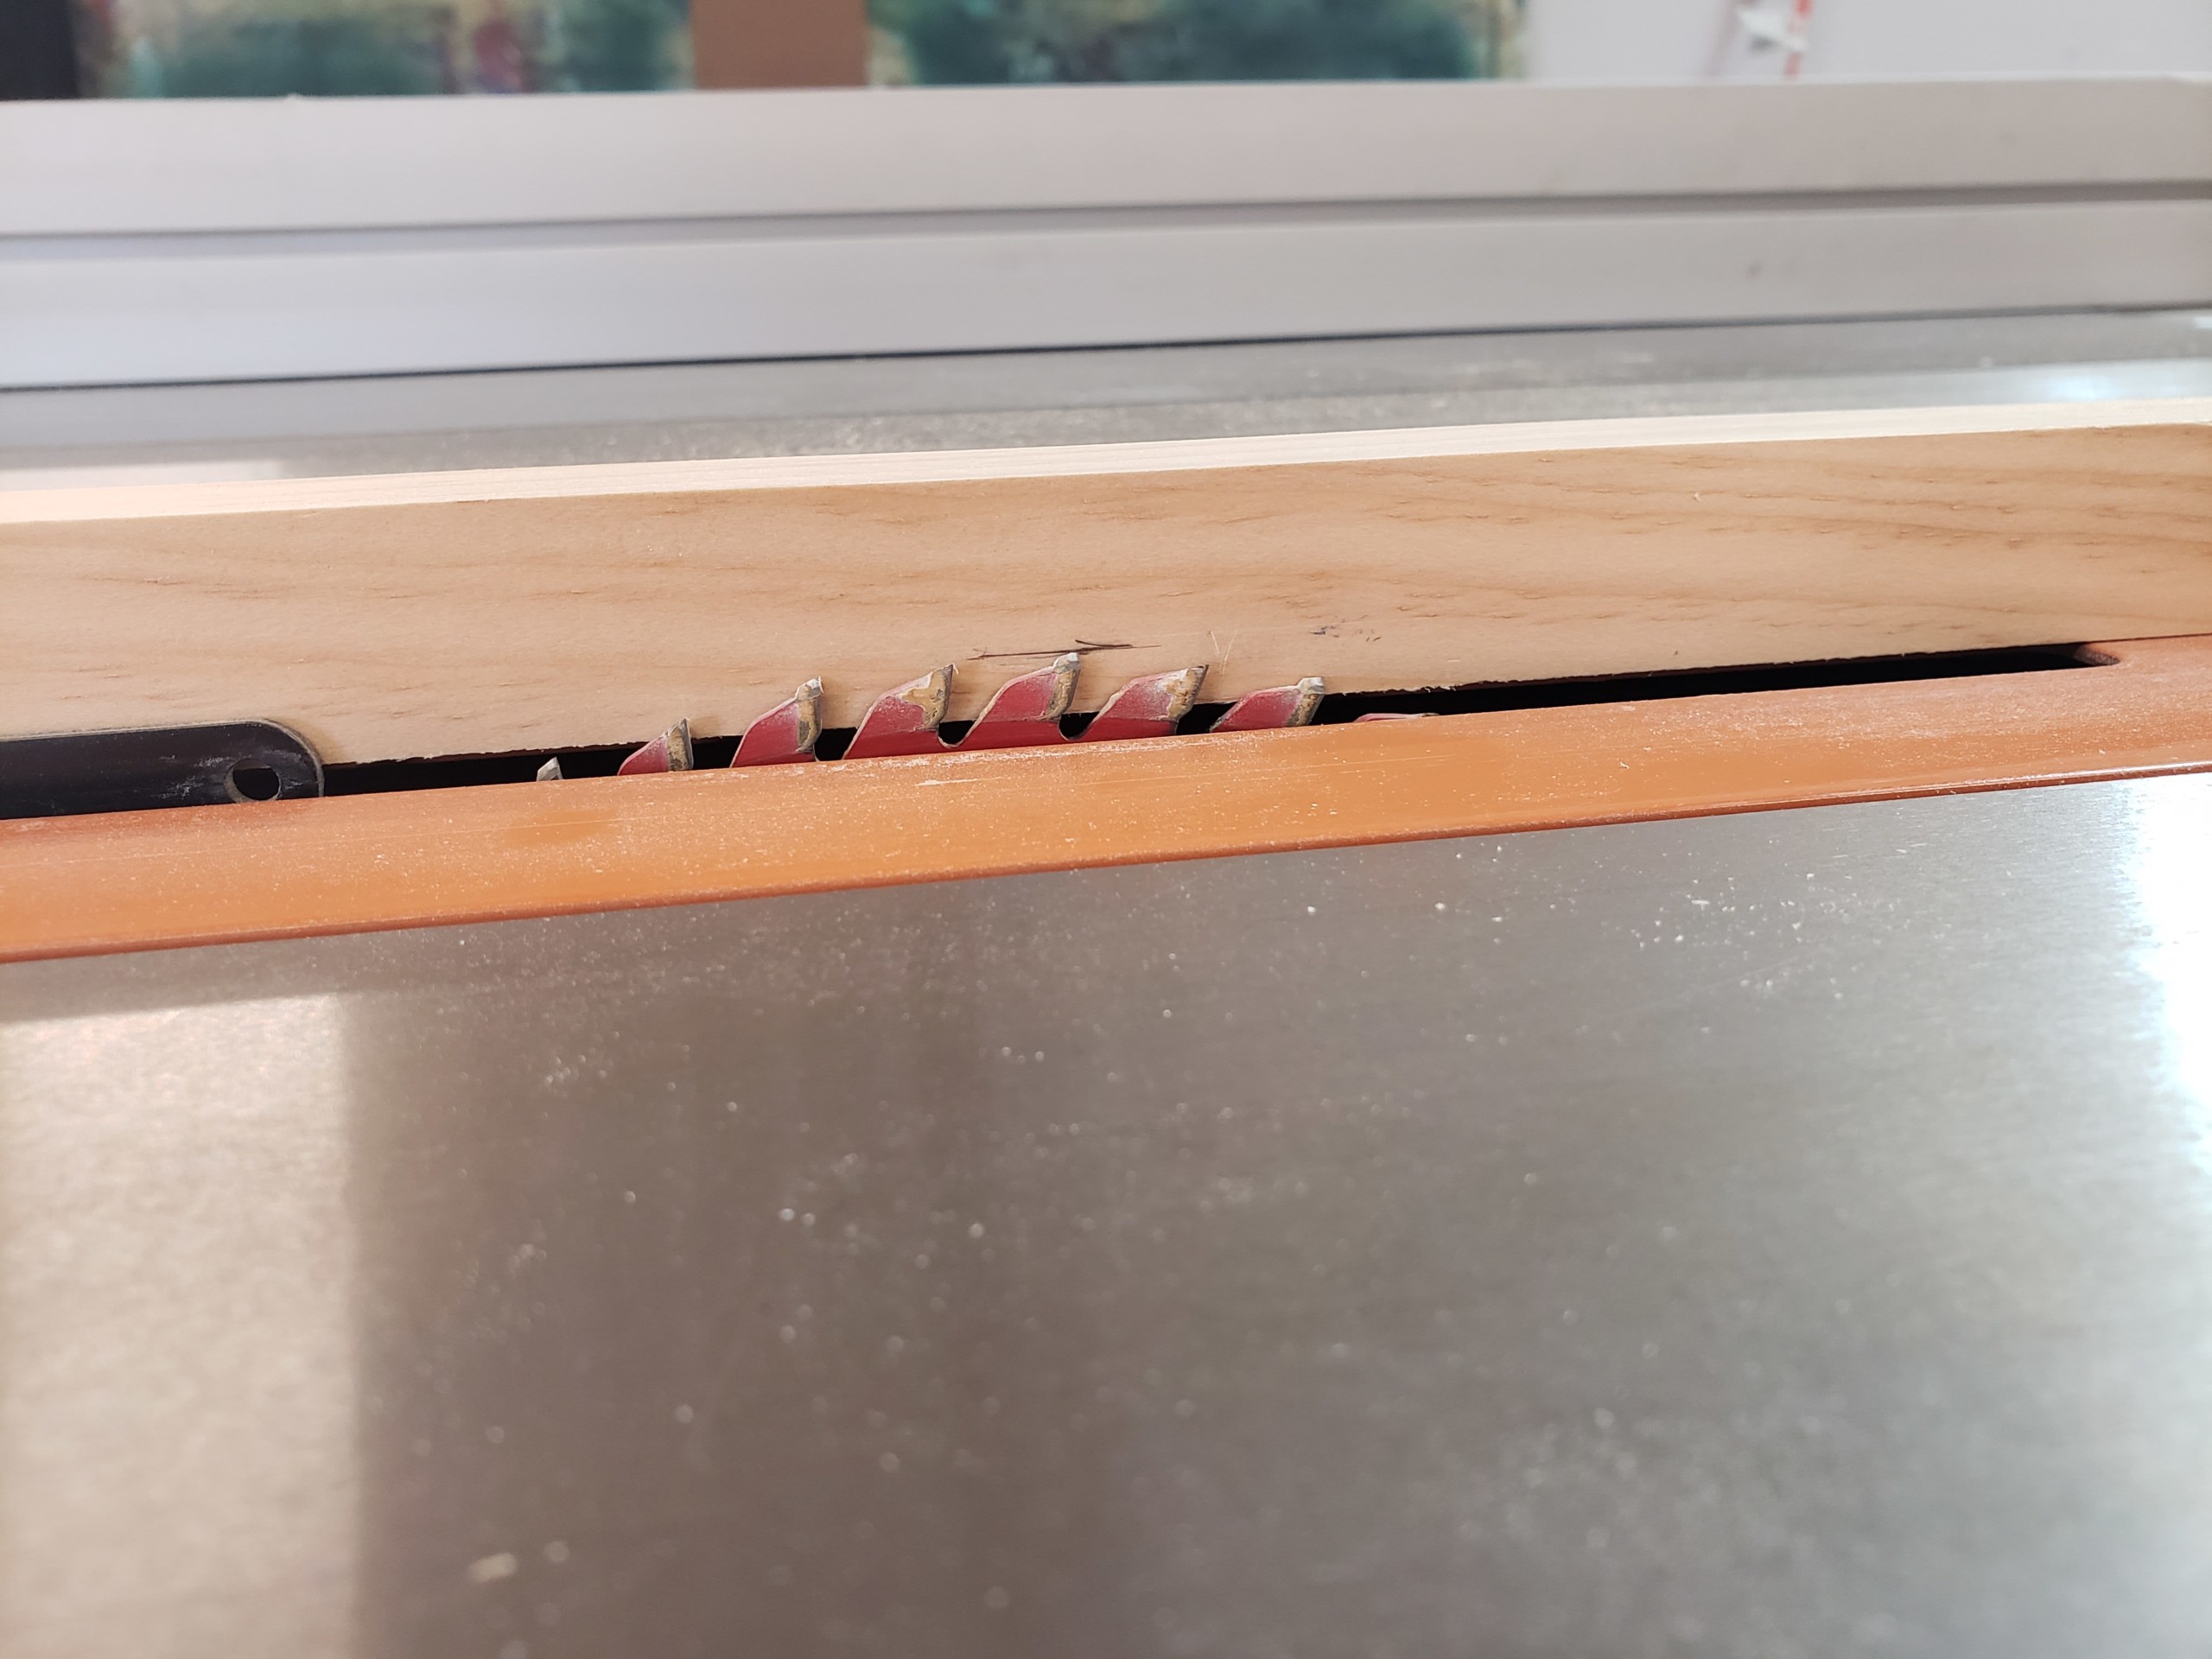
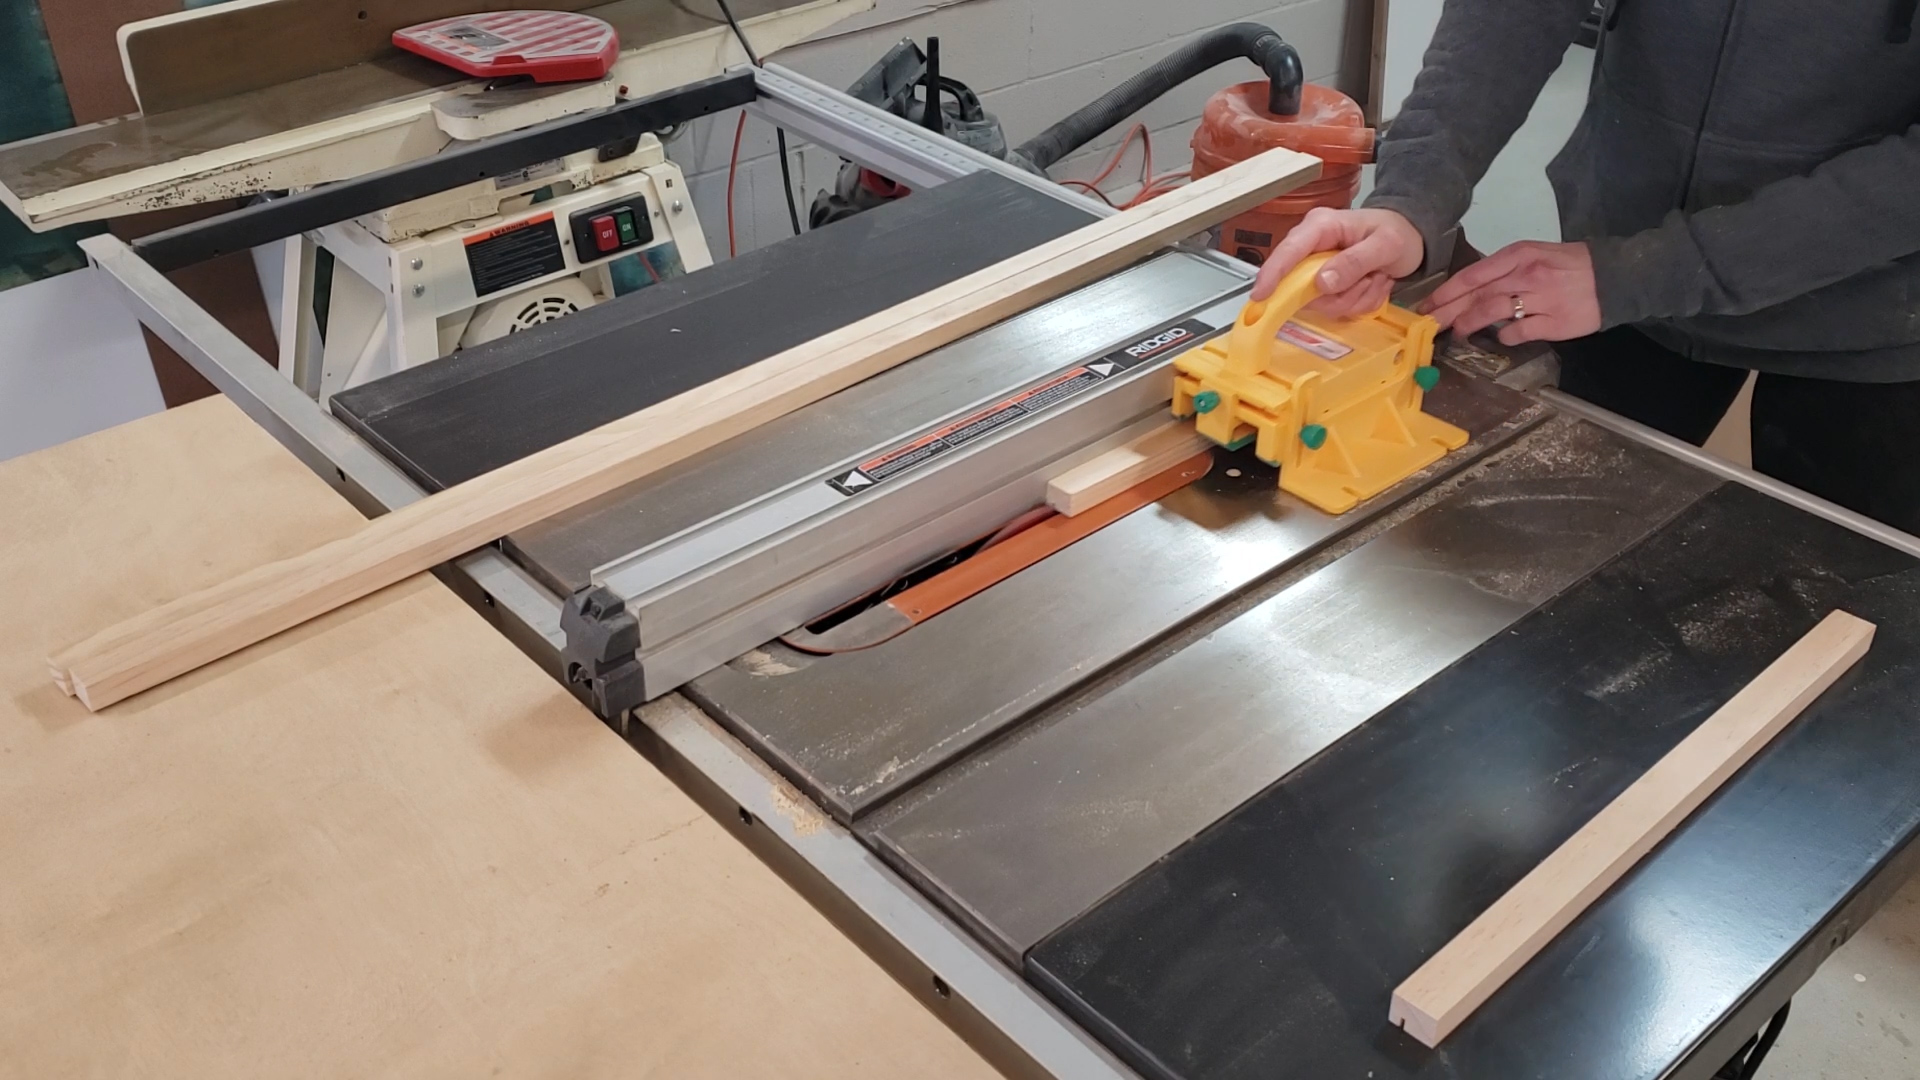
Next cut the groove for the backer board to sit into the frame pieces with the table saw. Raise the table saw blade 1/4” and set the fence to 1/2”. Carefully run each board over the blade, face down, so you are cutting a groove into the board that is 1/4” deep. Use a push block over the top of the board so you are not running your hand over the blade.
Now, move the fence over slightly, about a 1/16”, and make a second pass in each of the frame boards to make the groove wider.
Paint or stain the frame pieces whatever color you like. I used a 50/50 mix of Varathane’s Special Walnut and Briarsmoke stains. Set these aside and let dry.
Cut the backer board:
The backer board will need to be 1/2” taller and wider than the inner dimensions of the frame making the backer board 47” x 15”
Adding the Faux Shiplap detail
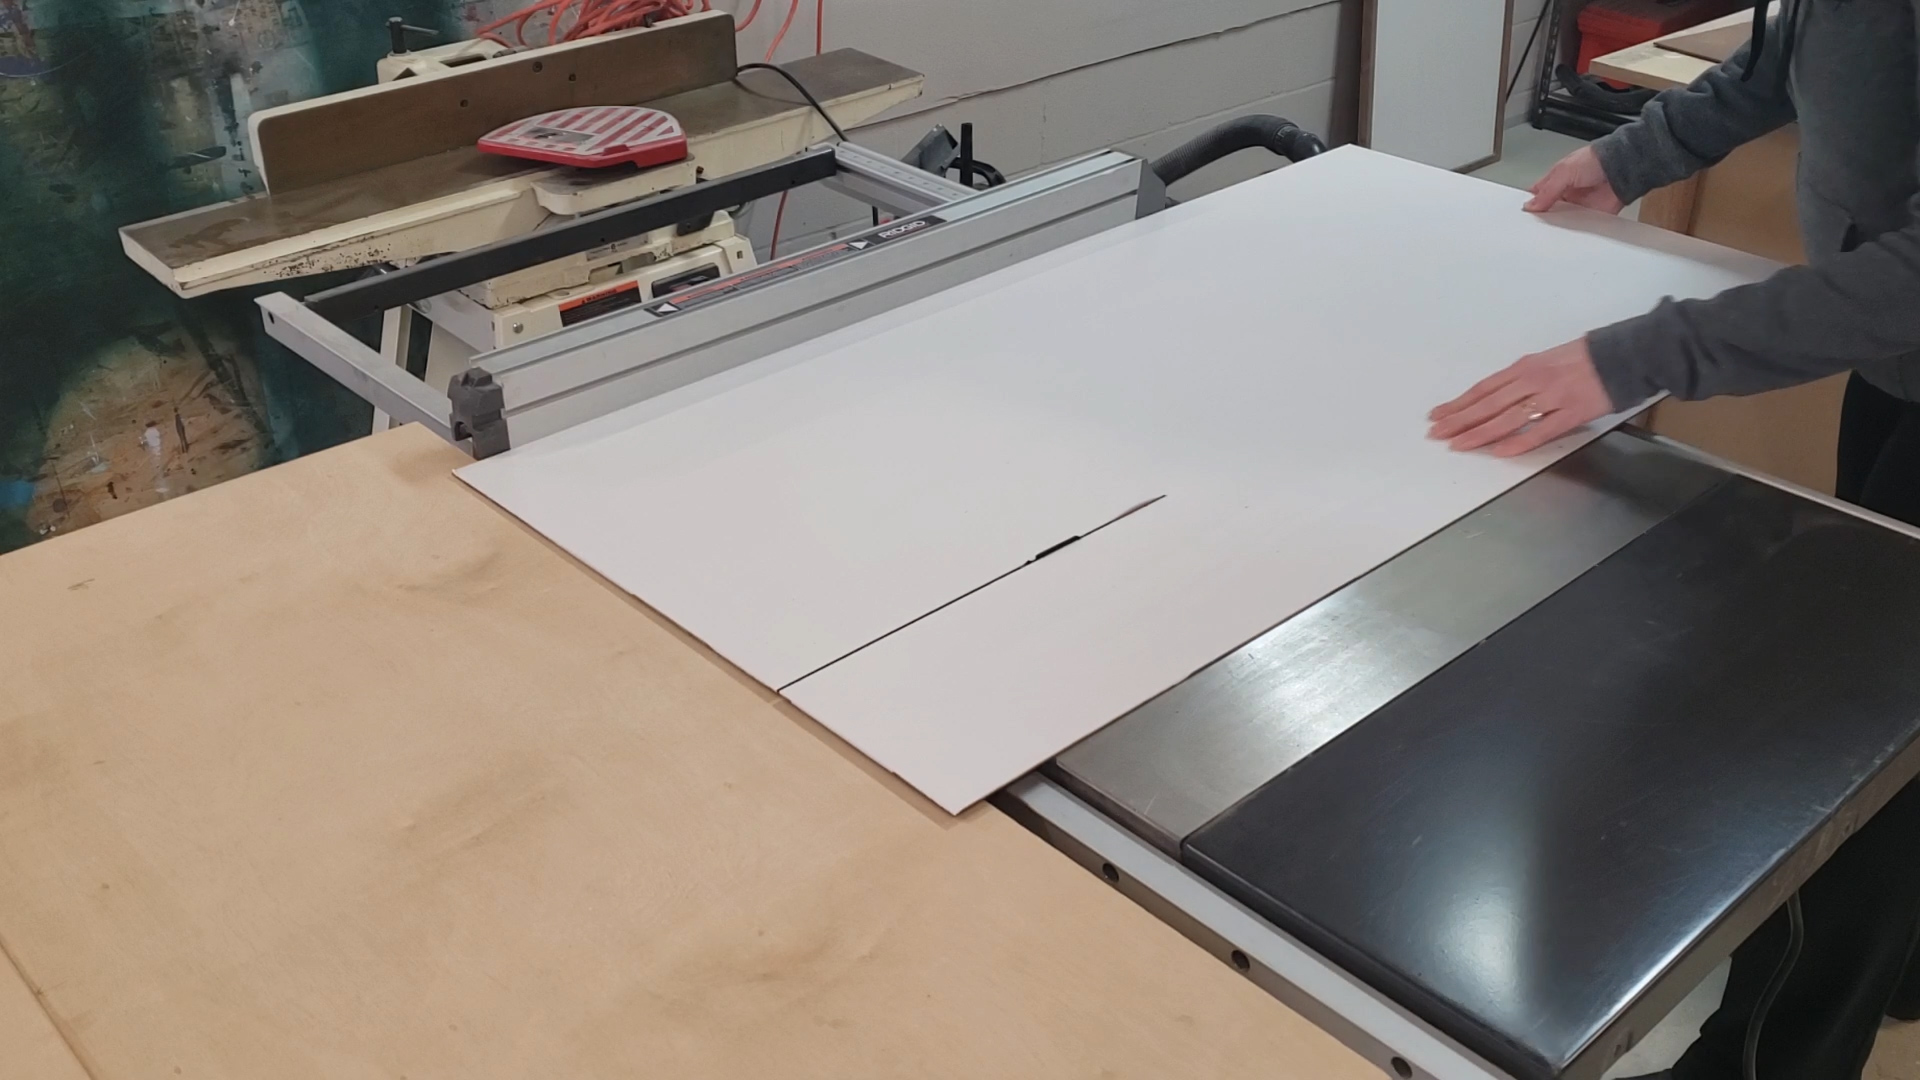
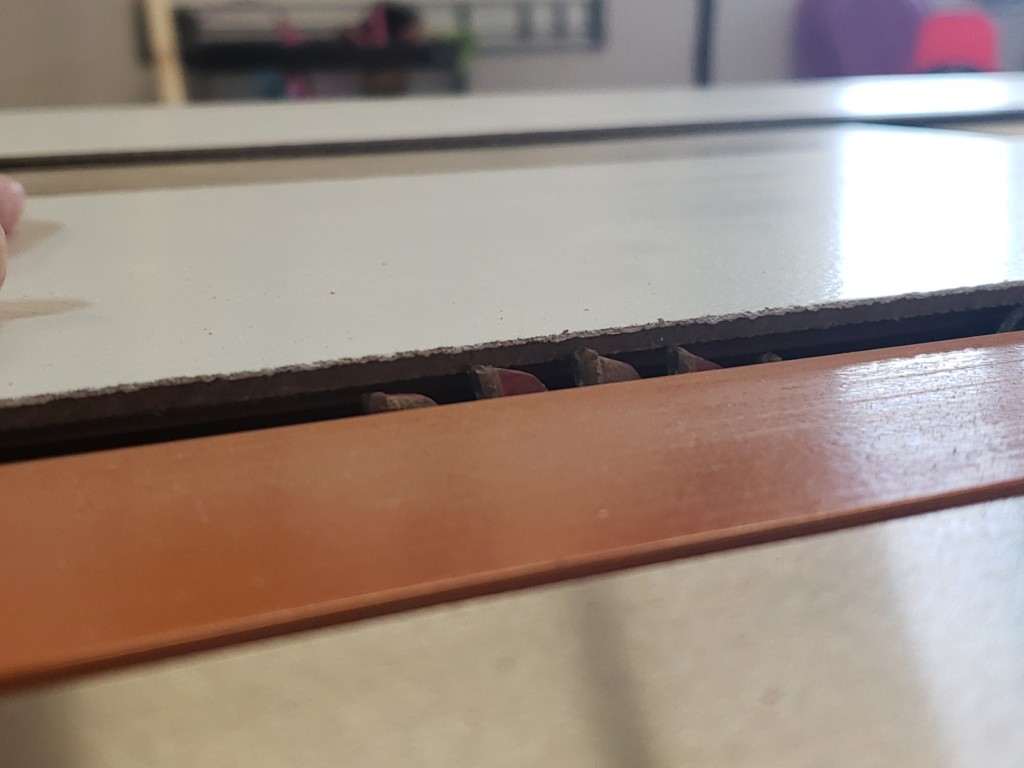
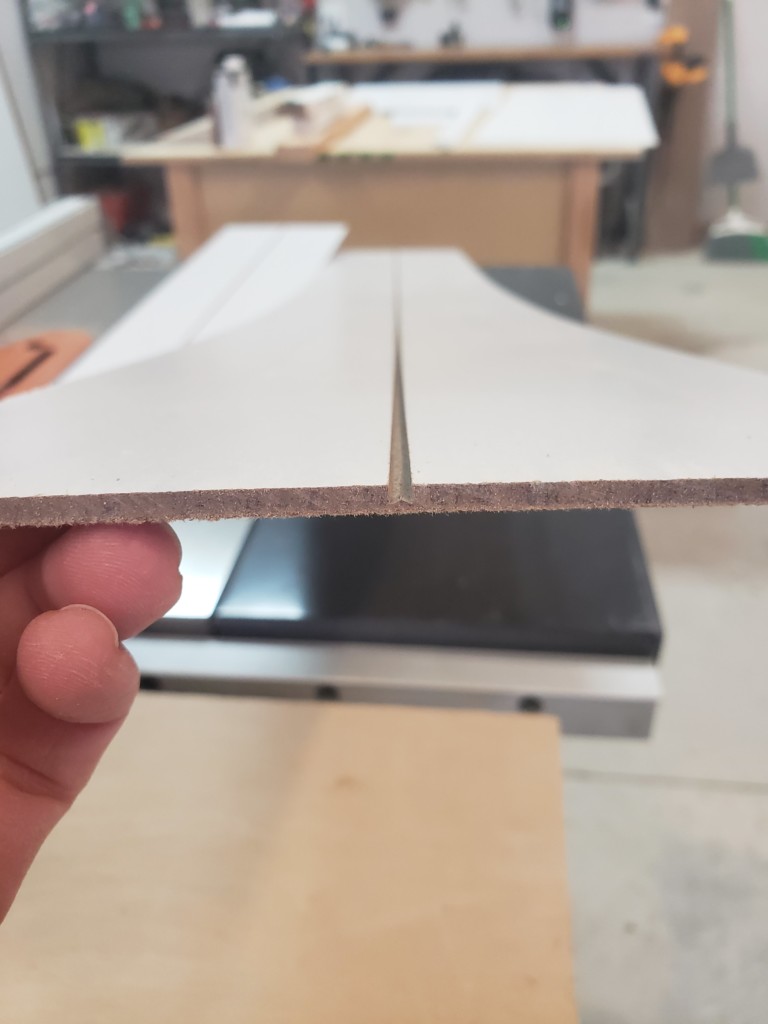
To add the faux shiplap lines, raise the saw blade just under half of the thickness of the backer board, about a 1/16”. You can eyeball this by laying the backer board next to the blade (for safety, unplug your saw during blade adjustments). Raise the blade to the desired height.
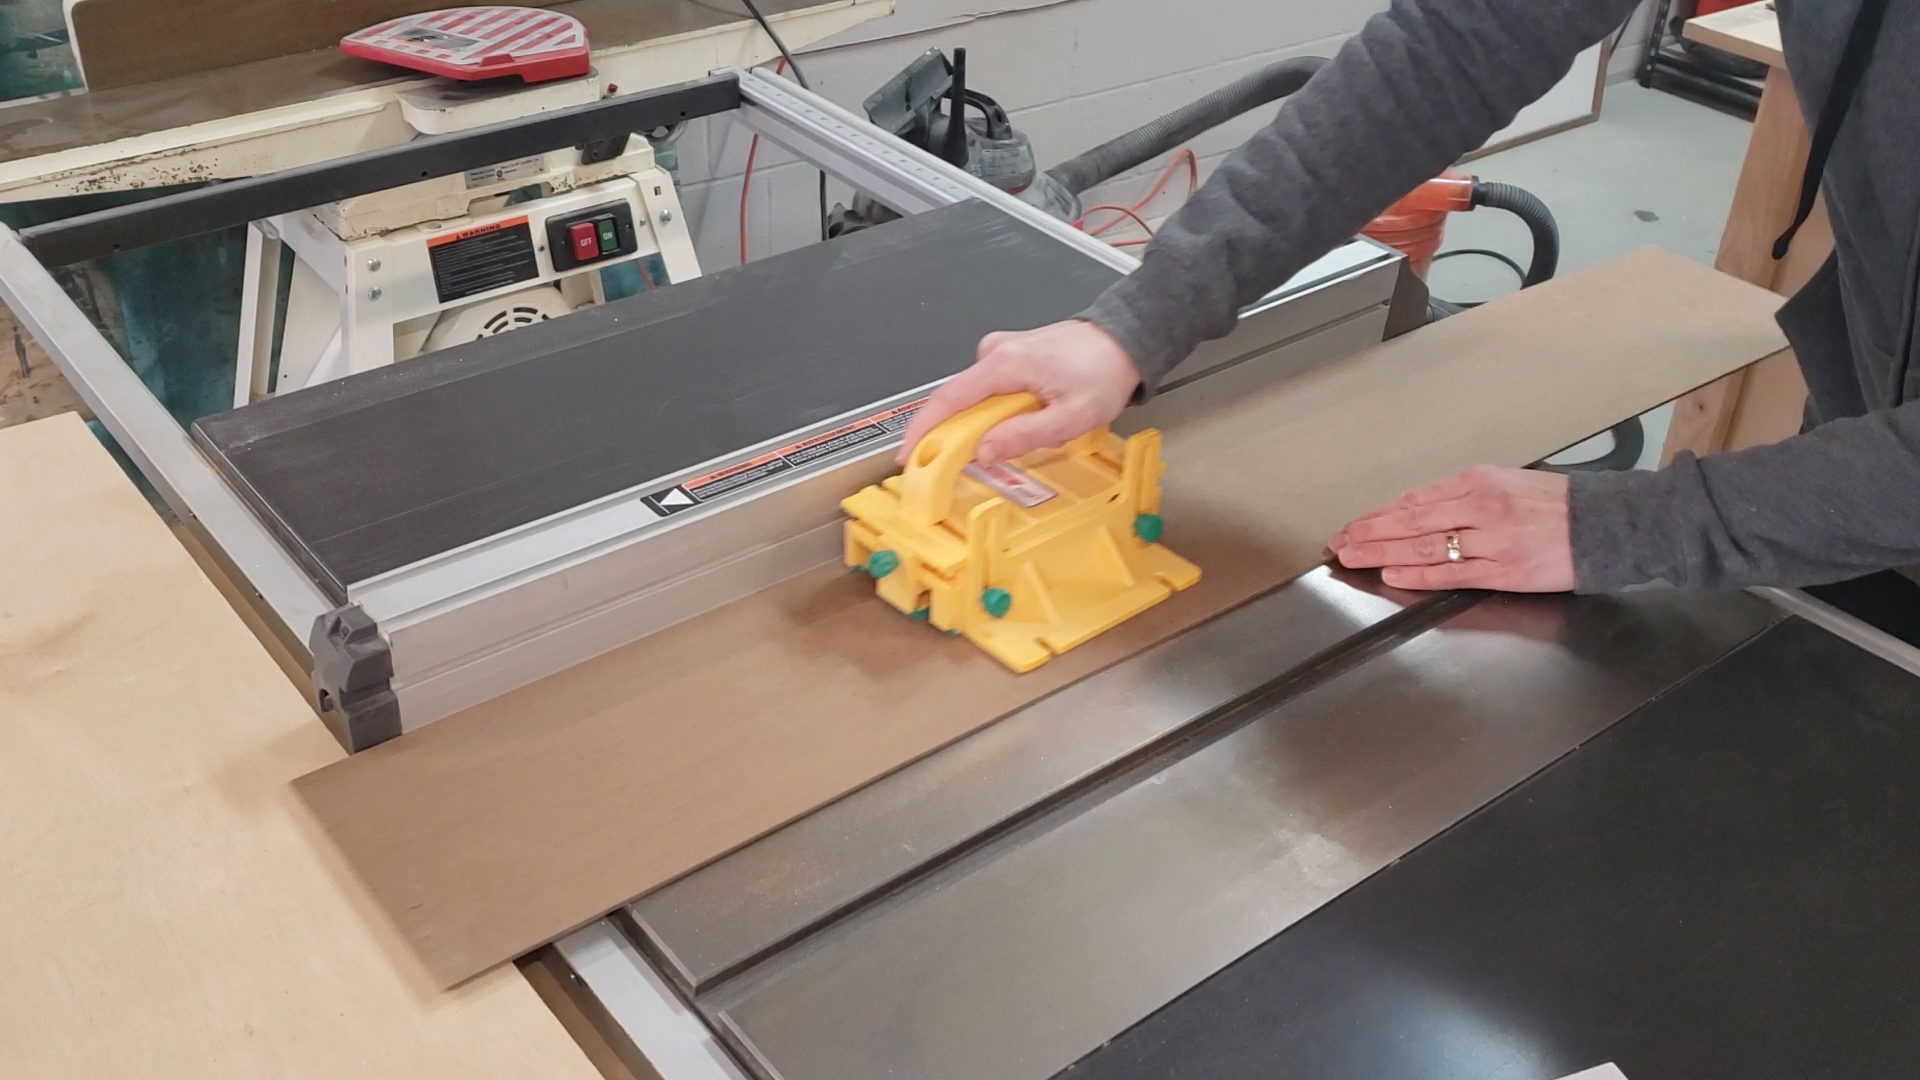
Next, set the fence to 3 ¾” and run the backer board over the blade to cut a line partially through the board.
Move the fence to 7 ½” and repeat
Move the fence 11 ¼” and repeat one last time.
Now you have 3 shallow horizontal cuts that mimic the look of shiplap. Super cute!
Adding the quote to the backer board
First, you will need to choose a quote. I chose the quote “Love Never Fails” and it will be printed on plain printer paper. I use Microsoft Word to create the template.
Note: I chose not to use my Silhouette for this because this is a large sign and I wanted to keep the printed paper as a template for future use. Plus, I didn’t want to waste vinyl!
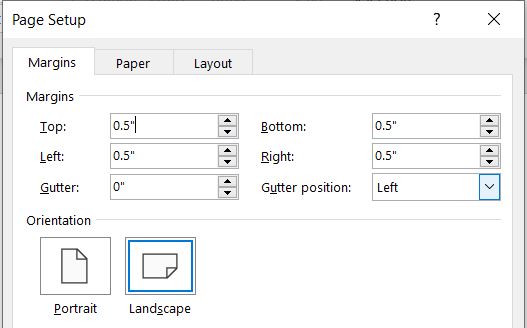
In a word document set the orientation to “Landscape” and the Margins to “Narrow”
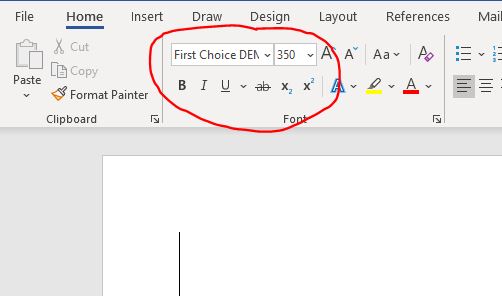
Type the quote of your choosing. Choose the font you want to use. There are a lot of free fonts available. I typically get mine from www. fontspace.com. The specific font for this sign is First Choice and it can be downloaded for free here.
Highlight the entire quote and start increasing the type size until you have the size you want. The size of this lettering is 350 pt.
Keep in mind standard paper is 11 ½” wide x 8” tall (landscape orientation) which should give you a rough guess as to how it will appear on your backer board.
An entire word will not fit on one page for a picture of this size. You will need to piece them together later.
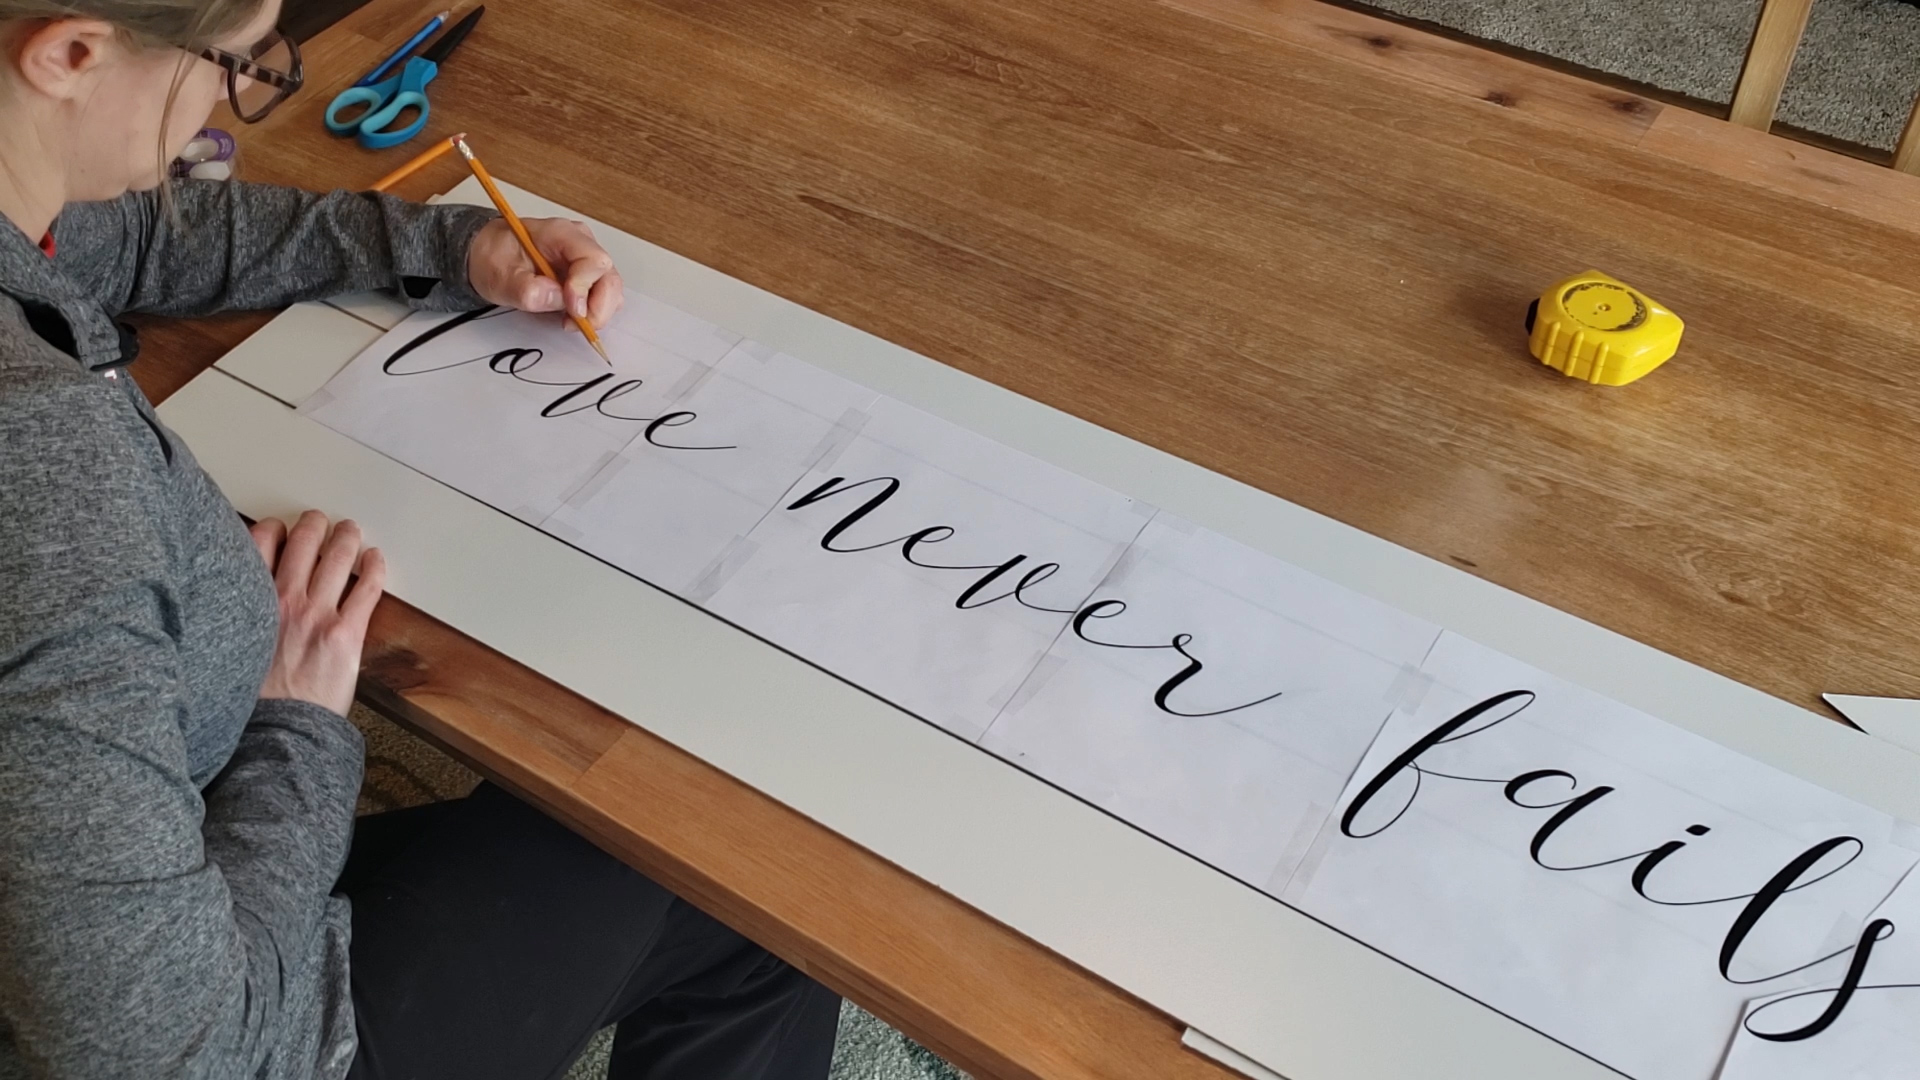
Print out your quote and tape each word together
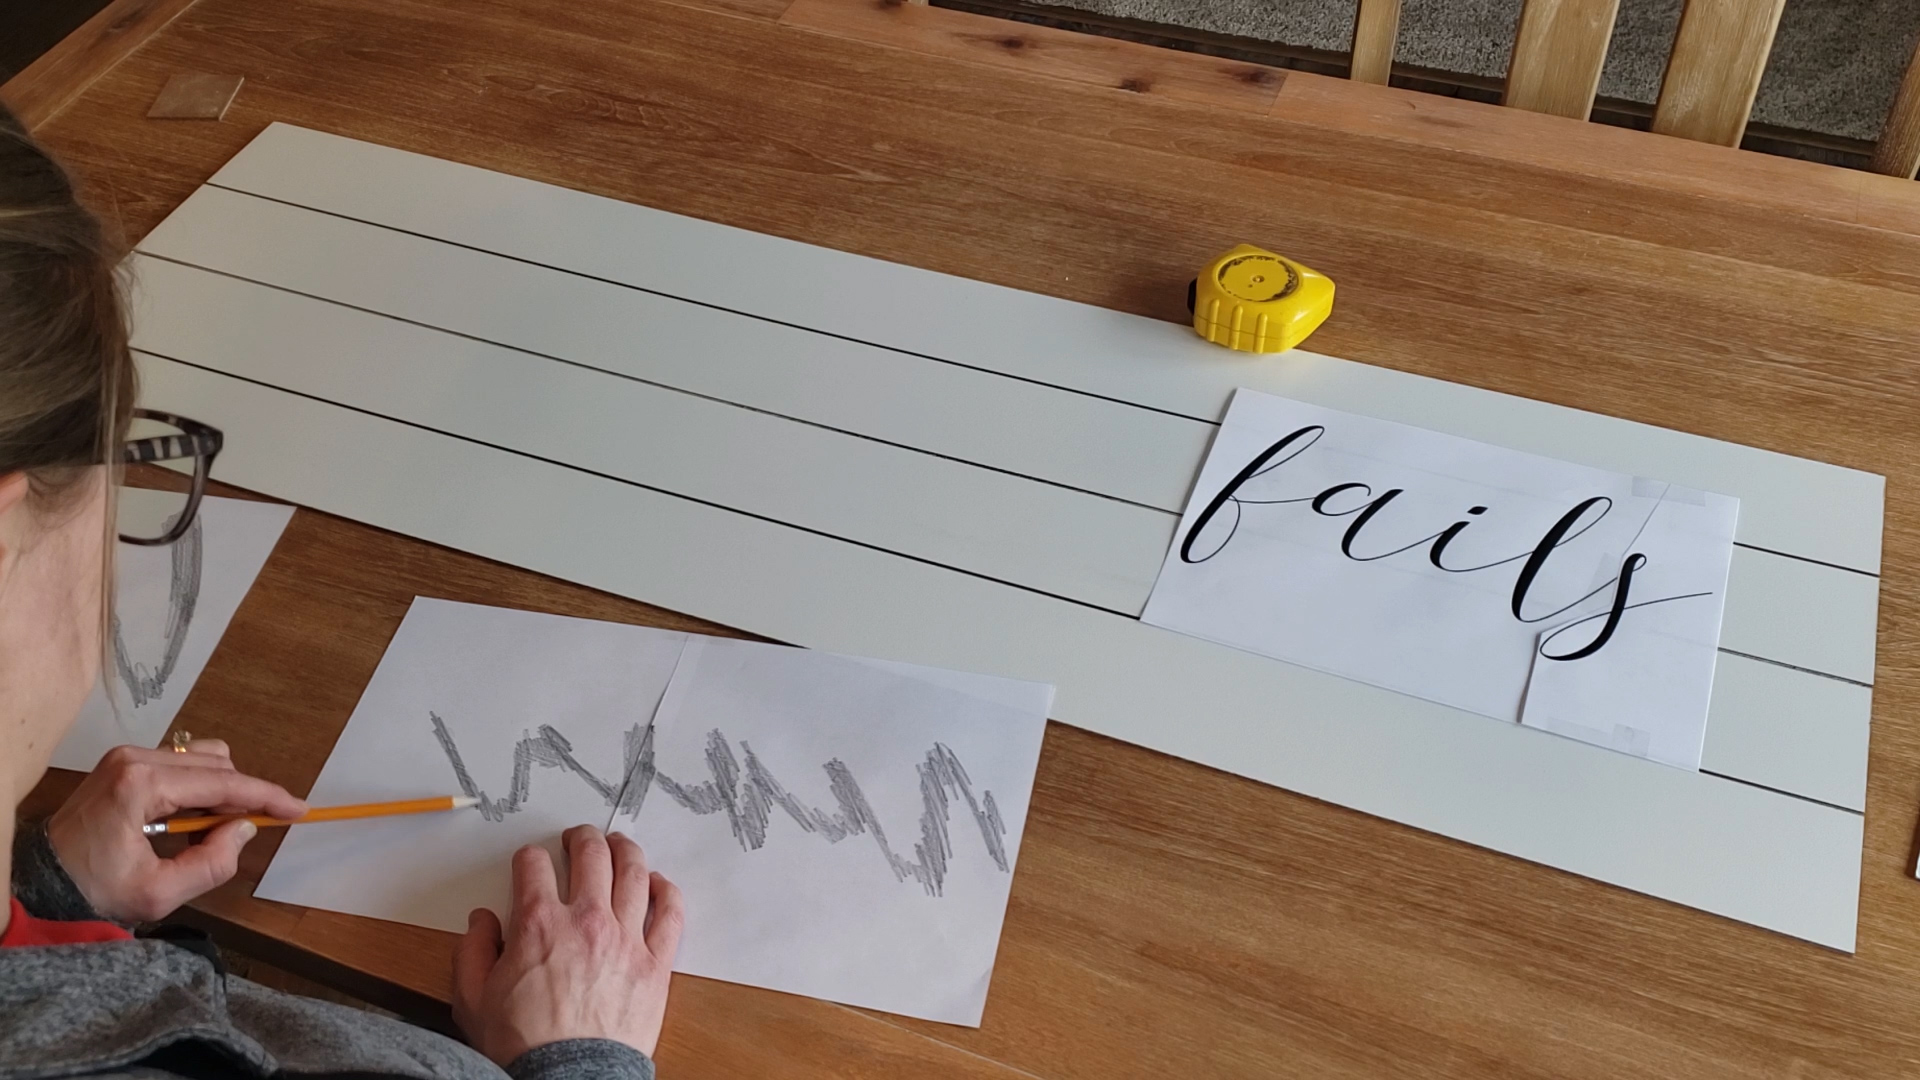
Using a lead pencil scribble over the back of the letters. Are you seeing where this is going? You probably remember this transfer trick from 2nd grade.
Once the back of the letters are covered with pencil, flip the paper back over and tape it in place to the backer board.
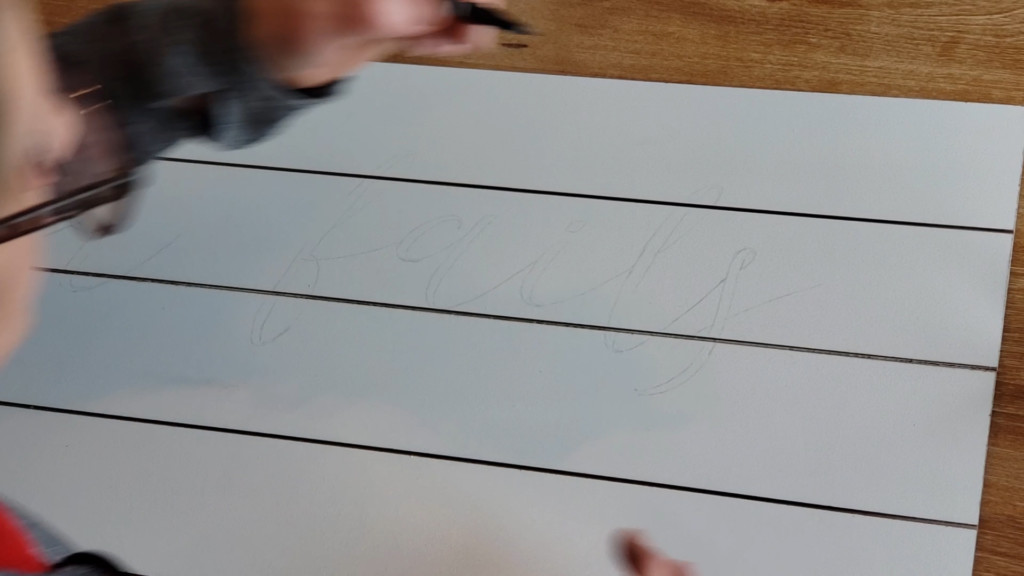
With a sharp pencil follow the outline of the letters until the entire quote is outlined. This will transfer your quote onto the backer board. It will be faint, but you should be able to see it without a problem. If it’s too faint, you haven’t pressed hard enough while outlining.
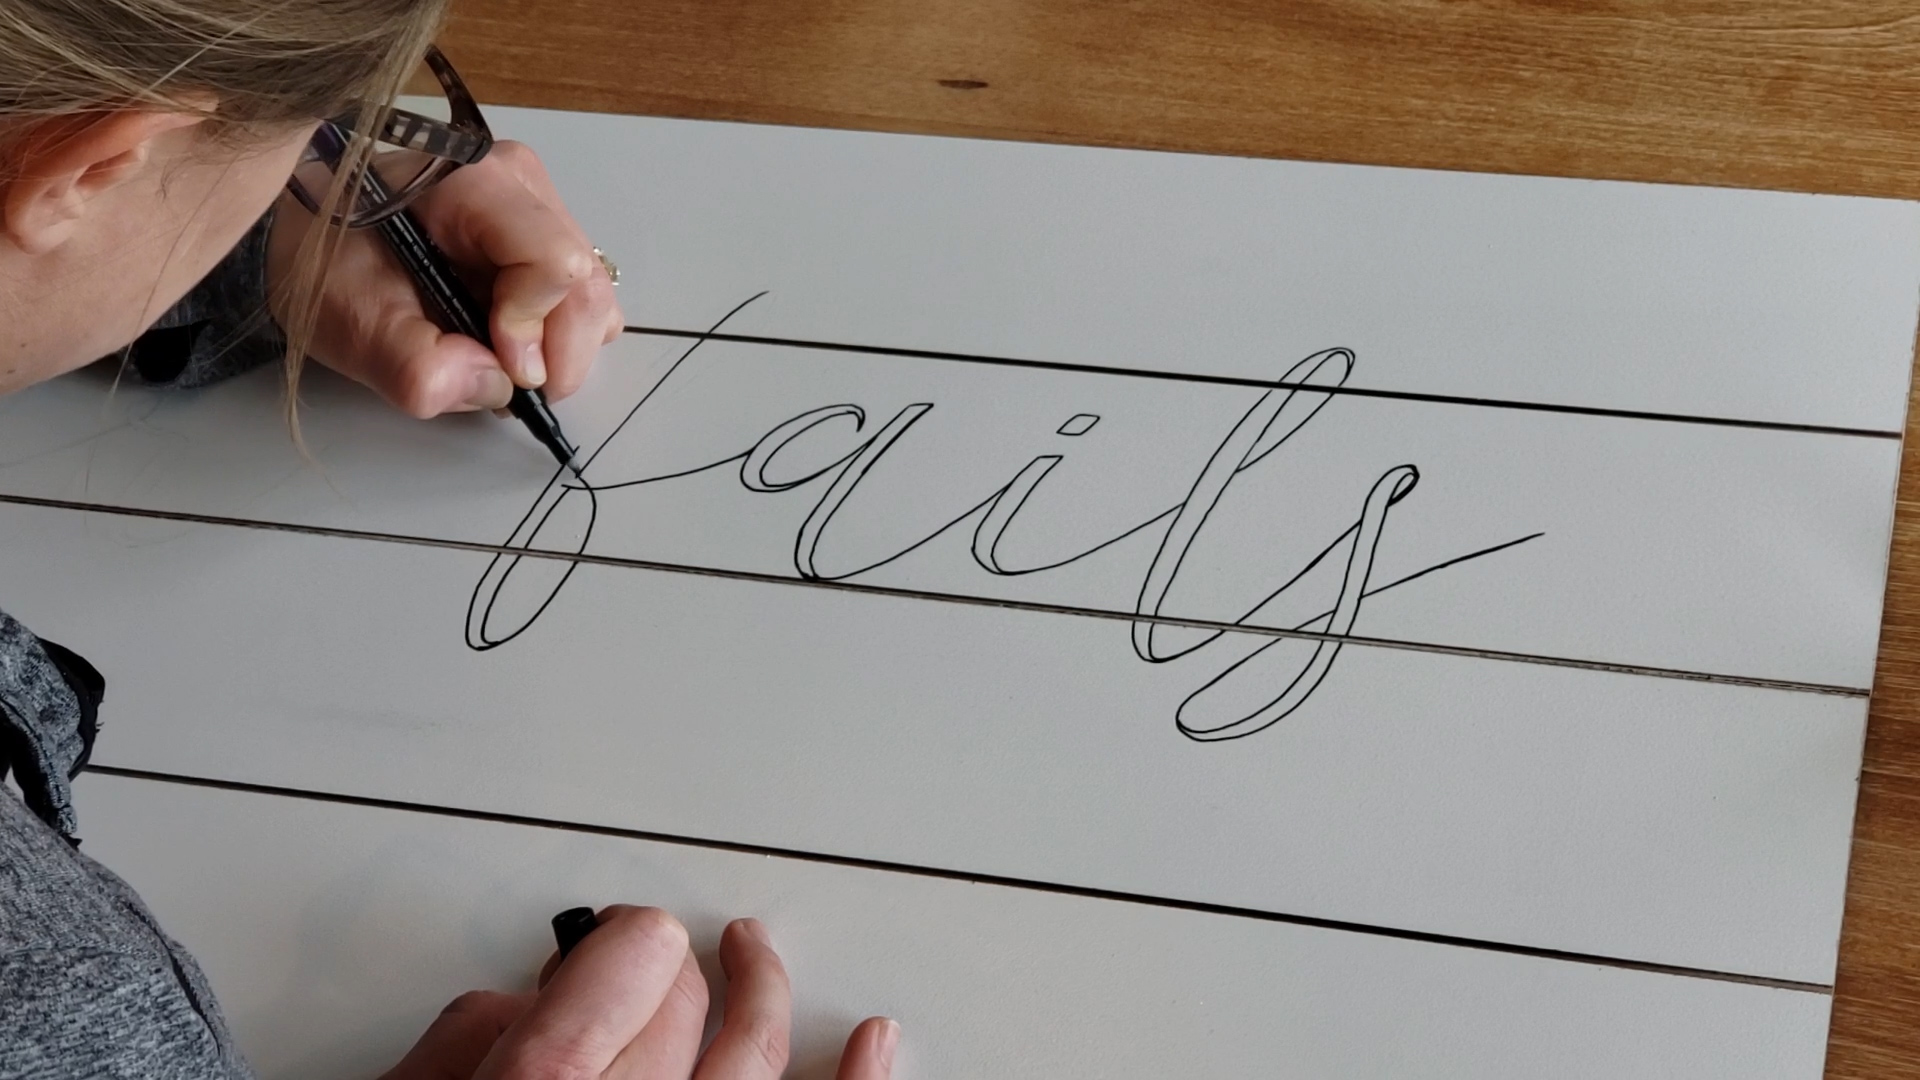
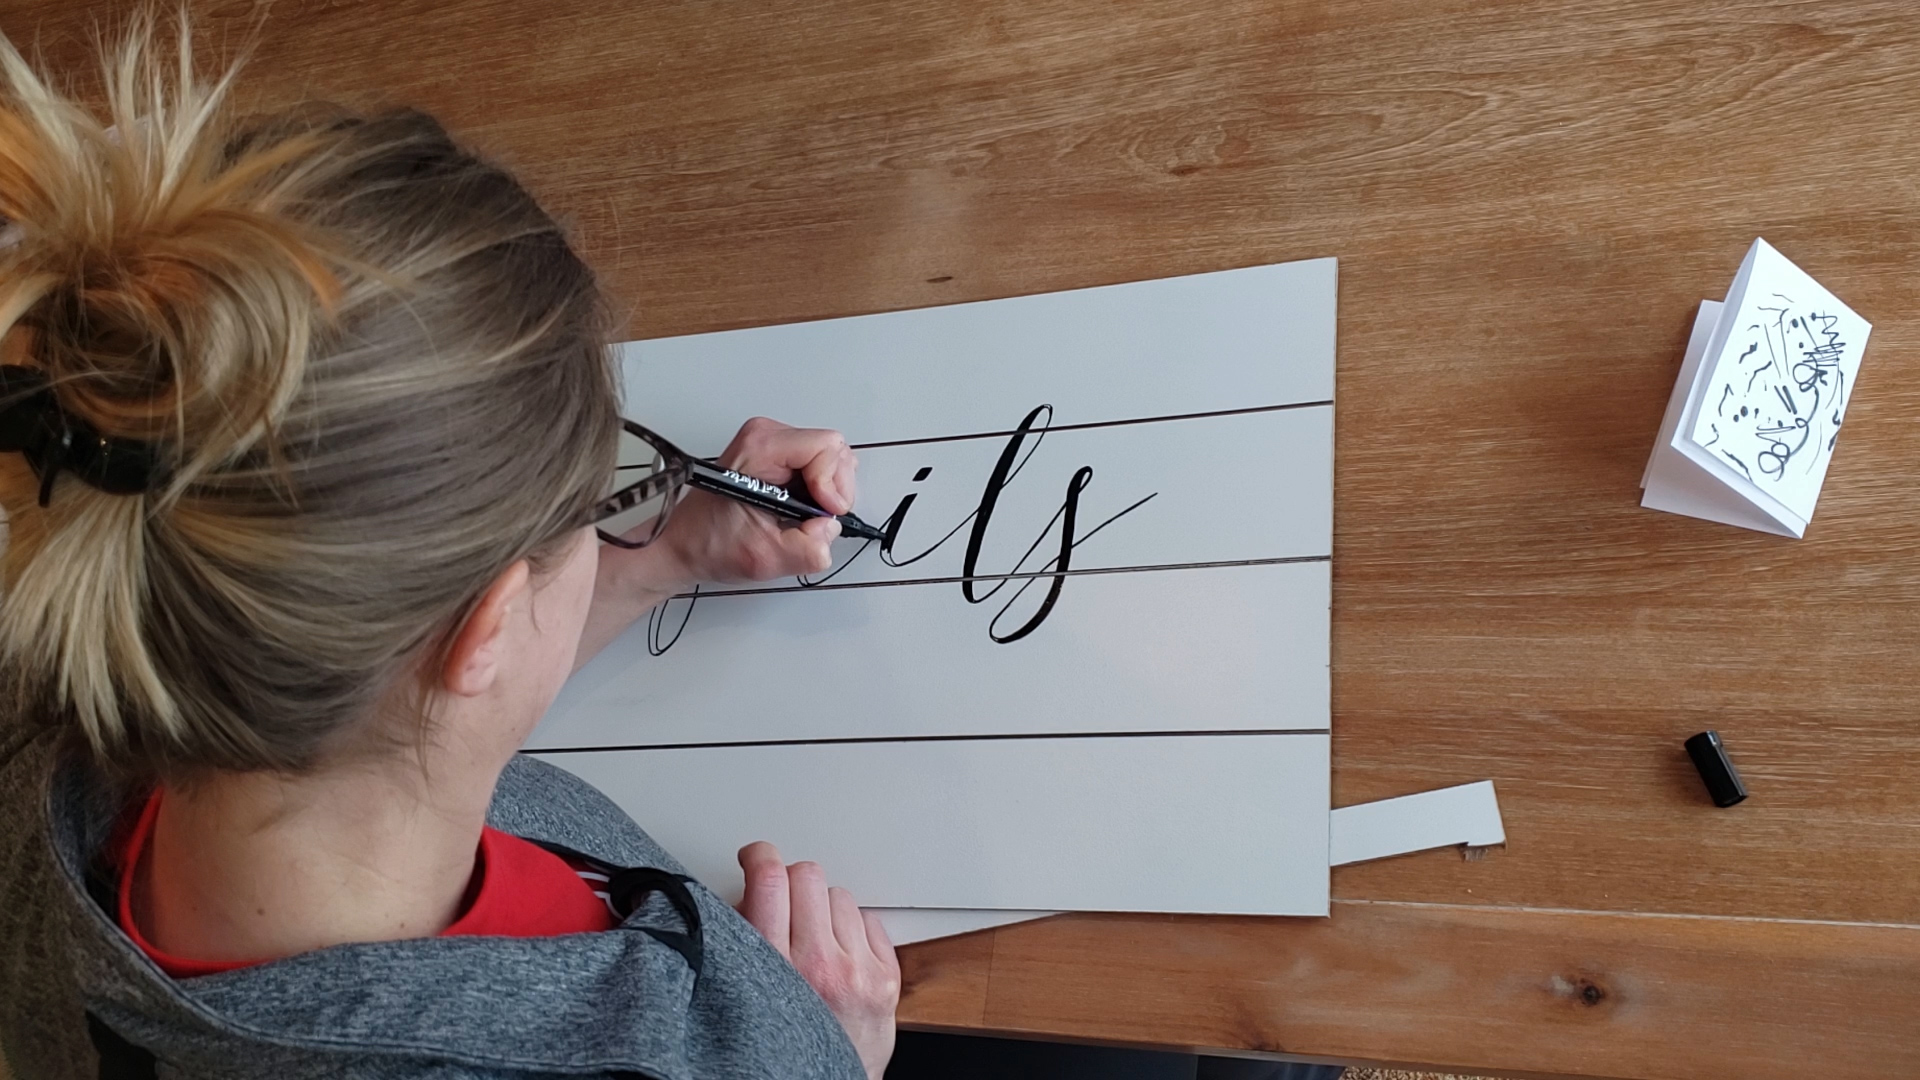
Using the fine tip paint marker trace the outline of the letters.
Using the medium tip paint marker fill in the outlined letters. Yes!! You’ve just painted a quote!
Assembling the Sign
Slip the backer board into the cut grooves in the frame boards.
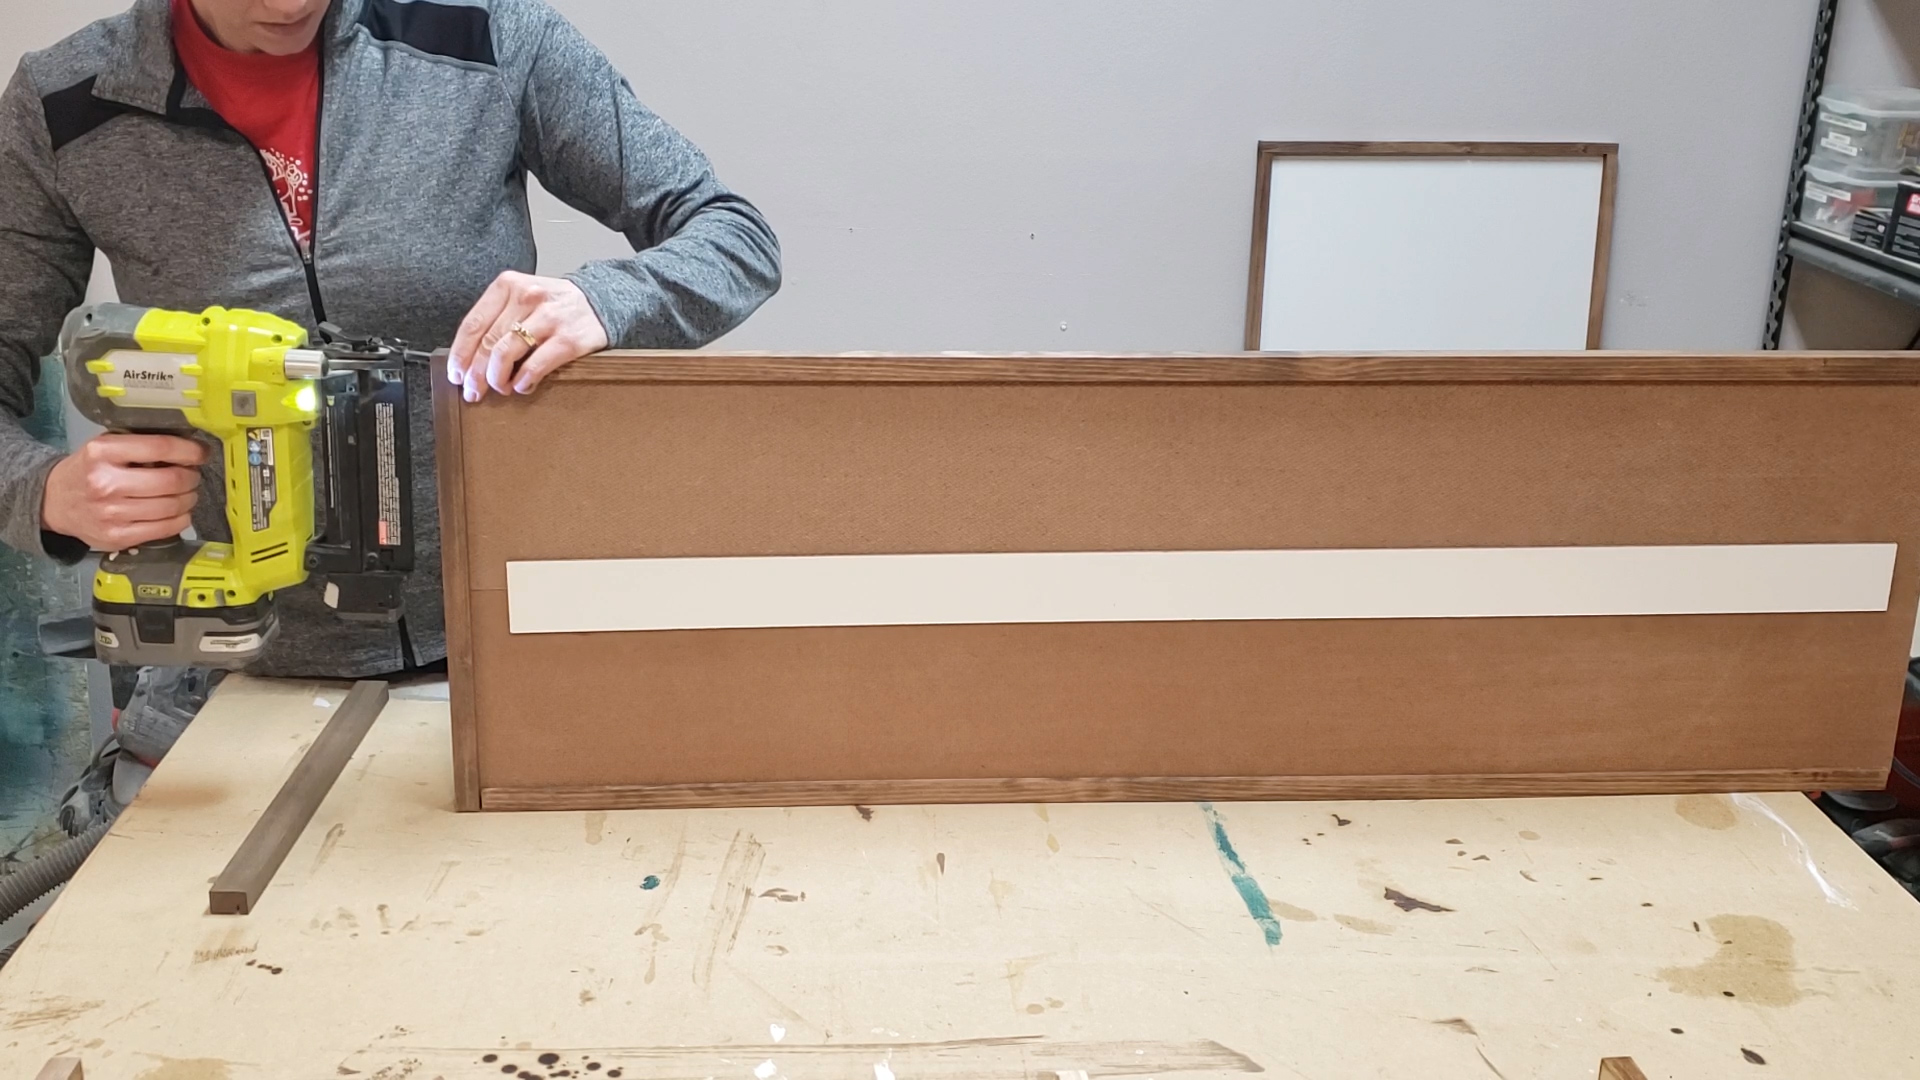
Using 1 ¼” brad nails, nail the frame in place in each corner with two nails.
In the top corners of the back of the frame add the Saw-tooth hooks for hanging the sign.
That’s all there is to it!! I highly recommend watching this video where I’ll show you all the steps to make this DIY quote sign with faux shiplap detail:
Now you have a completely personalized quote sign you’ve made yourself!! Bask in the sense of accomplishment! Show off your sign to all your friends. But be prepared for the request from your friends to make more signs for them.
Find more projects and inspiration In Her Garage and follow my DIY journey on Instagram and Facebook.
![]()

Hi! I’m Kristen, from In Her Garage, and I am a self-taught woodworker and DIY fanatic from Minnesota where I live with my husband and our two daughters. Between being a wife, mom and, registered nurse, I try to make as much time for DIY as possible. My love for building came after our family built our current home in 2015. After we moved in, we needed furniture and instead of spending massive amounts of money to order the pieces we wanted I decided that I would build them myself. I started with a buffet table plan from the fabulous Ana-white and quickly set out to remodel my entire home office.
Since then I have started a side business building furniture for the people in my community. I love hearing my clients talk about the pieces they wish they had whether it be a rustic buffet table, a one drawer side table, or a toy box and then making it a reality for them. While starting my small business it made perfect sense that I would document my building journey so I simultaneously launched the In Her Garage blog and I love sharing my plans, tips and tricks.
Making something beautiful with your own two hands through a little preparation and determination is an amazing feeling and I hope to bring inspiration and know-how to those looking to tackle a big or small project.
I am so glad that you found me here and please feel free to connect with me on Pinterest, Instagram, and Facebook to see what I am working on right now.






Leave a Reply
Want to join the discussion?Feel free to contribute!