12 DIY Home Storage Tutorials | Pretty Handy Girl

It’s January and you know what that means! Time to clean and purge the house of all the excess stuff. Last year I was too busy with projects to purge, so this year I’m taking advantage of some warmer days to clean out our home. I hope you’ll excuse me while I’m in clutter busting HELL mode. In the meantime you might enjoy these 12 DIY Storage Projects to help you organize your home (and hide clutter.)

mudroom_shoe_storage_bench
Make a Coat Rack from an Old Door
 and Make a Shoe Storage Bench with Kitchen Cabinets

full_flow_wall_above_washerLaundry Room Storage using Flow Wall Read more

Replace Water Lines with Braided Metal Hoses | Pretty Handy Girl

31 Days of Handy Home Fixes | Pretty Handy Girl

Welcome to Day 9 of my 31 Days of Handy Home Fixes. Would you believe that a burst water line can cause tens of thousands of dollars worth of damage to your home? It’s true! If one of your water supply lines is not braided metal, you could be putting your home in danger of a massive leak; leading to a flood; which can lead to rot, mold and termites! Yup, termites love moist wood.

Day 9: Replace All Water Lines with Braided Metal:

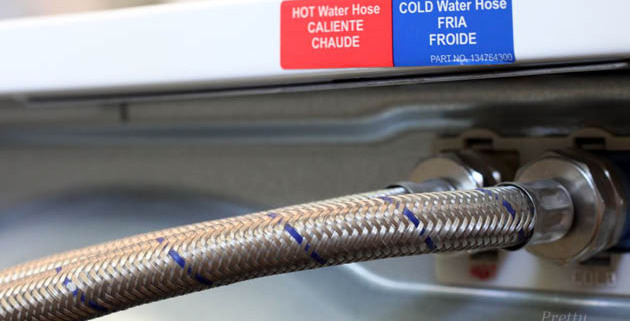
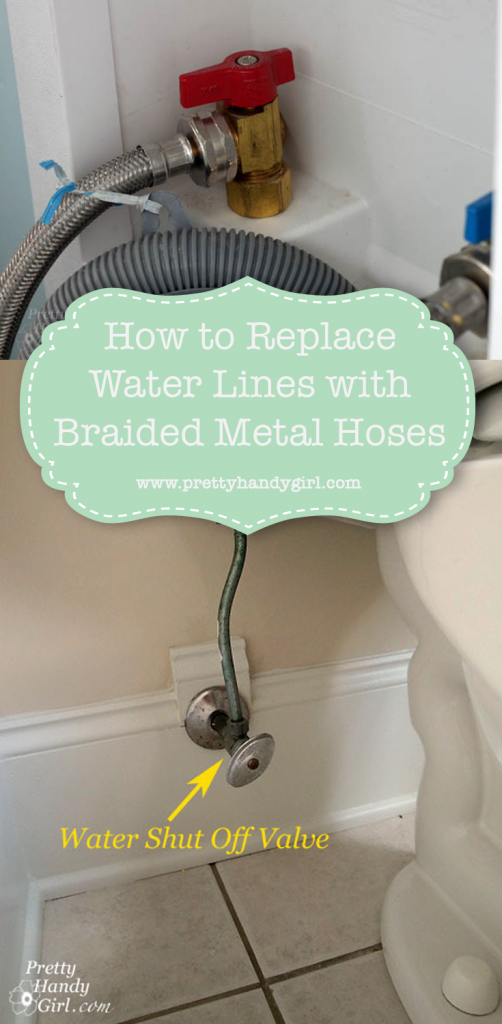
Take a few minutes to look behind your toilet, behind your washing machine and under sinks to see if you have water supply lines that look like these:Replace Water Lines with Braided Metal Hoses | Pretty Handy Girl

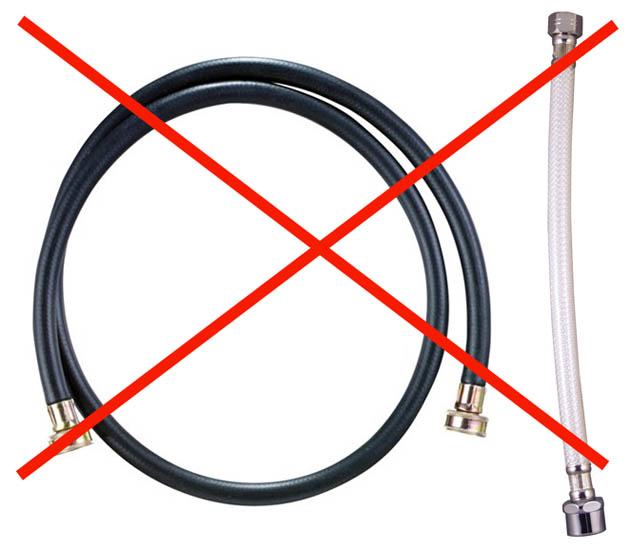
If you do, it’s time to change them out for braided metal water lines:

Replace Water Lines with Braided Metal Hoses | Pretty Handy Girl

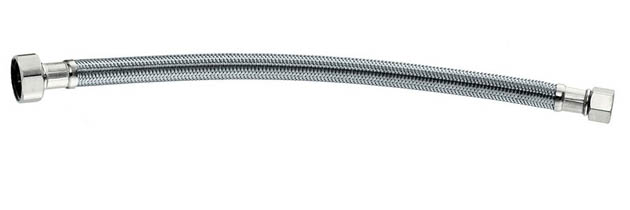
And if you are purchasing a new washer, dishwasher or refrigerator, request braided metal water supply lines instead of the basic lines that are sold with the appliance. The cost difference is literally a few dollars in some cases. That extra dollar or two could save you tens of thousands of dollars!

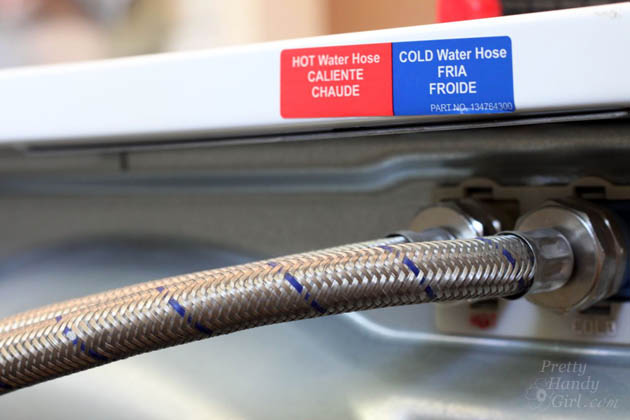
Replacing the water lines is as easy as attaching your garden hose. To replace your washing machine hoses, locate the water shut off (usually it is behind the washer.) Turn the knobs off. Then remove the supply line from the shut off and the back of the washer. Have a towel underneath to capture any drips.

Replace Water Lines with Braided Metal Hoses | Pretty Handy Girl

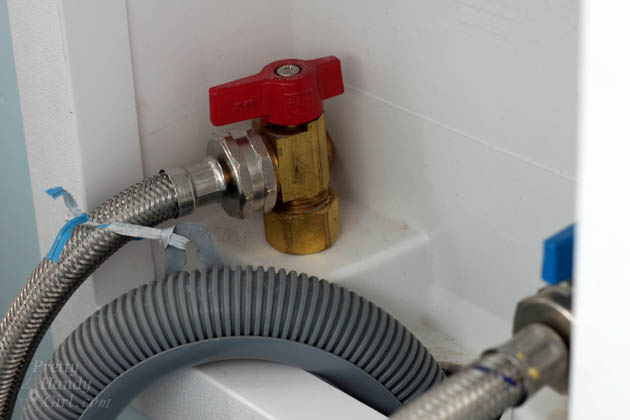
Tighten the new braided hoses onto the washing machine and the water shut off valve. Turn the water back on and look for any drips or leaks. You might need to use a wrench to tighten up to half a turn more if you notice any drips after you turn the water back on.

Replace Water Lines with Braided Metal Hoses | Pretty Handy Girl

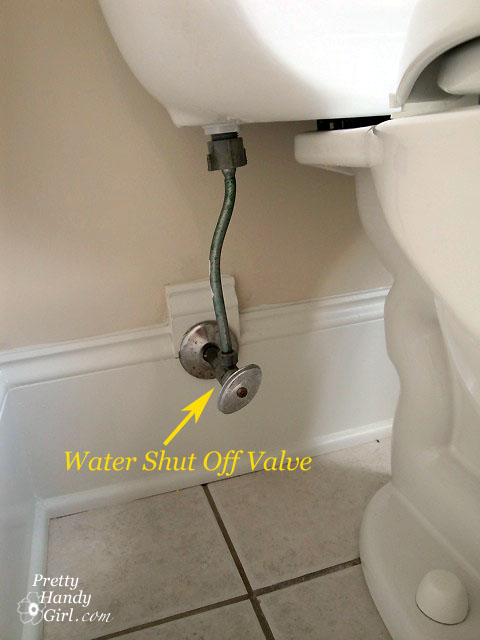
Replacing the water lines to your toilet and sink is almost as easy, usually the shut off valve looks like this:

water_shut_off_valve

Replacing the dishwasher water line can be a bit trickier if it is behind your cabinets. You might need to call in a helper to help you remove the dishwasher.

PHGFancySign

Pin for later!

water line replacement


I’m participating in Nester’s 31 Days Challenge. Check out all the other bloggers who are participating!

31 Day Writing Challenge

Don’t miss a single tip! Sign up to get all the tips in your email:


Sign Up for Email Subscription


Other tips in the 31 Days of Handy Home Fixes series:


Beef Up Door and Window Casing with Back Band | Pretty Handy Girl

Want an easy way to add more architectural interest to your standard colonial door and window framing? Adding an extra piece of moulding, called back band, can add that extra boost of architectural interest.

Add Architectural Interest to Casing | Pretty Handy Girl

And the good news is that you can do this to your existing trim moulding. No need to remove or start fresh! The only thing you will need is paint on hand to paint the moulding after you BEEF it UP! In essence, We’re gonna PUMP it UP!

Materials:

  • Back band moulding
  • Finish nailer
  • 2″ finish nails
  • Caulk
  • Paint
  • Miter saw or  hand saw with miter box

Instructions:

There’s really not much to this tutorial. Line up the back band against your existing door or window frame. Measure or mark the back band where you need to cut your miter. Read more

Faux Weathered Gray Wood Grain Tutorial | Pretty Handy Girl

A year has flown by since I laid our Globus Cork glue down tiles in our kitchen. I wanted to check back in and let you know how they are holding up.  I must say this is one of my favorite (if not THE favorite) fixture in our kitchen. I had some minor doubts because some people feared that dogs and cork floors don’t go well together. Or that rambunctious boys would ruin them. Well, I’m here to report that after a year they still look the same as when they were installed!

Update: Our Cork Floors One Year Later | Pretty Handy Girl

I can tell you that there has been lots of chair scraping. Lots of matchbox car races. Lots of wrestling and plenty of Buddy sliding on them as he runs to retrieve balls.

Update: Our Cork Floors One Year Later | Pretty Handy Girl

I have yet to see a scratch anywhere! The only mark that I did manage to make was a small dent when I dropped one of the heavy corbels and it hit the floor right at the pointy edge. But, I can’t even find that dent to be able to check on it.

There is also one dip where I must not have filled a knot hole in the underlayment. But, it is barely noticeable unless the light hits it just right: Read more

Faux Weathered Gray Wood Grain Tutorial | Pretty Handy Girl

Faux Weathered Gray Wood Grain Tutorial | Pretty Handy Girl

Do you love the Restoration Hardware tables that have that beautiful gray (driftwood-like) weathered wood? Me too. But, I can’t justify spending thousands of dollars on their furniture. Instead, I found a Craig’s List pedestal table that had the right shape and size for our kitchen. It was a cherry veneer finish, but after some paint you’d never know!

Faux Weathered Gray Wood Grain Tutorial | Pretty Handy Girl

And then, I created my own Faux Weathered Gray Wood Grain top. All you need are some Valspar paint samples, some wood grain tools and a dry brush to achieve this look.

Ready to get started?

Faux Finish Weathered Wood Grain Materials:

(I’ve included affiliate links for your convenience. I earn a small percentage from a purchase using these links. There is no additional cost to you. You can read more about affiliate links here.)

Faux Weathered Gray Wood Grain Tutorial | Pretty Handy Girl

Faux Finish Weathered Wood Grain Base Coat and Glazes:

Faux Weathered Gray Wood Grain Tutorial | Pretty Handy Girl

Before you begin creating your wood grain, you should paint your surface with Valspar Woodrow Wilson Putty and allow it to dry.

Faux Weathered Gray Wood Grain Tutorial | Pretty Handy Girl

If you are painting furniture, lightly sand the piece. And be sure to use Valspar Paint + Primer in one. This will allow you to paint directly onto the furniture and skip the primer. Read more