Building a Shoe Storage Bench from Kitchen Cabinets
Welcome! If you are a friend, you know that all our friends and family enter through our mudroom. This door is the closest to our driveway. Only the door-to-door salesmen go to our front door (heh, heh, heh!)
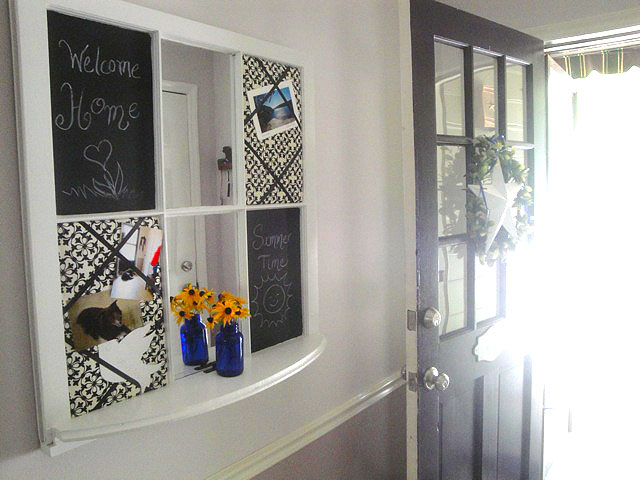
Come on in! This blackboard, mirror and memory board used to be a discarded window.
Make one of your own! Tutorial here.
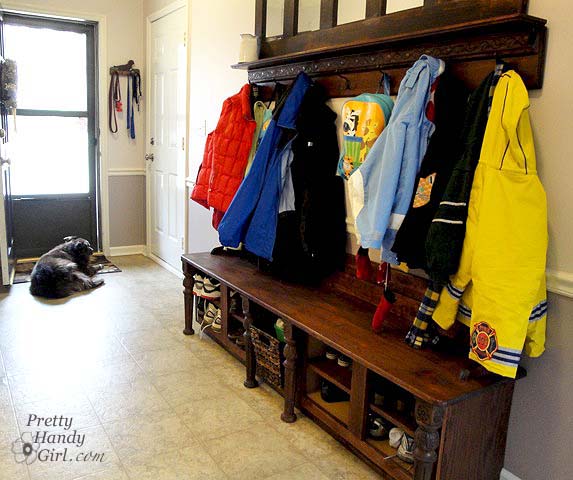
This is my pride and joy! My mudroom bench and coat rack. Yes, I made it myself.
And no, I didn’t have any help from my husband. I am the handywoman of our home.
I’ll give you a little background about how this bench came to be. I really loved having a mudroom to begin with. But, the piles of shoes and coats that accumulated behind the door were making me nuts! Who knew that a flip flop could double as a door stop, not allowing me to enter my own house!
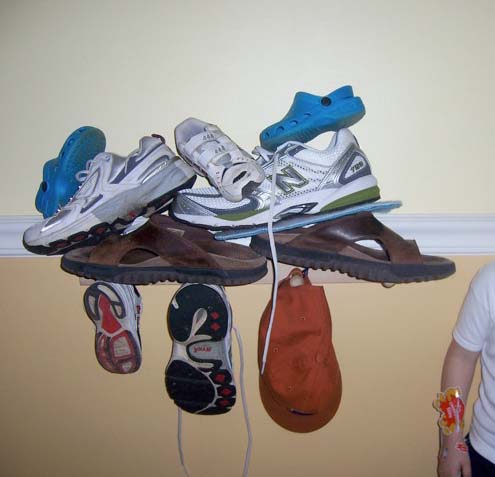
My son tried to help out by piling all the shoes on top of the coat rack. Better, right?!
Sure, I could have hopped over to Pottery Barn and bought a mudroom bench and shelf, but I balked at the price tag. So, I continued to ponder a solution. I dreamed of having a perfect storage solution to streamline my mornings of getting two little boys out the door to preschool. A bench to perch the kids on while putting on their shoes. (A task I know someday I will miss doing, but for now I can’t wait for them to learn to tie their own shoes.) Everyone’s socks and shoes would be at hand but not in the way. And a place for every jacket, book bag, and hat. The final product was beyond my dreams. I love it more than any other piece of furniture in my house. It is my sanity saver!
My dreams began to form when I stumbled across some kitchen wall cabinets on clearance at Lowe’s. These are the short cabinets that mount over your fridge. They were marked down to $45 each.

The wheels in my brain began to turn. I started to see how I could use these cabinets to solve our shoe dilemma.
I bought some lumber. I also had some salvage pieces that had been collecting dust in our attic. An old door with recessed panels, four ornate old coffee table legs, and some shelf brackets from a yard sale.
After a few days of distressing and staining boards, cutting lumber, rounding some edges, hammering, nailing, driving screws and sweating, this is what I ended up with!
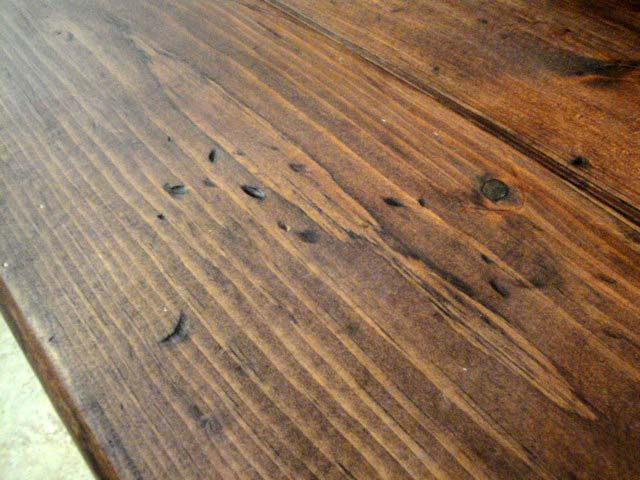
Chain throwing and hammer marks add a distressed look to new wood.
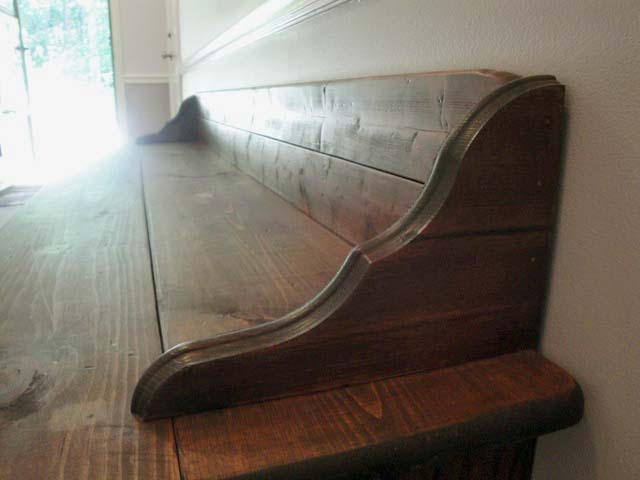
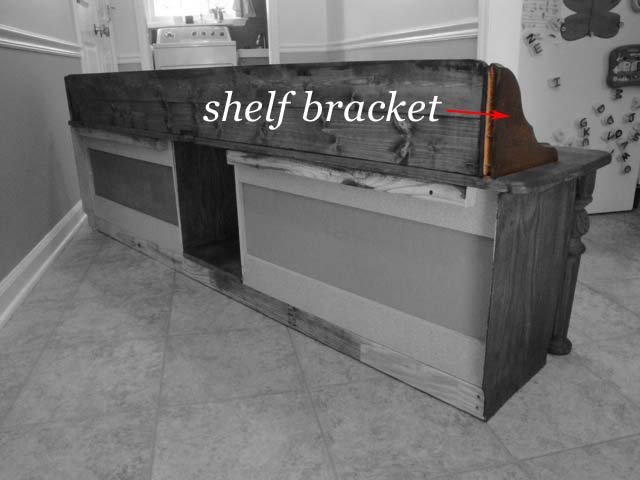
Decorative shelf brackets add nice character to the back rest.
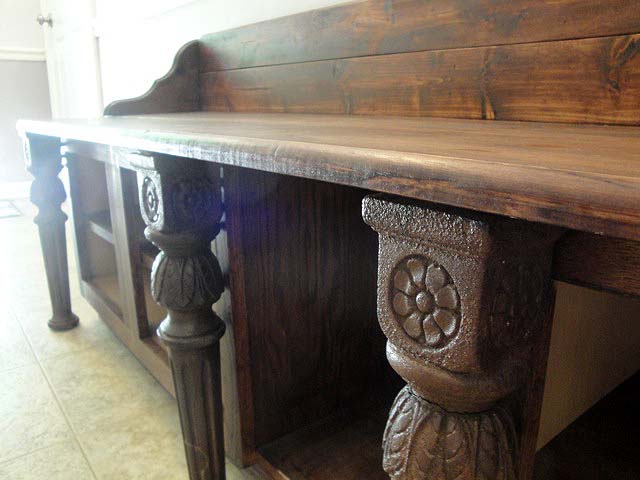
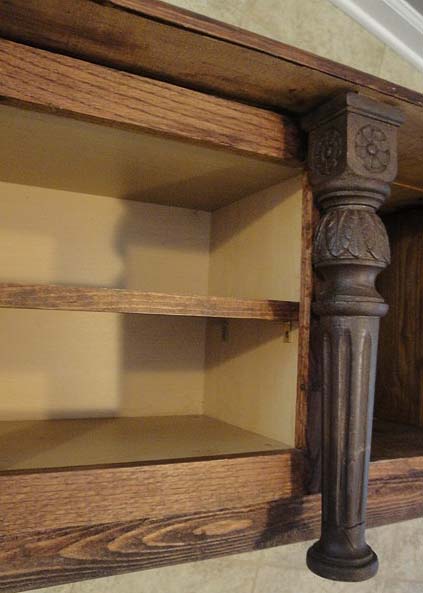
Salvage coffee table legs add that much needed detail.
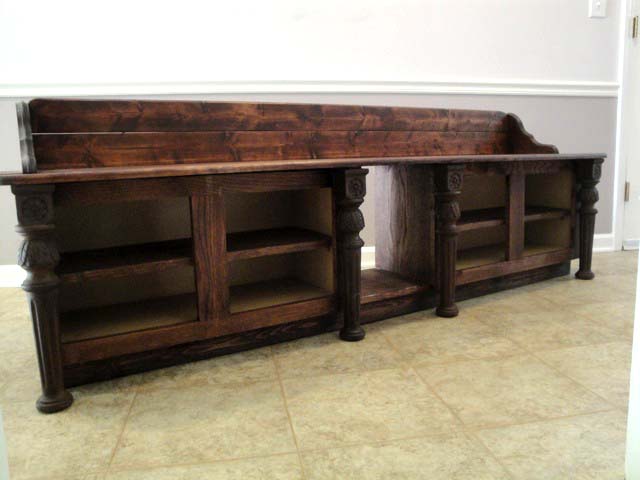
The finished bench (the only time it was ever empty.)
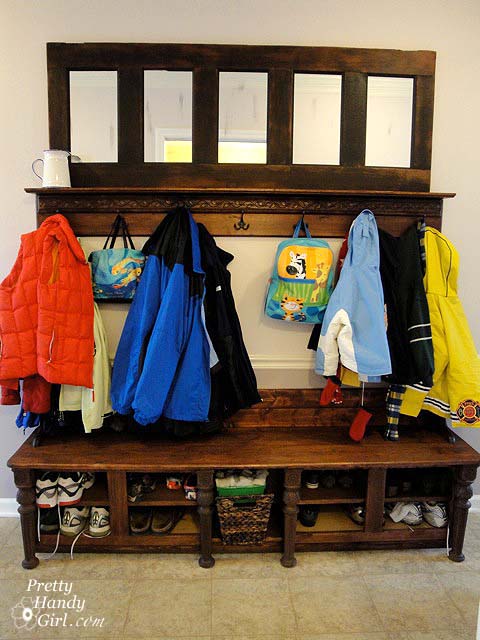
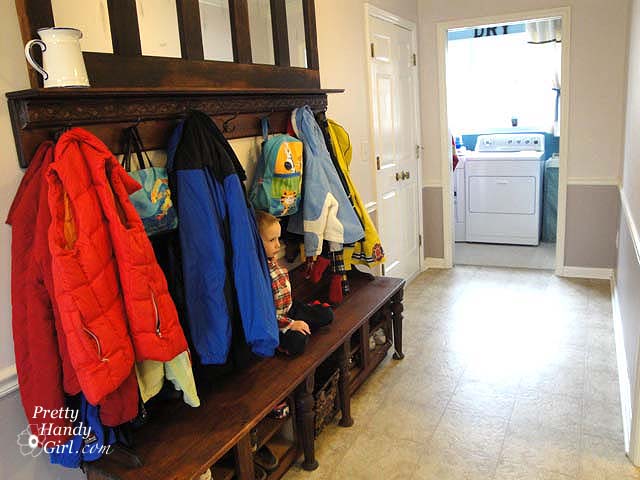
Loaded with shoes and with the salvage door on top as a coat rack. A mudroom bench with shoe storage and a clear floor! My sanity has returned.
If you are intrigued as to how I constructed this bench – keep reading. If not, thanks for stopping by. I hope you will come back again soon. And, the tutorial for the coat rack is here!
Building the Shoe Storage Bench (the Tutorial)
I have to apologize up front for not having the usual step-by-step tutorial for this bench. But, I built it pre-blogging days when I didn’t have to stop and start after every step to take a photograph. I hope you’ll forgive me. And now the abbreviated tutorial:
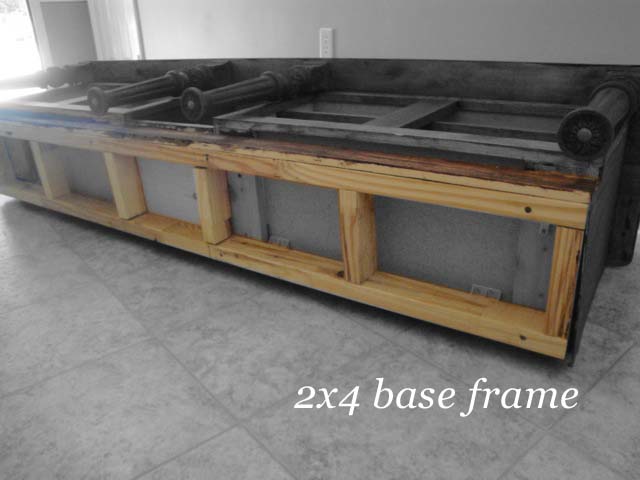
Here is the bench flipped on its back to show you the base construction:
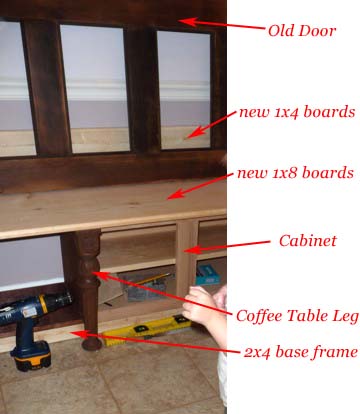
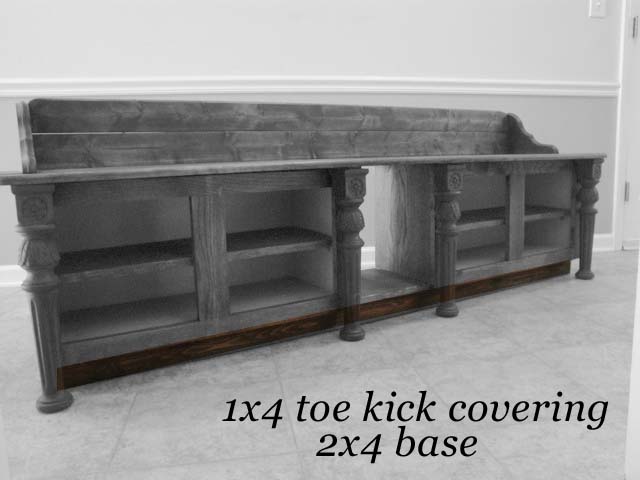
I built the base frame by nailing 2x4s together.
Added a 1×4 board (toe kick) to hide the cheap 2×4’s. Then finish nailed the toe kick to the base frame.
Now the upright view to show you the bench construction:
I attached the two wall cabinets to the base frame with screws.
Added a 1″ thick pine board cut to size to fit between the two cabinets. This board also hides the base frame.
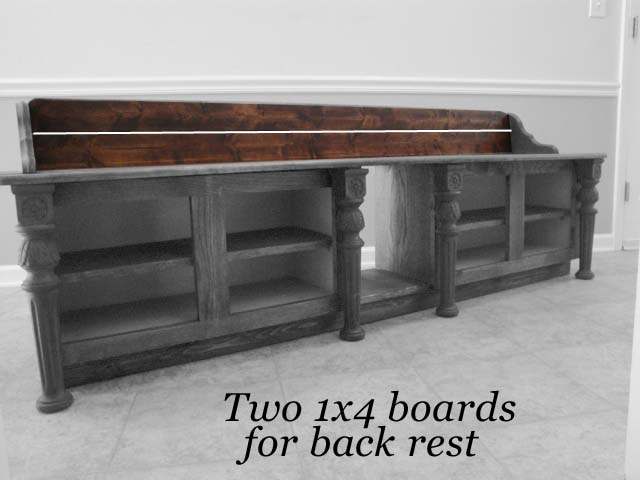
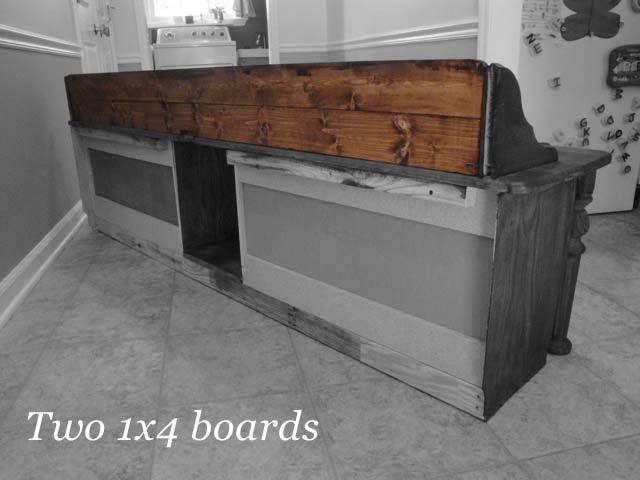
Used two 1×4 pine boards with rounded top corners for the back rest.
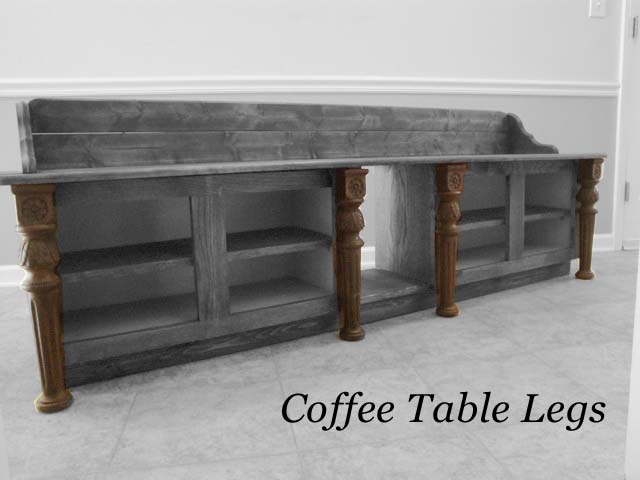
Mounted decorative coffee table legs by driving a screw down through the bench seat.
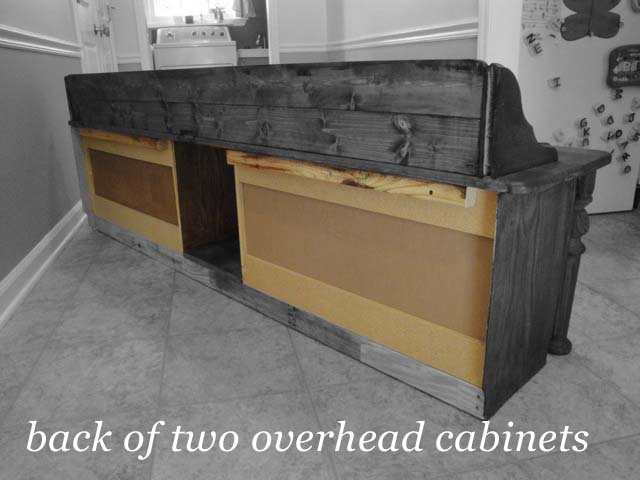
From the back, the bench looks like this (not pretty, but no one sees it.):
You can see the two wall cabinets from the back side.
Another view of the two 1×4 back rest boards.
Shelf brackets were used to mount the back rest to the bench seat.
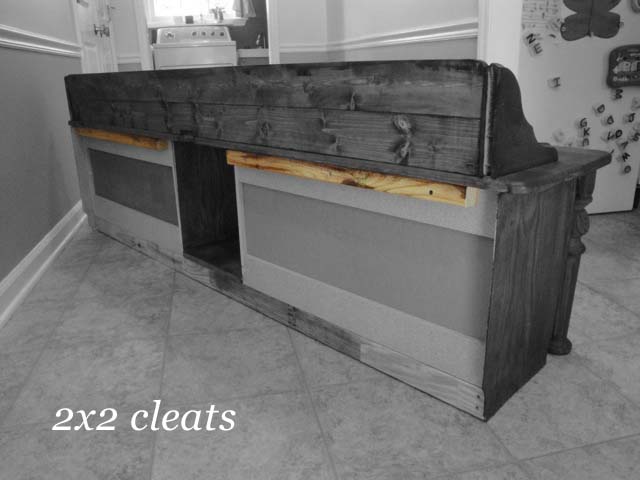
Screwed 2×2 cleats to back of cabinets, then attached the bench seat by driving a screw down through the seat and into cleats.
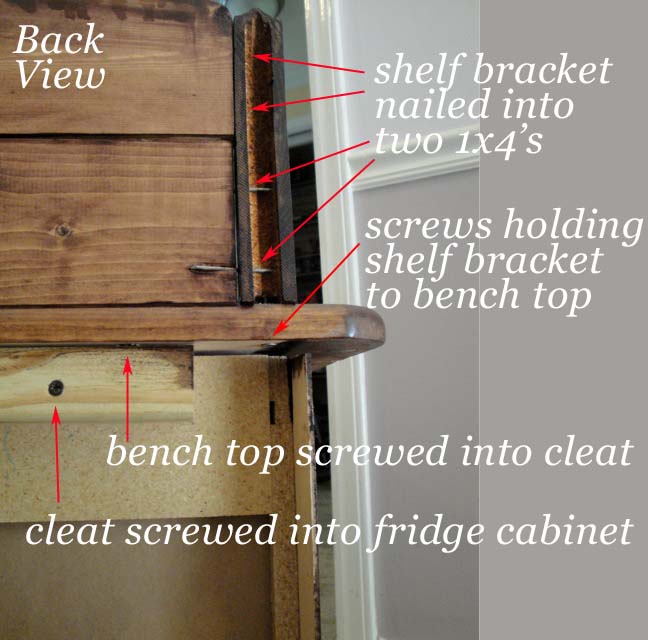
Now to show you how the pieces were attached, the close up below is a view of the shelf bracket and corner section:
This corner shows how I used screws and nails to attach the parts (definitely ignore my sloppy nailing skills. I’m still working on perfection y’all.)
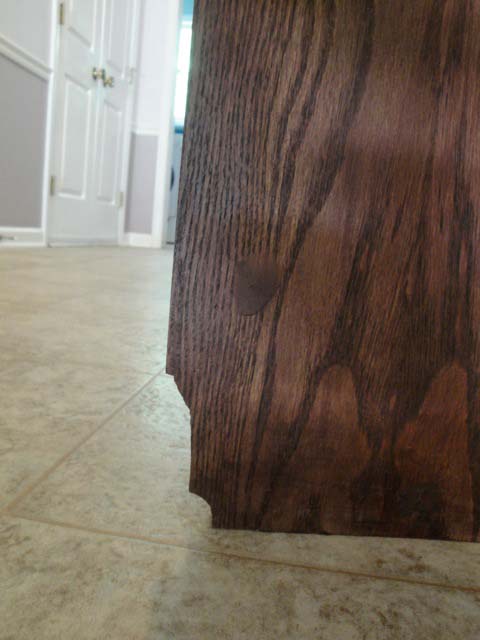
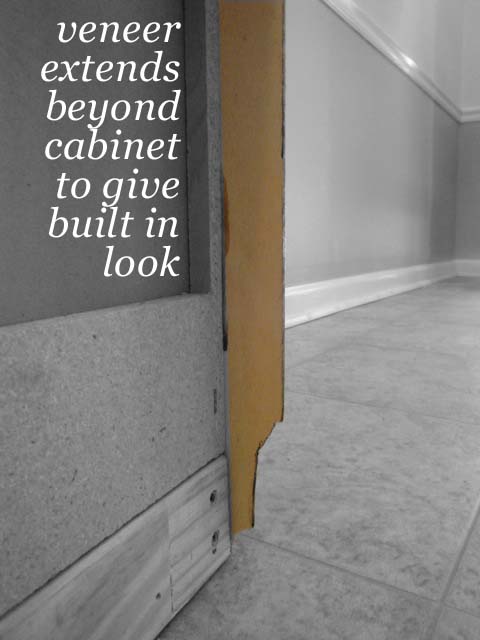
Base cabinets had particle board construction, so I added veneer end caps.
Close up of end cap veneer with base moulding profile cut out.
Read more about scribing and cutting a profile here.
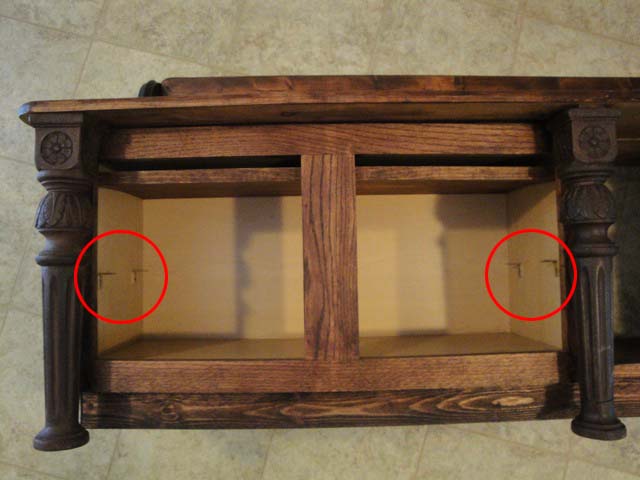
Then I added L brackets inside the cabinets to support a shelf.
Add the shelf and you’ve got double the shoe storage.
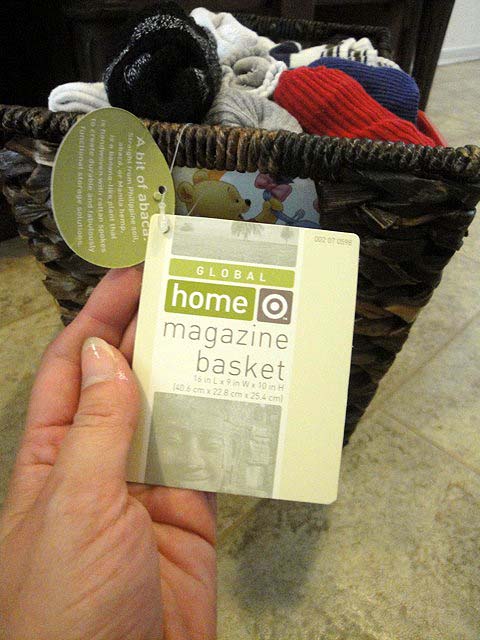
Hmmm, but if you have shoes, you need to have sock storage as well. I purchased one magazine basket at Target.
And filled it with our socks. Old baby wipe containers are used to divide the socks for each of my sons.

And voila, I have an efficient sock storage spot.
Here is the final result loaded with socks, shoes and coats! The coat rack is made from an old door, antique hooks, and yard sale shelves.
Coat rack tutorial is here!
Not bad for about $200 in materials! I love my mudroom bench and get oodles of compliments on it.
Sharing this organizational project with:

If you liked this tutorial you might want to follow me on some more DIY adventures, complete with step-by-step tutorials!
Or follow me on Twitter, Facebook, or Pinterest so you can be the first to know what I’m working on next!








Trackbacks & Pingbacks
-
31 Easy DIY Storage Bench Plans Anyone Can Build – 100% Free - Lemon Slide says:
October 2, 2017 at 5:58 am
-
30 Interesting DIY Entryway Bench Ideas – Cool DIYs says:
May 28, 2017 at 1:38 pm
-
25+ Real-life Mudroom and Entryway Decorating Ideas by Bloggers says:
February 16, 2017 at 4:05 pm
« Older Comments[…] Build this storage bench […]
[…] Tutorial via Pretty Handy Girl […]
[…] Kitchen Cabinet to Shoe Storage by Pretty Handy […]
Leave a Reply
Want to join the discussion?Feel free to contribute!