Saving Etta: Mudroom Reveal Tour and Sources

Saving Etta: Mudroom Reveal

Is it bizarre to say that the Saving Etta mudroom might be one of the favorite spots in the Saving Etta house? I’m not sure if it’s because this room has so many salvaged items. Or maybe it’s because this space gets a glorious dose of sun in the late afternoon. Regardless, I love that this room greets the homeowners every time they come home.

(I’ve included affiliate links for your convenience. I earn a small percentage from a purchase using these links. There is no additional cost to you. You can read more about affiliate links here.)

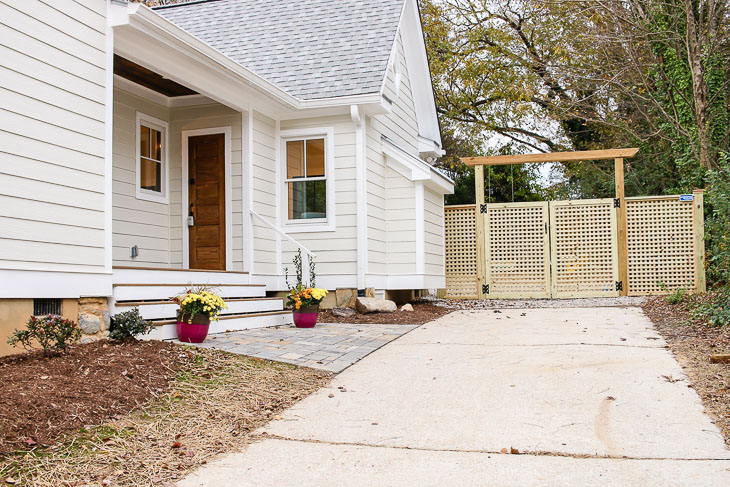
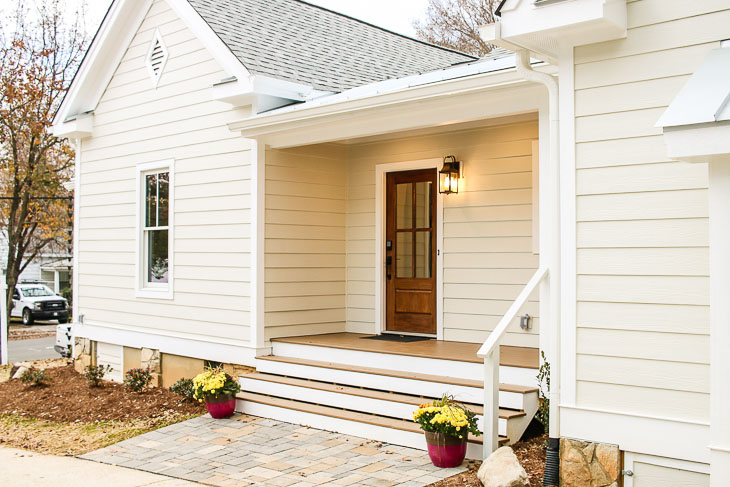
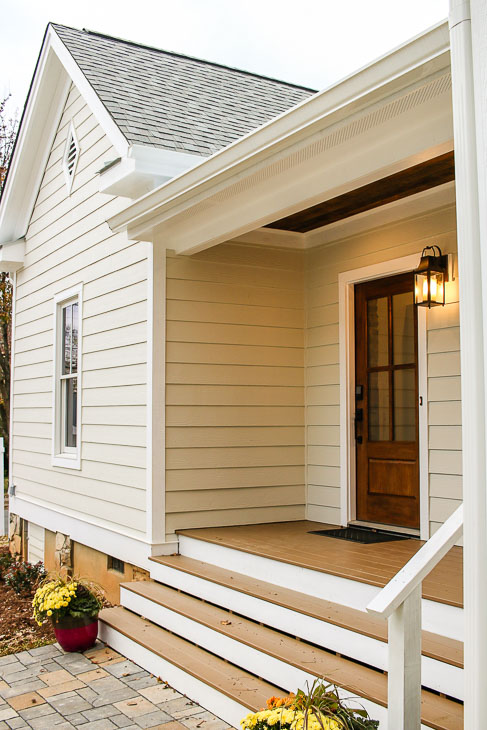
The entrance to the mudroom is off the driveway through a door on the side porch.

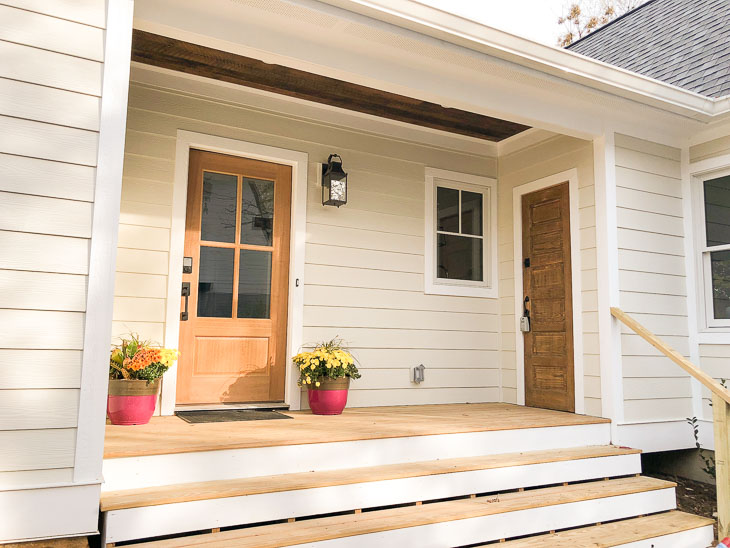
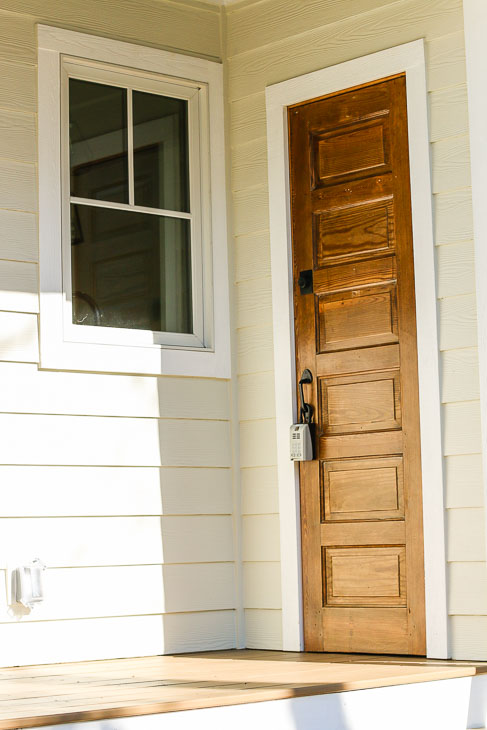
The smaller wood door on the porch leads to a little storage area. The door was reclaimed from an early 1900 house that was destroyed to make way for new condominiums. There is so much growth in Raleigh, NC and unfortunately many of these older homes are in the way of that growth. This is why I was thrilled to have been able to save a piece of Raleigh’s history by preserving the original 1900 portion of the Saving Etta house.

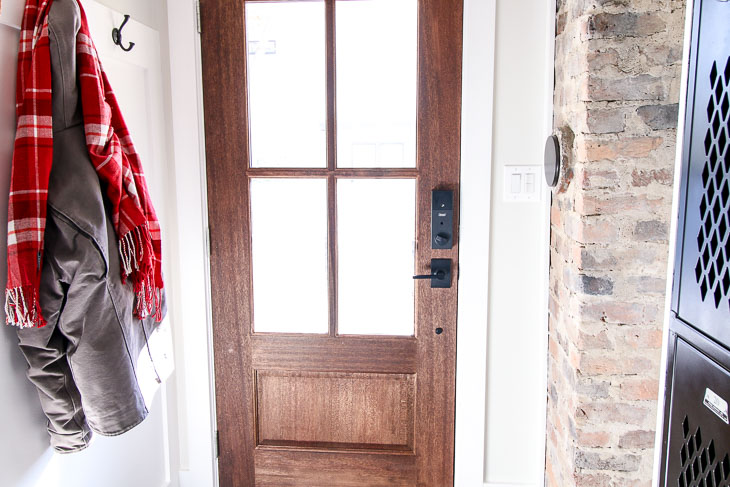
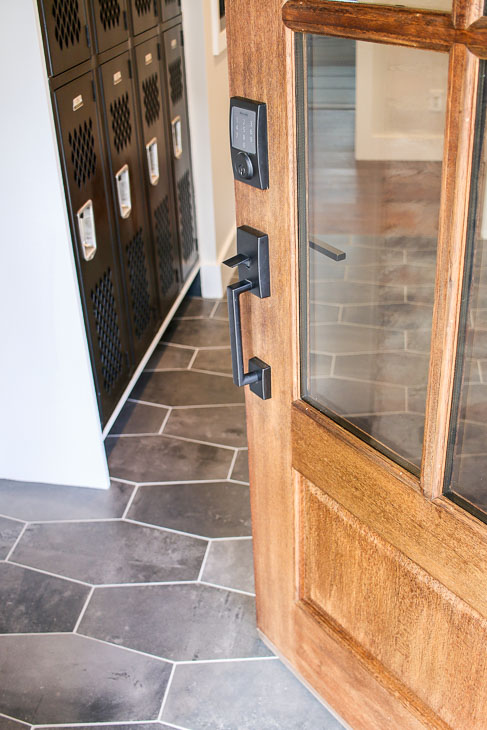
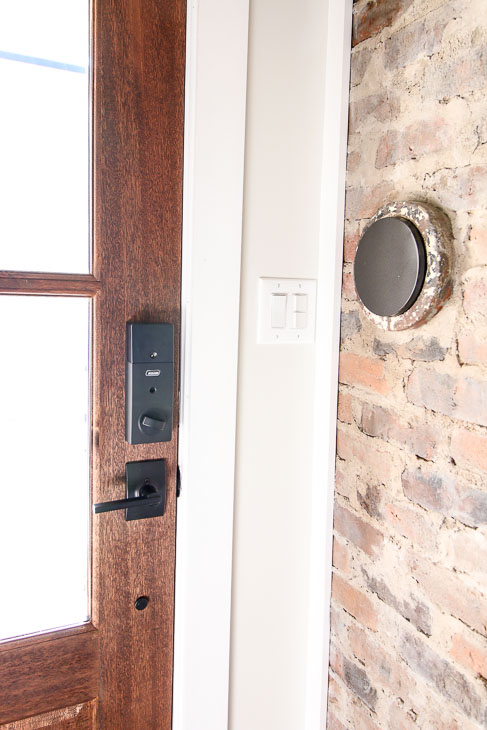
But, I digress, back to the mudroom. The little side porch is the perfect spot to drop your bags and fumble for your keys—wait, did I say keys? No keys necessary! The Schlage Sense Smart lock has codes you can program into it.

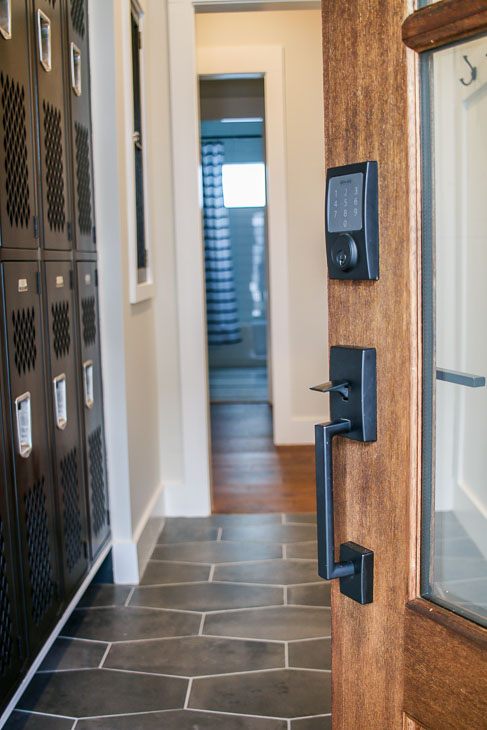
Alternatively, for more automagical unlocking, you can pair the lock with your smartphone after downloading the Schlage Sense app and lock or unlock your door with your phone! Watch this video to see the full features of the Schlage Sense app and how you can control the door locks:

You can also set codes and deactivate codes easily. I’m so thrilled with this Schlage Sense Smart lock that I will be installing one on my home in the near future.

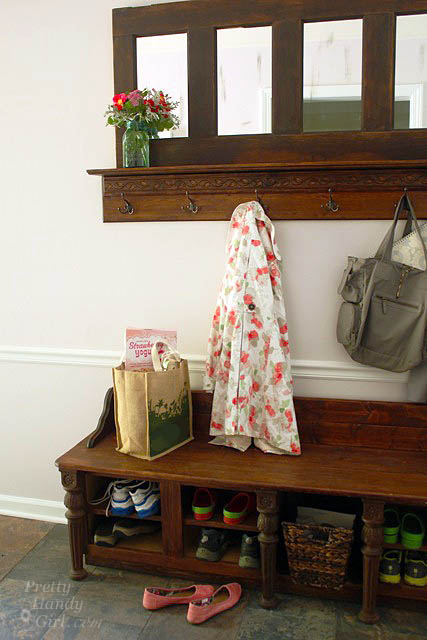
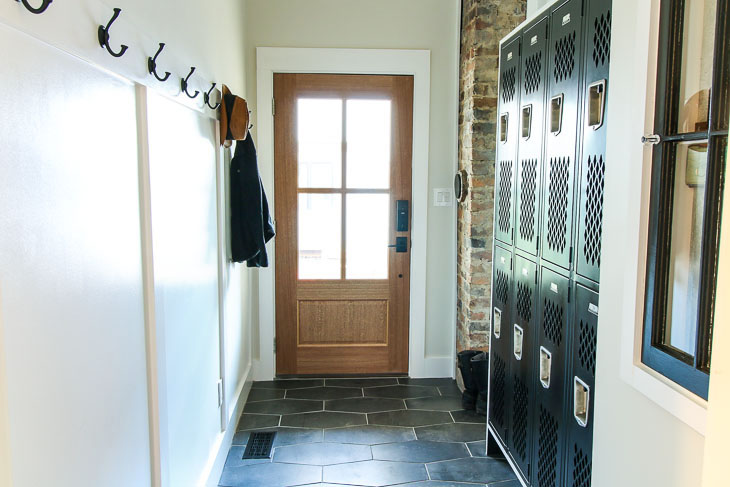
Once inside the house, the mudroom is a natural space to drop all the things.

This room used to be one of the bedrooms. Originally the chimney was covered by plaster. Can you spot the chimney on the left side of the picture below.

Saving Etta - The Story of Saving a House Built in 1900 | Pretty Handy Girl

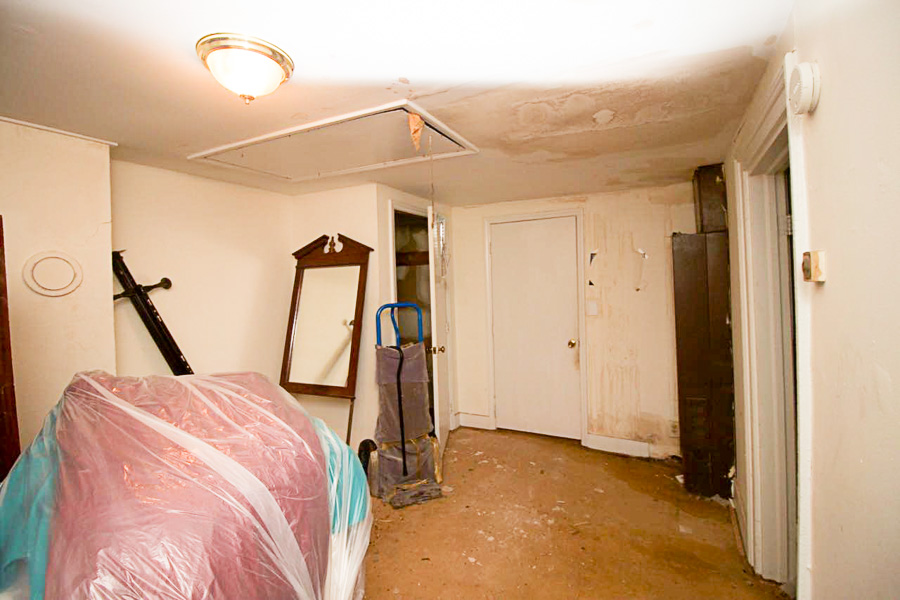
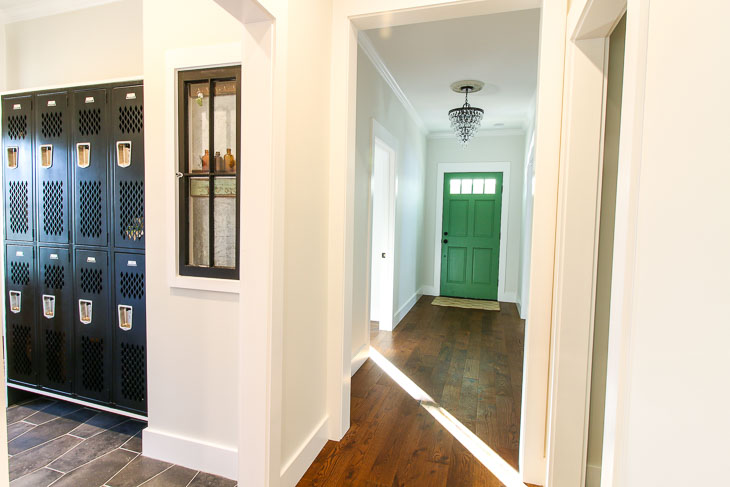
The open closet door above is where the little key hook window cabinet is below (more on how I built this gem in a later blog post.) The closed door in the picture above is now the doorway into the main hallway in the house as seen below.

Everything from the chimney back was removed during demolition. The back of the house wasn’t original to the 1900 house. The back 2/3 of the house was a series of bad additions and weren’t built well. Consequently, the floor sagged almost 5 inches from one end of the bedroom to the other. Although you can’t see it in the picture below, the chimney is still attached to the original portion of the house.

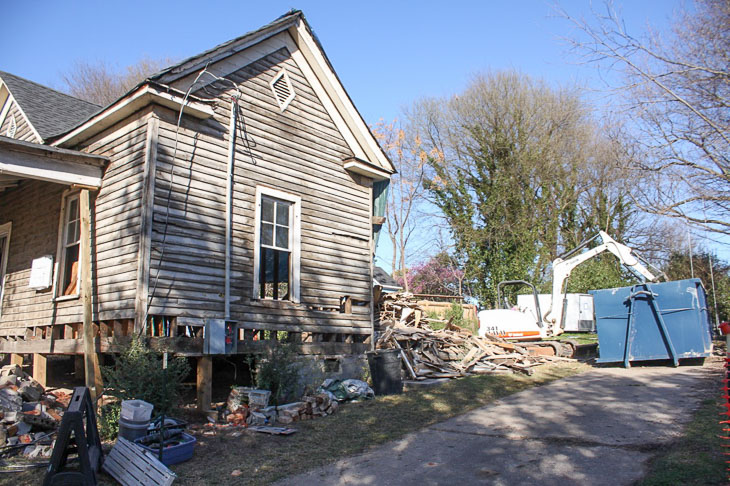
After demolition, I rebuilt onto the back of the original house (complete with a properly dug 24 inch deep crawlspace and a concrete block foundation.)

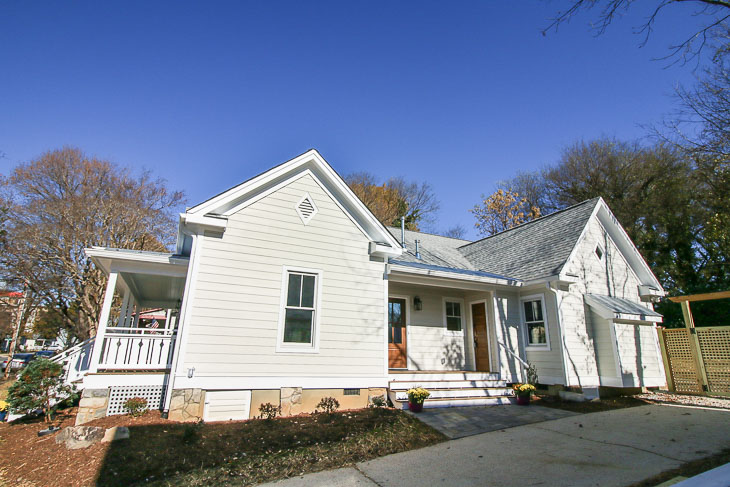
Now the house is on solid footing and has all new wiring and plumbing. Plus, the new insulation and fiber cement siding should insure a weather-proofed home protecting it from deterioration for decades.

Before we step in the mudroom, I want to give you a little behind the scenes story about dealing with inspectors and how to solve issues when you disagree with the inspector. (Because ultimately you can’t argue with them.)

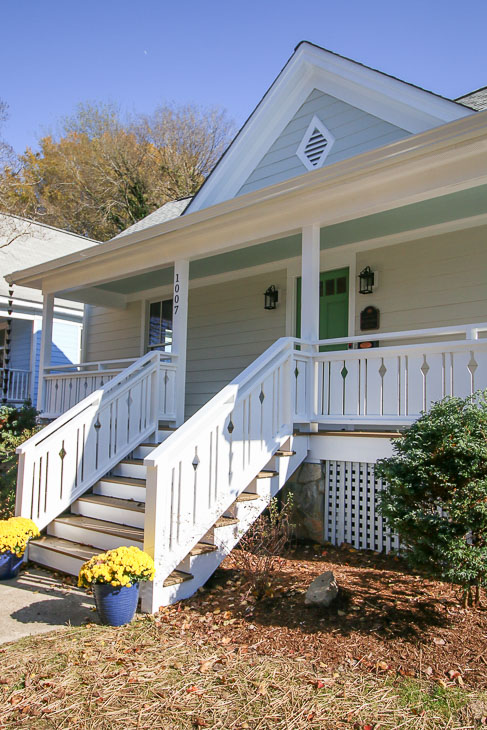
If you noticed the small paver patio above is pitched away from the house more on the left than the right hand side, you have incredible eagle eyes! The inspector warned me that he would have to fail my final inspection if I didn’t correct the slope on the left. His solution was to put in a step against the driveway that would start at a few inches high and slope to nothing once it reached the right hand side.

I talked to the buyers about this suggestion and we all agreed that adding a sloping step against the driveway would cause a tripping hazard (especially since the driveway is narrow and either the car door would hit the step or your ankle would).

Luckily, I came up with a solution that would pass code, but also avoid a tripping hazard.

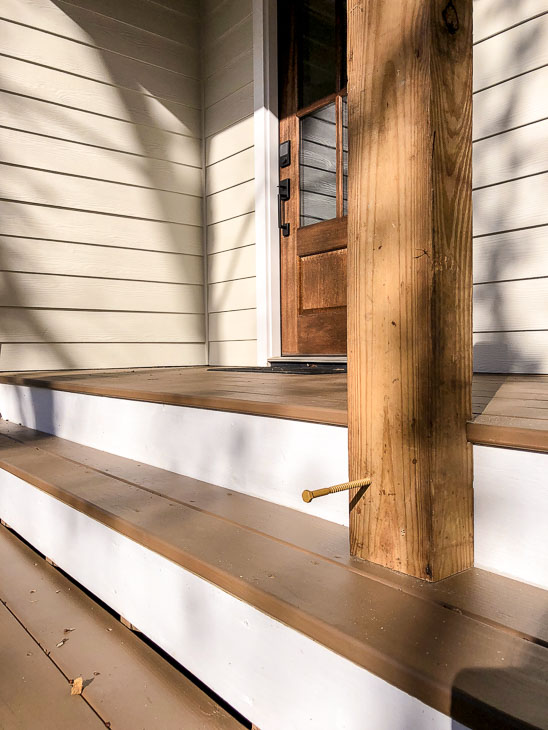
By bolting a temporary railing onto the porch, it would force travel to happen over the acceptable sloped section of patio.

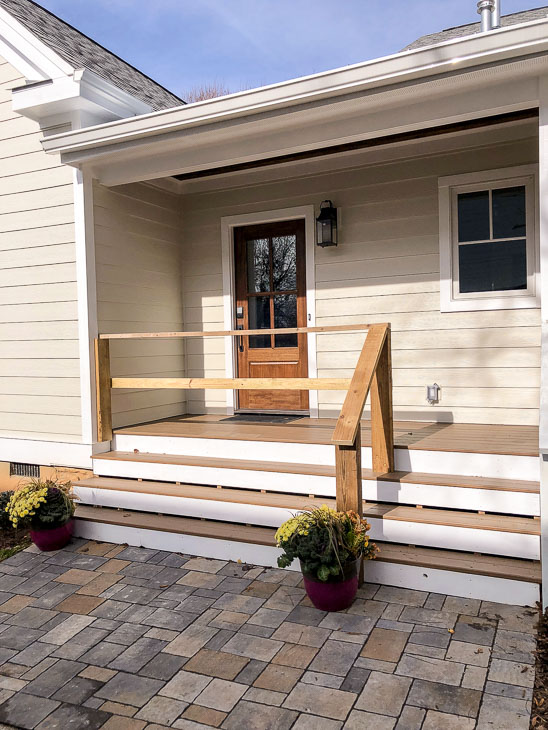
Then after final inspection (and before closing) I removed the railing per the buyers request. Ultimately the inspector had to pass the this configuration, but he can’t control what happens to a house after he leaves. Apparently these kind of solutions happen all the time when the code doesn’t provide for small issues arising during construction.

I would never have created intentionally created an unsafe situation just to pass an inspection. Ultimately, we all agreed, the sloped patio was a lot safer and not a big concern (unless it was covered with ice. But frankly ice presents an issue even on a level surface.)

Let’s get back to the glorious mudroom, shall we?

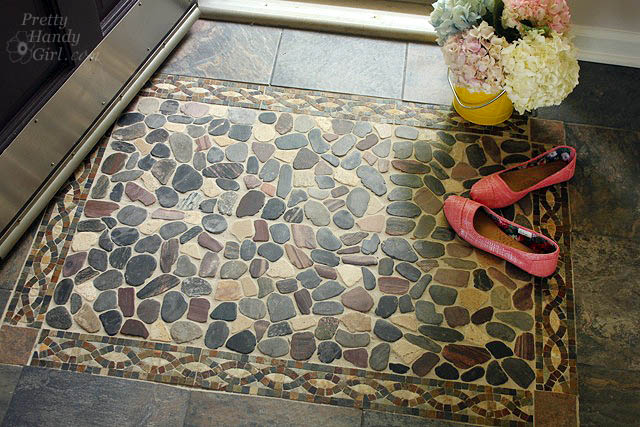
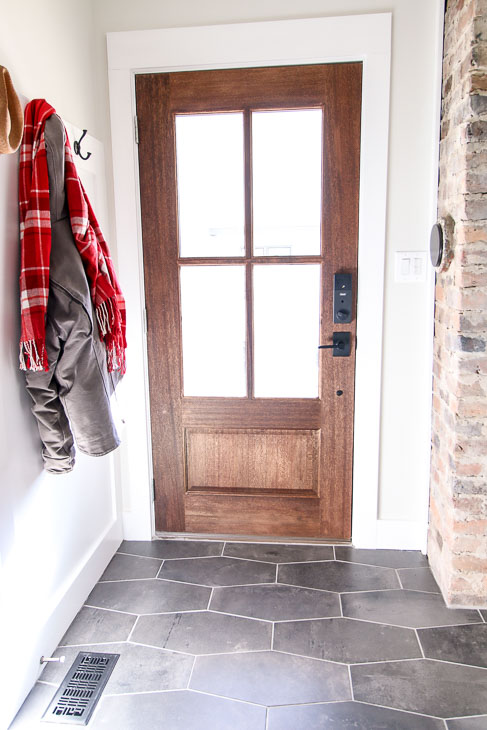
The floors were an intentional choice. I chose Jeffrey Court’s Porcelain Castle Rock Hex tile. My own dark grey tile mudroom floors rarely show dirt. The darker color (with lots of pattern) tends to hide any debris that gets tracked in.

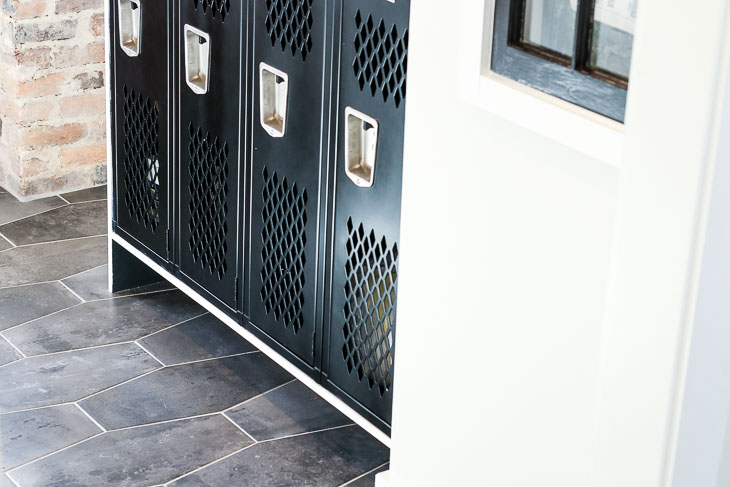
On the rare occasion that we have snow in North Carolina, these floors will allow cold snowy boots to dry without damaging the floor. And I intentionally left space under the lockers to let you kick off your shoes or add some bins if the homeowners desire.

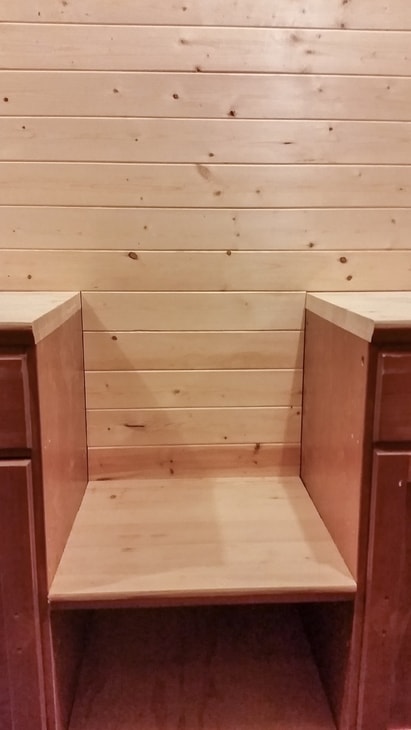
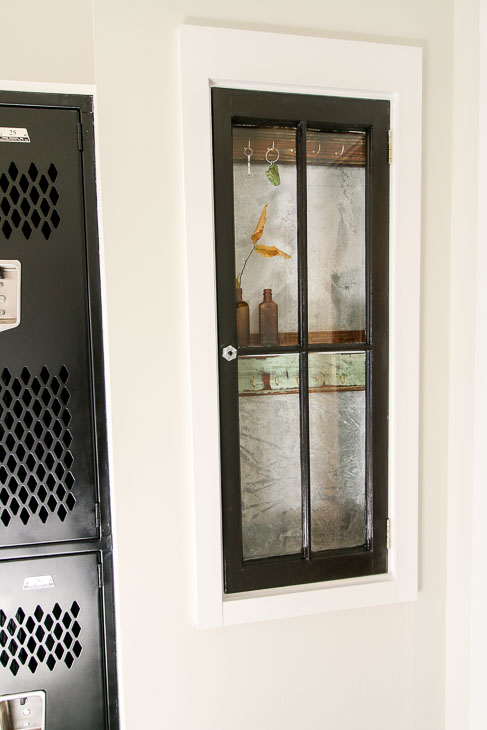
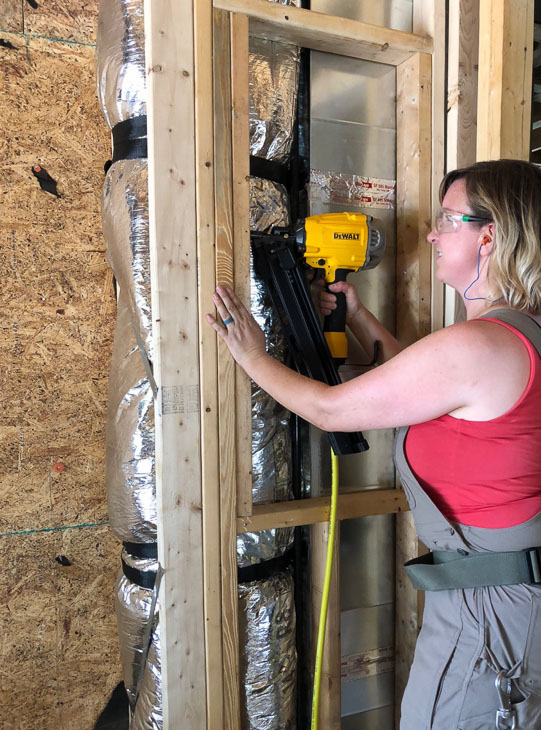
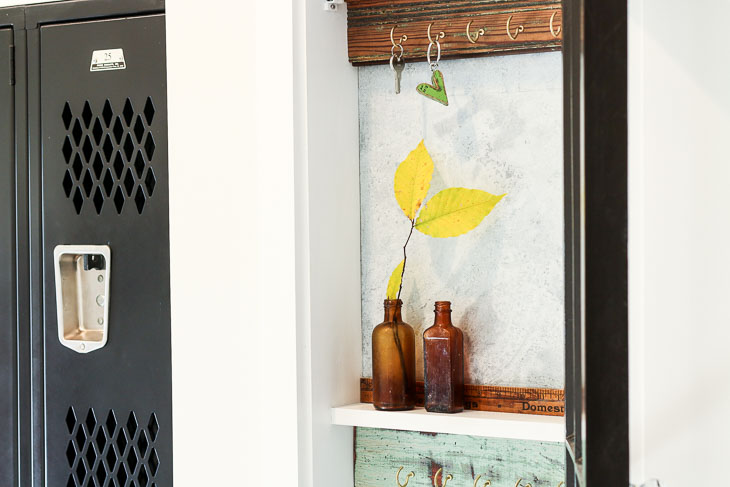
Speaking of places to store things, I knew I wanted to build a little key hook cabinet for between the studs in the mudroom. When my HVAC contractor told me he had to use space in the corner for an air chase, I figured this would be the perfect spot to put the little cabinet.

During framing, I framed out this spot for the cabinet and then built the key hook storage cabinet back in my shop (tutorial to come soon.)

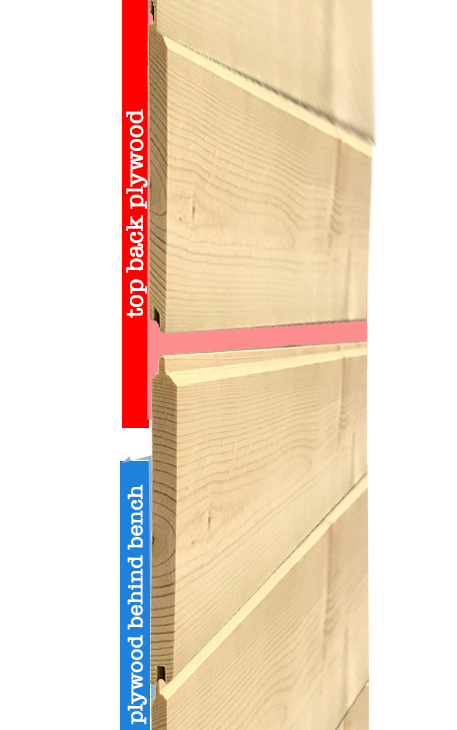
I used some of the reclaimed bead board from Etta’s walls to attach hooks too.

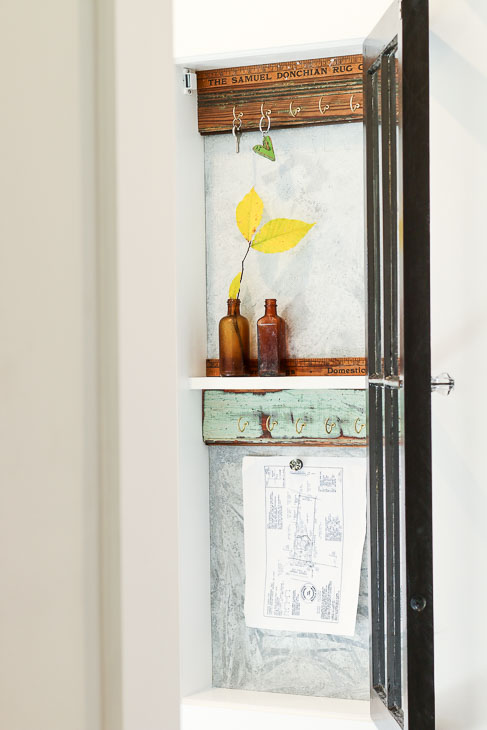
The sheet metal provides a magnetic surface to use for notes, etc. I gave it an aged look by following this tutorial.

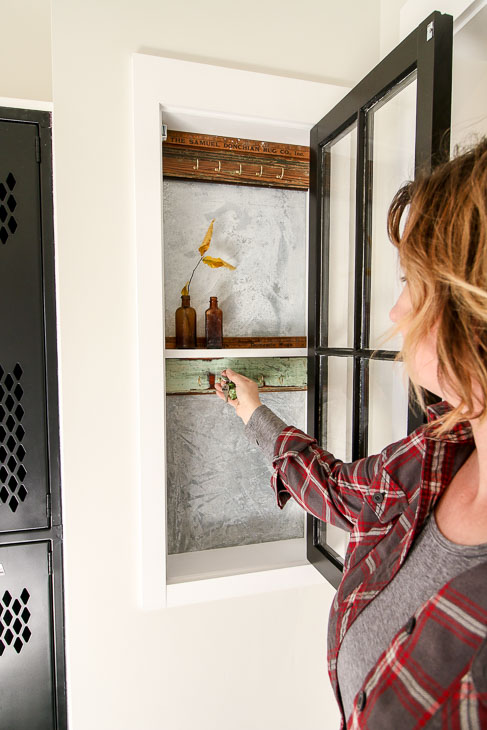
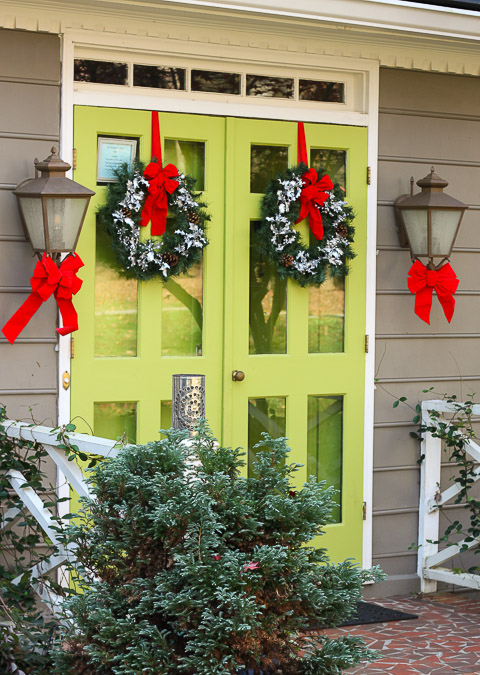
Now this little cabinet is the perfect spot to hang keys at the end of your day. See that little green heart? My friend Su makes these and sells them in her Etsy shop. When I saw the green one, I knew I had to purchase it to present to the new owners with their house keys. The color matches Etta’s front door color.

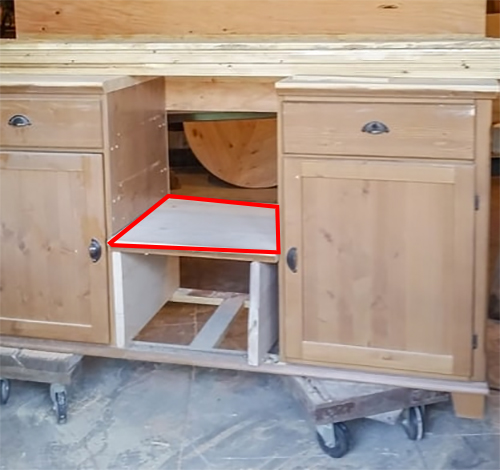
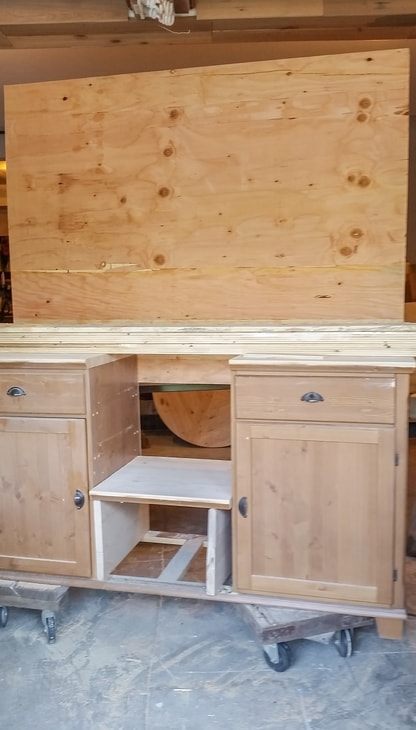
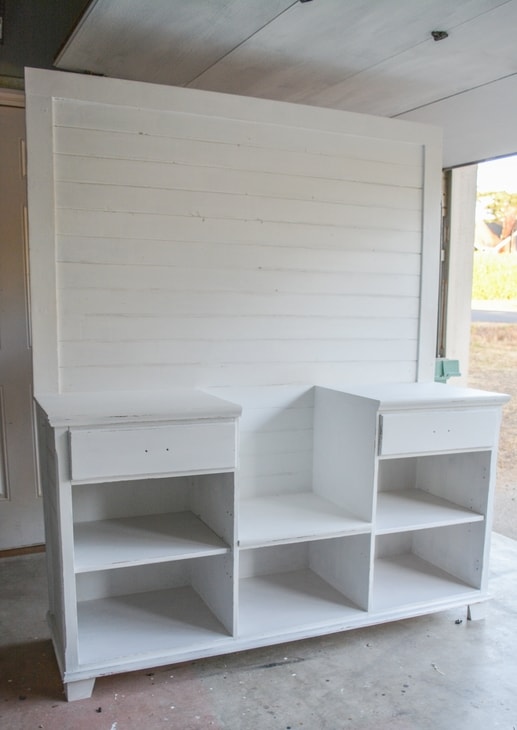
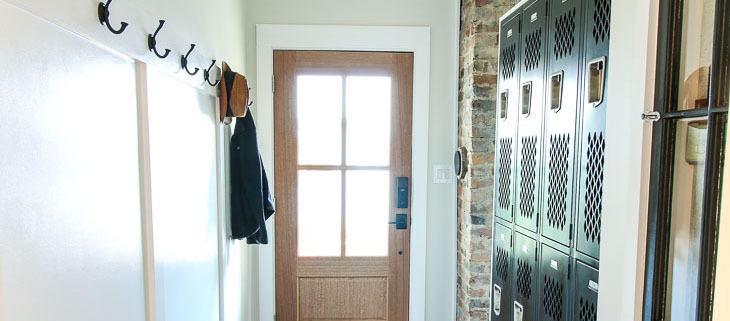
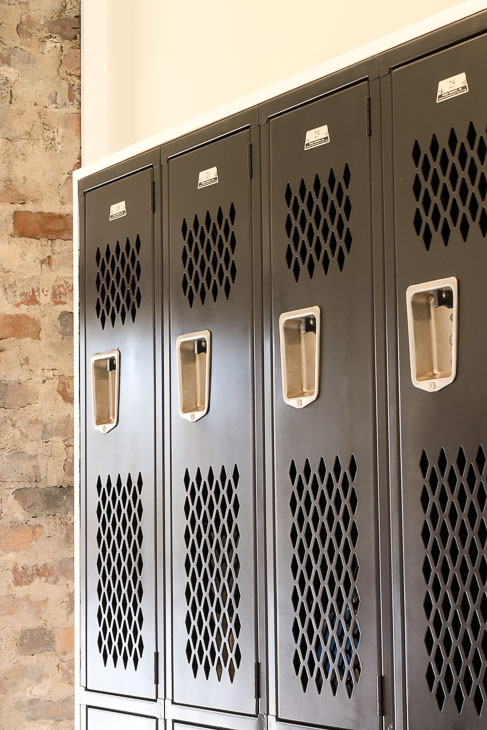
One of the things most people comment on in the mudroom are the lockers.

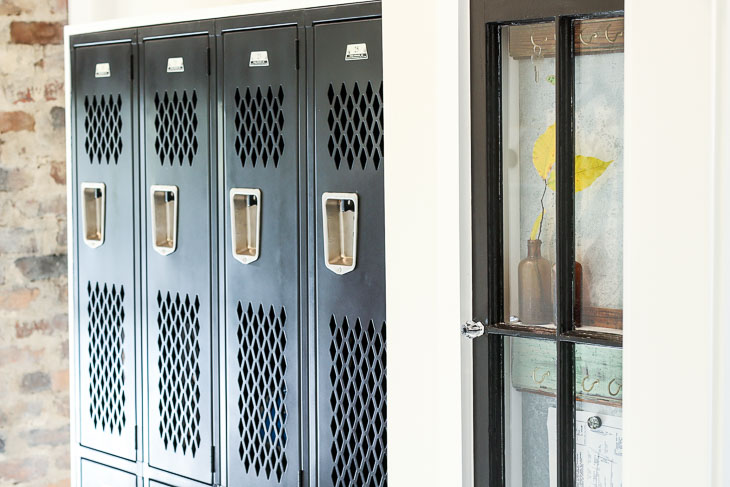
Those lockers are one of my favorite recycles! A friend offered them to me as he was removing them from an old gym to convert into a retail shop.

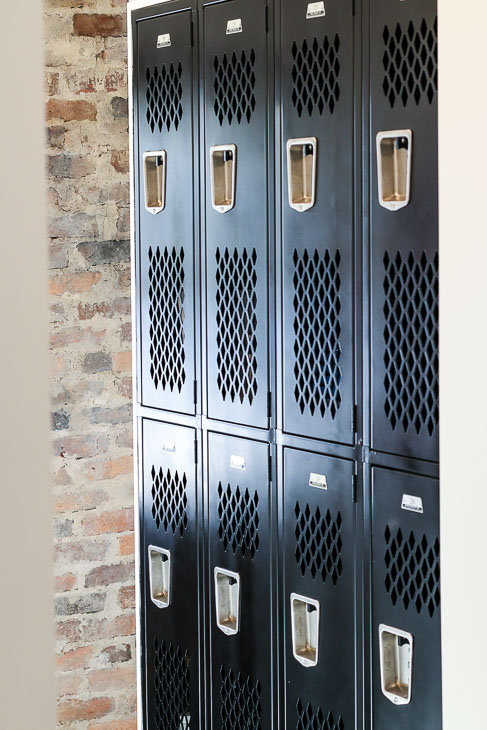
They sat in my garage gathering dust for almost a year. You’d think I would have noticed the little diamond pattern perfectly matches Etta’s diamond shaped attic vents.

But alas, it wasn’t until my trim carpenter and I installed them that I realized they were meant to be inside this house.

Next to the lockers is a small space where the circuit breaker is and then the chimney!

That beautiful brick chimney was created in 1900 and almost met its demise in 2018. The demo contractor thought it should come down. The framer said I was crazy to try to keep such an ugly piece of the house. My trim carpenter struggled to trim around its twists and turns.

But, here it is in 2019, proof that even something no one else sees as beautiful can be beautiful!⁣

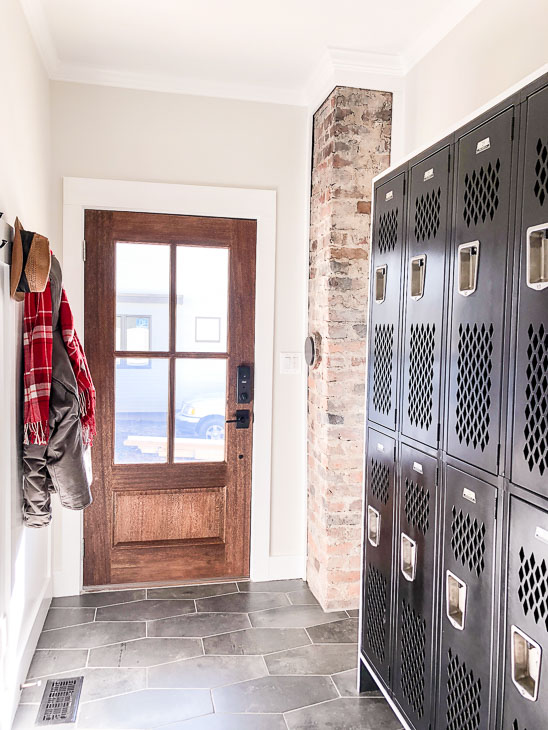
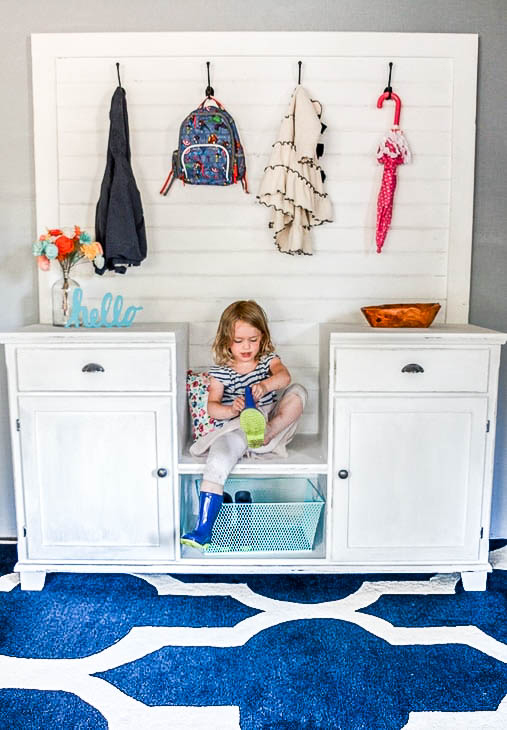
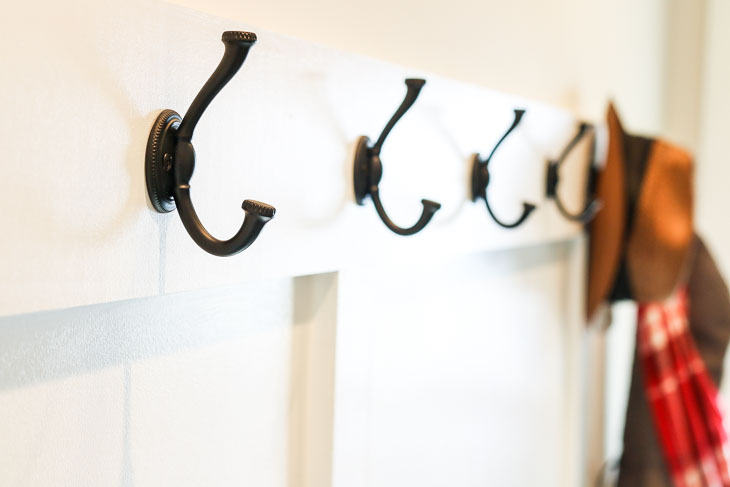
⁣The copious amounts of Nolan hooks from Liberty Hardware Brands hold backpacks, bags, and a plethora of coats ready to grab as you run out the door (because everyone knows how fickle North Carolina weather can be in the Spring). I love their classic shape and the contrast against the white board and batten wall.

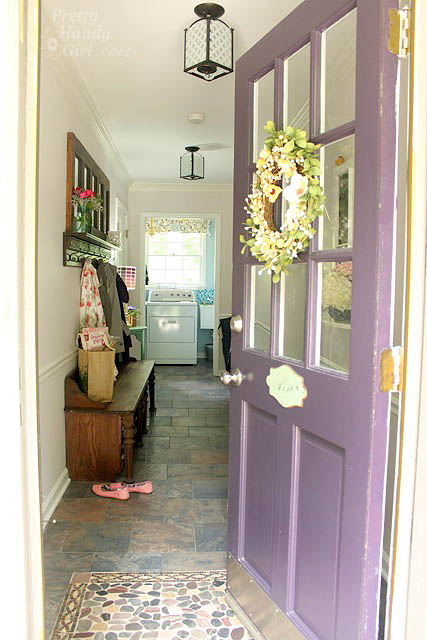
I fell for this door years ago when I saw it in many farmhouse style homes. But, tracking down one turned out to be a little tricky. Originally I wanted a 1/2 light door. But, my building supply representative told me a half window door had to be custom ordered and would take several weeks to arrive.

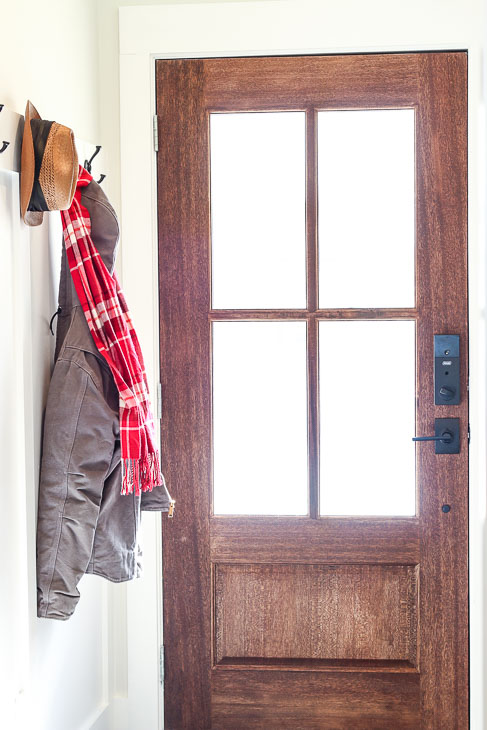
Instead he located a 2/3 light wooden farmhouse door that was stocked and could be delivered in a week.

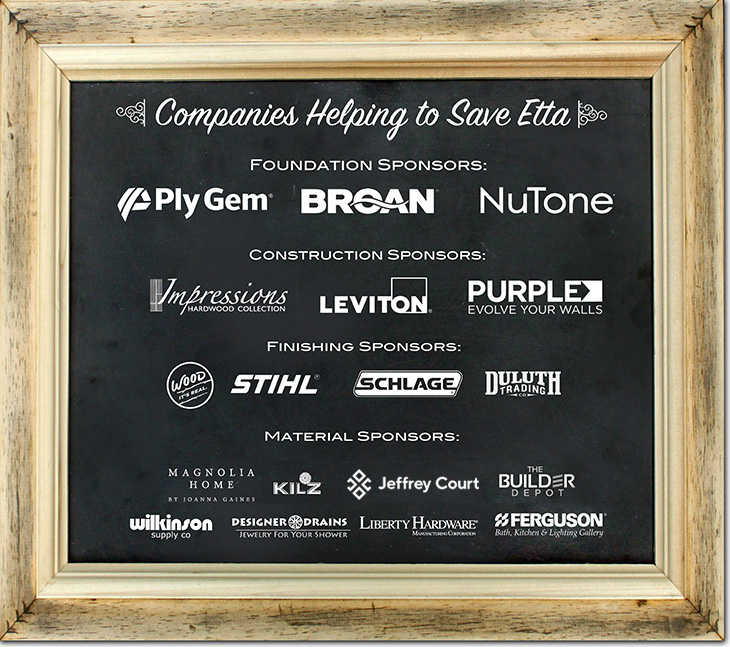
This completes the tour of the mudroom. It makes me happy and I’m so proud of the outcome. A special thank you to all the Saving Etta sponsors, and especially Schlage Locks, Jeffrey Court tiles, and Liberty Hardware for partnering with me on the mudroom build.

What do you think? Did you like all the salvaged items I used? Any questions for me?

Disclosure: Schlage Locks, Jeffrey Court HD tiles, and Liberty Hardware were all material sponsors of the Saving Etta project. They provided complimentary items for the mudroom. 
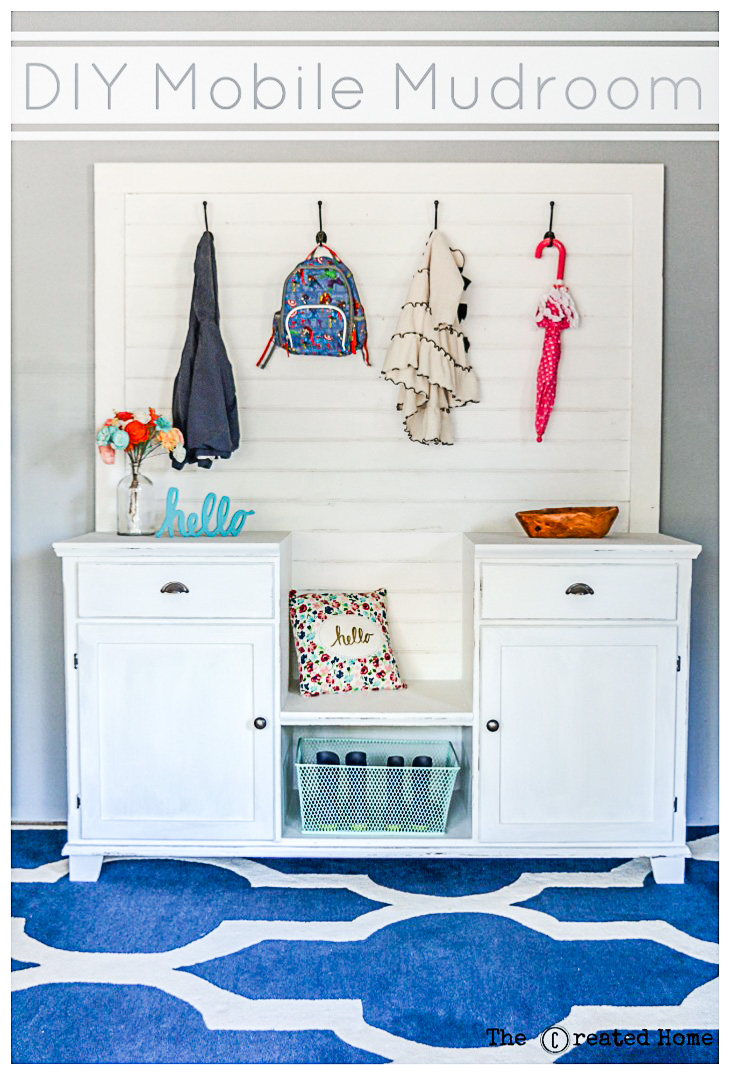
DIY Mobile Mudroom TutorialDIY Mobile Mudroom

Hello Pretty Handy Girl readers! I’m Sarah from The Created Home, and I’m thrilled to meet you. I love versatile designs that makes life a little easier. This mobile mudroom is sure to help keep your entryway more organized. It’s a simple storage solution that combines form and function. Best of all this is the perfect project for someone who rents or isn’t ready to take on a custom build.

How simple is it? Well, I have a secret. This DIY Mobile Mudroom is actually an upcycle project.

You can build this from scratch (that’s how I build 98% of my projects), but sometimes it just makes more sense to use existing furniture. You can create this mobile mudroom using an old dresser or buffet and a minimal amount of lumber. The savings in time and lumber will be well justified!

There will be some differences in structure depending on what you start with, but the basic idea will be the same. Be creative, have fun, and please ask if you have any questions!

Let’s get this party started and build a DIY Mobile Mudroom!

Materials:

(I’ve included affiliate links for your convenience. I earn a small percentage from a purchase using these links. There is no additional cost to you. You can read more about affiliate links here.)

Instructions:

The first step is locating an old dresser or sideboard/buffet. I picked this one up from the Habitat Restore and have been using it for shop storage. Other sources for cast off furniture are Craigslist, side of the road, and family members (or is that just mine?!)

You’ll want a piece that has three basic sections like the dresser pictured below:

Deconstruction:

Remove the middle section by pulling out the drawers and cutting out the shelf supports.

Depending on the dresser construction, you may have all drawers on either side or cupboards. The deconstruction should be fairly straight forward. (This was an Ikea piece, so it came right apart and only required a hammer to take apart.) If it doesn’t come apart easily, grab a pry bar or saw and cut the center pieces out. Leave the bottom support intact to maintain the shape of your piece.

Assess the condition of the top. If it’s dirty or rough, go ahead and clean it and sand any rough spots now.

Creating a seat from the dresser top:

Mark the top where it intersects with the middle section walls using a speed square. Use a circular saw to follow these lines and cut the top middle piece out. (You can see the top has been cut and is now resting in the middle in the photo below.) The middle piece should sit approximately 18″ off the ground for seat height.

DIY Mobile Mudroom Tutorial

Use scrap wood supports on either side to help you set the piece. Attach the middle section to the sides of the main body using pocket holes and screws. (New to using pocket holes? Follow Brittany’s tutorial on How to Use a Kreg Jig.)

Build the back board:

To create the back section, cut out a piece of 1/2″ plywood the width of your overall dresser. The exact height is up to you, though I found 42″ works well. Allow the plywood to overlap the dresser back by at least 6 inches. This gives you enough to attach to the mudroom base. You can use 3/4″ plywood here for more stability, but it will be heavier, and I’d recommend taking the plywood to the floor in that situation. Attach the plywood to the dresser using screws or bolts. Use at least two fasteners on each side, plus another two in the middle section.

Frame in the holes:

Use the leftover plywood to frame in under and behind the seat (shown below in red.) Attach with screws. You may need to run the plywood behind the seat a bit wider depending on how the back of your dresser is built. Just make sure there are supports for the screws to attach to.

DIY Mobile Mudroom Tutorial

Use the 1″ x 4″ boards to frame the back piece of plywood. Here’s a look at the framed plywood near its finished state:

Step 4: Add the shiplap (v-groove)

The v-groove planking is where the real magic happens. You can pick planking up at Lowes or Home Depot in economy packs. Typically they cost $10 per pack of six. Clad the plywood back with the v-groove planks using glue and brad nails to secure. Leave an inch or two of the bottom back unclad. (Shown in red below.)

Overlapping Back Mobile Mudroom

Create an overlapping v-groove piece that extends the same distance above the bench back (shown in blue above.) Then secure the plywood to the overlapping v-groove with screws.This will allow you to remove the back of your mobile mudroom. When assembled, the entire mudroom is difficult to get through doorways and around corners. This step allows you to take the back off to move.

If your dresser has inset side panels go ahead and add v-groove planking to the sides for a more cohesive look.

That’s it for the structure of the mudroom! All that’s left to do is the cosmetic work.

Fill the holes and finishing:

Because this is a repurposed piece, you will have holes leftover from the previous structure. Use wood filler to eliminate those spots and give a smooth finish. I prefer Bondo if you are painting your mobile mudroom. If you are staining it, use a stainable wood filler.

Of course you can finish your mobile mudroom any way you like. To achieve the aged and distressed look, stain the wood, then paint. After the paint dries, sand back some of the paint at edges and give it a distressed look that continues to look great even after being used and abused.

diy mobile mudroom farmhouse shiplap

For a seamless finish, caulk any seams. If you are planning to remove the back, don’t caulk where the top plywood back meets the bench seat back. I did add a little caulk to where the v-groove meets the edges to make it look perfect. (My secret is out!)

diy mobile mudroom farmhouse shiplap

Add a cute little pillow on your bench to invite little ones to sit down.

diy mobile mudroom farmhouse shiplap

Add hooks to the back, making sure to attach them high enough for coats scarves and hats.

diy mobile mudroom farmhouse shiplap the created home

The spot below the bench is perfect for more storage if you add a basket.

diy mobile mudroom farmhouse shiplap the created home

You’ll find plenty of storage in the drawers, cabinets or shelves in your mobile mudroom. Close the doors or drawers to keep your mudroom looking nice and clean.

diy mobile mudroom farmhouse shiplap the created home

The sky is the limit with how you want to customize your own mobile mudroom. Replace the feet with something you like better, change up the back to give it any look you like. If you move, you can take your mobile mudroom with you! I’ll leave you with a shot of the mudroom in action. If you build one of your own I would love to see it!

DIY Mobile Mudroom Tutorial

Like this mobile mudroom? You might also like Brittany’s shoe storage bench made from kitchen cabinets:

Holiday Home Tour 2016 | Pretty Handy GirlHappy building!


Pretty Handy Girl Holiday Home Tour Mudroom & Foyer

Last up on my holiday home tour is my mudroom and foyer. This year, I re-used the same wreaths for the front door, but I jazzed them up with silver holly leaf floral picks.

Pretty Handy Girl Holiday Home Tour Mudroom & Foyer

It’s incredibly easy to change the look of your wreaths. Try tucking in fresh clippings like these mahonia leaves:

Pretty Handy Girl's Holiday Home Tour 2014

Or tie ornaments onto your wreath to add some sparkle and shine. Get more ideas for updating your wreaths here.

Pretty Handy Girl's Christmas Home Tour

Inside the front door, I set up the advent calendars on our rustic IKEA hacked chest. Read more

12 DIY Home Storage Tutorials | Pretty Handy Girl

It’s January and you know what that means! Time to clean and purge the house of all the excess stuff. Last year I was too busy with projects to purge, so this year I’m taking advantage of some warmer days to clean out our home. I hope you’ll excuse me while I’m in clutter busting HELL mode. In the meantime you might enjoy these 12 DIY Storage Projects to help you organize your home (and hide clutter.)

mudroom_shoe_storage_bench
Make a Coat Rack from an Old Door
 and Make a Shoe Storage Bench with Kitchen Cabinets

full_flow_wall_above_washerLaundry Room Storage using Flow Wall Read more

31 Days of Handy Home Fixes | Pretty Handy Girl


Want to cut down on your vacuuming? Want to make your carpets last 10 times longer? Want to keep bacteria out of your home? Wow, sounds like a miracle product right? Actually you can accomplish all of the above by simply training yourself and your family to remove their shoes at the door.

close_up_river_rock_inlaid_doormat

Day 13: Remove Your Shoes at the Door

The carpets in our home are at least 13 years old. Believe it or not, they are in great shape! The main reason is that we don’t wear our shoes in the house. The carpeting is good quality carpet. We clean up spills immediately with our carpet steam cleaner (you can’t have kids and pets without one!) I’ve had the carpets professionally cleaned twice since we’ve owned the house in 7 years.

mudroom_shoe_storage_bench

Do we require our guests to remove their shoes? No. But, most of them do anyway because when they come in the mudroom it’s evident that we take off our shoes at the door.

mudroom_tour_entrance

In order to create a habit of removing your shoes at the door, it’s important to have a convenient storage location for shoes. Creating shoe storage doesn’t have to be expensive.

Beth made these beautiful faux birch log shoe storage out of PVC pipe:

PVC Birch Shoe Storage

Jessica shared how she took a nook and put in shelving for shoe storage.

Built In Shoe Shelves

I made a small shoe storage bench out of a kitchen cabinet.

Shoe Bench from a Kitchen Cabinet

But, my sanity saver is this larger shoe storage bench I made out of salvage materials.

DIY Mudroom Storage Bench

Do you have any other tips for keeping your carpets looking like new?

PHGFancySign

I’m participating in Nester’s 31 Days Challenge. Check out all the other bloggers who are participating!

31 Day Writing Challenge

Don’t miss a single tip! Sign up to get all the tips in your email:


Sign Up for Email Subscription


Other tips in the 31 Days of Handy Home Fixes series: