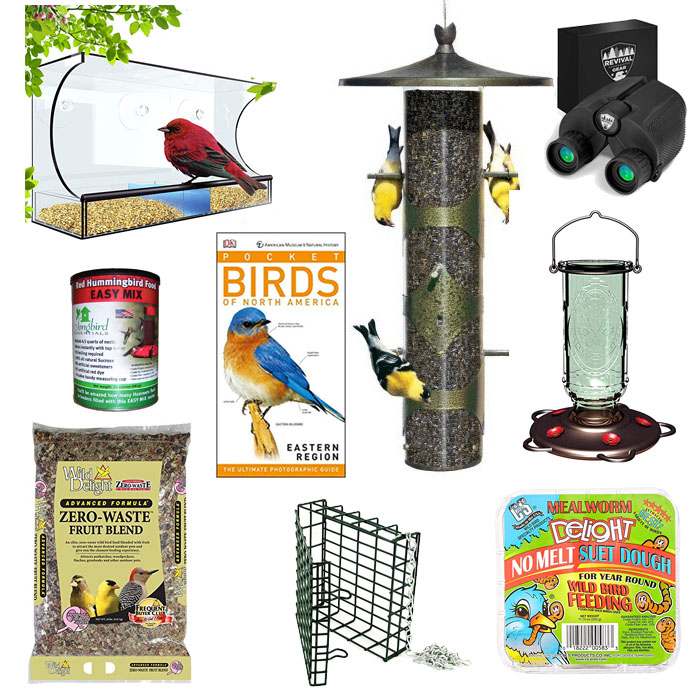
I saw a report on our local news station about hummingbirds saying that this is the time when a huge migration of hummingbirds fly south to Mexico for the winter. Can you imagine those little tiny birds flying from as far away as Canada down to Mexico and Central America? That’s an insanely long journey, even for a human in a car! Apparently, they start the trip when the weather begins to cool and as flowers and food become more scarce. According to the report, now is a great time to keep the hummingbird feeders well stocked as these winged marvels need lots of fuel to make it to their final destination. 

Photo Credit: Perky-Pet Bird Feeders

I didn’t have a hummingbird feeder, so I went to my local bird center (you can check your local hardware stores) to see what they had. All the cheap feeders were plastic and not very appealing. The more attractive glass bottle variety were a lot more expensive. As I sat there looking at all the hummingbird feeders, I thought to myself, I could probably make my own DIY hummingbird feeder for a lot less and make it more beautiful.

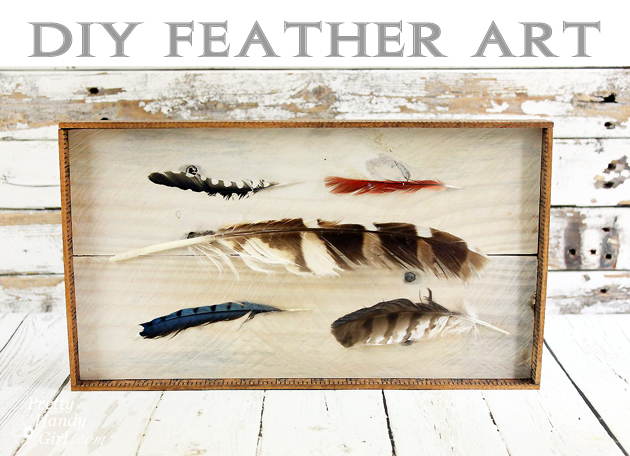
How to Make a Beautiful DIY Glass Bottle Hummingbird Feeder

You really don’t need anything fancy to make your own DIY Glass Bottle Hummingbird Feeder. Just look in your recycling or fridge and finish that soda or wine that’s been in there forever. I’ve listed all the materials for you below.

Materials:

(I’ve included affiliate links for your convenience. I earn a small percentage from a purchase using these links. There is no additional cost to you. You can read more about affiliate links here.)

Instructions:

I made this quick video to show you exactly how to make your own bottle hummingbird feeder. Below are just simple instructions to follow.

  1. Clean out your bottle very well using soap and water. Remove any labels (this is the absolutely best way to remove adhesive labels!)
DIY Gold Leaf Vases from Recycled Bottles | Pretty Handy Girl

2. Use a thick gauge copper wire to hang the glass bottle. First, bend a small curve at the bottom and feed it around the neck of the bottle. You can use a clamp to help get a tighter fit against the bottle’s neck.

3. Work your way up and around the sides of the bottle, twisting the glass bottle as you bend the wire. End at the base of the bottle.

4. Form a big curve and a curly Q at the bottom of the bottle (which will now be the top of the feeder) to act as a hanger.

For simplicity, I ordered these inexpensive hummingbird feeder tube spouts online that come with a red plastic flower and small feeding holes.

Optional: Before I fit the stopper into the neck of the bottle, I wrapped a smaller gauge copper wire around the spout and bent a small loop under the flower to create a small perch for the hummingbirds to rest on while feeding. Apparently, they will frequent the feeders that have a perch more than the kind they have to hover up to. They will also stick around longer.

And that’s how you make your own homemade hummingbird feeder using beautiful copper wire and a glass bottle.

Now it’s time to mix up a batch of hummingbird nectar to fill the bottle.

Hummingbird Nectar Recipe:

Create a sugar water mixture by using 4 parts water to 1 part sugar. Bring the water and sugar to a boil. Let it simmer for 5 minutes, then remove to cool. You can store the mixture for up to five days in the fridge.

After you fill up the feeder, hang the bottle outside a window so you can see all the pretty hummingbirds that come to your window.

It didn’t take long for the hummers to find my feeder.

Help! How Do I Deter Bees:

I have to be completely honest with you. After a few days of watching the hummingbirds come to the feeder, I got a very unexpected guest to the feeder. It was a honeybee. I didn’t think much of it because there were only one or two bees. But, then they must have spread the word, because soon it was a swarm. If you have any ideas how I can deter the bees, I’d love to hear it.

In the meantime, I’ve ordered two more spouts to try in the hopes that they don’t drip and hopefully that won’t attract the bees. These are the spouts I ordered:

3 Flower Hummingbird Feeder Spout

2 Flower Hummingbird Feeder Spout

I’ll be sure to report back as to how well they work. Until then, I hope you enjoy watching all the hummingbirds.

signature

Pin this image to refer to at a later date:

If you liked this tutorial, you’ll also love this other simple DIY hummingbird feeder.

Give your feathered friends a treat from spingtime through winter. Make this easy-peasy DIY log bird feeder with one tool and a few basic materials by Prodigal Pieces for Pretty Handy Girl www.prodigalpieces.com #prodigalpieces

Hello readers, I’m Larissa coming to share with you a nature-inspired DIY project. Today, we’ll learn how to create a special DIY Log Bird Feeder treat for our feathered friends. The best part is that this can be a family fun activity to do AND to give as a gift for anyone who loves bird watching.

Give your feathered friends a treat from spingtime through winter. Make this easy-peasy DIY log bird feeder with one tool and a few basic materials by Prodigal Pieces for Pretty Handy Girl www.prodigalpieces.com #prodigalpieces

DIY Log Bird Feeder

We are avid bird lovers in our home and were delighted when a friend of mine gave us this bird feeder made from a piece of firewood and rope. How easy is that?

Give your feathered friends a treat from spingtime through winter. Make this easy-peasy DIY log bird feeder with one tool and a few basic materials by Prodigal Pieces for Pretty Handy Girl www.prodigalpieces.com #prodigalpieces

What a delight it is to see our tree clinging birds (nuthatches, tufted titmice, and woodpeckers) come for a visit and see their excitement at the treat they’ve found, especially the birds that overwinter. Did you know that migratory birds will remember your home the next time they’re passing through and will come back again year after year if you continue to provide nourishment for them? It’s like a reunion each spring and winter. Fun!

So, let’s grab some materials and get ready to create a DIY log bird feeder!

Give your feathered friends a treat from spingtime through winter. Make this easy-peasy DIY log bird feeder with one tool and a few basic materials by Prodigal Pieces for Pretty Handy Girl www.prodigalpieces.com #prodigalpieces

Materials:

(I’ve included affiliate links for your convenience. I earn a small percentage from a purchase using these links. There is no additional cost to you. You can read more about affiliate links here.)

Picking Your Log:

We are blessed to have a fireplace, so we always have a stash of firewood on hand. For your log, you can use a downed branch or head to your own stash to grab a piece of wood.

Give your feathered friends a treat from spingtime through winter. Make this easy-peasy DIY log bird feeder with one tool and a few basic materials by Prodigal Pieces for Pretty Handy Girl www.prodigalpieces.com #prodigalpieces

The tree-clingers prefer a chunky bark, but any tree variety will do.

Give your feathered friends a treat from spingtime through winter. Make this easy-peasy DIY log bird feeder with one tool and a few basic materials by Prodigal Pieces for Pretty Handy Girl www.prodigalpieces.com #prodigalpieces

Instructions:

Clamp your log and keep your hand clear from the drill bit. Wear appropriate eye protection.

Give your feathered friends a treat from spingtime through winter. Make this easy-peasy DIY log bird feeder with one tool and a few basic materials by Prodigal Pieces for Pretty Handy Girl www.prodigalpieces.com #prodigalpieces

To start, use a 1″ spade bit to drill a hole approximately 1/2″ deep, 2 inches down from the top.

Give your feathered friends a treat from spingtime through winter. Make this easy-to-build DIY log bird feeder with one tool and a few basic materials.

Drill a second hole on the same face about 6″ below the first.

Roll the log a quarter turn and drill in the next face starting with the first hole about 5″ from the top and then a second hole 6″ below that one. (This does not have to be exact and gives a more rustic feel when randomly chosen.)

Give your feathered friends a treat from spingtime through winter. Make this easy-peasy DIY log bird feeder with one tool and a few basic materials by Prodigal Pieces for Pretty Handy Girl www.prodigalpieces.com #prodigalpieces

Repeat those steps until you have two sets of matching faces on opposing sides.

Drill your rope hole using a 5/16″ bit. Starting on the face that has the first hole 5″ down, drill your rope hole 2″ from the top, making sure to go completely through the log.

Give your feathered friends a treat from spingtime through winter. Make this easy-peasy DIY log bird feeder with one tool and a few basic materials by Prodigal Pieces for Pretty Handy Girl www.prodigalpieces.com #prodigalpieces

Cut a 2′ or longer piece of rope and thread it into the hole. If you turn the rope in the direction of the braid (counter-clockwise) while inserting it, that will help the rope go through smoothly.

Give your feathered friends a treat from spingtime through winter. Make this easy-peasy DIY log bird feeder with one tool and a few basic materials by Prodigal Pieces for Pretty Handy Girl www.prodigalpieces.com #prodigalpieces

Once through, tie the rope ends together using a basic knot.

Give your feathered friends a treat from spingtime through winter. Make this easy-peasy DIY log bird feeder with one tool and a few basic materials by Prodigal Pieces for Pretty Handy Girl www.prodigalpieces.com #prodigalpieces

On to the fun part! Birds burn a ton of protein flitting about, so they need to store up as much as they can. We prefer to use chunky peanut butter and then roll it in seeds like this.

Give your feathered friends a treat from spingtime through winter. Make this easy-peasy DIY log bird feeder with one tool and a few basic materials by Prodigal Pieces for Pretty Handy Girl www.prodigalpieces.com #prodigalpieces

Grab a tablespoon of peanut butter and place it in a bowl of birdseed.

Give your feathered friends a treat from spingtime through winter. Make this easy-peasy DIY log bird feeder with one tool and a few basic materials by Prodigal Pieces for Pretty Handy Girl www.prodigalpieces.com #prodigalpieces

Then sprinkle the peanut butter with seed.

Give your feathered friends a treat from spingtime through winter. Make this easy-peasy DIY log bird feeder with one tool and a few basic materials by Prodigal Pieces for Pretty Handy Girl www.prodigalpieces.com #prodigalpieces

After coating with the seed, press the mixture into the holes using the back of a spoon, or if you’re nutty like me (catch the pun?) it’s more fun to use your fingers.

Give your feathered friends a treat from spingtime through winter. Make this easy-peasy DIY log bird feeder with one tool and a few basic materials by Prodigal Pieces for Pretty Handy Girl www.prodigalpieces.com #prodigalpieces

The kids love this part!

Give your feathered friends a treat from spingtime through winter. Make this easy-peasy DIY log bird feeder with one tool and a few basic materials by Prodigal Pieces for Pretty Handy Girl www.prodigalpieces.com #prodigalpieces

You’re done and it’s ready to hang. Yay!

Give your feathered friends a treat from spingtime through winter. Make this easy-peasy DIY log bird feeder with one tool and a few basic materials by Prodigal Pieces for Pretty Handy Girl www.prodigalpieces.com #prodigalpieces

For a fun twist, and if you’re feeling handy, you could also add dowels for other species to be able to roost at each hole, but for this project I kept it simple.

Got questions? Please feel free to ask.

If you enjoyed this project, do pin and share!

blog signature copy

Pin this project for later!

DIY Log Bird Feeder Pin Image


Liked this project? Then you’ll love these birdhouses:

Can you think of anything more spring-like than a nest full of blue eggs? Today I want to show you how to make Faux Blue Speckled Bird Eggs and a Nest!

Faux Blue Bird Eggs and Nest

Spring has arrived in North Carolina and I want to dance and sing and tiptoe through the tulips. Now that Valentine’s Day has come and gone, it is the perfect time to start decorating for Easter! A nest of Blue Speckled Bird Eggs makes a beautiful centerpiece! Mother Robin sure does create beautiful blue eggs, but we’d never think of disturbing those precious eggs.

Instead, I’ll show you how to turn regular chicken eggs…

…into a beautiful nest of blue speckled eggs to decorate for Easter or Spring.

Materials:

(I’ve included affiliate links for your convenience. I earn a small percentage from a purchase using these links. There is no additional cost to you. You can read more about affiliate links here.)

Instructions:

It’s time to get messy. Put down a drop cloth or tarp to cover your work area (and beyond.) First, I’ll show you a magic trick! Learn how to remove the white and yolk out of eggs without breaking the shell. Rest an egg inside the empty carton. Gently tap a nail into the top of your egg.

Turn the egg upside down and put another hole into the other side. Typically you’ll need one hole slightly larger.

Faux Robin's Egg Spring Nest | Pretty Handy Girl

Pucker up and blow through the smaller hole until the egg white and yolk drain out the larger bottom hole. (Of course, you’ll probably want to save the eggs for omelets or scrambled eggs.)

Once you have emptied your eggs, clean them off. Then close your egg carton and flip it upside down to create a raised support for your eggs.

Faux Robin's Egg Spring Nest | Pretty Handy Girl

Gather your blue, black, and white acrylic paints. Paint the egg a robin’s egg blue color and allow them to dry.

Put on rubber gloves. Pour a small amount of black acrylic paint onto a paper plate. Add a little water to create a runny consistency. Dip the toothbrush into the paint mixture. Aim the toothbrush at the eggs and stroke your finger along the bristles to spatter black dots all over the eggs.

Allow the black speckles to dry and repeat the process using the white paint.

While the eggs are drying, pull out your pasta maker. (Am I the only one who never uses my pasta maker for making pasta?) Cut the paper bag into sections wide enough to fit into the pasta maker.

Feed the paper bag through the pasta maker to shred it. (You can shred the bag with a paper shredder or scissors if you don’t have a pasta maker.) Arrange the shreds into a nest form in a bowl, urn, or basket.

Set your faux blue bird eggs into the nest and admire your beautiful Spring décor!

This centerpiece can be left out until you are tired of looking at it. Then store the eggs in the carton and bring them out again next year.


Have a great week! I hope the weather is warming up where you are!


Pin for later!

This DIY nest of Blue Bird Eggs makes a beautiful centerpiece for your Easter decor! | DIY Easter table centerpiece | Pretty Handy Girl #prettyhandygirl #easterdecor #tablecenterpiece

9 Creative and Unique DIY Birdhouse Ideas - Pinterest ImageCreative and Unique DIY Birdhouses

Spring is just around the corner (I promise!) Now is the time to create some new birdhouses for your feathered friends. Not only will it make the birds happy, but birdhouses are a colorful way to decorate your landscaping. Here are 9 Unique and Creative DIY Birdhouses that may just inspire you to add some new bird houses to your yard. And, you don’t have to settle for the plain jane store-bought birdhouse (although several of these are made using store-bought houses). This list should help you create a birdhouse that is unique and represents your style!

Birdhouse Christmas Tree TopperMake a German-Inspired Christmas-theme birdhouse

white birdhouse with red roof and spigot for perch

Use paint, a spigot, and wood shims to create this one-of-a-kind birdhouse.

round white birdhouse with red roof and silhouette of birds and branches

Paint silhouettes of birds onto the outside of a small birdhouse to add colorful accents.

birdhouse with winter tree scene hand-painted, pine cone roof, and branch for perch

Take a simple store-bought birdhouse and add a pinecone roof and branch perch to it.

upcycle old silverware by adding knives to the top of the birdhouseUpcycle old silverware knives by making this Knife Topped Birdhouse.

painted flower garden birdhouseColleen shares some basic painting skills to create this beautiful Dip-dot Painted Flower Garden Birdhouse.

How to make a stone birdhouse by Empress of DirtEmpress of Dirt shows us How to Make a Stone Birdhouse for your yard.

Turn a vintage tin dollhouse into a birdhouseRepurpose a Vintage Tin Dollhouse into a birdhouse.

how to install a birdhouse on a postNow that you have your beautiful birdhouse made, learn how to Install a Birdhouse on a Post for a great landscape focal point.

I hope this inspired you to think outside the box when it comes to adding a birdhouse in your yard. Let me know what you think of these! Don’t forget to share on social media or Pinterest so others can be inspired too!

9 Creative and Unique DIY Birdhouse Ideas - Social Media Image

Hey bird lovers! My family loves bird-watching , too. Over the years we’ve experimented with several bird feeders, bird food, and resource books. I’ve created a list of our favorite bird-feeding and watching items on Amazon:

(I’ve included affiliate links for your convenience. I earn a small percentage from a purchase using these links. There is no additional cost to you. You can read more about affiliate links here.)

Hi, I’m Sheri from Hazel + Gold Designs. Here are a few fun stats about me: I like love chocolate and peanut butter (together of course.) If you like stats, I have been crocheting for about 16 years, crafting for 20, and woodworking for about 4 years. I found a passion in making and being creative and began documenting my projects online at Hazel + Gold Designs.

When not working on projects, I enjoy spending time with my husband, four children, perfect dog, and ornery cat. You can find me on Facebook, Pinterest, Instagram and Twitter.

Read all of Sheri’s tutorials.

~Find more of Sheri’s projects here ~

DIY-feather-art

DIY Feather Art | Pretty Handy Girl

When I needed an extra piece of art for our living room gallery wall I created DIY Feather Art. You can create your own, but please purchase craft feathers, use fake feathers or paper feathers. (Per the Migratory Bird Treaty Act, it is illegal to collect feathers, nests and other anatomical parts of certain migratory birds.)

Materials:

DIY Feather Art | Pretty Handy Girl

  • Rustic 1×4″ boards (I used pallet wood)
  • Wood yardstick or lattice boards
  • Watered down white paint
  • Paint brush
  • Clamp
  • Scissors
  • Kreg Jig
  • Pocket hole screws (1.25″)
  • Nylon line
  • Small drill bit
  • Drill
  • Staple gun
  • 1″ finish nails
  • Hammer or nailgun
  • Wood glue
  • Feathers
  • Pencil
  • D-ring picture hangers

Instructions:

Cut your 1×4″ boards to size (or select one board the size you want for your art background.) To connect the two boards, mark the location to drill pocket holes.

DIY Feather Art | Pretty Handy Girl

Use the Kreg Jig to drill pocket holes into the back of both boards.

DIY Feather Art | Pretty Handy Girl

Clamp the boards together and join them with 1 1/4″ pocket hole screws.

DIY Feather Art | Pretty Handy Girl

Flip the board over and paint it with watered down white paint for a white-washed look.

DIY Feather Art | Pretty Handy Girl

Mark the width of the white-washed board onto the yardstick. Cut two pieces the same length. Read more