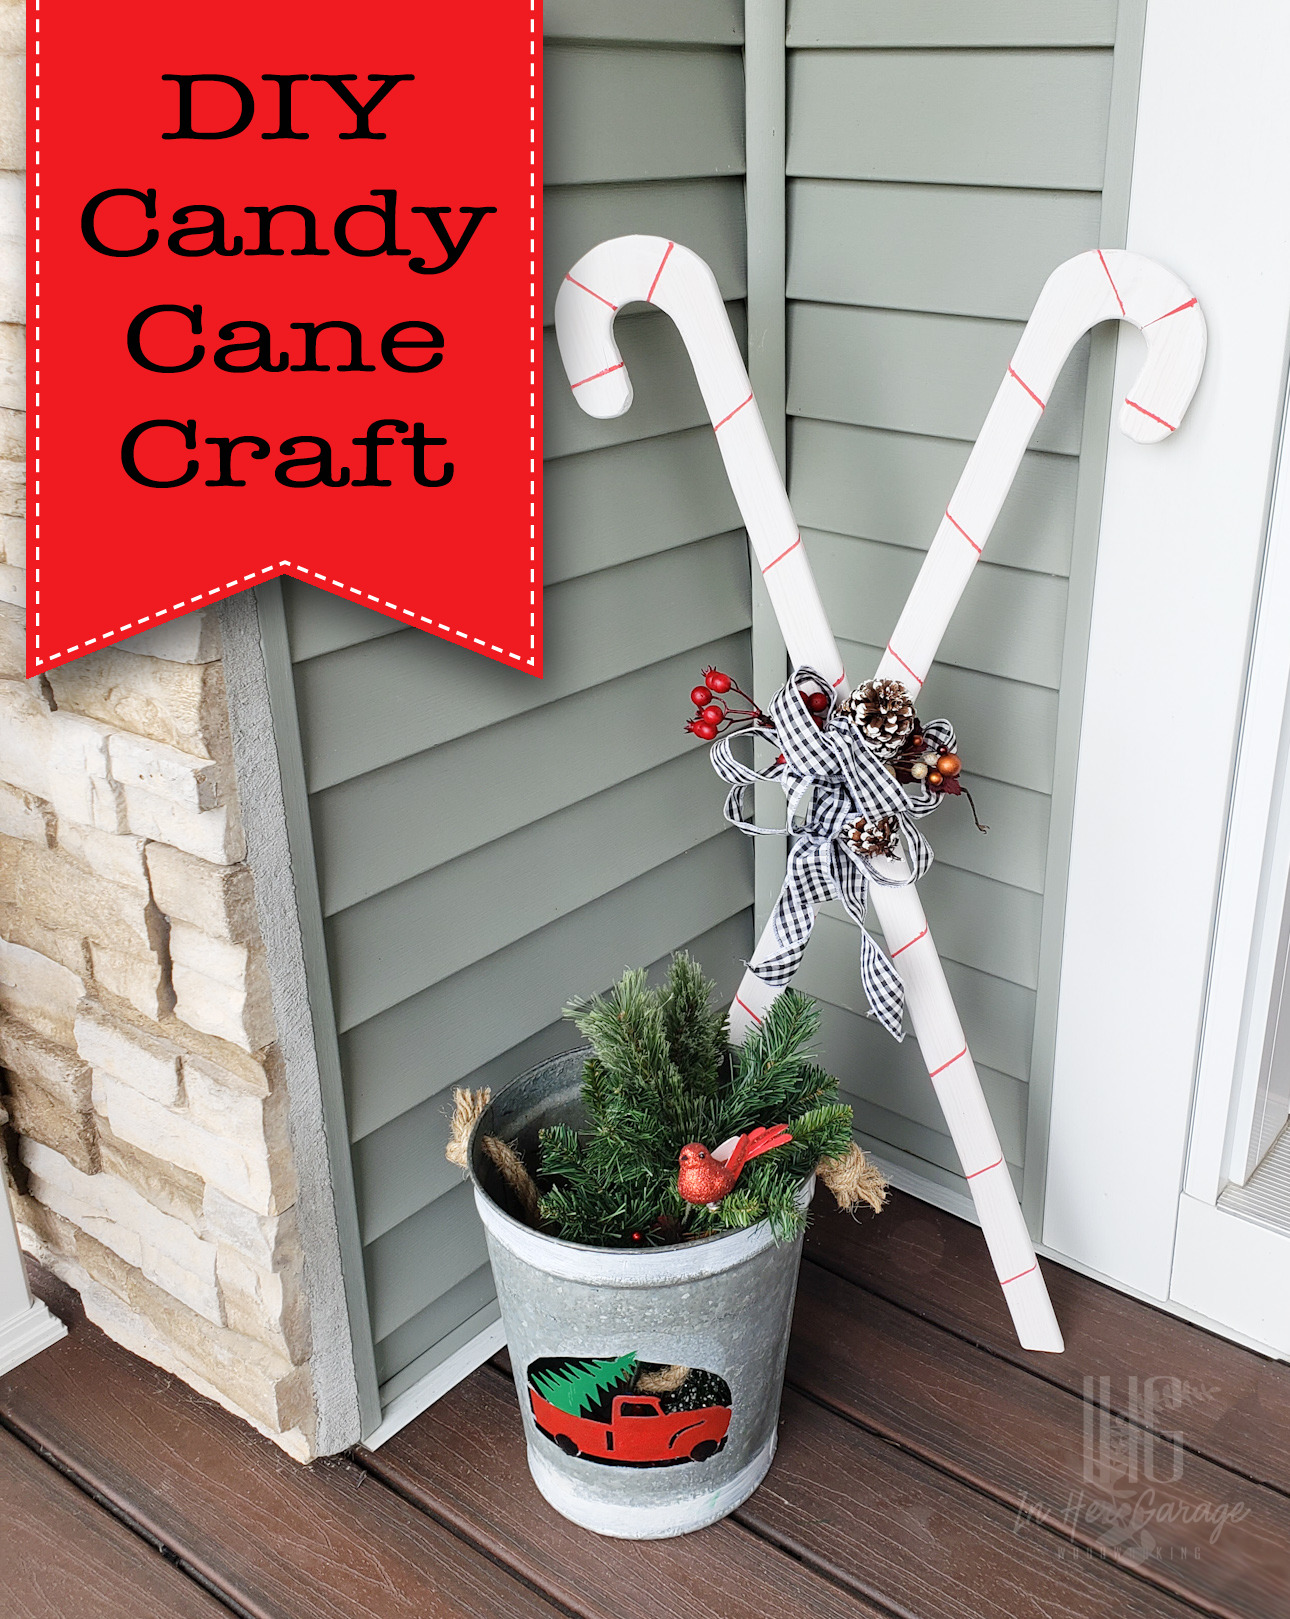
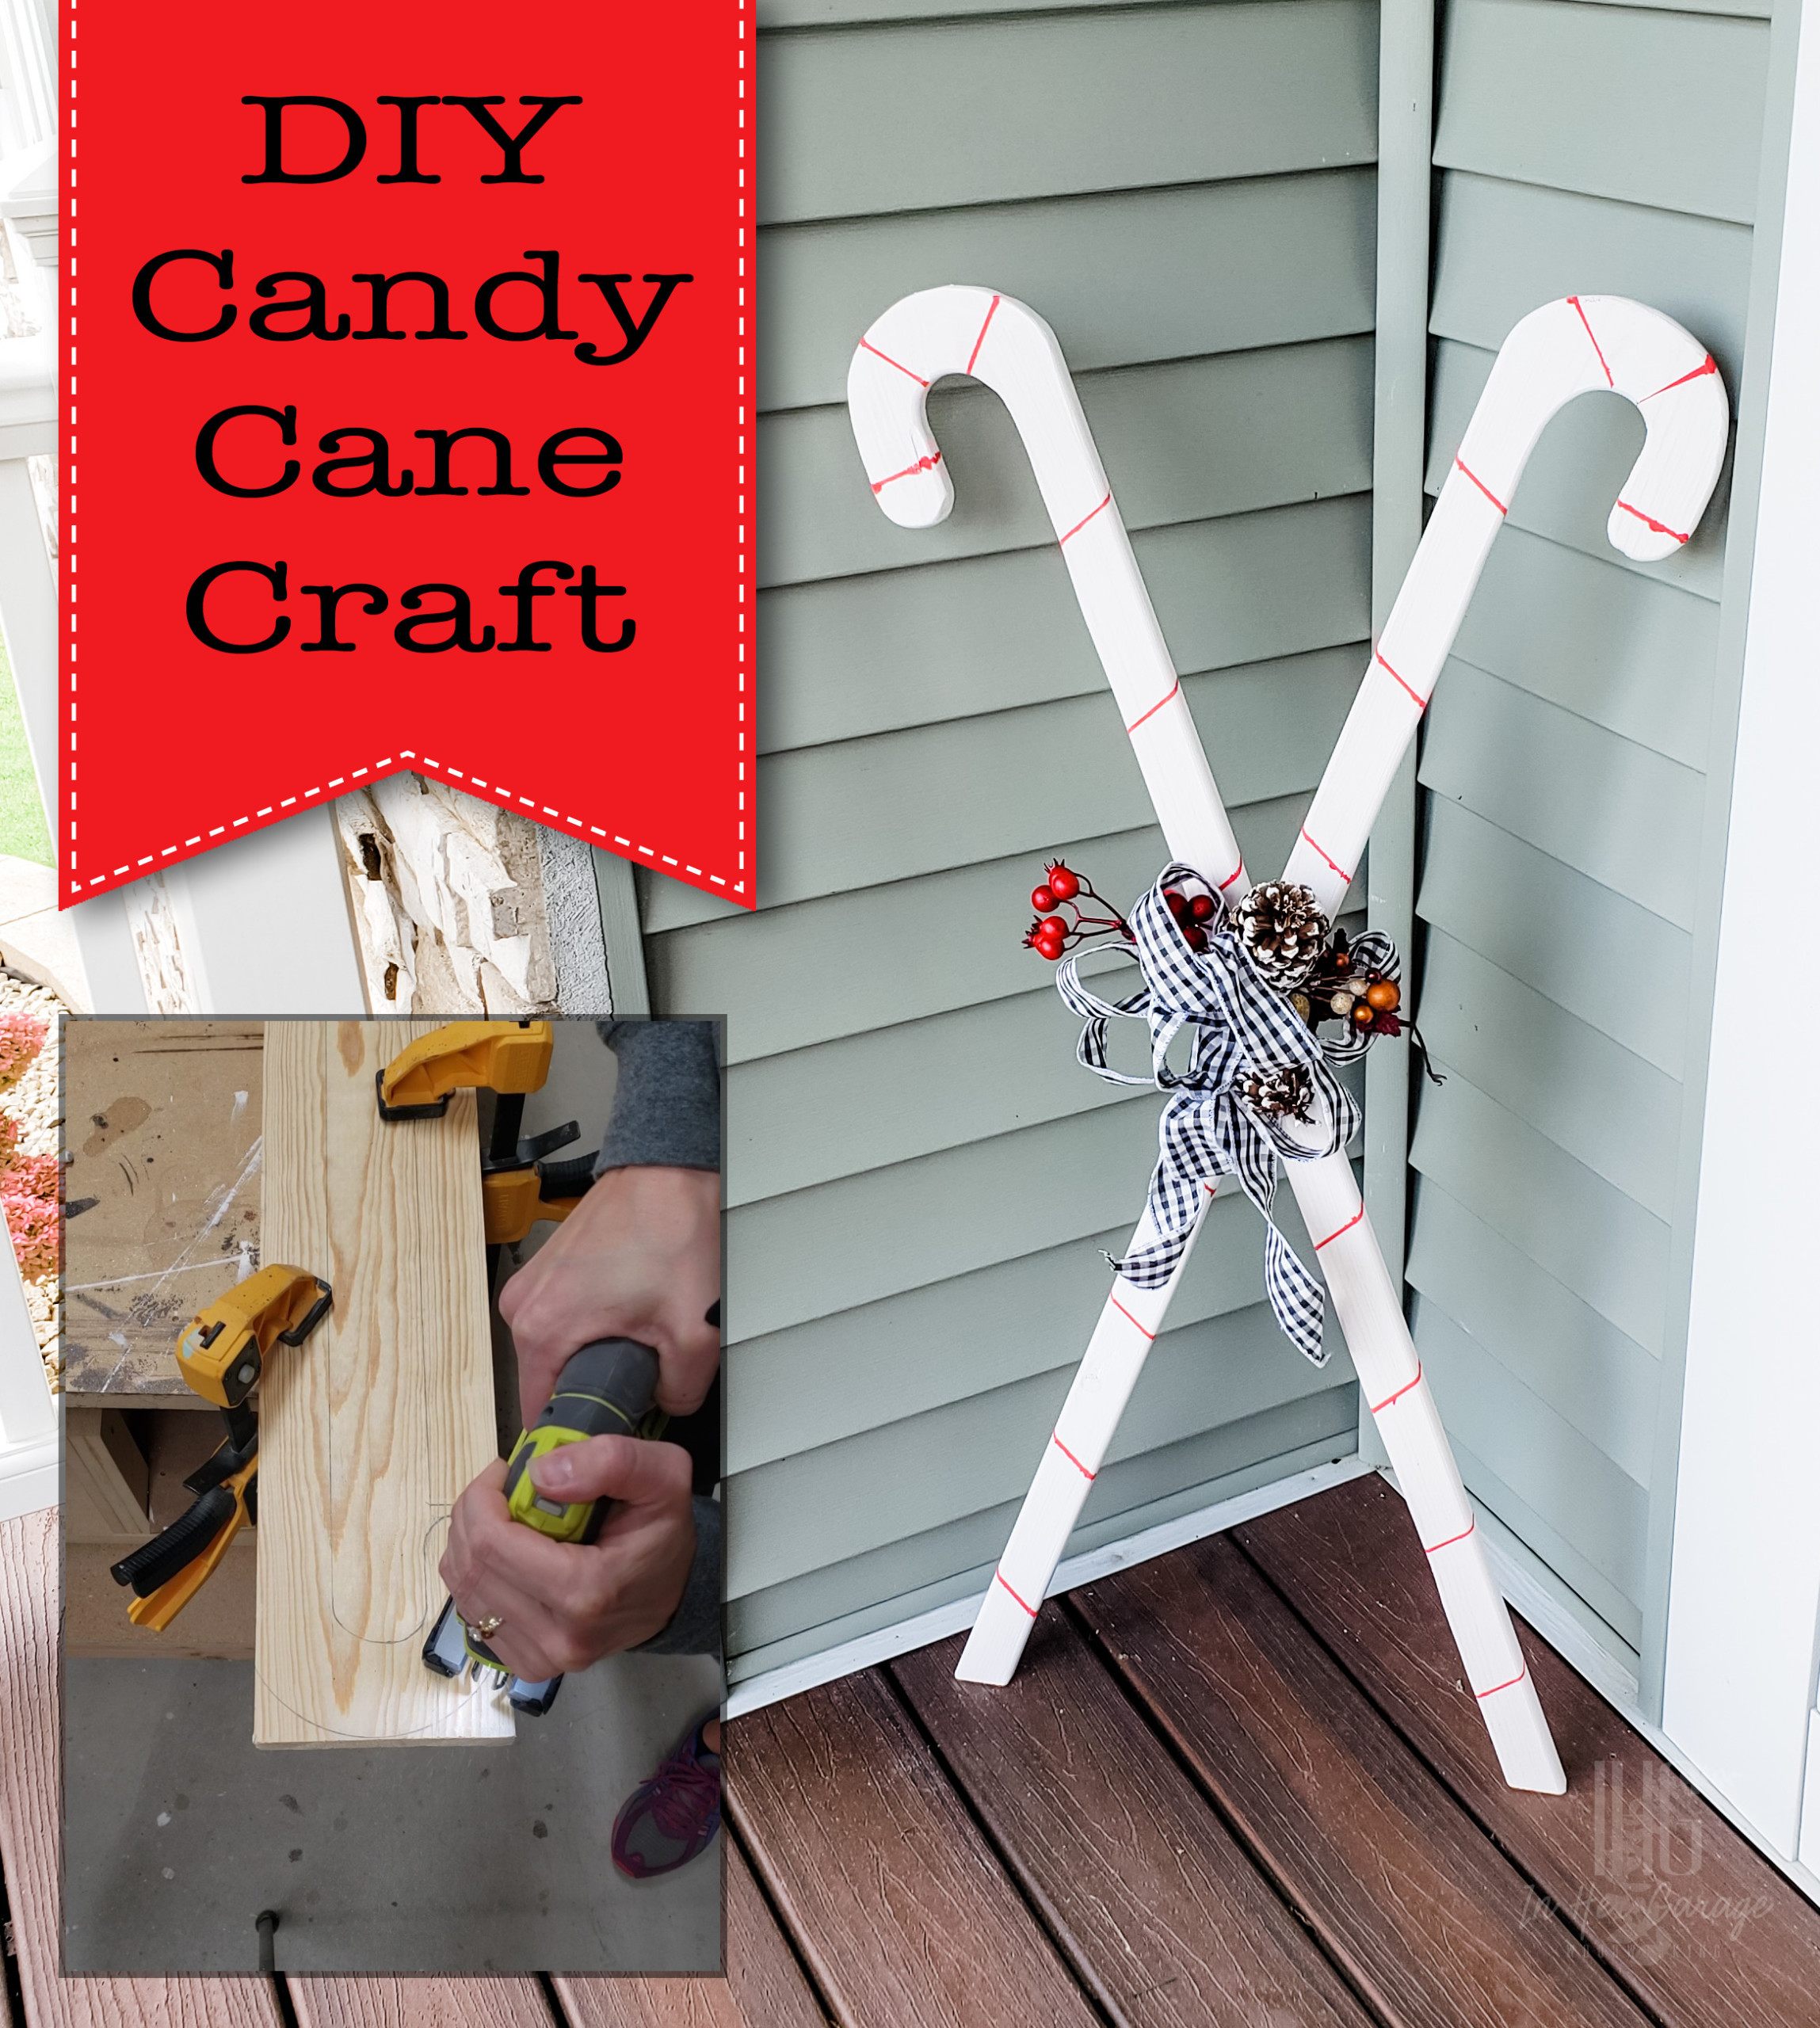
Make this adorable DIY Candy Cane craft using 1 board and 2 tools!  These DIY Candy Canes are the perfect complement to your holiday decorations.

DIY Candy Cane Decor

I love this craft because it’s not only cheery but it also helps me add decor at a mid-height. I often find myself decorating something really tall like my Christmas tree or something short, like cute decor items near the ground. These candy canes are super simple to make and add medium height decorations to your home.

Material:

(I’ve included affiliate links for your convenience. I earn a small percentage from a purchase using these links. There is no additional cost to you. You can read more about affiliate links here.)

  • 1- 1″ x 8″ x 6′ pine board cut to 4′
  • Wood glue
  • Paint

Tools:

Instructions:

Step 1: Draw the candy canes

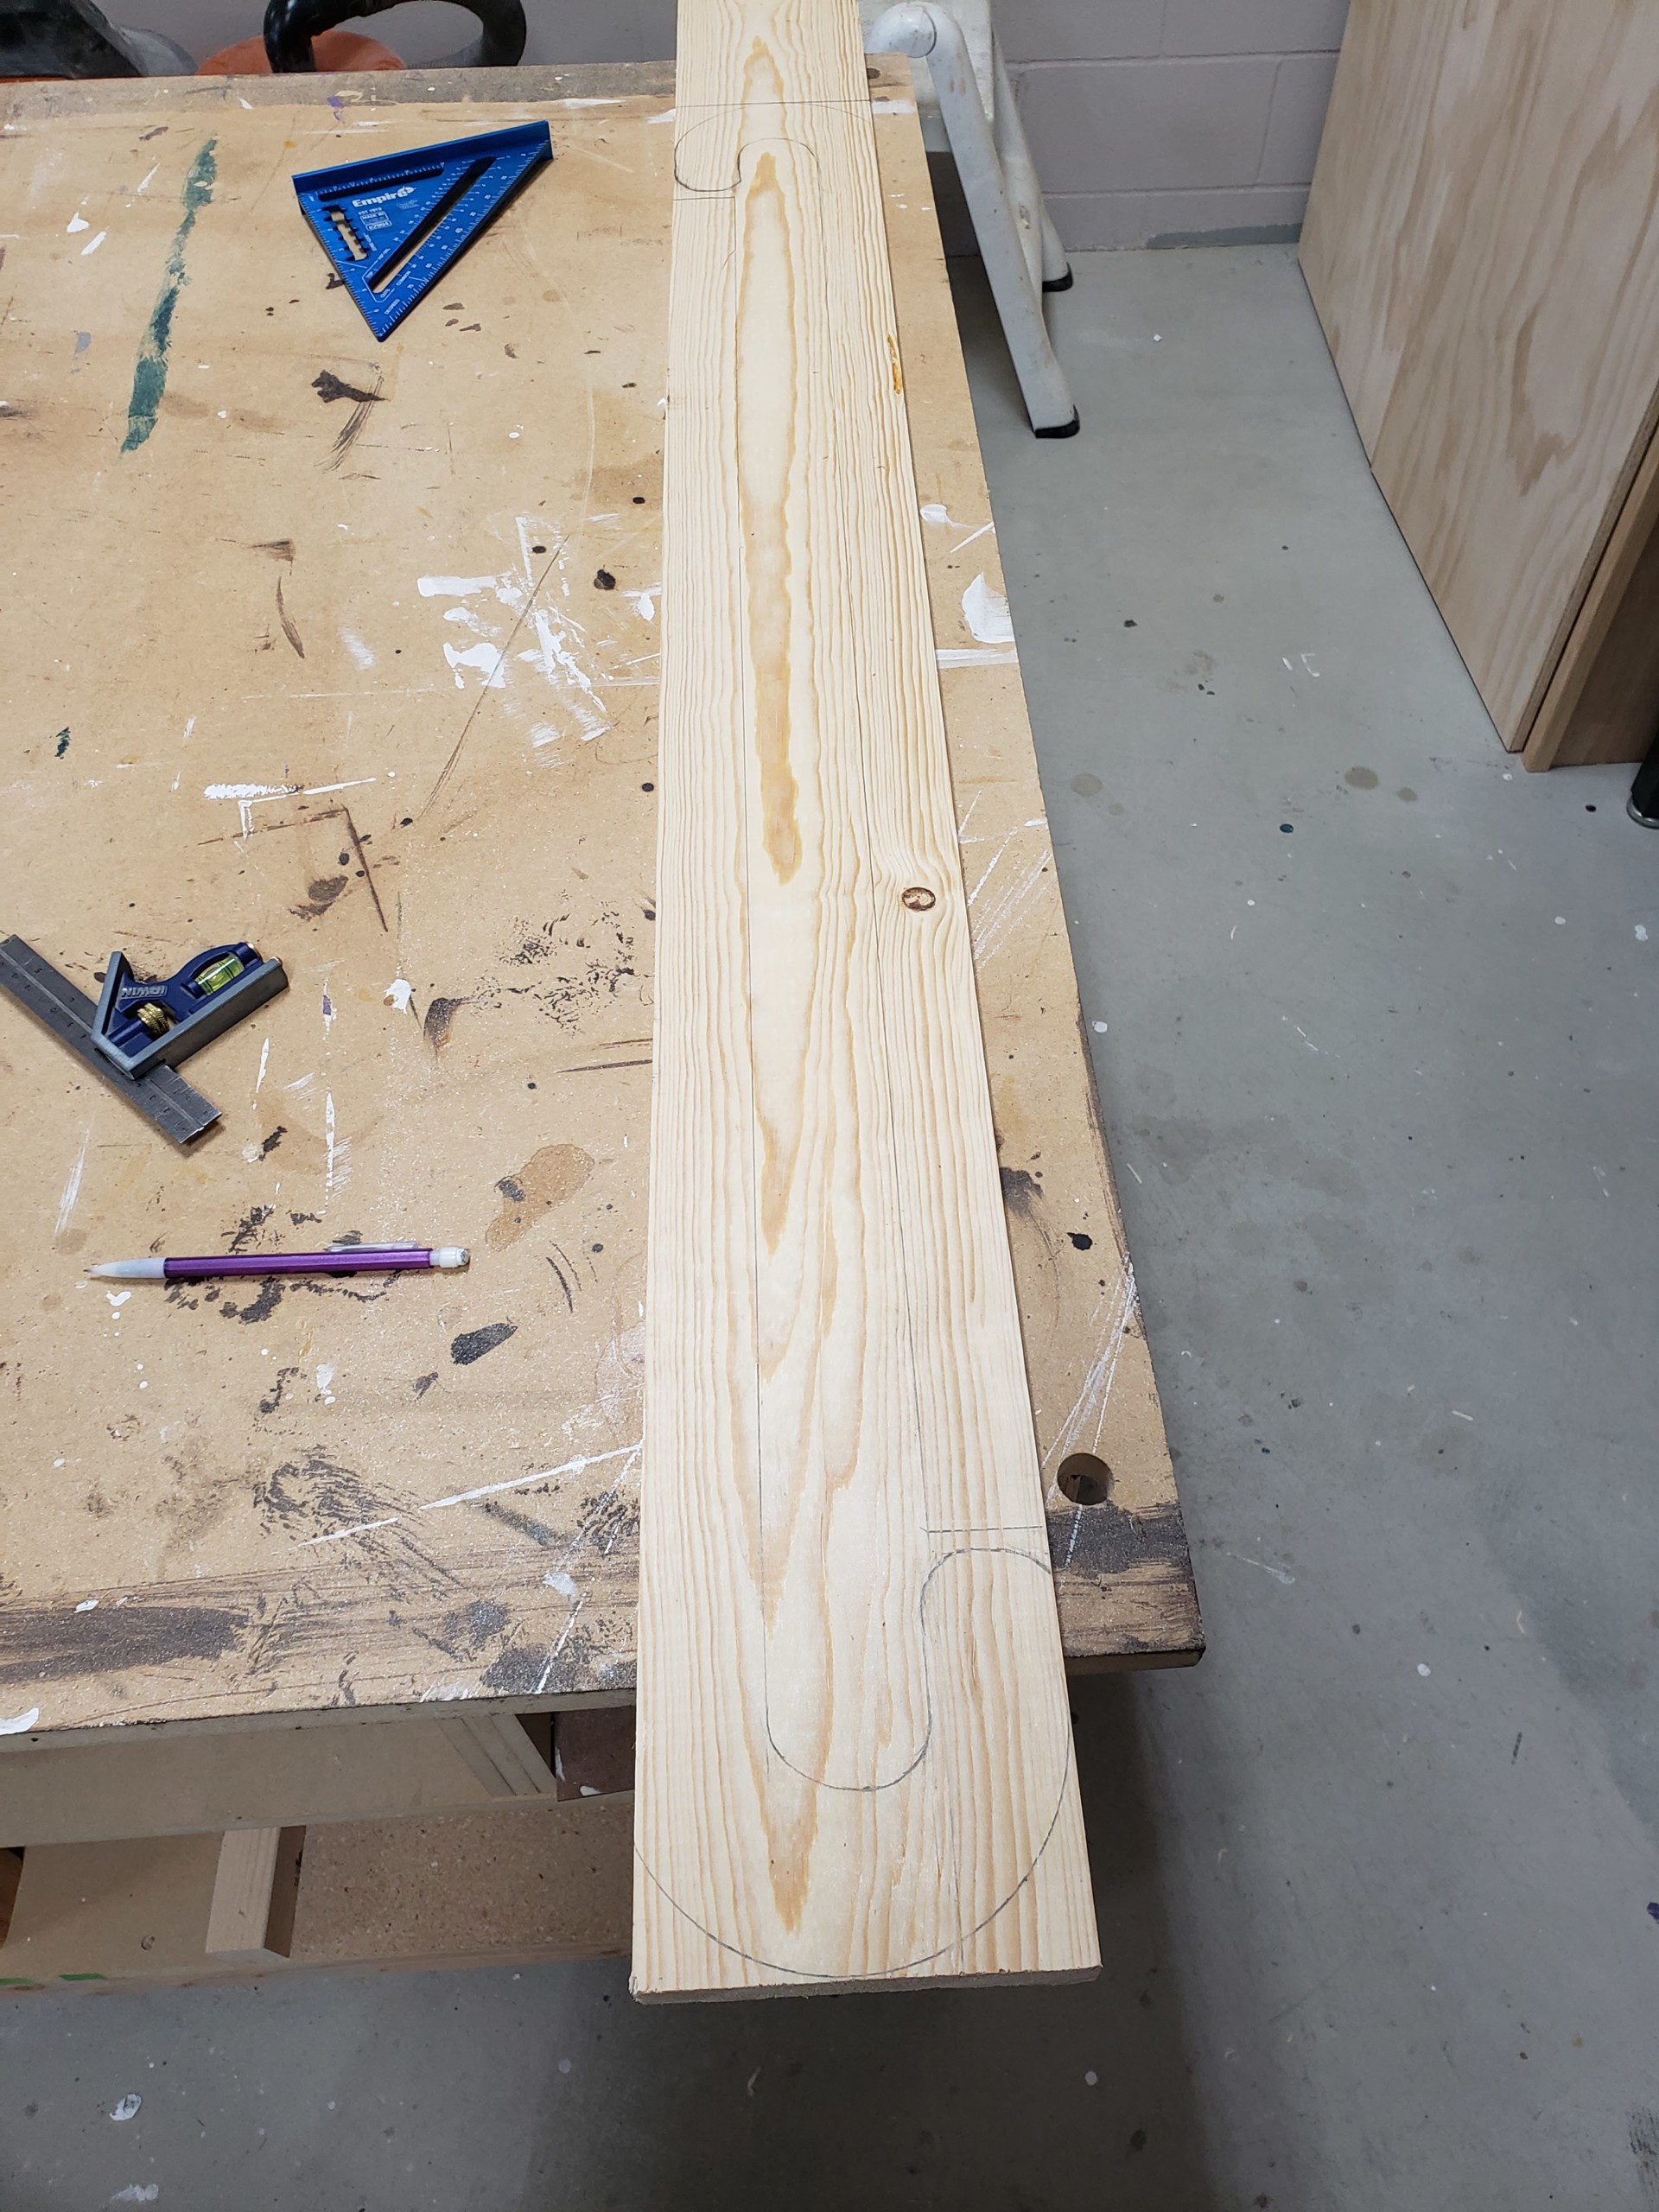
  • Find something round that is about as wide as your board. I used a cereal bowl from my kitchen.
  • Draw the top curve of the candy cane, one on each end of the board
  • Then draw the candy cane stem coming down from the curve on either side of the board.
  • By rotating the board, you should be able to fit two candy canes on one board.

Step 2: Cut out the candy canes

  • Clamp your board then use your jigsaw to cut out the candy cane. Mine looked pretty rough at first but no worries.

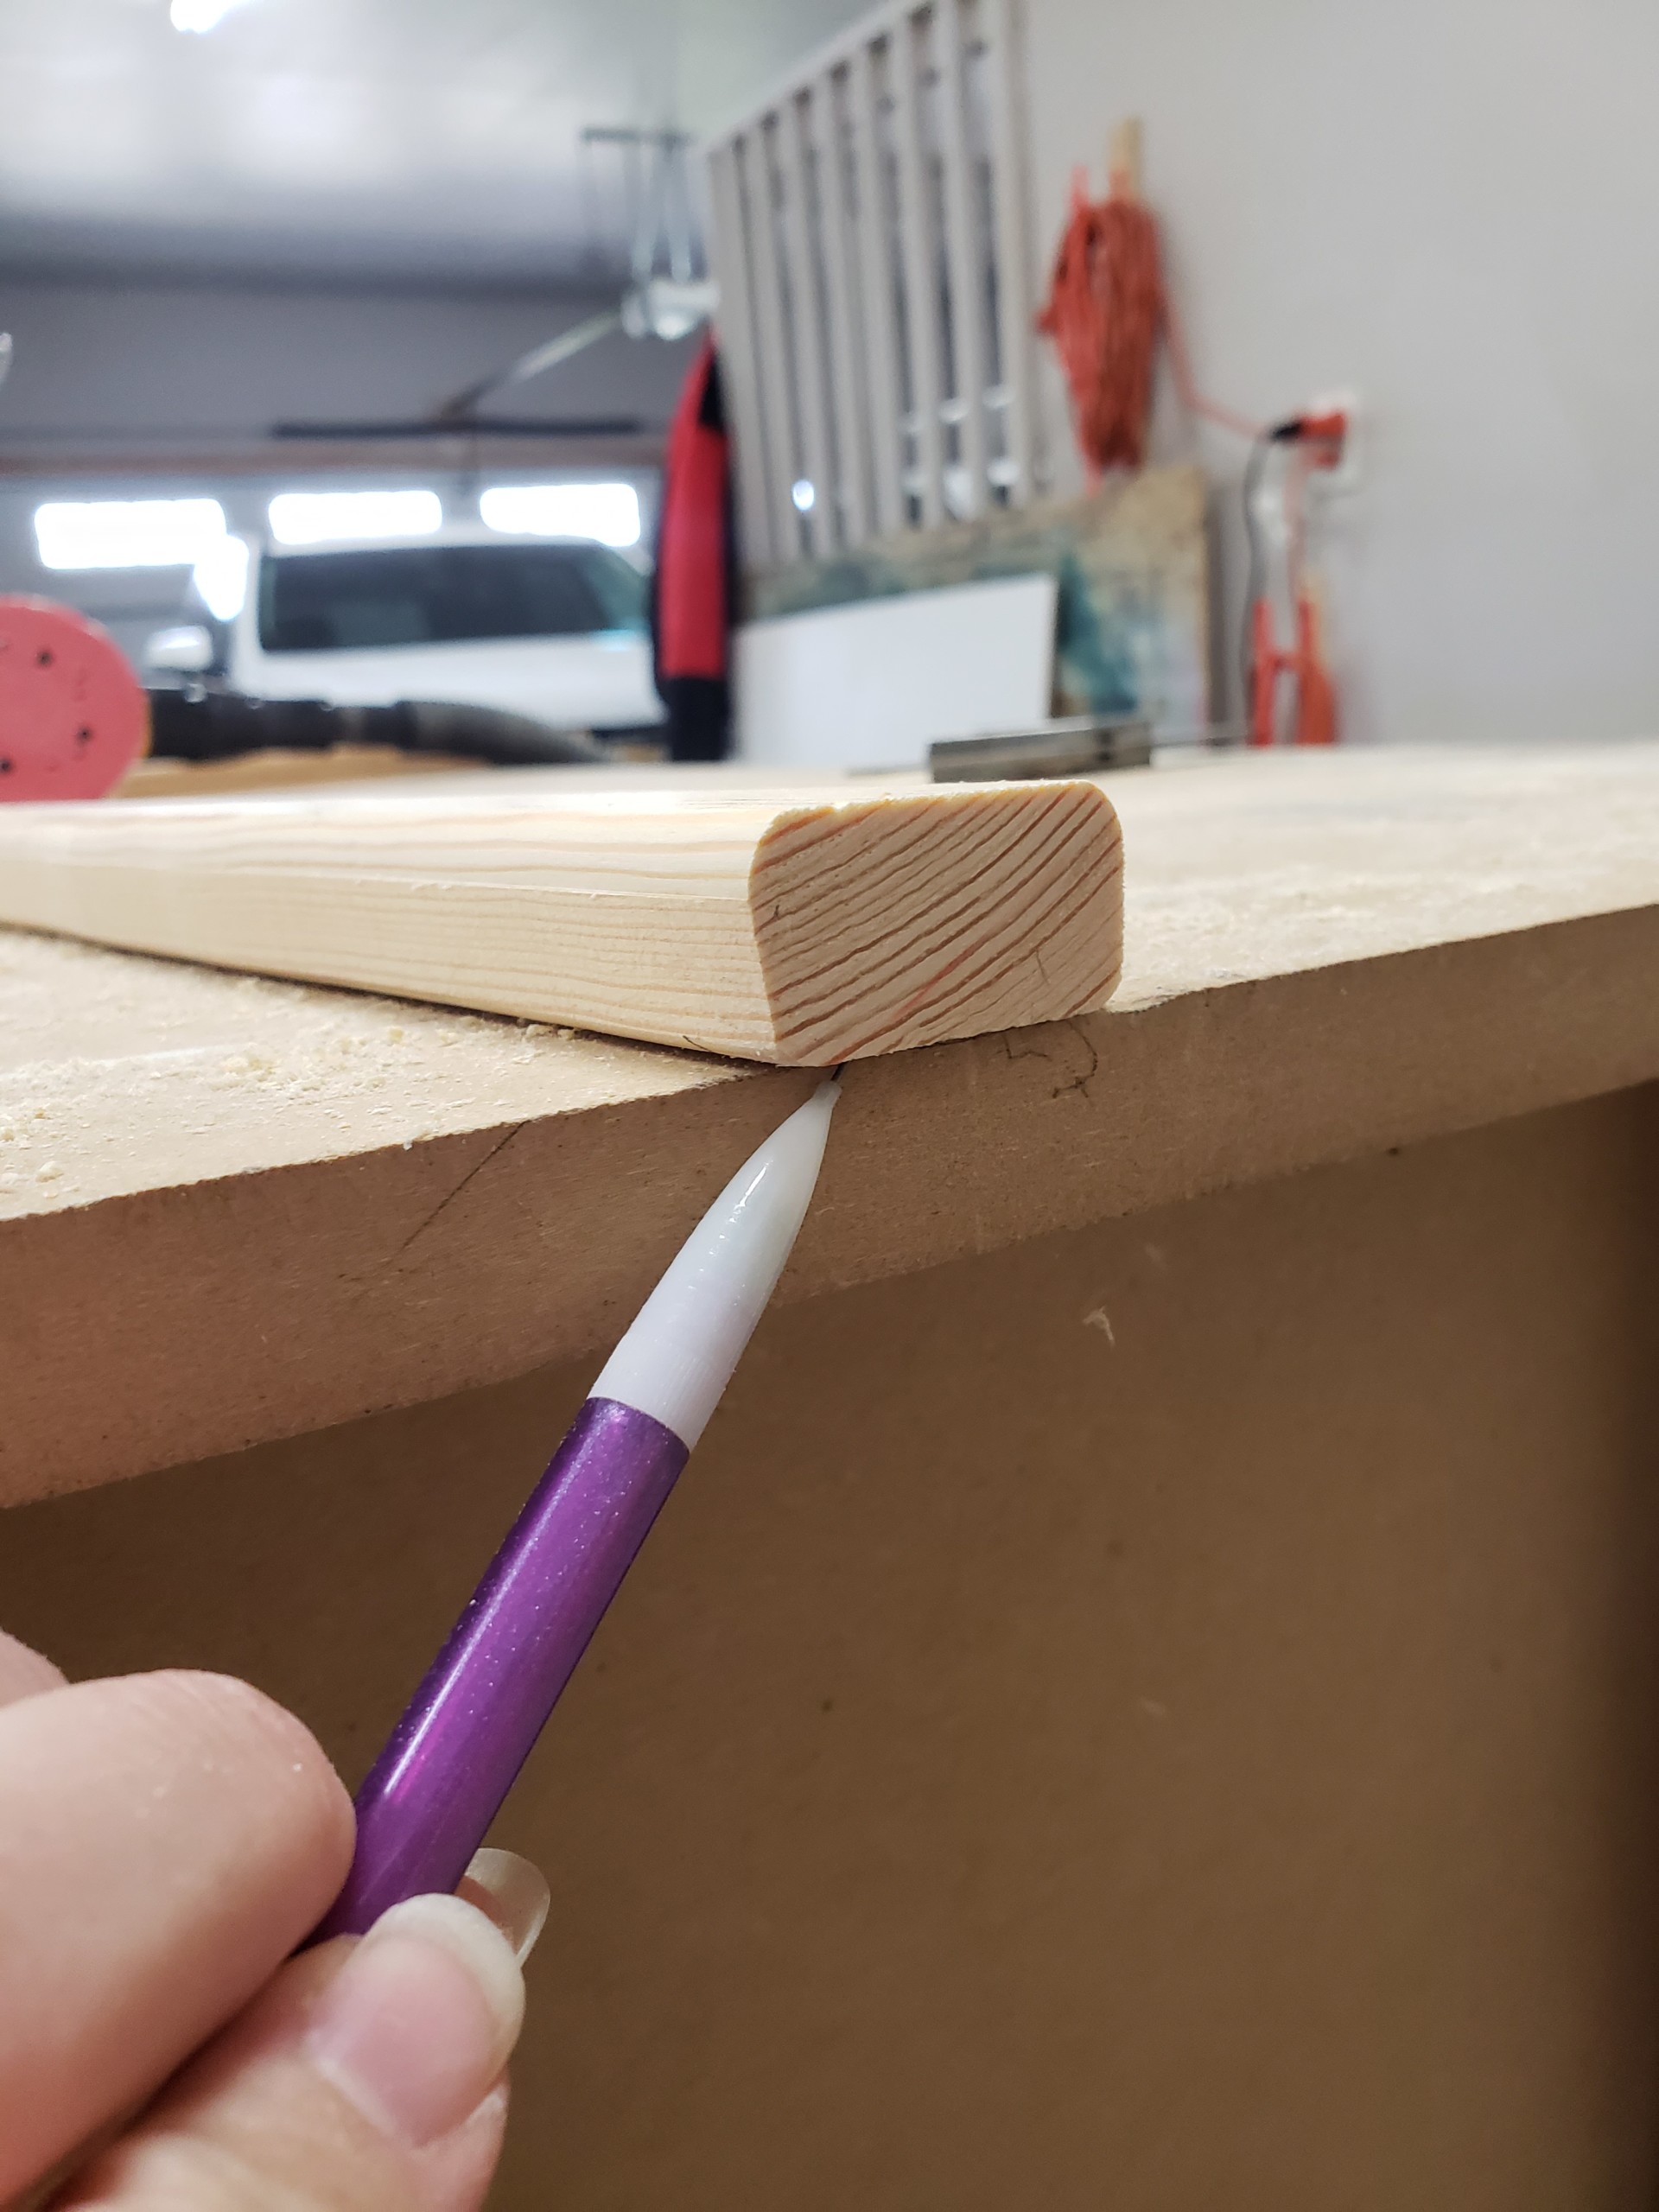
  • Sand the candy canes smooth.
  • Optional: If you have a trim router with a round-over bit, run along the edge of the candy canes to get nicely rounded edges.

Step 3: Paint

  • Paint the body of the candy canes white. (Or you can paint it red.)
  • Using painter’s tape, create candy cane stripes and painted them red (or paint them white if the body is painted red).

Step 4: Cross your candy canes

  • Place your candy canes, one over the other, in the way that looks best to you and use glue and brad nails to secure them together at their intersection. (No brad nailer? You can secure with a screw through the back.)
  • Cut the bottoms off at an angle so they stand up flat on the ground. (This step isn’t necessary since they won’t stand on their own anyway.)

Step 5: Decorate your candy canes

  • Using ribbon, ornaments, decor sprays, or picks you have in your Christmas decor box to decorate as it suits your decor style.
  • TIP: I like to wrap a rubber band around the candy near the intersection to hold the sprays and picks. This way you can change it up yearly.

Now incorporate these candy canes into your seasonal decor. They would look cute inside or outside.

That is about as simple as it gets for a fun DIY project you can do at home. I’m sure the kids would even love to help!


Hi! I’m Kristen, from In Her Garage, and I am a self-taught woodworker and DIY fanatic from Minnesota where I live with my husband and our two daughters.  Between being a wife, mom, and registered nurse, I try to make as much time for DIY as possible.   My love for building came after our family built our current home in 2015. After we moved in, we needed furniture, and instead of spending massive amounts of money to order the pieces we wanted I decided that I would build them myself. I started with a buffet table plan from the fabulous Ana-white and quickly set out to remodel my entire home office.

Check out all of my tutorials here on the Pretty Handy Girl and head over to my site to see more tutorials for making a Toy Box, Folding Craft Table, or a Rustic Buffet Table.  Making something beautiful with your own two hands through a little preparation and determination is an amazing feeling and I hope to bring inspiration and know-how to those looking to tackle a big or small project.

Not interested in making these items yourself?  Let me make them for you!! Feel free to contact me and I would be happy to talk with you about any idea you may have for your home.

I am so glad that you found me here and please feel free to connect with me on Pinterest, Instagram,  Facebook, and Etsy to see what I am working on right now.


8. Complete with "L" brackets on corners. Add gifts and deliver!

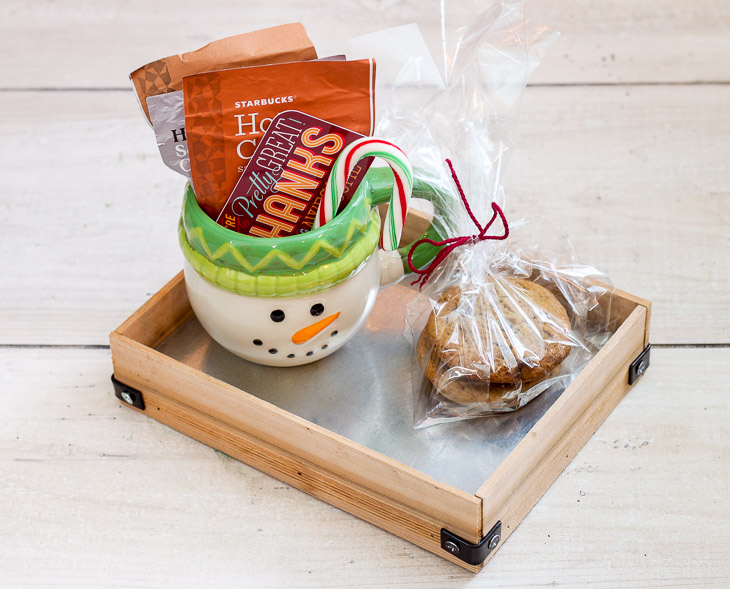
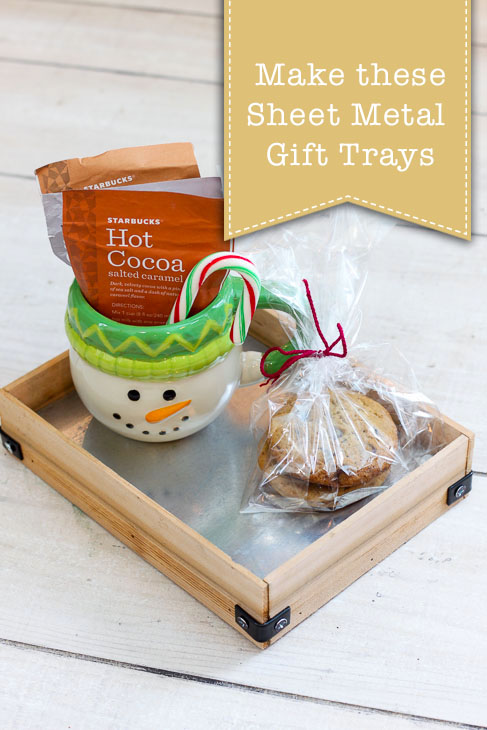
DIY Sheet Metal Gift TraysDIY Sheet Metal Gift Trays

The holidays are fast approaching and it’s time to start thinking about gift giving ideas! Gift trays are a great way deliver gifts to your friends, neighbors or teachers. The best part of a gift tray is it can be reused for anything they want and nothing goes to waste! Follow along with this tutorial to see how to make these DIY Sheet Metal Gift Trays.

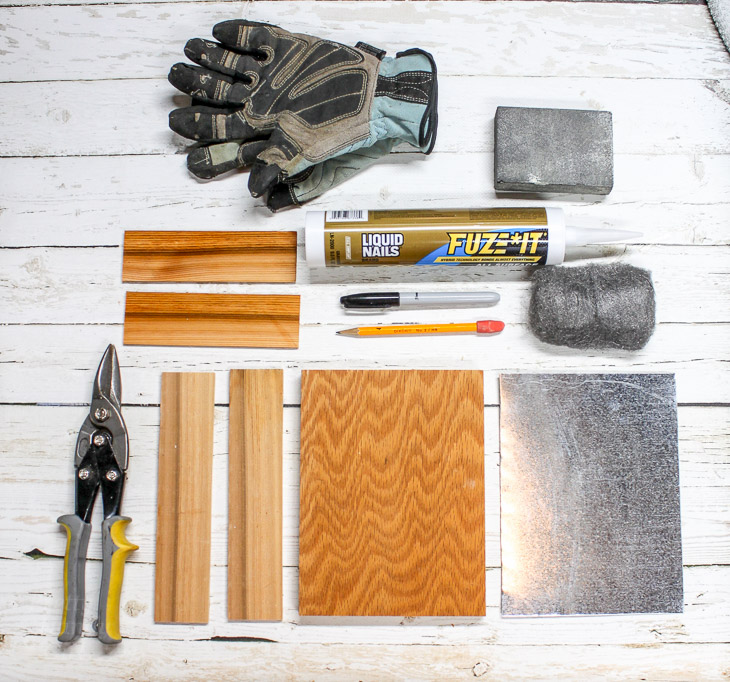
Materials:

(I’ve included affiliate links for your convenience. I earn a small percentage from a purchase using these links. There is no additional cost to you. You can read more about affiliate links here.)

Materials: Sheet Metal Gift Tray

  • 1/2″ or 3/4″ Plywood scrap wood
  • 2″ pieces of lathe or scrap moulding
  • [amazon_textlink asin=’B000W49NPC’ text=’Sheet metal scrap’ template=’ProductLink’ store=’prett-wp-001-20′ marketplace=’US’ link_id=’4f103892-cbe2-11e7-a00c-3fda84932599′] (large enough to cover plywood base)
  • [amazon_textlink asin=’B00009OYFY’ text=’Sheet metal snips’ template=’ProductLink’ store=’prett-wp-001-20′ marketplace=’US’ link_id=’56db011a-cbe2-11e7-88c9-230adf5bdb2c’]
  • [amazon_textlink asin=’B000S7ZSTS’ text=’Construction adhesive’ template=’ProductLink’ store=’prett-wp-001-20′ marketplace=’US’ link_id=’65c9549d-cbe2-11e7-8619-39ed35fc6585′]
  • [amazon_textlink asin=’B000DZF2Q4′ text=’Caulk gun’ template=’ProductLink’ store=’prett-wp-001-20′ marketplace=’US’ link_id=’6d3fe28c-cbe2-11e7-bb25-e144f3be5a89′]
  • [amazon_textlink asin=’B00125NQBC’ text=’Sandpaper’ template=’ProductLink’ store=’prett-wp-001-20′ marketplace=’US’ link_id=’7f0ff979-cbe2-11e7-b34f-fb2f071c5869′]
  • [amazon_textlink asin=’B001JYVDSE’ text=’Steel wool’ template=’ProductLink’ store=’prett-wp-001-20′ marketplace=’US’ link_id=’8e654c5e-cbe2-11e7-b495-0ffc93a9294c’]
  • [amazon_textlink asin=’B01I7DNOYA’ text=’Gloves’ template=’ProductLink’ store=’prett-wp-001-20′ marketplace=’US’ link_id=’b09e21ba-cbe2-11e7-91af-d908a698cd02′]
  • Drill
  • Pencil or Marker
  • 4 – [amazon_textlink asin=’B01N6NID4X’ text=’L brackets’ template=’ProductLink’ store=’prett-wp-001-20′ marketplace=’US’ link_id=’de9d5670-cbe2-11e7-84b2-2f143e838863′] and 1/2″ wood screws
  • [amazon_textlink asin=’B001PNH8D8′ text=’Brad nails ‘ template=’ProductLink’ store=’prett-wp-001-20′ marketplace=’US’ link_id=’0337c2d4-cbe3-11e7-b1d7-3dfa06c67bf1′]Nail gun

Instructions:

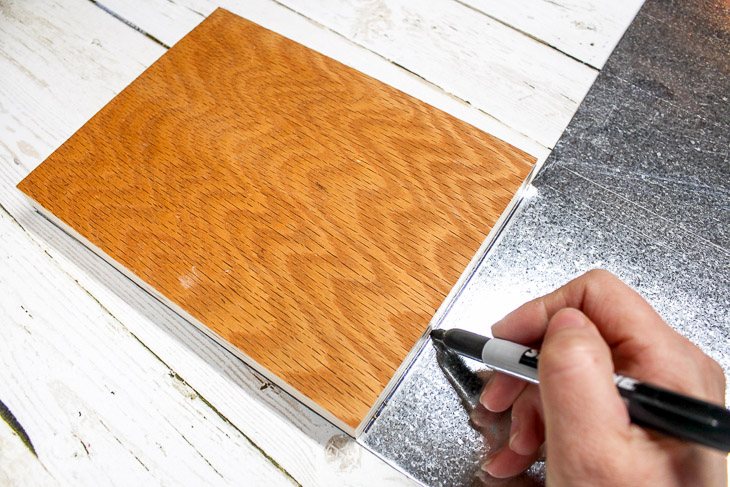
Cut your piece of plywood to the desired size for the tray base. Lay the plywood base on top of the sheet metal and trace with a permanent marker. Use tin snips to cut the metal to size.

1. Cut base and mark sheet metal size.

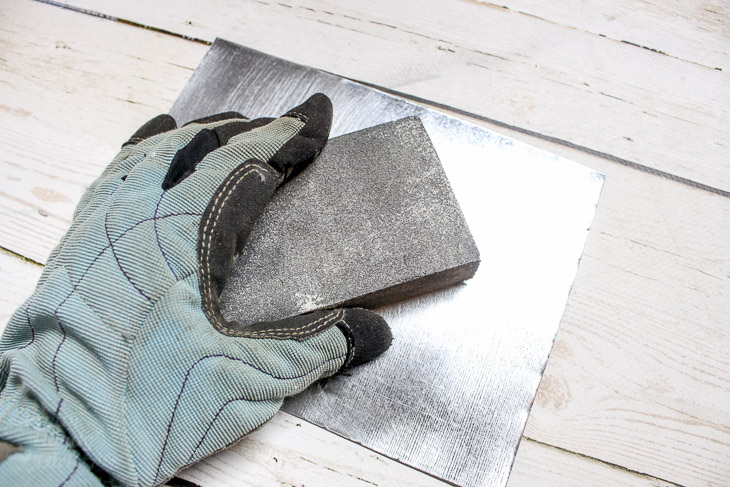
Put on your safety gloves and use the sanding block to remove some of the shine from the sheet metal. Smooth over any sharp edges.

2. Sand Sheet metal edges and base.

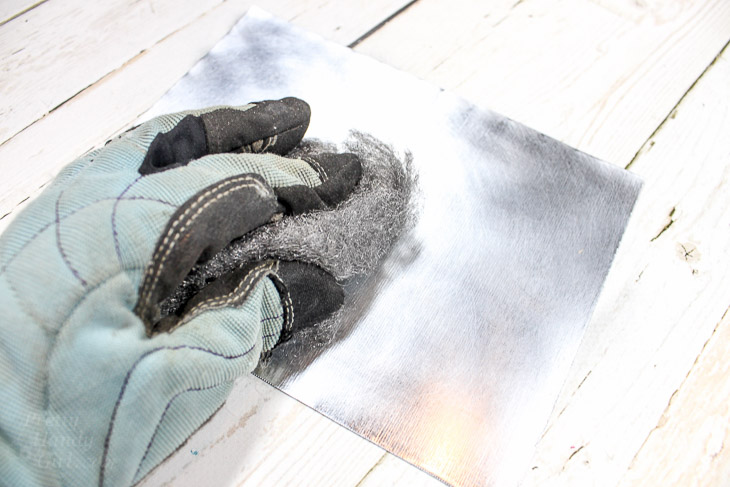
Rub the steel wool over the entire sheet metal piece to give it a soft polished finish.

4. Use steel wool to dull sheet metal surface.

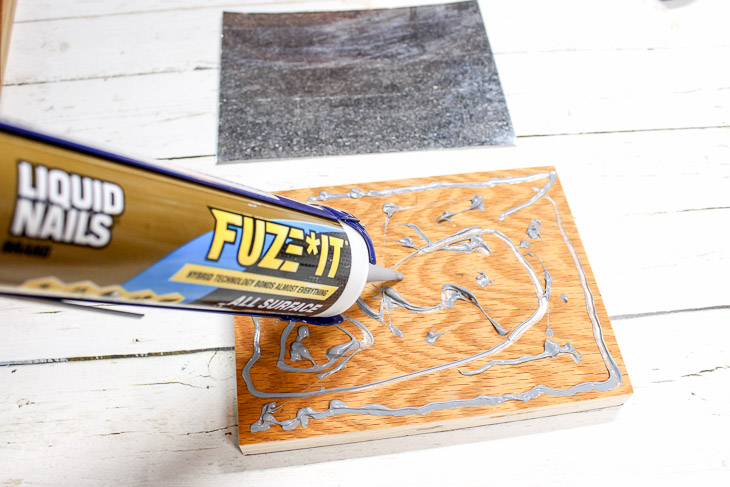
Load a tube of construction adhesive into your caulk gun. Apply a fair amount of adhesive to the plywood. Glue the sheet metal to the top of the plywood.

5. Add Construction Adhesive to wood base

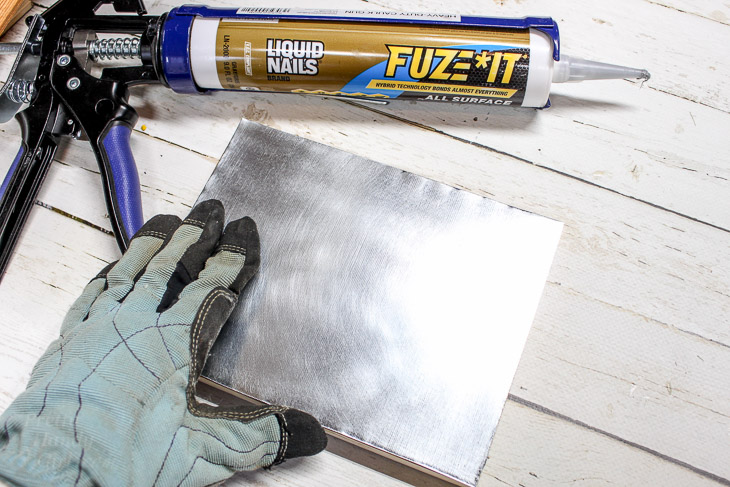
Press the sheet metal down evenly on top of the adhesive. Wipe off any excess if needed with a paper towel.

6. Press sheet metal on top of wood base.

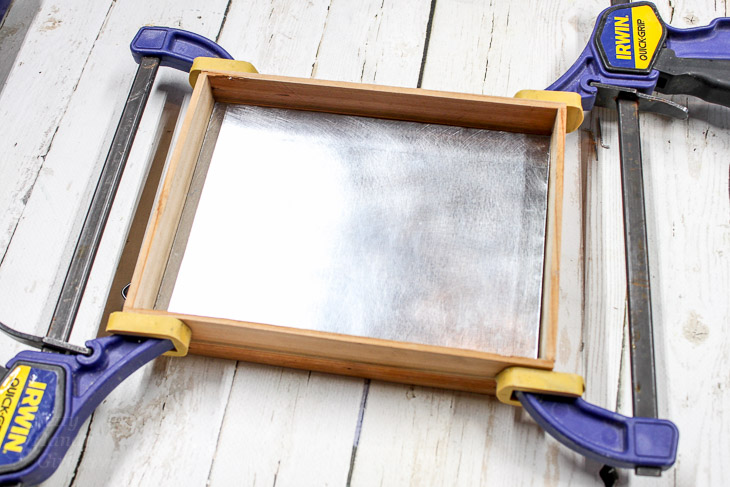
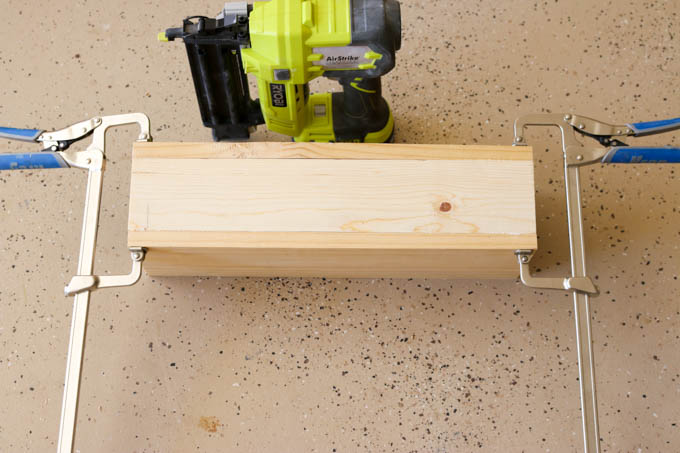
Cut the 2″ pieces of lathe or scrap moulding to the length of the two shorter sides. Next, measure and cut two pieces of lathe for the long ends. (Be sure to allow extra length to overlap the short pieces of lathe/moulding.  Use the construction adhesive and brads to secure the lathe to the sides of the plywood. Clamp the sides until the adhesive cures.

8. Clamp sides while glue cures.

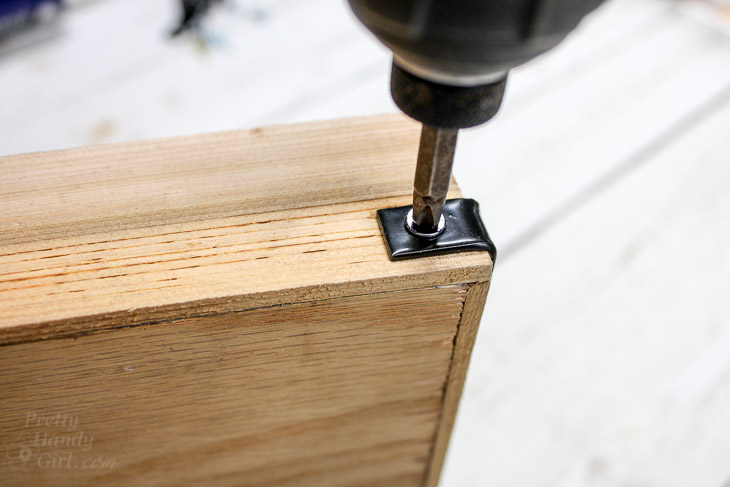
Once the adhesive is cured, remove your clamps. Attach the L brackets on the lower half of each corner using 1/2″ wood screws. The L brackets will reinforce the sides and add an industrial look.

9. Add corner brackets for extra support and decoration.

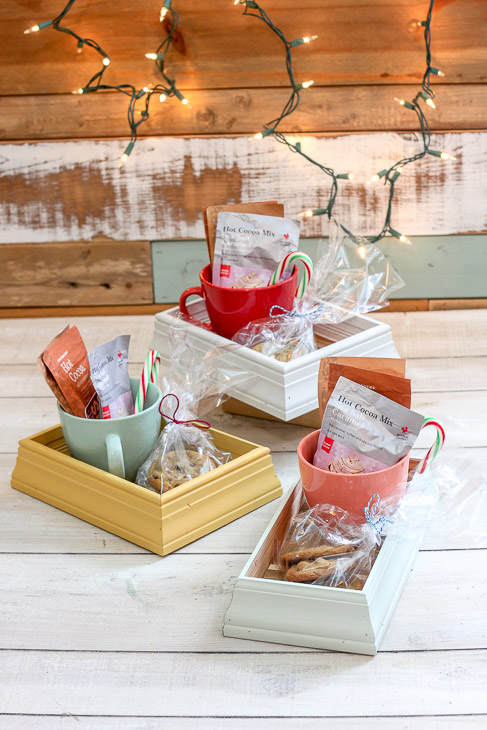
There you have it! These DIY Sheet Metal Gift Trays are easy to make, look great, and are an extra special and environmentally-friendly way to give gifts!
10. Add gifts and deliver!

I hope you love this project. Do you have other ideas for quick gift giving? Please share!

Want some more gift giving inspiration?

DIY Scrap Moulding Trays
scrap-moulding-trays
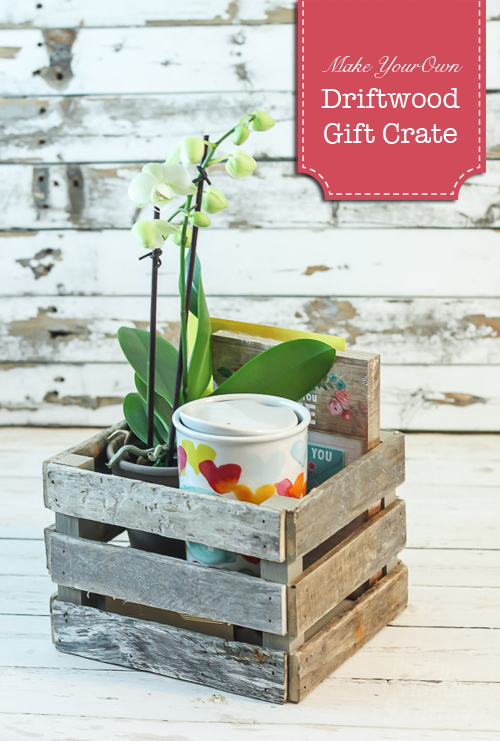
Make a Driftwood Gift Crate

Make a Driftwood Gift Crate | Pretty Handy Girl

Scrap Wood Wine Holder

Hey everyone!  Katie here from Addicted 2 DIY.  I don’t know about you, but I have a hard time letting go of good scrap wood.  If I think it could be used for anything in the future, I try to hold onto it.  Plus, my kids love to go through the scrap bin and see what they can put together.  It’s good, family fun!  I dug through my scrap pile recently and built this simple wine holder.  It was inspired by one that my aunt has in her kitchen that I just love.  It’s simple, it’s rustic, and it can be customized to hold however many bottles you like!
Materials:

  • 2 – 1×6 boards cut to 18″ long
  • 1 – 1×4 boards cut to 18″ long
  • 2 – 1×4 boards cut to 4 3/4″ long
  • brad nailer
  • 1 1/4″ brad nails
  • wood glue
  • drill
  • 2″ forstner bit or hole saw
  • 220 grit sandpaper
  • finish of your choice (I used Minwax stain in Espresso)

Instructions:

Step 1: Dig through your scrap pile and cut your wood pieces to size.

cut-wood-pieces

Step 2: Glue and clamp the 18″ 1×4 board flush with the top of the 1×6 boards.  Nail in place with 1 1/4″ brad nails.

glue-and-nail-front-and-back-pieces

Step 3: Glue and clamp the 1×4 ends and nail into place with 1 1/4″ brad nails.  This will form a box. Read more

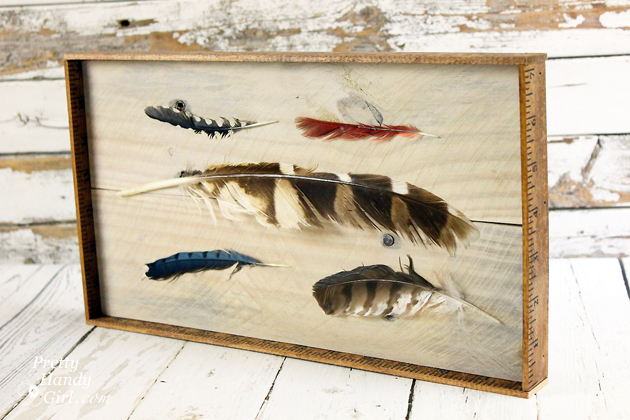
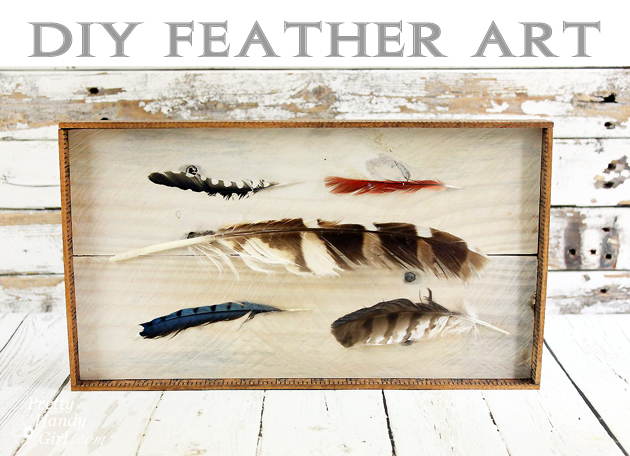
DIY-feather-art

DIY Feather Art | Pretty Handy Girl

When I needed an extra piece of art for our living room gallery wall I created DIY Feather Art. You can create your own, but please purchase craft feathers, use fake feathers or paper feathers. (Per the Migratory Bird Treaty Act, it is illegal to collect feathers, nests and other anatomical parts of certain migratory birds.)

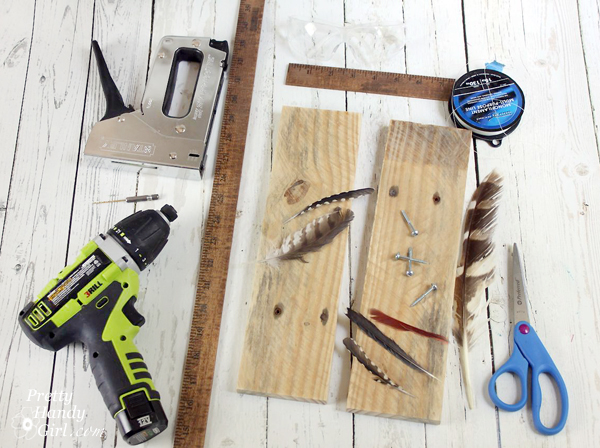
Materials:

DIY Feather Art | Pretty Handy Girl

  • Rustic 1×4″ boards (I used pallet wood)
  • Wood yardstick or lattice boards
  • Watered down white paint
  • Paint brush
  • Clamp
  • Scissors
  • Kreg Jig
  • Pocket hole screws (1.25″)
  • Nylon line
  • Small drill bit
  • Drill
  • Staple gun
  • 1″ finish nails
  • Hammer or nailgun
  • Wood glue
  • Feathers
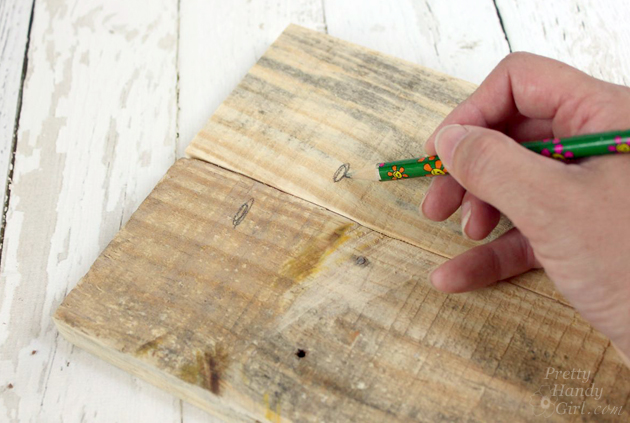
  • Pencil
  • D-ring picture hangers

Instructions:

Cut your 1×4″ boards to size (or select one board the size you want for your art background.) To connect the two boards, mark the location to drill pocket holes.

DIY Feather Art | Pretty Handy Girl

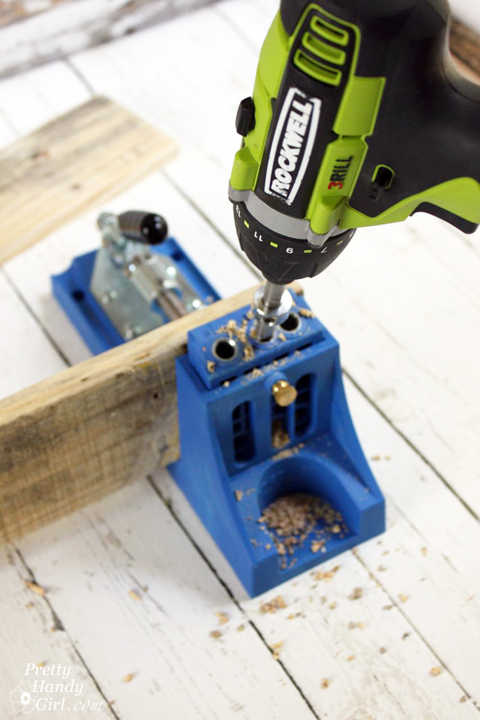
Use the Kreg Jig to drill pocket holes into the back of both boards.

DIY Feather Art | Pretty Handy Girl

Clamp the boards together and join them with 1 1/4″ pocket hole screws.

DIY Feather Art | Pretty Handy Girl

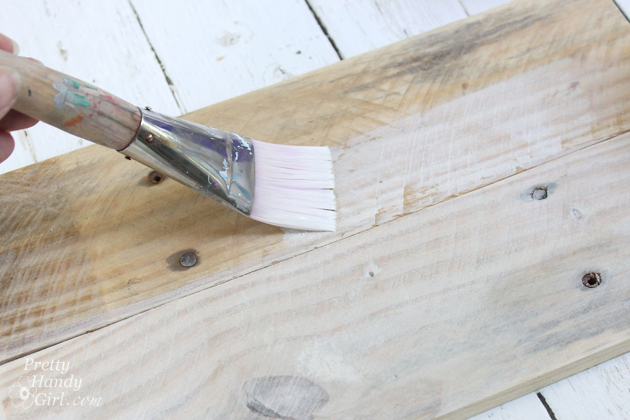
Flip the board over and paint it with watered down white paint for a white-washed look.

DIY Feather Art | Pretty Handy Girl

Mark the width of the white-washed board onto the yardstick. Cut two pieces the same length. Read more

how to build a wood ammo box

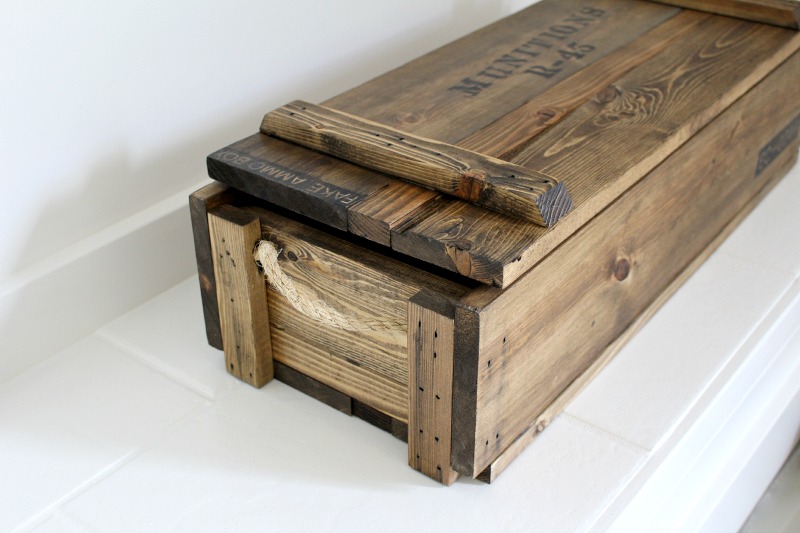
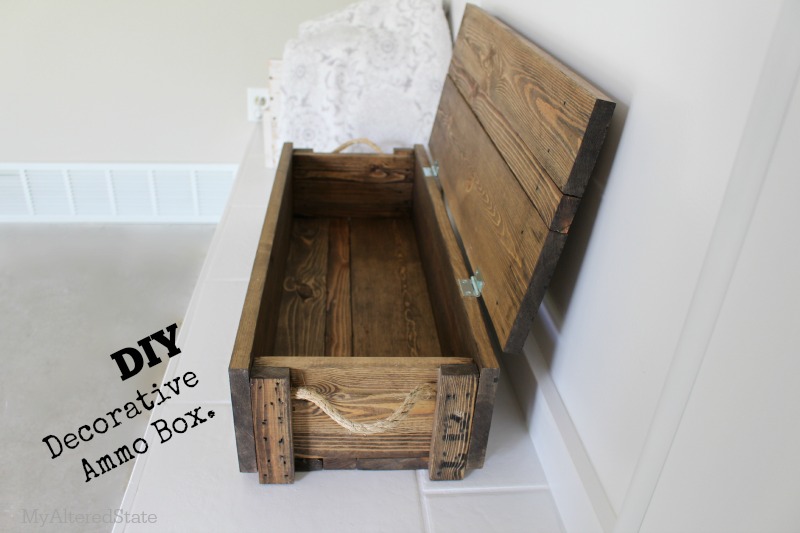
I’m super excited to have Pauline from My Altered State joining us today! It’s been a while since we’ve had a guest on Pretty Handy Girl, and this guest was certainly worth the wait! She’s joining us today to show you How to Build a DIY Decorative Ammo Box! This gorgeous crate may be for decorative purposes, but Pauline studied the construction of real ammo boxes to build it the same way the real ones are built. She’s amazing, and I know you’ll understand why in a minute.

I met Pauline at Haven last year, but I’ve been a fan of her blog way before we met. She is an avid upcycler and loves to use salvage materials in her projects.

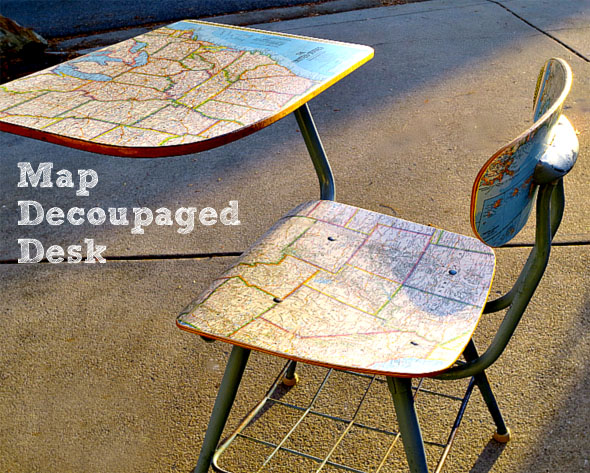
She has so many fabulous projects, I had a hard time picking a few to show you. Like this fabulous Map Decoupaged Desk/Chair!

DIY Decorative Ammo Box

Map Decoupaged Desk Chair

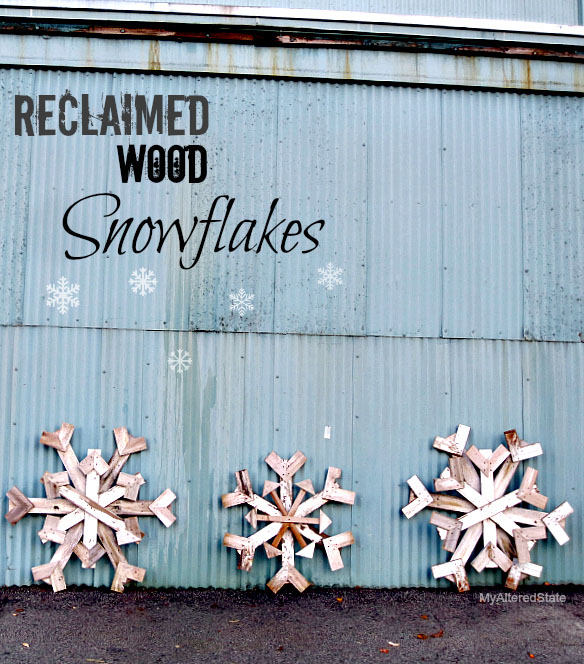
Or these beautiful Reclaimed Wood Snowflakes!

Reclaimed Wood Snowflakes

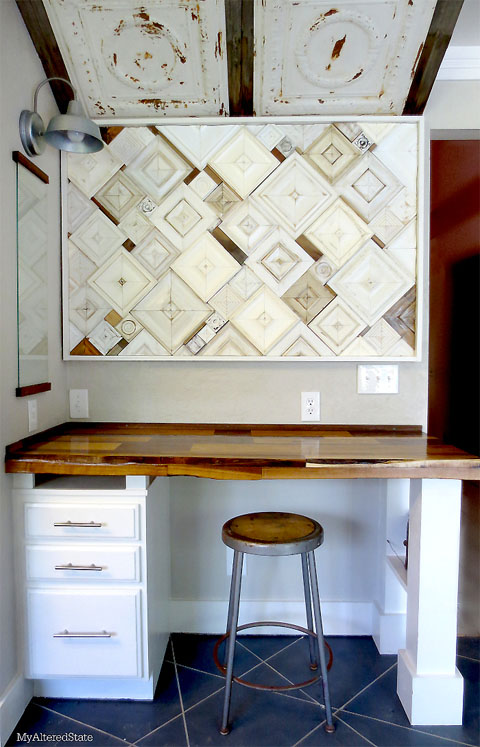
But, by far my favorite DIY project Pauline has completed so far is this desk and art installation in her kitchen!

Kitchen Nook Art Installation

And now, Pauline has an easy and unique tutorial for us today! Please clap, cheer and get on your feet for the amazing Pauline from My Altered State!

page_break_2
When I started blogging, I never dreamed that I would one day meet THE Pretty Handy Girl in person, let alone find myself writing a guest post for her.  So having said that, imagine how excited I am right now as I write my first guest post on Pretty Handy Girl!  Now it’s time to get started.  I hope you enjoy my DIY Decorative Ammo Box project.

ammo box diy

Wooden military ammunition boxes have been a staple in the vintage repurposing and upcycling world for a while. They are a versatile storage item with an industrial flavor, but sometimes they are hard to find. That’s when I get the urge to build.

In an effort to keep this tutorial from being too lengthy, you can find info on finishing and aging wood in this post. Now let’s get building.

DIY Decorative Ammo Box Materials:

To create a box with the dimensions of 27″ wide x 7″ tall x 10″ deep, purchase the following:

  • (2) 1″ x 6″ x 6′
  • (2) 1″ x 2″ x 6′
  • (1) 1″ x 4″ x 6′
  • Rope
  • Gorilla tape
  • Wood glue
  • 2 Hinges
  • Drill
  • Drill bit same thickness of rope
  • Clamp
  • Pencil
  • 2″ nails
  • Nailgun (or hammer)
  • Miter saw

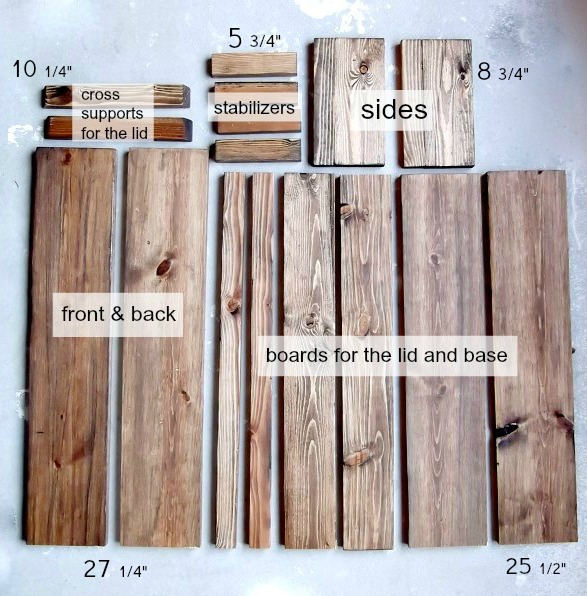
DIY Decorative Ammo Box Cut List:

cut list wood ammo box

  • 2 – 1″ x 2″ cut to 10 1/4″ (cut ends at 30 degree bevel as shown above)
  • 4 – 1″ x 2″ cut to 5 3/4″
  • 2 – 1″ x 2″ cut to 25 1/2″
  • 2 – 1″ x 4″ cut to 25 1/2″
  • 2 – 1″ x 6″ cut to 8 3/4″
  • 2 – 1″ x 6″ cut to 25 1/2″
  • 2 – 1″ x 6″ cut to 27 1/4″

DIY Decorative Ammo Box Instructions:

By copying the design of an authentic ammo box, I will show you how to build this DIY Decorative Ammo Box clear down to the way the handles are attached.

Lay out all your pieces for a “dry run” of the design:

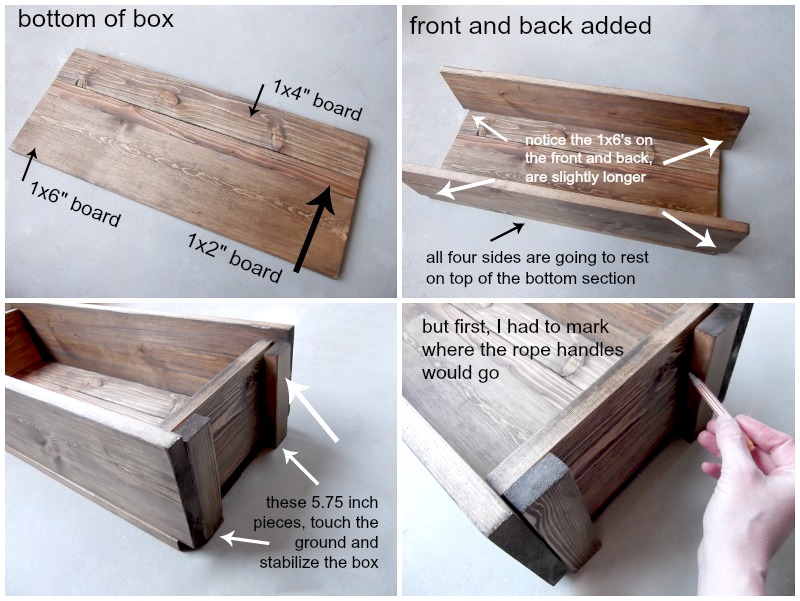
  • Bottom of box: (1″ x 6″ x 25 1/2″) + (1″ x 2″ x 25 1/2″) + (1″ x 4″ x 25 1/2″) boards.
  • Front and Back of box: 1″ x 6″ x 27 1/4″ boards
  • Sides of box (with rope handle): 1″ x 6″ x 8 3/4″ boards

Mark the location for your rope handles (approximately 2″ down from the top of the box.)

assemble wood ammo box

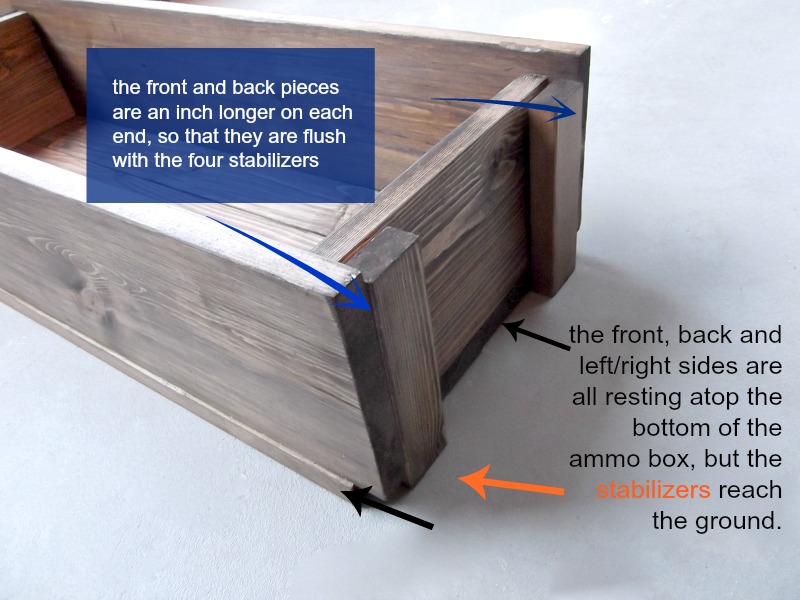
During the dry run, notice that the front and back pieces are an inch longer on each side. The stabilizing 1″ x 2″ pieces will rest on the ground, while the four sides of the box rest on the base.

diy ammo box design

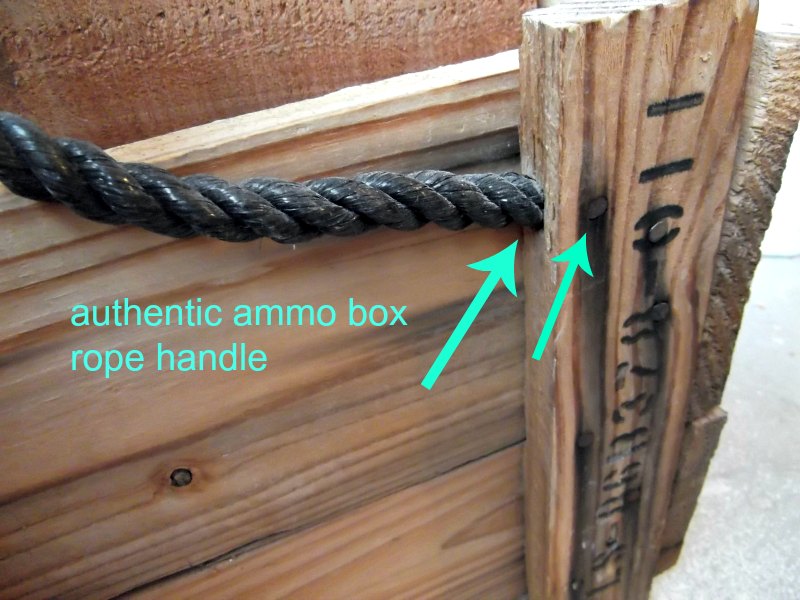
After all the ammo box collecting I’ve done over the years, you’d think I would have noticed how the handles were installed on the real thing. Nope. Never paid attention until now. Here’s a close up of the real thing:

military wood ammo box

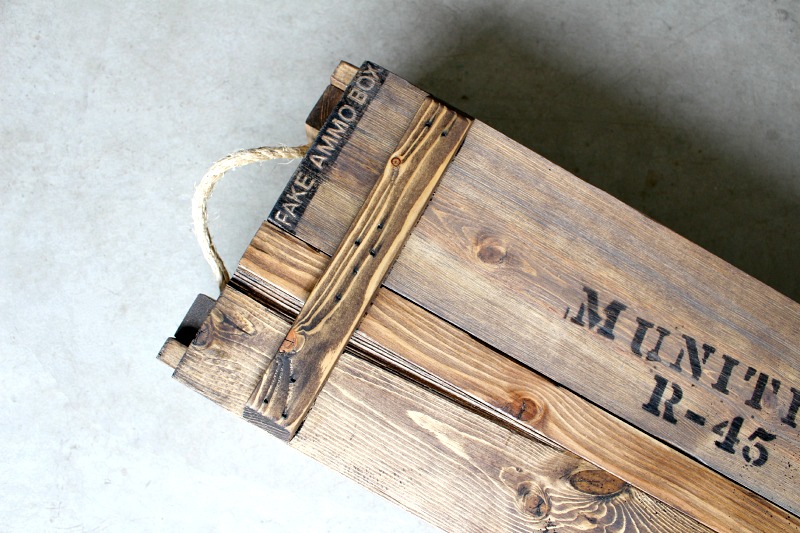
A notch is hollowed out where the end of the rope goes, and then secured in place with nails. This design actually keeps any rope ends or knots from being visible on the inside of the box. Clever.

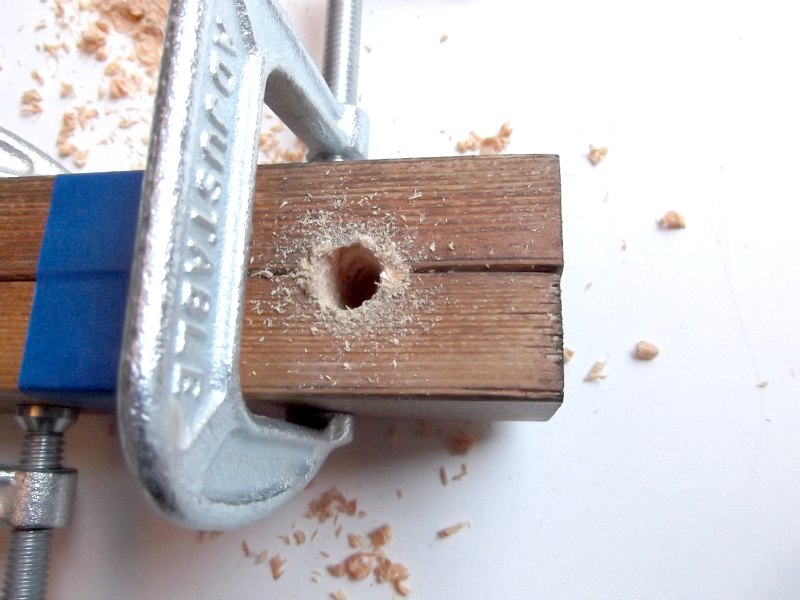
To create the notch, clamp two 1″ x 2″ x 5 3/4″ stabilizer pieces together. Use the drill bit to drill a hole directly in between the two pieces of wood. Repeat using two more 1″ x 2″ x 5 3/4″ pieces.

drill holes for rope handles

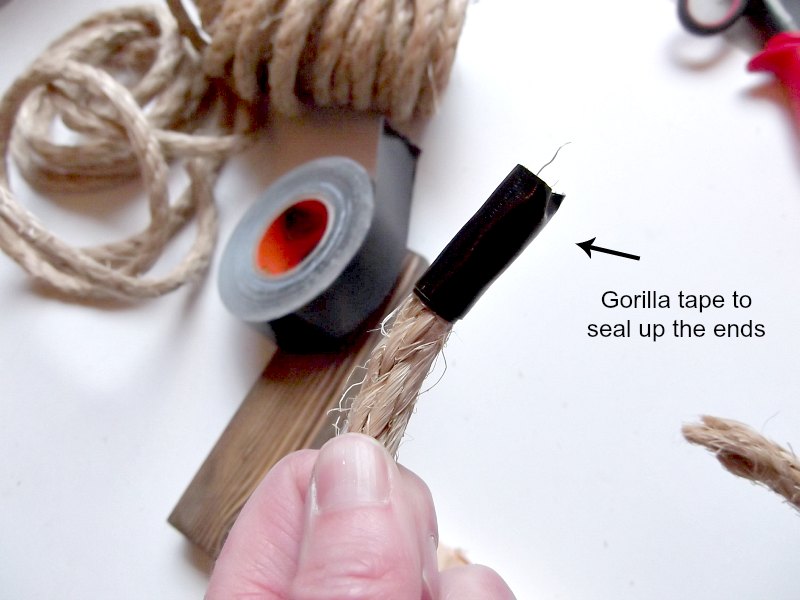
Use Gorilla Tape (or duct tape) to seal the end of the rope and keep it from unraveling.

rope handle wooden box

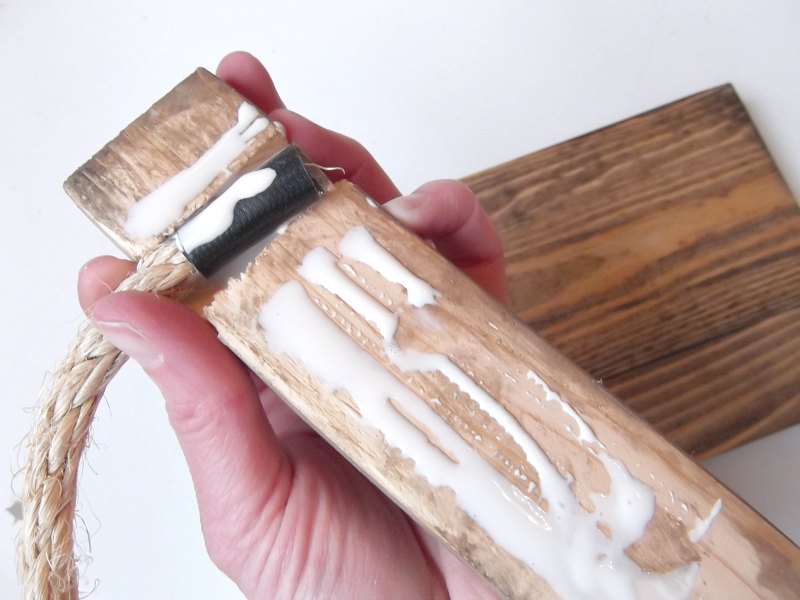
Rest the end of the rope into the notch of the stabilizer 1″ x 2″ and add wood glue to the stabilizer and the taped rope end.

wood glue diy ammo box

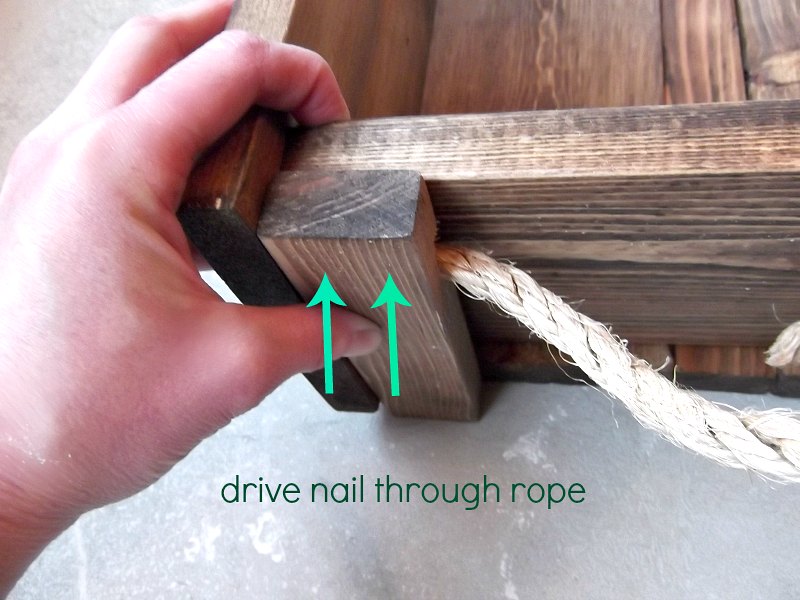
While holding the handle (stabilizer) pieces in place, drive the first nails through the wood, into the rope end and into the side of the box.

ammo box handles

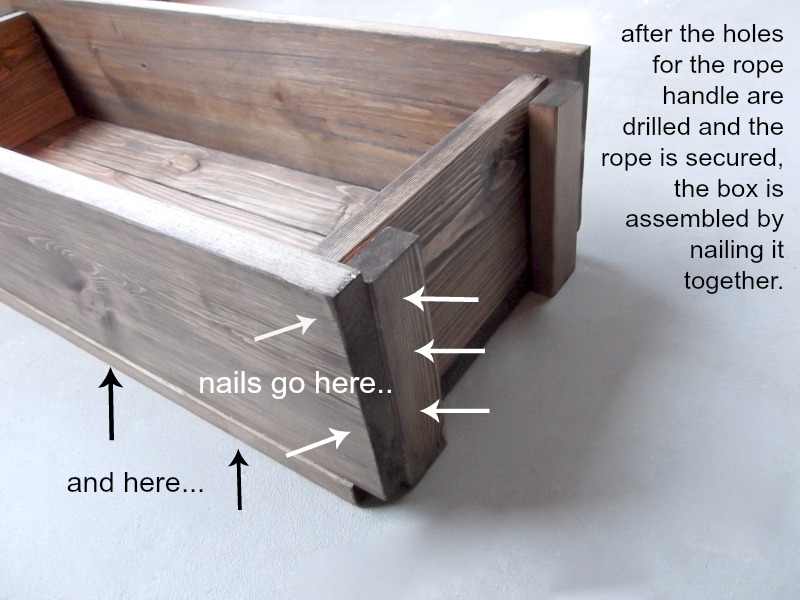
After driving two nails into the stabilizer pieces to secure the rope, drive two more nails through the front and back of the box, into the sides of the stabilizer pieces (as shown below.) Then go ahead and glue/nail all the sides together, while keeping it rested on top of the bottom boards.  (This will help you keep everything aligned and square.) Once all the sides are nailed together, flip the whole box upside down, and glue and nail the bottom boards into the frame of the ammo box.

diy ammo box secure sides

Assembling the lid:

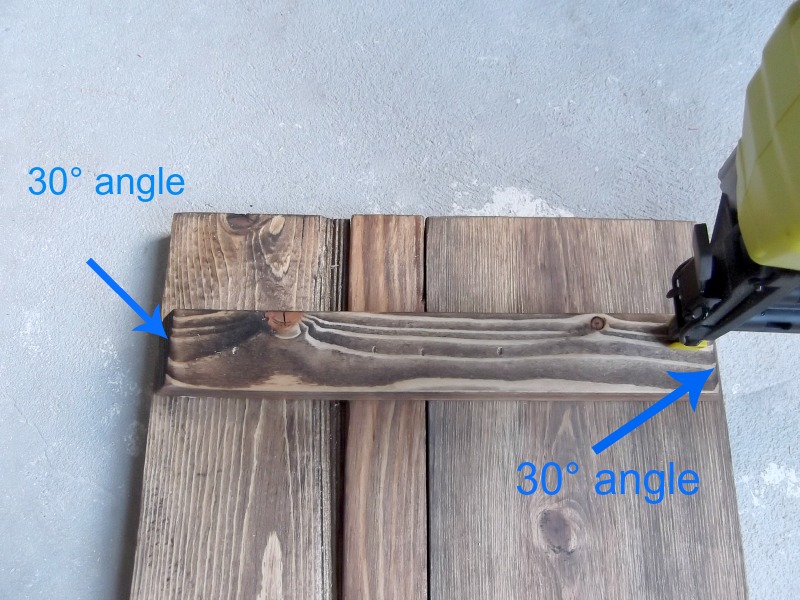
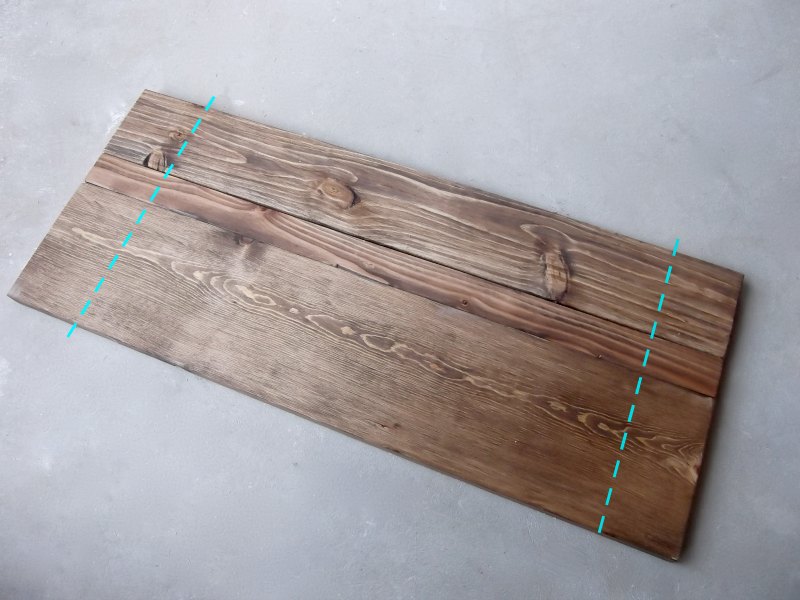
The three lid boards are identical to the boards on the bottom of the box: (1″ x 6″ x 25 1/2″) + (1″ x 2″ x 25 1/2″) + (1″ x 4″ x 25 1/2″) The lid boards are secured together by the two 1″ x 2″ x 10 1/4″ cross supports (the two pieces with both ends beveled at 30°.)

wooden ammo box lid

Nail on the cross supports about 2″  from outside ends of the lid.

ammo box lid

Attach the lid:

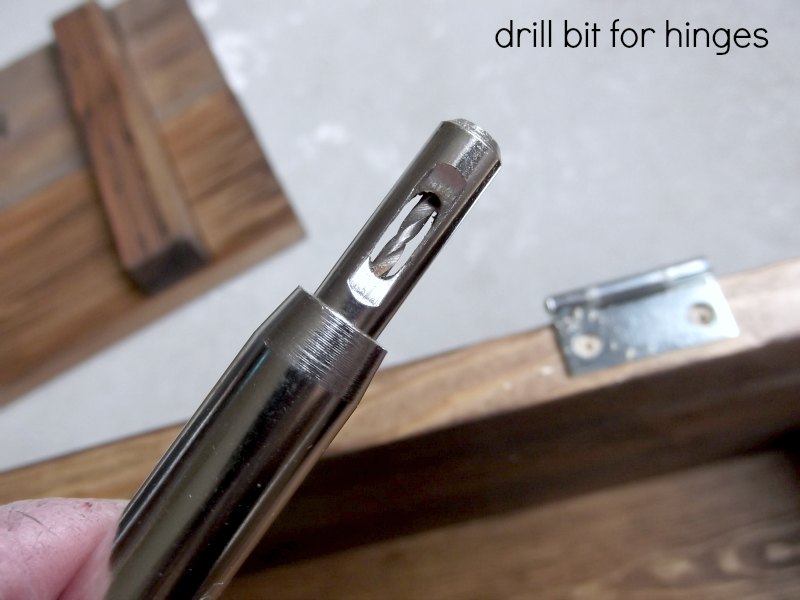
For a long time, if there were hinges involved in a project, I walked away in tears.  That is, until I discovered this little invention: a drill bit for hinges (affiliate link). I can’t say it enough as this little guy has saved my sanity a thousand times over.

Drill holes for the hinges, about 5 1/2″ from the outside edges of the box, and attach the hinges to the box and the lid.

drill bit for installing hinges

And that’s it!

how to build a wood ammo box

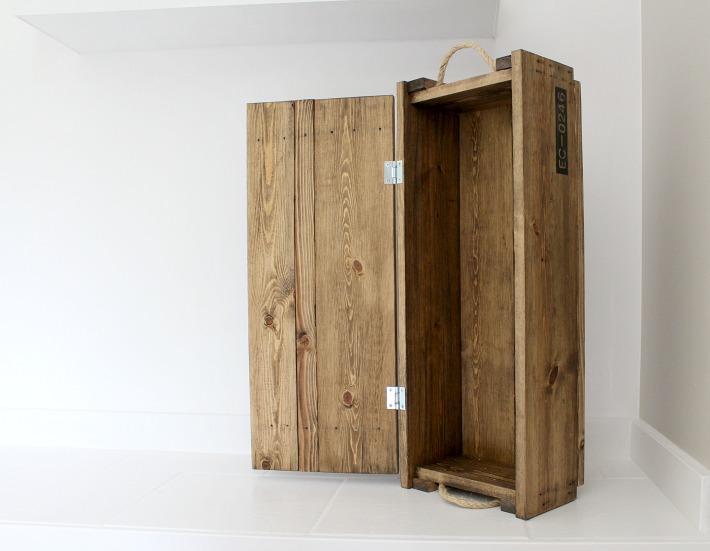
You’ve got yourself an ammo box, that has never actually held ammo.  What will you do with yours?

faux ammo box

I can think of a lot of other things that I might hide inside this box, like Wii remotes.  (After I add a lock, of course.)  😉

Visit this tutorial for the “how to” on the stain/distressing techniquefor this ammo box, where you’ll find great tips on aging wood with stain.

open ammo box

Hope you enjoyed!

Did I tell you Pauline is amazing or what?!

PHGFancySign