How to Create a Rustic Wood Headboard for $80 | Pretty Handy Girl

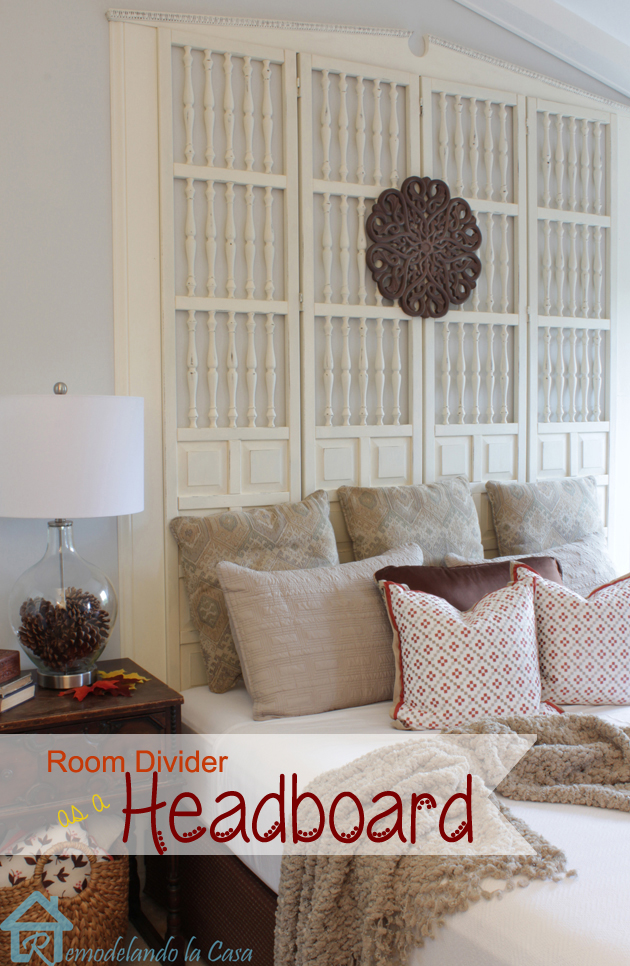
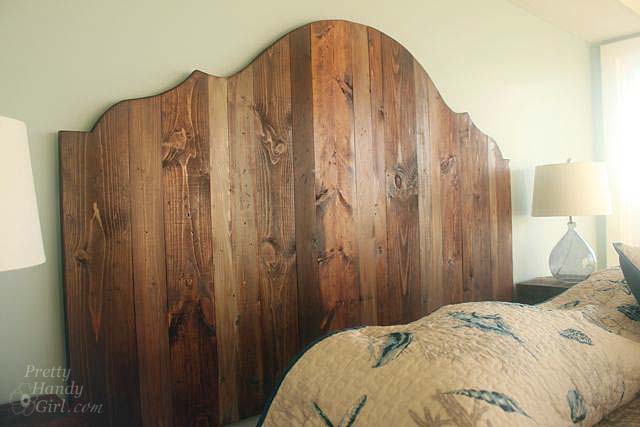
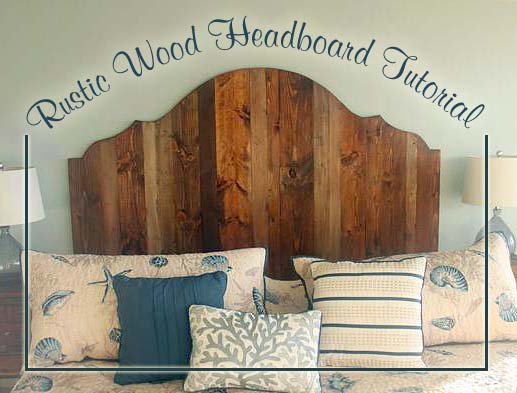
I’m back with more progress on the beach condo. I am really excited to share this tutorial on how to create a rustic wood headboard with you because it caused quite the buzz on Facebook and Instagram. This has to be one of my favorite projects that I completed in my stepmom’s beach condo. (You can see more pictures of the condo renovation on my sister’s interior design business page. Be sure to like her page, she has some great renovations to share.)

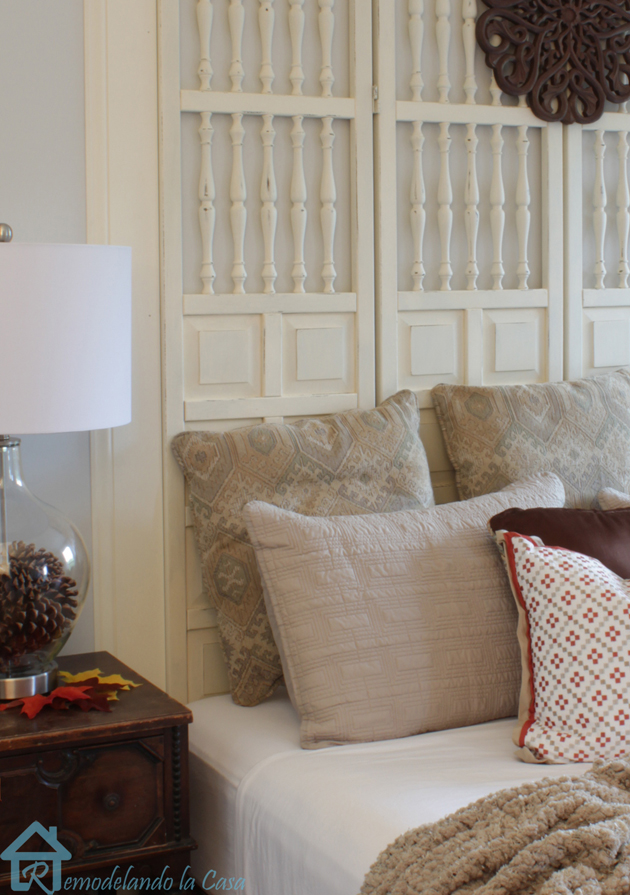
My sister, Caitlin, wanted me to make a unique rustic wood headboard for the master bedroom. Her budget was running low so she turned to Pinterest for some ideas and showed me this picture as inspiration.

I followed the link to a retail site where you could purchase the headboard for $2,195! {Cough, choke, gag…this was well out of our budget!} When we tallied the receipts, the lumber and materials to build our own king-sized headboard came in around $90 from Lowe’s! Woot woot!

And best of all, it is a relatively easy project that anyone can do if they have the right power tools.

Materials: Read more

How to Make Vintage Painted Oars | Pretty Handy Girl

Vintage painted oars are nostagic objects for me. They bring back memories of camp and watching crew teams rowing along the Schuylkill River in Philadelphia. So, when my sister wanted to find some oars to decorate the beach condo with, I jumped at the opportunity to make some. If you follow me on Instagram or Facebook you know that my sister Caitlin (of Symmetry Designs in San Jose, CA) and I have been renovating Diane Chamberlain’s Topsail Beach condo. The condo is a great size (three bedrooms) and located ocean front. That’s where the pros ended. Sadly the condo was stuck in the 80’s: teal carpeting, orangey wood trim and cabinet doors that were falling off. We converged on the property back in September to start the renovation process.

Before the trip, I whipped out these fun painted oars. They were easy to make, you could sooo do this!

(I’ve included affiliate links for your convenience. I earn a small percentage from a purchase using these links. There is no additional cost to you. You can read more about affiliate links here.)

Materials:

3M™ Safety Products:

Instructions:

Clamp your 1″ x 6″ board to a work surface. Trace out the oar shape onto your board. You can use rulers and rounded paint cans or plates to trace the curves.

Put on your safety glasses, ear plugs and grab the jig saw.

How to Make Vintage Painted Oars | Pretty Handy Girl Read more

DIY Room Divider King Headboard

I’m still working on my bedroom re-do, it’s been a long process but it is slowly coming to an end with the decorative part.

After painting the room, my big question was how to make the bed or that whole wall where my bed is going to be located, the focal point in the room.  At first I was thinking about installing wall paper with a nice design, then I thought about using a stencil since its a more economical choice. A painted stencil would also be easier to change later on.  Then, I received a stroke of luck! I scored a cabinet in the FREE section of Craiglist! When picking it up, the owner asked me if I also wanted this room divider:

DIY Room Divider King Headboard

“Of course!” I said and run out of there before he had time to change his mind!  That thing is super heavy! It looked really nice after a good cleaning, up close not that much, something was sprayed on it 🙁 there were lots of spots all around.

DIY Room Divider King Headboard

That’s why I decided to paint it and use it as my bedroom’s headboard.

The materials and tools you will need: Read more

Easy Fall Wreath Tutorial

Easy Fall Wreath Tutorial

Who’s too busy to spend more than 5 minutes creating a new wreath for Fall? {Raising my hand high!} Well, I’m about to give you the Easiest Fall Wreath tutorial…EVER!

Do you have one of these store bought wreaths? Pretty, but maybe a little lacking in color. Or maybe you’re just sick of looking at the same store bought wreath going on ohhhh six years now?

Easy Fall Wreath Tutorial

Quick! Go grab these five things:

Easy Fall Wreath Tutorial Read more

Painting chairs - a second chance makeover | Pretty Handy Girl

My search for some small chairs for the kitchen table area is finally over!  The chairs I had before blocked the view from my kitchen to the family room and vice-versa, their backs were too high and overall they were too big for that small space.

kitchen area before RLC

I’d seen some pretty, small and colorful chairs from the catalog magazines I receive, but their prices weren’t that pretty. Almost $150 per chair!  Craiglist was my searching place, it almost took me a year but I found them, $5 each!

Painting chairs - a second chance makeover | Pretty Handy Girl

Their condition was good, no squeaky sounds, loosened parts or missing screws. Their appearance was on the drab side, they looked better in these pictures than they did in real live.  At some point they had been re-stained but the job was poorly done because they felt bumpy.

Painting chairs - a second chance makeover | Pretty Handy Girl

I knew they deserved a second chance! And I knew just how to do that.

Painting chairs - a second chance makeover | Pretty Handy Girl

Materials: Read more