Gray Restoration Hardware Stain Recipe | Pretty Handy Girl

Gray Restoration Hardware Stain Recipe | Pretty Handy Girl

I’ve fallen in love with the Restoration Hardware Salvage Gray wood stain. But, try as I might, I haven’t found a pre-mixed stain that produces the same look. That never deterred me, and I don’t like to give up. Therefore, I created my own recipe for approximating that Restoration Hardware Weathered Gray stain. You may have seen this beautiful gray stain on my Sports Gear Storage Shelves the other day. Because I love you and I love to share, here is the DIY Restoration Hardware Weathered Gray Stain Recipe.

Materials:

Glaze: 

DIY Restoration Hardware Weathered Gray Stain Recipe Instructions:

Premix your glaze in a jar or bottle. 1 Part Valspar Arid Plains with 3 parts Valspar clear glaze.

Sand your wood smooth. Put on a rubber glove and slip an old sock over the glove. Dip you hand into the stain and wipe the stain onto your wood. Always wipe on stain with the grain.

Gray Restoration Hardware Stain Recipe | Pretty Handy Girl

After the first coat has dried, repeat by adding a second coat of Minwax Provincial stain. Let the stain dry.

Gray Restoration Hardware Stain Recipe | Pretty Handy Girl

Lightly sand the wood before applying the glaze. Read more

Rustic IKEA Hack Cabinet Transformation | Pretty Handy Girl

Rustic IKEA Hack Cabinet Transformation | Pretty Handy Girl

Rustic is not usually a word used to describe IKEA. IKEA is better know for their modern furniture, simple lines, meatballs and funny Swedish words. Today I’m going to change how you perceive IKEA furniture forever! Are you ready for this? Well, hang onto your hästes (Swedish for horses) because you’re going to see a transformation nothing short of amazing! You too can customize your plain jane furniture by adding legs and cladding the exterior with reclaimed picket fence wood.

This tale starts with a hunter green stained IKEA storage chest that I bought for our first apartment and stained myself (can you tell what decade it was? Hint: hunter green, honey pine, throw some burgundy in there and I’m sure you’ll be guessing no more.) It moved from room to room each time we settled into a new home. But, it never really fit in.

ikea chest in guest room

The cabinet was short and not very deep. Plus, it bore the mark of the popular 90’s hunter green. It was ugly. Why didn’t I get rid of it years ago? Maybe I was attached to it because it was the first piece of furniture I ever stained myself. And it brought back fond memories of calling the fire department because I smelled gas. Turns out you aren’t supposed to use an oil-based stain indoors, especially if you have a gas stove. Lesson learned.

Rustic IKEA Hack Cabinet Transformation | Pretty Handy Girl

Fast forward two decades and it’s still hanging around. The other day as I was lamented the fact that our foyer is too small to fit a cute dresser, I found myself looking at this sad little IKEA chest. I picked it up and put it in our foyer. The fit was perfect in the small space behind the front door! But, it was short and let’s not mention the hunter green again. Plus, it just wasn’t cute. And it doesn’t reflect my warm and weathered style. But, you know me, I wasn’t deterred.

I did some mental gymnastics and began to hatch a plan to create a marriage that would last longer than two decades.

Old picket fence pieces

It began with some pieces of old picket fence that I found by a dumpster. They were perfectly chippy and rustic! Luckily the 3M Lead Check results were perfectly negative. I carefully took the fence apart and removed all the nails.

Lead check picket fence paint

Ready to see how I convinced the two polar opposites that they belonged together — rustic and modern — to create a match made in heaven? Let’s explore this couples’ counseling further:

Read more

How to Create a Rustic Wood Headboard for $80 | Pretty Handy Girl

I’m back with more progress on the beach condo. I am really excited to share this tutorial on how to create a rustic wood headboard with you because it caused quite the buzz on Facebook and Instagram. This has to be one of my favorite projects that I completed in my stepmom’s beach condo. (You can see more pictures of the condo renovation on my sister’s interior design business page. Be sure to like her page, she has some great renovations to share.)

My sister, Caitlin, wanted me to make a unique rustic wood headboard for the master bedroom. Her budget was running low so she turned to Pinterest for some ideas and showed me this picture as inspiration.

I followed the link to a retail site where you could purchase the headboard for $2,195! {Cough, choke, gag…this was well out of our budget!} When we tallied the receipts, the lumber and materials to build our own king-sized headboard came in around $90 from Lowe’s! Woot woot!

And best of all, it is a relatively easy project that anyone can do if they have the right power tools.

Materials: Read more

turn_an_old_table_into_desk_top

Have you seen my command center in the kitchen? It’s a beauty to look at, don’t you think? Especially that gorgeous wood desk top.

kitchen_desk_top

Well, I have a secret! It’s actually an old kitchen table top that was given to me for FREE! Yup, zero dollars, no moolah, nothing! And this is what the table top looks like:

underside_desk

I actually flipped it upside down to refinish it. But, I’m jumping ahead of myself. Here are the details: Read more

I can’t believe I’m about to show you my dirty little secret. But, I feel bad for my friend Sandra from Sawdust and Paper Scraps. She has some work to be finished in her master bathroom. So, I hope she’ll feel better after I share my awfully tiny and incredibly outdated bathroom.

I’m warning you now, what you are about to see is disturbing. If you have children, please escort them from the room.

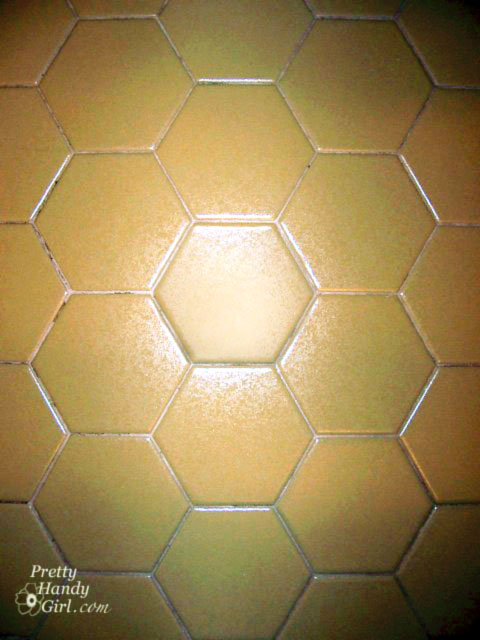
Exhibit A. Harvest Gold Tile
 Exhibit B. Jackson Pollock sponge paint and stamping
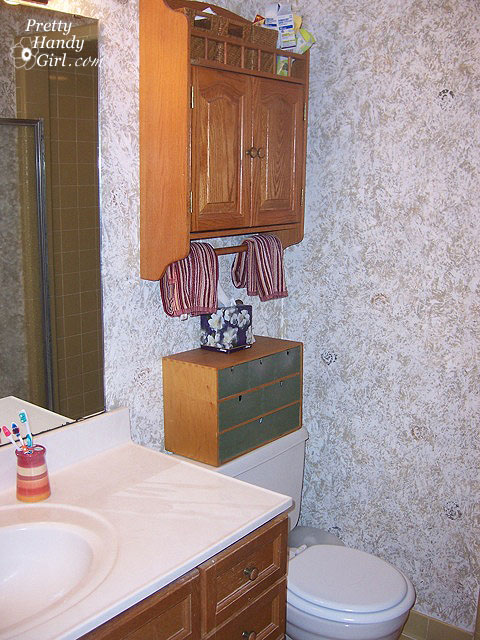
Exhibit C: Ugly Wall Cabinet on the Wall
Exhibit D. Outdated Oak Cabinet and Light Fixture
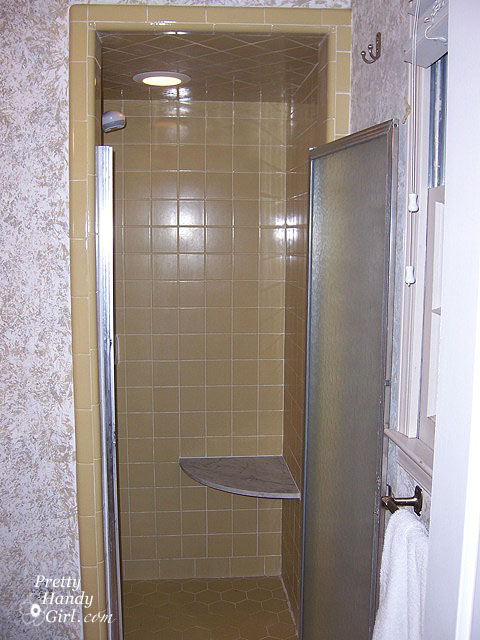
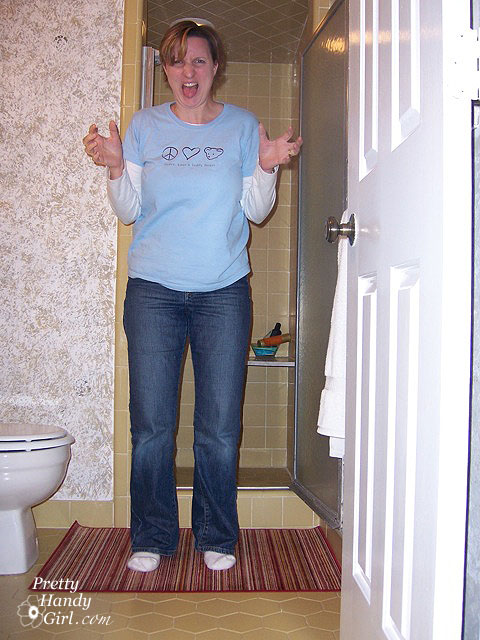
Exhibit E. Coffin-like shower.
 I know, SCARY, right?!

Pretty Handsome Guy and I knew that one day we would be gutting this bathroom. Therefore, we decided not to do anything to the bathroom knowing that it was going to be euthanized renovated at some point.

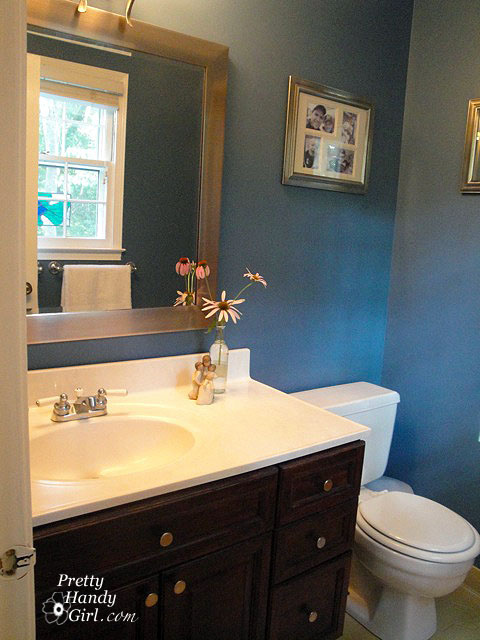
Well, after about a year, I couldn’t stand it anymore. As a surprise for Pretty Handsome Guy, I gave our teeny 1970’s bathroom a minor face lift while he was away on business. I spent about $100 to give us a calmer start to our morning.

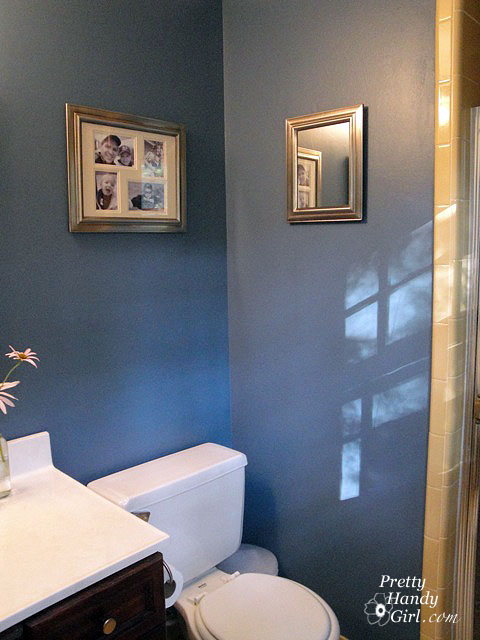
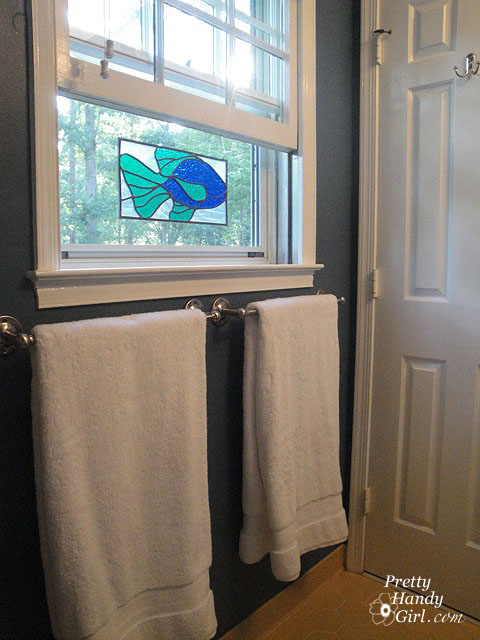
First I took down that ugly wall cabinet. Then patched all the holes in the wall. I sanded the walls to remove some of the bumps from all the random paint. I painted all the trim a glossy white. And the walls got a fresh coat of Ralph Lauren Durango Blue. I chose a deep color to draw attention away from the harvest gold tiles.

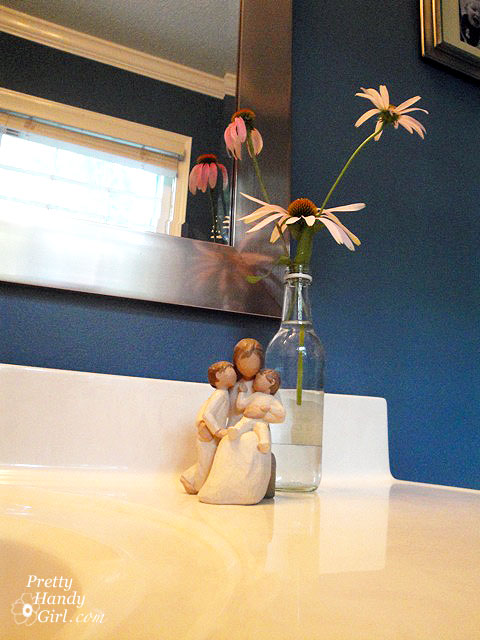
Then I hung some pictures…
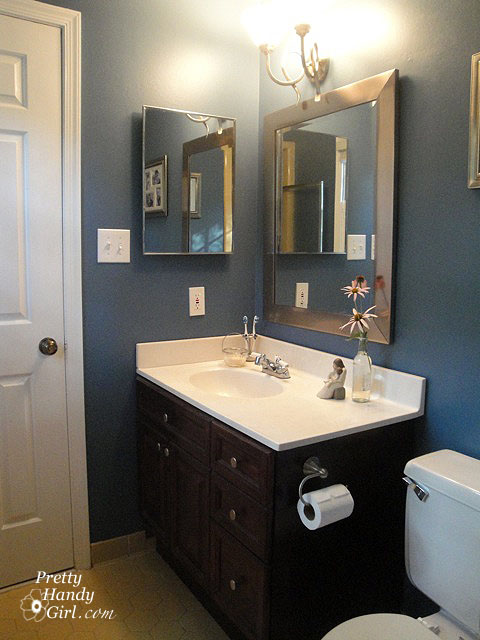
…and a new mirror (bought on clearance at Target).

I ditched the Hollywood strip lights and replaced them with this very affordable Craig’s List find.

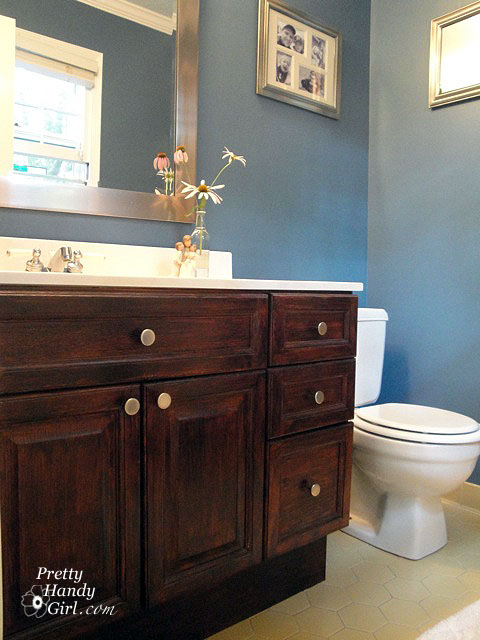
I really did not want to spend a lot of time on the vanity (stripping and sanding), so I roughed it up a little and put some Brazillian Rosewood gel stain on it. And left it for 24 hours to dry. Yup, that’s right, I didn’t wipe off the stain.

You know what else I didn’t do? I didn’t put a protective coating of polyurethane either!
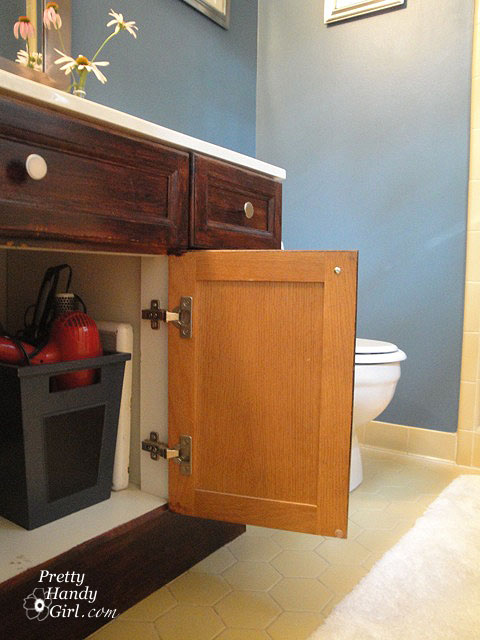
I also didn’t bother staining the inside of the cabinet. This is so opposite to my DIY code of conduct! I’m usually a perfectionist and I do it right the first time or I don’t do it at all. But, as I said, this bathroom is slated for demolition one day, so why put a lot of time or money into it.
Finally I installed some new towel bars and put new knobs on the cabinet.
Okay, sure the ugly tile is still there. And the shower still looks like this.

But, we now have a bathroom that we can enter without the risk of leaving with a migraine.

I am able to live with the bathroom as it is, until the happy day when I can knock down some walls, haul out some outdated tile and build my dream master bathroom.

Here are my plans for this dream:

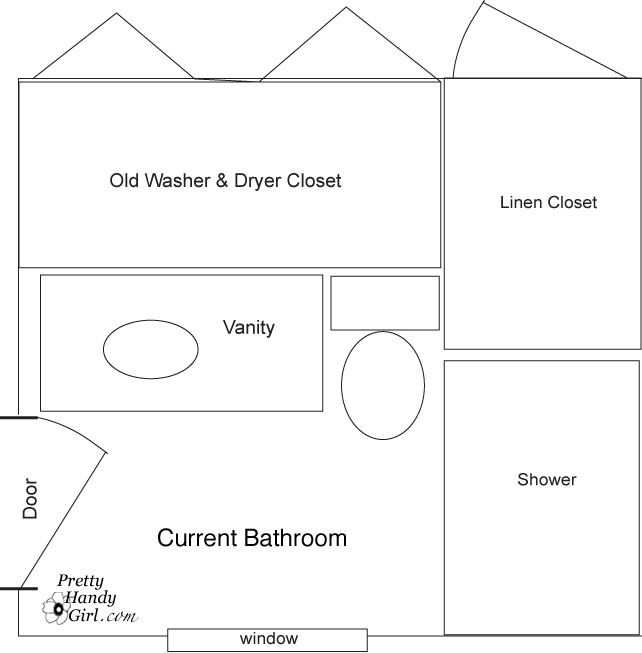
Existing Floor Plan: Luckily an old washer and dryer closet backs up to the other side of this bathroom. This will give us another 3′ of space along one wall!

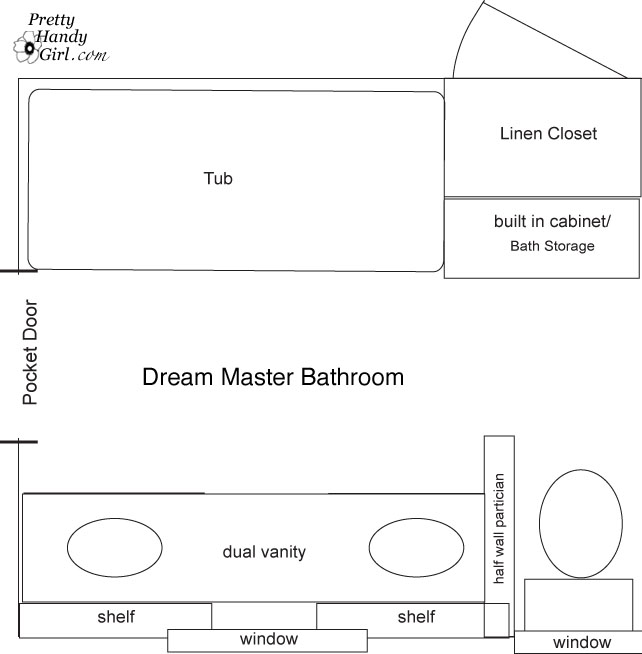
Renovation Floor Plan:

And this is what I envision our bathroom will look like one day!

Thanks to Lori Gilder of Interior Makeovers, Inc., who somehow has a window into my mind to see what I want our master bathroom to took like. She posted these photos from her portfolio on Houzz.com. She’s a fabulous interior designer who lives in Beverly Hills. Check out her blog and portfolio.

Sooooo, do you have a room or a space that is hideous? But, you don’t have the time, money, or effort to give it a full renovation? Why not make a few frugal changes so you can live with it until you can DESTROY IT (and then rebuild it of course.) It is amazing what some paint, new towels, pillows and/or a few fixtures can do.