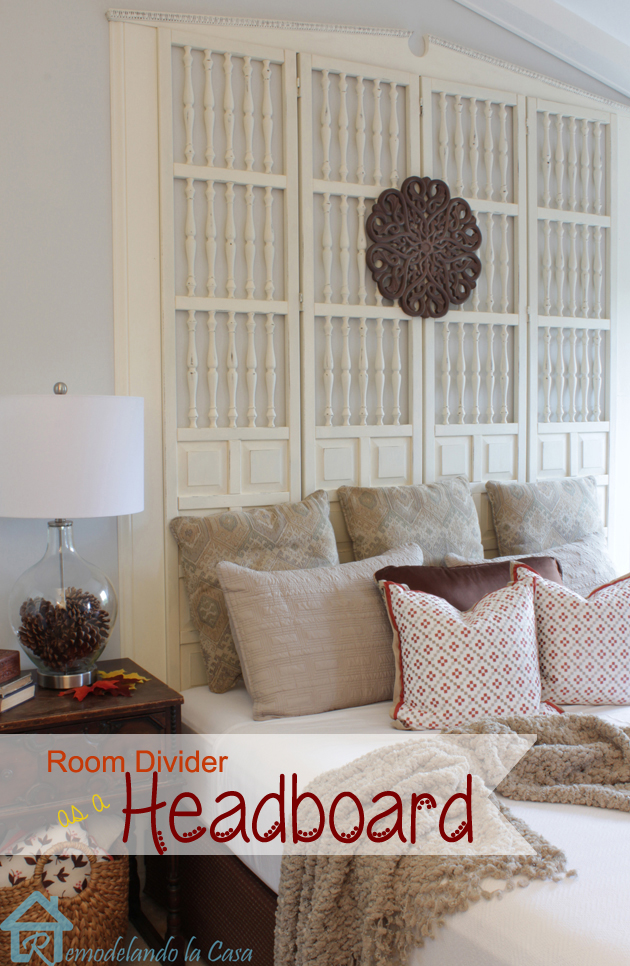
Upcycled FREE Room Divider becomes a King Size Headboard
I’m still working on my bedroom re-do, it’s been a long process but it is slowly coming to an end with the decorative part.
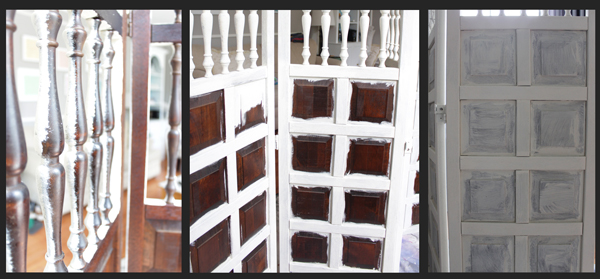
After painting the room, my big question was how to make the bed or that whole wall where my bed is going to be located, the focal point in the room. At first I was thinking about installing wall paper with a nice design, then I thought about using a stencil since its a more economical choice. A painted stencil would also be easier to change later on. Then, I received a stroke of luck! I scored a cabinet in the FREE section of Craiglist! When picking it up, the owner asked me if I also wanted this room divider:
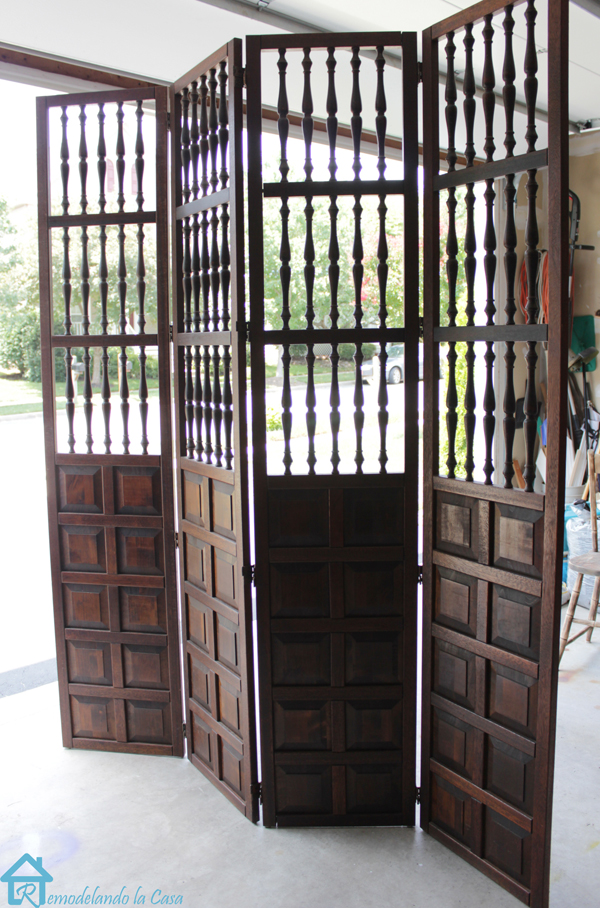
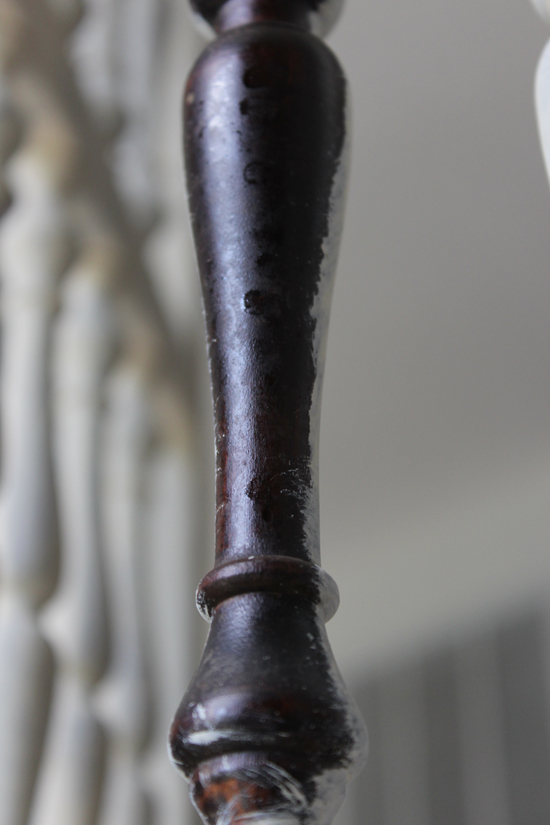
“Of course!” I said and run out of there before he had time to change his mind! That thing is super heavy! It looked really nice after a good cleaning, up close not that much, something was sprayed on it 🙁 there were lots of spots all around.
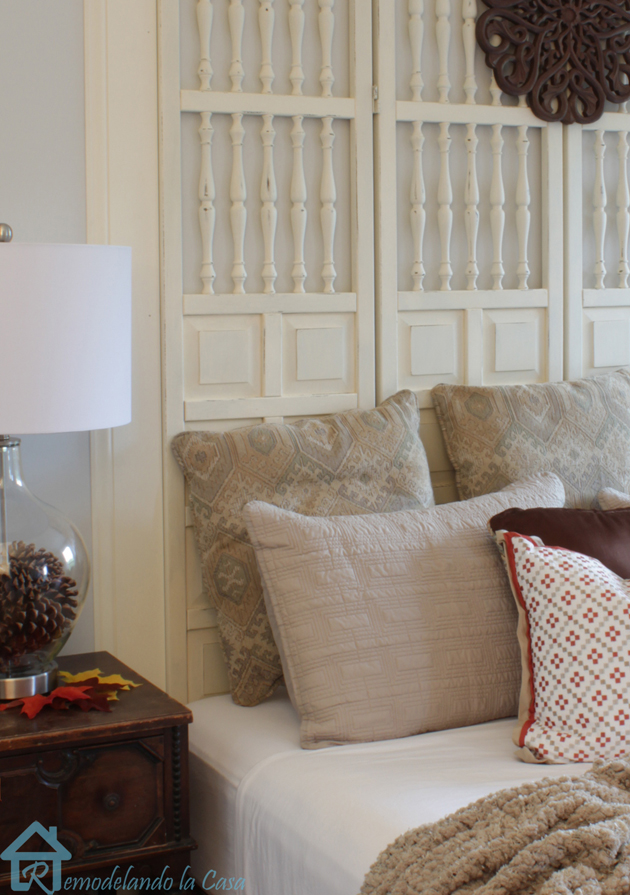
That’s why I decided to paint it and use it as my bedroom’s headboard.
The materials and tools you will need:
- 1 Room divider (other architectural elements would work too: door, fence, gate, etc.)
- Paint (I used Anne Sloan chalk paint -Antique white)
- Brushes
- Sandpaper
- 1 – 2 x 4 (for higher look, cut at the same width of the room divider)
- Drill
- Level
- 3″ screws
For the Header and side extensions (optional):
- 1 – 1 x 5 board of pine
- 8′ small decorative molding
- 16′ medium wall molding
- Pneumatic nailer
- Jig saw
Instructions:
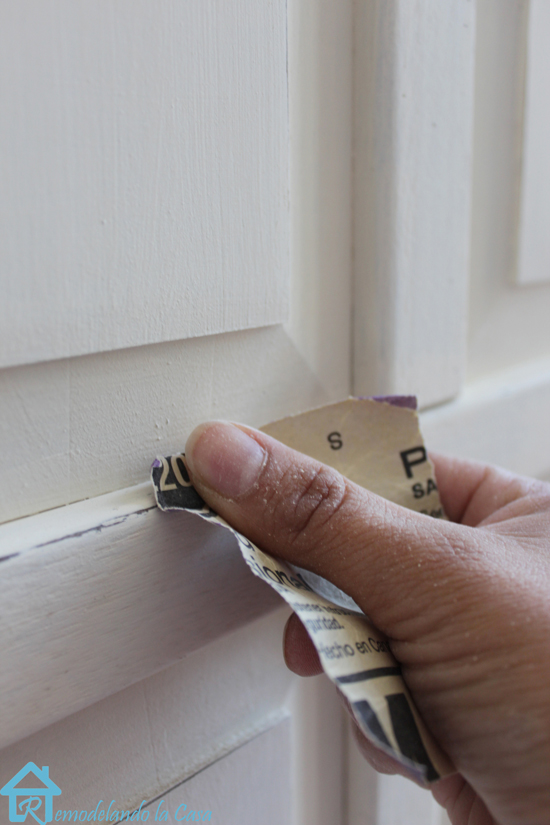
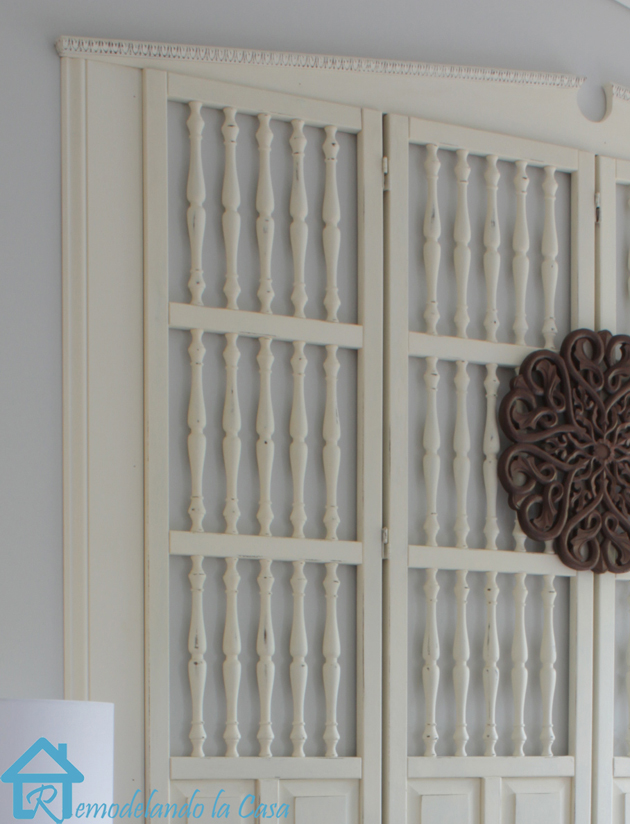
Paint the room divider. I applied two coats of ASCP on both sides, followed by a coat of wax and a light buff. You can use any paint treatment you want or better yet, leave it like it is.
Use sand paper to give it a light distressed look.
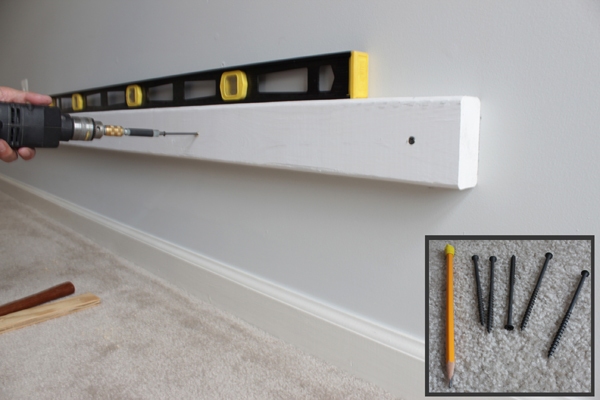
Determine the area where you want your room divider/headboard to be installed.

If you decide on installing the room divider/headboard off the floor to give it more height, a 2 x 4 needs to be anchored to the studs on the wall at your desired height. Always pre-drill and check the level first.
Once the 2 x 4 is installed, you can prop up your room divider, securing it to the wall, where the studs are located. Just like that it makes a nice headboard.
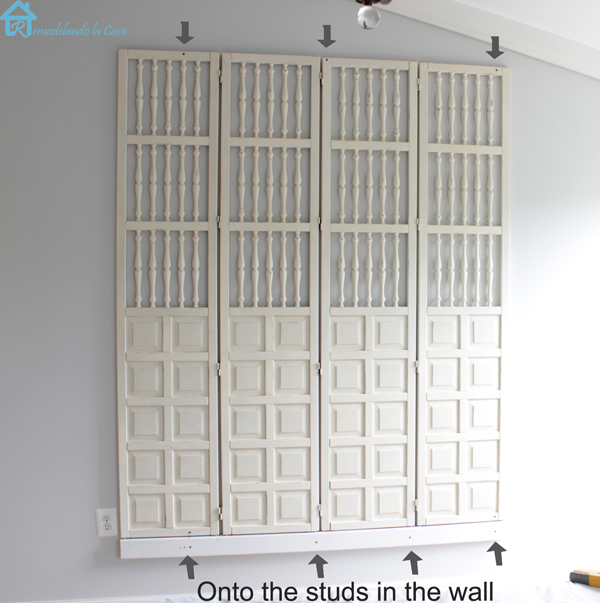
But if you’re like me, and want a headboard with a marked center point to balance your slanted ceiling, go ahead and build a header with a couple of legs on the sides.
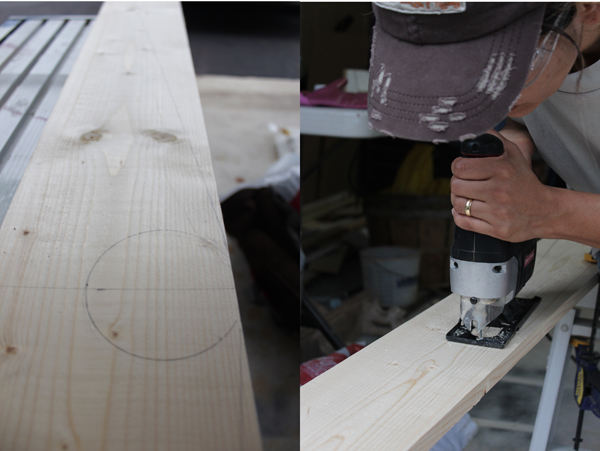
Draw a centered design on a 1 x 5 board. Use a jig saw to cut along the lines to form a triangle.
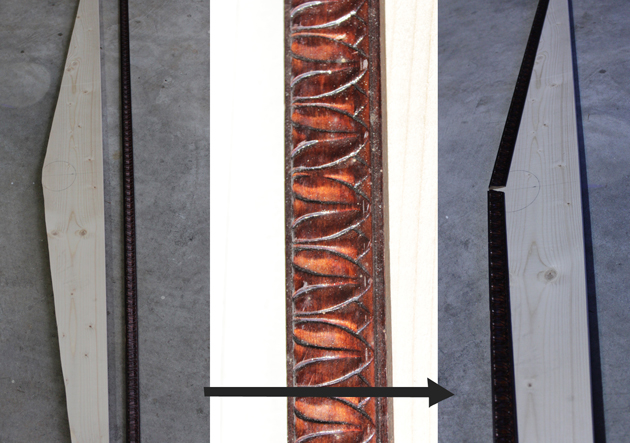
A small decorative molding can now be attached to the top of the triangle.
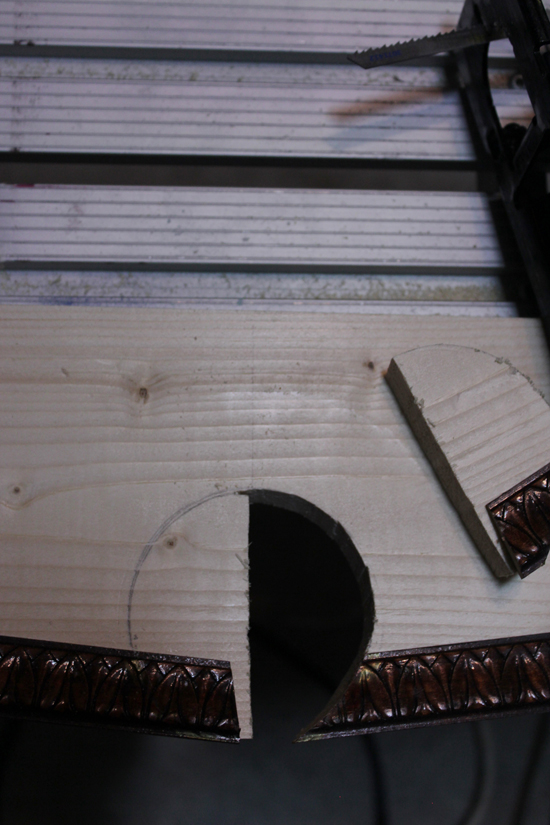
Finally, use the jig saw to cut out a center circle design for that finishing touch.
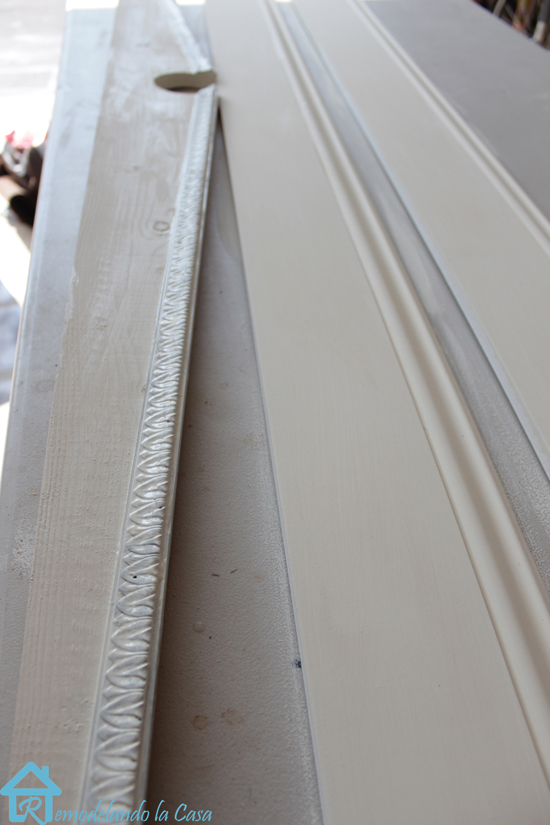
Add two coats of paint and a light distressing to the header.
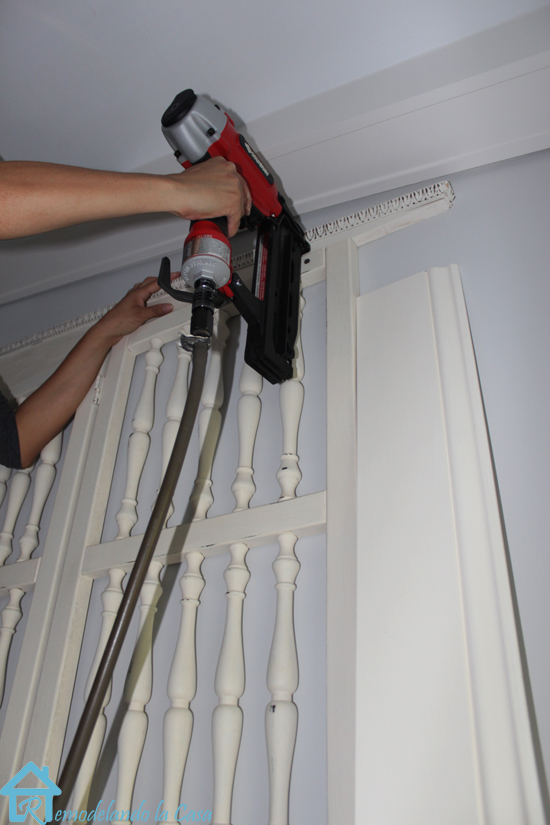
Using a pneumatic-nailer to attach them to the wall.
This is such an easy project to give your room a customized, one-of-kind architectural look!
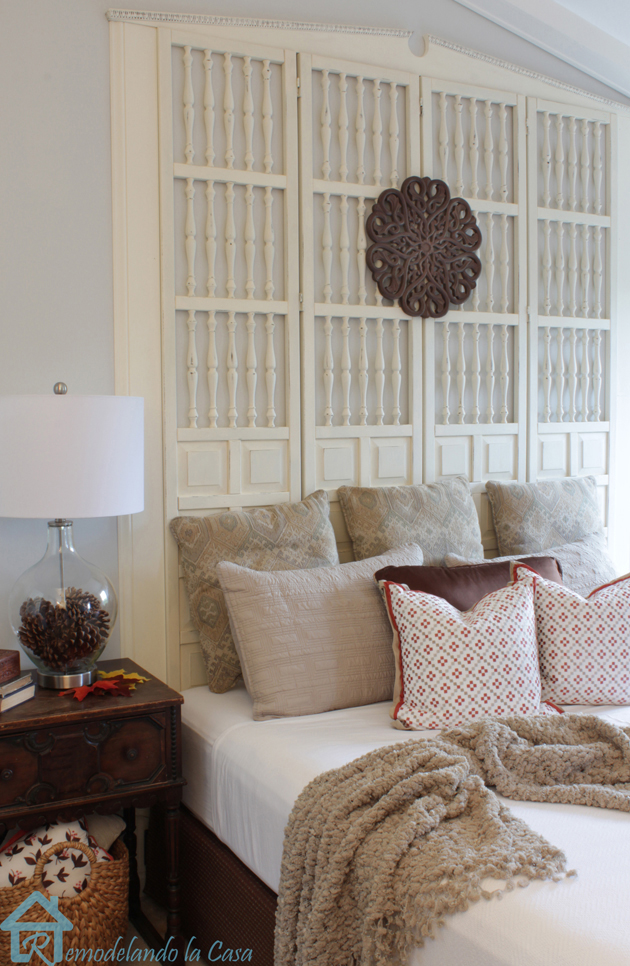
And a super affordable headboard!

Do you have any room dividers laying around? Have you ever searched the “FREE” section in Craig’s List? You just never know what you can make with freebies!


You’ve been spotted on my scout this week. Genius! LOVE this headboard! So much, its featured as the Friday Favorite this week. Hope you stop by to see how I bragged about you.
Hope you’re having a great creative week.
~ Robin
http://redoityourselfinspirations.blogspot.com/2015/01/friday-five-fabulous-furniture-features_23.html
I just bought a ornate wood room divider would love to paint it however so dusty between small areas of the wood what to use to clean between small areas thanks a million doll 😉
This is pretty darn awesome! Gone girl! 🙂
This is awesome Christina! There’s a place in New York City where they sell fabulously used architectural pieces (windows, doors, etc) super cheap. We bought a room divider and my daughter painted it gold. I wish I would’ve thought to bolt it to the wall because there was gold paint residue all over the back wall. I always learn something cool here!
Ok, I am in AWE!!! Seriously it is AMAZING! The finishing touches with the border are just perfect it looks like it came straight out of a magazine, truly!! Pinning!
OK – pardon my language – but that is “freakin” amazing!! LOVE that…great job!
Brilliant! I have seen the screens used as headboards many times before. And they generally look just like a screen shoved against the wall. Yours is stunning! The addition of the sides and header make it far above any DIY headboard I have seen! You are great! Super job!
Thank you so much, Jayne! You just made my day 😉
GREAT job on this headboard!
Wow, what a find Christina! I’m impressed with the outcome & look of it. Very unique, charming & beautiful!
That is simply stunning!
Christina, your headboard looks amazing! The decorative molding gives it a WOW factor! Looks stunning!
Hug,
Betty
Not only pretty but super unique too!!!! Love it Cristina!!!!
I can’t believe you made this out of a free room divider. So neat! I really like the distressed look and the decorative molding you attached to the top. The molding really completes it and makes it look more like a headboard – a genius idea, Cristina!
Sweet! That really IS spectacular! I don’t know about other regions, but Freecycle is a great option if looking for free stuff. They have a really good community here in Portland, OR so they might in other parts of the country too.
Thanks Laurie! That’s right, Freecycle is another great option. I’ve got to look there more often though.
Wow! That is just beautiful! If only Craiglist here ever had anything good . . . or even with the potential to be good after some work.
Frankie, you must live where I do! lol I never find anything on Craigslist either. I guess it helps to be near a big city.
I think it helps that I live near a big city, but many times is just a matter of luck and patience. That was my first Free-free find. Thanks for stopping by!
OMG, Christina, it is fabulous!!!!
Fabulous – taking something that looked not-so-great and turning it into a masterpiece shows awesome vision. I love Cristina’s work!