DIY Industrial Charging Station

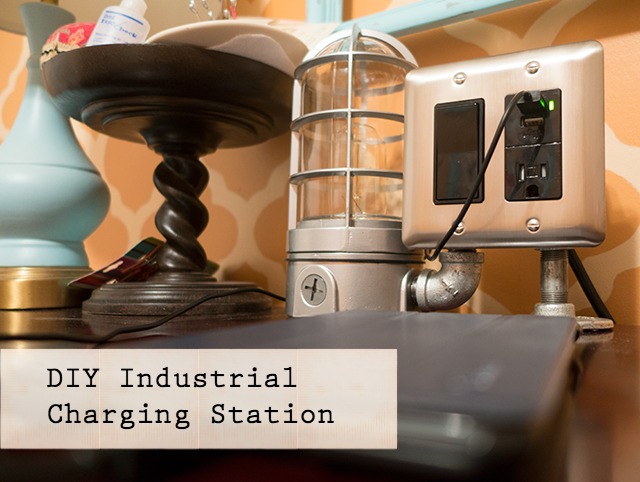
Have you ever been in need of an electrical outlet only to find that they’re hidden by furniture or in a hard to reach place?  How about that elusive time of day when you’re cell phone’s down to 1% and you have a handful of charging cables, but nothing to plug it into?  This seems to be a regular occurrence at The DIY Village, so we’ve finally solved these problems!  We created a DIY industrial USB charging station that has an accessible outlet; 2 usb ports capable of charging all of your devices; and even has a built-in accent light!  We think it would be the perfect addition to an office, your teenagers room, or even a college dorm room!  

DIY Industrial USB Charging Station Materials List:

(Contains some affiliate links)

DIY Industrial USB Charging Station Tool List

DIY Industrial USB Charging Station Instructions:

In order to make room for connectors and fittings that you’ll be using to build your Industrial Charging Station, you’ll need to remove (2) 1/2-inch and (1) 3/4-inch knockouts from the handy box.  (Set the handy box aside)

Handy-Box-Knockouts

The hardwired emergency light has screw-out plugs that give you installation options.

Emergency-Light-Base

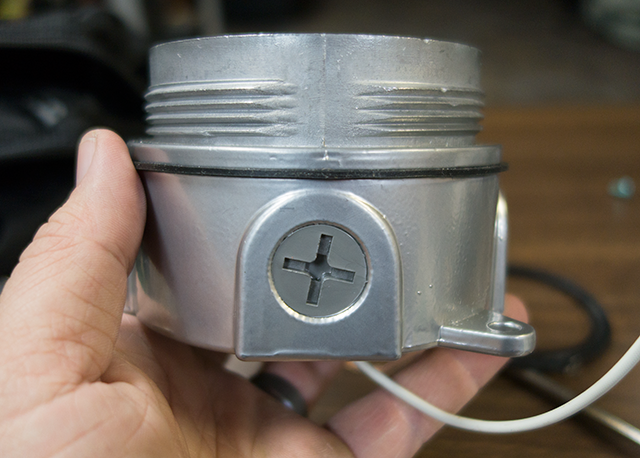
Remove one of the side plugs from the light base and re-route the wiring through the opening. Read more

How to Build Custom Rustic Crates | Pretty Handy Girl

How to Build Custom Rustic Box Crates | Pretty Handy Girl

Making custom rustic wooden box crates is super easy. You can build your crates to fit in a book case or use them as drawers in a cabinet. When I was giving my IKEA cabinet a makeover, I chose to remove a door and build custom box drawers instead.

How to Build Custom Rustic Crates | Pretty Handy Girl

Here’s the super easy tutorial so you can build your own:

Materials:
(some links are affiliate links)

Tools:

Instructions:

Begin by cutting the 1/2″ plywood into four pieces the size you want for your crate sides.

How to Build Custom Rustic Crates | Pretty Handy Girl

Test fit the sides together. Add a line of glue to the ends of the plywood. Read more

Rustic IKEA Hack Cabinet Transformation | Pretty Handy Girl

Rustic IKEA Hack Cabinet Transformation | Pretty Handy Girl

Rustic is not usually a word used to describe IKEA. IKEA is better know for their modern furniture, simple lines, meatballs and funny Swedish words. Today I’m going to change how you perceive IKEA furniture forever! Are you ready for this? Well, hang onto your hästes (Swedish for horses) because you’re going to see a transformation nothing short of amazing! You too can customize your plain jane furniture by adding legs and cladding the exterior with reclaimed picket fence wood.

This tale starts with a hunter green stained IKEA storage chest that I bought for our first apartment and stained myself (can you tell what decade it was? Hint: hunter green, honey pine, throw some burgundy in there and I’m sure you’ll be guessing no more.) It moved from room to room each time we settled into a new home. But, it never really fit in.

ikea chest in guest room

The cabinet was short and not very deep. Plus, it bore the mark of the popular 90’s hunter green. It was ugly. Why didn’t I get rid of it years ago? Maybe I was attached to it because it was the first piece of furniture I ever stained myself. And it brought back fond memories of calling the fire department because I smelled gas. Turns out you aren’t supposed to use an oil-based stain indoors, especially if you have a gas stove. Lesson learned.

Rustic IKEA Hack Cabinet Transformation | Pretty Handy Girl

Fast forward two decades and it’s still hanging around. The other day as I was lamented the fact that our foyer is too small to fit a cute dresser, I found myself looking at this sad little IKEA chest. I picked it up and put it in our foyer. The fit was perfect in the small space behind the front door! But, it was short and let’s not mention the hunter green again. Plus, it just wasn’t cute. And it doesn’t reflect my warm and weathered style. But, you know me, I wasn’t deterred.

I did some mental gymnastics and began to hatch a plan to create a marriage that would last longer than two decades.

Old picket fence pieces

It began with some pieces of old picket fence that I found by a dumpster. They were perfectly chippy and rustic! Luckily the 3M Lead Check results were perfectly negative. I carefully took the fence apart and removed all the nails.

Lead check picket fence paint

Ready to see how I convinced the two polar opposites that they belonged together — rustic and modern — to create a match made in heaven? Let’s explore this couples’ counseling further:

Read more

Updating a Knotty Pine Nightstand | Pretty Handy Girl

Updating a Knotty Pine Nightstand | Pretty Handy Girl

The best way to give your room a makeover on a budget is if you can use your existing furniture. Notice that I didn’t say using it “as is”. Heck no! Update your solid furniture by adding moulding, paint and new feet!

Updating a Knotty Pine Nightstand | Pretty Handy Girl
(Pretty Handy Dog is already staking his claim on his preferred spot on the new bed.)

When I decided to build our new bed, I wanted to use our existing nightstand and vanity to save money. But, the nightstand was a little too short for the new bed height. By adding new feet and painting it the same color as our new bed, I was able to give the knotty pine nightstand a second life.

(I’ve included affiliate links for your convenience. I earn a small percentage from a purchase using these links. There is no additional cost to you. You can read more about affiliate links here.)

Materials:

Optional:

Instructions:

Start with a solid night stand. She may have some dated curves, but that’s nothing a little baseboard moulding can’t fix!

Updating a Knotty Pine Nightstand | Pretty Handy Girl

Remove the drawers. Clean out any dust bunnies and lost love letters out of the back.

Updating a Knotty Pine Nightstand | Pretty Handy Girl

Cut an interior facing 45 degree angle into one end of the baseboard moulding. Line up the bevel against one end of the front of the nightstand. Mark the opposite corner of the base where you need to cut. Read more

How to Add Security Film to Glass Doors & Windows | Pretty Handy Girl

How to Add Security Film to Glass Doors & Windows | Pretty Handy Girl

The folks at Allstate Insurance have graciously sponsored this post, which will help you learn how to install security film to safeguard your doors (or windows) from a potential break-in! It’s a simply DIY solution that could potentially save you the heartache of having your home burglarized.

I’ve noticed an unsettling trend in our area. There are more thefts popping up around our neighborhood. Luckily the majority of them are burglaries with no violence. But, it’s still unsettling. If you want the latest on crimes around you, sign up for SpotCrime.com. Simply enter your address and you’ll get emails when crimes are reported around you. Then again, this could lead to a bit of paranoia {raising hand.}

SpotCrime.com map

Regardless, there are two doors in our home that have always caused me some concern. We have two half window doors that needed some added security measures. The first one is the entrance to our mudroom. The second one is the back door to our garage (and you know I’d be heartbroken if anyone stole my power tools!)

How to Add Security Film to Glass Doors & Windows | Pretty Handy Girl

If you have a door like this, a burglar can simply break the pane of glass closest to the knob, reach in and turn the deadbolt and handle. One option is to install a two-sided keyed entry deadbolt lock. Because we have little children, I worried about them not being able to find the key and get out of the house in the event of a fire.

How to Add Security Film to Glass Doors & Windows | Pretty Handy Girl

This past week I happened to hear about security film and did a little research. I was skeptical until I tested the material myself. The results seriously amazed me! You can watch my test in the video later in this post.

In the meantime, here are the supplies you’ll need and the very simply installation instructions!

(I’ve included affiliate links for your convenience. I earn a small percentage from a purchase using these links. There is no additional cost to you. You can read more about affiliate links here.)

Materials:

 Instructions:

1. Begin by removing the grill if you have one solid piece of glass with faux dividers (see my video below for more details on removing the grill.) If you have true divided light, move on to the next step.

2. Measure your windows. Reduce the size by 1/8″ to leave space at the edges for the water to escape. Transfer the measurements onto the film with pen. Cut the window film with the x-acto knife and ruler. (You could use scissors in a pinch.)

How to Add Security Film to Glass Doors & Windows | Pretty Handy Girl Read more