galvanized metal bucket aging

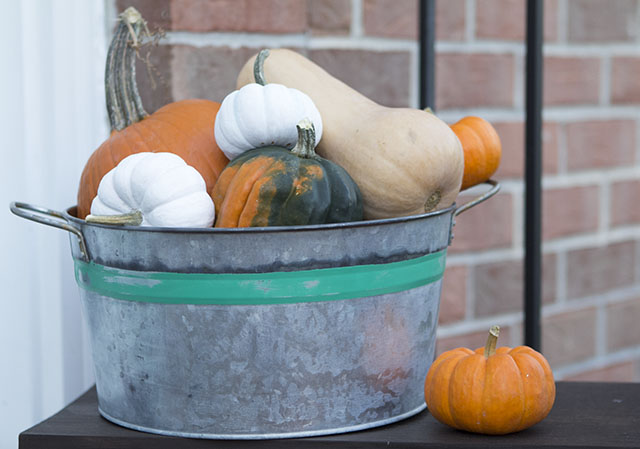
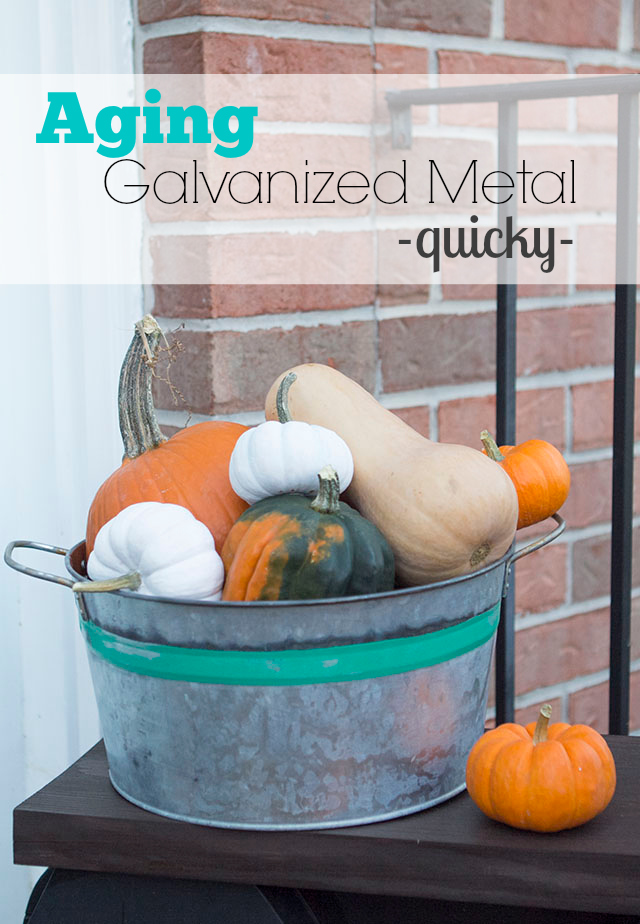
Hey everyone, it’s Jacque here from The DIY Village!  I am so excited to share this DIY tutorial with you.  I love the look of old metal buckets, but finding them with the nice patina is easier said than done. I am constantly coming across nice, bright and shiny buckets. I finally found a bucket that I liked the shape of and decided I would age it myself. Get ready to learn the quick process of aging galvanized metal that allows you to age it in minutes instead of decades!

Materials: 

  • Galvanized Metal Bucket
  • Painter’s Tape
  • Spray Paint
  • Cotton Balls
  • Rubber Gloves
  • Nail Polish Remover
  • Sand Paper
  • Zep Toilet Bowl Cleaner
  • Steel Wool

Instructions:

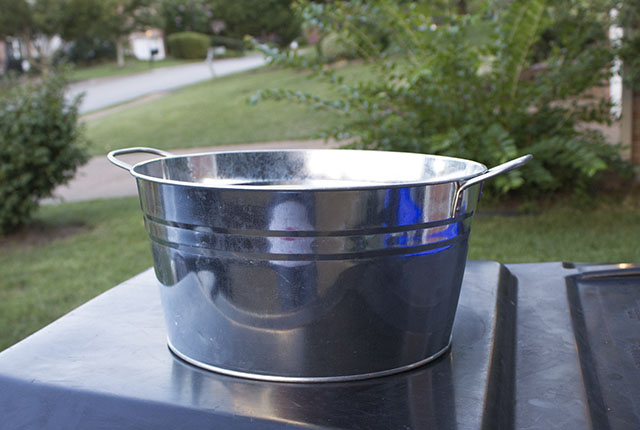
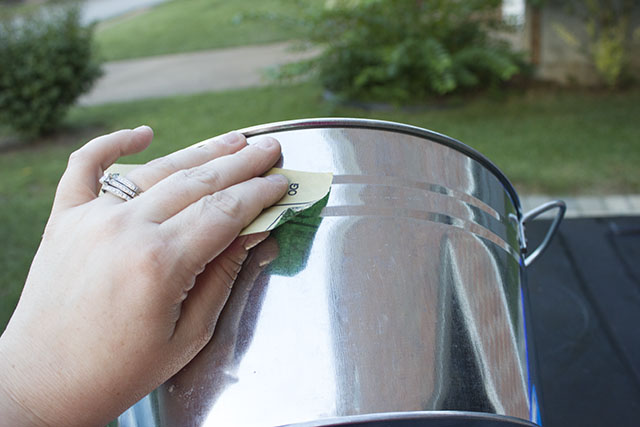
Start with a clean galvanized metal bucket.  Make sure all debris is removed by wiping the bucket down with a damp rag.

metal butcket

Decide where you’d like your painted stripe to appear on your bucket.

sand band

I positioned mine where the bends in the bucket are.

Sanded

Tape off the rest of the bucket leaving a metal band showing through.

tape off bucket

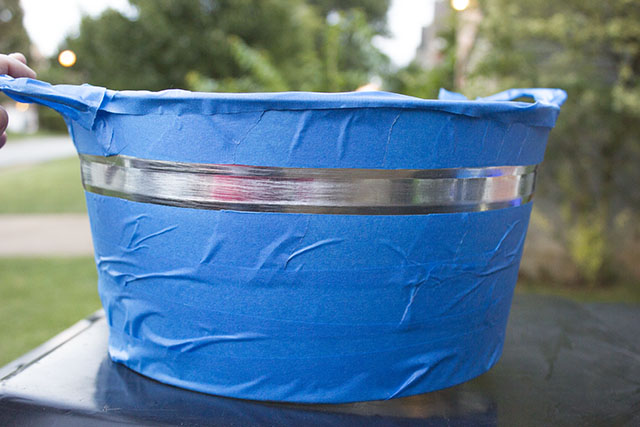
Spray a couple coats of spray paint in the color of your choice on the band area. (Red would also be a fun option for a vintage look.)

Read more

Easy Clean Up Paint Tray Liner | Pretty Handy Girl

31 Days of Handy Home Fixes | Pretty Handy Girl

I love to paint rooms! It’s one of those meditative tasks that leaves you with instant gratification when  you are done. But, I don’t like the clean up afterwards. Several years ago I came up with an Easy Clean Up Paint Tray Liner that costs next to nothing!

All you need are two plastic grocery bags and two strips of painter’s tape.

Day 11: Easy Clean Up Paint Tray Liner

Make sure your grocery bags are clean and don’t have any holes in them. Turn the bags inside out if there is printing on them. (Sometimes the ink is water soluble and can mix with the paint.) Observe as my sister gives her best Vanna White impression and shows you how to invert that bag:

Easy Clean Up Paint Tray Liner | Pretty Handy Girl

Slip the first bag on from the top of the tray and tape it at the bottom.

Easy Clean Up Paint Tray Liner | Pretty Handy Girl

Slip the second bag over the bottom this time:

Easy Clean Up Paint Tray Liner | Pretty Handy Girl

Tape the opening of the bag across the entire paint tray width.

Easy Clean Up Paint Tray Liner | Pretty Handy Girl

You’re ready to rock and roll, errr roll and paint!

Easy Clean Up Paint Tray Liner | Pretty Handy Girl

When you are done, carefully remove the plastic bags and throw them away. If you are pitching your roller, you can grab the roller through the bags and pitch it too.

Easy Clean Up Paint Tray Liner | Pretty Handy Girl

No need to clean the tray (unless some paint seeped inside.) Unfortunately, you’ll probably still need to wash your paint brushes. But, if you clean your paint brushes correctly, they should last you a decade or more!

PHGFancySign

Pin for later!

paint tray liner plastic bag

Benjamin Moore Yellow Highlighter Painted Interior Doors | Pretty Handy Girl

Benjamin Moore Yellow Highlighter Painted Interior Doors | Pretty Handy Girl

I painted my interior front doors Benjamin Moore’s Yellow Highlighter. It’s my way to start my day off on the right foot. When I get up in the morning and head downstairs, I see my front doors and immediately Good Day Sunshine starts to play in my head!

Let me tell you how this happened. Remember when I was in the middle of the DIY project from HELL?! I tried to paint our front doors on the outside and the paint was peeling off. I wanted to curl up in a ball and cry. I wanted to run down the street screaming. Instead, what did I do? I decided to create a cheerful view when I go downstairs every morning. I put stripping the outside of the doors on hold for a day or two and focused my efforts inside.

Benjamin Moore Yellow Highlighter Painted Interior Doors | Pretty Handy Girl

The solid wood doors are original to our house and had cracks in them.

Benjamin Moore Yellow Highlighter Painted Interior Doors | Pretty Handy Girl

Instead of replacing the doors, I fixed them by scraping the edges until they were smooth and devoid of bumps. Read more

how to stamp with potatoes

Hey there! It’s Melissa from The Happier Homemaker back again with a fun and easy DIY tutorial you can even get the kiddos involved with! I’ve been noticing block printing coming up a lot in my home decor magazines and catalogs lately. Last week when I was prepping a little rainy day potato stamping activity for my 3 boys, I decided it may be time to try a little block printing DIY of my own.

Supplies:

  • Flour Sack Tea Towels
  • Large Raw Baking Potato
  • Knife
  • Craft Paint
  • Fabric Medium
  • Iron and Ironing Board

Instructions:

Cut your potato in half and use your knife to {carefully} cut your design.  Simple shapes work best for this type of stamping.

diy potato stamped towel

On a paper plate, or paint palette, mix your craft paint with fabric medium in a 2:1 ratio (or according to fabric medium instructions.) Read more

Updating a Knotty Pine Nightstand | Pretty Handy Girl

Updating a Knotty Pine Nightstand | Pretty Handy Girl

The best way to give your room a makeover on a budget is if you can use your existing furniture. Notice that I didn’t say using it “as is”. Heck no! Update your solid furniture by adding moulding, paint and new feet!

Updating a Knotty Pine Nightstand | Pretty Handy Girl
(Pretty Handy Dog is already staking his claim on his preferred spot on the new bed.)

When I decided to build our new bed, I wanted to use our existing nightstand and vanity to save money. But, the nightstand was a little too short for the new bed height. By adding new feet and painting it the same color as our new bed, I was able to give the knotty pine nightstand a second life.

(I’ve included affiliate links for your convenience. I earn a small percentage from a purchase using these links. There is no additional cost to you. You can read more about affiliate links here.)

Materials:

Optional:

Instructions:

Start with a solid night stand. She may have some dated curves, but that’s nothing a little baseboard moulding can’t fix!

Updating a Knotty Pine Nightstand | Pretty Handy Girl

Remove the drawers. Clean out any dust bunnies and lost love letters out of the back.

Updating a Knotty Pine Nightstand | Pretty Handy Girl

Cut an interior facing 45 degree angle into one end of the baseboard moulding. Line up the bevel against one end of the front of the nightstand. Mark the opposite corner of the base where you need to cut. Read more