Large blank wall spaces can often be a challenge to decorate. Whether you are at a complete loss on how to decorate yours, are trying to decide what kind of art to hang or are looking for photo collage ideas, this roundup of 16 ideas for decorating a large wall space will be helpful to you.
What do you think of these ideas? Share thoughts in the comments. Also, be sure to save this image to Pinterest so you can find these ideas again:
Thanks for reading!
Hi, I’m Sheri from Hazel + Gold Designs. Here are a few fun stats about me: I like love chocolate and peanut butter (together of course.) If you like stats, I have been crocheting for about 16 years, crafting for 20, and woodworking for about 4 years. I found a passion in making and being creative and began documenting my projects online at Hazel + Gold Designs.
When not working on projects, I enjoy spending time with my husband, four children, perfect dog, and ornery cat. You can find me on Facebook, Pinterest, Instagram and Twitter.
https://prettyhandygirl.com/wp-content/uploads/2018/10/16-Ideas-for-Decorating-a-Large-Wall-Space-square-featured-Image.jpg700700Sherihttps://prettyhandygirl.com/wp-content/uploads/2021/07/PHG-logo-tagline-2020-1030x211-R.jpgSheri2019-02-13 07:00:572019-02-12 10:53:1316 Ideas for Decorating a Large Wall Space
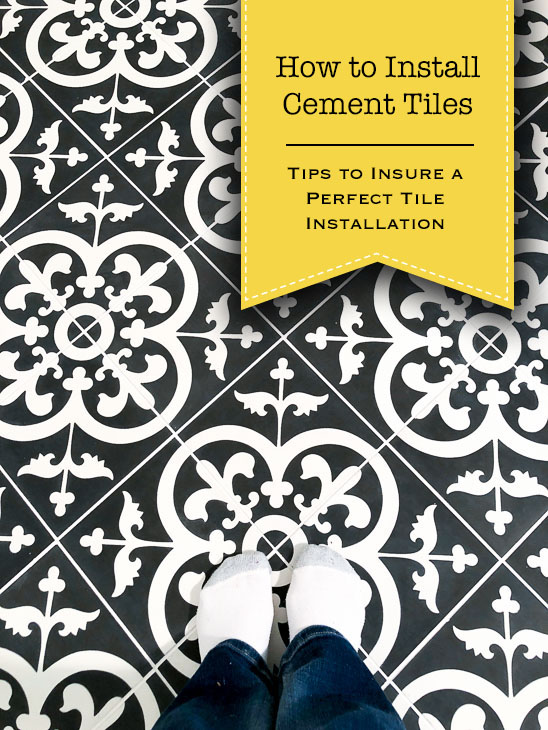
Step-by-step installation guide to install cement tiles and handle intricate designs like a pro. Get expert results for any space!
How to Install Cement Tiles
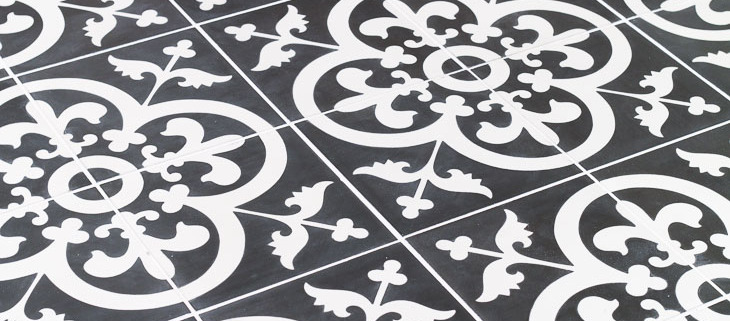
If you’ve been browsing Pinterest lately or flipping through the pages of your favorite home design magazine, you’ve probably seen (and likely fallen in love with) real cement tiles.
Cement tiles are trending, so much so that porcelain tile and ceramic tiles look alikes are popping up at most tile retail shops.
The first thing you’ll notice about real cement tiles, is the price tag can be steep.
What you probably don’t realize is cement tile can be a bit trickier to work with than standard ceramic or porcelain tiles.
Don’t let this dissuade you, because today I’m going to show you how to install those beautiful authentic cement tiles and achieve professional results.
Plus, because we’re friends, I’m going to share with you my affordable source for real encaustic cement tile options.
Cement tiles purchased from most tile retailers can run upwards of $20 per square foot. But, I’m about to let you in on my secret tile source.
Seeing those beautiful cement tiles and a great price prompted me to contact my friend at The Builder Depot and ask him about being a Saving Etta sponsor.
He agreed but on one condition; he asked me to write a tutorial on How to Install Cement Tiles and discuss the pitfalls and risks associated with improper installation techniques.
Apparently customers were unaware of the proper way to install cement tiles.
In fact, even seasoned tile installers were making costly mistakes because they were treating cement tiles like natural stone, or ceramic and porcelain tiles.
Both come in a wide selection of intricate designs, but there is a big difference between them.
Cement tiles make perfect choices for a kitchen backsplash, bringing unique character and timeless style to any space.
Their handcrafted appeal makes them a favorite among high-end retailers and design professionals.
What’s the Difference Between Cement Tiles and Porcelain or Ceramic Tiles:
Ceramic and porcelain tiles are slick (often shiny) and aren’t absorbent on the surface.
Encaustic tiles are highly porous and absorbent from the surface to the base.
Porcelain and ceramic tiles can be grouted immediately after the thinset mortar has cured.
Cement tiles must be sealed before grouting or you risk the grout staining (or permanently sticking to) the surface.
Porcelain and ceramic tiles do not need to be sealed.
Cement tiles need careful handling to avoid staining and scratching the tiles.
Porcelain and ceramic tiles are forgiving and can stand up to a lot of abuse.
Encaustic cement tile patterns are created by pouring different colored clay baked into the tile. It’s not merely a coating.
Porcelain and ceramic tile patterns are applied in the glazes (painted on top of the tile).
Here’s a beautiful video showing exactly how encaustic cement tiles are made:
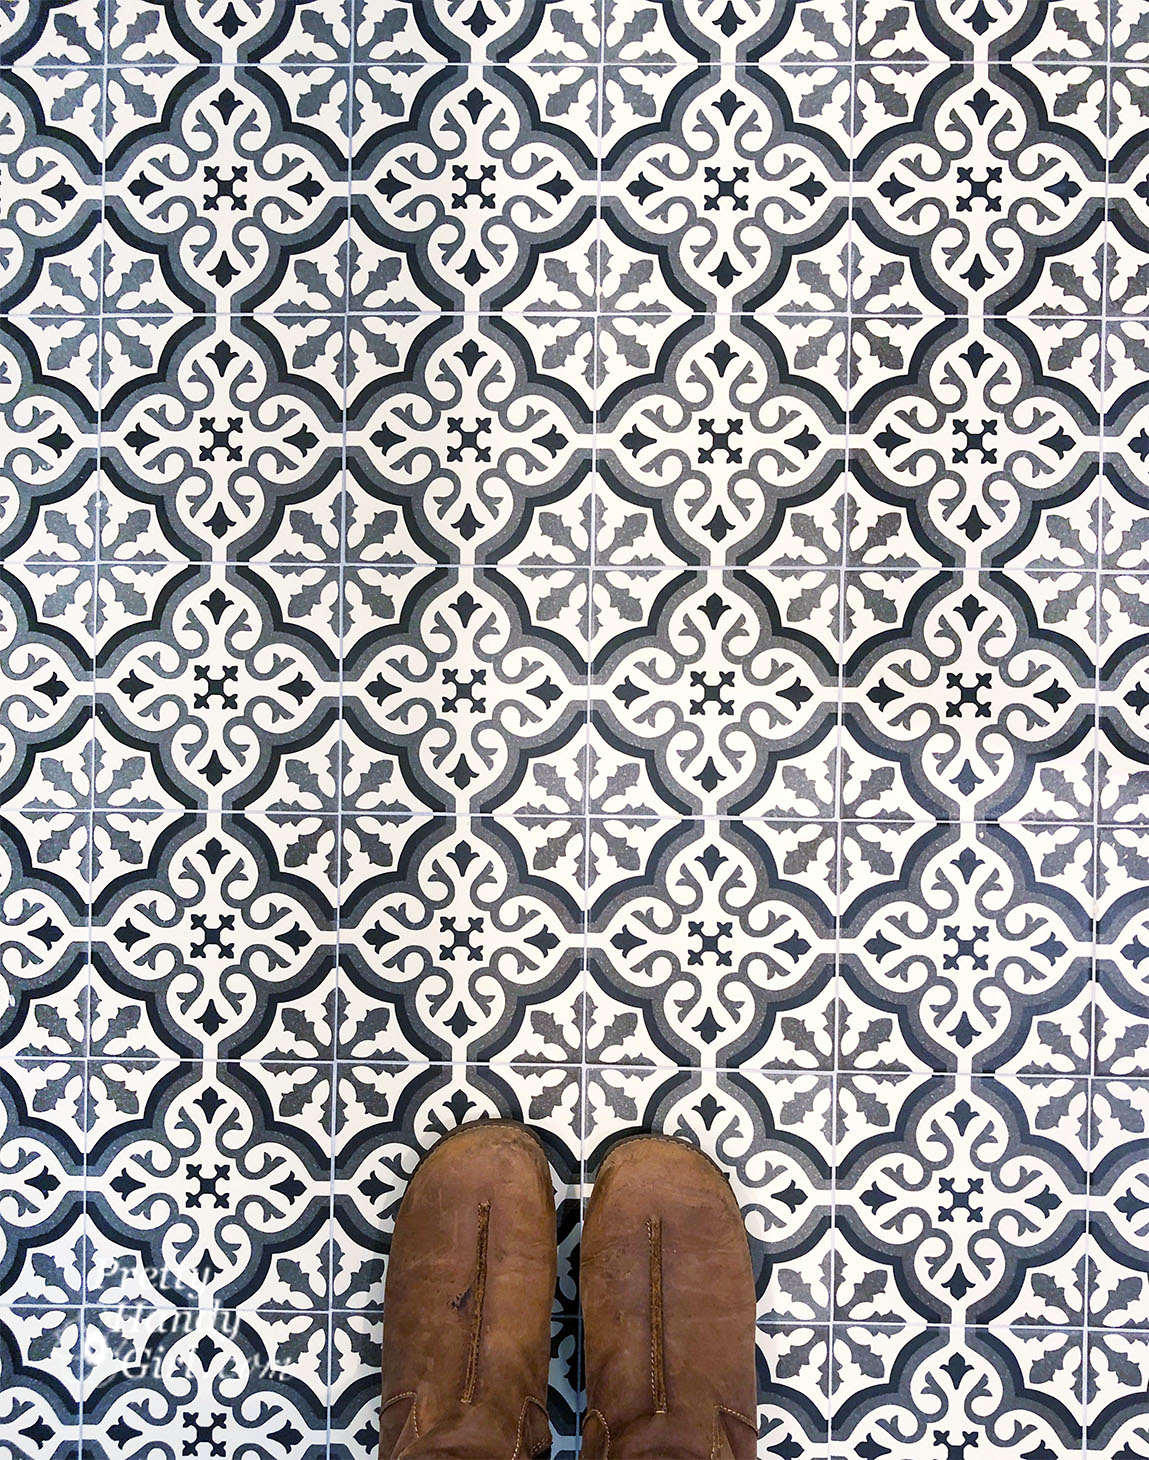
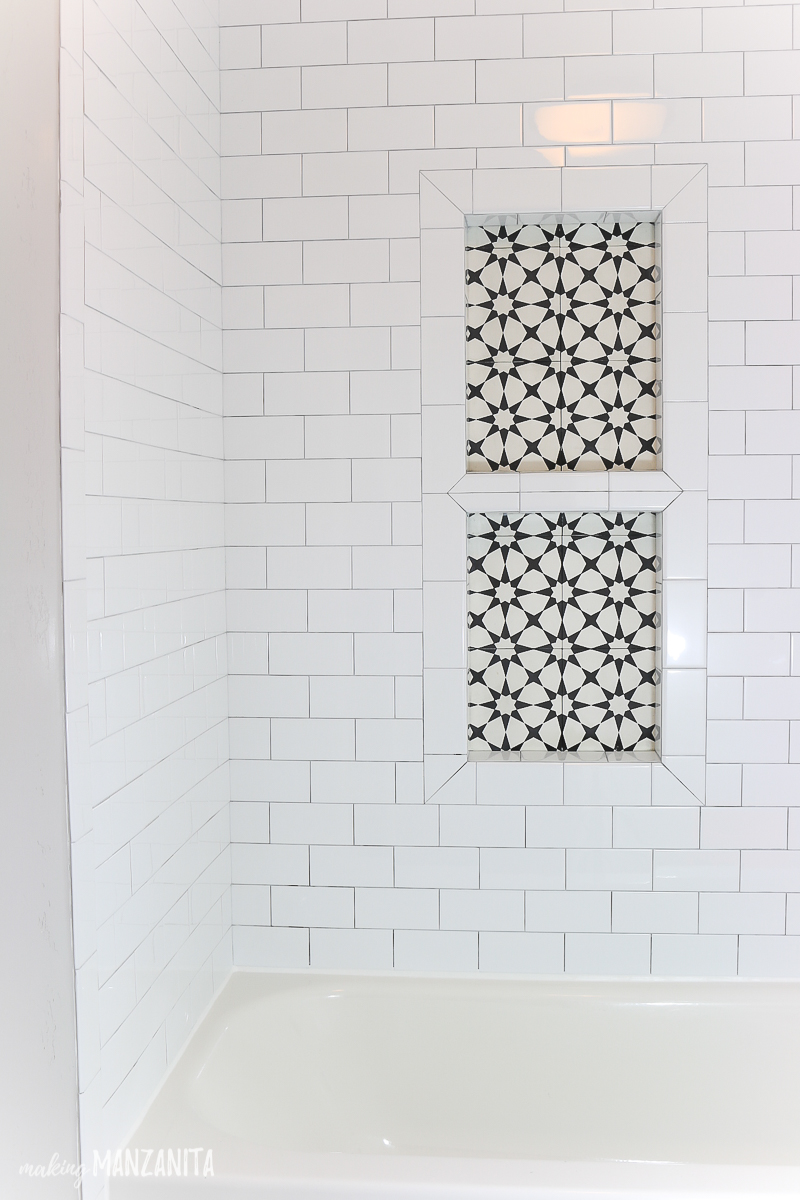
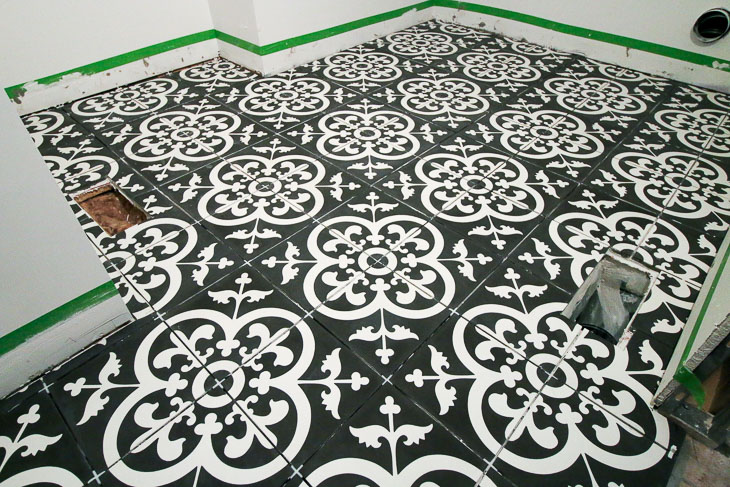
Now that you know more details about cement tiles, you can have a beautiful cement tile floor or install them as a wall tile.
But, you need to follow this tile project tutorial closely. (Almost all these instructions will apply to installing cement tiles on a wall, so keep reading.)
The most difficult part is choosing your desired pattern! There are so many gorgeous styles. You can even include a focal point piece to add to the center of the floor or wall.
Once you receive your cement tiles you’re going to be tempted to rip open the box and rub your grubby hands all over the smooth tiles (or am I the only weirdo that likes to stroke tiles?)
Regardless, before you open the box, wash your hands. Cement tiles are EXTREMELY porous and will absorb oils and stain easily.
Until you get to the sealing step, you’re going to have to handle these tiles with care (kid gloves wouldn’t be a bad idea.) Lest you think you can seal the tiles before installation, don’t try it.
The tiles have to be porous to release moisture while the mortar is curing. If you seal it ahead of time, there’s a good chance your tiles will develop a ghosting appearance.
Cement tiles can scratch easily. For best results, keep the packing material between the tiles until you are ready to install them.
Don’t mark your tiles with a pencil or pen for cutting (unless you will be cutting off the marks.) Even faint pencil lines can’t be easily removed from the tile surface.
How to Prepare Your Floor for Cement Tile Installation:
(I’ve included affiliate links for your convenience. I earn a small percentage from a purchase using these links. There is no additional cost to you. You can read more about affiliate links here.)
Just like when you paint a room, you’ll get the best results if you take the time to prep your space before you begin.
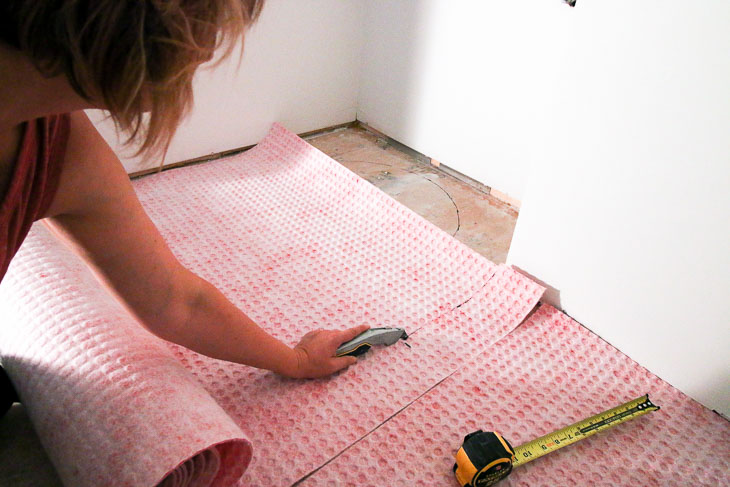
Before laying tiles on your floor, you must put down a substrate to prevent future flexing that can lead to cracks in your grout or worse in your tiles.
Typically tile installers will use cement backer board. But, because the cement tiles are so thick, I chose to use an uncoupling mat to reduce the finished floor thickness.
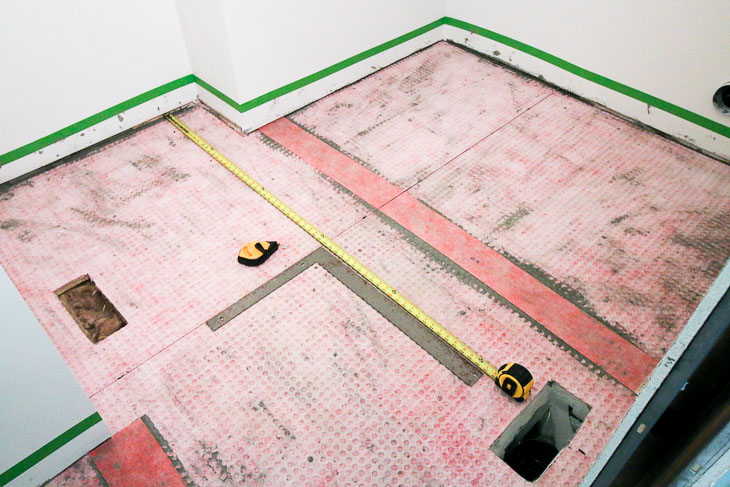
Measure and cut your mat (or cement board) with a utility knife. Dry fit the mats (or boards) before proceeding.
For improved waterproofing, you’ll want to cover seams with the recommended seam tape.
For completely waterproofed floors, add seam tape around the perimeter of the room (as shown in this video.)
Next find the center of your room and mark perfectly perpendicular guidelines to use as a guide when laying out your tiles.
Dry fit the tiles with spacers in your room before you begin. Make any adjustments to the tile layout or pattern before you begin.
How to Install Cement Tiles:
With your substrate installed, it’s time to install your tiles. Before we begin, make sure you have these tools and materials.
A quick note on cutting the tiles. You can use a score and snap manual tile cutter for straight lines, but nothing beats a wet saw for angled and more complicated cuts.
If you don’t want to buy a wet saw, you can rent one. Tile setting is a one person job, but it helps to have an assistant to speed things along by making cuts and mixing more mortar and grout.
Here’s a video I made to help you learn how to install cement tiles properly and keep them looking beautiful!
Mix your thinset mortar according to the package directions. (I usually try to achieve the consistency of peanut butter.)
Prepping Your Cement Tiles:
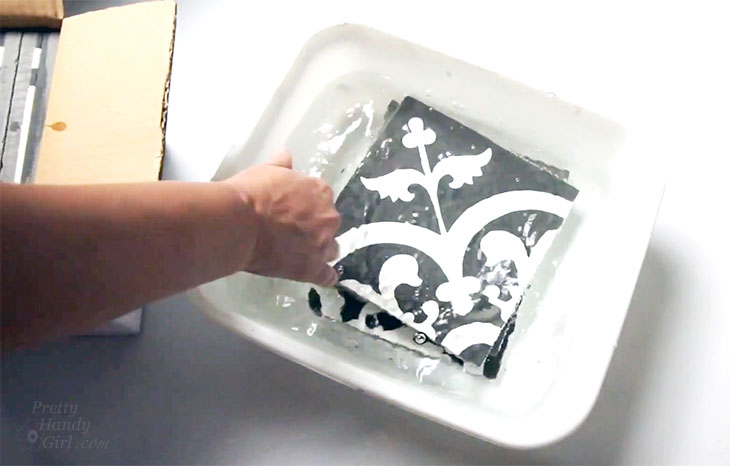
One of the most important tips for working with cement tiles is to soak them in water before installation. Allow them to soak for at least 30 seconds before laying them into the mortar.
If you don’t soak them, the tile will absorb too much moisture from the mortar.
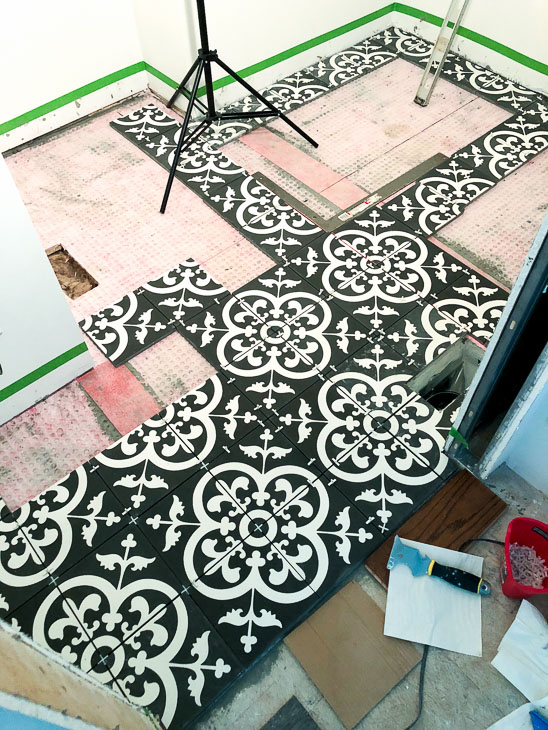
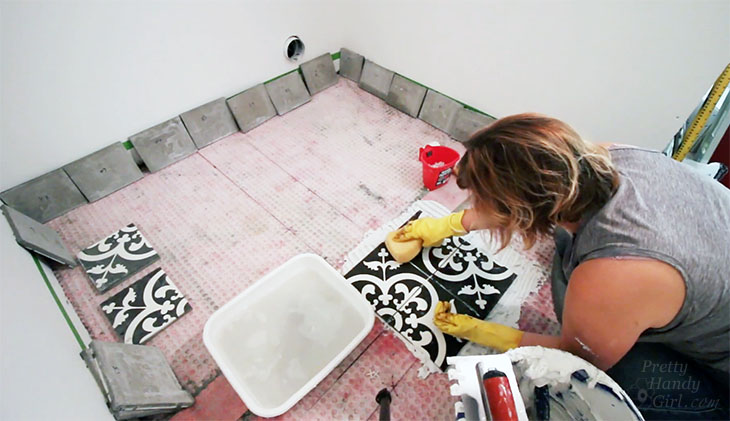
Starting from the center of your room, apply the thinset mortar to a small area and use your 1/2” notched trowel to comb the thinset.
Lay your tiles down. Lift one tile to check and see if the mortar is completely covering the back of the tile. If not, your mortar consistency may be too dry.
Avoid the temptation to lay more than a few tiles at a time.
After your first small group of tiles are set, insert spacers. Check to make sure the tiles are level and the same height.
Then immediately clean any and all thinset off your tiles using a damp sponge.
Before sealing, make sure your tiles (and the thinset for that matter) are completely dry.
You can test the tiles for any remaining moisture by laying down a piece of plastic on the tiles after installing them.
If there is moisture the next day when you lift the plastic, they aren’t dry enough. Wait for them to dry or you could risk discoloration of your tiles.
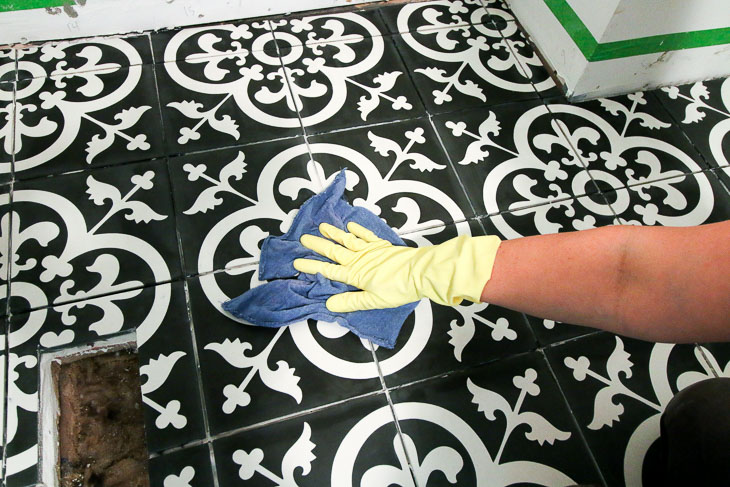
Clean the tiles by sweeping off any debris and clean with a ph balanced cleaner (a bucket of warm water with one drop of dish soap is a good cleaner.)
Let the tiles dry. Wipe or buff with a rag.
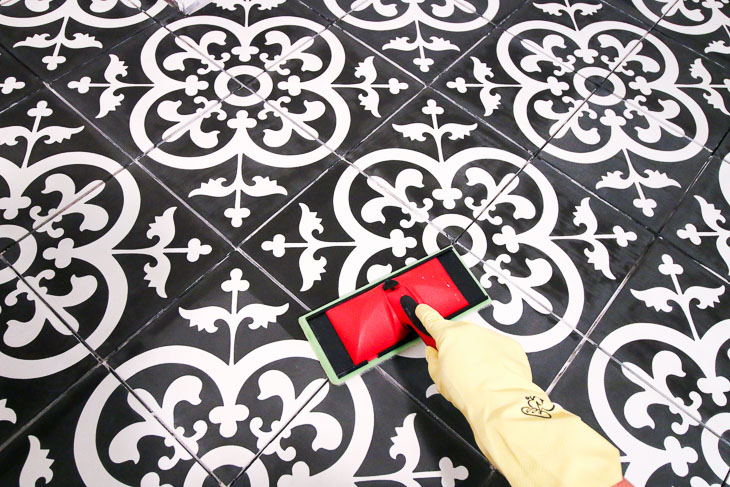
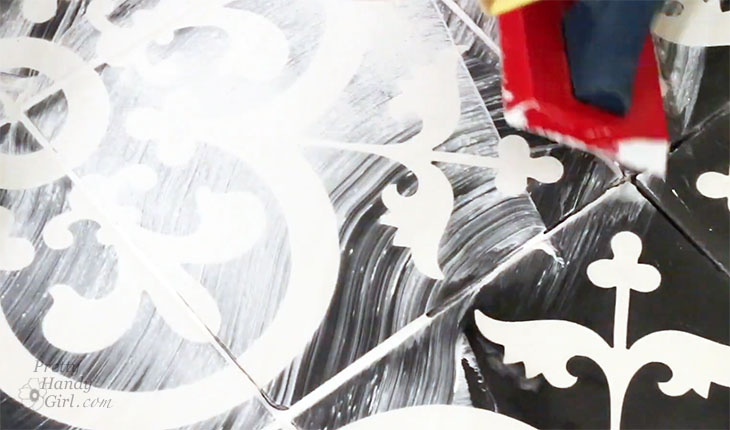
Pour the sealer into the dish pan. Dip your pad applicator into the sealer liquid. Squeeze off excess sealer against the edge of the dish pan.
Apply the sealer in thin coats working in one direction. Remove any excess sealer from the tiles BEFORE it dries. (See the streaks below?
Those streaks and any puddling needs to be buffed off to avoid uneven drying.)
Let the first coat of sealer dry completely. In fact you may want to take a break for 30 minutes or so between coats.
Be prepared to apply many coats before your cement tiles are fully sealed. (My tiles needed 5 coats to seal them. Then I had to wait another 24 hours for the sealant to fully cure before grouting.)
It may seem like a long process, but this insures the tiles will withstand regular use and resist stains.
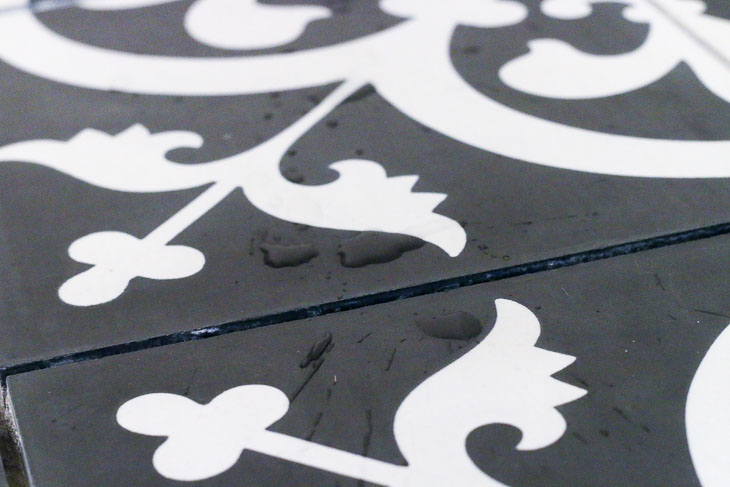
After each coat of sealant dries, you need to test to see if the cement tiles are completely sealed. Drip water onto the tiles.
If the water beads up, they are sealed. However, if the water absorbs into the tiles, add another layer of sealant and try the water test again later.
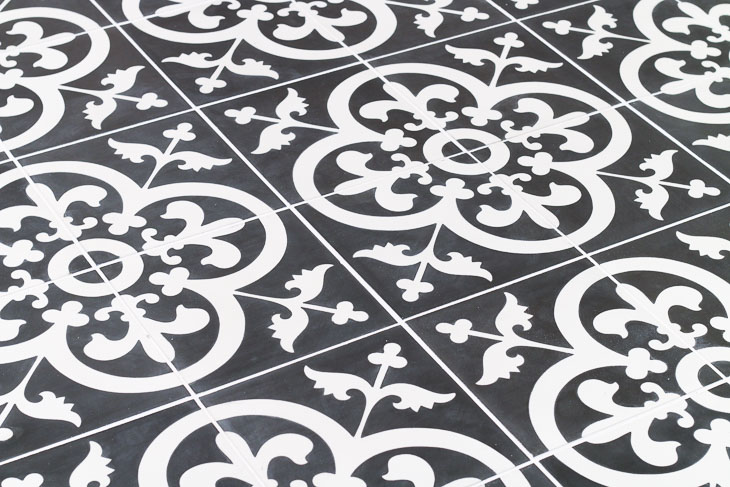
Once your tiles are fully sealed, wait 24 hours before grouting.
How to Grout Tiles:
Because I work alone, it takes me a little longer to grout. To prevent my grout from hardening too quickly, I like to float my mixed grout container in a bucket of ice water to slow down the setting action.
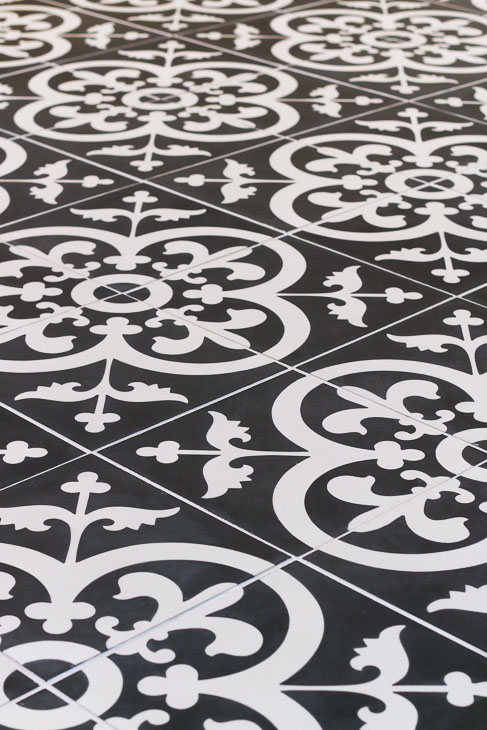
Load up your float with fresh mixed grout. Holding your grout float at a 45 degree angle against the floor, spread the grout over the gaps between the tiles in a diagonal motion.
Work in small 3 – 4 square foot areas. Then scrape any excess grout off the tiles using a clean grout float.
Immediately wipe off any excess grout using a clean damp sponge. Ring out and refresh your sponge with clean water frequently.
It is imperative to get all the excess grout off the tiles or you risk the grout staining or settling into the tiles.
Go ahead and move on to the next section, but go back to the previous tiles and buff off any haze with a dry rag.
After the grout has cured, clean your floors with a pH neutral mild cleanser. Then apply one final coat of penetrating sealer.
A new coat of sealer should be reapplied every 6-12 months for floors, and every 2-3 years for wall tiles.
Cement Tile Maintenance:
To protect your beautiful cement tile floors, clean up any spills immediately. Never leave anything sitting on the floor that could stain or scratch your tiles.
If your tiles get scratched or stained, you can use a fine grit sandpaper to sand off the stain on the surface of the tile. Just be sure to re-seal your tiles after sanding.
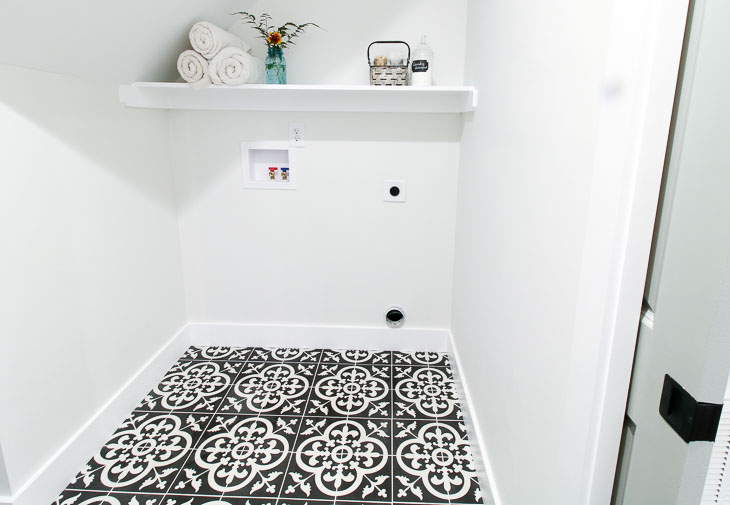
A big thank you to The Builder Depot for providing the laundry room tiles for the Saving Etta project and for giving me excellent instructions for installing the cement tiles.
What do you think? Do you love the cement tile look? They really add unique character to a home and are the perfect solution for modern kitchens and other high-traffic areas.
I hope you found this tutorial helpful. Happy tiling!
PIN FOR LATER:
Disclosure: The Builder Depot is a proud sponsor of the Saving Etta project. I was provided with materials for this project. I was not told what to write. All opinions and ideas are my own.
https://prettyhandygirl.com/wp-content/uploads/2019/01/grouted-cement-tiles.jpg487730Brittany Baileyhttps://prettyhandygirl.com/wp-content/uploads/2021/07/PHG-logo-tagline-2020-1030x211-R.jpgBrittany Bailey2019-01-28 10:00:002025-06-01 17:37:15How to Install Cement Tiles With Professional Results
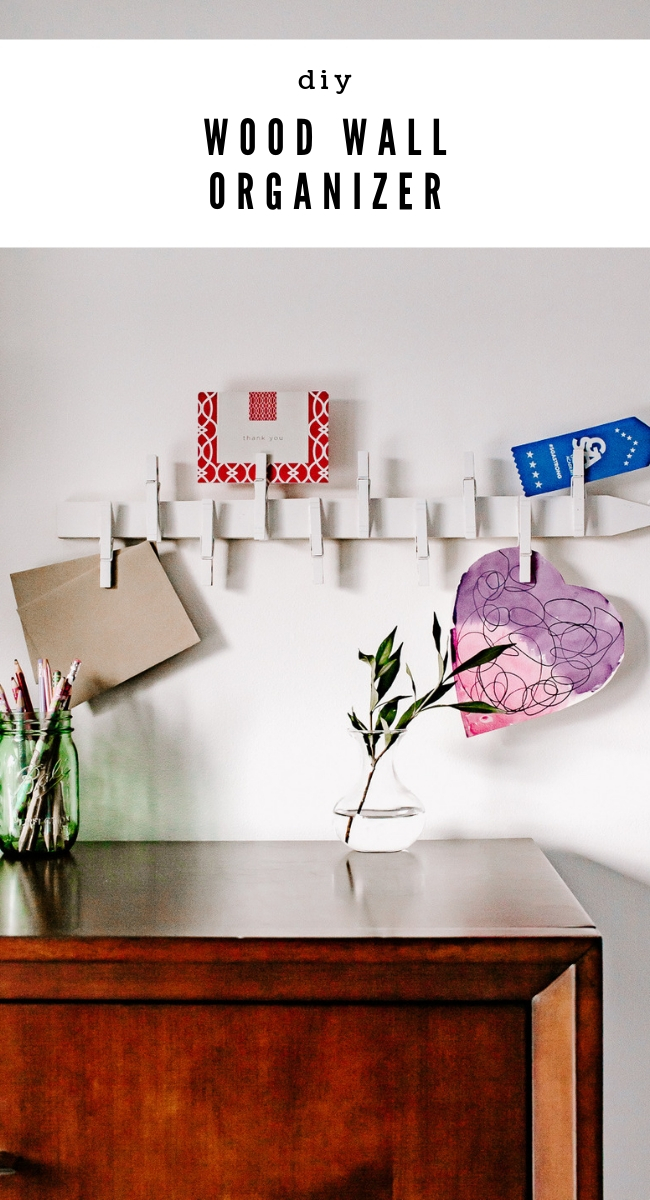
Hello, Pretty Handy Girl Readers! I’m Karen and I’m the blogger behind Decor Hint and a new member of the Pretty Handy Girl contributor team. I’m so excited to be here today. Today, I’m going to show you how to make a simple DIY Wood Wall Organizer. There is something about the New Year that always motivates me to clean up and organize my home. I’m always looking for new ways to organize my things but I still want to have it look polished and well decorated. Only I’m not interested in spending a lot of money. (Which is why I tend to DIY everything!) I’ve been seeing these cute wall organizers everywhere and I thought: “I could totally make that.” So here I am with a new project! Let’s get started, shall we?
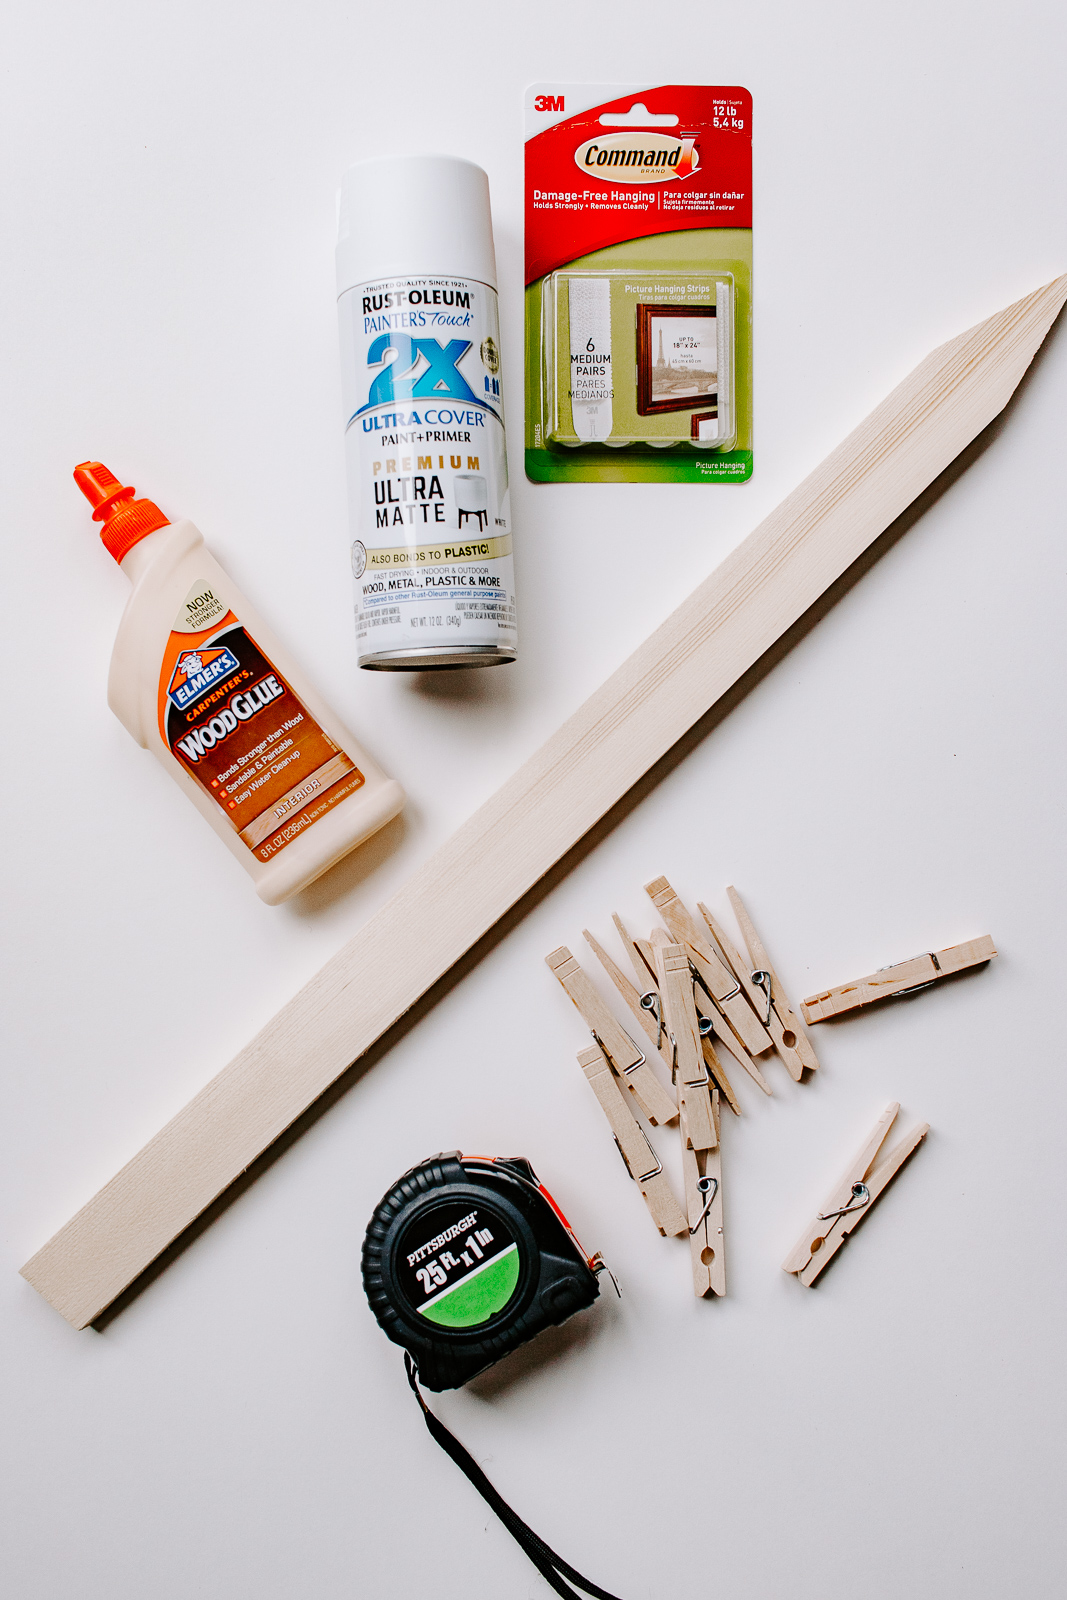
Materials:
Wood Garden Stake –
This cost me a buck from my local hardware store! You could also use a regular piece of scrap wood and cut it down to the size you need. For dimensions, my garden stake is 2 inches wide by 24 inches long
Wood Glue
Wooden Clothespins
Q-Tip
Tape Measure
Spray Paint (Optional)
Wood Wall Organizer Tutorial
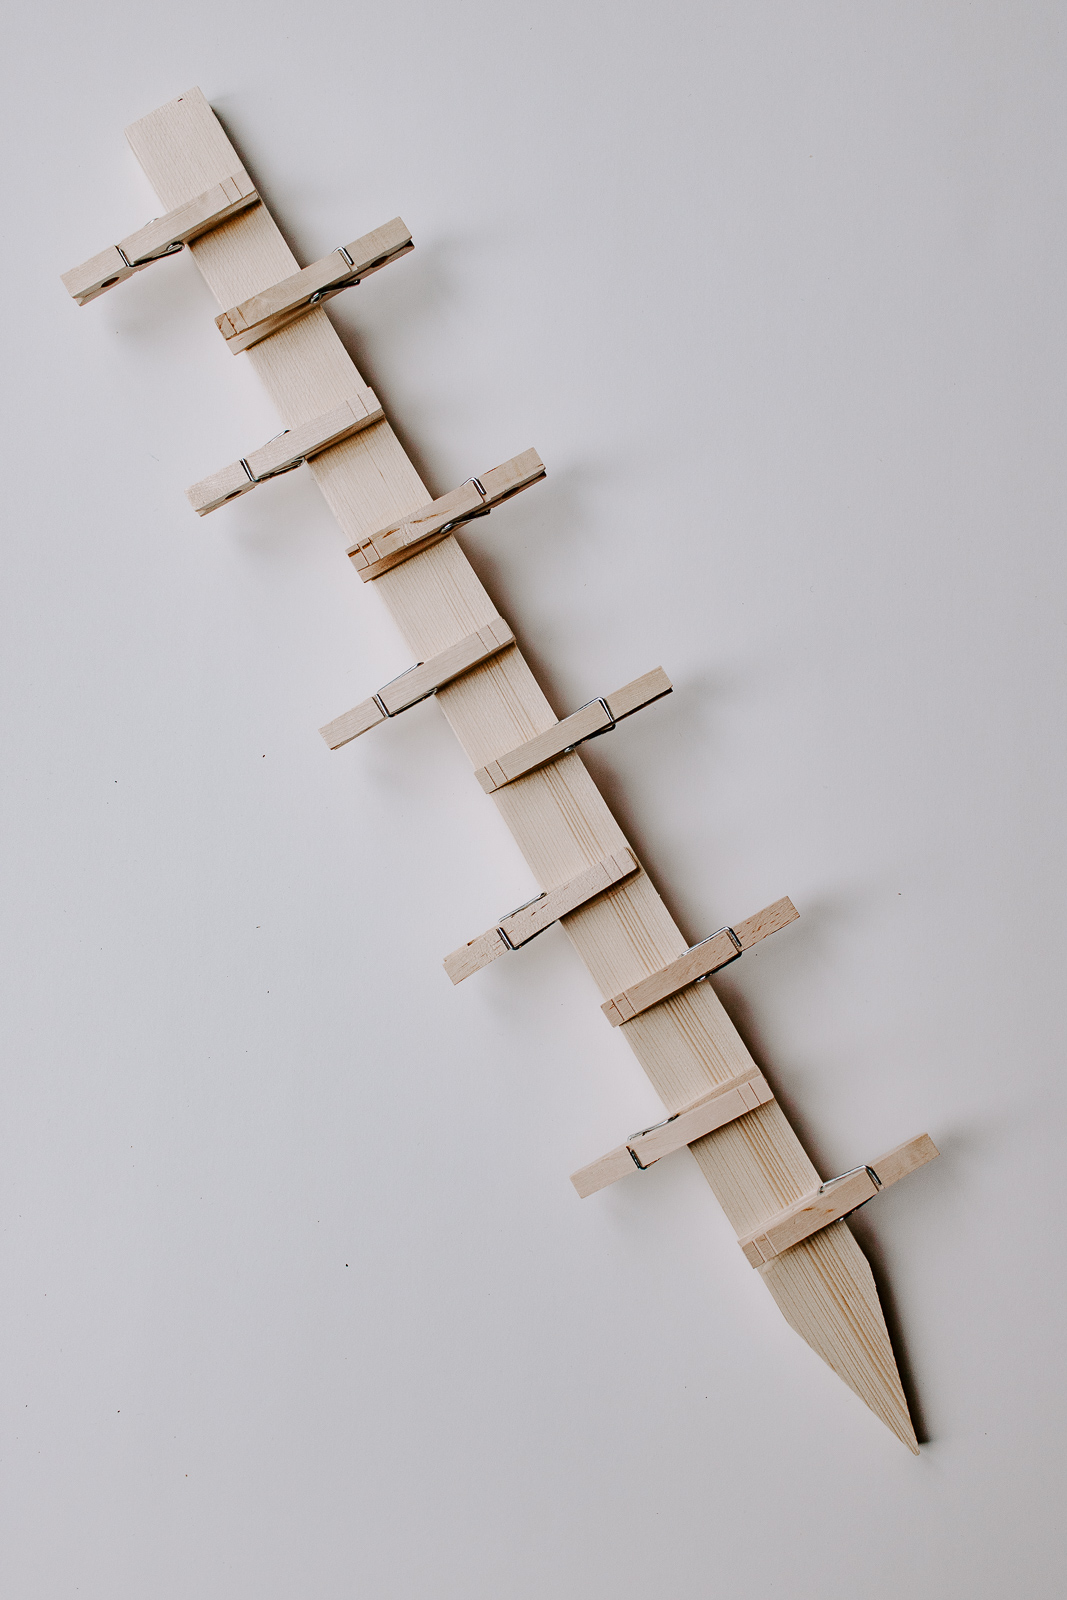
Step 1 :Take your tape measure and mark where you want your clothespins to be on your piece of wood. Two inches apart and alternated top and bottom is a good pattern.
Step 2 : Attach the clothespins to your piece of wood or garden stake using wood glue. Use your pen marks as your guide. Squeeze a little wood glue on your wood piece and a little glue on your clothespins.
Place the clothespins onto the wood piece and press firmly for a few seconds. Make sure the “mouth” part of the clothespin faces out. If excess glue squeezes out, use a Q-tip to remove the excess. Repeat this step with each clothespin. Allow to dry overnight.
Here’s what it looks like so far! Pretty cool, right?
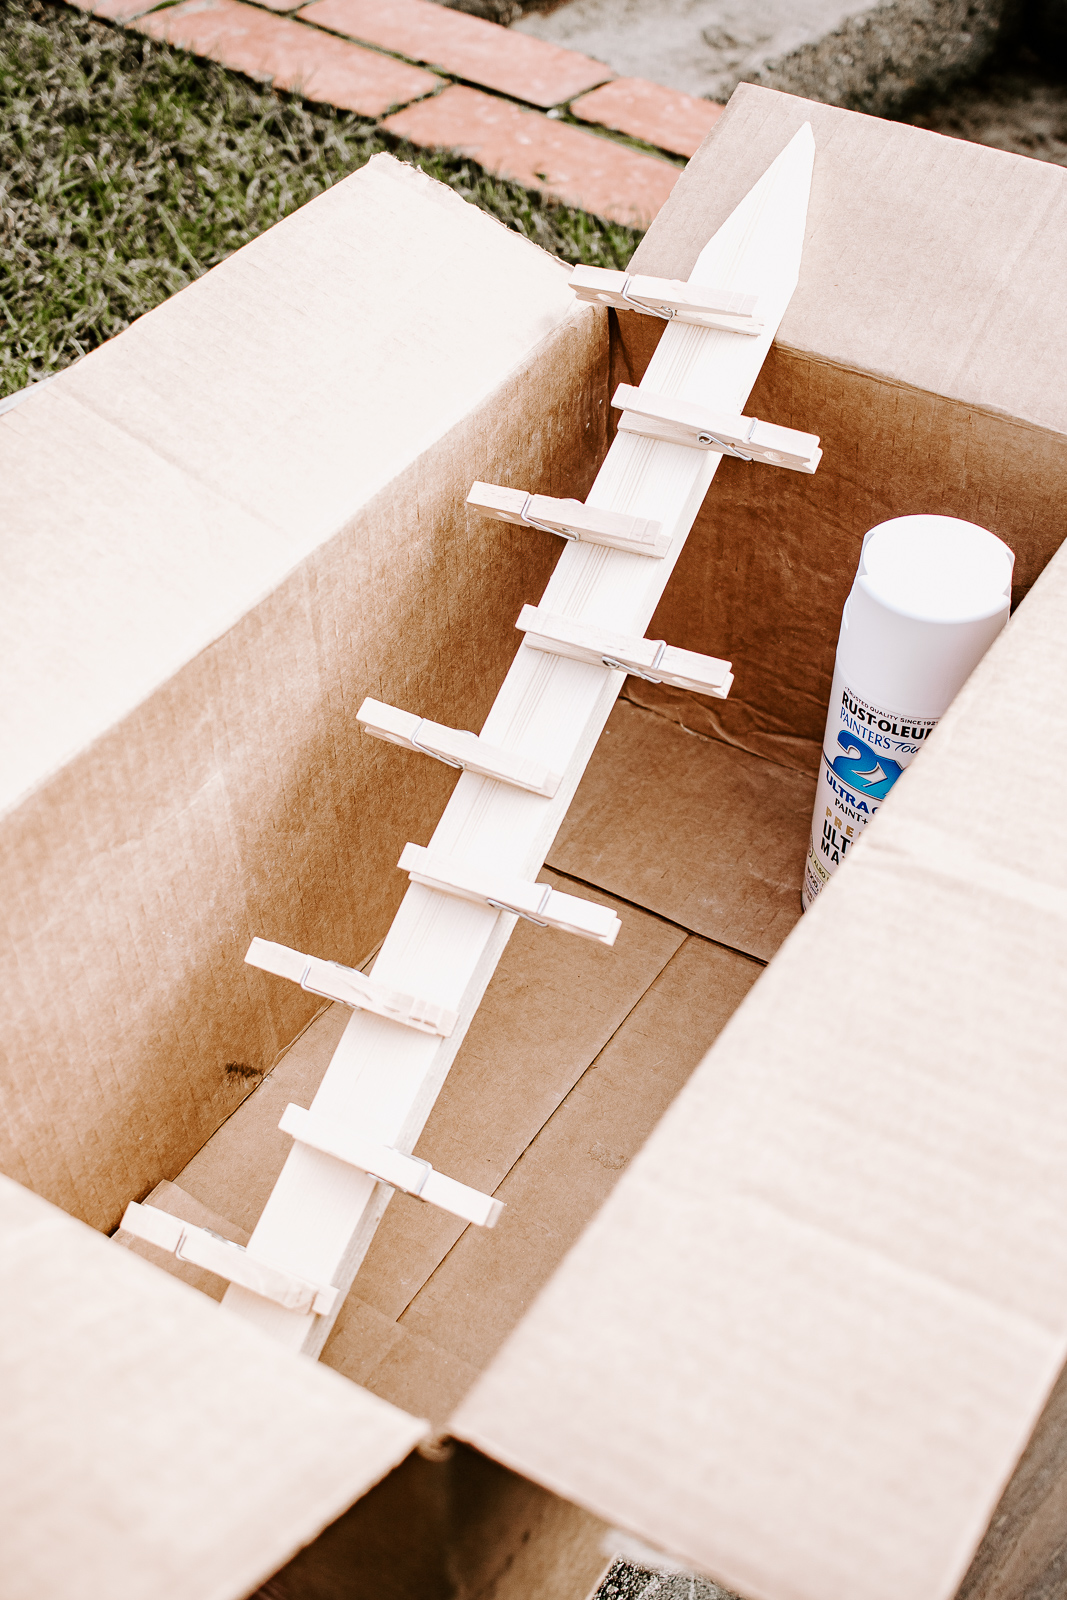
<Step 3: Once the wood glue is dry, it’s time to paint it. Of course, if you prefer the natural look of your wall organizer, you can keep it natural. If you decide to paint it, move outdoors or to an area with good ventilation while you are spray painting. Place your wall organizer in a large cardboard box and spray paint it. This will save you from having white spray painted grass! A lesson I’ve learned many times – although mine was pink grass! My husband really loved that project! 🙂
You don’t want to spray too much paint on your wall organizer at one time or it will get drippy. It’s best to spray several light coats in a sweeping motion to get smooth coverage. Allow the paint to dry overnight.
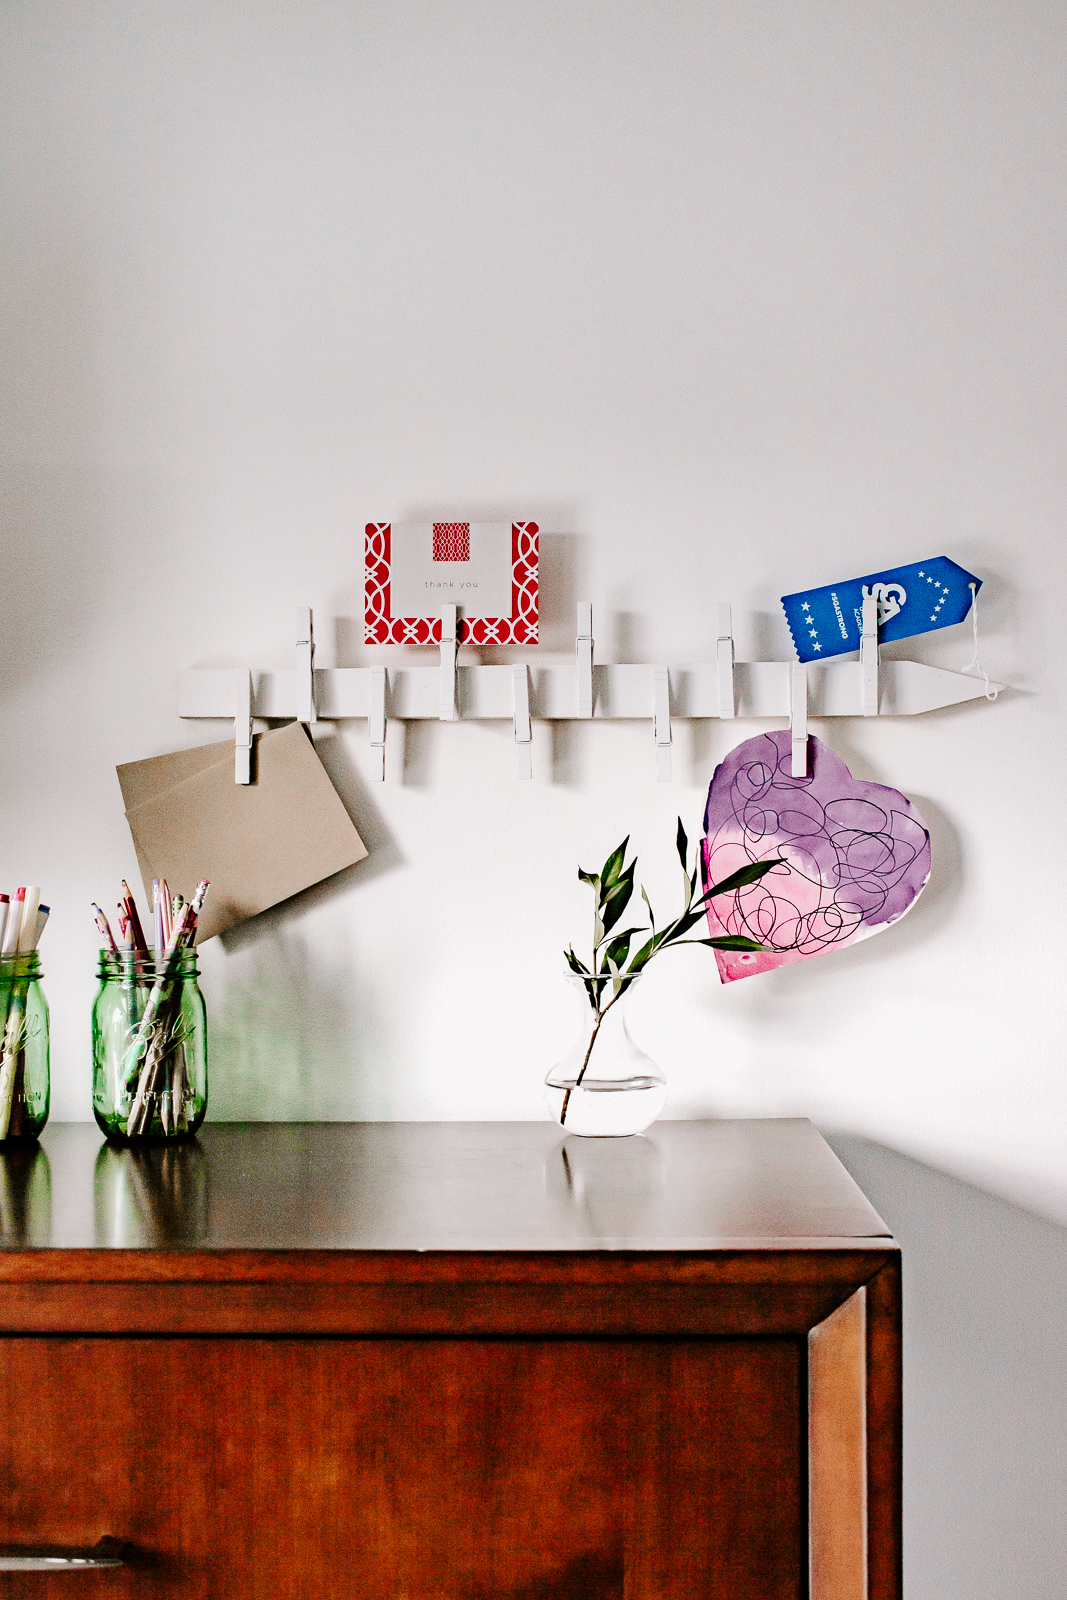
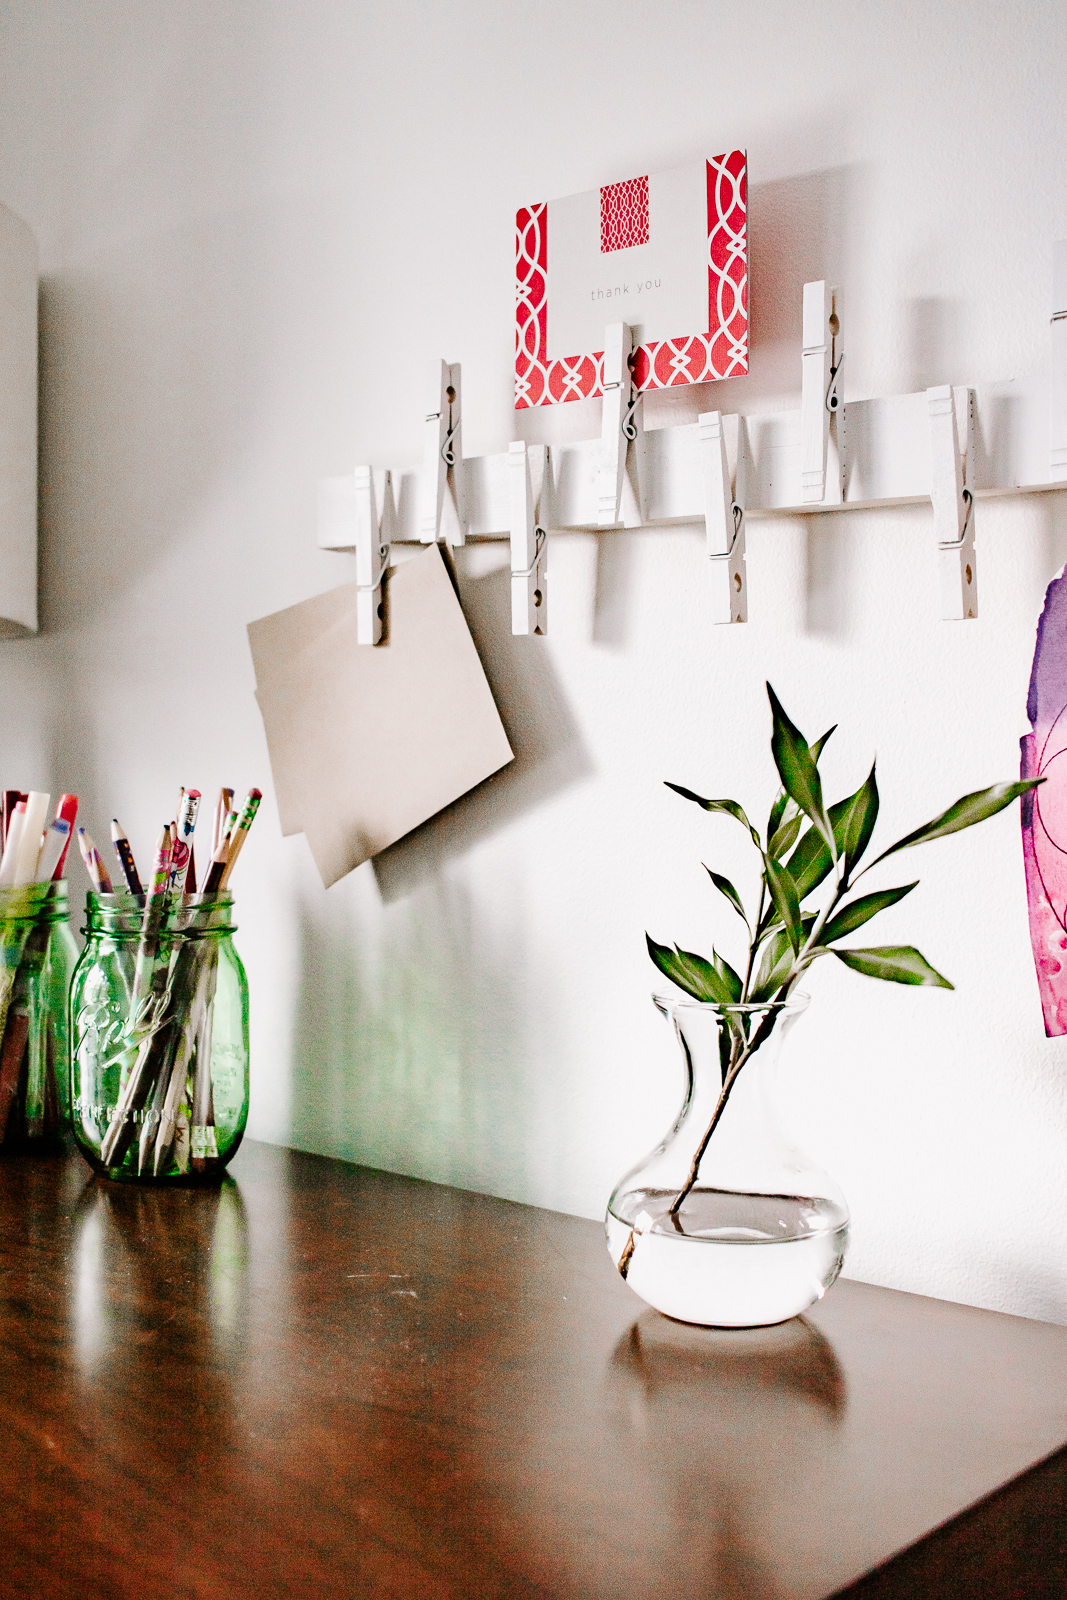
Step 4 : You’re done! Now it’s time to hang your new wall organizer! I use mine to hold and organize stationary, photos, postcards, and my kids artwork. I don’t plan on hanging anything too heavy on it so 3M velcro sticky tabs work perfectly. You could always hang your wall organizer with a good ol’ hammer and nails too if you feel you need the extra support.
And that’s it! A stylish wall organizer that was made for just a few bucks. You can’t beat that!
I love having a wall organizer like this that can help organize my papers. However, this isn’t just for stationary! The DIY Wood Wall Organizer could be hung in your closet to hold necklaces or ties. Or try hanging it in your laundry room to hold all those socks with the missing pairs. Make one for Christmas and use it to display all those Christmas cards from loved ones. I was even thinking this could hold spools or ribbons or washi tapes.
I hope you guys enjoyed this easy tutorial and I hope it gets you a little more organized this year! To see more of what I’m decorating and DIYing, I’d love for you to visit me at my blog, Decor Hint. I’ll be back next month with a new project for you!
Hello! I’m Karen, the creator of the Home Decor and DIY Blog: Decor Hint. I’m a Native of the East Coast, but I currently live in beautiful Seattle with my hubby, our two wonderful children and our spunky wheaten terrier.
You can usually find me with some sort of craft in one hand and a coffee in the other. And I’m always rearranging furniture or moving lamps from room to room. I have a passion (read: obsession) for decorating, DIY, and gardening. In short, I love making my house into a home.
Like many, I’m inspired by what I see in home decor magazines, but I’m not so inspired by the price tags. Consequently, I love finding and creating beautiful budget-friendly home decor items. In a head to head competition, I bet you’d never know the difference between the designer items and my DIY creations! Many of my DIY projects focus on sewing, crafting, upcycling and organizing. Some of my favorite projects have been making pretty wreaths, sewing my own tassel hand towels, and crafting these trendy wood bead garlands. I can’t wait to inspire you and spark your creativity through my DIY projects.
https://prettyhandygirl.com/wp-content/uploads/2019/01/diy-wood-wall-organizer-18.jpg16001067Karen Decor Hinthttps://prettyhandygirl.com/wp-content/uploads/2021/07/PHG-logo-tagline-2020-1030x211-R.jpgKaren Decor Hint2019-01-16 07:00:242019-01-15 22:41:40How to Make a DIY Wood Wall Organizer
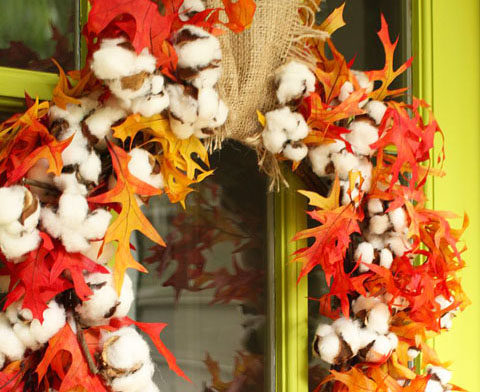
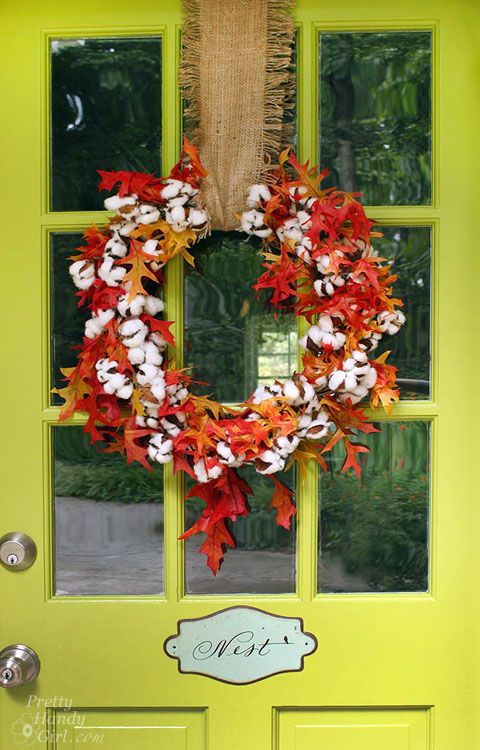
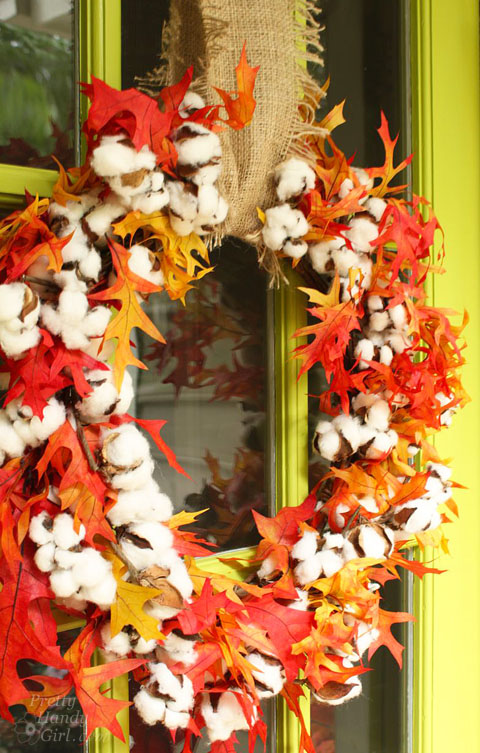
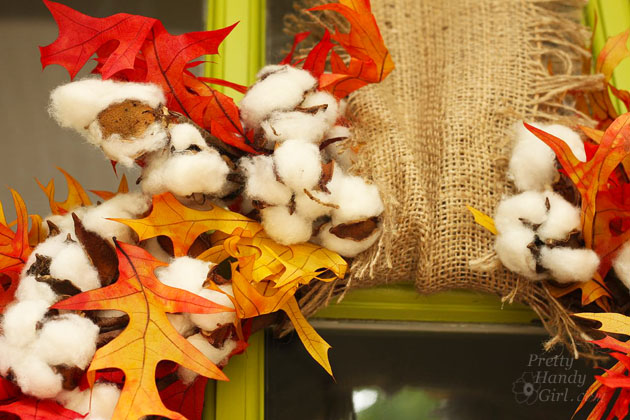
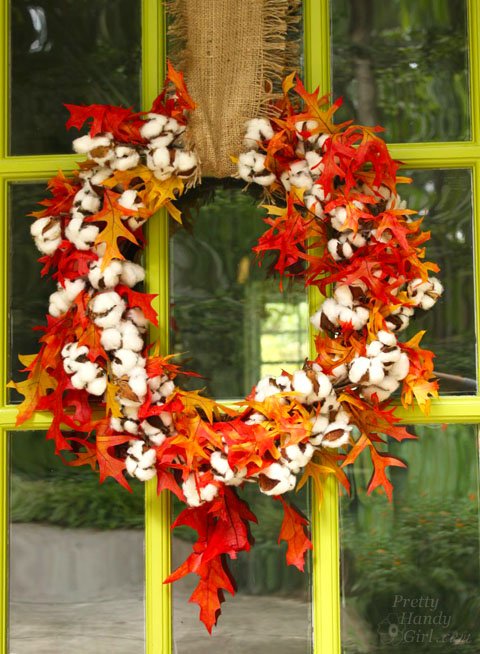
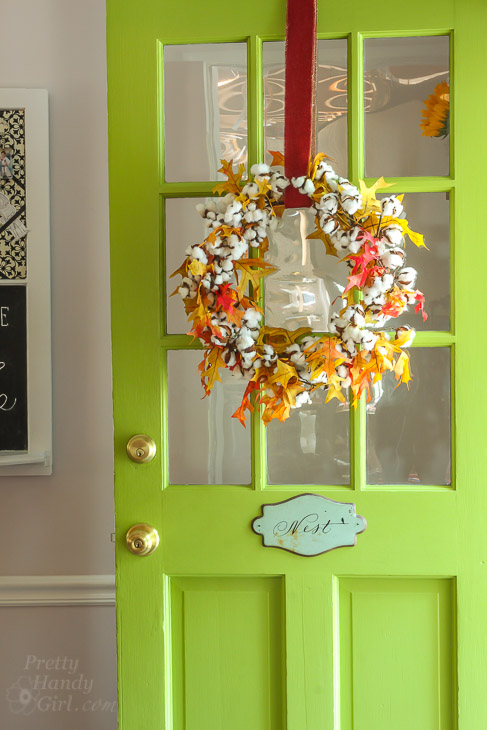
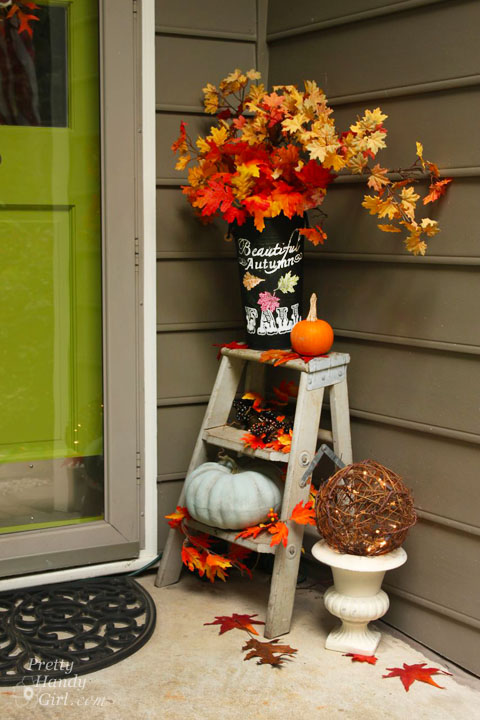
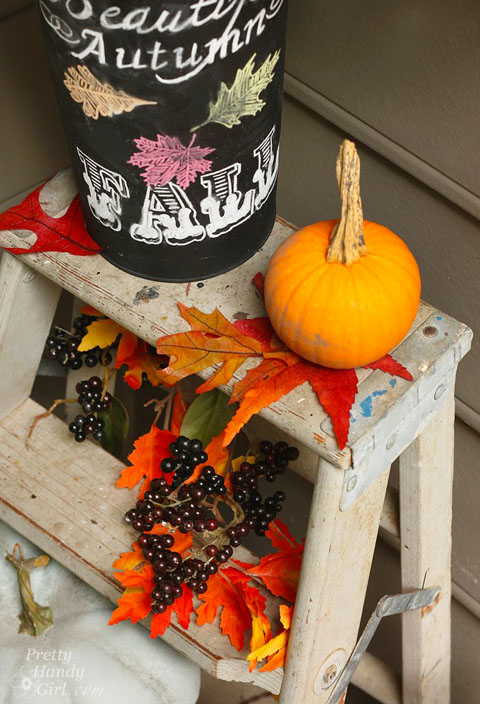
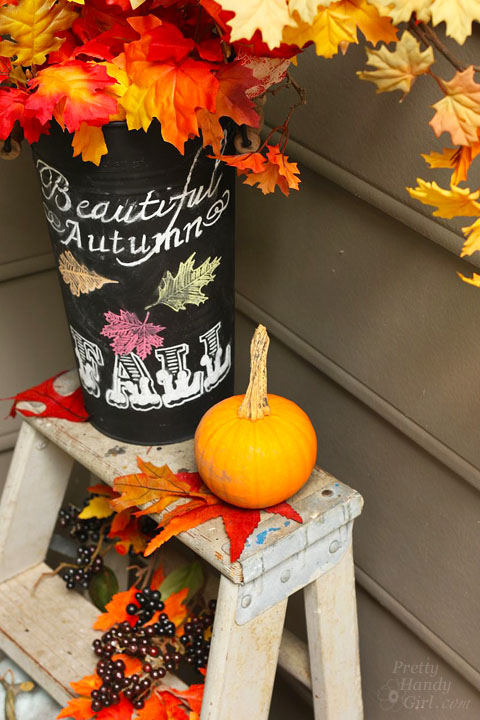
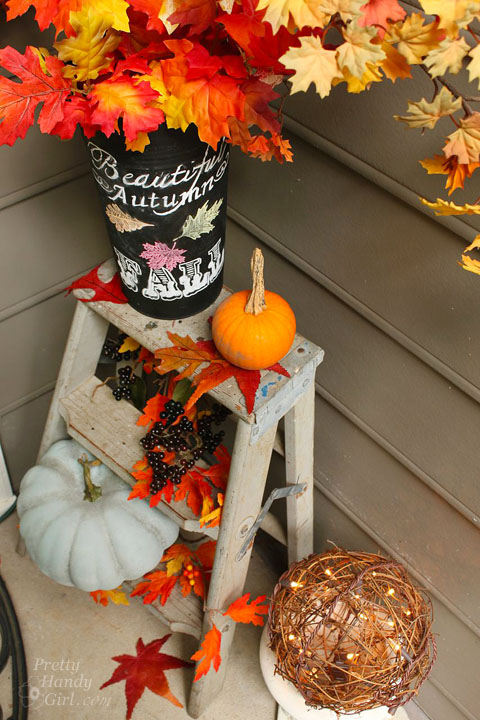
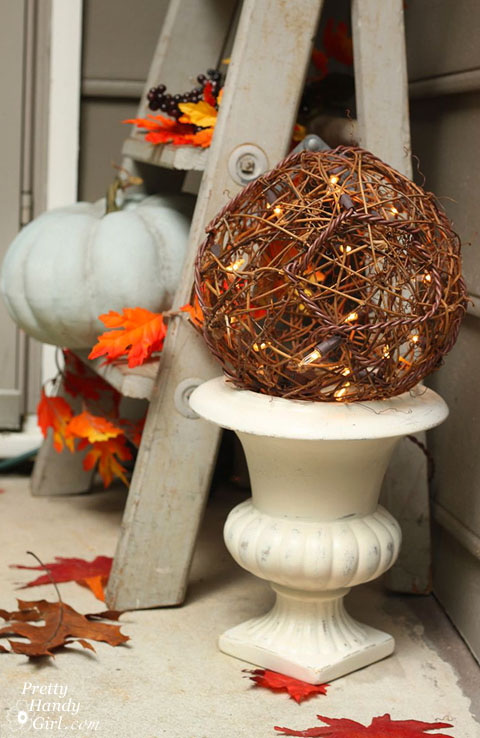
Every morning for the past few weeks I woke up and looked out the window. A few leaves have turned color, but as soon as I look at the weather report — the heat and humidity has yet to leave North Carolina. Will fall ever arrive? I want to wear flannel shirts and boots. I want cooler temperatures so I can stop sweating the minute I step outside. To usher fall into our area, I decided to make a super simple Cotton Fall Wreath. You won’t believe how easy this wreath was to make!
Materials:
(I’ve included affiliate links for your convenience. I earn a small percentage from a purchase using these links. There is no additional cost to you. You can read more about affiliate links here.)
https://prettyhandygirl.com/wp-content/uploads/2014/09/fall-leaves-cotton-leaf-feature.jpg392480Brittany Baileyhttps://prettyhandygirl.com/wp-content/uploads/2021/07/PHG-logo-tagline-2020-1030x211-R.jpgBrittany Bailey2018-10-08 07:00:002019-07-17 15:30:38Cotton Fall Wreath and Décor for the Entryway
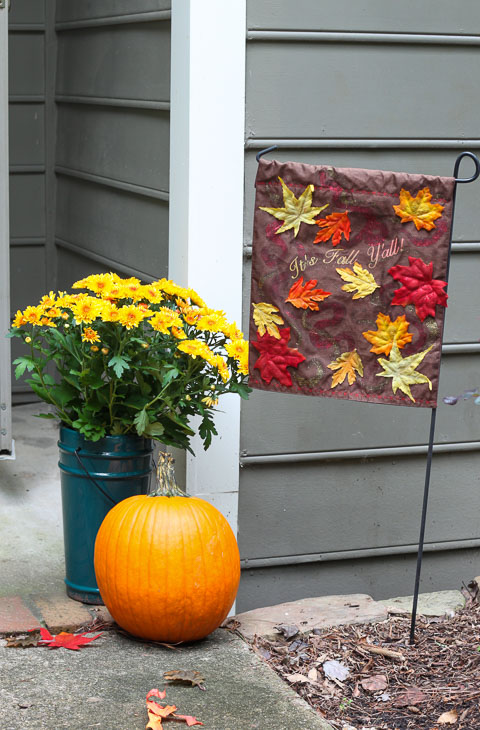
Make an inexpensive (but beautiful) Fall Leaves Garden Flag using a Dollar Store Placemat! Pull out your sewing machine (or skip the stitching and use your iron and some hem tape instead.) You can have a gorgeous fall garden flag in an hour or less. Plus, this is the perfect activity to do with the kids before school starts.
Sure, we’re in the thick of a heat wave here in Raleigh, NC. But luckily fall is around the corner and it’s time to start thinking about fall decorating! I like to create a beautiful garden flag for each season using a few simple supplies from the Dollar Store. Ready to make one? Great, let’s get to it.
*Optional: hand sew or use hem tape if you don’t have a sewing machine
Instructions:
1. Fold over the top of your placemat 2 inches. Stitch across the edge. (I used a decorative stitch, but a straight stitch is fine too.)
2. Create a stencil using a Silhouette, other craft cutter, or use pre-cut letter stencils. Adhere the stencil to the placemat. (Place centers of letters if needed.)
3. Squeeze out a small amount of fabric paint onto a paper plate.
4. Pounce or use a stencil brush to dab paint over the stencil. For more colorful letters, use yellow on one side and orange on the other. Let the colors overlap in the middle.
5. Remove stencil. Allow the fabric paint to dry.
6. Arrange and pin silk leaves onto garden flag.
7. Stitch leaves onto the flag along the “veins”.
8. Trim the excess threads off the flag.
9. Lay flag out on a flat surface.
10. Paint on glittery curly trails to simulate the path of a falling leaf.
When the flag is dry, thread it onto a garden flag stand and place it by your entryway. At the end of the season, store the flag flat to keep it looking fresh for many years to come.
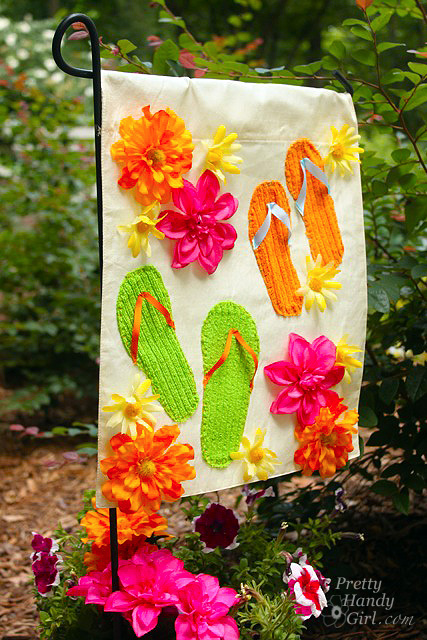
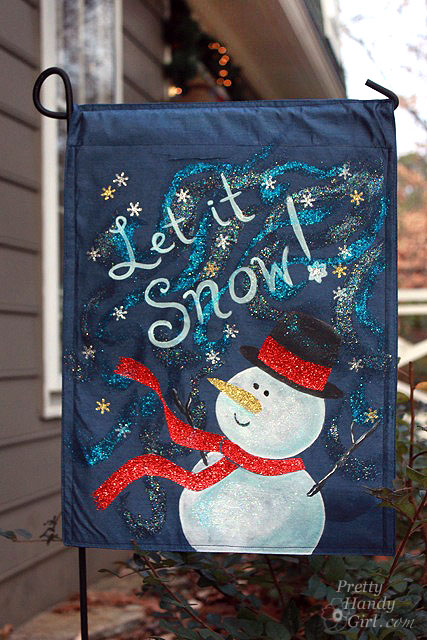
If you liked this tutorial you may like my other garden flag tutorials:
https://prettyhandygirl.com/wp-content/uploads/2017/09/fall-garden-flag-pumpkin.jpg730480Brittany Baileyhttps://prettyhandygirl.com/wp-content/uploads/2021/07/PHG-logo-tagline-2020-1030x211-R.jpgBrittany Bailey2018-08-10 07:00:032018-08-02 14:59:08Fall Leaves Garden Flag using a Dollar Store Placemat

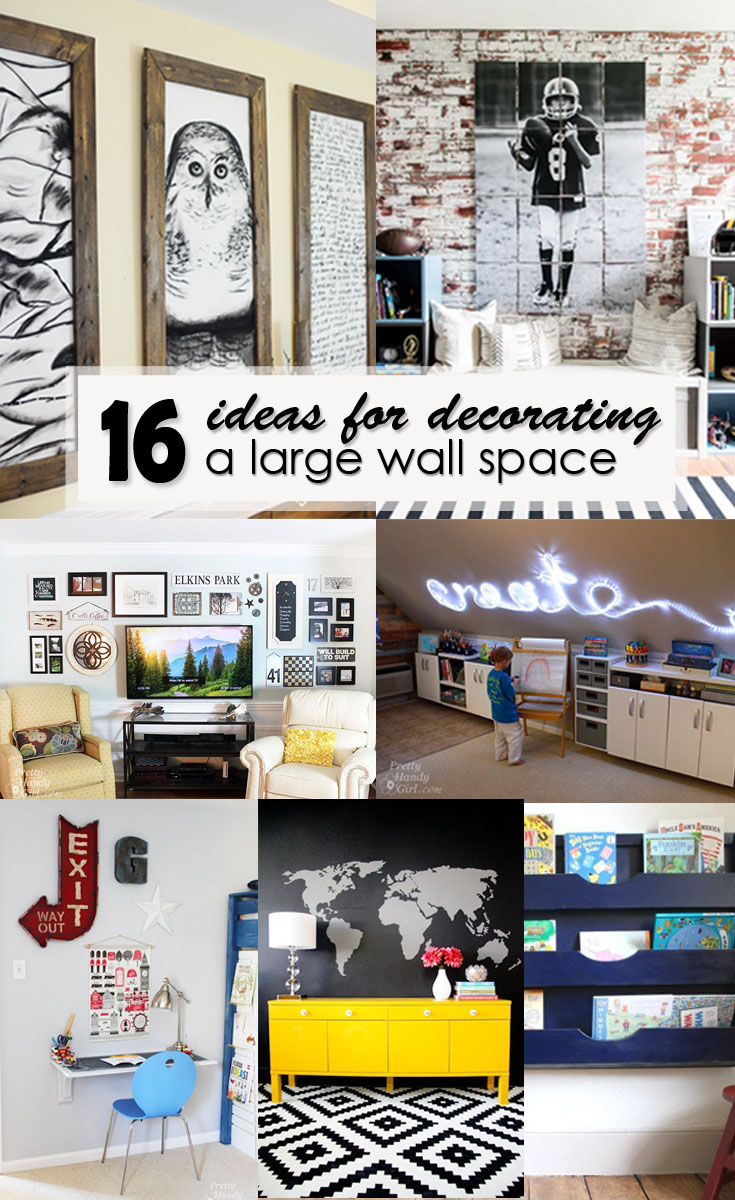 16 Ideas for Decorating a Large Wall Space
 Paint over an old piece of artwork and use the canvas to create a modern piece of art for your home.
 Build a large Bookrack that will take up a lot of space and keep your books organized.
 Add a large shelf that is customized, it’s not only functional but a work of art as well.
 Use blank wall space to build a wall-mounted desk for a great art or work station.
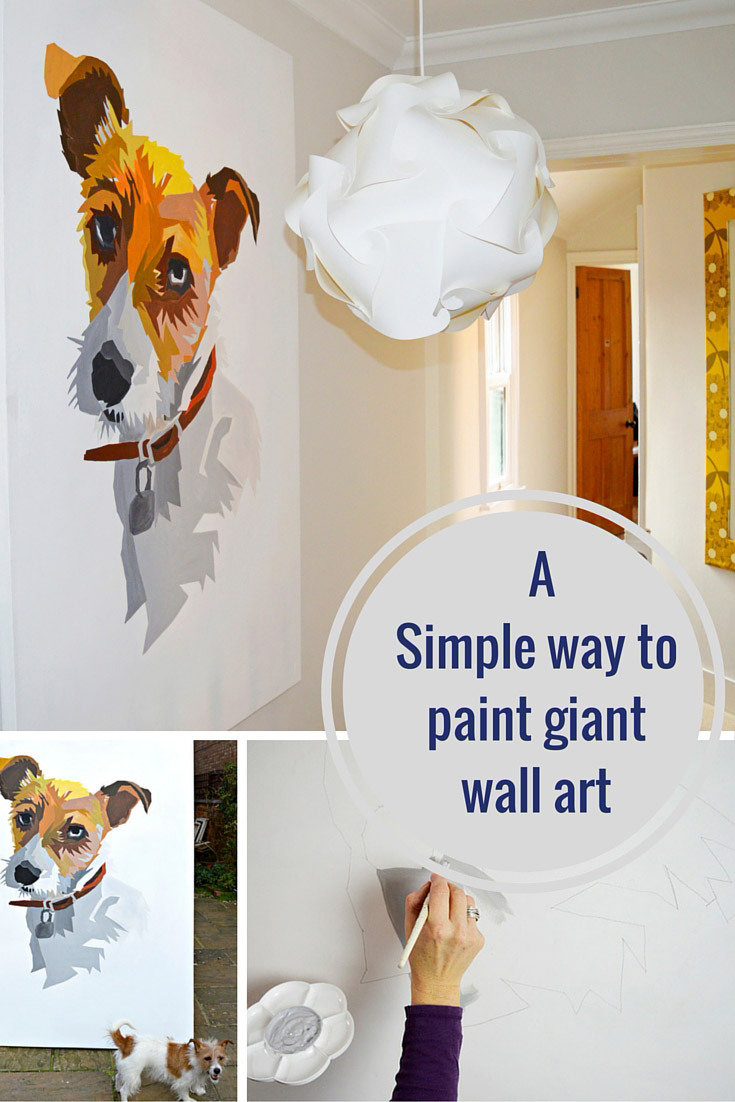 Learn how to paint your own Giant Wall Art.
 Build a large chalkboard with a ledge for all your supplies and hang it on your blank wall.
 Use rope lighting to make a bright and creative word art display.
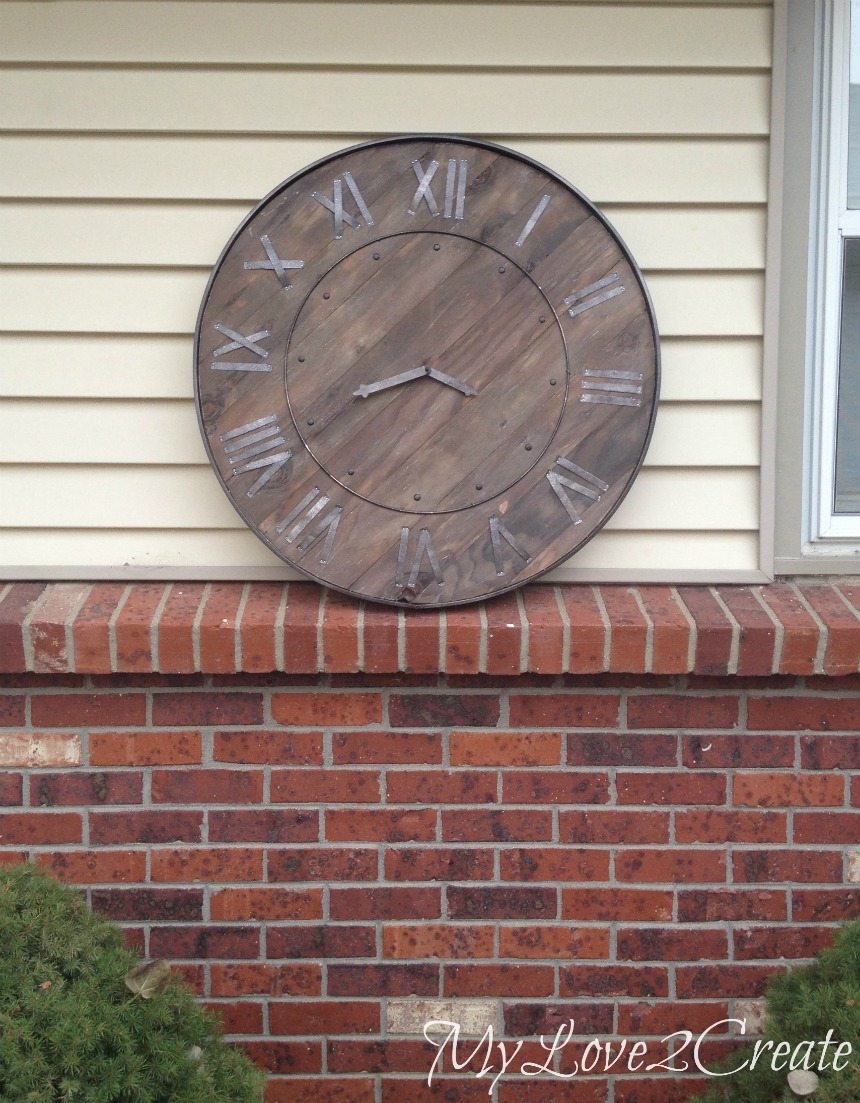 Build a large wall clock to take up space on a large wall.
 Use a Flow Wall system to create the perfect storage station in any room that needs it.
 Cover the wall in chalkboard paint and use it to write down whatever your family needs.
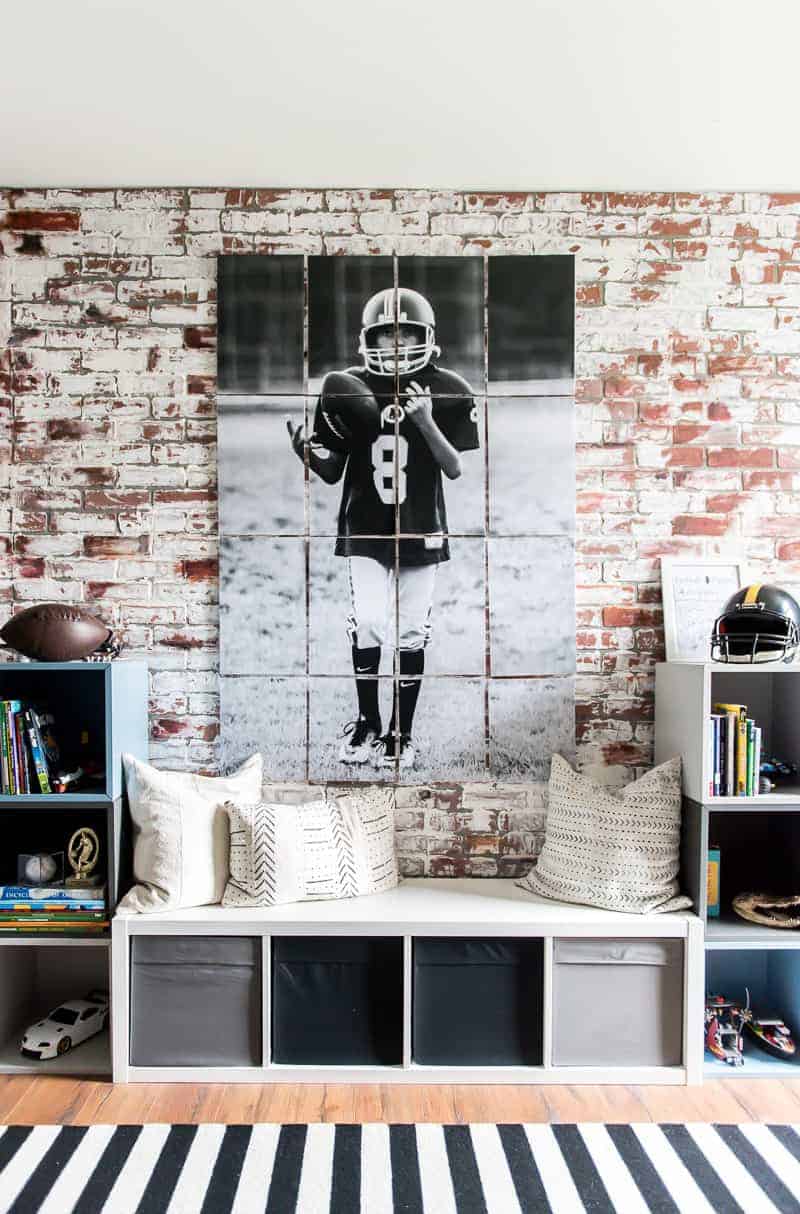 Use a photo printed on multiple pages to create this gorgeous large photo collage.
 Learn how to create the perfect gallery wall of photos, decor and memorabilia.
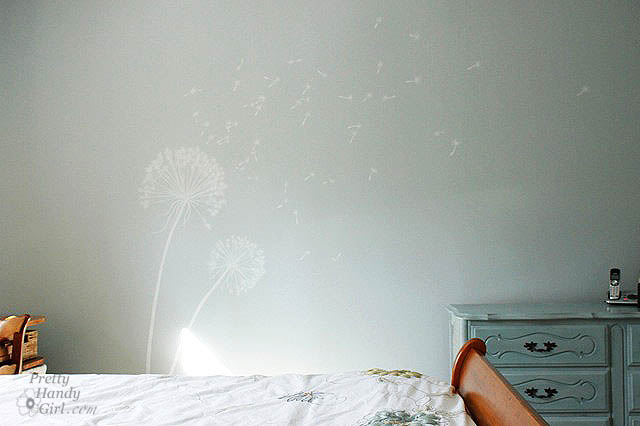 Paint a large image onto the wall to add character.
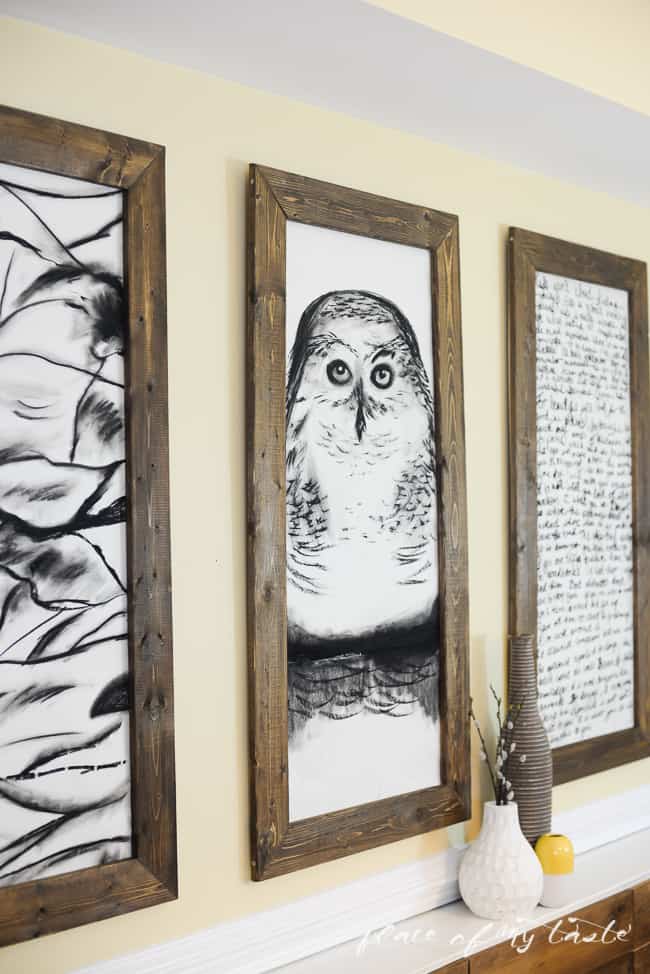 Build large frames and use multiple large canvases to build this great collage.
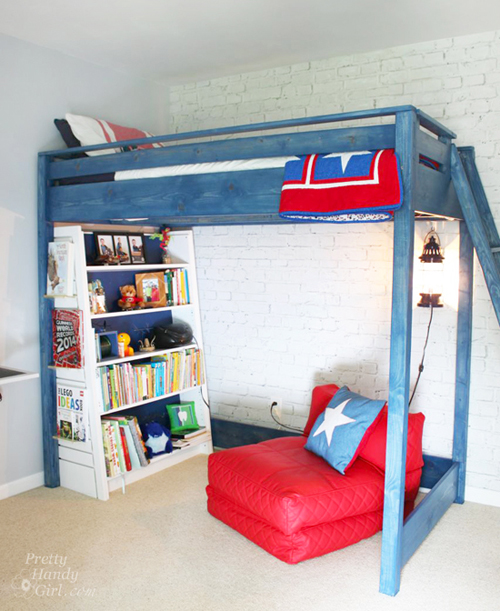 Install a brick wallpaper mural to add awesome character to any wall.
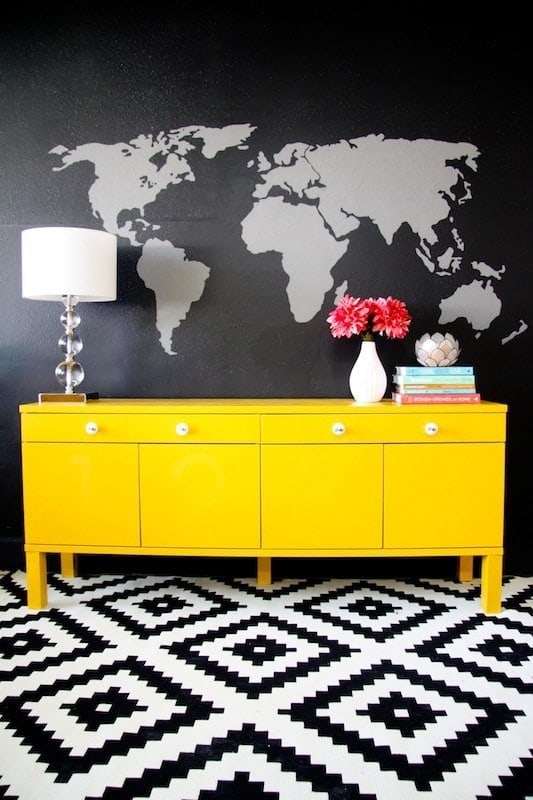 Paint a map wall mural that looks awesome and modern!