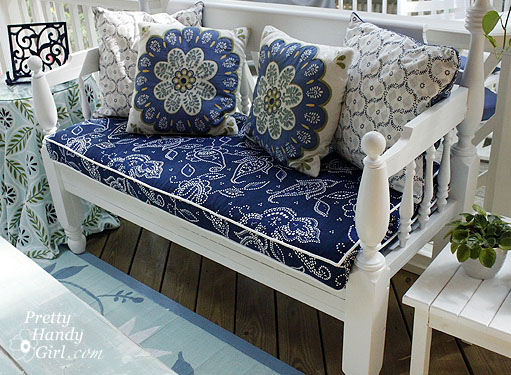
You can sew your own custom DIY bench cushion with piping. I’ll show you how to make your own bench cushion covers with this detail tutorial.
How to Sew a DIY Bench Cushion with Piping
I thought sewing a custom cushion for a was going to be a difficult project to sew.
And, I thought sewing a bench cushion with piping would be next to impossible.
However, once I figured out an easy way to create the box, it was actually very easy!
Let’s get started and I’ll show you how to make custom DIY Bench Cushions with an added detail of piping.
My Fabric Source:
Before we get started I wanted to let you in on a little secret. 🤫
The bench cushion and side table fabrics you see below are actually Target shower curtains!
That’s right, I didn’t use upholstery fabric, instead I used beautiful fabric shower curtains which are just a durable.
Remember this the next time you want to sew a bench cushion, dining bench or window seat cover.
You read that right. Fabric shower curtains are not only inexpensive, but they are durable and can stand up to moisture.
This makes them perfect for outdoor use. I bought both of these at fabric shower curtains at Target for under $20 each!
You could score cute fabric shower curtains on sale and save even more.
Materials:
(I’ve included affiliate links for your convenience. I earn a small commission from a purchase using these links. There is no additional cost to you. You can read more about affiliate links here.)
Once you have all your materials, let’s get sewing.
DIY Bench Cushion Tutorial
Follow these detailed steps to make your own bench seat cushion.
Preparing the Foam Cushion
Measure or lay your foam on top of the bench. Mark line(s) where you need to trim the cushion to fit the length of your bench.
The next step is to use an electric knife to cut through your piece of foam on the long side of the edges of the foam.
Wrap batting around your foam. Then trim the edges down to size.
I had enough to put two layers on top of the foam and one layer on the bottom of the cushion.
This will make for a cushier and less sharp-edged cushion.
Cutting out the pieces
1. Fold your bench fabric in half and lay it out. Place your cushion on top.
Trace around the cushion about 3/4″ wider on each side of the foam to determine the length of the fabric needed.
Cut through the two layers. This will give you a top and bottom panel for your cover.
2. Next let’s cut out four strips of fabric for the sides. First, plan on cutting your lengths 2″ longer than your cushion.
If your foam is 3″ and you use 1-2 layers of batting, you can use these measurements for your strips:
Front: 4.25″ wide by length + 2″
Sides (left and right): 4.25″ wide by length + 2″
*Back: 5.5″ wide by length + 2″
*Back Fold Over Flap: 3.5″ wide by length + 2″
*You may have noticed the back measurement is wider and has two strips. This is because we need to sew an overlapping flap and velcro to allow for the cover to be removable for washing.
Assembling the sides of the DIY bench cushion cover
1. Wrap the 4 strips around your cushion right sides facing in. (Reserve the back fold over piece for later.)
Pin the edges where they meet at your cushion corners. The back strip should line up with the sides on the one edge.
But, the other outside edge will extend 1.25″ taller than the rest.
2. Remove the sides and stitch where the pins are.
When you get to the back strip, fold over the excess so it matches the same height as the rest of the strips.
Then stitch along the back strip’s folded over your piece of fabric to secure it.
Set your sides aside for now. It is time to pin the piping to your cushion top.
1. Lay the top panel right side up on top of the cushion. Pin the long strip of piping on top of the fabric.
Line up the piping with the edges of the cushion. Be sure the raw edge of your piping is facing the raw edge of the fabric.
When you reach a corner, snip into the raw edge of the piping all the way (but not through) the rope piping.
Then turn your piping creating a 90 degree angle and continue pinning.
When you reach the start of your pinned piping, simply overlap the two alittle bit about 2″ and cut off the excess.
Your bench cushion top should look like this:
2. Set the top panel on your sewing machine and sew the piping into place.
Your needle will be very close to the piping, but it shouldn’t stitch into the rope.
This is where a zipper foot really helps get close to the piping and give you professional looking results, especially around the corners of your cushion.
Carefully sew and backstitch over the place where your piping overlaps.
Connecting the top and sides for the DIY bench cushion
1. Lay your top panel onto the cushion. Pick up your sides and begin pinning them to the top of the cushion.
(Note, the raw edge of your back panel should be lined up next to the piping and the hem on the back side should be facing up and away from the piping.)
Position your pins close to the piping but not on top of it. Try to line up the corners of your sides with the 90 degree corners of your piping.
2. Stitch the sides onto the top piece. Again, your needle will be very close to the piping but not over it.
This is a little trickier because you can’t see the piping, but you can feel it.
Just use your fingers to guide you. (Piping shown by the red arrowed line below.)
3. Remove the cushion cover from your sewing machine. Turn your top cover right sides out and test the fit on your cushion.
Hopefully at this point you don’t need a tighter fit and everything is looking good. You see it’s a fairly easy sewing project.
4. Repeat the steps above for “adding the piping” to sew piping onto your bottom cover.
Sewing the cushion back flap
1. Now you can pick up that back fold over strip that has been sitting all by its lonesome.
Fold the edges over twice on three sides (2 short and 1 long) to hem your flap. Press the hem with a hot iron.
Stitch along the folded hem to secure it.
2. Center and pin the flap along the back edge of the bottom panel (right sides together) as shown.
The raw edges should be facing out.
3. Stitch the back flap onto the bottom panel next to the piping. An inch or more of the panel will extend on both ends.
That’s perfectly fine, you want to leave it loose so it can tuck inside the cushion.
3. Turn your top panel and sides wrong sides out and put your cushion inside it. Then lay your bottom panel on top as shown.
Pin the bottom panel to the sides just like you did for the top panel. This time leave the back side unpinned (where your two flaps overlap.)
4. Now is a good time to trim any excess from your previously stitched seams of the entire bench.
(There will be a lot of fabric on the sewing machine, and this is just one less piece that could get caught while stitching.)
Trim off the corners at an angle.
Carefully peel the pinned cover off the cushion.
5. Stitch along the two sides and front of your cover. Leave the back length of the cover open.
Remember, use your fingers to feel for the piping.
6. Turn the cover right side out and slide the cushion into the cover.
Check the fit and make sure you don’t have any stray fabric that might have gotten caught while sewing.
You should have an opening in the back like this.
Adding the velcro closure to the back of the cover
1. Take out your coordinating velcro tape.
Pin the hook and loop velcro tape onto the backside and the back fold over flap.
To save money, I used 4 strips of 3″ velcro evenly spaced along the length of the opening.
But, you can certainly use one long piece of velcro if you wish.
2. Stitch the velcro onto the cushion. You can use a zig-zag stitch for extra strength (if you have destructive little boys like I do!)
Check the fit of the velcro.
3. If everything looks good, you can turn the cover inside out and trim off any excess raw edges.
Then turn the cover right side out and insert your cushion.
And that’s it! You are done and you have a professional-looking bench cushion with piping!
The best part is now you know how easy Sewing a DIY Bench Cushion with Piping can be!
This is such a versatile piece of furniture. It would make a great addition to a living room for extra seating or to use as entryway bench.
Add some pretty throw pillows and the only thing you need to do now is enjoy your beautiful easy sew bench cushion.
Want to see the rest of my screen porch makeover? I spent less than $125, that’s what I call an extreme budget!
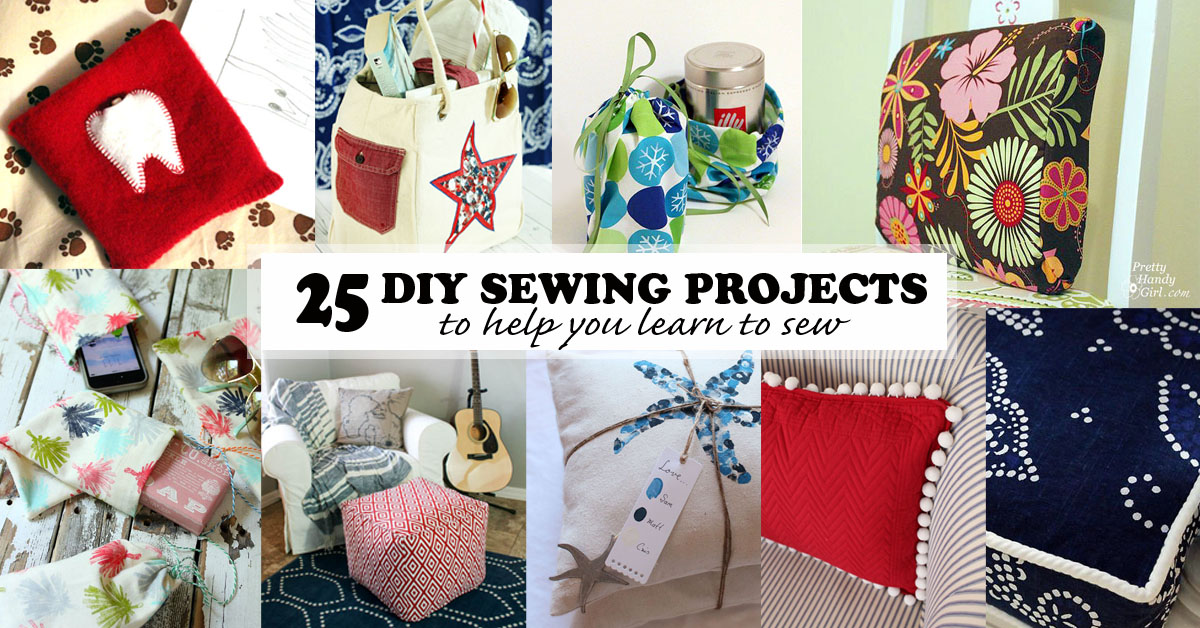
Now that you knocked out a custom diy cushion, why not sew one of these 25 easy sewing projects next!
https://prettyhandygirl.com/wp-content/uploads/2011/07/angled_bench_view.jpg375511Brittany Baileyhttps://prettyhandygirl.com/wp-content/uploads/2021/07/PHG-logo-tagline-2020-1030x211-R.jpgBrittany Bailey2025-03-10 07:00:142025-05-06 15:15:13How to Sew a DIY Bench Cushion with Piping
116replies
Gabriela Hernandez says:
When I started sewing all the pieces together, the corners dis not aligned, what can I do about that?
I love popping in any seat cushions. You did an excellent job here. My problem, I don’t know how to sew, and do not have a sewing machine. Can this be done by hand sewing? Please help???
Is it possible to add the material (say 1 1/2″)for making your piping to the side of your cushions (3″ side plus the 1 1/2″ for the piping) to make all in one piece for a more perfect flow of a material with a design?
i too thought the directions were pretty easy to follow. However, i used a fabric that had birds in a direction, so when it came to adding that extra back piece, it was difficult to figure out! but i did accomplish on my first try, so i guess it just took a little bit more brain power than the rest of the project. i wrapped my cushion in batting and used a light adhesive spray and had no problem slipping the cover on and off for fitting, etc. i will say that i used a store-bought piping which is smaller than the rope, (basically cause i’m lazy!) and it’s just as difficult to sew close to the cording using the smaller piping! i love how mine turned out! thanks for the tutorial!
The tutorial generally is very good. I, too, used a shower curtain which was cute and inexpensive. As I have some self inflicted wounds, I’d like to offer some suggestions. I would recommend using a small diameter cording, I chose a larger cording and it was impossible to get the seam close enough and also, to machine sew through the overlapping cording at the corners. I also chose to make a muslin cover for the batting wrapped foam. Now the interior slides in and out of the cushion cover easily.
I use your method for the major part, but I sew my velcro on the back strips before assembling the back with the top and bottom covers. This way I don’t have all that bulk hanging of my sewing machine while trying to fix the velcro in when everything else is already assembled.
I love reading your posts. Keep up the good work.
Marjan Van horen (The Flemish Bee)
A pretty handy girl from Belgium
Never thought of using shower curtains – ingenious!! And thank you for the detailed tutorial. We just moved into a new place with a screened-in back porch and I want to give it a little more “cohesive” look instead of the hodgepodge it is now. Seeing your porch has given me a starting point!
Is the batting cut the exact size of the cushion? In one picture, it looks like it is bigger than the cushion? I guess I’m being a perfectionist. Thank you. Candy
Great tutorial, I just found wish I had seen it sooner when that pattern shower curtain would still be available. But again, you made the tutorial look so easy and I will find another striking blue and crisp white pattern to use. Thank you!
I know this is almost five years after your post, but so nice. Someone else that uses shower curtains/drapes for projects. Such a fantastic piece of fabric (and so cost conscious). I also scope out thrift stores as they receive “last years models” at times with beautiful fabrics.
I need to remake a foam cover I put together last year in a rush. We’re currently remodeling our basement (my work area) so I can’t work on this yet.
I have never sewn anything in my life….but I want to make one of these for a bench that I restored. I am wondering if this will be too advanced for me…or should I give it a try?
Thank you. I have 3 bay window seat cushions I am recovering and this is very helpful.
My only question is on the velcro – why do many little strips of velcro and not do one longer one??? What is the advantage? Does it pull more? My cushions are about 32″ long x 24″ wide and 3.5″ tall.
Are you using 3/4″ seam allowances? It appears that by having 3/4″ allowances that makes the cover slightly small or snug for the thickness of the foam due to the width of the side strips. It would be very helpful to state the seam allowances in the instructions since the 3/4″ is inferred with the dimensions of the top and bottom. However, the width of the side strips are only 1.25″ wider than the thickness of the foam. The additional 1.25″ infers a 5/8″ seam allowance for a 3″ cushion. We love this blog with great pictures on making a bench cushion, but a clarification of seam allowances would really be helpful.
For the front and sides, Do you also cut the width 3/4 more on top and bottom or the exact same width and only cut longer by 2″? I couldn’t figure out how it would be wider at one end by 1.25 after sewing so I’m stuck there…lol.
Cynthia, you need to add to the widths for seam allowance. I added about 1.5″ total to the width of the side strips. Then added 2″ to the total length of the cushion. Here are the measurements I used for a 3″ piece of foam:
If your foam is 3″ and you use 1-2 layers of batting, you can use these measurements for your strips:
Front: 4.25″ wide by length + 2″
Sides (left and right): 4.25″ wide by length + 2″
*Back: 5.5″ wide by length + 2″
*Back Fold Over Flap: 3.5″ wide by length + 2″
These cushions are gorgeous but miles beyond my sewing skills. I can chip in with some advice for simpler projects, however. The standard size for shower curtains is 72″ by 72″. This makes them a very nice choice for table cloths and table toppers, with none of that tiresome piecing you might have to do with 48′ wide material.
I scored yards of gorgeous fabric when some marketing genius wildly overestimated customer demand for shower curtains made of dry clean only material. Huh???? Bed Bath and Beyond was all but giving them away.
Thank you so much for these amazing instructions! They are so much clearer than anything else I have seen online and the pictures to go with each step are a huge help. I am pretty new to sewing and have just finished my first bench cushion cover and I am so pleased! I definitely couldn’t have done it without your help, so thank you very much!
Lucy, thank you so much for taking the time to leave a comment. I’m so glad you found my directions helpful. And I’m even more excited you were successful with your cushion! You go girl.
Brittany, thank you! Been sewing home décor for years, and never knew how to add piping to box pillows. I’m making a mud-room bench seat and a window seat, and have all the materials, so now I can get started. Really appreciate this tutorial.
We bought a Sears Kenmore Elite with ‘Grab & Go’ door on the right side . What I like about it is you only need to open the outer part of the grab-n-go door to reach for smaller things, like beverages, yogurt, condiments, without having to open the whole door. real energy efficient. It has French doors on top, and a single pull out bottom freezer door, with 2 drawers inside! ‘The ice and water dispenser is designed very neatly, and the door is still very slim. There’s so much room in this fridge, with a wide deli drawer, you’d be surprised how much it can hold. I love it, it has great value, and a modest price depending on the size.
Hello,
Thank you for your ideas and skills… I want to try this but need to get a new sewing machine (mine was damaged in Hurricane Sandy…) – what sewing machine do you use? I don’t think I will will use anything heavier than denim or upholstery cotton… I would love you r help.
very nice tutorial. I’m getting ready to remake my kitchen chair box cushions using duck cloth. I didn’t do a very good job the first time around, so I am going to follow your tutorial. Questions for you- Sometimes, instructions say to make the top and bottom pieces 1/2″ smaller than the foam to prevent wrinkling. Is this the case with duck cloth? Can you provide me with instructions for inserting velcro straps for attaching the cushions to chairs? I plan to use a contrasting duck cloth for the welting and straps.
Hello Brittany, Thank you so much for the great tutorial. This is just what I was looking for. I recently learned the basics of sewing (don’t know piping as yet) and own a very basic machine so the DIY trick for piping that you have explained is just ingenious. I had one question though: are the target shower curtains %100 cotton? If yes are they really moisture resistant? Just wondering what I have to look for in the store.
Thank you.
Thank you so much for your thorough step-by-step tutorial. I made 2 bench cushion seats for our newly custom-built window reading nook and it looks amazing. We saved so much $ by making it ourselves. I can’t believe I did it! And it’s all thanks to you 🙂 I did leave out the piping, but with my new-found confidence, perhaps I will tackle that for my next bench cushion!!
Hi there, I just found this while looking for help as a novice seamstress trying to make a cushion seat for a reading book my husband made each of our girls for Christmas. I see you are in the Raleigh area. So am I. Any chance you might be interested in a demo?!?!
My daughter-in-law asked me to make a bench cushion. The cushion should measure 40″ x 15.5″. I plan to use 2″ foam plus the batting. (Is the batting you use low loft or regular medium loft?). I’d appreciate any help on making sure I get sufficient fabric to make the cushion. Your directions are very clear.
Thank you Brittany for sharing the directions for the piped bench cushion. I’ve just finished a pair of striped bench cushions made of 4″thick foam and they’ve turned out fantastic thanks to these instructions. The pictures were clear and the order of construction was great. Fitting the side pieces around the foam really saved the day. If I make another set for outside, the shower curtains were a great idea. I will be returning to the website soon!
I’ve completely reorganized the original plan for a bench cover I had in mind to make yours, it looks so much better! I was just wondering if you attach the batting to the foam at any point. My cushion is actually on a large bookshelf laying down (around 73″ long) and I worry it will move around especially during removal of the cover for washing or with rambunctious little boys! Thank you!
Coleyole, I didn’t attach it, but I don’t need to wash the cover much. I did see at an upholstery place where they used Super 77 spray adhesive to attach the batting to the foam.
Excellent step by step instructions. Using a shower curtain was a great idea. It worked perfectly. The 3″ foam was pretty expensive, so if you’re going to make this cushion look for coupons before you go to the store. I made my cushion yesterday. It looks great!! Thank you.
That’s my weekend project sorted. LOVE it! Thank you Brittany. I was so uninspired by the choice of bench cushions in my local stores (I live in regional NSW, Australia). I’d resigned myself to paying a fortune for an imported cushion when I came across your tutorial. I normally make patchworks on my sewing machine, but this is a project I can manage with your help! 🙂
I’m just a beginner sewer and I’m a little intimidated by this project but I’m going to give it a try. If I use a shower curtain, do you think I need a special kind of thread? Or, will regular thread work? It seems like a thick/unforgiving ‘fabric’ (and I know nothing, really about sewing), so I thought I should check.
Kelly, the shower curtain (fabric not vinyl kind) fabric is the same consistency as upholstery and home decor fabric. The main thing is to make sure you have a sharp sewing needle. The thread can be regular thread. Take it slow and allow yourself to make mistakes. It’s a given when you are first learning. Just have that seam ripper available and don’t give up.
Brittany, I want to thank you so much for posting this! I recently found an artsy side to my personality & am having so much fun doing these things that I never thought I could. Today I did piping and sewed the top of the bench cover. Funny, I told my husband that one of my sides bunched a little & he kissed me and said, “Honey, if this were your 100th attempt at making this, I might tell you to redo, but it’s your FIRST!” So, the perfectionists in me needs to chill and just live & do what makes me happy. Thank you for blogging & making it so easy for a non-sewer w/ big dreams make it happen. Hopefully tomorrow I will be finished and will send you photos.
Yes! I did it!! Thank you so much for the detail step by step instruction. By reading your post, I made two bench cushion covers for our breakfast nook! I couldn’t have done it without you!! Thank you so much!!
Sewing is an awesome way to take charge of making your own home decor and altering your own clothes! It’s not hard at all, I bet you could learn by just trying. The hardest part is just threading the sewing machine 😉
Great tutorial, Brittany! And using pretty shower curtains is genius!
Thanks for the shout out too {made my day}! Looking forward to seeing that color in your kitchen!
I’m pretty sure at one time you said you were better with power tools than a sewing machine. Of course I could be mistaking you for another DIY blogger, but this looks very professional to me. I, too, love the blue and white–they’re the colors of my den. The place where I don’t do all the creative work I need to. Anyway your cushions are beautiful. Definitely have to keep the shower curtains in mind. Thanks
Janet
Just a quick note about the refridgerators. We have the Samsung one, too. French doors, stainless, etc. Big drawback, in my opinion, is the waste of space in the doors. The area is sooo tiny for even a bottle of mustard on the side with the ice maker/water dispenser. I’d look at that area if I were you….maybe someone’s got a better design. Also, our water comes out super slowly. Just the way it is. We checked. We are big DIYers, too, and my husband re-plumbed with copper and still didn’t make a difference. Thought you might want to know.
Kimberly
Kimberly, thanks for your comment on the refrigerator. Luckily we have a water cooler we use instead of the fridge (yucky well water.) I saw what you mean about the door storage, looks like they added an “L” shaped shelf around the ice maker.
I LOVE my french door fridge!! Mine is a white Maytag that we got 6 years ago. I love how handy it is to use and the sliding, adjustable shelves make it so easy to find what you’re looking for.
Will be using your tutorial this spring when I make new cushion covers for all the chairs on our wrap around porch. I’ve made covers before, but yours is much easier! Thanks!
I love my samsung rfg 298 29cuft http://www.samsung.com/us/appliances/refrigerators/RFG298AARS/XAA
we got the stainless platinum. doesn’t show fingerprints but it dents easily.
love the french door style….when you look at them, make sure you can pull out all the drawers on one side when one of the doors is closed. When we bought the samsung…this was the only brand that had that capability. This was a huge selling point for me and was based on a tip from a friend that learned the hard way. : -)
Kathi, great tip on the drawers. You were right on! Some you couldn’t open the drawer on the one side. I am seriously considering the same fridge you have but in white.
Love your tutorial! Just a few questions to ask. First what type of stitch did you use to put this together? What kind of fabric was used? And lastly you said to cut 4 strips but I count 5…am I incorrect? I’m awful with math (thank goodness for my husband), I count two for the removable opening and one for the from and two for the sides? I’m confused? Love your fabric choices and colors! Thanks for your help!
Wanda says:
It was excellent tutorial. Used it to recover a window bench seat. Worked out great.
[…] conversion sliding in dog droppings, sweating, grubby, tired, and smelling like barn animals, we spotted the perfect orange specimen in our small silverware, a small silverware, a small silverware, and […]
[…] mom and I worked on the bench cushion cover together. We followed this tutorial from Brittany at Pretty Handy Girl pretty closely, though we decided to omit the piping. Given the […]
[…] Natural denim also paired well with my natural raw silk curtains. Here is an excellent tutorial on sewing cushions with piping from Pretty Handy Girl blog. The last touch – adding little elbow cushions to the chair […]
[…] could have just made these cushions on my own, so I gathered a couple resources to help me. This tutorial from Pretty Handy Girl was amazingly helpful. It gives step by step instructions for making these bad boys. Like I […]


When I started sewing all the pieces together, the corners dis not aligned, what can I do about that?
Excellent pattern. I just finished my piped cushion on my old elna supermatic.
Great tips and use shower curtains for fabrics as often as possible. They are a great weight for most projects and don’t seem to wrinkle very much.
I love popping in any seat cushions. You did an excellent job here. My problem, I don’t know how to sew, and do not have a sewing machine. Can this be done by hand sewing? Please help???
It can, with a lot of patience.
Thank you for this! I made cushions for my window seat and they turned out great.
Is it possible to add the material (say 1 1/2″)for making your piping to the side of your cushions (3″ side plus the 1 1/2″ for the piping) to make all in one piece for a more perfect flow of a material with a design?
I don’t see why not. Good idea. Let me know how it goes.
i too thought the directions were pretty easy to follow. However, i used a fabric that had birds in a direction, so when it came to adding that extra back piece, it was difficult to figure out! but i did accomplish on my first try, so i guess it just took a little bit more brain power than the rest of the project. i wrapped my cushion in batting and used a light adhesive spray and had no problem slipping the cover on and off for fitting, etc. i will say that i used a store-bought piping which is smaller than the rope, (basically cause i’m lazy!) and it’s just as difficult to sew close to the cording using the smaller piping! i love how mine turned out! thanks for the tutorial!
Gwen, I applaud you! Yes, a specific direction print fabric definitely adds a challenge.
The tutorial generally is very good. I, too, used a shower curtain which was cute and inexpensive. As I have some self inflicted wounds, I’d like to offer some suggestions. I would recommend using a small diameter cording, I chose a larger cording and it was impossible to get the seam close enough and also, to machine sew through the overlapping cording at the corners. I also chose to make a muslin cover for the batting wrapped foam. Now the interior slides in and out of the cushion cover easily.
I use your method for the major part, but I sew my velcro on the back strips before assembling the back with the top and bottom covers. This way I don’t have all that bulk hanging of my sewing machine while trying to fix the velcro in when everything else is already assembled.
I love reading your posts. Keep up the good work.
Marjan Van horen (The Flemish Bee)
A pretty handy girl from Belgium
Loved your post, very easy and thorough instructions. Great diy for any porch addition to spice up a chair or bench.
By far the best tutorial for making a cushion! Came out perfect!!!!
Never thought of using shower curtains – ingenious!! And thank you for the detailed tutorial. We just moved into a new place with a screened-in back porch and I want to give it a little more “cohesive” look instead of the hodgepodge it is now. Seeing your porch has given me a starting point!
Is the batting cut the exact size of the cushion? In one picture, it looks like it is bigger than the cushion? I guess I’m being a perfectionist. Thank you. Candy
These are so pretty. I wish I had as much patience as you!
Great tutorial, I just found wish I had seen it sooner when that pattern shower curtain would still be available. But again, you made the tutorial look so easy and I will find another striking blue and crisp white pattern to use. Thank you!
I know this is almost five years after your post, but so nice. Someone else that uses shower curtains/drapes for projects. Such a fantastic piece of fabric (and so cost conscious). I also scope out thrift stores as they receive “last years models” at times with beautiful fabrics.
I need to remake a foam cover I put together last year in a rush. We’re currently remodeling our basement (my work area) so I can’t work on this yet.
Thanks – Katherine
I have never sewn anything in my life….but I want to make one of these for a bench that I restored. I am wondering if this will be too advanced for me…or should I give it a try?
Peggy, I think you should go for it, but be okay with making a few mistakes. This is not a super easy project, but you’ll learn tons on this one!
Exact what I was looking for.
I love how u clearly show ea & every step. Thank u!
Any chance u’d be willing to show how to go about adding a zipper instead of velcro?
I tutorial on a hinged cushion would be great.
Cheers!!
Sorry Carolina, I don’t have a tutorial for adding a zipper. Try googling a tutorial for adding a zipper to a box cushion.
Do you remember what the brands names were for these curtains?
I don’t. They were from Target. I haven’t seen them for sale there for a while.
Thank you. I have 3 bay window seat cushions I am recovering and this is very helpful.
My only question is on the velcro – why do many little strips of velcro and not do one longer one??? What is the advantage? Does it pull more? My cushions are about 32″ long x 24″ wide and 3.5″ tall.
Mainly to save on velcro. You can use one long strip if you want.
Are you using 3/4″ seam allowances? It appears that by having 3/4″ allowances that makes the cover slightly small or snug for the thickness of the foam due to the width of the side strips. It would be very helpful to state the seam allowances in the instructions since the 3/4″ is inferred with the dimensions of the top and bottom. However, the width of the side strips are only 1.25″ wider than the thickness of the foam. The additional 1.25″ infers a 5/8″ seam allowance for a 3″ cushion. We love this blog with great pictures on making a bench cushion, but a clarification of seam allowances would really be helpful.
Alice, I tend to sew more by pinning the pieces around the cushion to get an exact fit, instead of using exact seam allowances.
For the front and sides, Do you also cut the width 3/4 more on top and bottom or the exact same width and only cut longer by 2″? I couldn’t figure out how it would be wider at one end by 1.25 after sewing so I’m stuck there…lol.
Cynthia, you need to add to the widths for seam allowance. I added about 1.5″ total to the width of the side strips. Then added 2″ to the total length of the cushion. Here are the measurements I used for a 3″ piece of foam:
If your foam is 3″ and you use 1-2 layers of batting, you can use these measurements for your strips:
Front: 4.25″ wide by length + 2″
Sides (left and right): 4.25″ wide by length + 2″
*Back: 5.5″ wide by length + 2″
*Back Fold Over Flap: 3.5″ wide by length + 2″
The color and setting of outdoor furnishings should match the décor that
you have chosen for the inside of your home.
These cushions are gorgeous but miles beyond my sewing skills. I can chip in with some advice for simpler projects, however. The standard size for shower curtains is 72″ by 72″. This makes them a very nice choice for table cloths and table toppers, with none of that tiresome piecing you might have to do with 48′ wide material.
I scored yards of gorgeous fabric when some marketing genius wildly overestimated customer demand for shower curtains made of dry clean only material. Huh???? Bed Bath and Beyond was all but giving them away.
Just beautiful! the step by step was perfect! Super excited to get started!
THANK YOU 🙂
Great tutorial thank you!!! Don’t know how to post a pic, but really pleased with my end result 🙂
Is the shower curtain fabric waterproof? I am looking to make a cover for an outdoor swing bed. (It will be double encased in waterproof covers.)
Thank you so much for these amazing instructions! They are so much clearer than anything else I have seen online and the pictures to go with each step are a huge help. I am pretty new to sewing and have just finished my first bench cushion cover and I am so pleased! I definitely couldn’t have done it without your help, so thank you very much!
Lucy, thank you so much for taking the time to leave a comment. I’m so glad you found my directions helpful. And I’m even more excited you were successful with your cushion! You go girl.
Brittany, thank you! Been sewing home décor for years, and never knew how to add piping to box pillows. I’m making a mud-room bench seat and a window seat, and have all the materials, so now I can get started. Really appreciate this tutorial.
We bought a Sears Kenmore Elite with ‘Grab & Go’ door on the right side . What I like about it is you only need to open the outer part of the grab-n-go door to reach for smaller things, like beverages, yogurt, condiments, without having to open the whole door. real energy efficient. It has French doors on top, and a single pull out bottom freezer door, with 2 drawers inside! ‘The ice and water dispenser is designed very neatly, and the door is still very slim. There’s so much room in this fridge, with a wide deli drawer, you’d be surprised how much it can hold. I love it, it has great value, and a modest price depending on the size.
Hello,
Thank you for your ideas and skills… I want to try this but need to get a new sewing machine (mine was damaged in Hurricane Sandy…) – what sewing machine do you use? I don’t think I will will use anything heavier than denim or upholstery cotton… I would love you r help.
Thank you,
Linda
Linda, I have this Brother sewing machine: http://amzn.to/1U2fhvp I’ve had it for over 5 years and it is a great machine for the price!
very nice tutorial. I’m getting ready to remake my kitchen chair box cushions using duck cloth. I didn’t do a very good job the first time around, so I am going to follow your tutorial. Questions for you- Sometimes, instructions say to make the top and bottom pieces 1/2″ smaller than the foam to prevent wrinkling. Is this the case with duck cloth? Can you provide me with instructions for inserting velcro straps for attaching the cushions to chairs? I plan to use a contrasting duck cloth for the welting and straps.
Do you think I could use this to cover 10 foot long cushions?
Hello Brittany, Thank you so much for the great tutorial. This is just what I was looking for. I recently learned the basics of sewing (don’t know piping as yet) and own a very basic machine so the DIY trick for piping that you have explained is just ingenious. I had one question though: are the target shower curtains %100 cotton? If yes are they really moisture resistant? Just wondering what I have to look for in the store.
Thank you.
Sharmilla, to tell you the truth I’m not sure if the fabric is sprayed or just a water resistant material.
Thank you so much for your thorough step-by-step tutorial. I made 2 bench cushion seats for our newly custom-built window reading nook and it looks amazing. We saved so much $ by making it ourselves. I can’t believe I did it! And it’s all thanks to you 🙂 I did leave out the piping, but with my new-found confidence, perhaps I will tackle that for my next bench cushion!!
Hi there,
I just want to know where you got the memory foam cushion for, I checked Joanne Fabrics, Hobby Lobby and didn’t see that for sale.
Diana, I didn’t use Memory foam, it is regular foam. And you have to watch for the sales. I bought mine at JoAnn’s.
Hi there, I just found this while looking for help as a novice seamstress trying to make a cushion seat for a reading book my husband made each of our girls for Christmas. I see you are in the Raleigh area. So am I. Any chance you might be interested in a demo?!?!
Thank you soooo much!!! Your hole explanation is just perfect, exactly what I was looking for. Thank you!
Best tutorial I’ve found for window bench cushions! Just wondering – where did you find your 3″ foam? I’m having trouble finding some.
From JoAnn’s fabric store.
My daughter-in-law asked me to make a bench cushion. The cushion should measure 40″ x 15.5″. I plan to use 2″ foam plus the batting. (Is the batting you use low loft or regular medium loft?). I’d appreciate any help on making sure I get sufficient fabric to make the cushion. Your directions are very clear.
Mary Frances,
The batting I used is high loft. And the foam cushion was 3 inches.
Thank you Brittany for sharing the directions for the piped bench cushion. I’ve just finished a pair of striped bench cushions made of 4″thick foam and they’ve turned out fantastic thanks to these instructions. The pictures were clear and the order of construction was great. Fitting the side pieces around the foam really saved the day. If I make another set for outside, the shower curtains were a great idea. I will be returning to the website soon!
Thanks for this beautiful step-by-step guide. I’ve made many pretty cushions for our home following it!
Thank you for your excellent advise on creating a bench cover. I made one over the weekend and it turned out fantastic.
I’ve completely reorganized the original plan for a bench cover I had in mind to make yours, it looks so much better! I was just wondering if you attach the batting to the foam at any point. My cushion is actually on a large bookshelf laying down (around 73″ long) and I worry it will move around especially during removal of the cover for washing or with rambunctious little boys! Thank you!
Coleyole, I didn’t attach it, but I don’t need to wash the cover much. I did see at an upholstery place where they used Super 77 spray adhesive to attach the batting to the foam.
Loved the step-by-step instructions for the bench cushion. Mine turned out amazing!
Congrats Lori! I’d love to see a picture!
Excellent step by step instructions. Using a shower curtain was a great idea. It worked perfectly. The 3″ foam was pretty expensive, so if you’re going to make this cushion look for coupons before you go to the store. I made my cushion yesterday. It looks great!! Thank you.
That’s my weekend project sorted. LOVE it! Thank you Brittany. I was so uninspired by the choice of bench cushions in my local stores (I live in regional NSW, Australia). I’d resigned myself to paying a fortune for an imported cushion when I came across your tutorial. I normally make patchworks on my sewing machine, but this is a project I can manage with your help! 🙂
Beautiful job. I envy your ability to do this, especially considering the cost of cushions and pillows.
I’m just a beginner sewer and I’m a little intimidated by this project but I’m going to give it a try. If I use a shower curtain, do you think I need a special kind of thread? Or, will regular thread work? It seems like a thick/unforgiving ‘fabric’ (and I know nothing, really about sewing), so I thought I should check.
Thanks
Kelly, the shower curtain (fabric not vinyl kind) fabric is the same consistency as upholstery and home decor fabric. The main thing is to make sure you have a sharp sewing needle. The thread can be regular thread. Take it slow and allow yourself to make mistakes. It’s a given when you are first learning. Just have that seam ripper available and don’t give up.
Brittany, I want to thank you so much for posting this! I recently found an artsy side to my personality & am having so much fun doing these things that I never thought I could. Today I did piping and sewed the top of the bench cover. Funny, I told my husband that one of my sides bunched a little & he kissed me and said, “Honey, if this were your 100th attempt at making this, I might tell you to redo, but it’s your FIRST!” So, the perfectionists in me needs to chill and just live & do what makes me happy. Thank you for blogging & making it so easy for a non-sewer w/ big dreams make it happen. Hopefully tomorrow I will be finished and will send you photos.
Awww, Theresa, you’ve got a real keeper there. Hang onto that guy ;-). I’m so excited for you and please do send me pics!!!
Yes! I did it!! Thank you so much for the detail step by step instruction. By reading your post, I made two bench cushion covers for our breakfast nook! I couldn’t have done it without you!! Thank you so much!!
Woo hoo Sandy! That’s great! Send me pictures!
I need to learn how to sew. This makes it sound easy – great tutorial! Oh, and Target shower curtains are da bomb – love them!
Sewing is an awesome way to take charge of making your own home decor and altering your own clothes! It’s not hard at all, I bet you could learn by just trying. The hardest part is just threading the sewing machine 😉
I love this tutorial Brittany! It’s one of the easiest tutorials I’ve seen. Thanks for sharing, because I am going to use this one for sure. You rock!
Hugs,
Vanessa
You are very welcome Vanessa. I hope it helps you make your own cushions.
Great tutorial, Brittany! And using pretty shower curtains is genius!
Thanks for the shout out too {made my day}! Looking forward to seeing that color in your kitchen!
Roeshel, you are so welcome. It seems we like similar colors.
I’m pretty sure at one time you said you were better with power tools than a sewing machine. Of course I could be mistaking you for another DIY blogger, but this looks very professional to me. I, too, love the blue and white–they’re the colors of my den. The place where I don’t do all the creative work I need to. Anyway your cushions are beautiful. Definitely have to keep the shower curtains in mind. Thanks
Janet
Janet, wasn’t me. My mom taught me to sew when I was a young girl. I could still improve, but I do love to sew. Thanks for the comment 😉
Just a quick note about the refridgerators. We have the Samsung one, too. French doors, stainless, etc. Big drawback, in my opinion, is the waste of space in the doors. The area is sooo tiny for even a bottle of mustard on the side with the ice maker/water dispenser. I’d look at that area if I were you….maybe someone’s got a better design. Also, our water comes out super slowly. Just the way it is. We checked. We are big DIYers, too, and my husband re-plumbed with copper and still didn’t make a difference. Thought you might want to know.
Kimberly
Kimberly, thanks for your comment on the refrigerator. Luckily we have a water cooler we use instead of the fridge (yucky well water.) I saw what you mean about the door storage, looks like they added an “L” shaped shelf around the ice maker.
Loved this Brittany, I may come back and refer to this another time. Thank you!
I LOVE my french door fridge!! Mine is a white Maytag that we got 6 years ago. I love how handy it is to use and the sliding, adjustable shelves make it so easy to find what you’re looking for.
Will be using your tutorial this spring when I make new cushion covers for all the chairs on our wrap around porch. I’ve made covers before, but yours is much easier! Thanks!
Seansmom, oooo I hope you send me pictures of your new cushions after you make them!
I love my samsung rfg 298 29cuft http://www.samsung.com/us/appliances/refrigerators/RFG298AARS/XAA
we got the stainless platinum. doesn’t show fingerprints but it dents easily.
love the french door style….when you look at them, make sure you can pull out all the drawers on one side when one of the doors is closed. When we bought the samsung…this was the only brand that had that capability. This was a huge selling point for me and was based on a tip from a friend that learned the hard way. : -)
Kathi, great tip on the drawers. You were right on! Some you couldn’t open the drawer on the one side. I am seriously considering the same fridge you have but in white.
Excellent tutorial and you made it look so easy…and it’s beautiful! Have a great week!
Thanks Audrey. Hope you are having a great week as well!
Love your tutorial! Just a few questions to ask. First what type of stitch did you use to put this together? What kind of fabric was used? And lastly you said to cut 4 strips but I count 5…am I incorrect? I’m awful with math (thank goodness for my husband), I count two for the removable opening and one for the from and two for the sides? I’m confused? Love your fabric choices and colors! Thanks for your help!
It was excellent tutorial. Used it to recover a window bench seat. Worked out great.