How to Trim a Sticking Door with a Power Planer
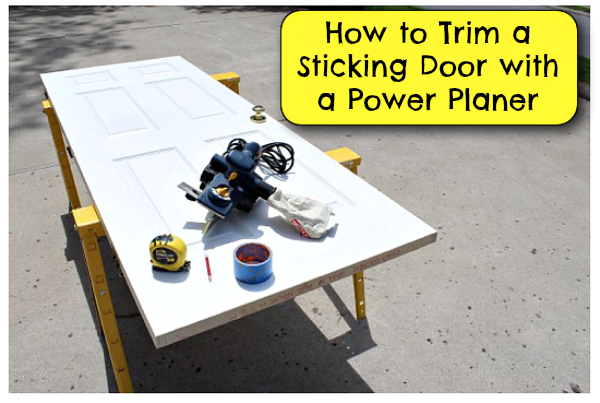 Doors that rub the floor or jamb are flat out annoying. This problem is typically fixed by tightening or shimming hinges. But sometimes the door just needs to be shaved down a tiny bit and this can be accomplished by using a power planer. The Ryobi planer used in this tutorial is cheaper than pair of Nikes. You can find a factory reconditioned one on Amazon for $35 (buying factory reconditioned tools is a great way to save a ton of money :-)).
Today you’ll learn how to trim the bottom or top of your door. It’s simple, straight forward, and will save you at least $50-$75 (the cost a carpenter or handyman would probably charge).
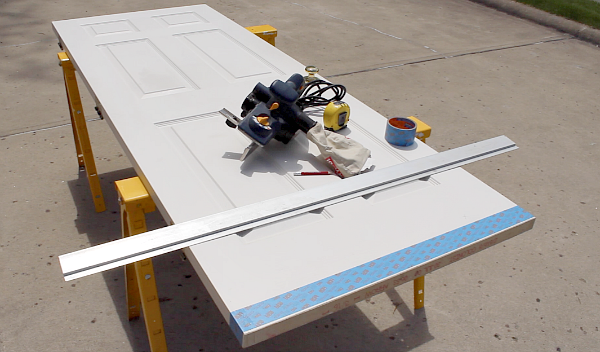
Here are the supplies you’ll need to trim any wood door (hollow or solid core):
- Measuring tape
- Pencil
- Blue painter’s tape
- Straight edge
- Clamps
- Saw horses
- Power planer
- Earplugs
- Dust mask
So let’s get to it!
Trim a Sticking Door with a Power Planer Instructions:
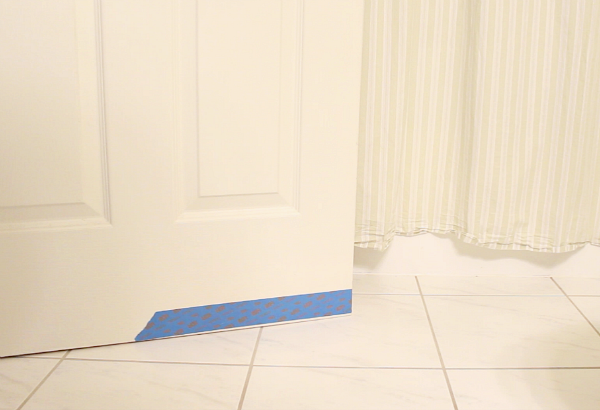
The first step is to mark the section of the door that’s rubbing against the floor or top of the door jamb. In my case the door was scraping the ceramic tile in our bathroom. Place a piece of tape on the section that needs planed.
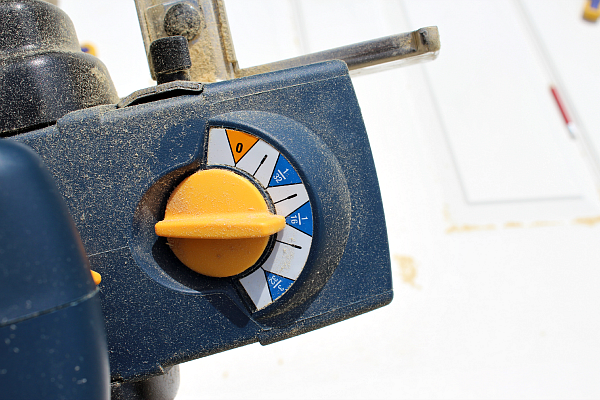
Then estimate how much of the door needs to be trimmed. The bottom of our door was just barely scraping the tile and I determined that 1/8 of an inch should be removed. If you have to trim less than 1/2 inch I suggest using a hand planer instead of a circular saw because you can adjust a planer’s depth of cut to as little as 1/64 of an inch. The picture below shows my setting was at 1/16 of an inch.
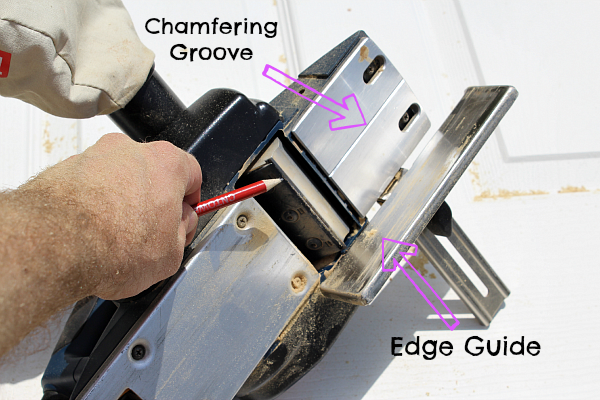
This Ryobi planer works via a small rotating blade. I’m pointing the red pencil at the blade in the picture below. Blades can be reversed, which is way cool and saves you money. The planer has two more features that help you trim doors: an edge guide and chamfering groove. The edge guide helps you smoothly move the planer along the door while applying even pressure. The chamfering groove in the center of the base allows you to ease the door’s edges so that it will close better. And although I don’t show you how to use this attribute it comes in handy when you have to plane your door’s vertical edges.
Remove the door from its hinges. Place your door on sawhorses and secure it with clamps. Check the bottom of the door for staples or nails. If the planer hits one of these you’ll ruin the blades and possibly hurt yourself. Make a mark 1/8 of an inch from the bottom of the door on both the left and right side. Use your straight edge to connect these two marks with a pencil. Place blue painter’s tape along this line on both sides of the door. The painter’s tape will prevent the planer’s edge guide from scratching up your door’s paint and splintering.
Now here’s where my tips will save you that “Oh CRUD!!” moment. Doors are more fragile than you think. If you plane the door from one end to the other you’ll likely see the door splinter apart. This isn’t terrible but certainly constitutes a pain in the rear end.
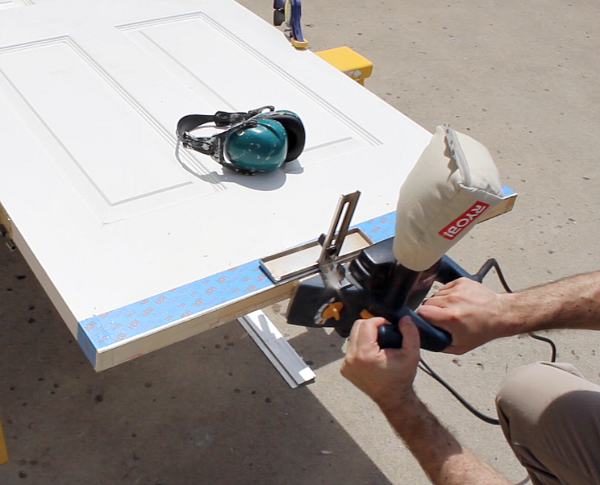
Plane the door from the outside edges to the center. Do this slowly and apply even pressure. There’s no rush and you want to take off small amounts at a time.
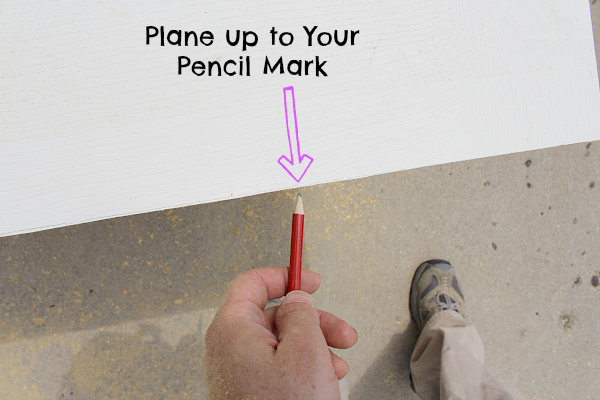
To preserve symmetry you can plane the front side of the door then flip it over. Make sure both sides of the door are planed evenly to keep the door symmetry intact. Plane up to your pencil mark so that you can see when you’re done.
Here’s the video showing exactly how to use the planer to trim down the bottom of your door:
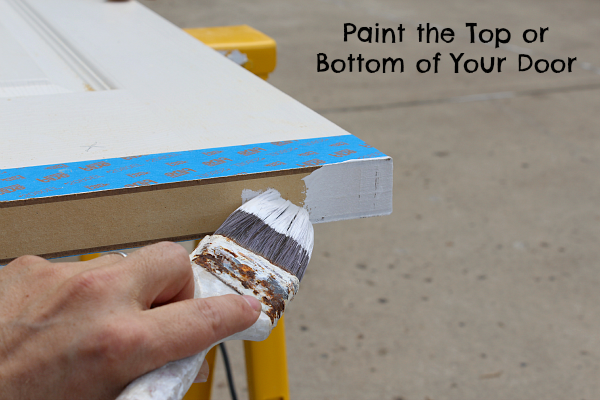
If you have to plane a bathroom door like me you should prime and paint the bottom and top. Why? Bare wood allows moisture to enter the door. Moisture will cause your door to swell and rub against floors or jambs. So taking this extra little step cause STOP huge problems.
That’s all there is to it. Planing a door is really easy if you have a power planer like this one. With a little patience and the supplies listed above you can solve any sticking door problem. You don’t need the help of a handyman, you can do it yourself!!
Got a question? Ask away in the comment section, I’m here to help 🙂 Make it a great day.



Hey guy’s,
Just wanted to say thanks for the awesome tutorial the video is going to make my job a little easier doing my mother in-laws bathroom door this weekend.
I think whoever hung the door in the first place, didn’t prime and paint the bottom or the top of the door so I’m assuming that’s what has caused this in the first place? Either way I would not have picked that up without your video so thanks.
Defiantly be making sure the door is primed and sealed this time round.
Cheers
Places like home depot also rent door planers, so I was able to rent a 150 dollar planet for 13 and I was more than happy with that as I won’t be needing it again. 🙂
if you at any time are job women, it could seem sensible
why it is vital to sustain your appears through your working hours.
Not finding rollers large enough, I used empty orange juice cans,
but first I applied a green jelly-like substance
called Dippity-Doo. Summer is the perfect season to spend relaxing
and having a good time as often as possible.
Do you think your cardbooard shim method will work for a door that is an 1/8″ too wide?
The door is too wide? Or the door frame? I guess it doesn’t hurt to try it.
Hello just stumbled upon your website from Google after I typed in, “How to Trim a Sticking Door with a Power Planer” or perhaps something similar (can’t quite remember exactly).
Anyhow, I’m glad I found it because your subject material
is exactly what I’m looking for (writing a
university paper) and I hope you don’t mind if I
collect some information from here and I will
of course credit you as the reference. Thanks for your time.
Thanks Gertie. Hope you get some use from the post. Let us know if that’s the case 🙂
Awesome tutorial! Perfect timing, we just moved into a new house and about half our doors are sticky. Thanks!
This is great! I’ve been wanting to fix our bedroom door for a while, just wasn’t sure how to do it, Thanks for the tutorial!
Thank you for this! WE are going crazy here with all these sticking doors. 🙂