Free printable moving checklist - the only checklist you'll need for a successful move

I am originally from the East Coast, moved to the West Coast, and now I’m back on the East Coast. That makes this the 2nd time I’ve officially moved cross country and I guess that makes me a bit of an expert at this point. Today I’ll share my FREE Printable Moving Checklist plus some essential tips for moving.

Free printable moving checklist - the only checklist you'll need for a successful move

Free Printable Moving Checklist plus Essential Tips

Hello, Everyone! This is Karen back with a freebie and some tips if you are getting ready to move. The past few weeks have been extremely busy for me – I moved cross-country! Needless to say—my life has been a little crazy lately.

Free Printable Moving Checklist:

I decided to put my knowledge down on paper with this free moving checklist for you. There is so much to remember when you’re moving, let alone moving to a whole new state, so I hope this checklist and these tips help you along your way.

1. Take a Few Days Off Work

While not possible for everyone, if you can take some time (even a few days) off work, it will be extremely helpful. It can be challenging to move and unpack while having to also keep up with work and jump on conference calls. Having a few days to solely focus on moving will be important for your sanity! If you can plan time off up against a weekend, that’s even better.

2. Get a Copy of Medical Records

This was a hard lesson learned for me. I thought it would be simple to get a copy of my children’s medical records via email! I was wrong! Due to HIPPA, you have to fill out forms and fax them or drop them off to your old doctor’s office. Then, it can take up to two weeks for medical records to be mailed to you.

In turn, this can make registering kids for school difficult as some states require children to have a health assessment before enrollment. And doctors’ offices often require medical records before they can provide a health assessment. Now you understand why it’s important to get your medical records before moving.

Plan ahead by getting a copy of your medical records a month or so before you leave.

3. Make Repairs to your Home Before Moving In

Home Repair book plumbing example

Moving is an exhausting process. After traveling, arriving at your new home, unpacking, and getting acquainted with your surroundings, the last thing you want to do is make repairs. Plus, it’s a great feeling unpacking and settling into a move-in ready home. If possible, get the seller to make the repairs. Or schedule a handyman (or handywoman) to make repairs before moving in. Finally, if you choose to DIY the repairs, know that there are a plethora of tutorials here on PrettyHandyGirl.com to help you fix it! (Here’s a link to electrical, plumbing, doors, and other home repairs.)

4. Get Window Coverings

(I’ve included affiliate links for your convenience. I earn a small percentage from a purchase using these links. There is no additional cost to you. You can read more about affiliate links here.)

Although often overlooked, making sure you have window coverings is kind of essential in my opinion. If you’re moving into a house that’s been lived in before, chances are blinds will be pre-installed. However, occasionally the sellers will take their curtains with them. This is especially true for new construction. Blinds are typically your responsibility to install. Make sure you’ve worked figured out if there will be window treatments or you need to provide them before moving – at least in the areas you need privacy or darkness for sleeping. Home Depot and Amazon sell temporary paper shades that you can attach for quick privacy. If you’ve never installed blinds or curtain rods, it’s easy if you follow this tutorial.

5. Pack an Essentials Box

Trust me on this one! When you have 25 or 50 or more boxes, you will forget where the essential items are. Set aside the things you’ll need and take this with you when you move in. That way, you’ll have all essentials at hand and won’t have to go digging for a pair of scissors or resort to open wrapped boxes with your teeth.

Luckily for you, I gave you a whole list of essentials you might need on moving day. Check off each one as you pack it and you’ll be set to go.

6. Pack Food

Easy Pumpkin Dip

This tip goes along with the essentials box. You will get hungry at some point, so pack a small sack of food that you can munch on while moving and unpacking. Nutrigrain bars, bottled waters, salty snacks, dried fruit, and cereals are good to pack because they won’t go bad and they don’t need refrigeration. And if you are moving into a new construction home, you might not have a refrigerator installed yet!

7. Keep Important Documents with You

You must bring your important documents with you, DO NOT PACK them in a box. When you get to your new home, put them somewhere safe, like in a secure locked safe that’s fireproof. Order one from Amazon and have it delivered to your home around moving day. Here’s another tip: bolt your safe to the wall or a heavy piece of furniture when you get time. If your home is burglarized, a thief can’t just pick up your safe and walk off with it.


FREE CHECKLIST:

To download your free printable moving checklist, click here.

Stay tuned after I get unpacked because I will be continuing with the watercolor series as soon as I get that box unpacked, wherever it is right now!  🙂

Good luck and see you next month!

Free printable moving checklist - the only checklist you'll need for a successful move

karen signature

See More of Karen’s Tutorials ~


karen from decor hintHello!  I’m Karen, the creator of the Home Decor and DIY Blog: Decor Hint. I’m a Native of the East Coast, but I currently live in beautiful Seattle with my hubby, our two wonderful children, and our spunky wheaten terrier.

You can usually find me with some sort of craft in one hand and a coffee in the other. And I’m always rearranging furniture or moving lamps from room to room. I have a passion (read: obsession) for decorating, DIY, and gardening. In short, I love making my house into a home.

Like many, I’m inspired by what I see in home decor magazines, but I’m not so inspired by the price tags.  Consequently, I love finding and creating beautiful budget-friendly home decor items. In a head to head competition, I bet you’d never know the difference between the designer items and my DIY creations!  Many of my DIY projects focus on sewing, crafting, upcycling and organizing. Some of my favorite projects have been making pretty wreaths, sewing my own tassel hand towels, and crafting these trendy wood bead garlands. I can’t wait to inspire you and spark your creativity through my DIY projects.

You can always connect with me on Pinterest, Twitter or Instagram.

Get a load of this transformation! See Millie’s Remodel and her exterior front reveal. Plus, I’m sharing tips to help you keep your home protected from termites when landscaping.

Millie’s Remodel Update: Exterior Front Reveal

This update of the Millie’s Remodel project is sponsored by Corteva, the makers of Sentricon. I’m grateful to have Sentricon on board as a Millie’s Remodel sponsor!

Although I still have a lot to catch you up on inside the Millie’s Remodel house, the exterior siding, brick, and front door has been painted. I chose a pretty bright blue for the front door. It’s Loyal Blue from Sherwin Williams.

I built the shutters using leftover tongue and groove planks from the porch overhangs. I promise to share a tutorial for you in the near future.

And I added a modern address plaque beside the door. Also, a DIY I’ll share a tutorial for later.

Although the shutters have been hung and the house numbers look amazing, I feel like something is missing. The house feels a bit naked from the waist down if you catch my drift. It needs some landscaping!

Unfortunately, I’m a little over budget on all the renovations at Millie’s Remodel, so I need to save some money on the landscaping. I decided to plant a few bushes out front and call it done.

Budget Landscaping for a Mid-Century Modern House:

With my budget being under $200, I was able to put in some foundation plantings and one feature plant to give Millie a more finished look outside.

I planted three Fatsio Japonica bushes (the wider bushes with bigger leaves).

Between the Japonicas, I planted two Golden Ticket privet bushes. They should fill in a little over time, but for now, they certainly help ground the house.

For the feature item, I chose a pretty yellow Amber Gold arborvitae for the small bed between the front door and the driveway. I like the color and the tall skinny look of this tree. When full-grown it may be up to 5′ wide and 10′ tall. But, hopefully, it won’t reach full width and can stay a little narrower. I’ll have to keep an eye on it and trim the sides if it starts to get too big.

Luckily, I had a pile of wood chips in the backyard where I had to take out a large rotted tree that was hanging over the house. I was able to use the chips as fresh mulch around the plantings.

Although it’s hard to tell, in the above photo, I kept a barrier of bare earth (and no wood chips) against the foundation of the house. Why? Let me take a moment to talk about how to landscape while keeping your house protected from termites.

Landscaping While Keeping Your Home Termite Free:

I know we live in an area that is overpopulated with termites, so I’m very careful about protecting my homes from conditions that could lead to a termite infestation. Most plants need moisture to stay alive, but unfortunately, termites love wet mushy wood because it’s easier to chew and more tempting! For that reason, it’s important to pay attention to moisture around your home’s foundation. All the tips below will help you reduce the likelihood that termites will find your home tasty.

signature

  • When spreading mulch around plantings, keep it away from the house. Leave at least a one-foot perimeter along the foundation clear of mulch and other organic matter
  • Plant bushes so as to maintain a three-foot clearance from your home (be sure to look at the mature height and width information on new plantings)
  • Never pile firewood, lumber, mulch, soil, or other “termite-friendly” matter against your house
  • Don’t use wood timbers or lumber to create garden beds against your house
  • Install gutters and use downspouts to move water away from the foundation
  • Always make sure your land is graded with a slope away from your house
  • Keep gutters clear of debris to prevent them from overflowing.
  • Contract with a good termite treatment company (you can read how I chose Sentricon in this post.)
  • Keep up with scheduled inspections with your termite company.

My local termite company that installed the Sentricon system came back two weeks ago to check on the system to see if there was any termite activity and inspect the bait stations to see if they needed to be replaced. My technician was able to find most of the bait stations from the map he created during installation.

But, if the stations were buried, he could use the detector to find them.

You can learn more about the Sentricon system and how it’s installed by watching my previous video:

We saw some minor evidence that they had found the stations. This is good because it means they are feeding off the bait stations and taking it back to the colony.

Unfortunately, the memory card in my camera was corrupt, or I’d show you the bait station after almost a year. Luckily, Sarah has an excellent photo of her Sentricon bait station after being in the ground for almost a year.

A Look Back at Millie’s Front Exterior Transformation:

Together, I think the landscaping (although only 6 plants and some mulch) and painting made a big difference. We should look back to when I first bought the house. Remember how she looked? The greenery you see was all weeds!

Then, after painting, she looks great, but still needs some architectural pizzazz.

Finally, the shutters and painted front door made a big difference, but she was a tad naked around her base.

Now she has some beautiful modern greenery out front.

Did I do okay on my minimal budget?

Disclosure: This is a sponsored post for Corteva, the makers of Sentricon. I was provided complimentary termite protection for a year and was compensated for my time and efforts to promote Sentricon. I was not told what to write. All opinions are my own. I am particular about the brands I represent and will always let you know when you are reading a sponsored post.

Fixing Common Door Problems

Do you have a door that sticks or doesn’t close properly? You are not alone. Many factors can contribute to this problem. Let’s learn how fixing common door problems can be easy.

Fixing common door problems pin this image

Fixing Common Door Problems

Do you have a door that sticks or doesn’t close properly? Or maybe your door rubs, squeaks, or is drafty. Regardless of the problem, I’m going to show you how to fix your most common door problems! But first, a big thank you to Schlage, the 100-year-old leading door hardware company, for sponsoring this article.

If you have common door problems, you are not alone. Many factors can contribute to them: house movement, humidity, dry air, improper installation, slamming doors, or kids swinging on them (true story). Without being able to control many of these factors, it’s important to know how to fix your door problems – as your door is often a main focal point of the room and/or entryway.

(I’ve included affiliate links for your convenience. I earn a small percentage from a purchase using these links. There is no additional cost to you. You can read more about affiliate links here.)

Door Not Latching:

A door that doesn’t latch properly is usually a simple fix. Lean down until you are at eye-level with your doorknob. Look at the gap between the door and the door frame. Is the latch centered on the strike plate?

latch too low on strike plate

If not, that’s why your door doesn’t latch. Here’s how to fix it. Determine the center of the latch. Remove the strike plate and move it to center on the latch.  Mark the new location of the strike plate. Chisel the door frame as needed.

chisel strike plate area out

Reattach the strike plate and test the door. You can see in the photo below the latch is now centered with the strike plate and the latch can now slide into the strike plate properly.

Latch and strike plate lined up

(Like the knob above? It’s a Schlage Plymouth in Bright Brass, but comes in a variety of finishes.)

Door Not Closing Tight Against Stop:

If your door rattles loose in the frame and doesn’t close properly against the stop, it can be as simple as moving the strike plate closer to the stop.

Important: If this problem happens on a door between the garage and the house, it could be a potential safety issue! The door between the garage and the house must protect the residents from carbon monoxide gases potentially leaking in from a car’s exhaust. With this in mind, it’s important to fix this problem immediately!

Luckily, fixing a door that doesn’t close tightly is a simple one to remedy. But, there are two solutions depending on your type of strike plate. (Is your strike plate adjustable or non-adjustable?)

door won't shut tight vs. door closes against stop

If You Have an Adjustable Strike Plate:

Look closely, does your door strike plate have a small screw holding a sliding tab to the strike plate? If this looks like your strike plate, the solution is simple.

common door problems strike plate

Loosen this screw and adjust the tab closer to the door stop.

door problems adjust latch

Tighten the screw and try closing your door again. Continue to adjust the tab until your door shuts properly and stays closed.

If You Have a Non-Adjustable Strike Plate:

Non-adjustable strike plates don’t have an adjustable tab, but your fix is still easy. Remove the strike plate and reposition it closer to the stop.

moved strike plate

Sticking Doors or Doors that Won’t Close

Look at the space around the door. Is there a gap at the top or bottom? Normally, the door will stick at the top corner opposite of the hinges because over time the weight of the door will pull away from top hinges.

To fix a door that sticks or rubs in the frame, you can try one of these fixes:

  • Tighten screws
  • Add longer screws
  • Add a shim behind a lower hinge

Let’s take a look at this french door. The door rubs at the top when trying to close it.

french doors rubbing at top

Open the door and look at the hinges. Do any of them need to be tightened? Well look at that! This door is missing a screw.

missing screw in hinge

Try to tighten the screws. If they just spin, the wood has been stripped. You can either add longer screws or fill in the holes with toothpicks.

Replace with Longer Screws

Remove the hinge screws and use longer screws that drive through the door jamb and into the framing.

long and short screw in hand

How to Fix Stripped Screw Holes:

Remove the screws from one hinge at a time. Squeeze some wood glue onto several toothpicks. Pack the hole with toothpicks.

insert toothpicks into stripped screw holes

Let the glue dry. Cut off the excess toothpick with a utility knife (or use a chisel if you don’t have your knife with you.)

chisel off extra toothpick

Drive screws back into the hinges.

drive longer screws into door hinge

Better yet, replace the screws with longer ones that will grip into the framing behind the door jamb.

Hopefully this will fix your door. You can see below the door shuts and the spacing is even between the french doors.

Is Your Door Out of Alignment?

Door still rubbing? Occasionally a door will get out of alignment. To fix this, first, look at the door and determine where the gaps are bigger.

For the door above, try simply loosening the screws from the top hinge 1/4 turn or more. If this doesn’t work, try tightening the screws into the hinges at the bottom. If it’s still not fixed, you’ll need to try shimming the door hinge.

Shimming Door Hinges:

Sometimes a door hinge needs to be shimmed to adjust the door in the frame. If the spacing is tight behind one hinge, you can adjust it slightly to correct uneven spacing around the door.

common door problem fixes

The door above still shows a tight spot near the top right hinge. To shim it slightly, add a piece of chipboard (cereal box cardboard) behind the hinge.

door problems shim hinges

If you need a thicker shim, you can use the end of a wood shim.

add shim behind hinge

Replace the screws in the hinge and test your door. Is it still rubbing?

replace door hinge screws

Recessing a Hinge:

Occasionally, you might need to set a hinge deeper into the door or the frame. You can use a chisel to remove a small amount of material from the jamb or the door. If you don’t have a chisel or are worried about taking out too much, use the small sanding bit on a Dremel.

dremel door hinges

Door Rubbing on Top:

Have a door that swells when the temperature or humidity changes? To fix a door that rubs along the top in different seasons, you’ll want to sand or plane the top. This doesn’t involve buying a ticket or boarding an airplane. Planing is removing material from the edge of wood. You can try using sandpaper with a coarse grit to sand it down, but if that doesn’t work, reach for a hand planer.

plane top of door

As you run the planer across the top of the door it literally shaves off some of the wood. Simple design, but very effective.

Door Scraping on the Floor:

door scraping floor

A door that rubs on the floor or carpet is not only annoying, but it can scratch your floors. Time to fix this problem!

Get a helper to assist with removing the door. Close the door completely.

Position a scraper or flat pry bar just under the hinge pin head. Gently tap the end of the pry bar with a hammer to raise the hinge pin. Remove the hinge pin from the top and bottom hinges first.

remove hinge pin

Remove the middle hinge pin last but have your assistant nearby to hold the door in the frame. As the assistant opens the door, be ready to lift it off the hinges.

Lay the door on sawhorses. Tape the button of the door with painter’s tape to protect from chipping.

cut off bottom of door

Use a circular saw, track saw, or power planer to remove a portion of the bottom of the door.

Plane doors from the edge to center

Replace the door and check to see if it still rubs.

Exterior Door is Hard to Open:

If your exterior door is hard to open, it might be from a loosened threshold piece. You can try to tighten the threshold screws or replace the threshold and sweep at the same time.

driving screws into door threshold

Also check to see if the door sweep has lowered. Unscrew the sweep and raise it on the door. Tighten the screws.

raise door sweep

Door Latch Sticks in the Door

If the latch is sticking in the door, you can try one of three fixes:

  • Loosen the screws on the doorknob. (Tightening the screws on your doorknob too much can cause the knobs to bind.)
  • Remove the knobs, spray a little lubricant onto the latch inside the door. Replace the knobs and turn them to distribute the lubricant.
  • Finally if all else fails, it might be time to replace the doorknobs. Believe it or not this is a quick fix and can be done in five minutes.

Save yourself the headache of doorknobs that stop working smoothly and purchase Schlage brand door hardware from the start. Schlage has been producing high-quality door hardware in a variety of types, looks, and finishes for more than a century and will continue to do so in the years to come. Whether traditional, modern, or technology, Schlage products offer a limited lifetime mechanical and finish warranty and a three-year limited electronics warranty.

How to Replace Door Knobs | Pretty Handy Girl

Squeaking Doors

Doors that squeak mean the hinges need lubrication. Simply spray a lubricant like WD-40 just under the top of the hinge pin. Be sure to have a rag handy to catch any drips.

Fixing Common Screen Door Problems | Pretty Handy Girl

Open and close the door several times to help the lubricant work its way down the hinge. Your door should be squeak free now.

Door Knob Hits the Wall

Door knobs that hit a wall can put dents or holes in the wall if left alone. The solution is quick. Either add a door stop behind the door at the baseboard…

door stop behind door at baseboard

…or add a hinge pin adjustable door stopper to the top door hinge.

hinge pin adjustable door stopper

Drafty Doors

Cold drafts wafting in around your door? The solution is as simple as installing (or adjusting) the weatherstripping. If you can see light coming in around your door, it’s guaranteed to let drafts in too!

Adding Foam Weatherstripping | Pretty Handy Girl

Simply adding adhesive-backed foam weatherstripping around the door will stop those drafts in their tracks.

Look Ma, no more light, no more drafts!

Adding Foam Weatherstripping | Pretty Handy Girl

Adding a door sweep to the bottom of the door will keep out drafts from the bottom of the door. In addition, a well-fitted sweep will also keep insects and spiders from making an entrance under your door.

white door sweep on yellow door

That pretty much sums up fixing common door problems. Next time you have an issue with your door, you can fix it yourself!

PHGFancySign

Disclosure: This article has been sponsored by Schlage. If you’ve been around here for a while, you know I’m very particular about the brands I work with. I only recommend products and brands that I use myself. I was compensated for my time, but I was not told what to write. All opinions are my own.

Pin for later!

How to Fix common Door Problems

This is the next update in the Millie’s Remodel series. Recently I had to decide whether I needed to replace the HVAC unit for Millie. Although it was an expensive proposition, the decision on brand was an easy one for me.

Millie’s Remodel: HVAC Update + How to Extend the Life of Your HVAC System

Thank you for your patience with the Millie’s Remodel series. Today I have the next update and this one could actually save you money and the dread of replacing your HVAC unit sooner than you want to.

Just so you know, TRANE is a Millie’s Remodel project sponsor. But, if you’ve been around my website for a while, you know I don’t promote just any brands. If I’m going to mention a brand, you can be sure I’d recommend them to my best friend or my own mother. Now that we’re past the legal disclosure stuff, read on to find out why I like TRANE so much and how to extend the life of your HVAC system!

Millie’s Remodel Inspection:

During the home inspection at Millie’s Remodel, the inspector told me the exhaust fan for the gas furnace was no longer functioning in the unit. Given the age of the HVAC, he recommended replacing it instead of fixing it. Plus, the unit was incredibly loud and sounded like a helicopter! I knew it would need to be replaced.

When TRANE contacted me about being a Millie’s Remodel sponsor, I knew it would be the perfect opportunity for me to share how we decided to purchase a TRANE in the past and how long it lasted.

Back in Time:

The year was 2001 and Pretty Handsome Guy and I had just moved to Raleigh. The Dot Com bubble had burst and we were left without full-time jobs. We had just purchased our first house—needless-to-say—money was tight. We were surviving, but money was still not flowing in. Despite our financial situation, we decided to host a party for some of our new friends. Midway through the party, I looked at our friend Jaye, who was 8 months pregnant. Sweat ran off her forehead and I suddenly realized it was a bit hot in the house. I kept turning the thermostat lower, but each time I checked it, the temperature was climbing instead of going down.

After the party, I walked outside and discovered the unit was covered in ice. I knew enough to know that was not a good sign. We called a few HVAC companies and got the news that it was probably best to replace our old HVAC.

Although we were cash-strapped, we knew we didn’t want to make a poor decision on a major system for our home. After a lot of research, we decided to purchase a TRANE unit. Little did I know that this same unit would still be pumping conditioned air almost two decades later. Our rationale for choosing a TRANE was: if we chose less than stellar HVAC equipment we could be looking at replacing it within 10 years. Whereas, if we chose a TRANE, we could expect to have the same unit for 15+ years. It made sense to spend a little more money now, and hopefully, only have to replace the HVAC twice over 30 years versus paying for three systems in the same time frame? Now doesn’t it make sense to spend a little more up front to save you money in the future?

Guess what! Our rationale was correct. In case you weren’t aware, we moved in 2007 to the house across the street from our first home. Over the years we’ve watched three families move into our old house. Recently I was talking to the current owner and I asked her if she still had the TRANE unit we installed. She told me yes, she did, and it’s still working perfectly! Here it is:

Deciding what brand HVAC system to buy for Millie, is obviously an easy decision. After seeing the old TRANE we put in at our old house still pumping heat and cool air after more than 18 years, why would I choose anything else!

How to Select a New HVAC System:

Ask around. Find out from friends, family, or neighbors which system they installed and who installed it. Ask how old their system is and if they’ve had any issues with the equipment. When I mentioned I was having a TRANE installed at Millie’s Remodel I received several messages from my followers who were also happy TRANE owners:


How to Hire an HVAC contractor:

I recommend finding local TRANE contractors in your area by going to the TRANE website. Then look up the recommended contractors on Better Business Bureau and search for Google or Yelp reviews. When you call, ask for references and call the references. (Not sure what to ask? I have a great article on How to Hire Contractors with suggested questions to help you get the most information from references.)

The HVAC Installation:

Once the day arrived to install the new HVAC system at Millie’s Remodel, the contractors removed the old unit. I was not sad to see that eyesore and earsore go! (It was incredibly loud.)

Luckily the ductwork was almost brand new, so we all agreed to keep it so I could save a little money. The contractors did remove the old pad and put down a new one.

Tip: Always make sure your contractor levels the new pad. Non-level pads can put undue stress on your unit. Do not let them throw mulch or leaves (compostable materials) under the pad to level. They need dirt or gravel or other non-composting material. If you have eagle eyes, you may have noticed a piece of lumber leveling the old unit. This is not an acceptable way to level your HVAC pad.

While the guys were installing the new TRANE unit (I chose the TRANE XR14c which is not a top of the line model, but is still energy-efficient and quiet.) I asked the foreman a question after he finished installing the unit. I specifically asked him what he saw in terms of age of units when removing old HVAC equipment specifically TRANE units vs. other brands. Watch the video to hear his unscripted response:

How to Keep Your HVAC System Running Smoothly:

If you only do one thing to prolong the life of your HVAC unit, it would be to change the filters regularly. Whether that means monthly or up to three months will depend on your home’s dust levels (and any pets you have.) Keep an eye on your filters. If they are showing more dust and hair before three months is up, change them more regularly.

Did you know TRANE has filters specifically designed to meet the balance of reducing dust and lint while keeping your HVAC system running longer? Best of all, you can order them from Walmart and receive them the next day!

If your home is going through a renovation, it’s important to change the filters after a lot of debris has been released into the air. The day after my drywall contractors finished sanding, I replaced the filters. And immediately after the floor refinishers sanded the floors, I replaced the filter. When the renovations are complete I’ll replace them again.

Other things you can do to keep your HVAC system running smoothly is to keep vegetation and landscaping at least 18 inches away from the unit. There needs to be proper airflow around the unit for it to work efficiently.

signature

Call for a maintenance tune-up and check on your system in the Spring and Fall. Don’t wait for temperature extremes to find out your system was stressed and you are now without heating or cooling.

For more maintenance tips and ways to keep your system running a lot longer, read these maintenance tips from TRANE.  In the meantime, I’m going to enjoy this nice, quiet, and efficient new HVAC system from TRANE!

Do you have any TRANE stories? Have a system that proves the saying, “It’s hard to stop a Trane.” Please share in the comments!

Have a great holiday, I’ll be back in January with the next Millie’s Remodel update!

Disclosure: This is a sponsored post for TRANE. I was not told what to write. All opinions are my own. I am particular about the brands I represent and will always let you know when you are reading a sponsored post.

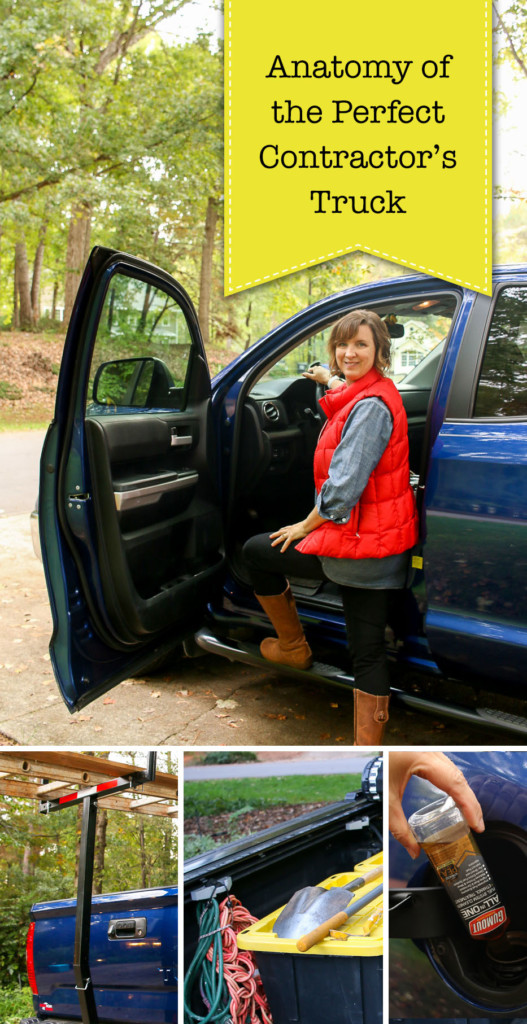
After over two years of general contracting, I’ve finally transformed my truck into the perfect contractor’s truck. Whether you’re a woodworker, a contractor, a remodeler, or a serial DIYer, you’ll find this article about the Anatomy of the Perfect Contractor’s Truck beneficial for discovering accessories to make your truck more practical for hauling tools and lumber.

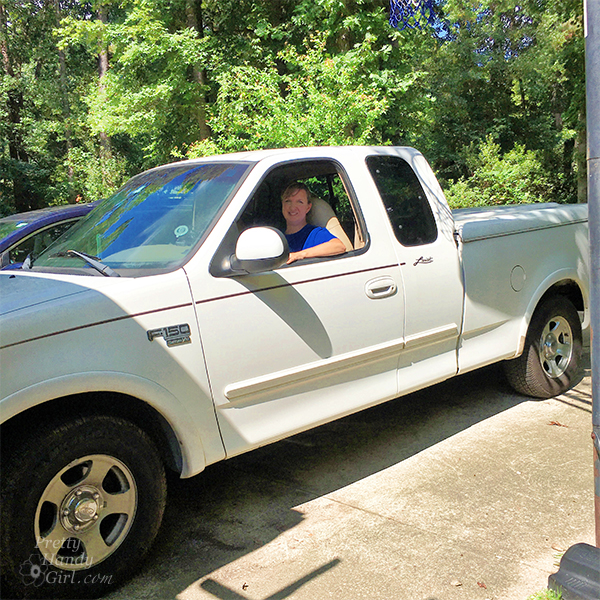
Back at the start of the Saving Etta project, it became clear I’d need a pickup truck to assist me with hauling materials and my tools. I purchased an old white pick up truck for $4,500.

Although the truck got me through the project, it wasn’t without a fair amount of headaches. Frankly, I felt like the truck and I didn’t get along. Twice the truck locked me out. One time the keys were in the ignition and the engine was still running! Little annoying things kept breaking on the truck (like the back door latches one after the other) and then the ABS brakes (which actually control the regular brakes too) went out to the tune of $900. I replaced them, but was always wary of the possibility of them dying on me again.  Between the rising repair costs and the fear of being locked out, I decided it was time for another used truck after I sold the Saving Etta house. This time I had a much clearer vision of what I needed in a general contractor’s truck. And I think you’ll appreciate my new-to-me truck and how it really is the perfect contractor’s truck! Keep reading to find out the accessories that make it perfect and how I’m planning on keeping this truck running smoothly for me.

This is a sponsored post for Gumout. I was provided complimentary products and was compensated for my time and efforts to promote Gumout. I was not told what to write. All opinions are my own. I am particular about the brands I represent and will always let you know when you are reading a sponsored post.

The Search for the Perfect Contractor’s Truck:

When I searched the internet for ideas for what I should look for in a general contractor truck, all I found were links to truck accessory websites. Then I looked on YouTube and discovered lots of ideas for beautiful custom-built tool storage in a truck bed. Besides not having the time to build something for my truck, I also knew it would limit the flexibility and storage capacity in it.

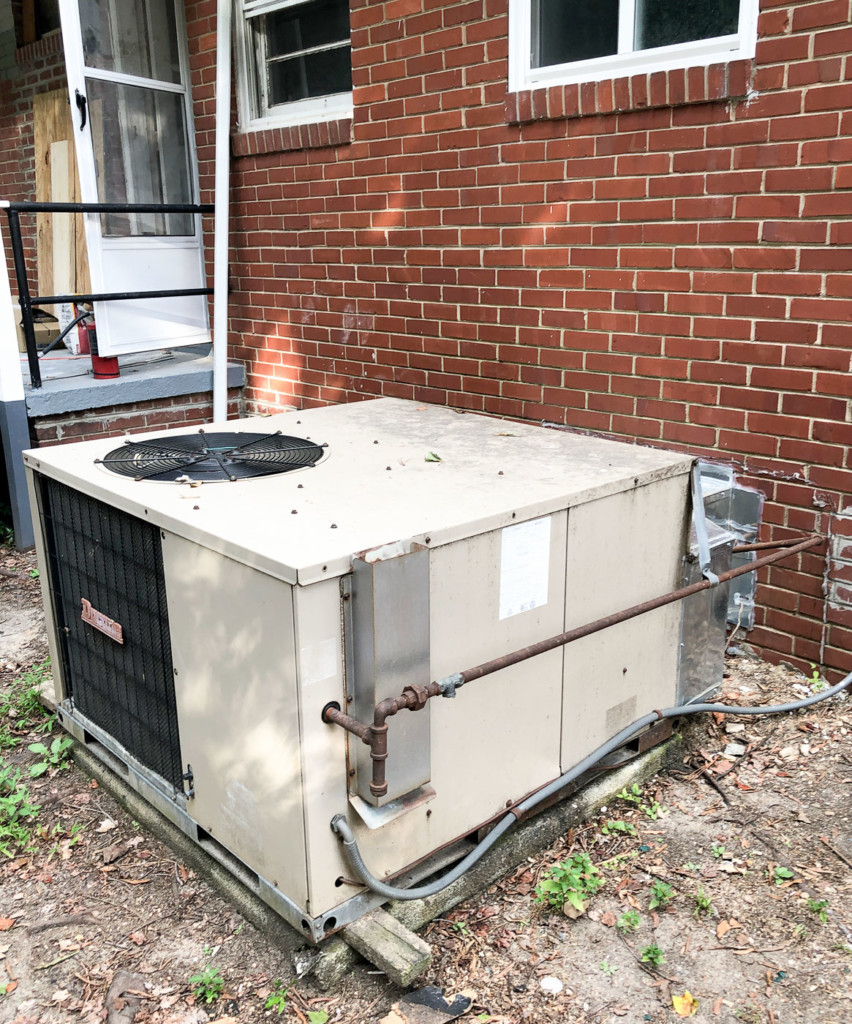
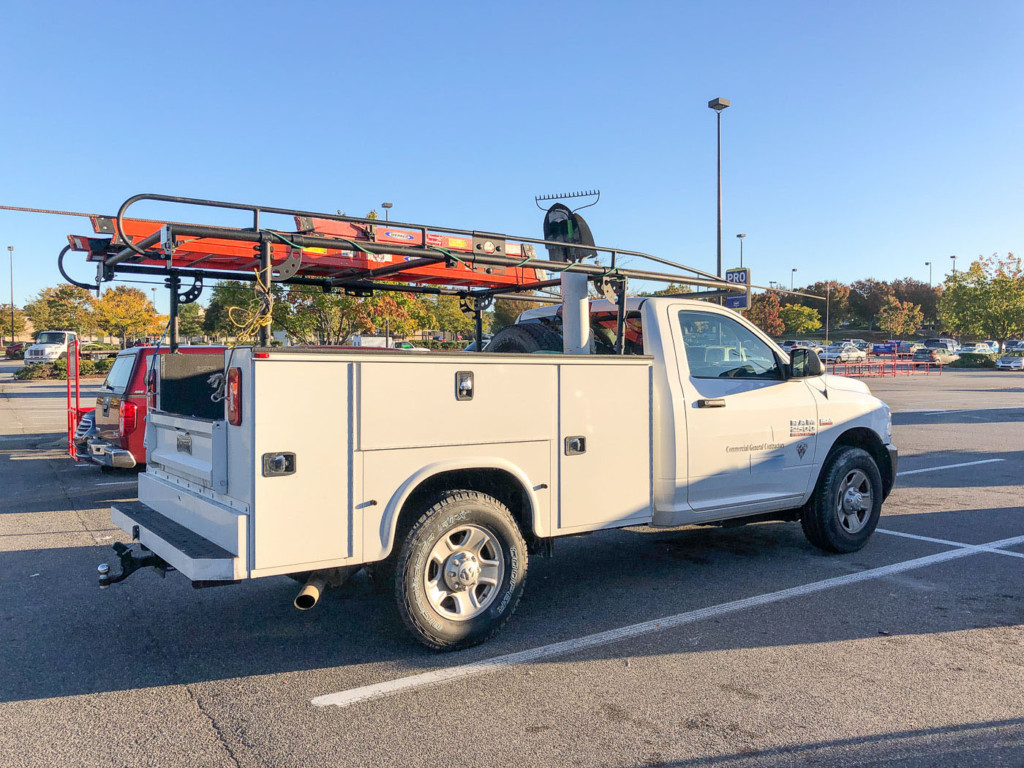
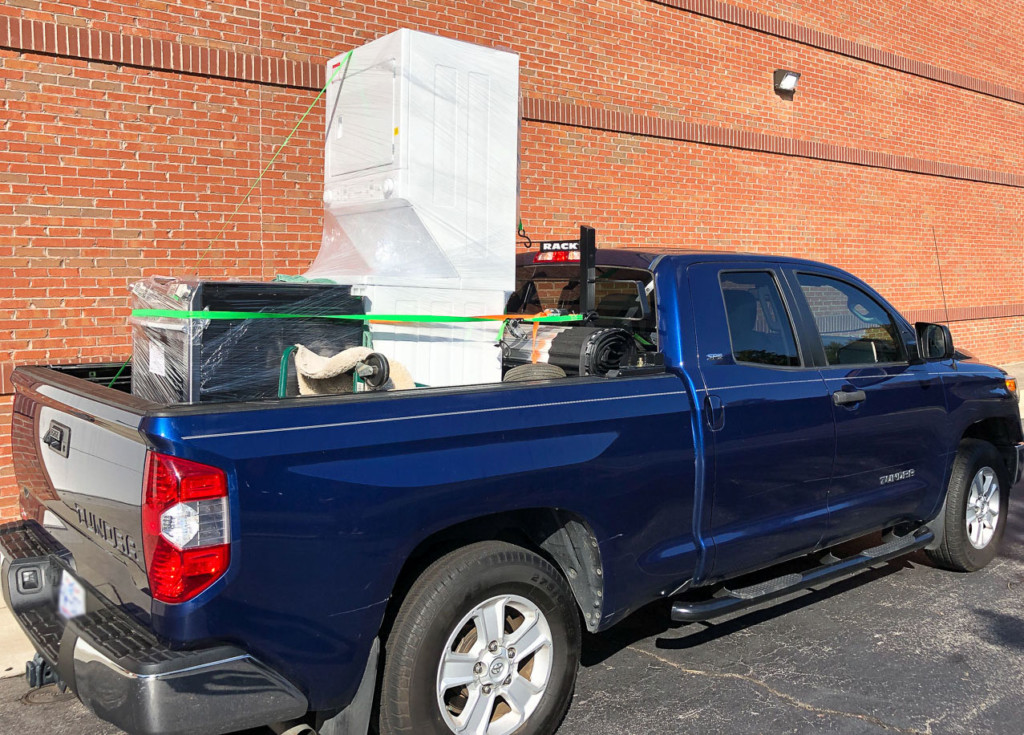
The other options I found were true work trucks with more storage than I wanted. For example, the truck below is outfitted with storage compartments, but you usually give up valuable real estate when built-in storage is added. I knew I needed the flexibility of a full pick up truck bed sometimes. Therefore I nixed the idea of built-in storage compartments.

Before searching for another truck, I made a list of must-haves and “would be nice” options on a contractor truck.

Contractor Truck Must Haves:

  • Safe (and Weather-Proof) Place to Store Tools
  • Ability to Haul Lumber
  • Flexibility to Carry Cargo like Appliances
  • Back Seat for Passengers (and Dog)
  • Additional Storage Space in the Back Seat
  • Truck Bed Large Enough for a Sheet Goods
  • Locking Cover for Truck Bed
  • Tow Hitch
  • Strong Engine for Hauling Trailers

Contractor Truck Optional Features (not Necessities):

  • Back Window that Opened
  • Additional Storage Bins inside Cab
  • Radio/Bluetooth Stereo
  • USB Port
  • Truck Bed Rubber Mat
  • Easy Cleaning Floor Mats inside Cab
  • Leather or Vinyl Seats
  • Back Up Camera
  • Power Outlet

With my list made, I began searching for used pickup trucks that would meet my criteria. I purposely didn’t look at new trucks because I knew I’d be putting this truck through the paces and I didn’t want to cry over a scratch or dent on a new truck.

Ultimately I narrowed my search to 4-5 year old used trucks because I didn’t want to buy an older model again.

Must Have Features in a Contractor’s Truck

(I’ve included affiliate links for your convenience. I earn a small percentage from a purchase using these links. There is no additional cost to you. You can read more about affiliate links here.)

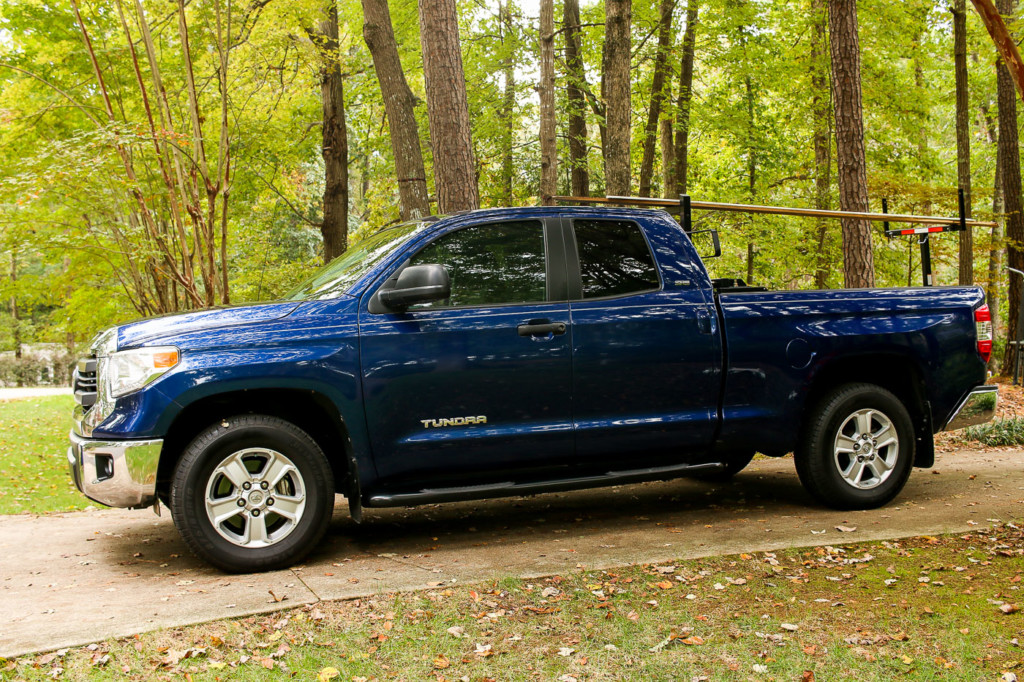
Let me preface this by saying, I’ve been using this truck for almost a year now and it fits my specific needs as a general contractor perfectly. I perform a lot of my own labor, so I load my truck with the tools I’ll use for the week and remove the ones I don’t need that week.

Tool Storage:

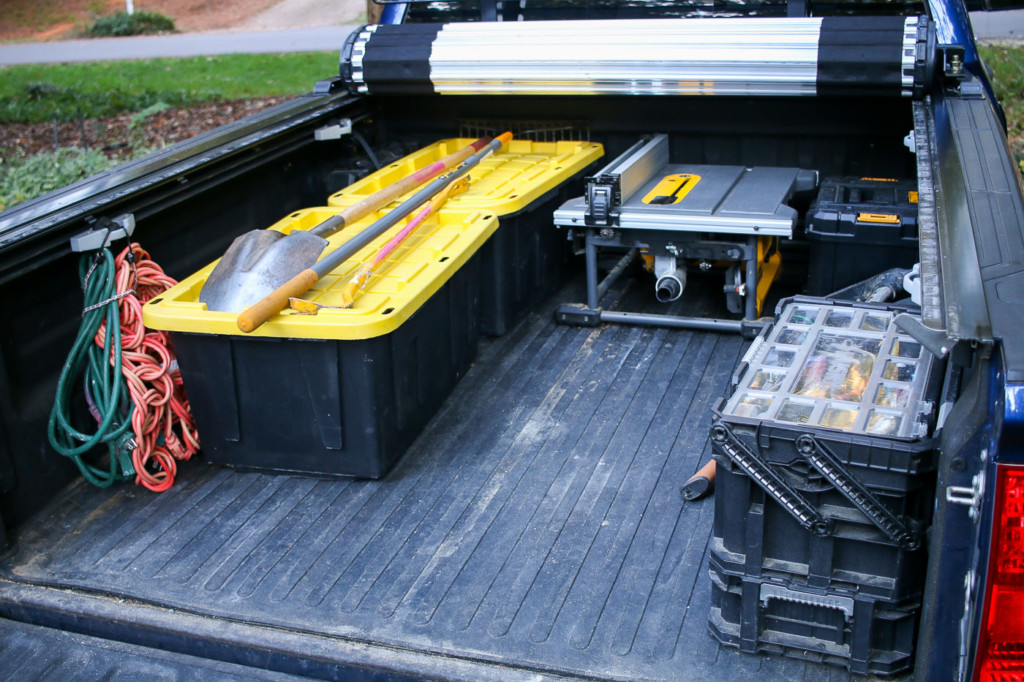
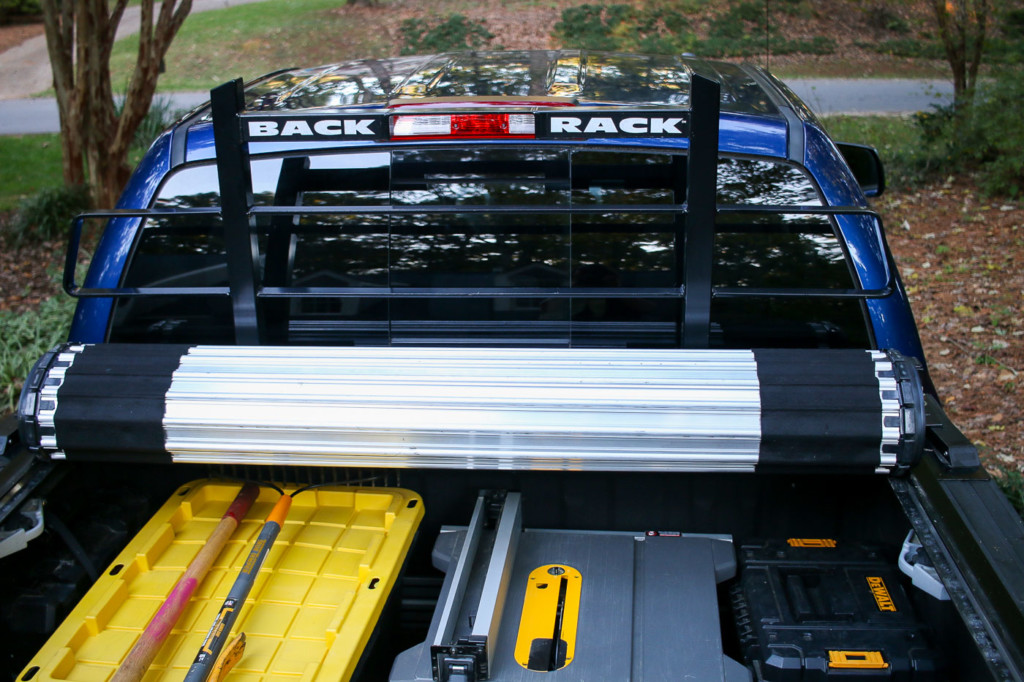
While using the old white truck, I purchased several utility bins to keep tools and equipment organized in the bed area. This system worked so well, I decided to continue to use the bins in my new navy truck.

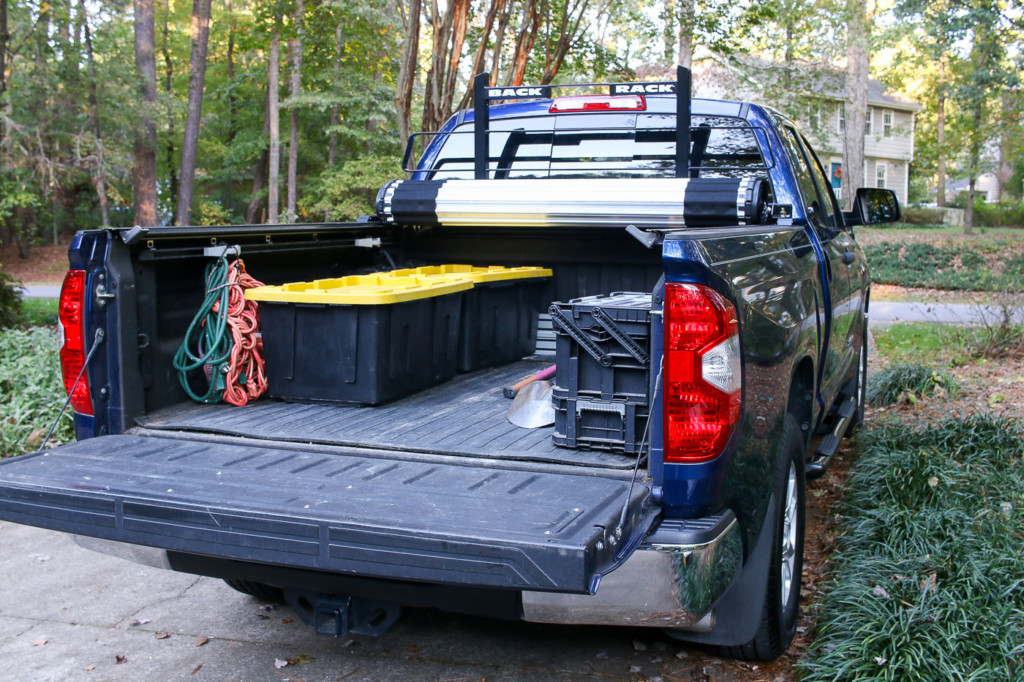
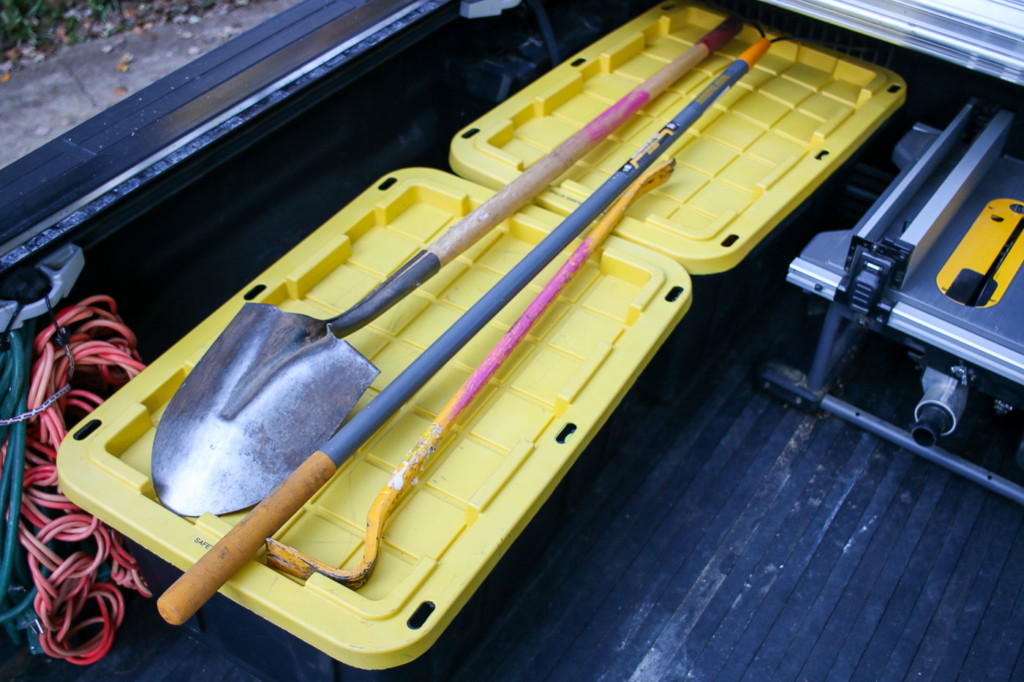
The nice thing about the bins is they keep my tools out of sight and drier than just sitting loose in the truck bed. Plus, the raised edges on the bin lids let me set things on top of the bins and they won’t slide around.

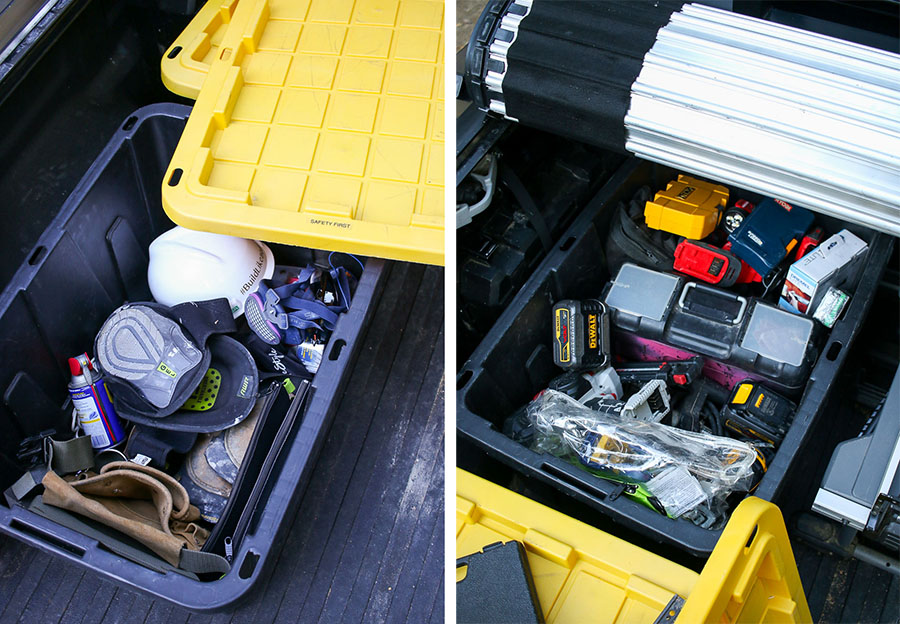
Inside one bin is my safety gear and occasionally a can of WD-40. LOL, not sure how that got in there. The other bin holds my smaller power tools, batteries, and bits for my drills.

The utility bins are easy to maneuver, move, or remove when I need the space in the truck bed.

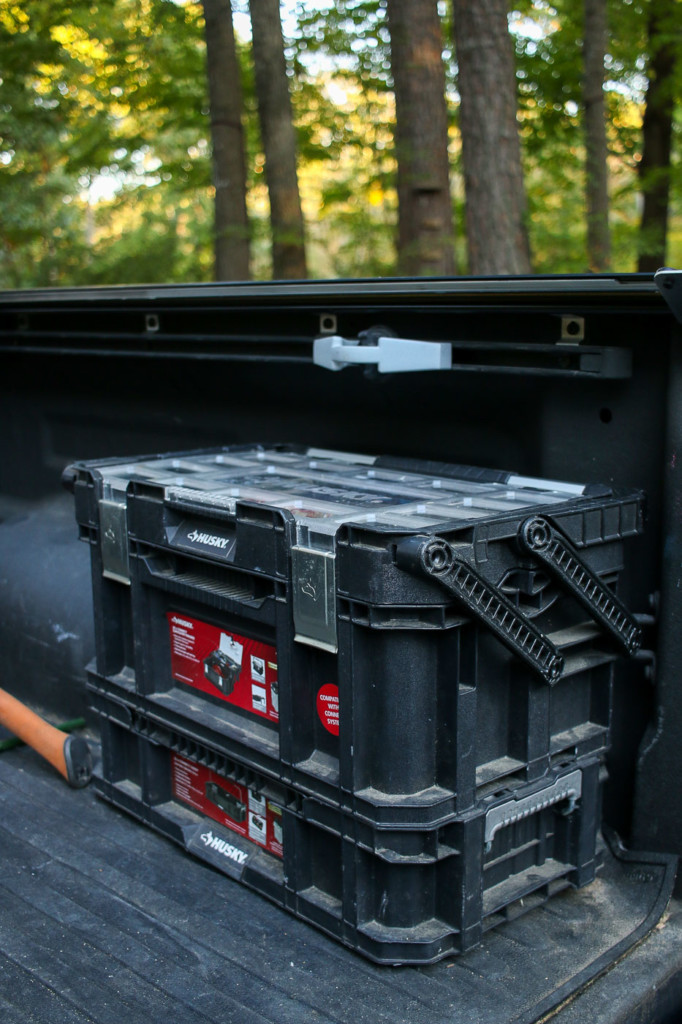
Hand tools, small nails, screws, and other tools fit neatly in the Husky connect toolboxes. I purchased this top toolbox and the bottom handled-bin. Connected together they create one large toolbox.

Hauling Lumber and Materials:

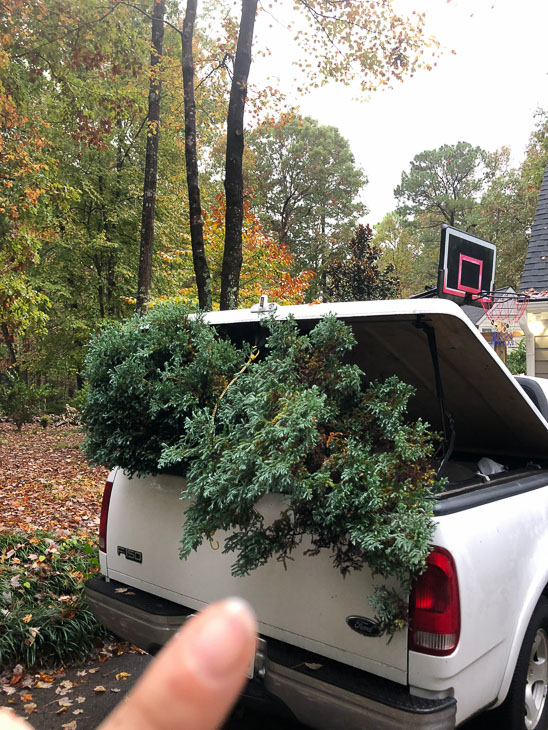
(Please Note: the photos below are for illustration purposes only. Be sure to secure and tie down your lumber and material loads before transporting them.)

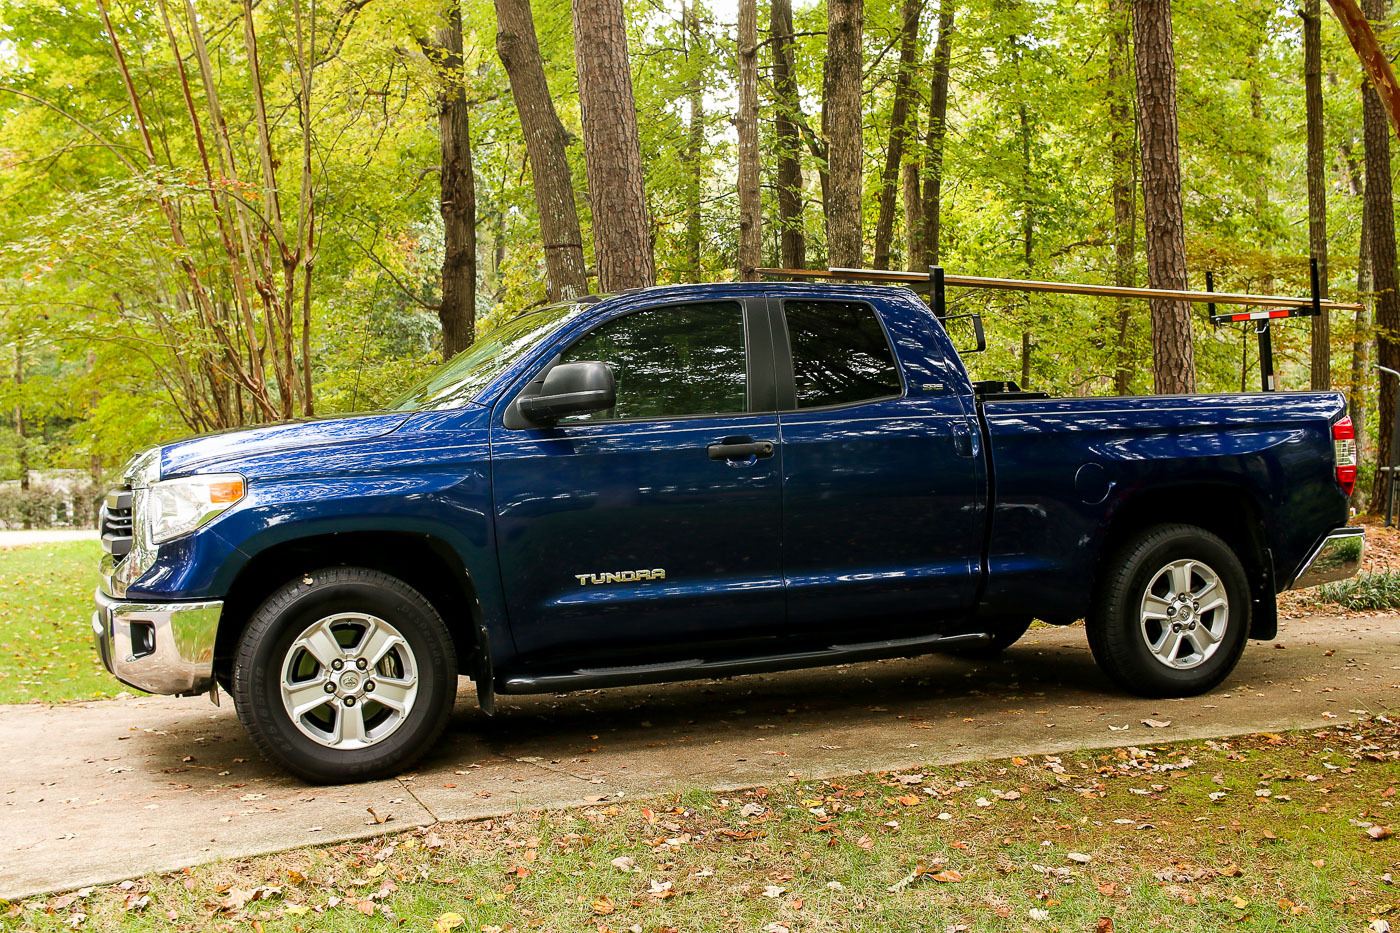
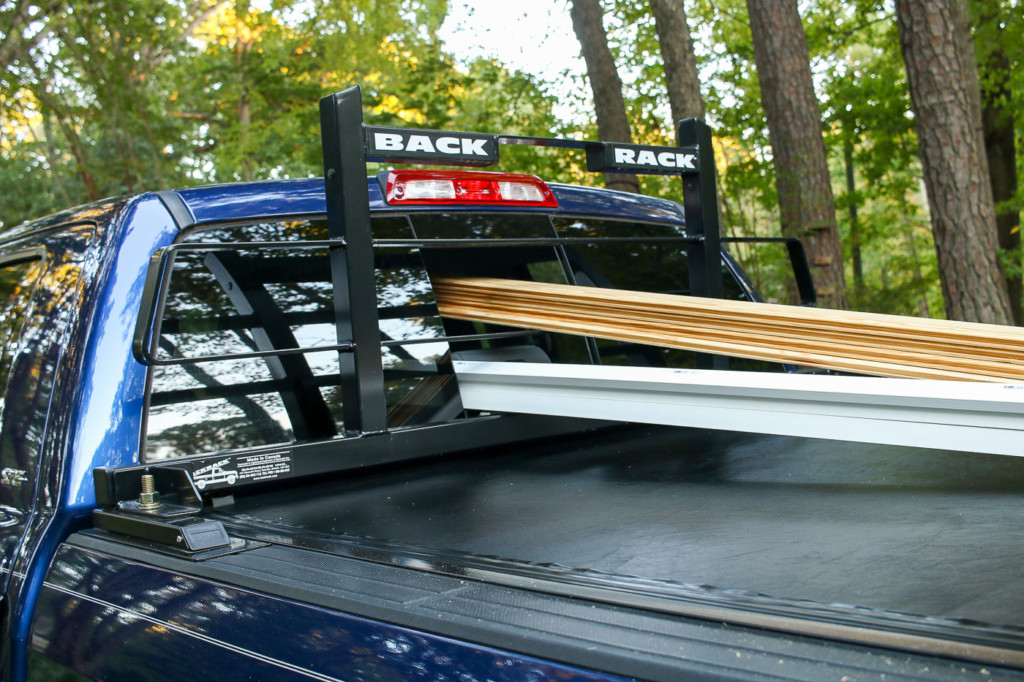
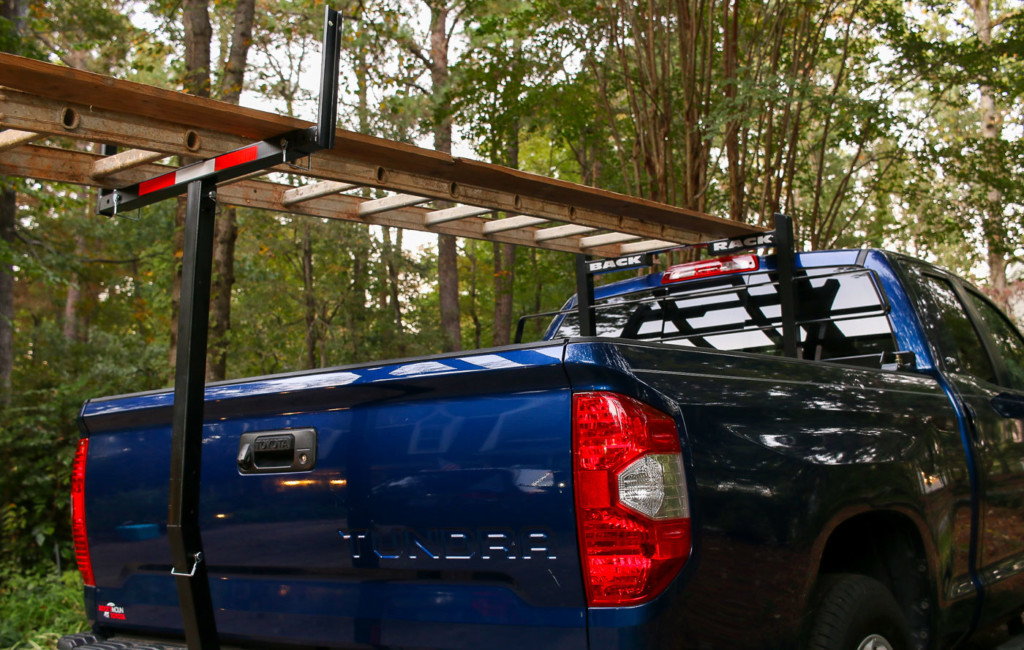
Traditionally I try to have lumber and supplies delivered to the job site. But, there are definitely times when it’s easier for me to pick up lumber at the last minute. With the old F-150, I had an operable back window but made the mistake of hauling big pressure treated 2x10s and resting them on the dashboard. The first bump I hit, I cracked my dashboard.  Lesson learned—and for that reason—I decided to purchase a headache rack, specifically a BackRack for the Tundra.

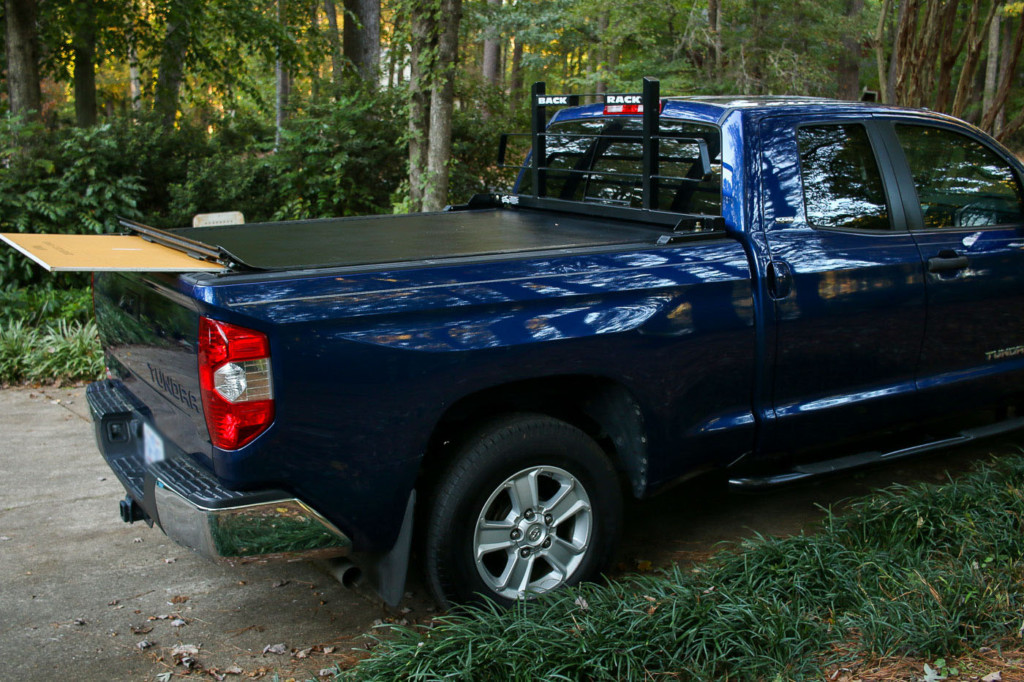
For those occasions when I want to haul long lengths of trim and lightweight lumber, I can rest stacks on the rails of the BackRack and feed them through the open back window. But, I never let the lumber touch the dashboard or the windshield. (No need to risk damaging them.)

signature

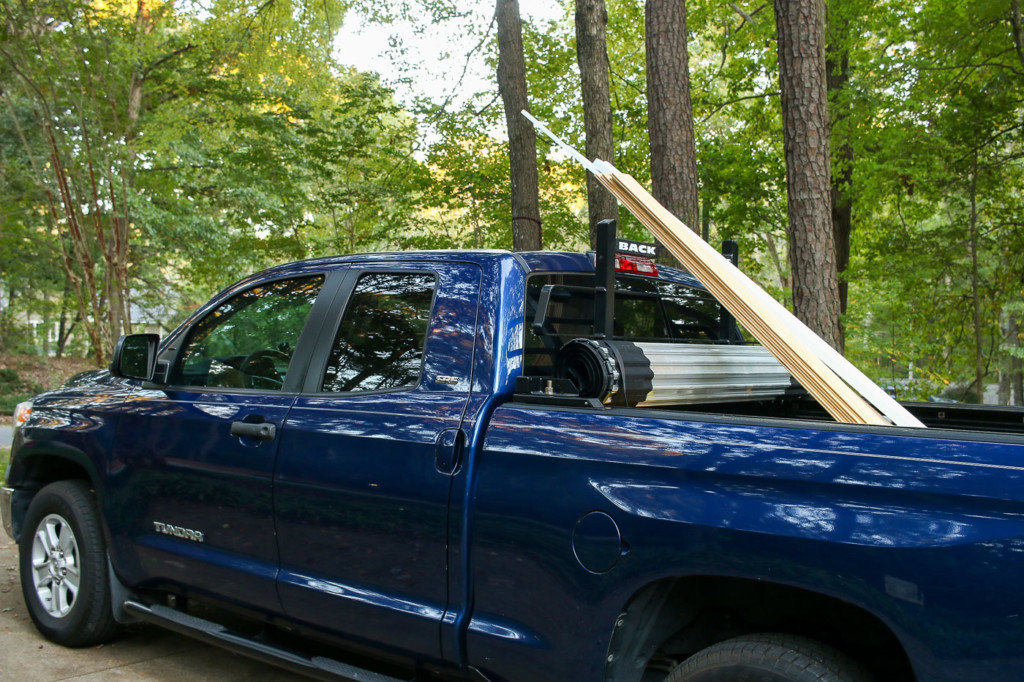
Another way I use the BackRack is to haul materials over the truck cab. Normally I don’t run the lumber at this extreme an angle, but as long as it’s not going to snap and is tied down, this system works well.

If  I have to transport long boards or extension ladders, I add the bed extender. You can see it below (the bar attaches to the hitch.) The bed extender I bought also has the option to be reconfigured to support lumber extended directly from the truck bed. This has been a huge help when transporting up to 12′ lengths. Anything over that I run up and over the cab on the Back Rack.

The bed extender I purchased is the MAXX Haul Truck Hitch Bed Extender, you can purchase it on Amazon or your local truck accessory shop. When not in use, I can easily store it in my garage or shed.

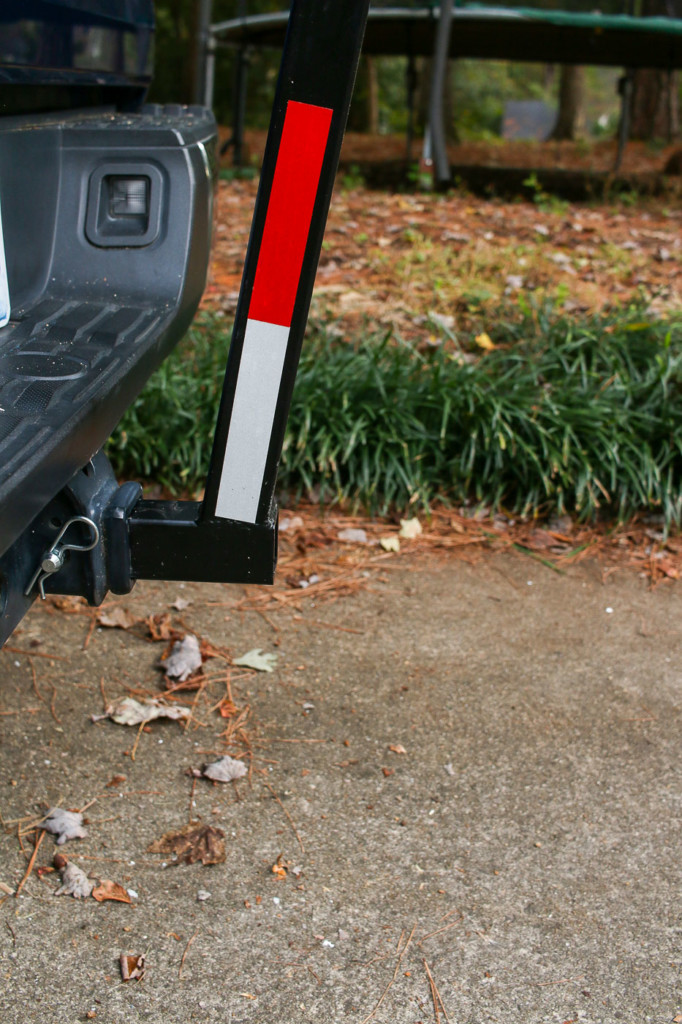
If I need to haul a trailer, I can remove the bed extender and insert a towing ball mount. This feature comes in handy for hauling everything from open to closed trailers.

Security and Weather Protection:

My old F-150 had a hard tonneau cover on it. The cover was great for weather protection and security, but it didn’t offer full use of the bed. If I had to remove it, it was a literal pain in the neck trying to crawl under the cover to get to the clamps and remove items from the back of the bed. If I needed to haul appliances I had to get help removing the hard cover. It was definitely not a quick or easy process.

spruce trees loaded into back of truck

After purchasing my Tundra, I visited our local truck accessory shop and talked at length with the salespeople there. I explained all the requirements I had for my new truck and specifically asked for alternatives to the hard tonneau cover. They pointed me in the direction of the BAK Revolver X2 rolling tonneau cover. This is by far my favorite addition to the truck!

I can roll it open and closed one-handed and it gives me access to entire truck bed. Once closed, the cover won’t open until the tailgate is opened. If you want it locked, just lock your tailgate! The cover will rest nicely on top of sheet goods that don’t fit inside the truck bed.

And when I need to haul appliances, I can quickly roll the cover open and load in tall appliances (unlike the old hard cover on my Ford.) For carrying appliances, the BackRack doubles as a tie-down anchor for safely transporting appliances or other cargo.

If I had any complaints about the BAK Revolver X2 cover, they are minimal. The first is the aluminum underside gets very hot when it’s in the sun. But, I quickly learned to only touch the black felt strips when rolling the cover.

My second complaint is, the cover isn’t 100% weatherproof. A heavy rain will allow some water to seep into the truck bed at the four corners of the cover. But, I store my tools in the storage bins, so this isn’t a huge deal for me.

Miscellaneous Interior Storage and Contractor’s Mobile Office:

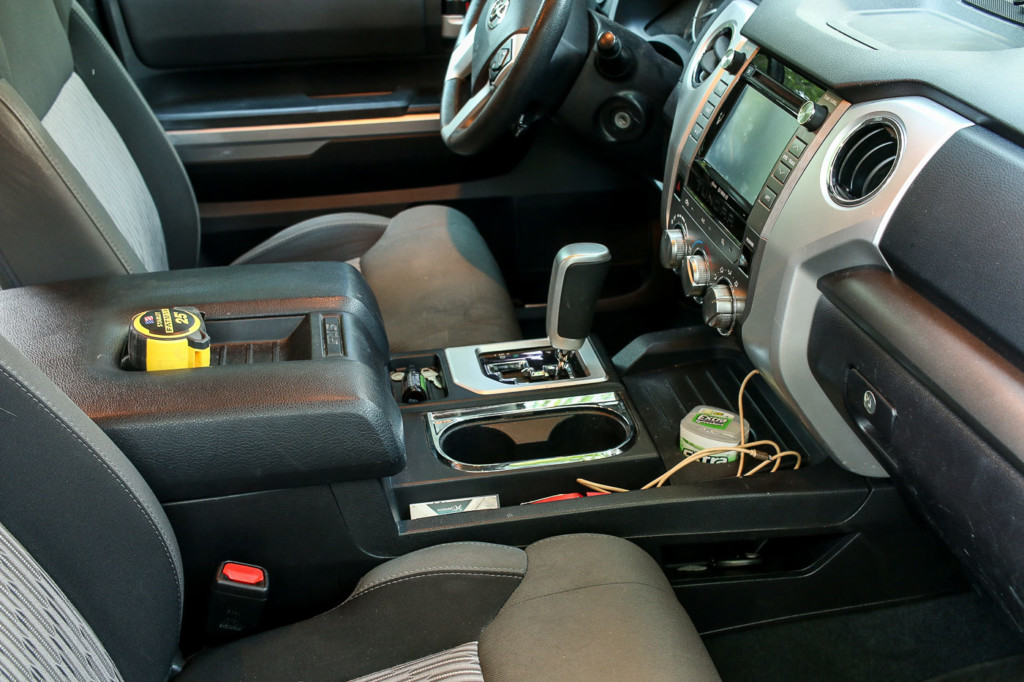
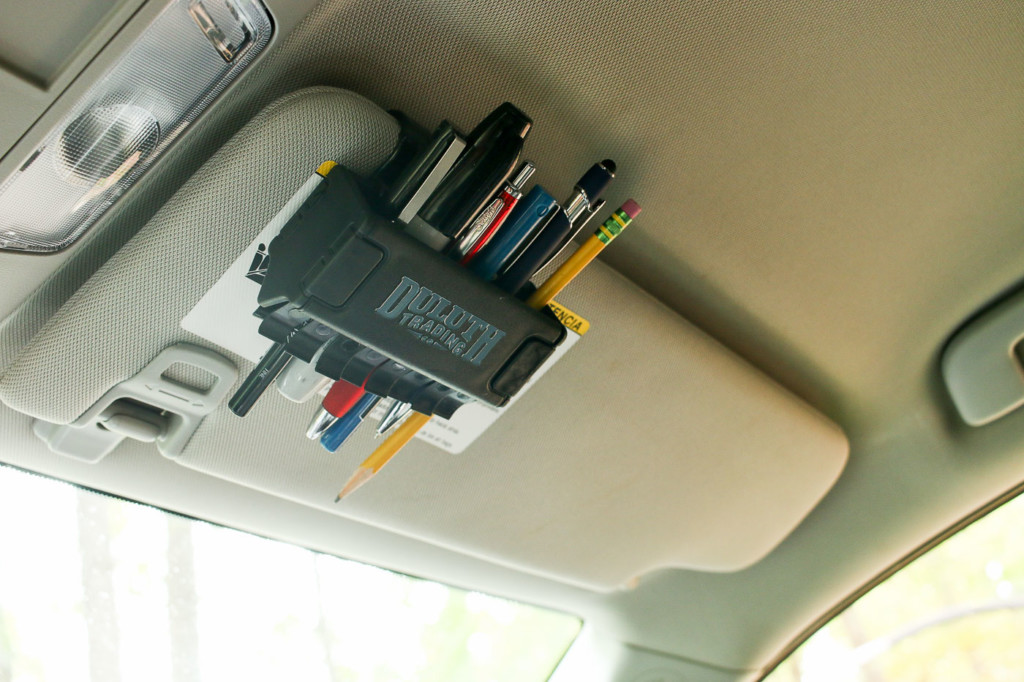
Inside the cab of my truck are all the things I need on a day-to-day basis. I store materials I don’t want to be exposed to the weather inside. My Tundra has a lot of compartments, but my favorite is the sunglasses compartment where I keep my favorite safety glasses inside to prevent them from getting scratched.

The center console has lots of additional storage areas for my tape measure, business cards, my favorite utility knife, and more.

Pens and pencils are close at hand in this pen grip holder which attaches to the visor in my truck.

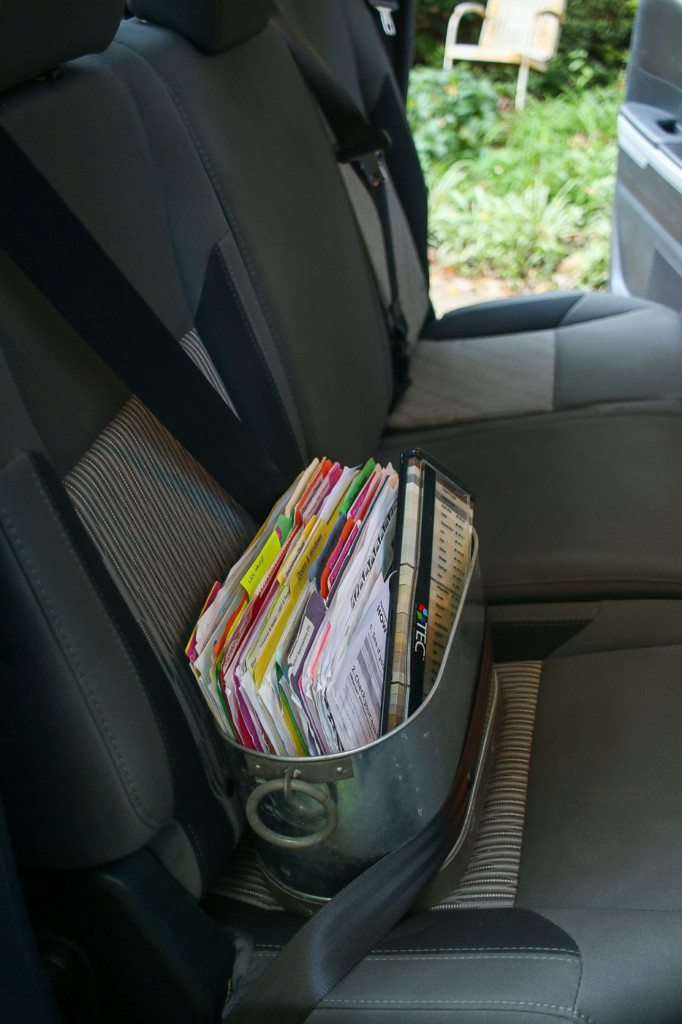
In the backseat, I have a file bin that holds all the files I need to reference throughout the day. For safety, I keep it buckled up because I wouldn’t want to get hit in the head by the metal bin. Ouch.

One of my most miserable memories from working on the Saving Etta project was the day it was cold and rainy. After that experience, I always keep a change of clothes in my truck. My washable coveralls are also stored in the bag. I tend to spend a fair amount of time in attics and crawlspaces and the cloth coveralls are more comfortable (and form-fitting) than the disposable ones. A clean pair of boots are also a necessity. Did I tell you about the time I had to go see my son’s teacher at school and my boots were so muddy I had to leave them at the front entrance and walk through the school in my socks? True story.

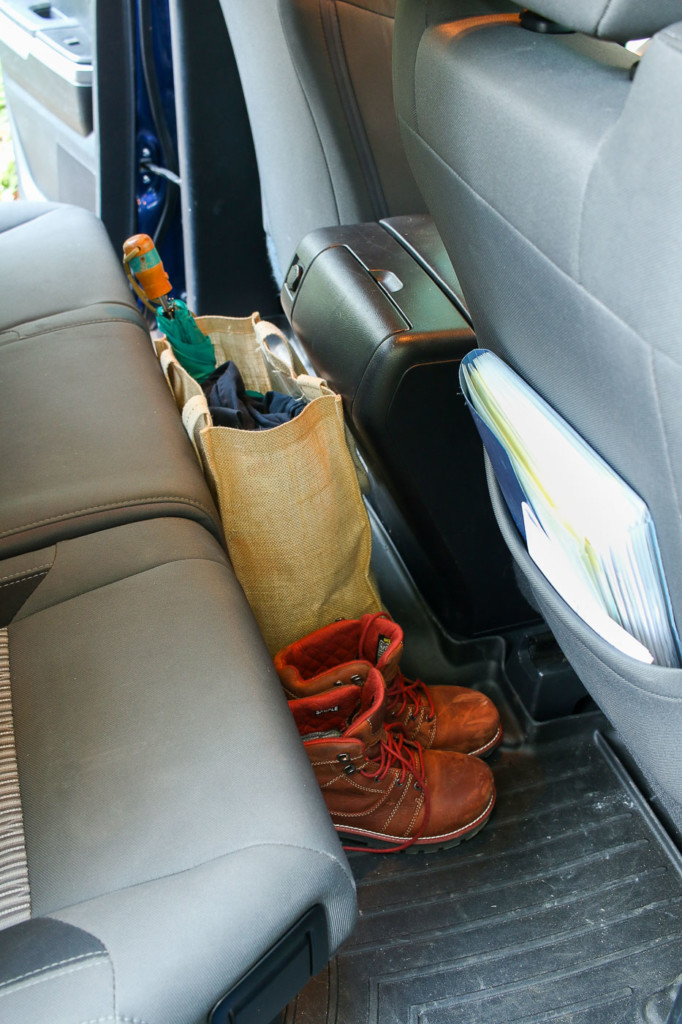
Any contractor knows receipts are plentiful while working on a project. I keep my receipts organized in the accordion file in the passenger seatback pocket. I never have to hunt for receipts again and they don’t get scattered all over.

Protecting My Perfect Contractor’s Truck:

The Tundra and I are definitely working well as a team. It hasn’t locked me out once and there aren’t random things breaking on my truck. I’m determined to keep this truck for a long time and I want to protect it from excessive wear and tear. Therefore when Gumout approached me about talking about their products, I was all in!

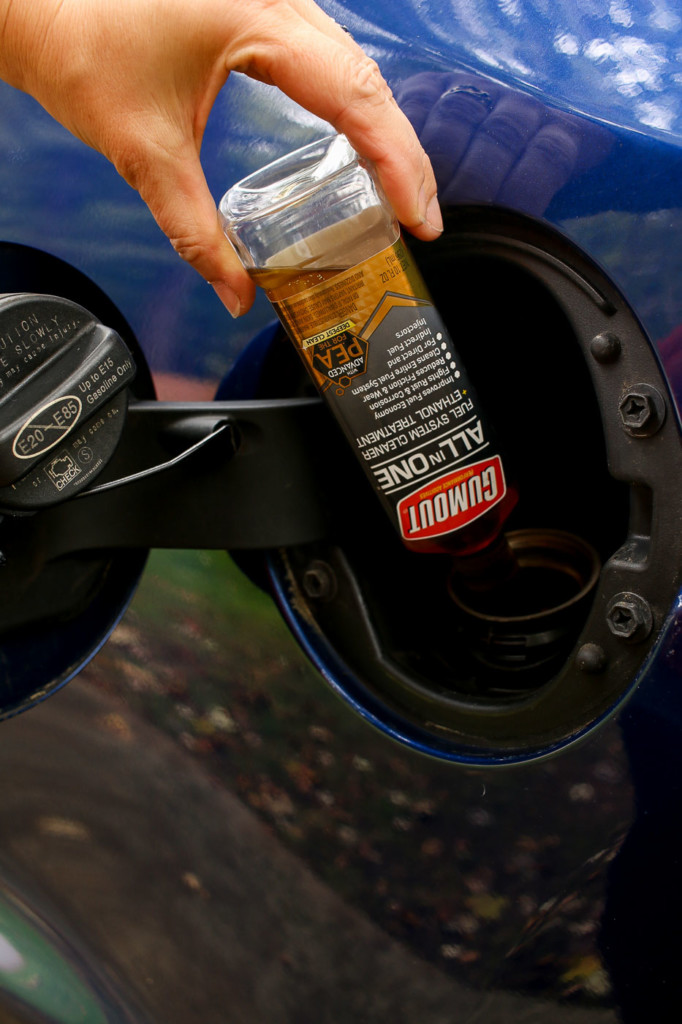
To keep my Tundra running smoothly and let me have a dependable ride, I make sure I keep up with regular maintenance like oil changes on my truck. I also started protecting the engine by adding a bottle of Gumout All-in-One Fuel System Cleaner every 3,000 miles.

Gumout All-in-One is protecting my truck specifically in these ways:

  • Helps improve fuel economy and horsepower
  • Helps boost engine performance
  • Flushes your fuel system from gas tank to tailpipe
  • Cleans and protects engine parts
  • Get every mile out of each tank of gas
  • Helps keep your engine running smoothly
  • Guards against deposits and wear that can prematurely age an engine
  • Helps keep your engine younger, longer
  • Helps your car maintain peak performance

To protect your vehicle, add one bottle to a nearly empty gasoline tank. Refill the gas tank with up to 25 gallons of gasoline. For best results, do not refill the tank until near empty. Repeat every 3,000 miles. (It’s easiest to remember when it’s time to use Gumout again if you time it just after each oil change.)

My truck has about 60,000 miles on it, but next year that odometer will likely roll over to 75,000 miles. When that happens, I’ll be switching to the Gumout Regane High Mileage Fuel System Cleaner.

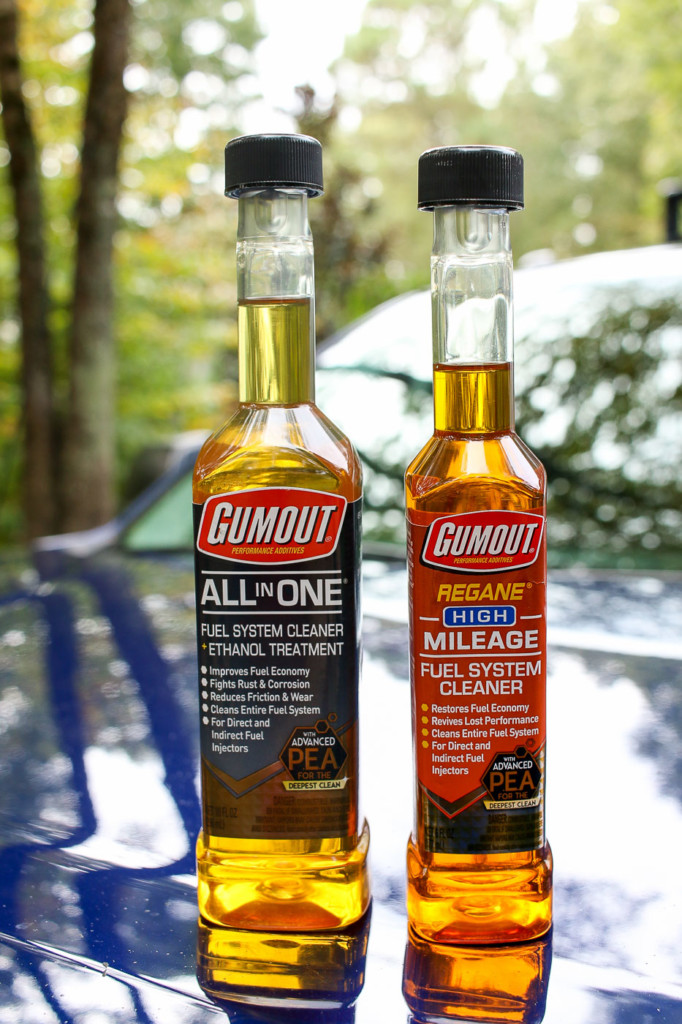
The Gumout Regane High Mileage Fuel System Cleaner benefits higher mileage automobiles in these ways:

  • Cleans your fuel system
  • Helps restore engine performance
  • Helps restore engine power
  • Helps extend the life of your engine
  • Helps keep your engine going
  • Make it part of your car’s maintenance routine
  • Help add years to your car in just seconds
  • Prevents and removes deposits that compromise fuel economy
  • Minimizes carbon buildup
  • Prevents excess friction and reduces carbon deposits

Now I’m curious, do you have any accessories or options I should add to my perfect contractor’s truck? Or let me know how you protect your automobile or truck? I definitely love my truck.

Disclosure: This is a sponsored post for Gumout. I was provided complimentary products and was compensated for my time and efforts to promote Gumout. I was not told what to write. All opinions are my own. I am particular about the brands I represent and will always let you know when you are reading a sponsored post.