how to build a wood ammo box

I’m super excited to have Pauline from My Altered State joining us today! It’s been a while since we’ve had a guest on Pretty Handy Girl, and this guest was certainly worth the wait! She’s joining us today to show you How to Build a DIY Decorative Ammo Box! This gorgeous crate may be for decorative purposes, but Pauline studied the construction of real ammo boxes to build it the same way the real ones are built. She’s amazing, and I know you’ll understand why in a minute.

I met Pauline at Haven last year, but I’ve been a fan of her blog way before we met. She is an avid upcycler and loves to use salvage materials in her projects.

She has so many fabulous projects, I had a hard time picking a few to show you. Like this fabulous Map Decoupaged Desk/Chair!

DIY Decorative Ammo Box
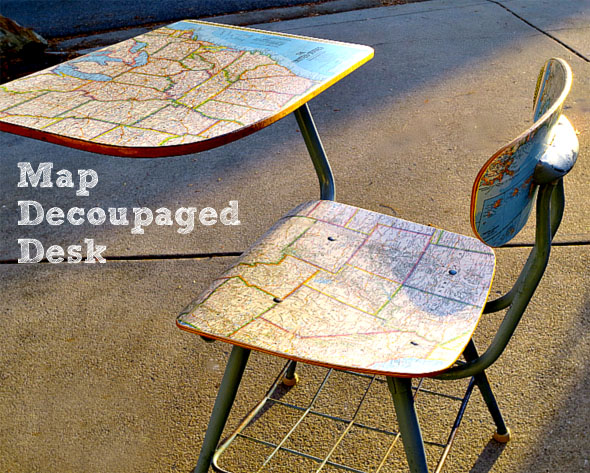
Map Decoupaged Desk Chair

Or these beautiful Reclaimed Wood Snowflakes!
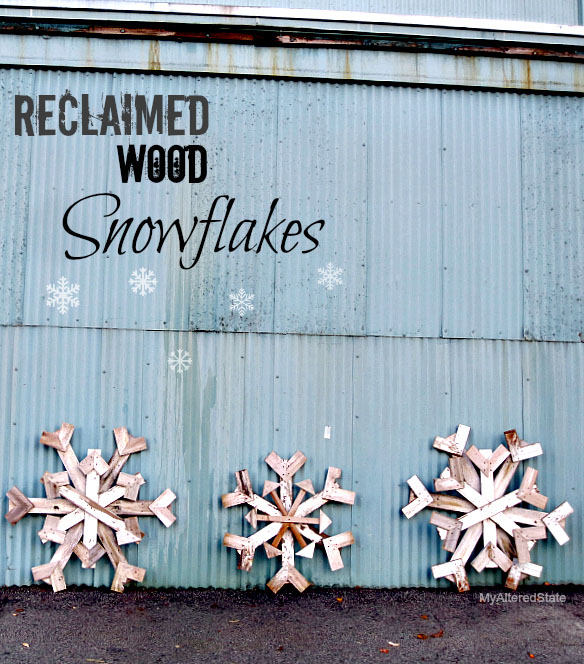
Reclaimed Wood Snowflakes

But, by far my favorite DIY project Pauline has completed so far is this desk and art installation in her kitchen!
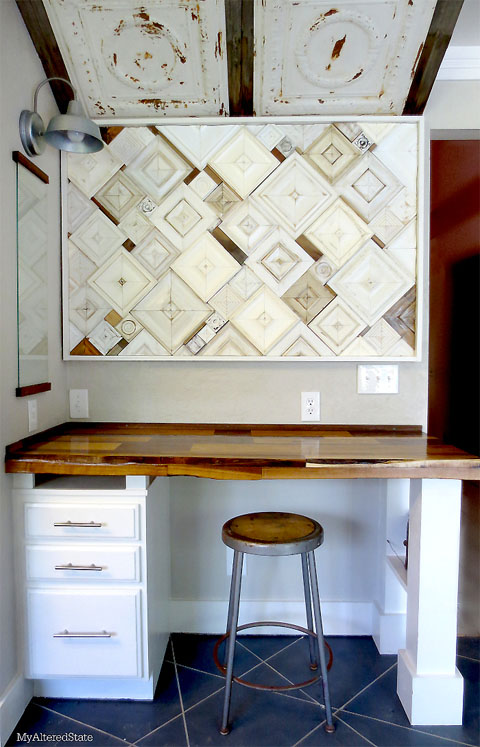
Kitchen Nook Art Installation

And now, Pauline has an easy and unique tutorial for us today! Please clap, cheer and get on your feet for the amazing Pauline from My Altered State!

page_break_2
When I started blogging, I never dreamed that I would one day meet THE Pretty Handy Girl in person, let alone find myself writing a guest post for her.  So having said that, imagine how excited I am right now as I write my first guest post on Pretty Handy Girl!  Now it’s time to get started.  I hope you enjoy my DIY Decorative Ammo Box project.
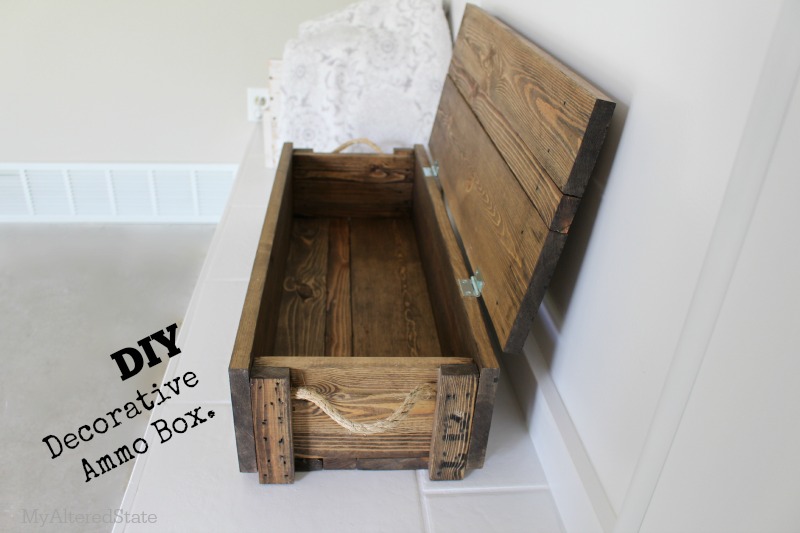
ammo box diy

Wooden military ammunition boxes have been a staple in the vintage repurposing and upcycling world for a while. They are a versatile storage item with an industrial flavor, but sometimes they are hard to find. That’s when I get the urge to build.

In an effort to keep this tutorial from being too lengthy, you can find info on finishing and aging wood in this post. Now let’s get building.

DIY Decorative Ammo Box Materials:

To create a box with the dimensions of 27″ wide x 7″ tall x 10″ deep, purchase the following:

  • (2) 1″ x 6″ x 6′
  • (2) 1″ x 2″ x 6′
  • (1) 1″ x 4″ x 6′
  • Rope
  • Gorilla tape
  • Wood glue
  • 2 Hinges
  • Drill
  • Drill bit same thickness of rope
  • Clamp
  • Pencil
  • 2″ nails
  • Nailgun (or hammer)
  • Miter saw

DIY Decorative Ammo Box Cut List:
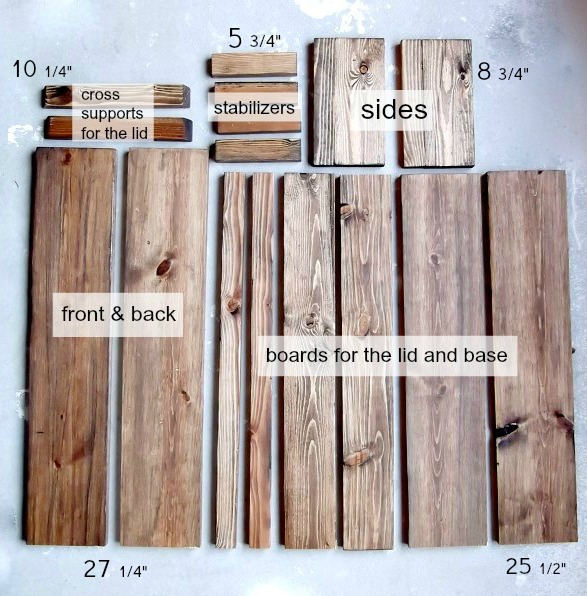
cut list wood ammo box

  • 2 – 1″ x 2″ cut to 10 1/4″ (cut ends at 30 degree bevel as shown above)
  • 4 – 1″ x 2″ cut to 5 3/4″
  • 2 – 1″ x 2″ cut to 25 1/2″
  • 2 – 1″ x 4″ cut to 25 1/2″
  • 2 – 1″ x 6″ cut to 8 3/4″
  • 2 – 1″ x 6″ cut to 25 1/2″
  • 2 – 1″ x 6″ cut to 27 1/4″

DIY Decorative Ammo Box Instructions:

By copying the design of an authentic ammo box, I will show you how to build this DIY Decorative Ammo Box clear down to the way the handles are attached.

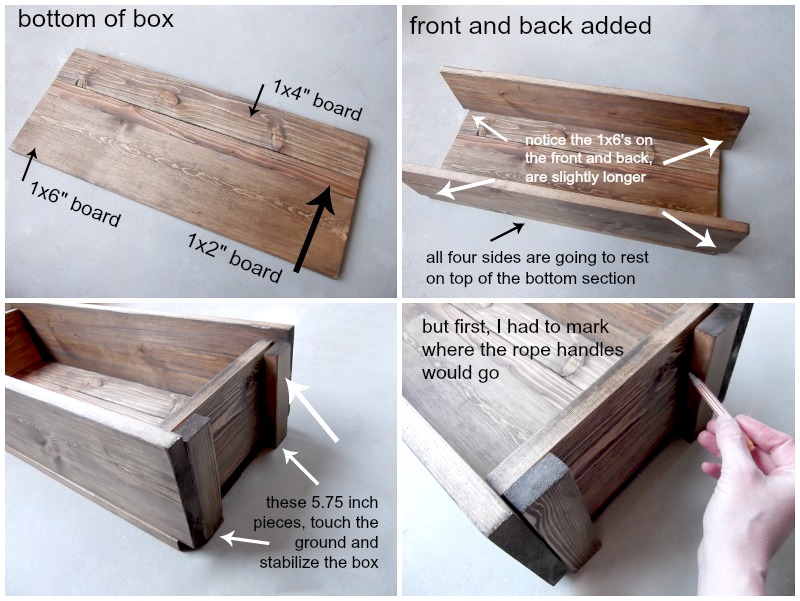
Lay out all your pieces for a “dry run” of the design:

  • Bottom of box: (1″ x 6″ x 25 1/2″) + (1″ x 2″ x 25 1/2″) + (1″ x 4″ x 25 1/2″) boards.
  • Front and Back of box: 1″ x 6″ x 27 1/4″ boards
  • Sides of box (with rope handle): 1″ x 6″ x 8 3/4″ boards

Mark the location for your rope handles (approximately 2″ down from the top of the box.)
assemble wood ammo box

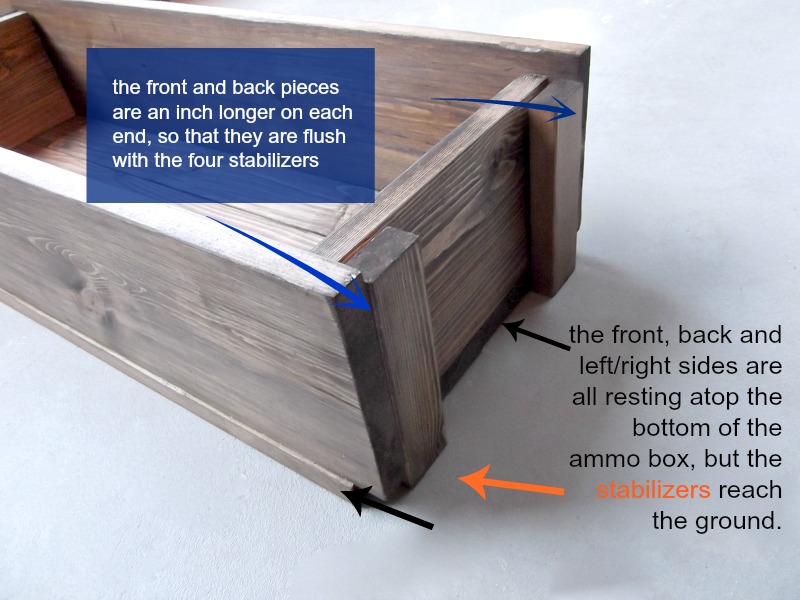
During the dry run, notice that the front and back pieces are an inch longer on each side. The stabilizing 1″ x 2″ pieces will rest on the ground, while the four sides of the box rest on the base.
diy ammo box design

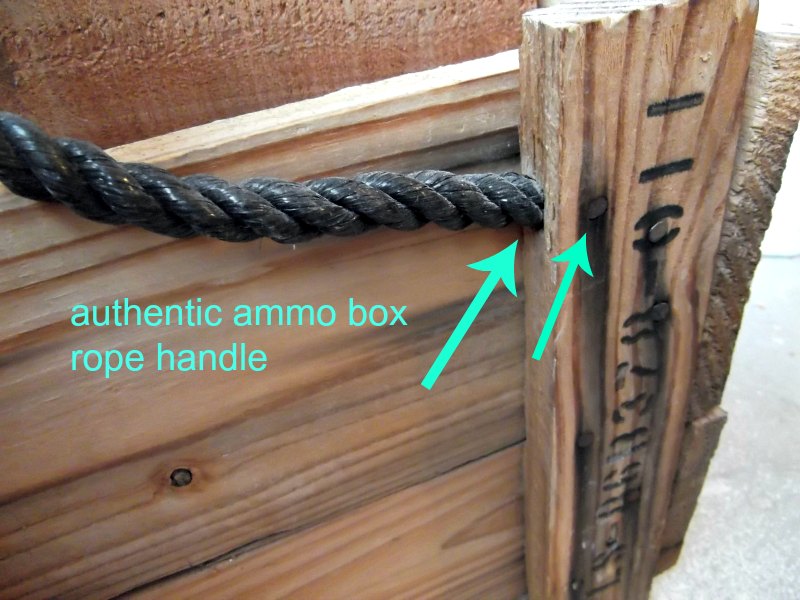
After all the ammo box collecting I’ve done over the years, you’d think I would have noticed how the handles were installed on the real thing. Nope. Never paid attention until now. Here’s a close up of the real thing:
military wood ammo box

A notch is hollowed out where the end of the rope goes, and then secured in place with nails. This design actually keeps any rope ends or knots from being visible on the inside of the box. Clever.

To create the notch, clamp two 1″ x 2″ x 5 3/4″ stabilizer pieces together. Use the drill bit to drill a hole directly in between the two pieces of wood. Repeat using two more 1″ x 2″ x 5 3/4″ pieces.
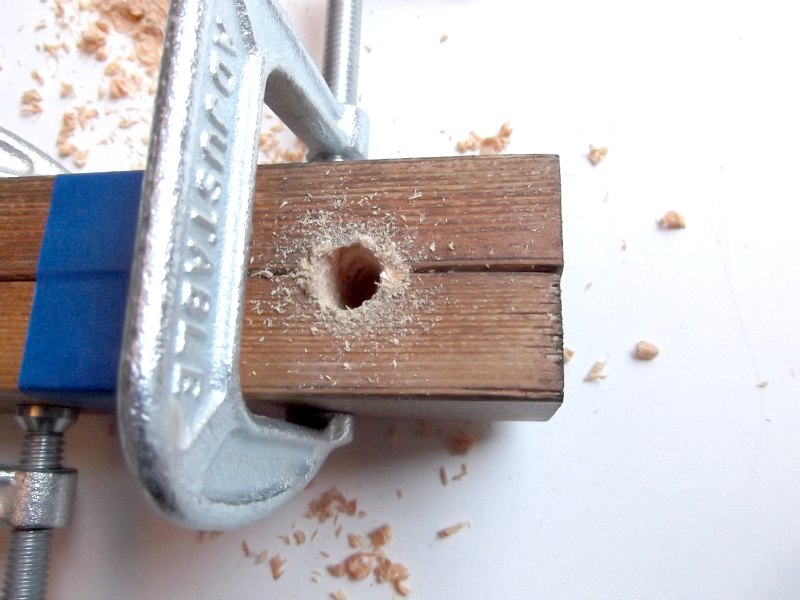
drill holes for rope handles

Use Gorilla Tape (or duct tape) to seal the end of the rope and keep it from unraveling.
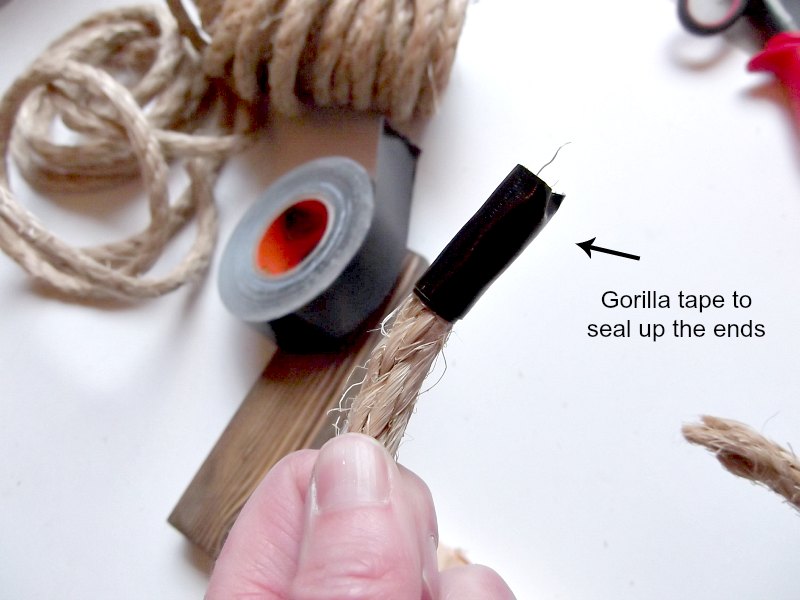
rope handle wooden box

Rest the end of the rope into the notch of the stabilizer 1″ x 2″ and add wood glue to the stabilizer and the taped rope end.
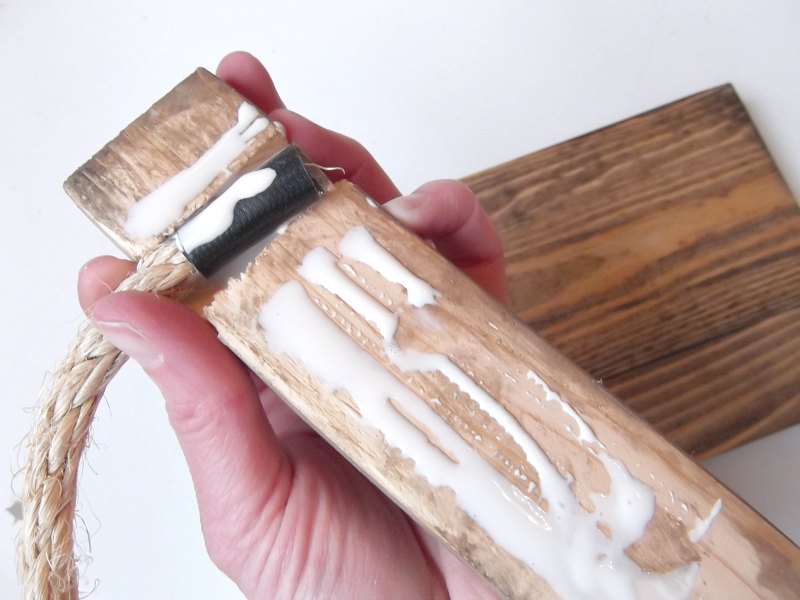
wood glue diy ammo box

While holding the handle (stabilizer) pieces in place, drive the first nails through the wood, into the rope end and into the side of the box.
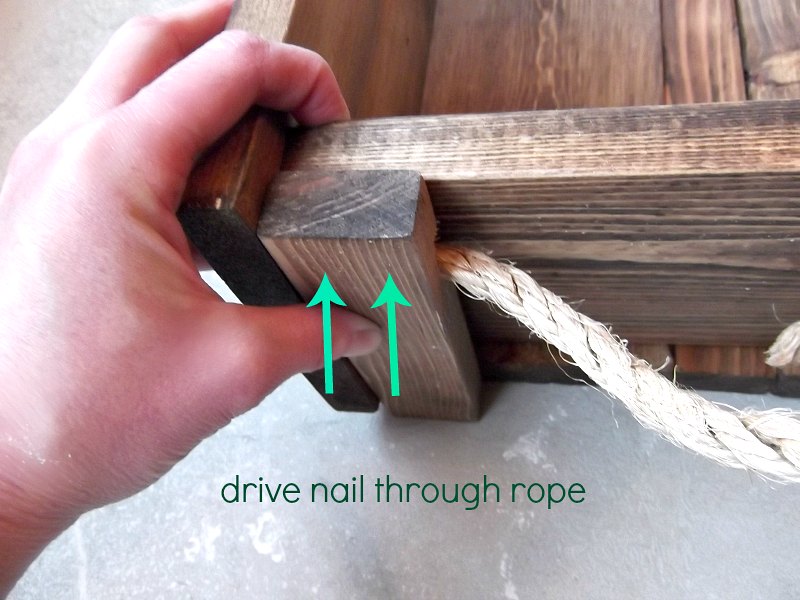
ammo box handles

After driving two nails into the stabilizer pieces to secure the rope, drive two more nails through the front and back of the box, into the sides of the stabilizer pieces (as shown below.) Then go ahead and glue/nail all the sides together, while keeping it rested on top of the bottom boards.  (This will help you keep everything aligned and square.) Once all the sides are nailed together, flip the whole box upside down, and glue and nail the bottom boards into the frame of the ammo box.
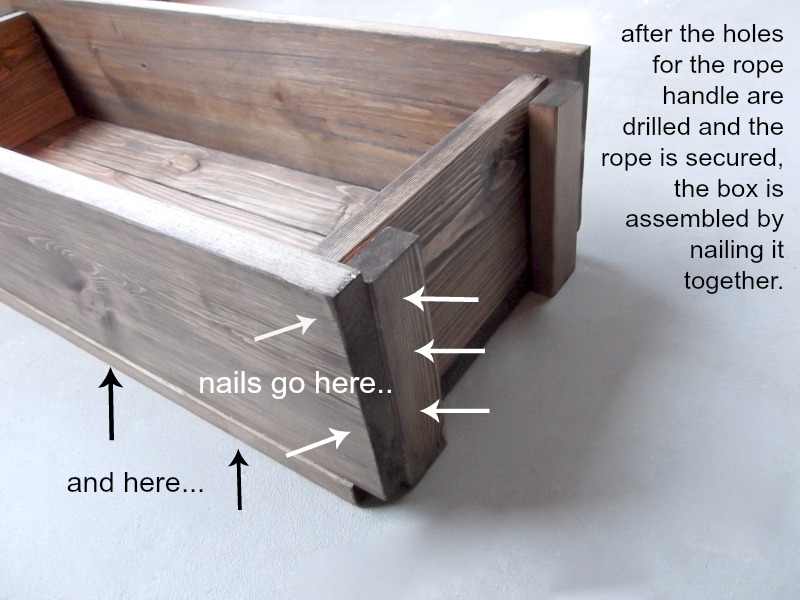
diy ammo box secure sides

Assembling the lid:

The three lid boards are identical to the boards on the bottom of the box: (1″ x 6″ x 25 1/2″) + (1″ x 2″ x 25 1/2″) + (1″ x 4″ x 25 1/2″) The lid boards are secured together by the two 1″ x 2″ x 10 1/4″ cross supports (the two pieces with both ends beveled at 30°.)
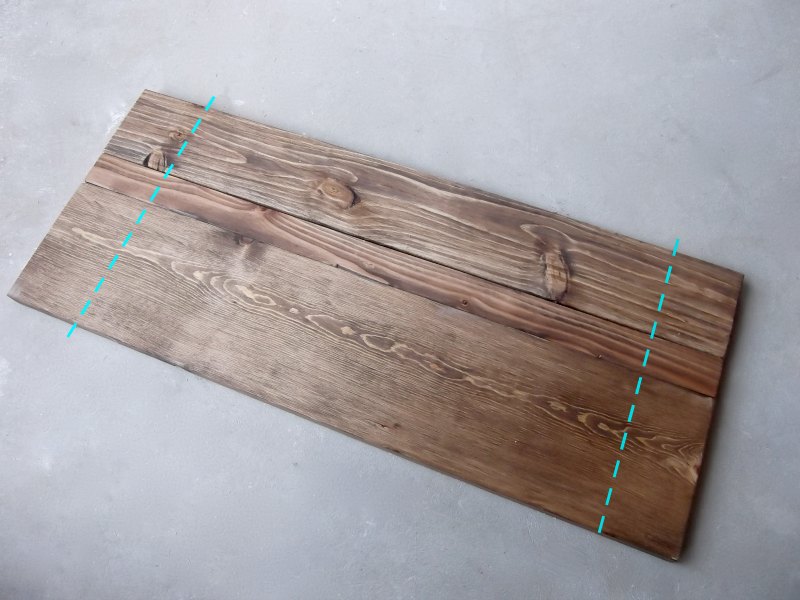
wooden ammo box lid

Nail on the cross supports about 2″  from outside ends of the lid.
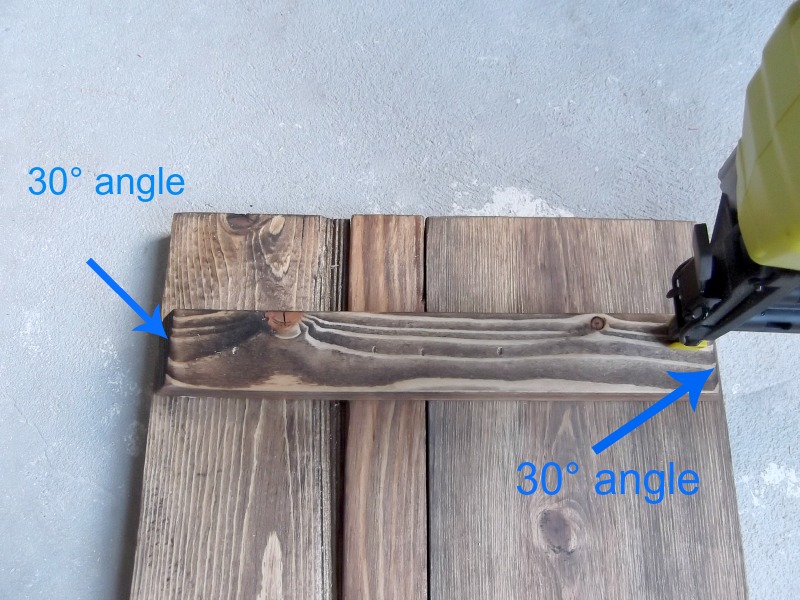
ammo box lid

Attach the lid:

For a long time, if there were hinges involved in a project, I walked away in tears.  That is, until I discovered this little invention: a drill bit for hinges (affiliate link). I can’t say it enough as this little guy has saved my sanity a thousand times over.

Drill holes for the hinges, about 5 1/2″ from the outside edges of the box, and attach the hinges to the box and the lid.
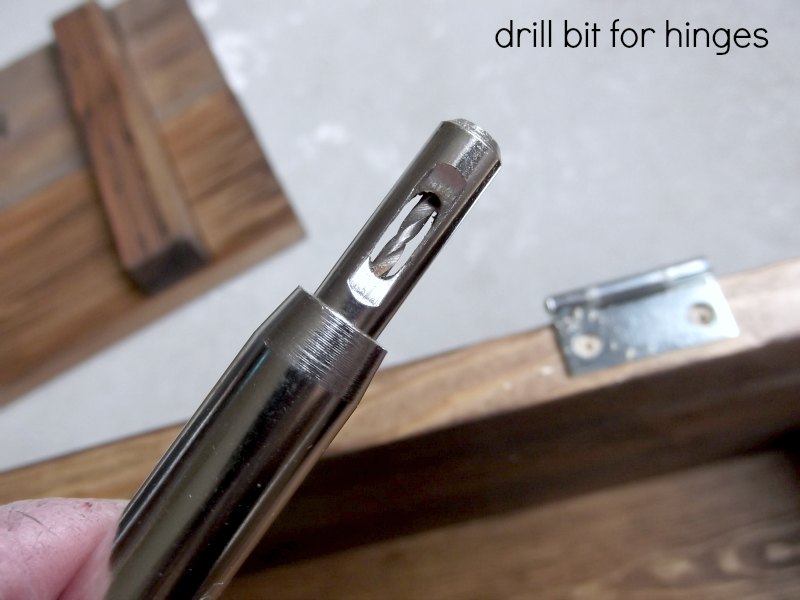
drill bit for installing hinges

And that’s it!

how to build a wood ammo box

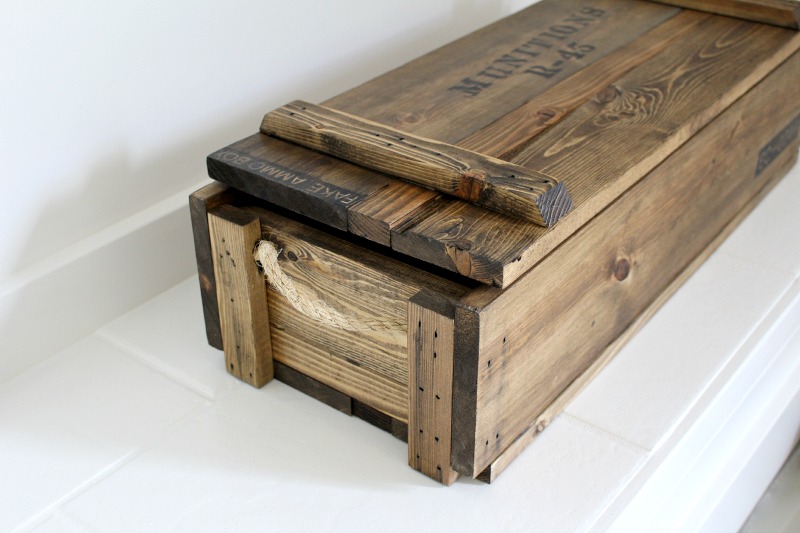
You’ve got yourself an ammo box, that has never actually held ammo.  What will you do with yours?
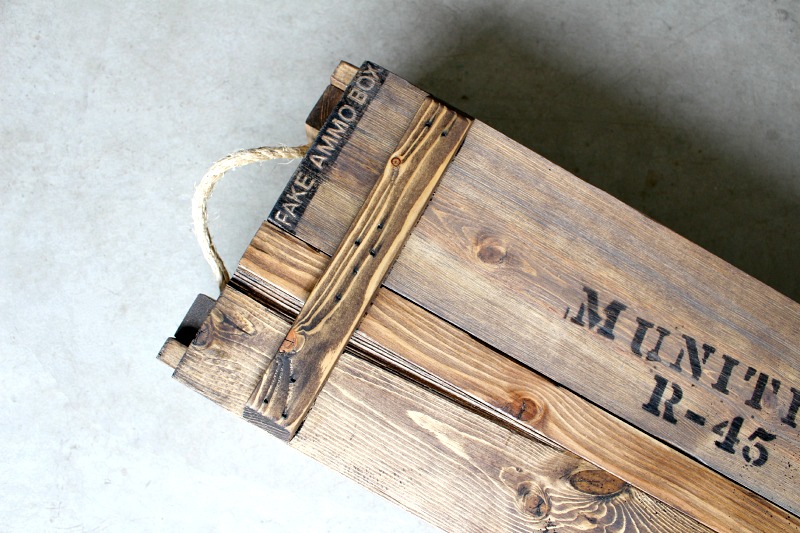
faux ammo box

I can think of a lot of other things that I might hide inside this box, like Wii remotes.  (After I add a lock, of course.)  😉

Visit this tutorial for the “how to” on the stain/distressing techniquefor this ammo box, where you’ll find great tips on aging wood with stain.
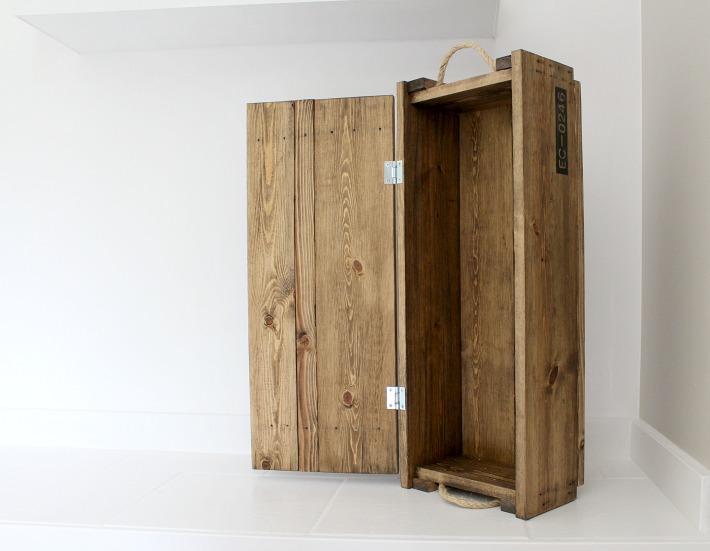
open ammo box

Hope you enjoyed!

Did I tell you Pauline is amazing or what?!

PHGFancySign

DIY Firepit and Seating | Pretty Handy Girl

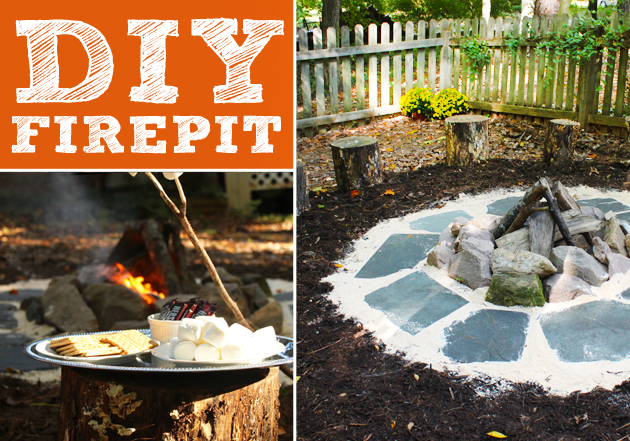
Firepits are very popular right now. You can purchase a simple firepit at your local home improvement store, or put in a little sweat equity and create a DIY Firepit with Seating.

When we had several hardwood trees taken down in our yard, I asked the tree guy to cut some of the base pieces of the tree trunk into 18″ segments to use as stumps to sit on.

Then I set about creating a DIY firepit and seating in our back yard.

Materials:

  • Shovel
  • String
  • Stake
  • Stick
  • Rocks or fire ring
  • Sand
  • Bag of drainage gravel
  • Slate, stepping stones or pea gravel
  • Mulch or crushed stone
  • Stumps or seating
  • Wood to burn

Instructions:

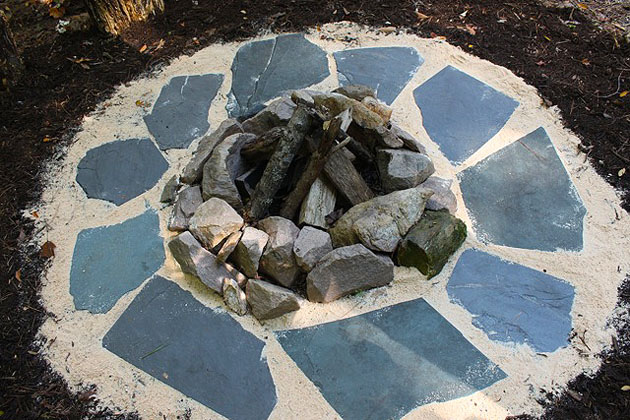
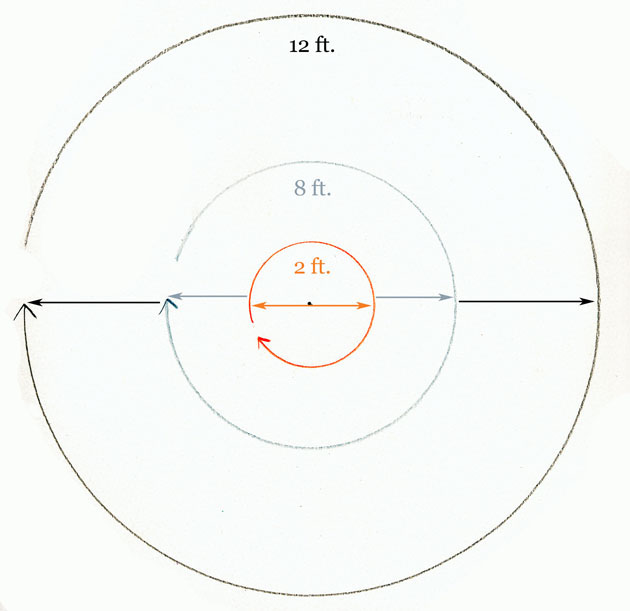
Begin by locating a level location to build your fire pit. Take note of any overhanging branches and trim them away from the firepit area. Hammer the stake into the center of your firepit area. Attach string and make a loop in the string at 6 feet. Insert a stick into the loop and walk around pulling the string taut while dragging the stick in the earth to mark a 12 foot diameter circle. Create another loop at 4 feet and repeat marking an inner circle. Finally, create a loop at 1 foot and drag the stick to mark the firepit ring area.

DIY Firepit and Seating | Pretty Handy Girl

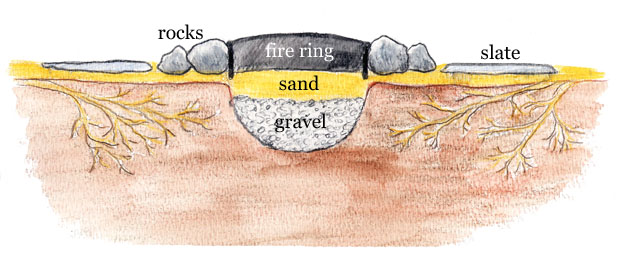
Dig a hole in the 2 foot firepit ring area. Remove any roots from the dirt. Dig about 12″ down. Fill the bottom of the hole with gravel. Add a layer of sand on top of the gravel. Line the 2′ firepit area with a fire ring or rocks (or both).

DIY Firepit and Seating | Pretty Handy Girl

Pour sand around the 8 foot diameter circle and set your stepping stones or pea gravel in this area.

Read more

How to Build a Table | Pretty Handy Girl

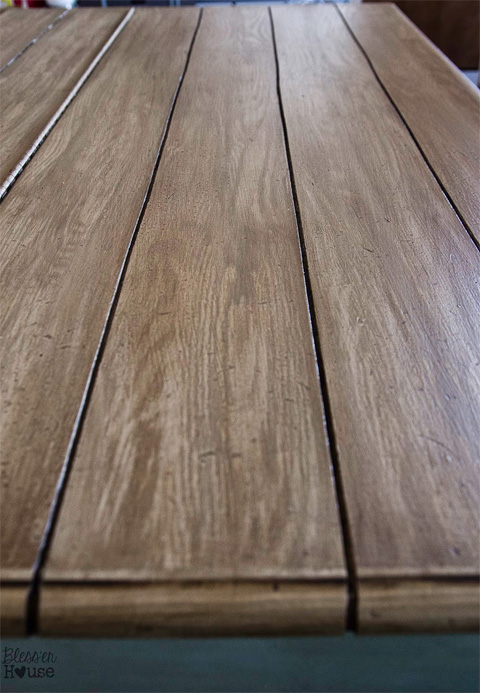
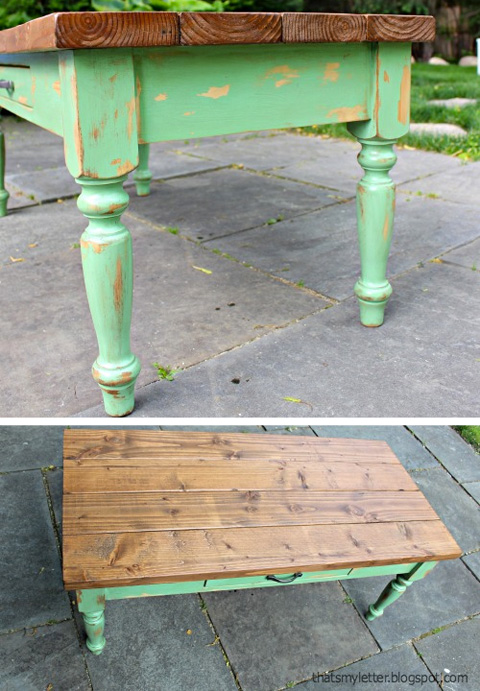
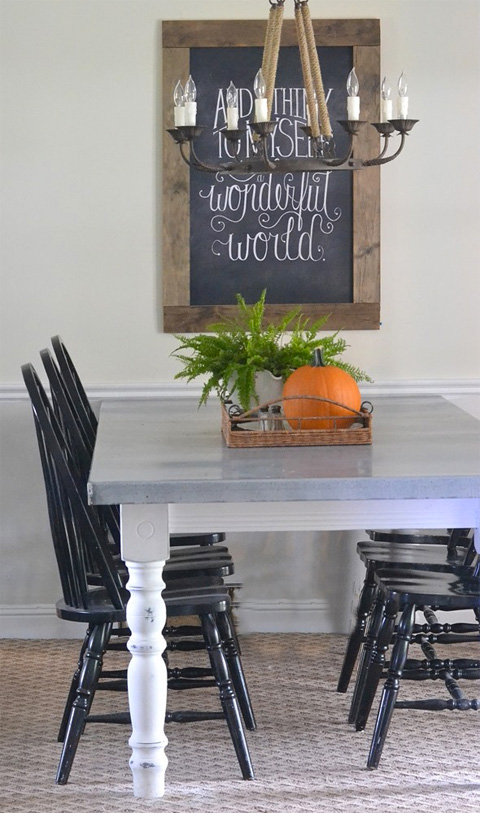
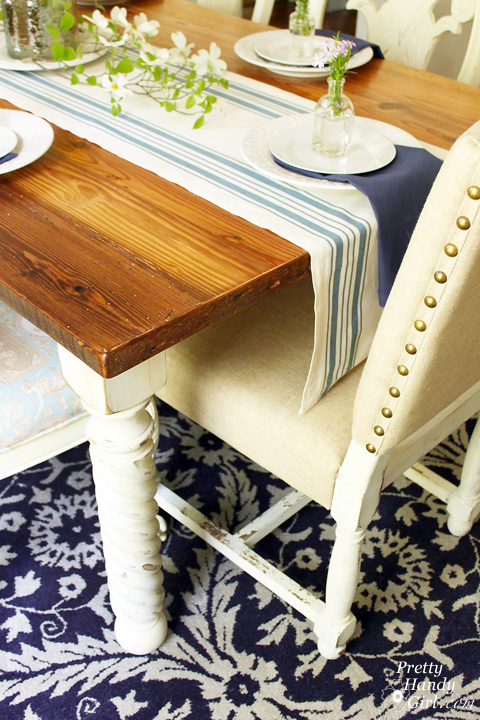
Building a Farmhouse Table has been on my mind for several years. I was never crazy about our hand-me-down dining set. But, I never had the time to build a table from scratch. Now that the table is done, I don’t know why I put it off for so long. Building a table is relatively easy DIY project. You basically need four table legs, 1″ x 4″ boards for the apron and a table top. Depending on your style, you can use anything for the top. You can cut grooves into an existing table top to create the plank look, like Lauren from Bless’er House did:

Faux Plank Table Top by Bless'Er House

Or you could use 2″ x 6″ lumber to create a new table top like Jaime from That’s My Letter did:

2x6 Lumber Table by That's My Letter

Or wrap MDF with galvanized sheet metal for a zinc top, like Traci from Beneath My Heart did:

Zinc Topped Table by Beneath My Heart

Feel free to create a table top with something less conventional like a slab of marble, tempered glass or an old door! Use your imagination and creativity.

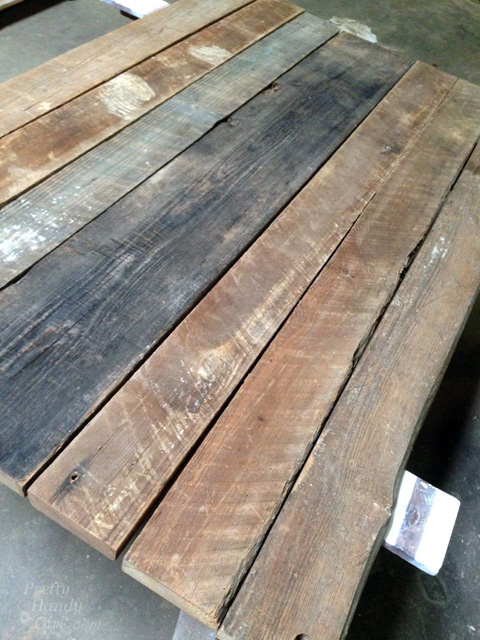
I chose to work with reclaimed lumber for a true farmhouse table top. I bought reclaimed rafters from The ReUse Warehouse in Durham, NC. When I paid for it, the lumber looked like this:

Reclaimed Lumber Farmhouse Table | Pretty Handy Girl

But, was transformed into this:

Reclaimed Lumber Farmhouse Table | Pretty Handy Girl

Here are the details for creating the reclaimed wood table top.

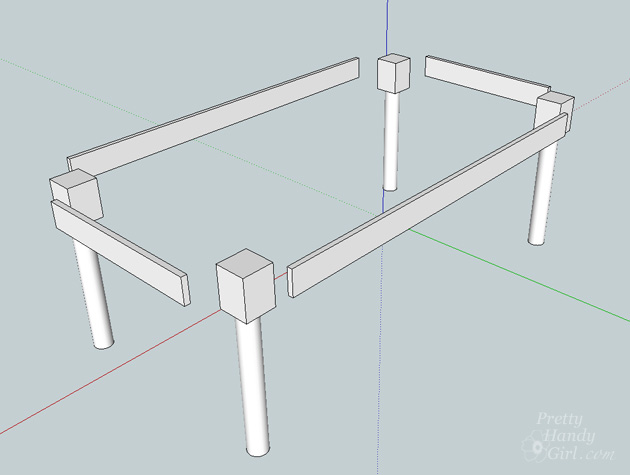
Today we’re going to learn how to build the table base!

How to Build a Table Materials:

(I’ve included affiliate links for your convenience. I earn a small percentage from a purchase using these links. There is no additional cost to you. You can read more about affiliate links here.)

  • 4 Table legs (rope twist legs I used from Osborne Wood Products)
  • Table top
  • 1″ x 4″ Premium Pine (poplar or other straight knot free wood)
  • Kreg JigHow to Build a Table
  • 2″ Pocket Hole ScrewsHow to Build a Table
    (you may also need different depth screws if you have a thin table top)
  • Tape MeasureHow to Build a Table
  • Combination SquareHow to Build a Table
  • ClampsHow to Build a Table
  • Pencil

Optional: 2″ x 4″ board for additional center support

How to Build a Table Instructions:

Measure your table top and subtract 8″ from the length measurement (my table is 71″ long, so the measurement I need for the base is 63″.) Measure the table top width and subtract 5″ from that measurement (my table is 42″ wide, so the measurement I need for the base is 37″.)

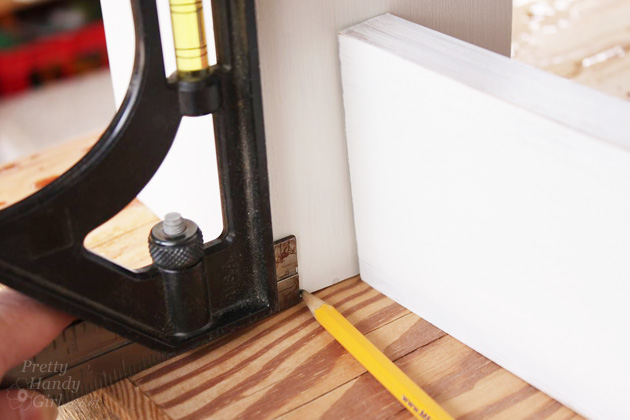
Next measure the thickness of the top of your table legs. Then double that number. This will give you the width of both legs per side. Subtract this number to get the length of your apron rails. (For example, my table base final measurement is 63″ x 37″. My table legs are 4″ wide x 2 = 8″. Therefore my two side rails need to be 55″ and the end rails should be 29″.)

How to Build a Table | Pretty Handy Girl

Cut the 1″ x 4″ boards to the size you figured out above.

Lay your legs and apron rails upside down on a flat surface. Double check your measurements, square and the table top dimensions against the table base. Read more

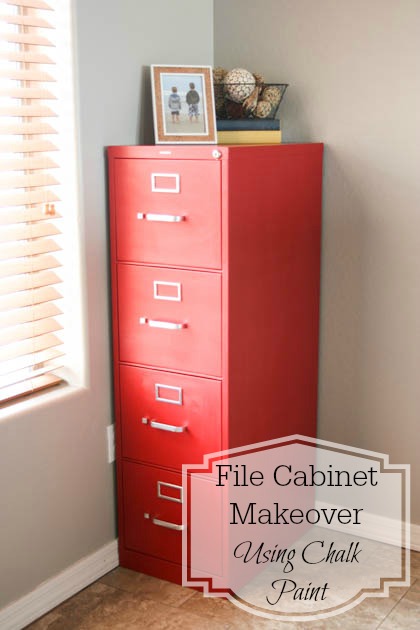
File Cabinet Makeover Using Chalk Paint

Hey there everyone!  I’m working in my craft room to give it a major overhaul and make it a much more functional and creative space.  It also doubles as an office that I share with my husband.  It’s not always the easiest thing to do, partly because of a lack of organization. One of the biggest projects we’re taking on is completely making over the closet.  I’ve already replaced the closet doors with curtains and I love how much easier it has made it to get to things in the closet.

File Cabinet Makeover Using Chalk Paint

edited-8164

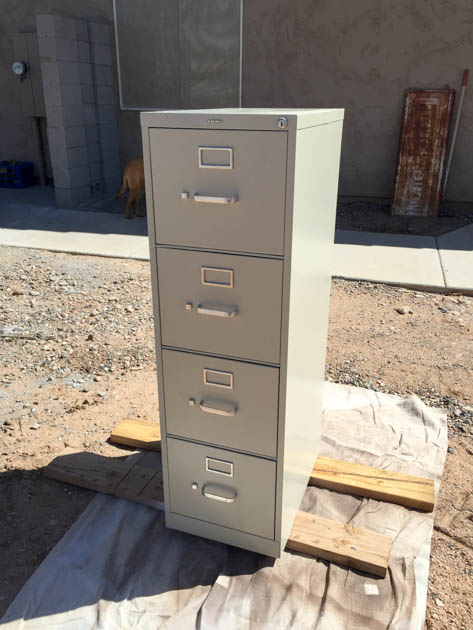
This file cabinet is one of the things that goes in that closet.  When we finish making over the closet, it will be moved to a more prominent location that will be more visible, especially if the curtains are left open.  Because of that, I decided that the boring beige color had to go and I gave it a quick and SUPER cheap makeover!

Here’s what you’ll need to do this project yourself!

File Cabinet Makeover Using Chalk Paint Materials:

File Cabinet Makeover Using Chalk Paint Instructions:

Unless you plan on painting it, you want to remove all of the hardware off of your file cabinet.  I wasn’t quite sure how this would go, but it was extremely easy to remove everything.  Just a couple of bolts and I was pretty much done!

edited-8166

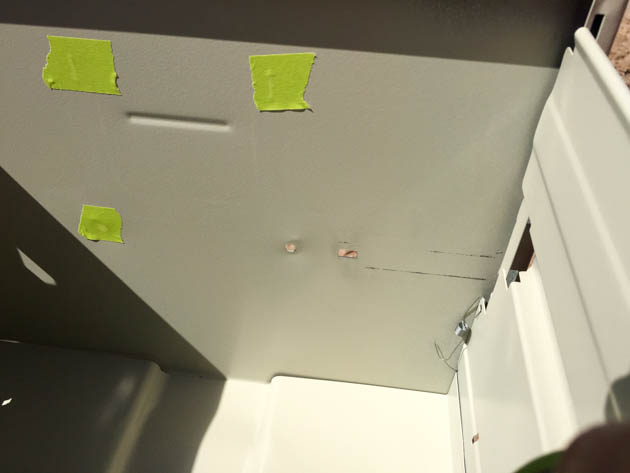
To protect the inside of the cabinet from overspray or paint dripping through, cover all of the holes from the inside using masking or painter’s tape.

edited-8168

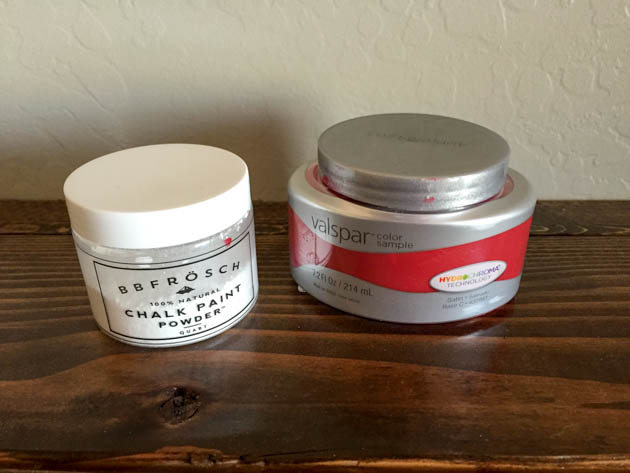
Time to mix your chalk paint.  What I love so much about BB Frösch Chalk Paint Powder is that there’s virtually no waste.  You mix as you go.  I like using the sample-sized paint containers because they’re cheap and if it’s a project where I’m not sure how much paint I’ll need, at least I know I won’t go way over by buying a quart.  The other amazing thing is that there’s virtually no prep work.

Wipe down the file cabinet with a wet cloth and that is it!

edited-8170

If you choose to paint your cabinet using a roller or paint brush, you can get started from this point.  If you plan to use a paint sprayer, you’ll need to prep the paint.  First and foremost, strain your paint!  Lowe’s sells little cone paint strainers (they look like coffee filters) for $.98 a four pack.  Once your paint is strained, you need to thin it with water.  The HomeRight paint sprayer that I use comes with everything you need to do this, plus great instructions. Read more

mom diy cut out tray

cut out tray title

Happy Wednesday Pretty Handy readers.  Jaime here from That’s My Letter to share a DIY project that makes a great anytime gift or (an even better idea) for Mother’s Day.  I’ll show you how to make this wood cut out tray which you can personalize with any name or shape.

The wood cut out makes for an unexpected design element.  I painted bright blue behind the cut out, but any contrasting color will look great.

cut out tray 3

Plexiglass installed over the wood cut out provides a solid flat surface.  The plexiglass also adds a bit of shine and fancy!

cut out tray 2

Below are the step-by-step instructions to make this tray.

Materials:

cut out tray supplies

  • 1/2″ plywood 18″ x 12″
  • 1/4″ plywood 18″ x 12″
  • 1 sheet plexiglass (18″ x 24″ –  makes 2 trays)
  • 1 – 1″ x 2″ x 6′ pine board (cut 2 @ 18″ length and 2 @ 13 1/2″ length)
  • white paint
  • blue paint
  • stain
  • 2 handles
  • 1/2″ wood screws
  • 1/2″ lath screws
  • plexi/glass cutter
  • jig saw
  • sandpaper
  • ballpoint pen
  • measuring tape & pencil
  • drill, bits & 1/2″ spade bit

Instructions:

cut out tray step 1

Step 1: Print out your name or word.  (I used Sign Painter – housescript font at 475 point.  Any font will do as long as it’s thick enough to cut out.)

cut out tray step 2

Step 2: Center the printout on the 1/2″ plywood and trace around letters with a ballpoint pen.  Use heavy pressure to create an indent in the wood. Read more