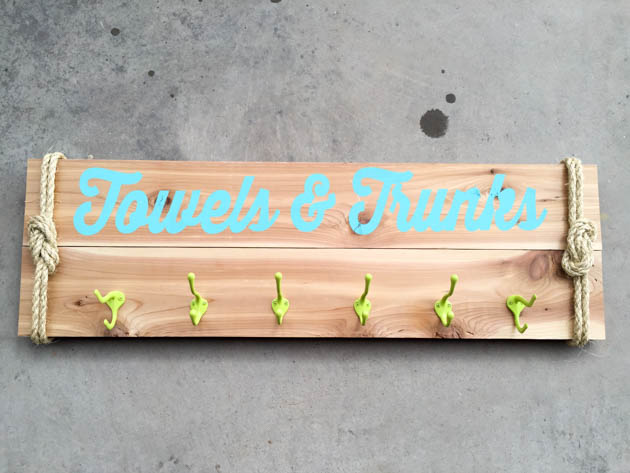
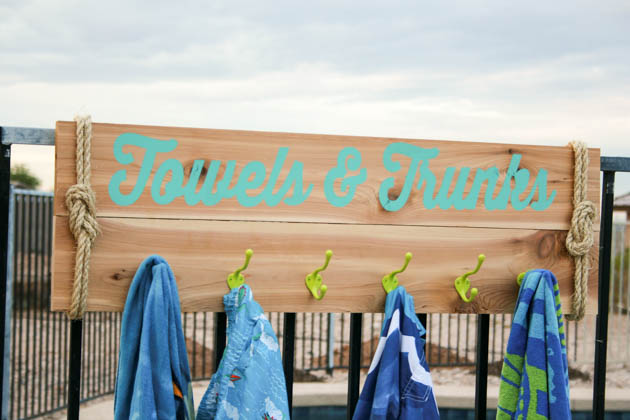
The kids are back in school, but we still have plenty of hot summer weather here in Arizona. This means a lot of time by the pool. My boys swim every single day, and always leave a pile of towels left in their wake. I was tired of the towels and swim trunks piling up in their bathroom, so I decided it was time to make a designated place for them to hang everything to dry. This DIY Nautical Towel Rack keeps their bathroom picked up and it adds a little fun nautical decor to the pool area, so it’s a win-win!
Materials:
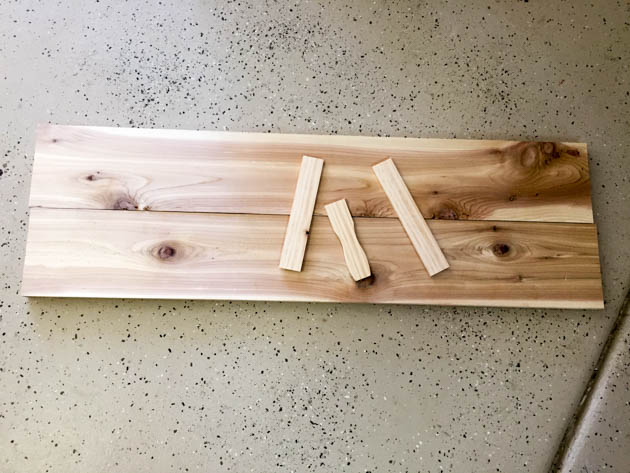
- 1 – 1x6x8′ cedar board
- 1 – 5 gallon paint stick
- 1 roll of 1×2″ sisal rope (about 10 feet)
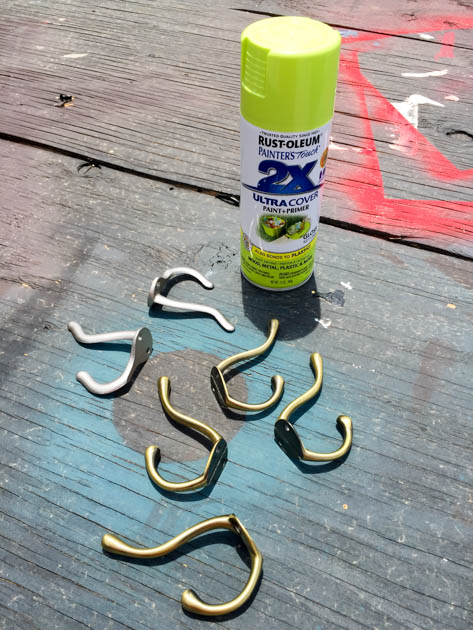
- 6 coat hooks
- Green Apple spray paint
- acrylic paint in the color of your choice (I used Americana Bahama Blue)
- Wood Glue
- Super Glue
- Staple Gun with 3/4″ staples
- 1 yard of adhesive vinyl and transfer paper for the stencil
- Die-cutting machine
- 1 1/2″ hose clamps
- 1/2″ self-tapping screws
Instructions:
Spray paint the coat hooks and set them aside to dry.
While the paint dries on the hooks, cut the cedar board into two 3′ sections. (If you have a bigger family, you can always just cut it in half for a bigger towel rack. ) Cut the 5 gallon paint stick into three pieces to attach to the back.
Line up the boards and attach the paint sticks to the back using wood glue and staples. If you don’t have a staple gun, a brad nailer with 3/4″ nails will work as well. Read more