Hang Stockings Without a Mantel

Hang Stockings Without a Mantel

Hello, it’s Jessica here from Decor Adventures, back this month with a simple solution for holiday decorating. These days we see all kinds of lovely homes with Christmas stockings hung beautifully from the mantel or staircase. But what if you don’t have either in your home? I’ve come up with an easy way to display stockings that you can put together in less than an hour. Here is how to hang stockings without a mantel – frame them!

Materials:

Hang Stockings Without a Mantel

  • Large empty picture frame
  • Foam board
  • Fabric
  • Chicken wire
  • Wire snips or sharp scissors
  • Gloves
  • Paint (optional)
  • S-hooks
  • Glazier’s points and tool (or a wide flat head screwdriver)
  • S hooks
  • Stockings

Instructions:

1. For this project you’ll use a large empty picture frame that doesn’t have glass. You can find them at thrift stores, craft stores, or just reuse one of your own. You can paint or stain the frame to your liking, but that is optional depending on your style.

2. Cut a piece of chicken wire one inch larger on all sides than the inside of your frame where the glass would rest. Make sure to wear gloves for this part as the wire can be sharp. Most chicken wire comes with natural lines where the wire is twisted. You can use those as your edges. If you want to spray paint the wire to blend in, that would create a nice look too.

Hang Stockings Without a Mantel

3. Place the frame front side face down on a table and insert the wire into the back of the frame. Set that aside for the moment. Read more

snowglobe ornament

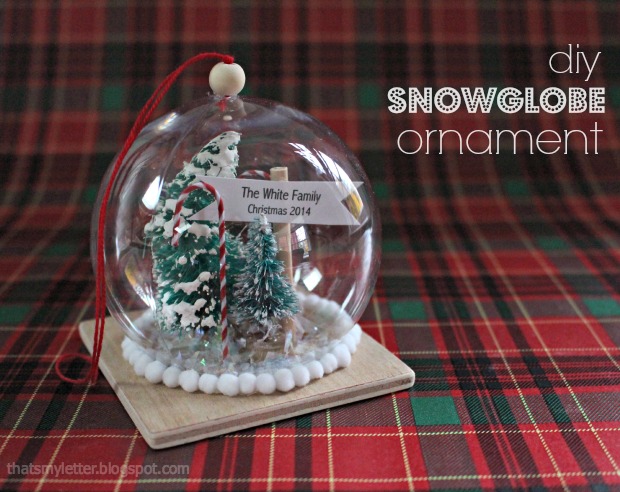
Jaime here today from That’s My Letter and it’s officially holiday prep time!  Today I’m sharing a DIY snow globe ornament with a wood base that makes a perfect gift for anyone big or small.

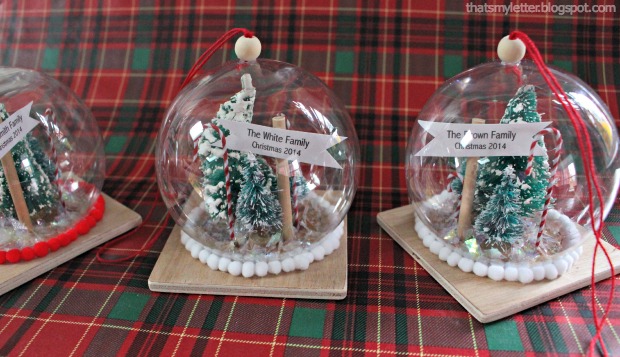
This snow globe ornament is constructed on a wood base where all the interior pieces can be glued to the base and then the clear globe is placed over the scene.  The globe is plastic and the entire ornament is very lightweight so it won’t weigh down your tree branches!

snowglobe ornament 4

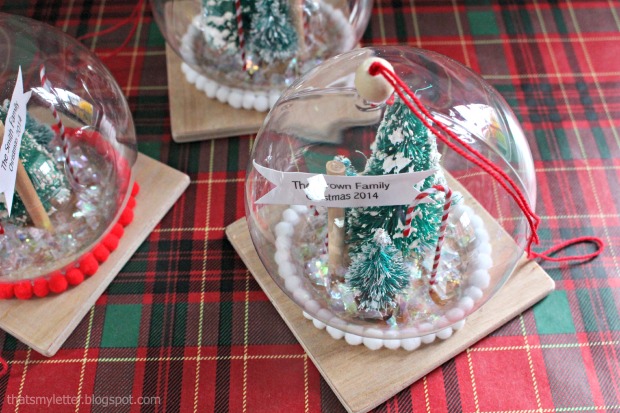
You can put nearly anything inside the snow globe as long as it fits under the dome.  I used bottle brush trees, wire candy canes and a wood dowel sign with the family name printed on cardstock.  Add a little faux snow and you have the cutest little winter scene.

snowglobe ornament 2

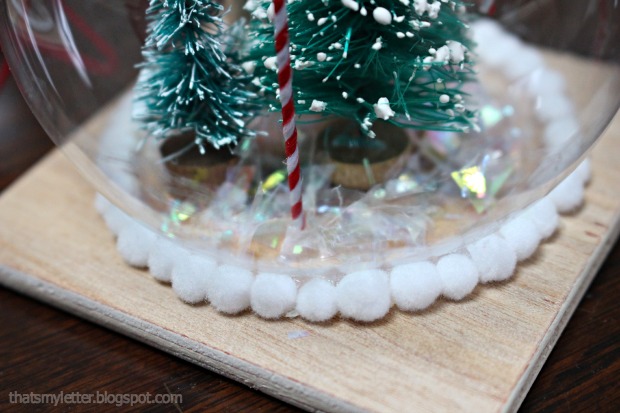
The faux snow will cover any unsightly hot glue and adds just that tiny bit of sparkle.

snowglobe ornament 3

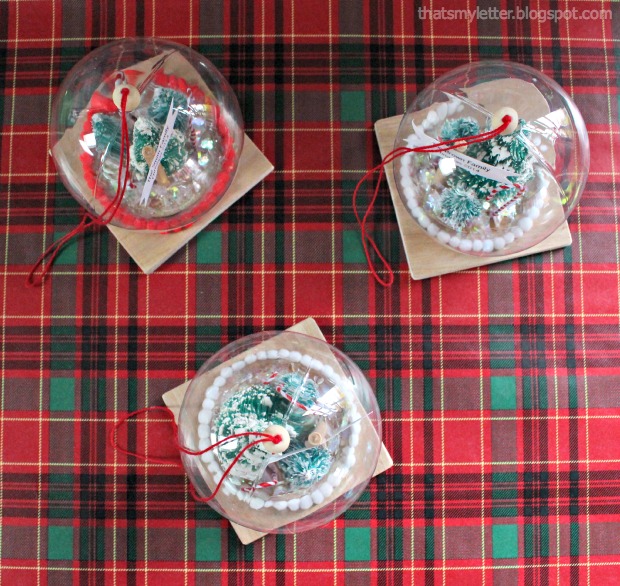
Add a small wood ball on top to compliment the wood base with a string for hanging and you have a keepsake ornament that will look beautiful on or off the tree.

snowglobe ornament 1

Materials:

snowglobe ornaments supplies

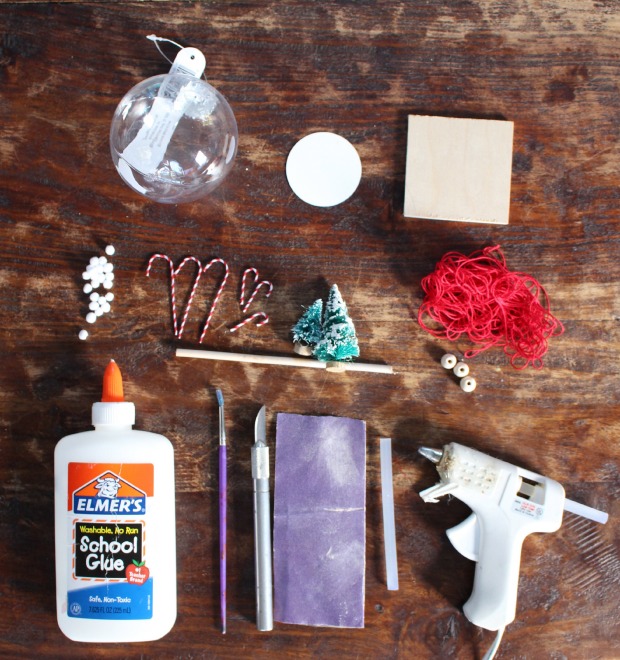
  • 3″ clear plastic craft ornament
  • 2″ circle (cut from cardstock, only used as a template)
  • 3″ wood square (1/4″ plywood)
  • mini pom poms
  • mini wire candy canes
  • mini bottle brush tress
  • 1/8″ dowel
  • small wood balls with hole in center
  • red string
  • white glue
  • paint brush
  • faux snow
  • x-acto knife
  • sandpaper
  • hot glue gun & glue sticks
  • scissors
  • pencil
  • black sharpie marker

Instructions:

Step 1: Using an x-acto knife cut around the ornament opening enough to remove the neck portion.  Don’t worry about being neat here the goal is to remove the neck and have a wide enough opening for scissors. Read more

Gray Restoration Hardware Stain Recipe | Pretty Handy Girl

Gray Restoration Hardware Stain Recipe | Pretty Handy Girl

I’ve fallen in love with the Restoration Hardware Salvage Gray wood stain. But, try as I might, I haven’t found a pre-mixed stain that produces the same look. That never deterred me, and I don’t like to give up. Therefore, I created my own recipe for approximating that Restoration Hardware Weathered Gray stain. You may have seen this beautiful gray stain on my Sports Gear Storage Shelves the other day. Because I love you and I love to share, here is the DIY Restoration Hardware Weathered Gray Stain Recipe.

Materials:

Glaze: 

DIY Restoration Hardware Weathered Gray Stain Recipe Instructions:

Premix your glaze in a jar or bottle. 1 Part Valspar Arid Plains with 3 parts Valspar clear glaze.

Sand your wood smooth. Put on a rubber glove and slip an old sock over the glove. Dip you hand into the stain and wipe the stain onto your wood. Always wipe on stain with the grain.

Gray Restoration Hardware Stain Recipe | Pretty Handy Girl

After the first coat has dried, repeat by adding a second coat of Minwax Provincial stain. Let the stain dry.

Gray Restoration Hardware Stain Recipe | Pretty Handy Girl

Lightly sand the wood before applying the glaze. Read more

galvanized metal bucket aging

Hey everyone, it’s Jacque here from The DIY Village!  I am so excited to share this DIY tutorial with you.  I love the look of old metal buckets, but finding them with the nice patina is easier said than done. I am constantly coming across nice, bright and shiny buckets. I finally found a bucket that I liked the shape of and decided I would age it myself. Get ready to learn the quick process of aging galvanized metal that allows you to age it in minutes instead of decades!

Materials: 

  • Galvanized Metal Bucket
  • Painter’s Tape
  • Spray Paint
  • Cotton Balls
  • Rubber Gloves
  • Nail Polish Remover
  • Sand Paper
  • Zep Toilet Bowl Cleaner
  • Steel Wool

Instructions:

Start with a clean galvanized metal bucket.  Make sure all debris is removed by wiping the bucket down with a damp rag.

metal butcket

Decide where you’d like your painted stripe to appear on your bucket.

sand band

I positioned mine where the bends in the bucket are.

Sanded

Tape off the rest of the bucket leaving a metal band showing through.

tape off bucket

Spray a couple coats of spray paint in the color of your choice on the band area. (Red would also be a fun option for a vintage look.)

Read more

Sport Gear Storage in a Small Space | Pretty Handy Girl

My home is protected by ninjas! Well, actually Tae Kwon Do athletes, but they are ninjas in training. So, don’t even think about breaking into our house or they will open up a can of whoop ass on you! 😉

Unfortunately, where my boys are plentiful in kicking and punching skills they lack in the picking up your stuff department. Which means that the bottom of the stairway to our bonus room is usually the dumping ground for their gear bags, clothing and gear.

Sport Gear Storage Shelves in a Small Space | Pretty Handy Girl

I knew I could “up” the amount of storage we had in this small unused space by going vertical. I designed and created Sports Gear Storage Shelves in the small space at the base of our bonus room stairs. Adding mesh siding gives the storage system a locker vibe and allowed for better air flow around stinky sports gear.

Sport Gear Storage Shelves in a Small Space | Pretty Handy Girl

Want to know how to build your own Sport Gear Storage Shelves? Hang out for a while and I’ll walk you through the step-by-step tutorial.

Materials:

Cut List:

  • 5 – 15″ x 24″ plywood (shelves)*
  • 5 – 1 x 3 x 15″ (shelf cleats)
  • 5 – 1 x 3 x 23″ (shelf cleats)
  • 2 – 1 x 3 x 88″ (sides of support frame)
  • 2 – 1 x 3 x 4.5″ (top & bottom of support frame)
  • 1 – 5.5″ x 84″ piece of wire mesh
  • Rip edge banding 1/4″ thickness from one 1 x 3″ board

* You should be able to get a sixth shelf cut from your plywood if you wish to use it for a base.

Instructions:

Before beginning to build, sketch out your design with painter’s tape. Take note of the height of any baskets or gear bags you will store on the shelves. This should give you the ability to visualize the storage shelves and make any alterations to your design before you build. Once you are happy with the layout, write down your shelf heights.

Sport Gear Storage Shelves in a Small Space | Pretty Handy Girl

You may wish to clad the walls in wood planks like I did before you build the shelving. If you decide to add the planks, here’s the tutorial for planking your walls.

Sport Gear Storage Shelves in a Small Space | Pretty Handy Girl

Measure and mark the heights of your shelves.

Sport Gear Storage Shelves in a Small Space | Pretty Handy Girl

Using a level, draw a pencil line where the shelves will rest.

Sport Gear Storage Shelves in a Small Space | Pretty Handy Girl

Secure the 1×3″ cleats below the pencil line using 2 1/2″ wood screws into studs.

Sport Gear Storage Shelves in a Small Space | Pretty Handy Girl

Continue securing shelf cleats to the wall with screws into available studs.

Sport Gear Storage Shelves in a Small Space | Pretty Handy Girl

Paint or stain the cleats to match the wall color.

Sport Gear Storage Shelves in a Small Space | Pretty Handy Girl

Building Curved Shelves with Edge Banding: Read more