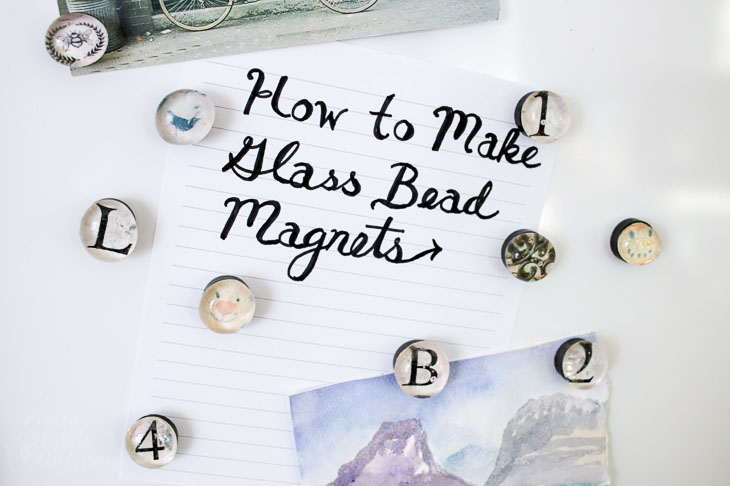
Easy Decorative DIY Glass Bead Magnets
Make glass bead magnets with the kids for a simple and easy craft project to help you get through those long summer days when the kids are home.
How to Make Glass Bead Magnets
I love working with mod podge, especially for this decorative book with a secret hiding place and this vintage map lampshade. But, when it comes to a craft the kids can safely work on, I chose these Easy Decorative DIY Glass Bead Magnets.
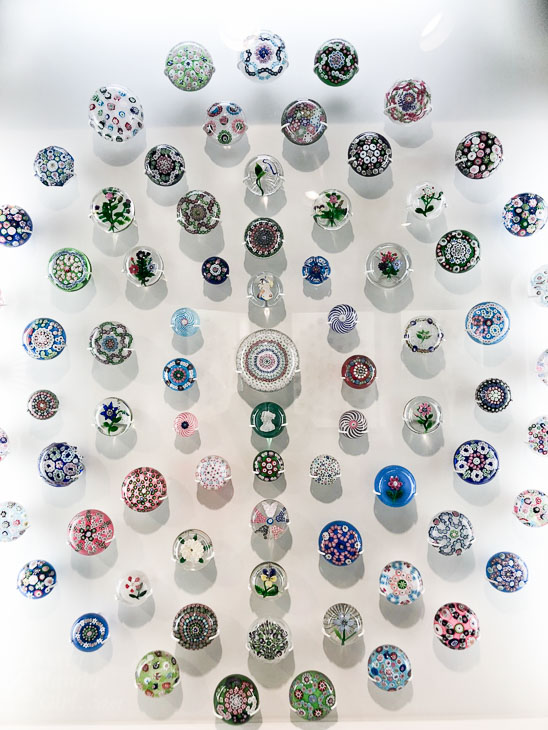
We recently visited the Art Museum in Chicago and I found myself swooning over the beautiful paperweight collection. The glass magnifies the design inside the weights allowing you to see all the intricate details. While I don’t foresee making my own glass paperweights, the kids and I could get creative and use glass beads to make some beautiful magnets.
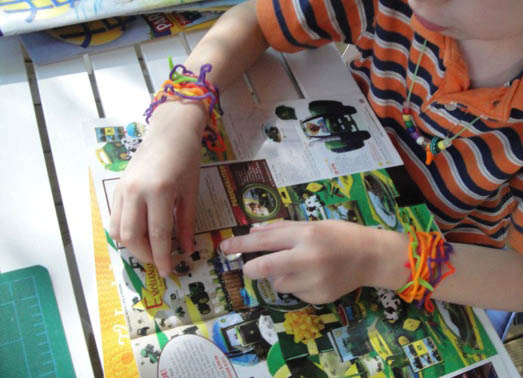
A while ago, I happened upon a craft tutorial creating decorative push pins with glass beads. The next day my boys and I picked out glass beads and the rest of the supplies at AC Moore. My 3 and 6 year old were so excited when I pulled out the Oriental Trading Catalog and asked them to pick out their favorite pictures. We spent over an hour chatting and giggling as they cut out pictures from catalogs and magazines. If your children are looking for specific photos, you can always print them out from your computer first. Once you have your images, you are ready to get creative!
Materials:
(I’ve included affiliate links for your convenience. I earn a small percentage from a purchase using these links. There is no additional cost to you. You can read more about affiliate links here.)
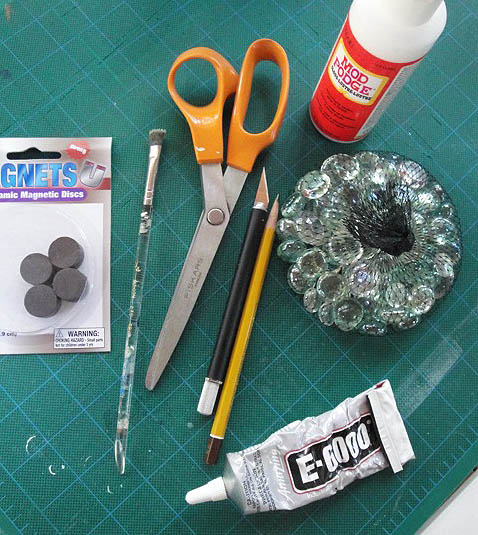
- Scissors or X-acto blade
- Glass Beads (clear)
- Strong circular magnets
- Old paint brush
- Mod Podge
- Pencil
- E-6000 adhesive glue
Instructions:
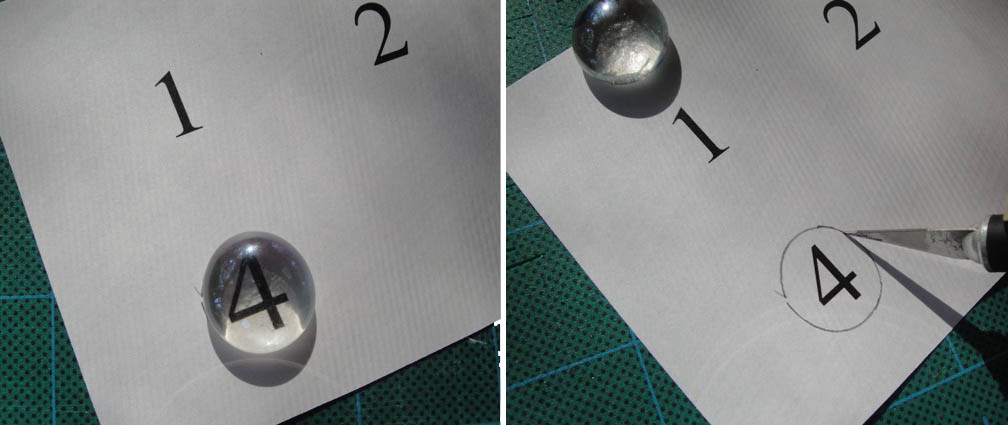
Lay your bead on top of a picture you want to use.
Trace around the pictures and cut them out with an x-acto knife.
Paint mod podge on the front of the picture.
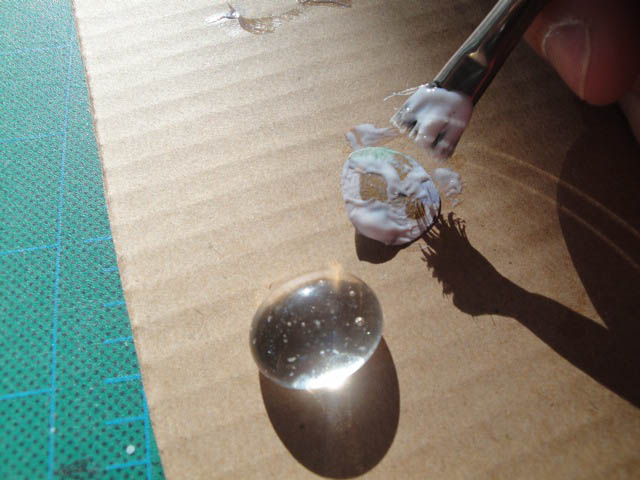
Center the glass bead on top of the picture. Then seal the picture by coating the back of the image with more mod podge.
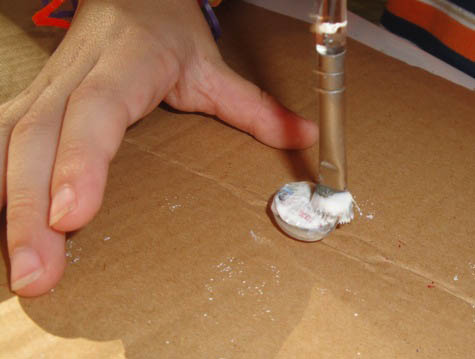
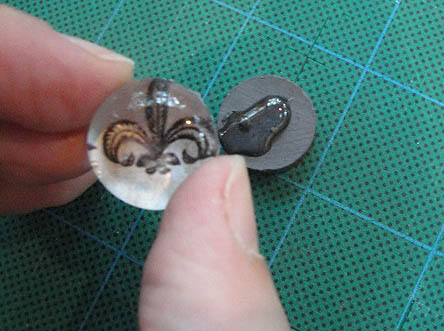
After the beads dry, take out the magnets. Apply a dab of E-6000 glue to the magnet…
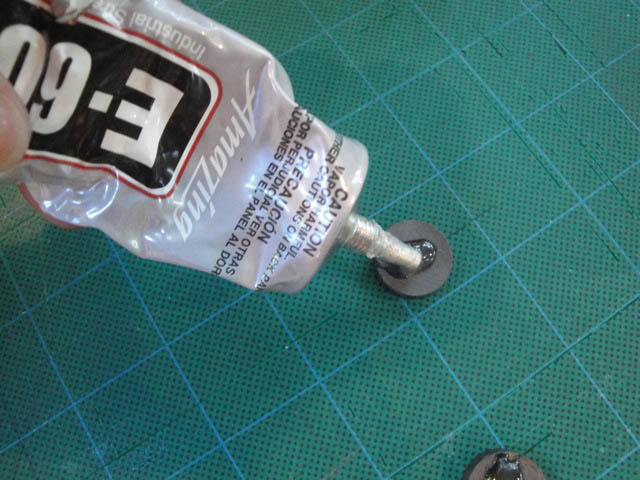
…then set the glass bead on top.
Within 30 – 45 minutes they should be dry and hardened.

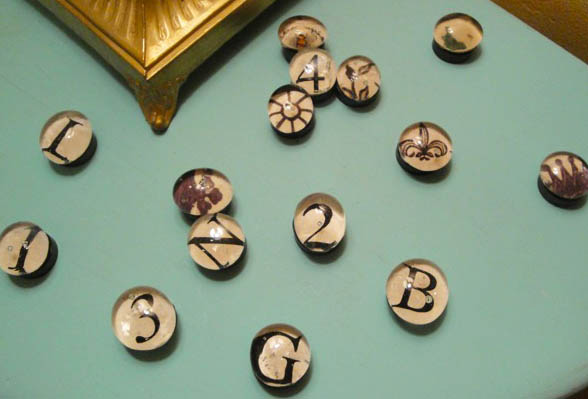
Now you have beautiful custom glass bead magnets.
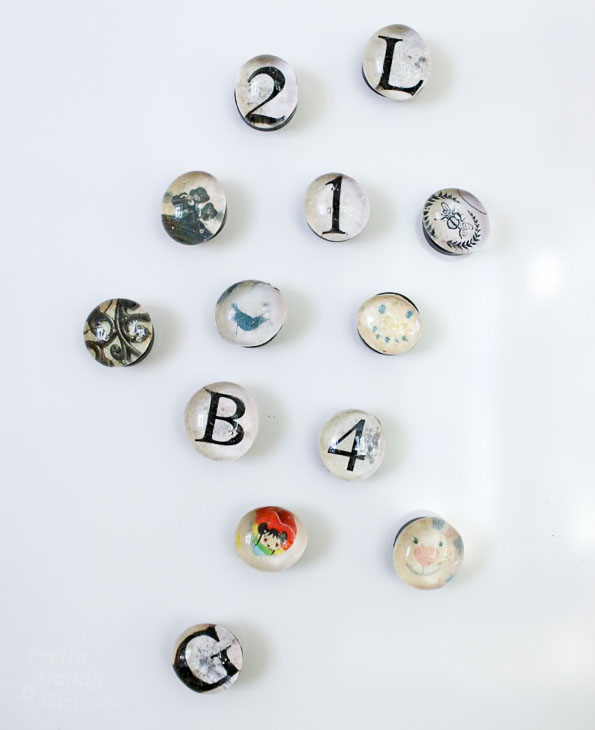
I chose mostly black and white images and graphic numbers and letters for my set.
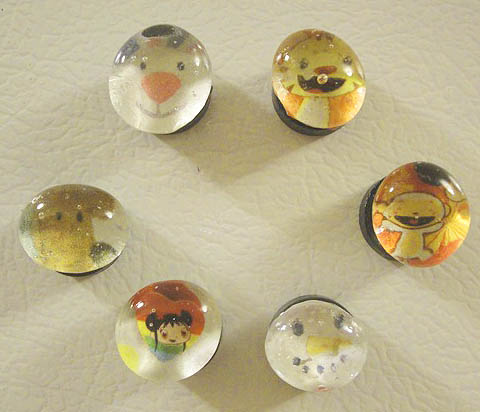
The kids on the other hand – well, let’s just say they do love their cartoon shows!
Let me know if you make your own glass bead magnets. What images will you use?
Be sure to pin this image for a friend. You know how hard it is to keep the kids entertained over the summer, right?!

![]()

My three sons (ages 11, 9, and 5) and I had a blast making these today. They loved photocopying favorite comic books (Calvin and Hobbes, etc.) and putting favorite characters behind the glass beads. Also spirograph drawings, hand drawings, their initials, etc. It was a fun project. Thank you for the great tutorial!
That’s awesome! So glad they enjoyed it.
For our wedding we did cuff-links similarly. We used simple icons from the games and comics we are familiar with, my dad his fav. baseball team. For the image, I printed a black and white image on a transparency and used rub-n-buff to turn the now clear “white” a metallic tone similar to the cuff-link color. Unfortunately the cuff-link blanks were not the most durable, so a few guys reported them falling apart or a galvanic reaction month or so after. I was happy they continued to use them!
I recommend a clear coat on-expensive ceramic magnets if you use them on a decorative board you don’t want to scrub. Sometimes if left in the same place they’ll leave magnet rings.
Thanks for your comment. What a cool idea for cuff links! Good tip on the magnets.
You can buy a paper punch at craft store for about $5 and it will clip out the images to the exact size. Much easier than tracing and scissor or exacto knife cutting. The backing can be card stock like index cards.
That’s a good tip, although most of the glass beads we had were different sizes and not perfect circles.
beautiful glass bolls.i will make these beads in my coming holidays.
How cool! I love the graphic numbers and letters.
These are really cute! I could see them making a cute gift with a fun magnetic writing pad ('to do' list or something) and a matching pen. Great thinking!
got 7 weeks off school for the Summer so am going to make these beads out of anything and everything! thanks
those are so cute! I am going to have to make some, a bit easier for me than a bench lol =)
no AC for 2 days!!! I'm sorry. Our AC blower went out last summer right before we went on vacation so we had to have our neighbor who's son in law is an AC tech take care of it for us. We went to France for 10 days and when we got back, nice and cool. We have such nice neighbors. Hope you get yours back up and running soon!
Love this, great project!