GMC_Acadia_roadtrip

My goodness, it has been a whirlwind week for me. I left on Wednesday to head down to Atlanta, GA with my good friend Holly (of Storywood Designs). We rode in the lap of luxury in a swanky new 2014 GMC Acadia Denali! (My boys were in love with the new SUV. Especially the bluetooth headphones that let them listen to another radio station as Mama belted out the lyrics to “Blurred Lines.” I can’t blame them, singing is the one skill I don’t have.)

I was sponsored by GMC at Haven and they let me borrow the vehicle for the week. It’s a good thing we had the Acadia with loads of cargo space, because neither of us travel light. We even brought our own furniture:

bellhopOur bellhop barely skipped a beat as he loaded furniture onto the cart with our luggage.
(photo courtesy of Holly)

Holly and I didn’t waste a moment. We checked into the Grande Hyatt in Atlanta, spread out our ScotchBlue Heavy Duty Non-Slip drop cloths and started transforming furniture: Read more

Phew, I just made it through the whirlwind two weeks of speaking engagements! First I gave three back-to-back talks at the Southern Ideal Home Show in Raleigh. Then a few days later I hopped a plane to Salt Lake City to give my presentation at SNAP. Remarkably I still have a voice. Read more

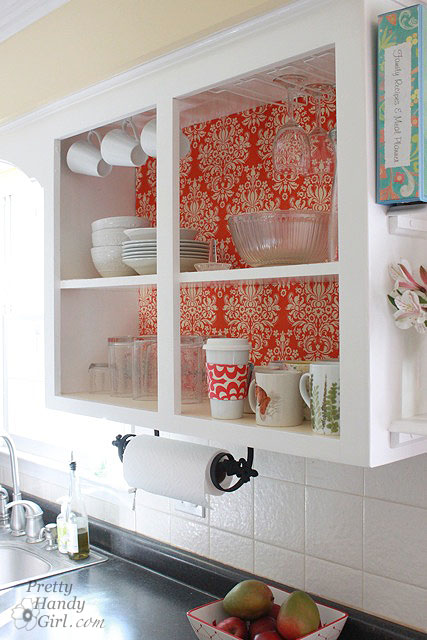
I’m back to show you the updates I made to my kitchen. Remember the plans I shared with you? These fabric backed cabinets made the kitchen new.

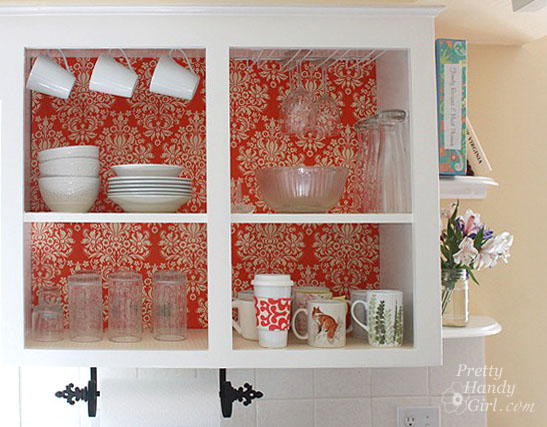
Well, they have been implemented and I LOVE the results! Best of all, the materials I bought cost me under $25 and that included the white dish set. But, the cherry on top is that I can easily reverse the changes if we move (or get sick of the look.)

And now, I present to you:
Fabric Backed Open Cabinets for the Kitchen

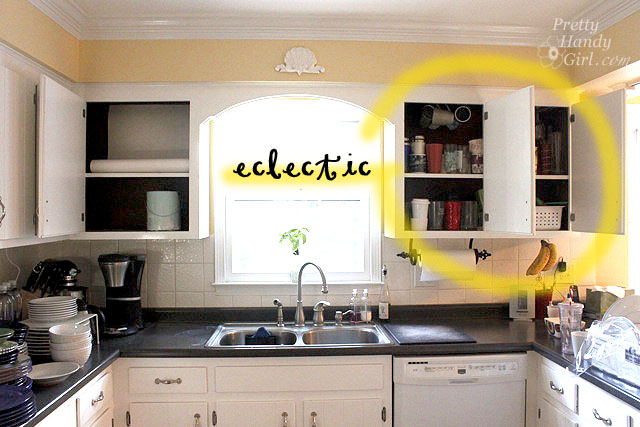
When we first met these sad cabinets, they were dark, dreary and had an eclectic collection of mugs:
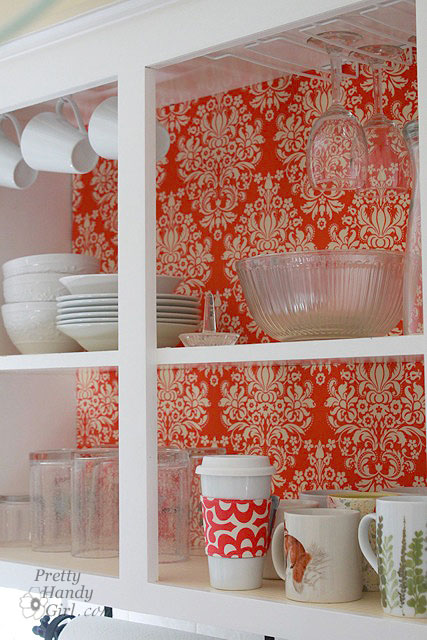
Within only a few hours (minus drying times), I had a stylish new look that is bright and cheery!
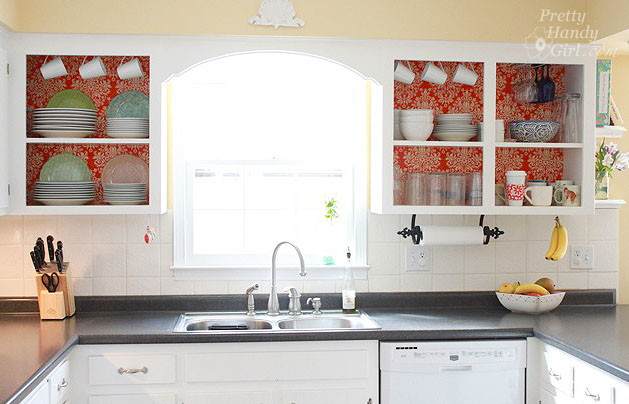
Follow along for the tutorial and the 50 cent tour (please deposit your pocket change on the way out.) Just kidding. I’ll let you in for free.

Materials:

(I’ve included affiliate links for your convenience. I earn a small percentage from a purchase using these links. There is no additional cost to you. You can read more about affiliate links here.)

Optional: 

Difficulty: Easy

Step 1: Empty your cabinets.

Clean the insides with an all purpose kitchen cleaner.
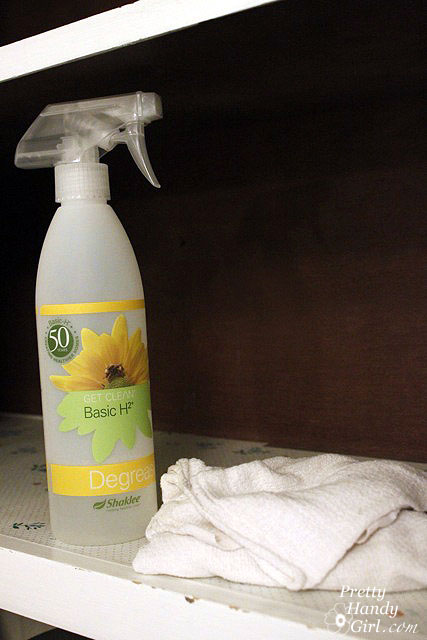
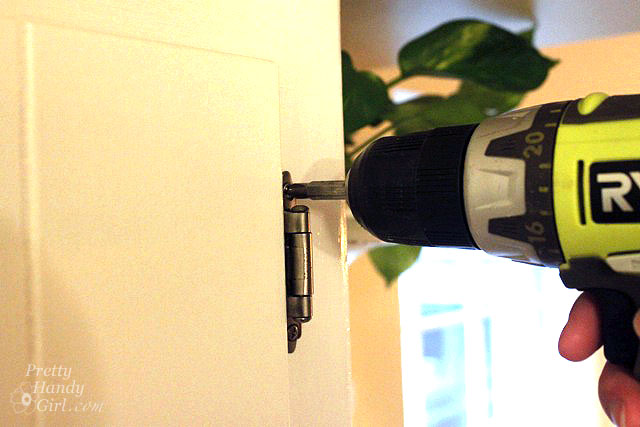
Step 2. Starting from the bottom, remove the screws from the cabinet door hinges. The last screw should be the very top hinge (to keep the weight of the door from wrenching the screw out of the wood.)
Put screws into a ziplock bag and label your cabinet doors in order so that you can return them to the appropriate cabinet opening at a later date.
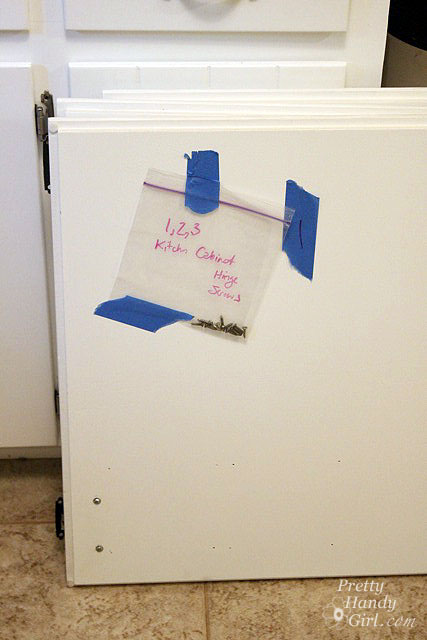
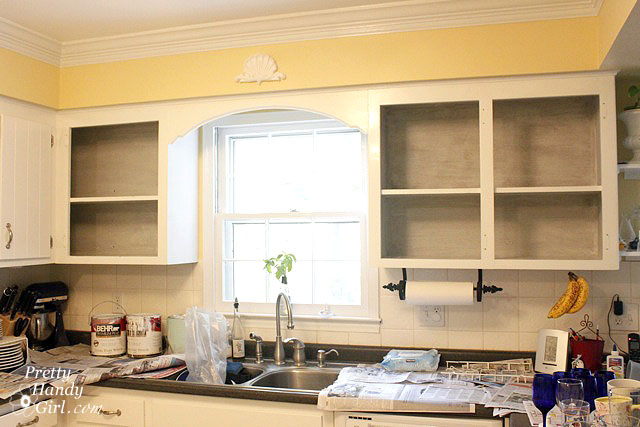
Now you should have a clean slate like this:

Step 3. If your cabinets are dark inside, you may or may not decide to paint the insides. (Be sure to check with your landlord if you are renting.) I chose to paint mine because the interiors were so dark. If you want to skip this step, fast forward to the next step.

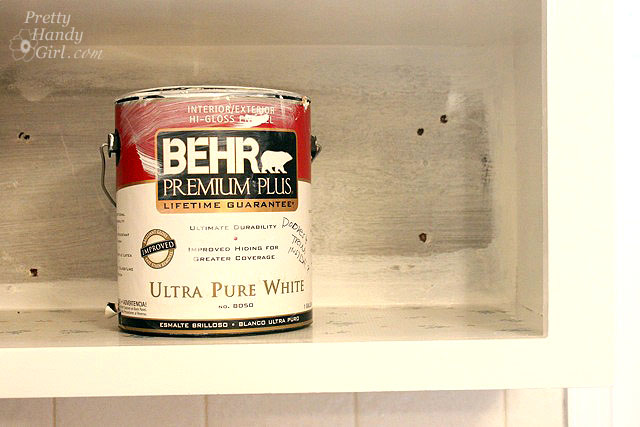
Prime the insides by rolling on primer over the flat surfaces. Use a brush to get into the corners and crevices.
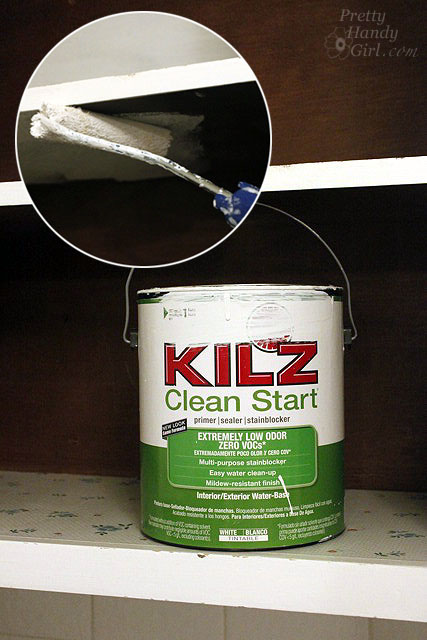
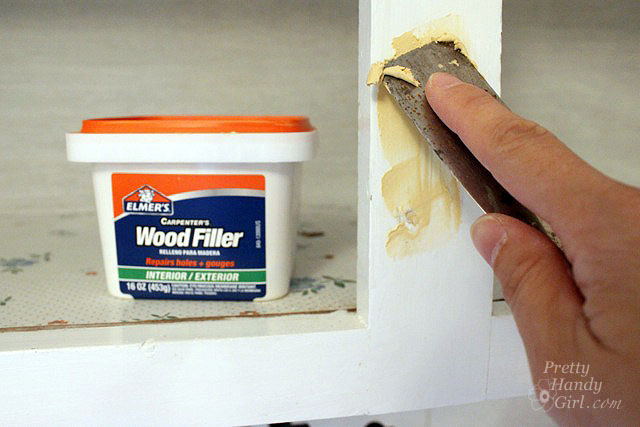
Once the primer has dried, get out the wood putty and putty knife.
Step 4. Using the putty knife, spread a small amount of putty over the holes where the hinges were. Push the putty into the holes, then scrape the excess off. Allow the putty to dry completely.
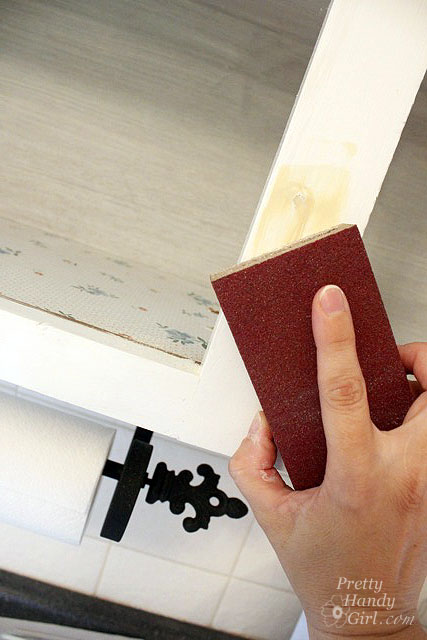
Step 5. Sand the puttied holes until smooth.
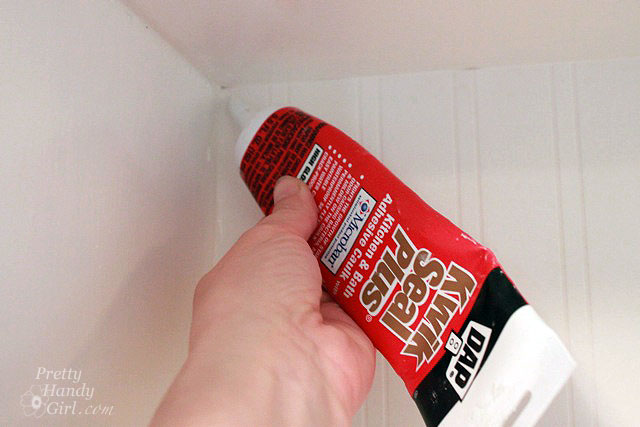
Step 6. Touch up the putty holes with paint or stain. Add caulk to any cracks or seams at the back of your cabinet. Allow the caulk to dry thoroughly.
If you are painting the inside of the cabinets, roll on paint with the small roller and use the brush to smooth out the paint and get into the grooves.
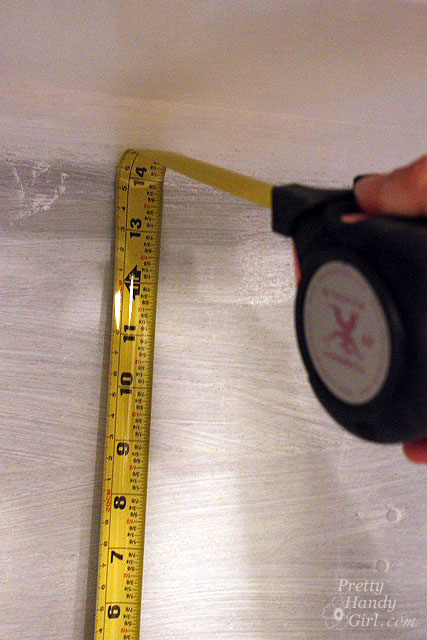
Step 7. Measure the dimensions of the back of your cabinets. Make sure your measurements are precise (measure twice, cut once is a good adage.)
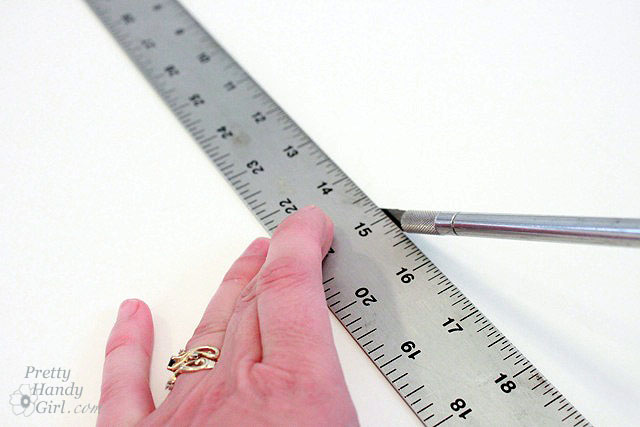
Cut a piece of foam board using the measurements you just took.
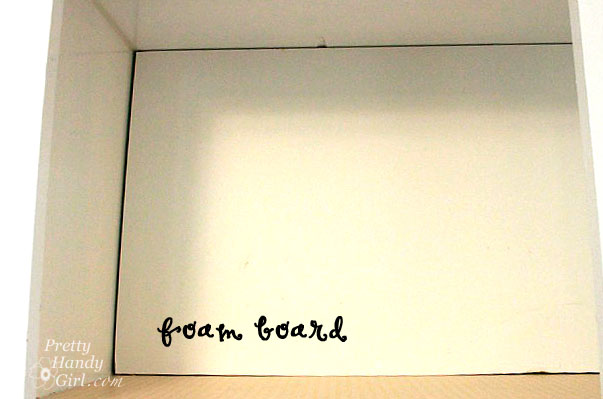
Test fit the foam board into the back of the cabinet. If your cabinet’s face frame is smaller than the cabinet back, you will probably have to bend the foam board to get it in.
Step 8. Iron your fabric. Make sure to iron all the wrinkles out.

Cut the fabric 3 inches wider than the foam board. Lay the foam board on top of the fabric (wrong side facing up.)
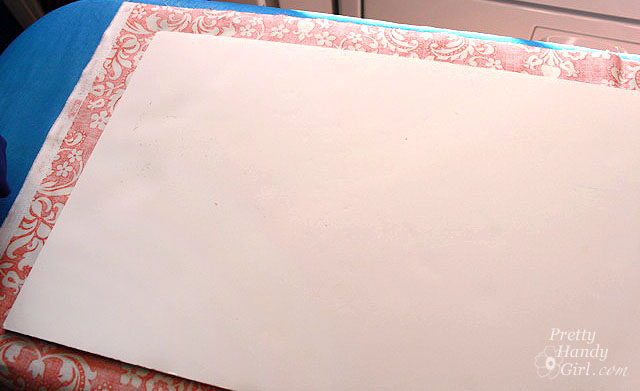
Step 9. Tape the edges of the fabric onto the back of the foam board. Be sure to pull the fabric taut.
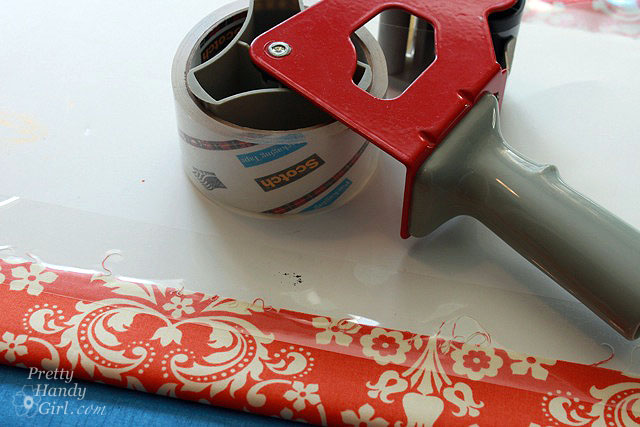
Fold the edges of the fabric as you would on a gift. Tape the ends to the back of the foam board.

Step 10. Insert the foam board into the cabinet.
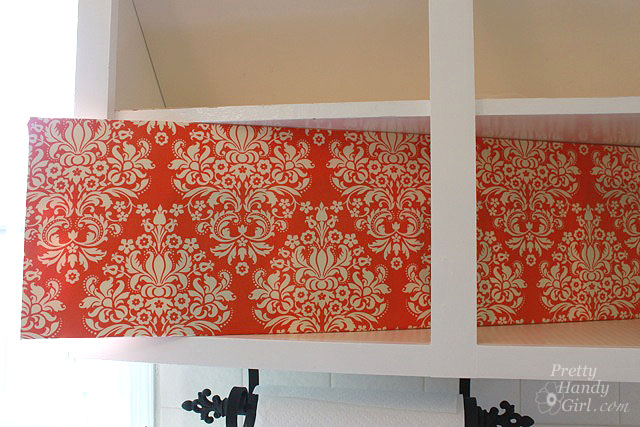
Push the foam board firmly against the back of the cabinet. The tension of the fabric and the board against the edges of the cabinet should hold it in place, no need to tape or glue anything!
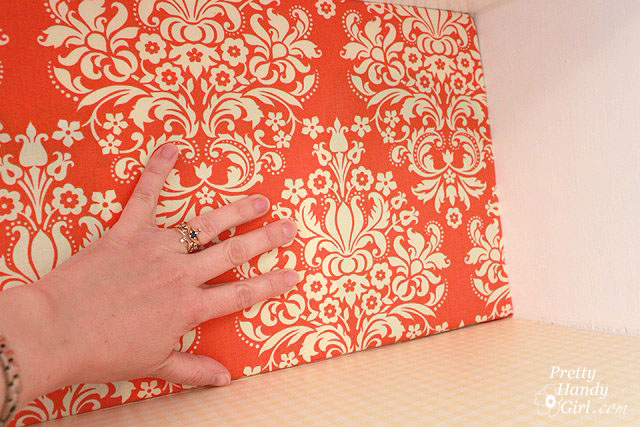
It is a good idea to try to line up your pattern if you have multiple shelves. (Do as I say, not as I do.)
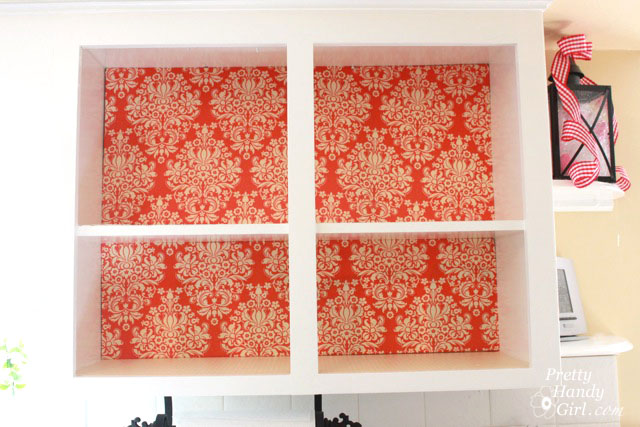
Start putting your coordinated dishes back into the cabinet. Think about displaying them as you might see in a store to complement these fabric backed cabinets.
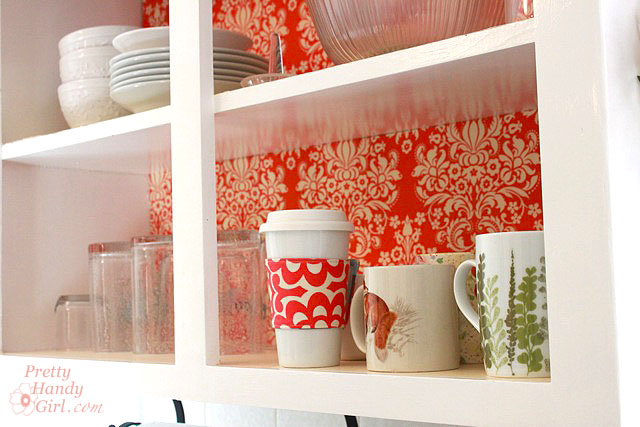
For visual interest and extra storage, I hung some mugs from the top of the cabinet.
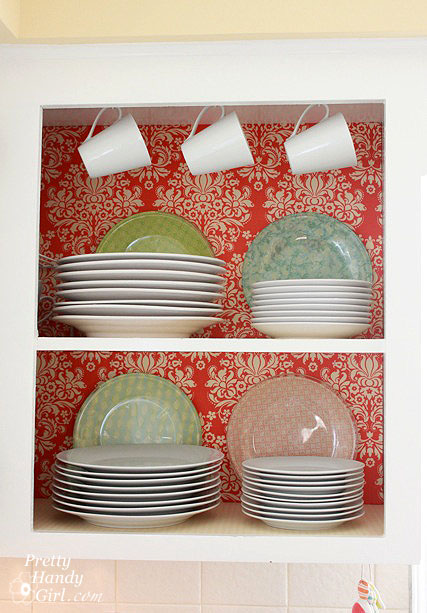
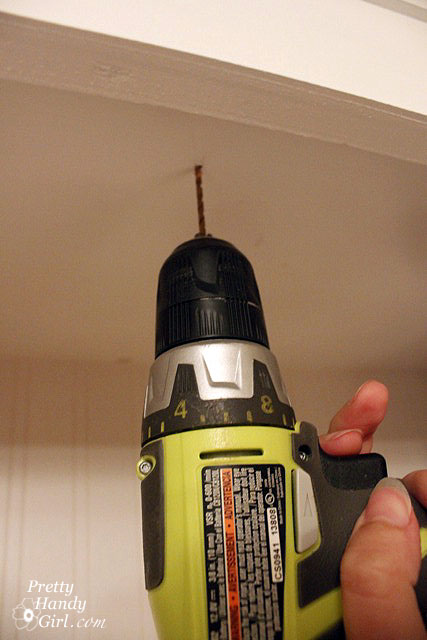
It was as simple as pre-drilling some holes and screwing in white cup hooks. (I did measure the same distance back from the face frame and spaced the hooks evenly. But, I’m a perfectionist like that.)
I am in love with my new kitchen! And all it took was less than $25 in supplies and a few hours.

What do you think?

The best part about this project is that I can easily remove the foam boards…
…or tape new fabric onto the back when I want to update the look!
Can you imagine a cheaper, easier or more glamorous update to your kitchen?
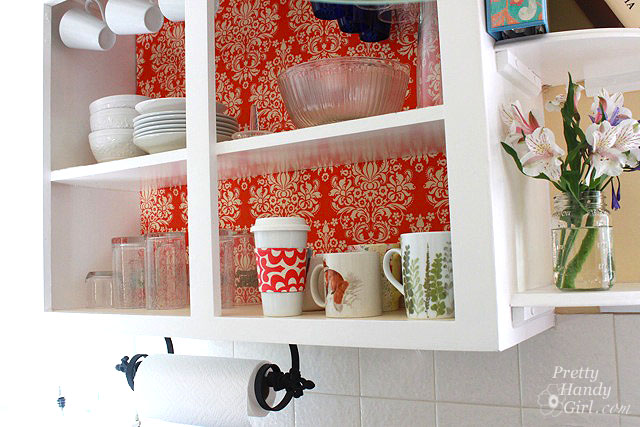
Are you an apartment dweller that is restricted from making permanent changes to your home? Or does your budget limit the renovations you’d really like to make? Why not make a few frugal changes that reflect your own style. These fabric backed cabinets are a win for any kitchen!

Apartment Guide has changes you can make that won’t break the bank:

Want to find even more design tips for your home? Apartment Guide has budget friendly ideas and DIY how-tos for people in any sized home on https://www.movingtoday.com and https://www.apartmentguide.com/blog/

Disclosure Statement:

Apartment Guide and owner Consumer Source, Inc. partnered with bloggers such as me to participate in their monthly blogger program.  As part of that program, I received compensation.  They did not tell me what project to create or what to purchase. Nor did they influence my opinions! We believe that consumers and bloggers are free to form their own opinions and share them in their own words. Consumer Source’s policies align with WOMMA Ethics Code, FTC guidelines and social media engagement recommendations.

Today is Friday! And you know what that means…it’s time for another Tool Tutorial Friday! Today I’ll be introducing you to the circular saw.


But first, how are you? I don’t know about your week, but I’ve had a busy one. If you follow me on Twitter (I’m not sure why anyone would), you would have been privy to the rainbow of color casts my son has been collecting. He received his 4th cast yesterday. But, who’s counting, right?! Anyway, I learned two things about casts in the process.
  1. Little boy arms will swell to adult proportions post surgery, but will eventually return to normal size…eventually. At that point, a new cast is desired to keep the arm from finding a way to wiggle out.
  2. If you put two brothers in the bathtub and leave the room for one nano-second they will find a way to water log a tightly plastic bagged and saran-wrapped cast that is merely 5 days old!

Mr. Green up there, he only lasted a mere 5 days! You could probably tell by the one signature on it. My mom is trying to convince us to paint white stripes around his current red cast to make it into a candy cane. Hee, hee.

And now let’s plug in some power and start this tutorial!

A circular saw is essentially a portable power saw that can make easy cross cuts like a miter saw. But, it can also rip long boards like a table saw. This little hand held bad boy is a necessity if you are working on an exterior project like a deck or a fence, or anything that is too big to put on the miter saw or table saw work surface. Trimming the varied lengths off newly laid deck boards would be near impossible without a circular saw.

Before I owned either a table or miter saw, this was my power saw. And this baby has cut a lot of wood in its life.

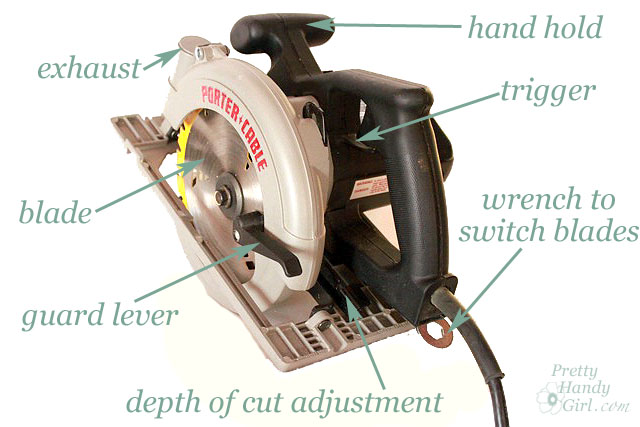
If you are familiar with circular saws, this particular model may look a little bit backwards to you. That is because this is a left-sighted circular saw. I think Porter Cable is one of the few companies (if not the only one) to make one. I am right handed, but for some reason, this saw seemed more comfortable to me. When I was shopping for my circular saw, I spent about an hour or so picking up, holding and imagining using the saw. What I liked about the Porter-Cable is that it had a smaller grip and I was able to span my hand width between the hand hole and the guard lever while cutting.

If you go shopping for a circular saw, spend some time holding them and see what feels most comfortable to you.

Circular saws range in price from as low as $30 up to $300 or more. They come in a variety of  sizes (5 3/4″ – 9″) which refers to the blade size. The most common size people buy is a 7 1/4″.

Before you make any cuts with a circular saw, you must set your depth of cut. If cutting through a board, set the blade about 1/8″ – 1/4″ lower than your lumber. Support your lumber on saw horses or a raised surface (4″ x 4″ posts on the ground work well.) It is imperative that you think through your cut before you actually saw a board. Make sure that your waste end will fall away from the saw after it is cut. Otherwise, the blade will get pinched between the boards and can kickback (see the example in the video.)

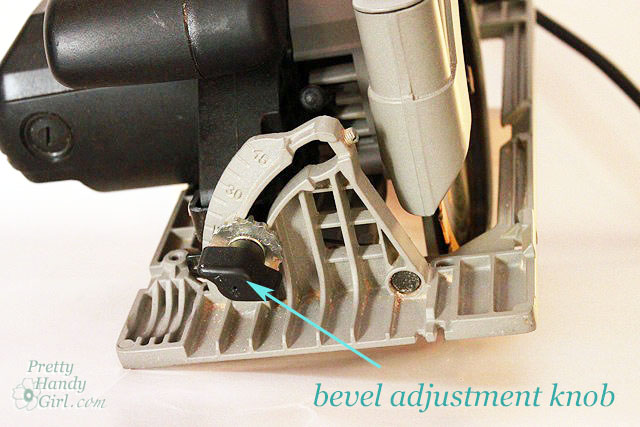
You can also change the bevel angle of your cut by adjusting the base of the saw after loosening the bevel adjustment knob.

As with any other power tool. Take the time to familiarize yourself with your power tool. Read the manual and only use a power tool when you are alert and not distracted.

DISCLAIMER

The viewer assumes all responsibility and liability associated with the hazards of woodworking. Pretty Handy Girl is not responsible for any errors or omissions that may be present in this tutorial. She also assumes no liability for any action or inaction of a viewer.

Please use extreme caution when using power tools. Read your tool manual thoroughly and wear protective safety gear. Take your time familiarizing yourself with a tool before using it. (If you are missing the manual, you can easily find it online by going to the manufacturer’s website or google your saw’s make and model + manual.)

Please recognize that I have tried to put together a basic circular saw usage tutorial to get you started. I have tried my best to show the safest way to use a circular saw. That being said, I am not a professional (I only play one on this blog ;-) .)


Welcome back to another Tool Tutorial Friday! I hope you enjoyed some time off last week. Today I want to share with you a power tool that can cut long straight lines and it can cut curved lines with ease. This tool is also my “go to” tool when I need to cut plexiglass. I’m introducing you to a band saw.

Although the band saw is big and may seem intimidating, it actually isn’t very scary. The blade is usually a mere 1/4″ wide and the cutting action is not super loud and it doesn’t usually throw wood back at you. So, cutting with this power saw really gives you a lot of control and can help eliminate the intimidation factor.

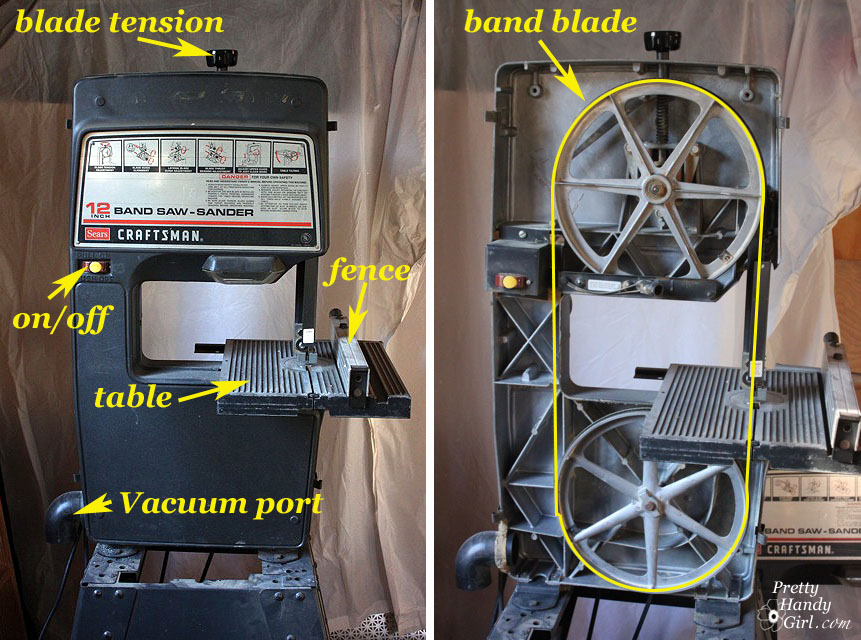
The band saw I have it old, but it still gets the job done. If you were to buy a new band saw, the mechanics are basically the same and not much has changed over the years. The size of the band saw (usually 9″, 10″, 12″ or 14″) refers to the distance between the blade and the neck or side column of the saw. Prices for a new band saw vary from about $125 – $600. I would definitely recommend buying a band saw used unless you are running a business that puts out tons of wood projects. Also, make sure that your band saw comes with a detachable rip fence or you will need to purchase one to fit your saw. This is important for making straight cuts.

A band saw has a circular one piece band shaped blade. The blade rotates around the two wheels at a high speed and allows for precise cuts.

There are several blades available for a bandsaw. In addition you could buy a sanding band for sanding intricate cuts. Band saw blades have a TPI (teeth per inch) number. In general, the more teeth per inch the tighter the cuts and more intricate details it can handle. However, that blade will flex more and cannot cut harder stock wood as efficiently. For straight cuts and thicker stock, a lower TPI number is desired. For a more detailed explanation of band saw parts and blades, check out WoodworkingHistory.com’s bandsaw syllabus.

The ONLY saw that I know of that will make more precise cuts than a band saw is a scroll saw. And when I talk precise, I mean making doll furniture type precise. A band saw is used for ripping, cross cutting, curved cuts, circles, you name it! So, why would you need anything else if this saw does it all? Well, sometimes speed is a factor, the band saw is not super fast when ripping a piece of plywood. Plus, you are limited by the width of your bandsaw. You have to work with a board that will fit in between the blade and the neck of the saw (this is specific inch size of your saw.)

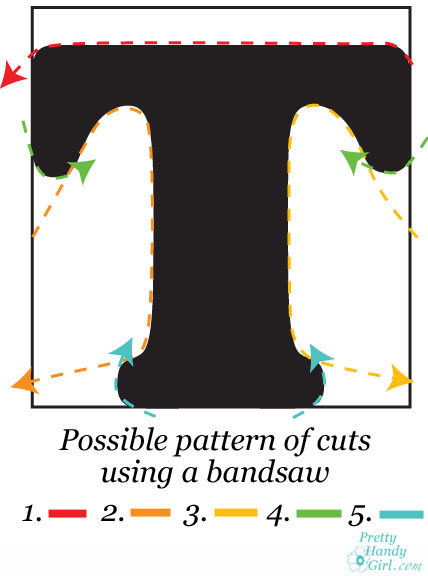
Personally, I prefer using the band saw for smaller projects and cutting plexiglass, thin metal, or intricate shapes. It is a staple for anyone who wants to cut letters out of wood! When making intricate cuts, you will need to plan your cutting paths. In other words, you can’t put your wood in and cut around like you would scissors in a piece of paper. Here is an example of what I’m talking about:

To cut the letter “T” out of a piece of wood, you’ll likely have to make several cuts into the wood, making your cuts meet at tight angles or corners.

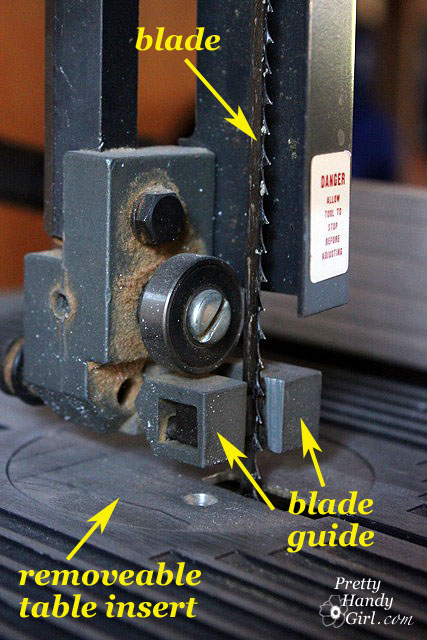
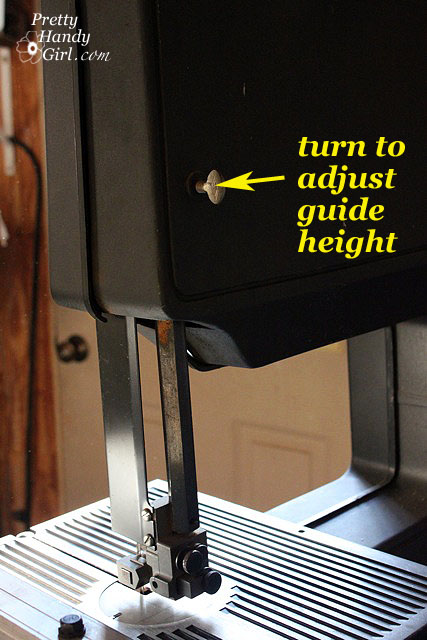
Before making any cut using a band saw, you need to make sure that your guide is set for the proper depth. You want the guide to ride just above your board. There should be approximately a 1/16″ space between the wood and the guide so the board doesn’t get pinched between the guide and the work table. On my band saw the adjustment is made by loosening a screw at the back of the machine, raising the guide, and re-tightening the screw.

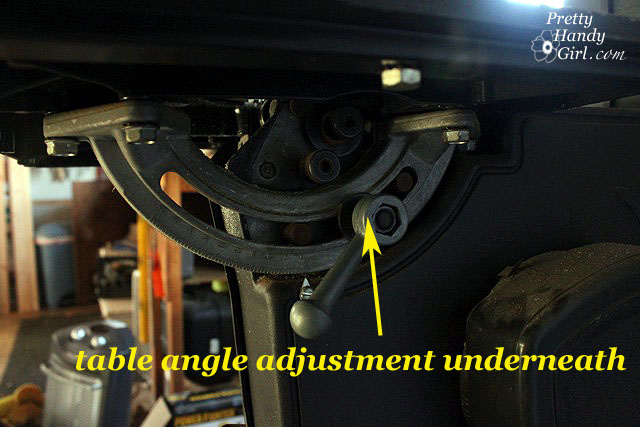
My band saw also has a work table tilt lever for making bevel cuts. Honestly I’ve only used this feature once, but it is nice to have. Simply turn the lever to loosen the bolt holding the table in place. Then tilt the table to the desired angle and re-tighten the bolt.


That’s basically it for setting up the band saw. Before cutting be sure to wear safety glasses. Ear protection is a good idea, but I’ve been known to skip it since this saw doesn’t bust my ear drums as much as some of my other power tools.

As I’ve said before, keep in mind your safety is in your own hands:

DISCLAIMER

The viewer assumes all responsibility and liability associated with the hazards of woodworking. Pretty Handy Girl is not responsible for any errors or omissions that may be present in this tutorial. She also assumes no liability for any action or inaction of a viewer.

Please use extreme caution when using power tools. Read your tool manual thoroughly and wear protective safety gear. Take your time familiarizing yourself with a tool before using it. (If you are missing the manual, you can easily find it online by going to the manufacturer’s website or google your saw’s make and model + manual.)

Please recognize that I have tried to put together a basic band saw usage tutorial to get you started. I have tried my best to show the safest way to use a band saw. That being said, I am not a professional (I only play one on this blog ;-) .)

And here is the video tutorial:

Okay, time once again to let me know what you think about this tutorial; ask any questions; or simply beg to win. When you do so, you will be entered to win this cutie!

Don’t let her pink attire fool you. This lovely lady packs a punch that will knock out any “boy’s” hammer! So limber up those fingers and leave me a note. Your comment will automatically enter you into the 13 oz. Tomboy Tools magnetic hammer giveaway. Good luck!

Sharing with these link parties:

Weekend Bloggy Reading