After you read the title, I guess the cat’s out of the bag. It’s true, I installed radiant floor heating in our mudroom/laundry room and I couldn’t be more thrilled. One of the positives of having a plumbing leak and subsequent gutted room, is being able to make changes that you otherwise wouldn’t have considered. Tile floors with radiant heating underneath was one such change we never entertained until our flooring was ripped out.
Here’s the low down on those two rooms. Our long hallway mudroom that ends in the laundry room was an addition to our home back in the 80’s. It was built on a concrete pad and the owners must have decided not to tie those two rooms into the heating and air conditioning. Consequently, in the winter, these rooms are brrrrrrr…chilly willy! (It’s true, my blood has thinned over the years from living in the south. I think I’d turn into a useless popsicle if I had to spend more than an hour in Alaska like Ana White.) The linoleum flooring that was there didn’t do much to dampen the chill. And, I knew since we were installing tiles in these areas that it would only contribute to that polar ice effect (wimpy wimpy wimpy, I know).
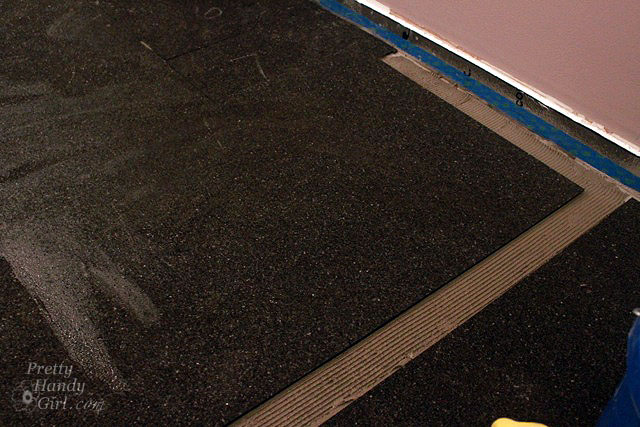
I decided that I wanted to try to add radiant heat in the floors. After a few nights of research, I settled on a company that makes custom configured TempZone radiant heating mats for your home.
I’m so thrilled to be healthy again, that I’m doing a happy dance (see the video below if you want to witness it.) The pneumonia is gone and my boys are back in school. Can I get a “Woot Woot!”?
The bonus room/art studio renovation is rockin’ and rollin’ again and I have some progress to show you: Read more
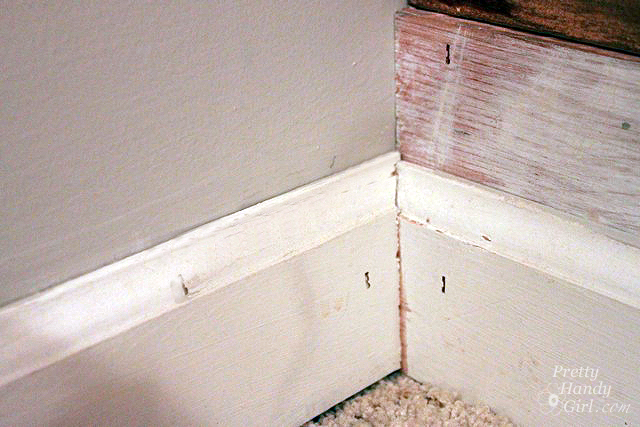
https://prettyhandygirl.com/wp-content/uploads/2012/10/perfect_interior_corner_baseboard.jpg427640Brittany Baileyhttps://prettyhandygirl.com/wp-content/uploads/2021/07/PHG-logo-tagline-2020-1030x211-R.jpgBrittany Bailey2012-10-03 14:43:112021-07-22 03:47:07Baseboard Trim – How to Remove and How to Install
A few months ago when I got the call that Woman’s Day wanted to send a photographer to photograph me and my garage, I kind of freaked a little. I mean, it was my garage, the least attractive room in our house! Part of the unattractiveness stemmed from my workbench with a huge gaping hole in it.
It was suggested that I could just cover the hole with some fabric (which, yes, I could have done.) But, being that it is my workshop and a sawdust producing place, I felt I could do a little a little better than just some fabric. I decided to build custom doors for the opening. Luckily they turned out to be less of an involved project than I originally anticipated. (I love when that happens.)
Come on in the workshop and I’ll show you how I built these open frame cabinet doors. Read more
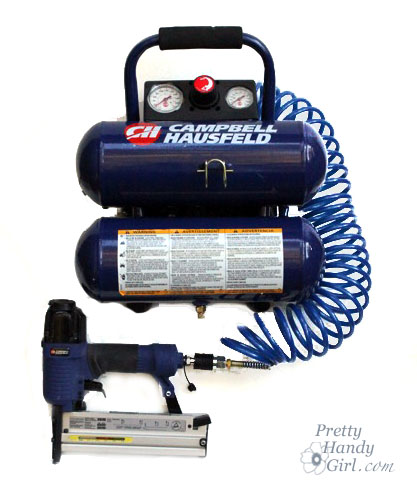
Welcome back for another Tool Tutorial Friday! Today I’m going to introduce you to a 2 gallon compressor and pneumatic finish nailer. I use the Campbell Hausfeld 2 gallon compressor with Pneumatic Finish Nailer. I bought these as a kit when they were on sale at Lowe’s for $69! A good price on this set is $89. There are loads of other brands out there and I’m sure they have other features and capabilities, but frankly I’ve been happy with my set that I’ve had for 2 years. Other kits can cost up to $300. The only drawback with this set is that they can not be used for framing (building walls of a house structure.) But, so far I haven’t needed to do that.
The finish nailer works very well on moulding, trim, board and batten, wainscoting, and other small wood projects.
How to Use a Pneumatic Finish Nailer and Air Compressor
The compressor is a fairly simple tool. When turned on, air builds up in the chambers until it reaches the maximum 110 psi.
The pressure going into the air hose can be controlled by the regulator button. I typically use my compressor and nailer at about 90 psi. But, if the nails are going too far into the wood, I might turn it down to 80 psi. Or if the nails aren’t going in far enough I will turn it up to 100 psi. With continual use, the pressure will drop down. When the pressure is low enough, the compressor will start itself back up to raise the pressure again.
The on/off switch on my compressor is in the back.
The finish nailer holds small brad nails up to 2″ in length and “U” shaped staples. They are held in the magazine. The safety tip on the nailer must be pressed into the wood before a nail will fire. Otherwise, the gun will not discharge.
While using the nailer and compressor it is very important to use safety goggles and ear protection.
When you are finished using the compressor, it is important to release all the air from the compressor. If you don’t release the air, moisture can build up and rust the tank. Start by reducing the pressure by turning the regulator down. Then pull the safety valve ring. It will close automatically, so you will need pull it a few times or hold it open. I also unscrew the valve at the bottom of the tank to insure it is completely empty before storing. Then I screw the valve back in.
After the tank is empty, release the hose from the nailer. Add a drop or two of penetrating oil onto and in the air inlet on the nailer to keep it well lubricated. Cover the air inlet and then you can store your nailer and compressor.
DISCLAIMER
The viewer assumes all responsibility and liability associated with the hazards of woodworking. Pretty Handy Girl is not responsible for any errors or omissions that may be present in this tutorial. She also assumes no liability for any action or inaction of a viewer.
Please use extreme caution when using power tools. Read your tool manual thoroughly and wear protective safety gear. Take your time familiarizing yourself with a tool before using it. (If you are missing the manual, you can easily find it online by going to the manufacturer’s website or google your saw’s make and model + manual.)
Please recognize that I have tried to put together a basic finish nailer and compressor tutorial to get you started. I have tried my best to show the safest way to use them. That being said, I am not a professional (I only play one on this blog .)
https://prettyhandygirl.com/wp-content/uploads/2011/11/Compressor_finish_nailer_combo_kit.jpg492417Brittany Baileyhttps://prettyhandygirl.com/wp-content/uploads/2021/07/PHG-logo-tagline-2020-1030x211-R.jpgBrittany Bailey2011-11-04 07:30:462021-08-06 16:16:06How to Use a Pneumatic Finish Nailer and Air Compressor (with video)