
How to Install a Scrap Wood Wall

I’m so thrilled to be healthy again, that I’m doing a happy dance (see the video below if you want to witness it.) The pneumonia is gone and my boys are back in school. Can I get a “Woot Woot!”?
The bonus room/art studio renovation is rockin’ and rollin’ again and I have some progress to show you:

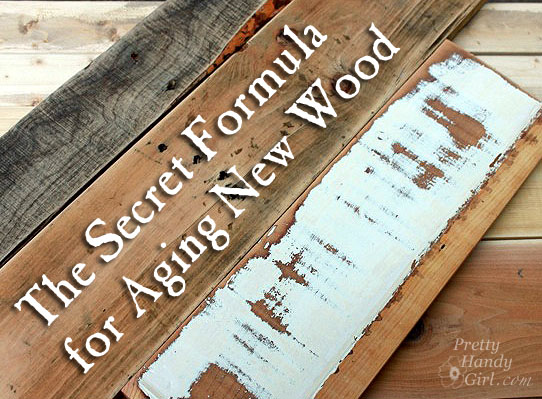
Are you amazed? I used almost all of the pallet wood and scraps that I had lying around my workshop! I purchased just a few 1″ x 4″ pine boards for the ledges. Then made those new boards look old!
The back wall of this room is one of the only vertical spots to hang artwork in the room. In addition to making it a feature wall, I wanted to maximize the art hanging space with some ledges.

I did a little Pinterest search to help me visual the finished wall. Shaunna’s colorful wall convinced me I could be eclectic:
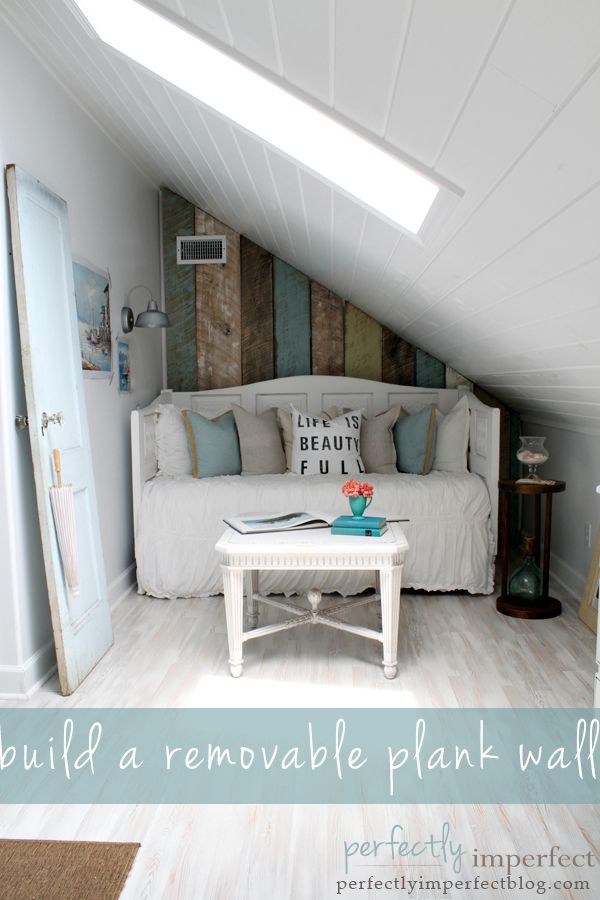
Source: PerfectlyImperfectBlog
And Sarah’s wall on Design Sponge proved that varying width horizontal boards look amazing:

Source: Design Sponge
You can see some of the other amazing salvage wood walls I used for inspiration in my Pinterest board.
Now, are you ready to learn how to install a wood plank wall plus a few tips and tricks for cutting all those boards and angles?
Materials:
(I’ve included affiliate links for your convenience. I earn a small percentage from a purchase using these links. There is no additional cost to you. You can read more about affiliate links here.)
- 3M Tekk Hearing Protection (I love the Digital Work Tunes, they ROCK!)
- 3M Tekk Safety Glasses
- Construction Adhesive
- Caulk Gun
- Finish Nailer
- 2″ finish nails
- 1 5/8″ screws
- Drill
- 1/8″ drill bit
- Pry bar
- Clamps
- Compressor
- Dremel MultiMax or Jig saw
- Miter Saw
- Pencil
- Level
- Laser level (optional)
- Scrap wood (tutorial for harvesting pallet wood)
- 3 – 1″ x 4″x 8′ pine boards
Notes:
Just a few notes before we get to the tutorial. I cleaned and sanded down most of my scrap and pallet boards. Definitely wear a dust mask when sanding the wood. I also glazed, stained and painted several of the boards to get the eclectic look I wanted (more on that in another tutorial.)
There is some controversy about the safety of using pallet boards. Before I took on this project, I did a little research and ultimately decided to take the risk. I recommend you do your own google search and decide which information is relevant for your project.
Originally I was going to seal the wall with polycrylic. But, in the end I decided not to because I liked the colors and look au natural. If you are nervous about potential chemicals—or potential hazards of pallet wood—go ahead and paint or seal your wall.
Instructions:
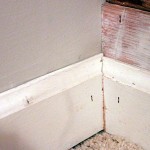
Before you begin, make sure to remove your baseboard trim.

Start from the bottom and choose scraps the same width to run along the width of the wall. Use the level to check each board.
Squeeze some construction adhesive onto the back of your board.

Place the board onto the wall.

Check and make adjustments to level the board. Add a shim if you need to keep the board leveled.
![]()
Fire a few finish nails into the board to secure it.

Continue adding rows on top of the previous row. If your rows are separated by a window, be sure to check that both sides are level with one another or you’ll have some out of sync rows when they meet again on top of the window. (Using my Black & Decker laser level really helped with this task.)

To install a ledge, cut your ledge to the same width as the row beneath it. Lay it on top of the last row and check that it is level.

1. Add construction adhesive on top of the last row. 2. Set the ledge in place and secure with a few finish nails. 3. Pre-drill pilot holes for screws. 4. Drive screws into the pilot holes to give the ledge enough strength to hold any boys that might try using them as rock climbing ledges. (Don’t ask me how I anticipate these kind of antics…I just do!)

To make cuts around outlets or light switches: 1. Mark the width of the outlet plate (plus extra to account for the beveled angle). 2. Measure the height of the plate. 3. Transfer the height measurement onto the board. 4. Cut out the notch using an angled Dremel Multi-Max wood cutting blade (or jigsaw).

For more tips and tricks for cutting perfect angles and perfect sized boards, watch the video below:

Here is a fun progression animation of the wall as it was installed:

And…the moment y’all have been waiting for…the full reveal!


I can’t even begin to tell you what a huge difference this wall has made in the room. It is warm and it inspires me to want to create more art to fill up those ledges.

Have a great weekend! I’ll be working on finishing the art and craft room. Stay tuned for a few more tutorials and the final reveal!


Disclosure: This post is a sponsored post paid for by 3M DIY. I was not told what to write or what project to create. The ideas and tutorials are my own.
Watch 3MDIY YouTube videos here

Follow 3MDIY on Facebook Follow 3MDIY on Twitter
*Content and/or other value provided by our partner, 3M Frameworks.
Brittany-
This wall is wonderful. Do you remember the color that you used on some of the blue and green boards that are on your wall?.
I think they are Annie Sloan Chalk Paint in Duck Egg Blue and Versailles
Are you using brading nails or staples to adhere the board to the wall? I would like to do this project, but I don’t know which type of nail gun to buy.
Will
Finish brad nails 2″ long.
This wall transformation is stunning….can’t wait to try it!
This is amazing!! I can’t wait to do my own wall in my home. Thanks for sharing!
I am looking into doing a feature wall in a bedroom using old pallets. Is it best to add strips to the wall to anchor the wood? I really don’t want all the holes in my wall because I know one day I will take it down.
Hi there everyone, it’s my first visit at this site,
and piece of writing is genuinely fruitful designed for me,
keep up posting these types of posts.
You have designed the perfect walls for my future home, I’m in love! BRILLIANT
Awesome! Thanks! Glad I’m not the only one trawling blogs and dreaming up projects on a Saturday night. 🙂
Hey Brittany! Starting to tackle another room in the house and love the look of these reclaimed wood walls. When doing this, is there any concern about the weight of the boards upon the wall? Should I be concerned that the drywall can carry the load? Thanks!
Charlotte
Charlotte, you should have no concerns at all. Drywall is strong, and can handle a lot more than some pine planks. It can handle tile which is a lot stronger, and the load is straight down, not pulling at an angle, out from the wall.
WOW! You are amazing! It just look stunning! I am jealous, your husband must be so proud ^_^
Great website and thanks for sharing the process, it’s truly inspirational.
Take care
Looks amazing! Thanks so much for the shout-out, friend!
🙂
shaunna
Hi there, I love this project. Can you please explain how you figure out/measure/cut the correct angle? Thanks so much for this beautiful inspiration!
Joy, did you watch the video that is embedded in the post? That should answer your question. Here’s the YouTube link: http://youtu.be/mQwOJyEiZs8
This wall is amazing. This blog is amazing. Which means you must be not only Pretty Handy, but Pretty Amazing. I’d like to try this project. My question to you: How do I attach boards to my wall that is concrete (brick home)? Thank you for your inspiration.
Crystal, I think you have two choices. One would be to secure drywall or wood wall on top of your concrete. Then nail the boards into that wall. The other option would be to use generous amounts of construction adhesive.
Hey, do you have the tutorial on how you …. glazed, stained and painted several of the boards to get the eclectic look?
Summer, yes! Here’s the link: https://prettyhandygirl.com/2012/10/how-to-make-new-wood-look-old-weathered-and-rustic.html
Your website is SO inspiring!! Beautiful work 🙂 You have helped me to feel like I can take one some fabulous, creative challenges this summer -so thank you!
I am just blown away by the breadth of your talent, Brittany . I actually just finished using pallet wood for a bed head and footboard. I started using pallet wood for the same reasons everyone does, plus, I live in a remote place where it’s difficult to get everything. I WAS thinking of using it for the ceiling of the house I’m finishing, but when I started gathering boards, I noticed a couple of issues and I’m wondering how you handled them. First, there was a bigger variation in board width than I had imagined. To do a ceiling, I’m worried I’d have to run them through a table saw for consistency. Second, what about straightness? Same thing, I figured without the saw pass (I have no jointer) I’d have big gaps between boards so I’d have to rabbet the edges (which I did for my headboard stock). And then there is thickness. Did you just go with a variety of thicknesses?
I was going to go with a finish of Danish oil (third each varnish, boiled linseed and mineral spirits) but after seeing YOURS, I may rethink that……
Although the inspiration walls are beautiful, I love yours more. What an inspiring place to work.
Thank you Joselyn, I love them too 😉
I know wood inspires me, but your website is purely inspirational!
Yep – Pretty handy lady!
I’m so glad you are feeling better. You totally rocked the pallet wall Brittany! It almost feels like you are inside an old barn especially with the angled walls. What a sweet place to craft with the kiddos.
Have a great week!
Deborah
Fantastic Blog and what a great idea,I’m going to post it on my FB page to share with others. My daughter has an old farm house they have started renovation which is a work in progress. With all her 8 children they had to enlarge it. The neat thing when her husband had to remove some sheetrock in a room it revealed the old wall boards that once had wallpaper on them. She proceded to remove all the paper/netting and did slight sanding had to leave most of the tacks(jillions). She now has an awesome wall that actually looks somewhat like your wall. Little long on comment but had to share! Glad I found you via Flamingo Toes.
You amaze me once again! I love it and it makes the room look bigger. You knocked it out of the park, girl! 🙂
Absolutely Wonderful! The colors are amazing. Rita’s right! You make that look
so easy.
We have tongue and groove walls and ceilings. Trying to get hubby to let me paint one
or two of them.
Can’t wait to see the finished room.
I am in LOVE with your wall. It’s so pretty and unique. If you get a chance I would love for you to come link up at my Pin Party.
http://sarahdawndesigns.blogspot.com/2012/10/pintastic-monday-12.html#.UHMb064-WnA
I have been following you for quite a while and love the way you empower AND INSPIRE other women. This room is absolutely gorgeous. I love EVERYTHING about it. Thanks so much for sharing your talent with the rest of us .
Great tutorial, Brittany! And the wall looks amazing!!
Found your tutorial through Pinterest. I’m so inspired! Looks incredible. Great work.
Oh my that wall is amazing!! I just love it, and would love to do a wall like that in our home. (don’t see it happening anytime soon! lol) Great job again!
Saw you sharing at Funky Junk SNS
Debbie 🙂
Holy cow Brittany this is crazy awesome!! I am so in love with this! The colors and woods you chose are perfect!
Brittany!
this wall is amazing. i love how rustic but elegant it looks. the texture & weathered boards are gorgeous! great job!
xo
kellie
I just adore your wall and your tutorial! And I’m excited to meet you next weekend at the Southern Bloggers Conference!
🙂
Linda
It looks fantastic Brittany!! LOVE it!!
Absolutely awesome wall!! You did wonderful job with the tutorial too. Thanks for sharing and inspiring.
Oh my word – this is absolutely gorgeous, friend!!
This is AMAZING!!!! I love it! Thanks for the great tutorial. Did you paint your boards those great varying colors? Or did they really just come that way?
Thanks again,
Lindsay
Would you believe I have a table positioned identical to the one in this room, coming out from under the window, that we use every day for school work? And even more, I’ve longed to do my window wall with pallet planks for a couple months now! When I saw Shaunna’s wall a couple weeks back, my desire only grew, so to visit your site today and see my dream wall and exactly positioned table on this post…well ~ it just confirmed what my next big DIY will be! Thanks so much for the tutorial! I had it pictured in my mind, but seeing your method made it seem easier and more doable. I may even be brave enough to try it without my hubby’s help……
Wow, it turned out awesome! Great use of scraps and I love that you added ledges!
Brittany, you are my hero! That wall is so freakin’ fabulous… I am in love with it!
I am in love Britt. I took careful notes and will definitely come back to this when I take it on. I LOOOOVE the color on it. You rock!
So beautiful Brittany!!! I love how the wall “made” this room!
That looks fabulous! Great work!
VIRAL ALERT! This is one killer wall, Brittany! I’m in LOVE!!!
Oh my gosh, it is STUNNING! I love the wood wall. It is simply gorgeous. I love the ledges too. I’m glad you are healthy and well. Here’s what I did with my scrap wood
http://interiorsbykenz.com/baby-barn-doors/
Happy Friday 🙂
I LOVE IT!!!
Not just because my last name is Bailey 🙂
You make it look so easy! Beautiful!
I am absolutely “pine-ing” over this wall 🙂 (insert laugh track) and I have been waiting on “pins” and needles to add this to my Pinterest board. Gorgeous!
Ha, ha. You are too funny sis. ;-). Thanks for the comment.
That looks great.I need to do something like this in my sons room, but its so hard to find good pallets that don;t fall to pieces when you try to take them apart.
Elizabeth, did you see my tutorial the other day on removing the boards? I cut the ends and then use a Dremel Multi-Max to cut the nails. Otherwise they do tend to break and splinter.
Hi there,
I found you at the SBC page and hope to become a little more “handy”, even though my better half is pretty talented. See you at the conference! Please consider joining http://www.theblogsisters.com! Many from the SBC are members!
All the best,
Barbara
Barbara, nice to virtually meet you! Looking forward to meeting you next weekend ;-).
AWESOME!!!!
I LLLLOVE that wall girl! LOVE IT.
Thanks Sandra ;-).
This is stunning. Lots of hard work, but so creative with the shelfs for display. Totally change over for the room. Great Job.
Thanks ;-). But, I knew you’d like it. You and I have similar tastes ;-D.
Wow! This looks fantastic!
And this was a WONDERFUL tutorial.
Thank you so much!!